Stripe Checkout is a solution prepackaged from Stripe. We've added an integration so users will be able to utilize its functionality right from Salesforce. Read more about Stripe Checkout here.
Prerequisites
- Contact Blackthorn Support to share your org ID. Support will use it to enable Stripe Checkout from the backend. This applies to both Sandbox and Production.
- The PayLink package must be installed and configured in your org. Use the Payments Setup Wizard to install PayLink if you haven't already.
- Stripe Checkout must be used with Payment Gateways with the Provider set to "Stripe".
Configure PayLink
Add Stripe Checkout to the PayLink Configuration Object
- Navigate to the PayLink Configuration object in Setup.
- Click the Fields and Relationships tab.
- Click the link for the Allowed Payment Methods field.
- Go to the Values section.
- Click New.
- Add "Stripe Checkout" to the text box.
- Click Save.
Set the Value on the Paylink Configuration Record
- Navigate to the Paylink Configuration record that you will use for your Stripe Checkout Transactions.
- Click Edit (the pencil icon) next to the Allowed Payment Methods field.
- Move "Stripe Checkout" to the Chosen column.
- Click Save.
Configure the Payment Gateway
Update Your Page Layout
- Navigate to the Payment Gateway object in Setup.
- Click the Page Layouts tab.
- Click the Payment Gateway Layout link.
- Add the Accepted Checkout Payment Methods field to the Page Layout.
- Click Save.
Set Values on the Payment Gateway Object
- Navigate to the Stripe Payment Gateway that will be used for Stripe Checkout.
- Select your required values for the following fields.
- Default Currency
- Default Country
- Edit the Accepted Checkout Payment Methods field to include the Payment Method to be used for Stripe Checkout. The supported payment method types for Stripe Checkout are here.
NOTE: Stripe updates this list periodically.
Payment Method Limitations: Certain payment methods like Sepa Debit only work with certain currencies (EUR). Check out this payment method fact sheet to review the limitations of each payment method type.
Add Permissions to Access Encrypted Data
- Go to Permission Sets in Setup.
- Click New.
- Enter "Access Encrypted Data" in the Label field.
- Click Save.
- Navigate to System Permissions.
- Click Edit.
- Check the View Encrypted Data checkbox.
- Save the permission set.
- Navigate to the user record in Setup for the person who authenticated the PayLink app. This is the person who clicked the Authenticate button while running the PayLink setup wizard.
- Add the new permission set to their user record.
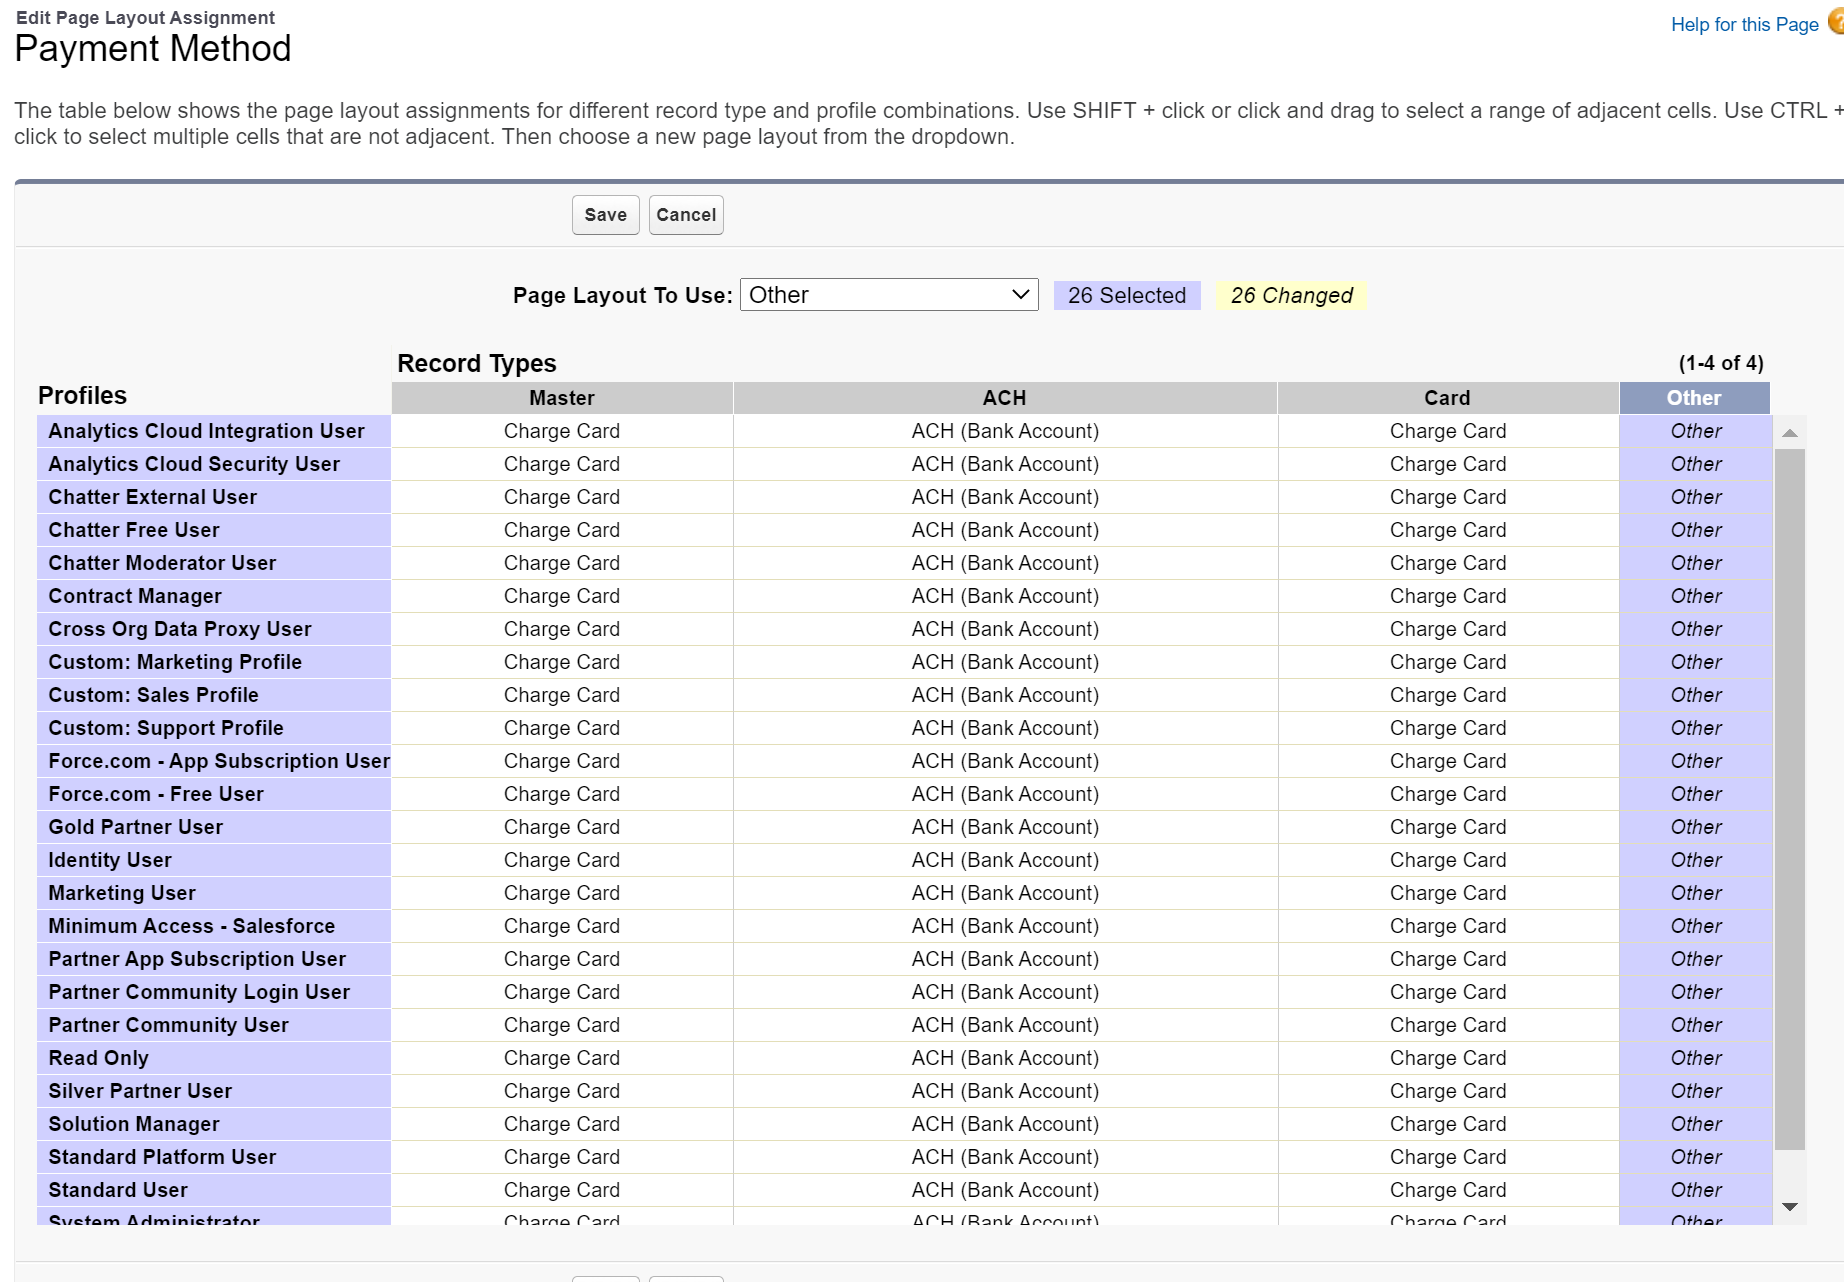
Assign the Proper Page Layout to the Corresponding Record Type
- Navigate to Setup.
- Click the Object Manager tab.
- In the Quick Find box, enter and click "Payment Method."
- Click the Page Layouts tab.
- Click Page Layout Assignment.
- Click Edit Assignment.
- Set the Page Layout to Use to "Other" and confirm that the "Other" column lists "Other" for each relevant profile.
- Click Save.
Setup Webhooks
If you haven't already setup webhooks in your org you'll want to do this. Stripe Checkout utilizes data that is brought into the org via webhooks. Related records like Payment Method and Payment Gateway Customer are attached to the Transaction AFTER the webhooks process.
Check out this guide for setting up Webhooks.
Enable SCA
If you are using Strong Customer Authentication (SCA) and Stripe Checkout with Events, you must also enable the SCA feature.
To enable SCA in your org, complete the following steps.
- Click the Gear icon.
- Click Setup.
- In the Quick Find box, enter and click "Custom Settings."
- Click Manage next to Blackthorn Pay - Trigger Settings.
- Click Edit.
- Set Enable SCA = "True" (checked).

- Click Save.
Access Stripe Checkout from PayLink
- Create a Transaction record.
- At a minimum set the following:
- Amount
- Payment Gateway (Must be a Payment Gateway connected to Stripe)
- PayLink Configuration (Must be the PayLink Configuration with Stripe Checkout set as an Allowed Payment Methods.)
- Click the PayLink URL populated in the PayLink field.
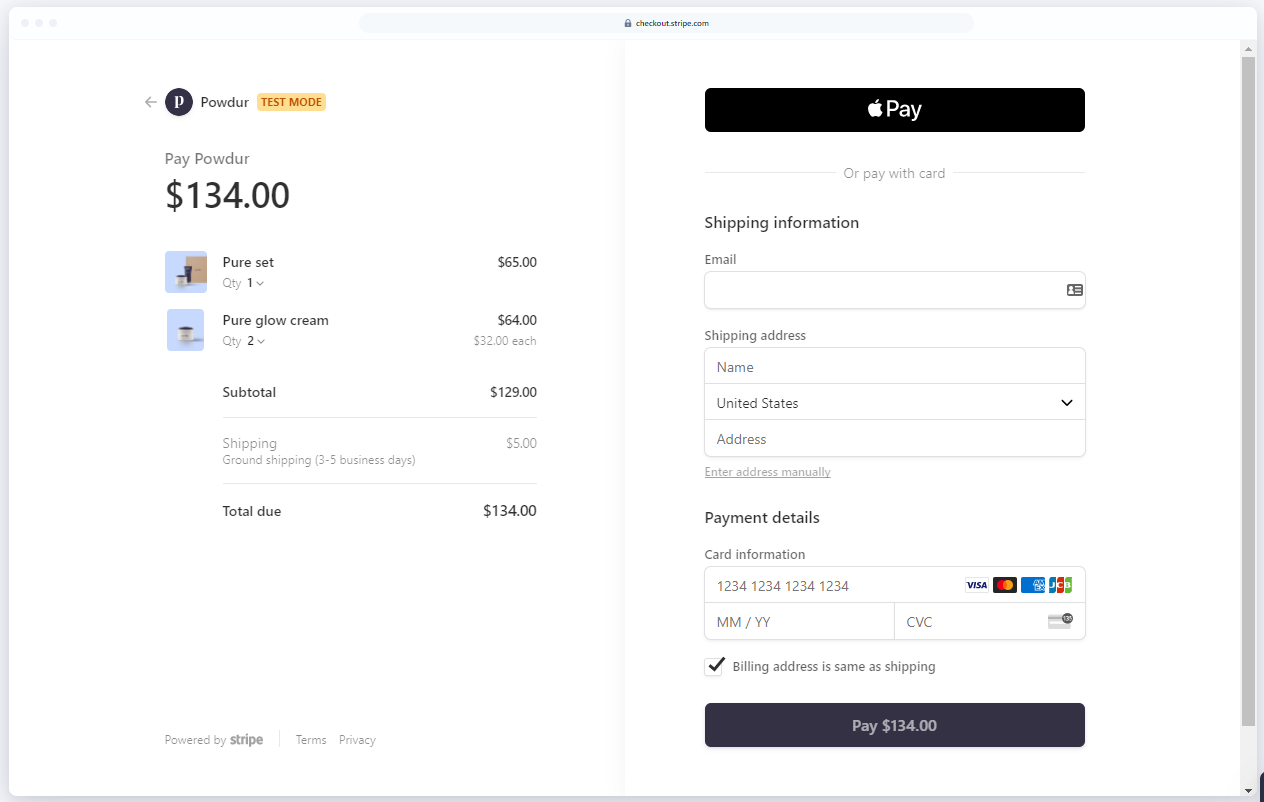
Complete a Stripe Checkout with PayLink
- Wait for the PayLink page to load.
- Click PAY.
- Wait for Stripe Checkout to load.
- Complete the Stripe Checkout form.
- Observe the success page.
- Observe the Paylink fields "Amount Paid" and "Paid on" are displayed.
Quick Help: If you aren’t redirected to Stripe Checkout after clicking PAY from the PayLink, you may need to reauthorize your Payment Gateway. Open the related Payment Gateway record and click Connect to Gateway.
Stripe Checkout Considerations
Existing Payment Methods
Currently, Payment Method records created in Stripe Checkout cannot be reused for additional Transactions or updated through Blackthorn.
This includes capturing an authorized one-time payment. We understand this does not create a new Transaction, but it does change the status of an existing one-time payment. Therefore, these are considered "one-time" Payment Methods, which can only be refunded through Blackthorn Payments.
Stripe Payment Method Types
The Payment Method object includes the Type field, which identifies the payment method type used for Stripe Checkout. This field differs from the Payment Method’s Record Type field.
For example, say you use iDEAL to complete a Stripe Checkout transaction. After the Payment Method record is created and the webhook has been processed, you will see that the Payment Method’s Record Type = "Other" and Type = "Ideal."
Click here to see a list of Stripe-supported payment method types. We are working to incorporate most of the Stripe-supported payment method types into our solution; however, we will not support AfterPay / ClearPay.
Apple Pay and Google Pay
To see the option for Apple Pay or Google Pay in Stripe Checkout you must view Stripe Checkout from a supported device. Discover more about wallets here.
Example: To view the Apple Pay button in Stripe Checkout you must use an iOS device AND have your Apple Wallet configured.
Iframes
If you are using an iframe with Stripe Checkout, follow the steps in Stripe’s “Register domains for payment methods” article to configure the domain.
Per Stripe's Payment Request Button docs, users can also use “allow="payment *" (with the asterisk). For some users in the UK, adding the asterisk helps stop Google pay and Apple Pay from appearing.
The asterisk delegates payment permission to all nested cross-origin frames, which matters because Stripe loads its own iframes for Google Pay (pay.google.com) and Apple Pay. Without the asterisk, permission stops at the Blackthorn origin and doesn't propagate down.
Currency Errors
If, while using Stripe Checkout, you encounter and error on the Transaction record that refers to currency there is a workaround available while we develop a long-term solution. Currently, only USD, EUR, and GBP are added to the package as values available on the Payment Intent object. You'll need to add values following the instructions below for any currency outside of those values.
What you'll see on the Transaction record:
- Error Message = "Insert failed. First exception on row 0; first error: INVALID_OR_NULL_FOR_RESTRICTED_PICKLIST, Currency: bad value for restricted picklist field: cny: [bt_stripe_Currency_c]"
- Error Parameter = "The Transaction/Payment Intent was captured in Stripe but failed to save correctly in Salesforce."
The above errors were displayed when attempting to use Stripe Checkout with the AliPay Payment Method Type and a Transaction with the Currency ISO = "CNY".
How Do You Resolve?
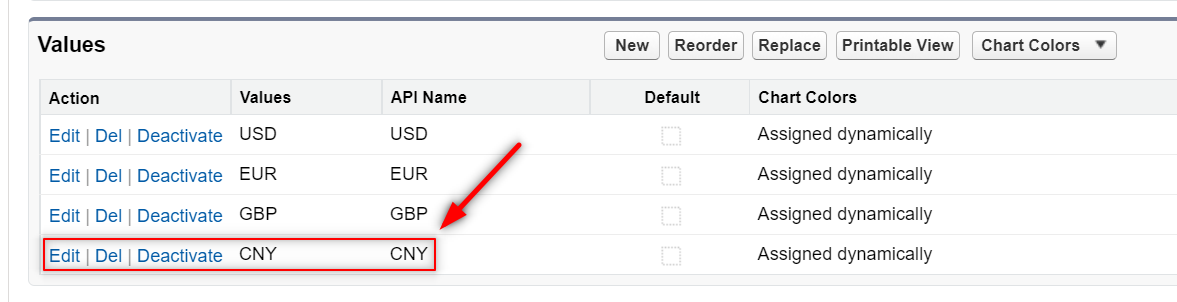
You'll want to add the desired currency value to the Currency picklist on the Payment Intent object.
- Navigate to Setup -> Object Manager -> Payment Intent -> Fields & Relationships -> Currency.
- Click New in the Values section.
- Add the Currency value to the list of picklist values. (ex: "CNY")
- Click Save.