Blackthorn | Payments allows you to send receipts from Salesforce using the “Send Blackthorn | Payment Receipt” flow or from Stripe.
If you choose to send from Salesforce, you will have full control over the Email Template (HTML or text) and who the email goes to (Email Alert). Emails from Stripe offer two options: successful payments and/or refunds.
NOTE: Please do not send receipts from both Blackthorn | Payments and Stripe. Your customers do not want to receive two emails with the same information about a Transaction.
Customize the Email Template
The information below provides instructions on customizing the Email Template for the automated Transaction email receipt.
The Email Template defines what message will be sent to your customer and whether it is formatted (HTML) or not (Text).
For this example, we are working with the Receipt (HTML) template in the Classic Email Templates.
Go to Setup.
In the Quick Find box, enter “Email Templates.”
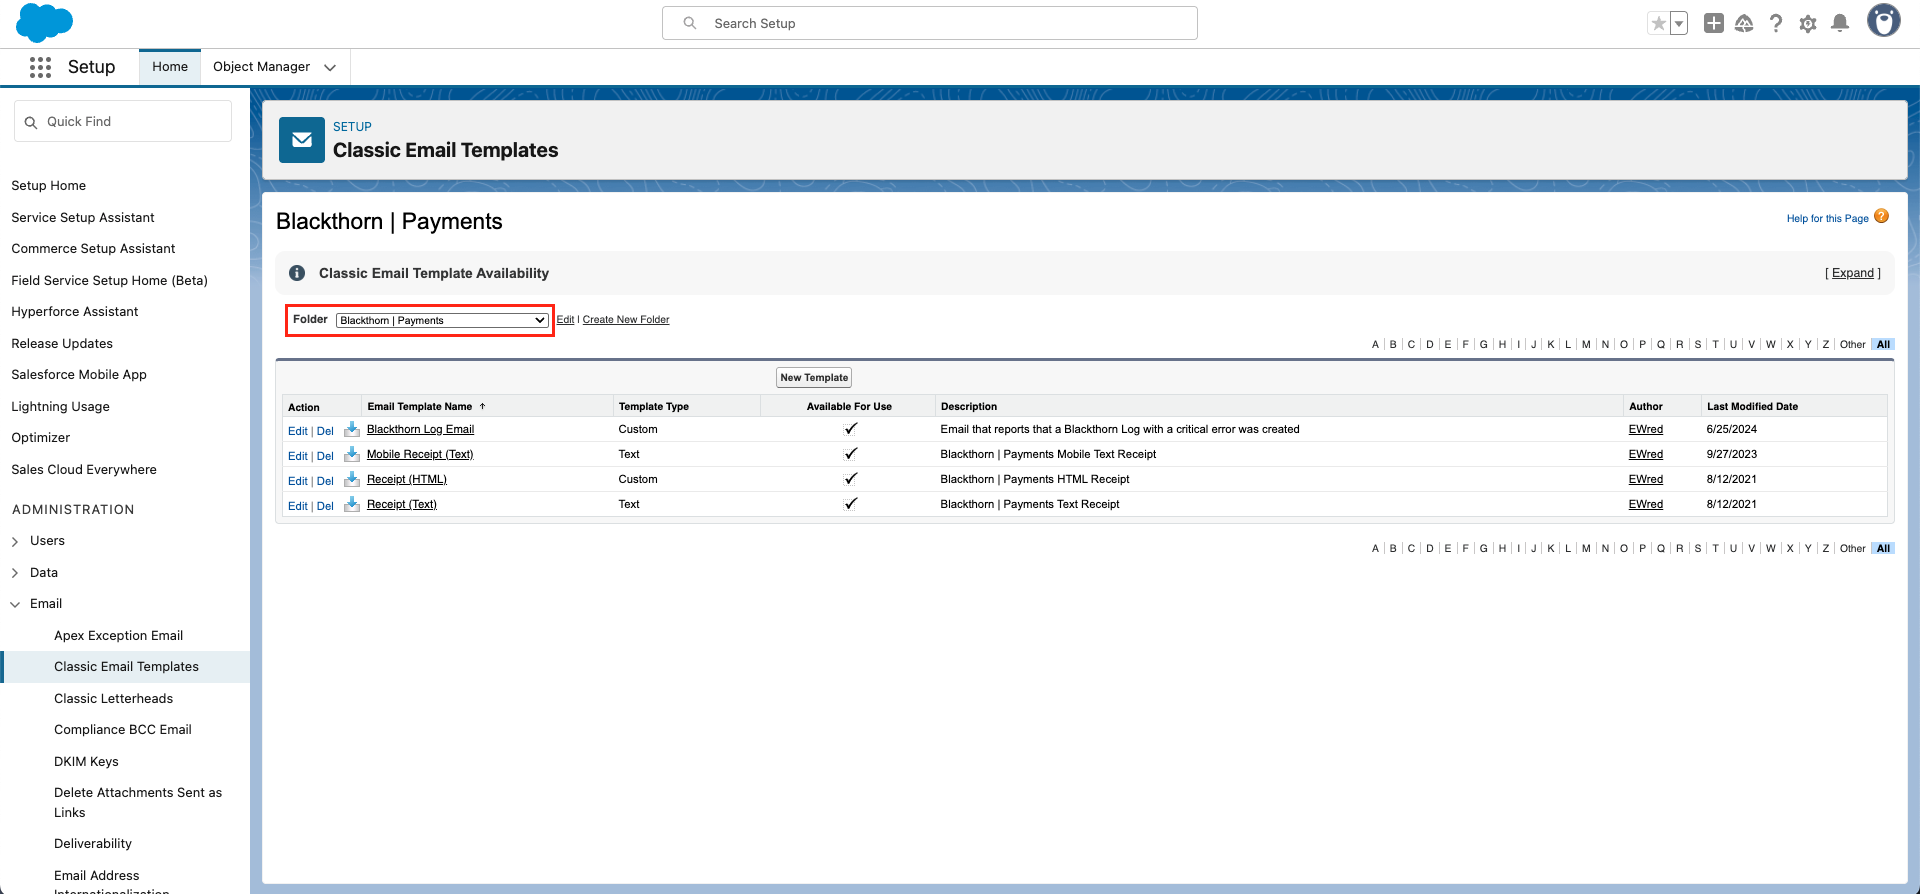
Select “Classic Email Templates.”
In the Folder drop-down, select “Blackthorn | Payments.”
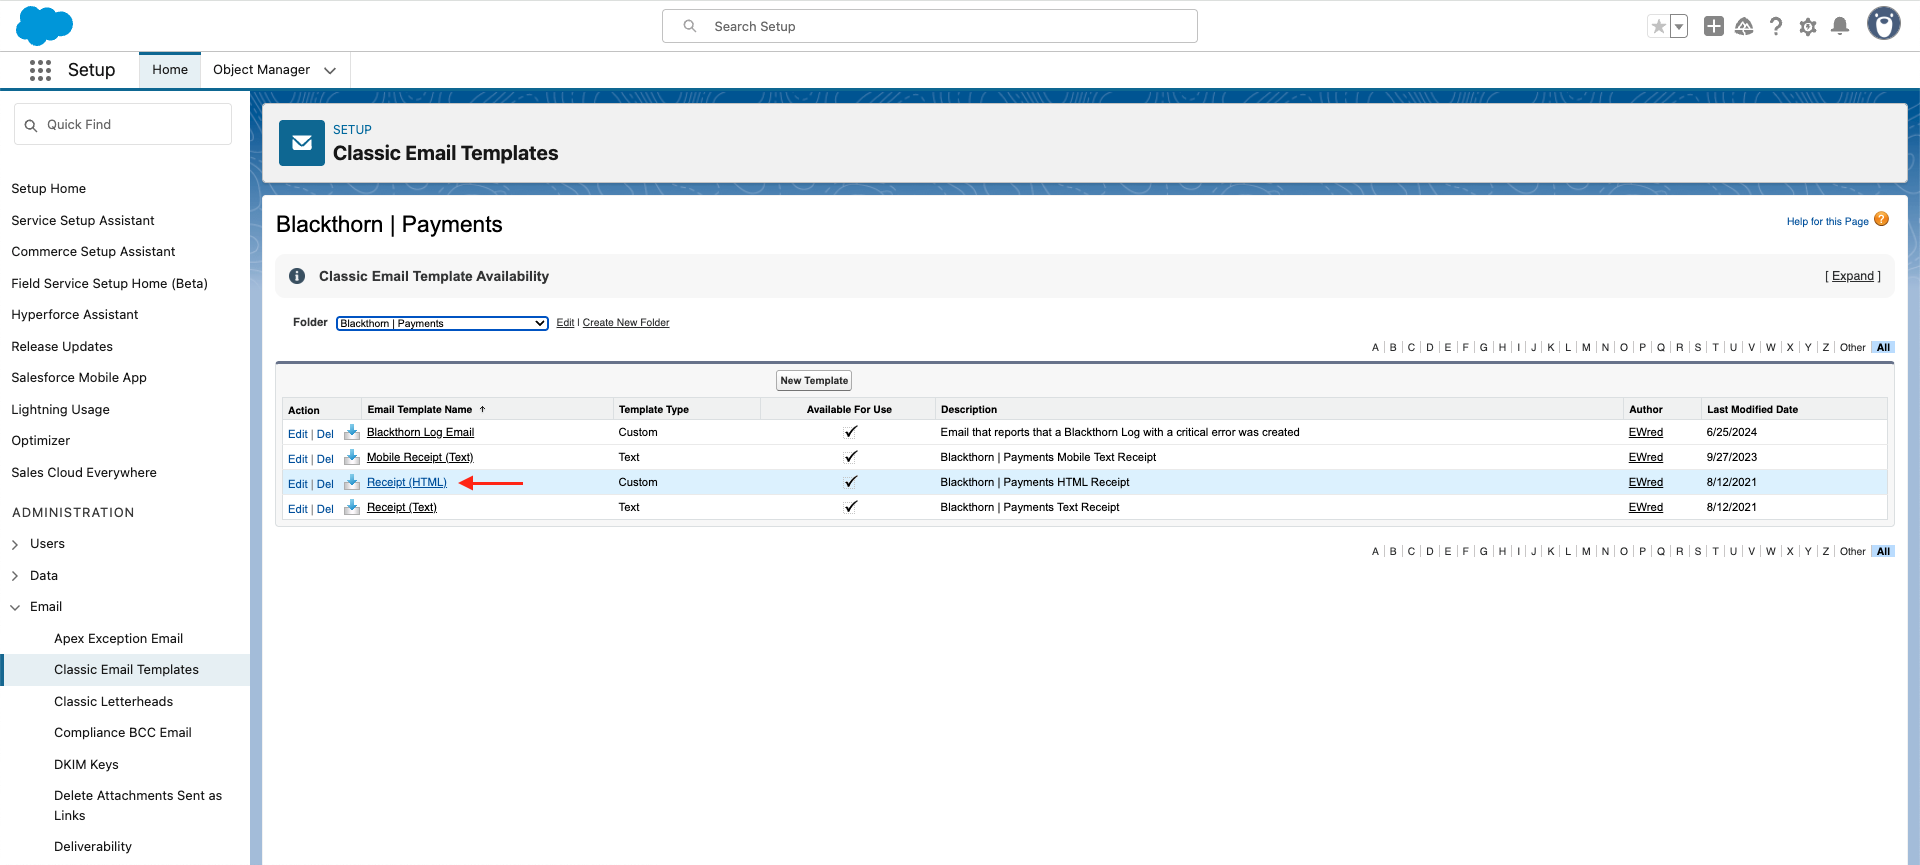
Click "Receipt (HTML)" to select the template.
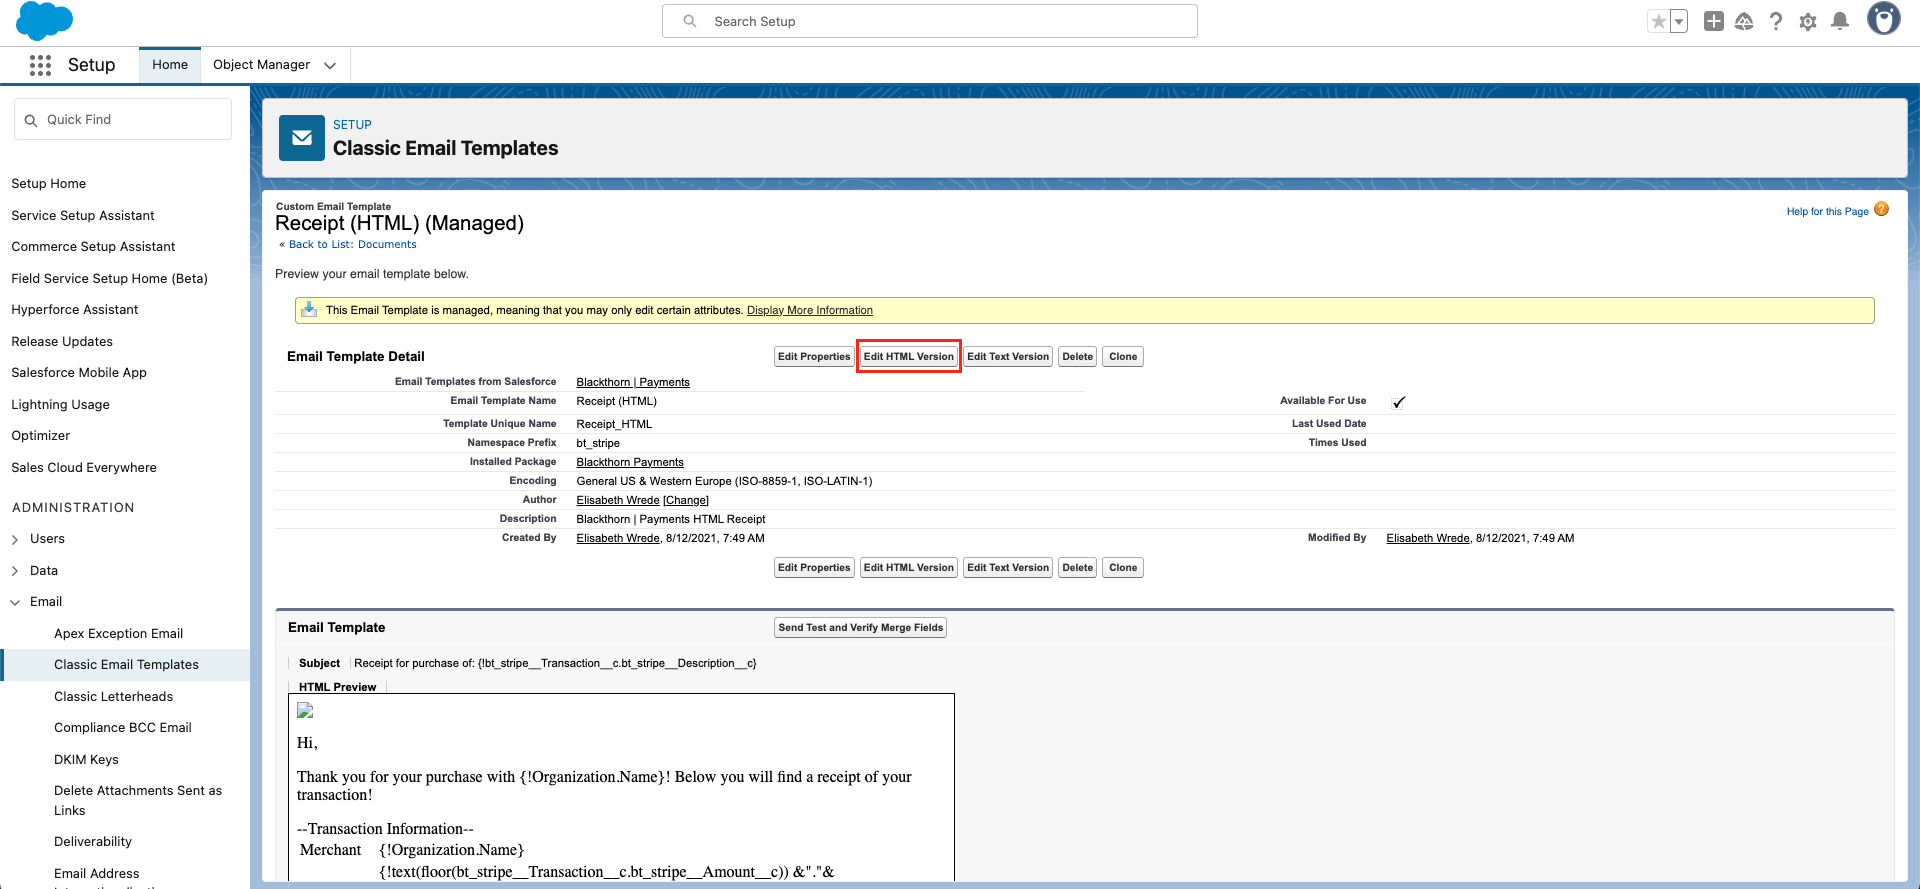
Click the Edit HTML Version button.
Update the email message.
For the Email Template, merge fields can only come from the Transaction object. If you need to use merge fields from a related object, you must create formula fields on the Transaction object first. Review the section below for the steps to add custom fields.

Click Save.
Send from Blackthorn Payments
The Transaction flow used to send the Payments Receipt Email is the “Send Blackthorn | Payment Receipt” flow.
Users can launch the Transaction email receipt from the flow in the Payments package. The email receipt will be sent when the Transaction is completed/captured and will contain the Transaction’s Description in a merge field.
To test the flow, complete the steps below.
Process a Transaction with the following values:
Amount
Transaction Type = “Normal”
Transaction Status = “Completed”
Payment Status = “Capture”
Payment Method Billing Email = the email address where you would like to receive the test
The email will be sent, and the email receipt will contain the Transaction's Description.
Note: The previous Transaction workflow rules, “Send Blackthorn | Payment Receipt (HTML) and “Send Blackthorn | Payment Receipt (Text),” used to send the Transaction email receipt were deprecated. The new “Send Blackthorn | Payment Receipt” flow replaces both.
Send from Stripe
Sign in to your Stripe account.
Go to Settings.
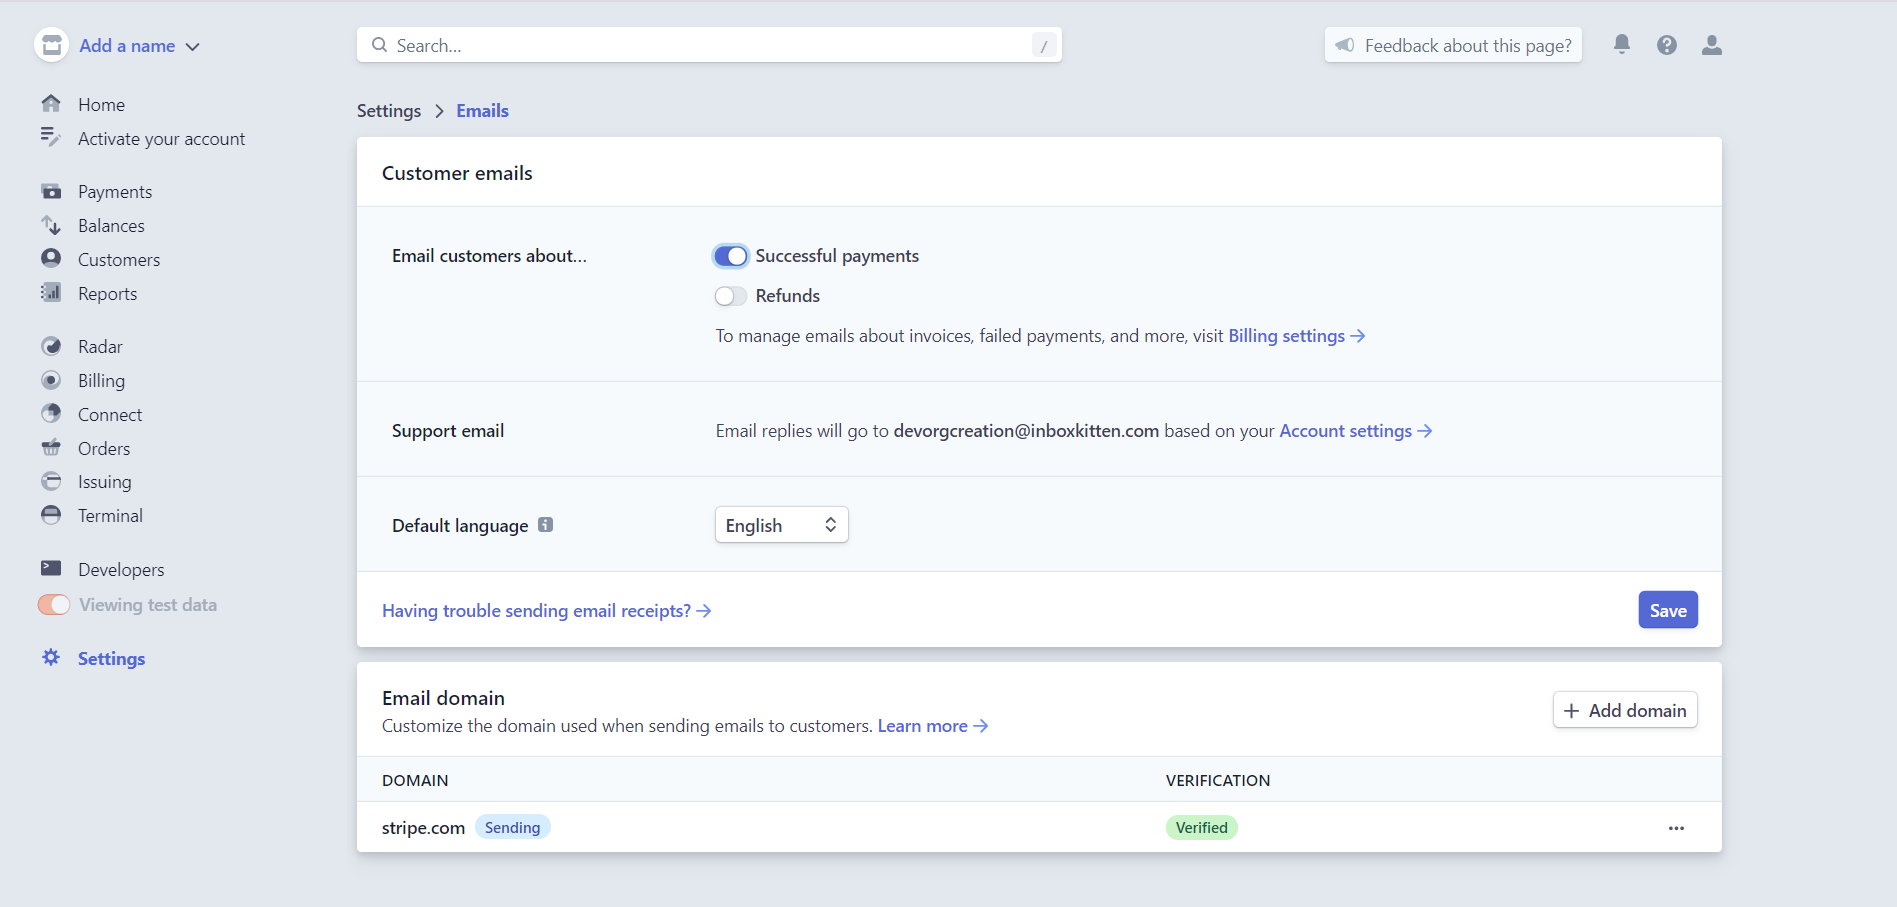
Select Emails.
Select "Successful Payments" and/or "Refunds."
Add Custom Merge Fields to the Email Template
To add custom merge fields from an Opportunity record to the Transaction's Email Template, you must create those fields in the Transaction object as formula-type fields and pull in the values from the related object before they can be added to the Email Template.
For the use case below, we will create a custom field on the Transaction with a formula referencing the Opportunity Name field.
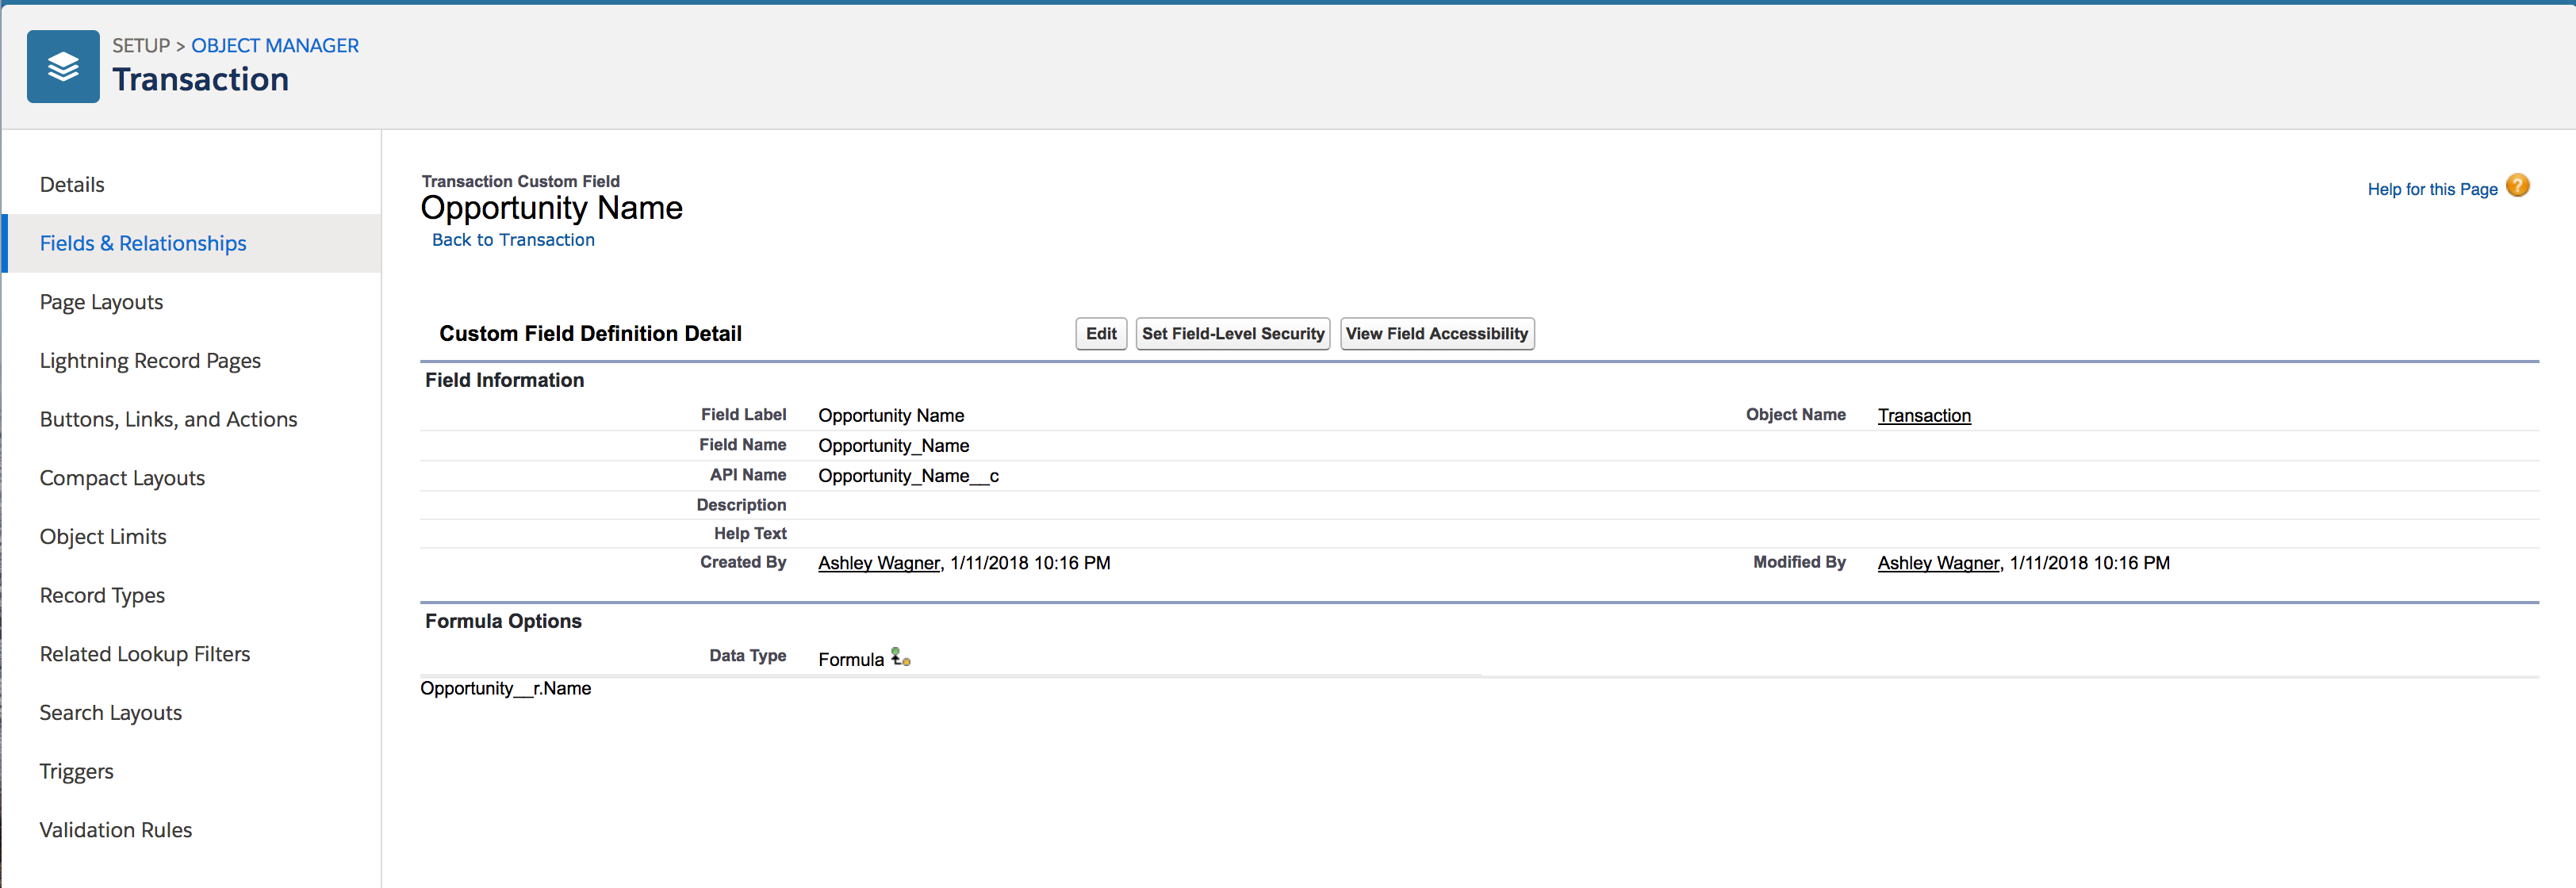
Step One: Create a custom formula field on the Transaction object.
Go to Setup.
Click the Object Manager tab.
In the Quick Find box, enter and click “Transaction.”
Click the Fields & Relationships tab.
Click New.
Select "Formula."
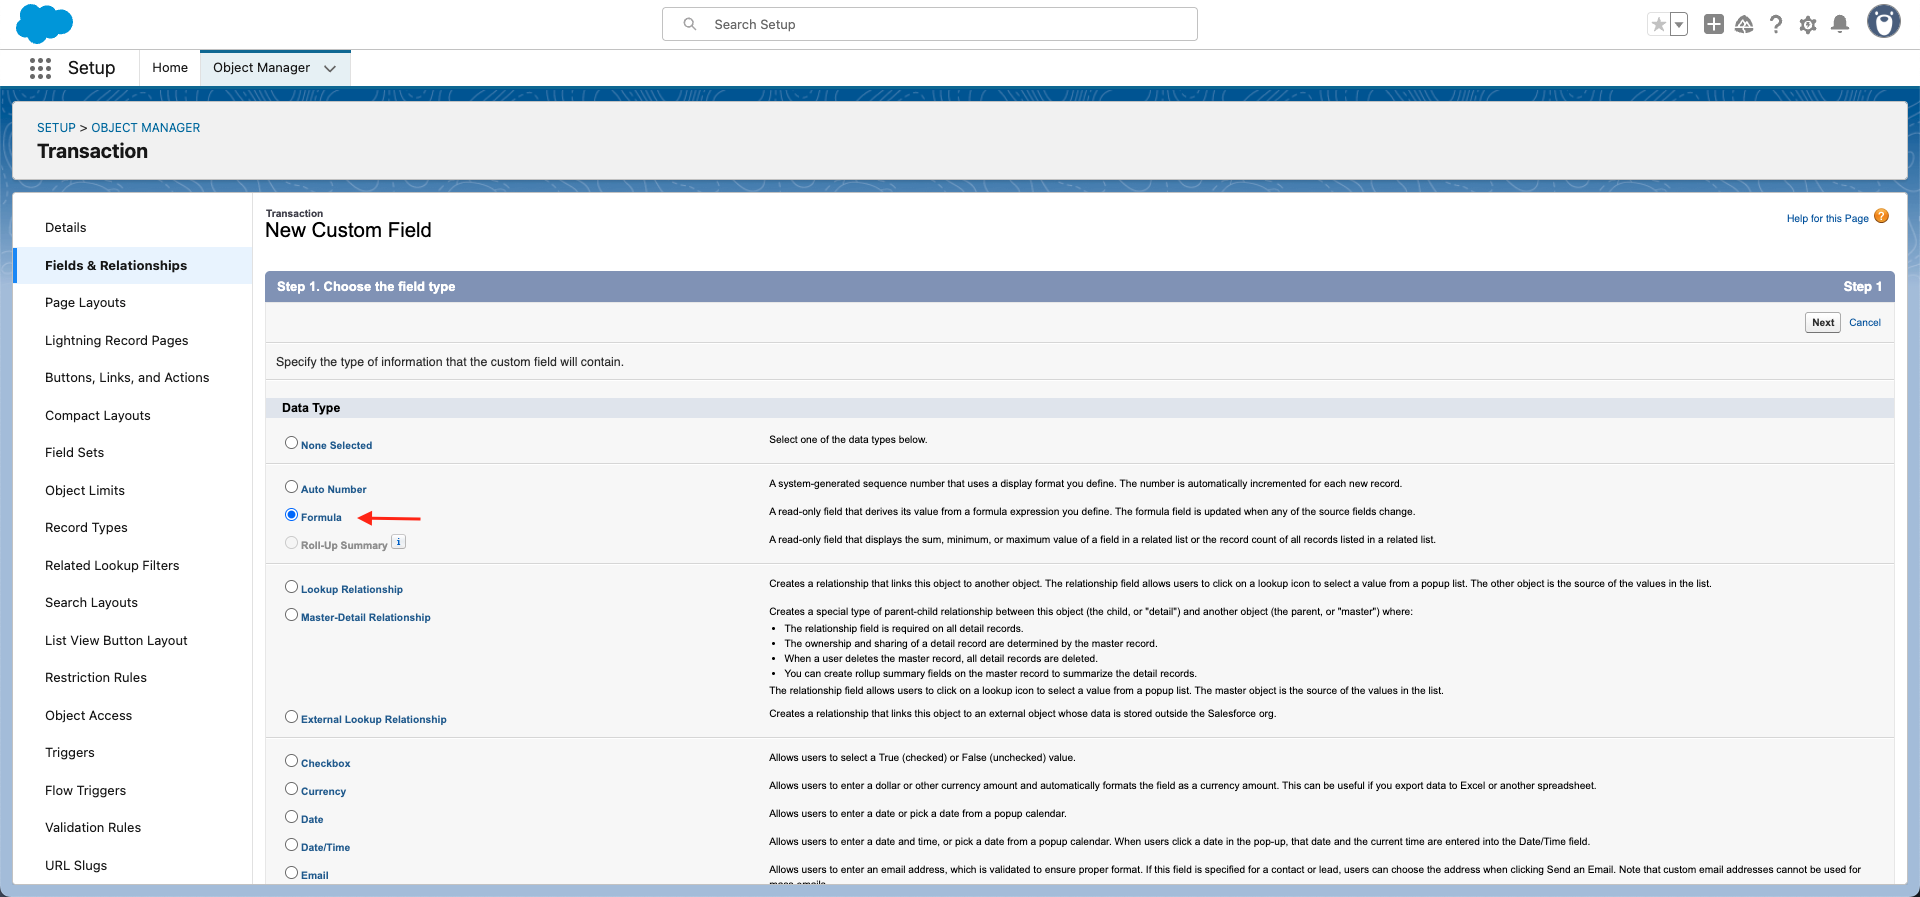
Click Next.
Enter a Field Label.
Set the Formula Return Type to “Text.”
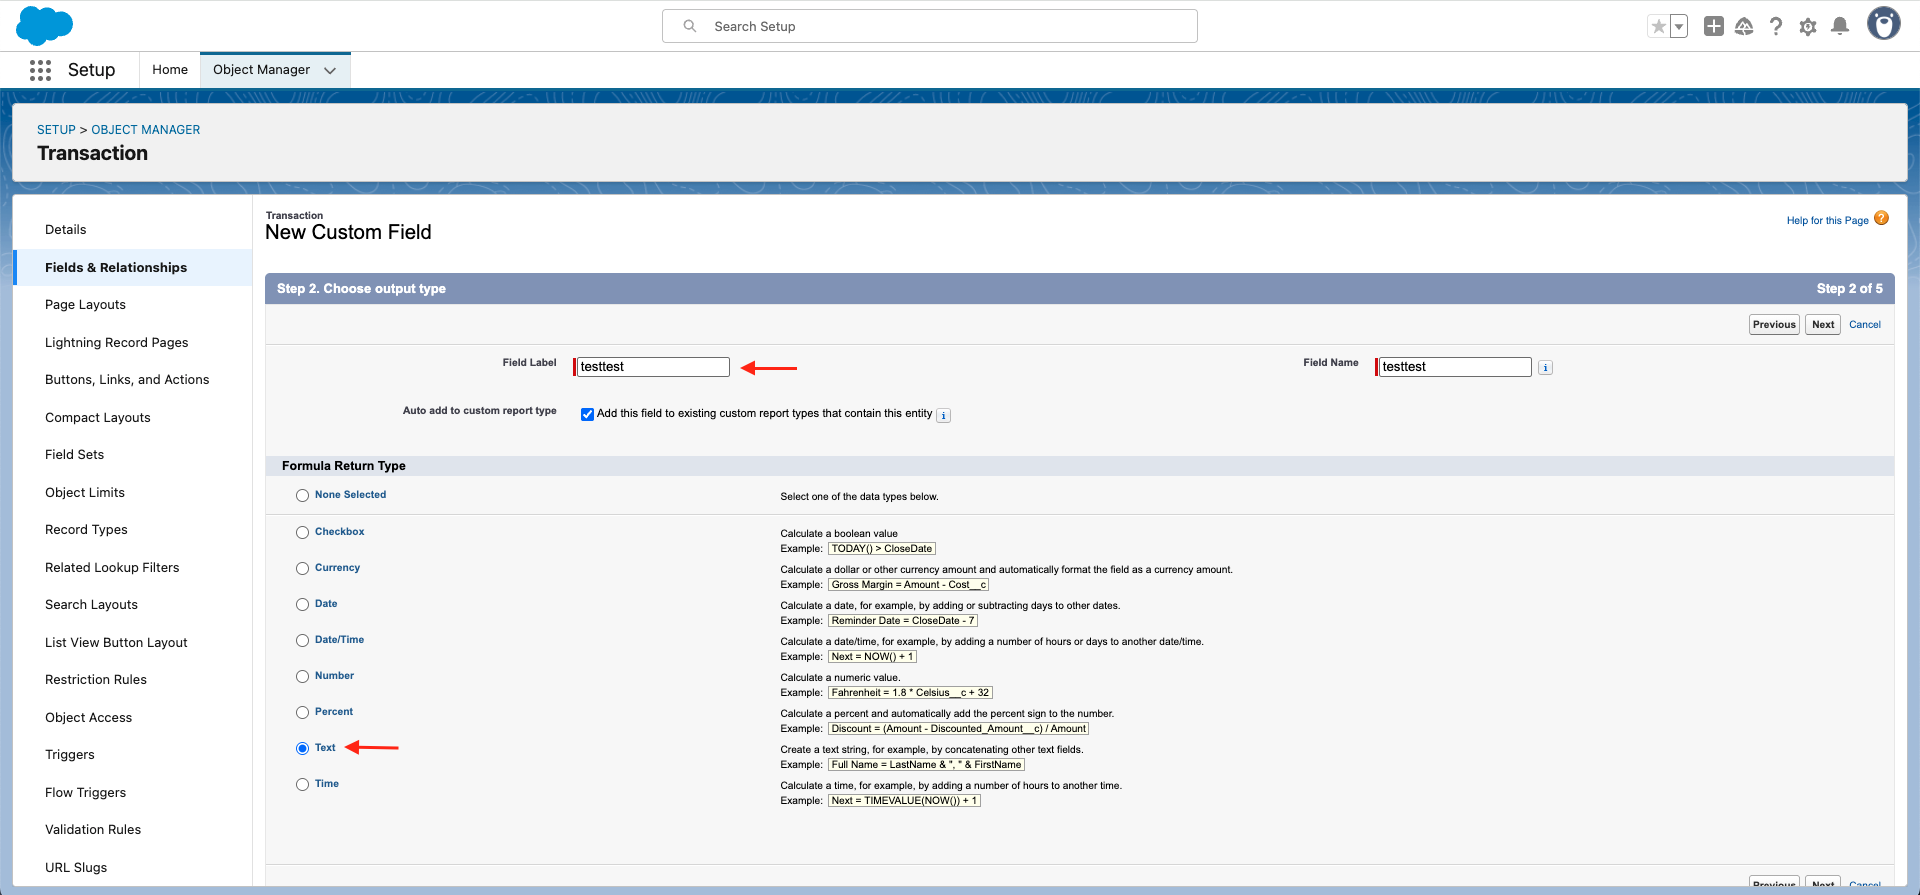
Click Next.
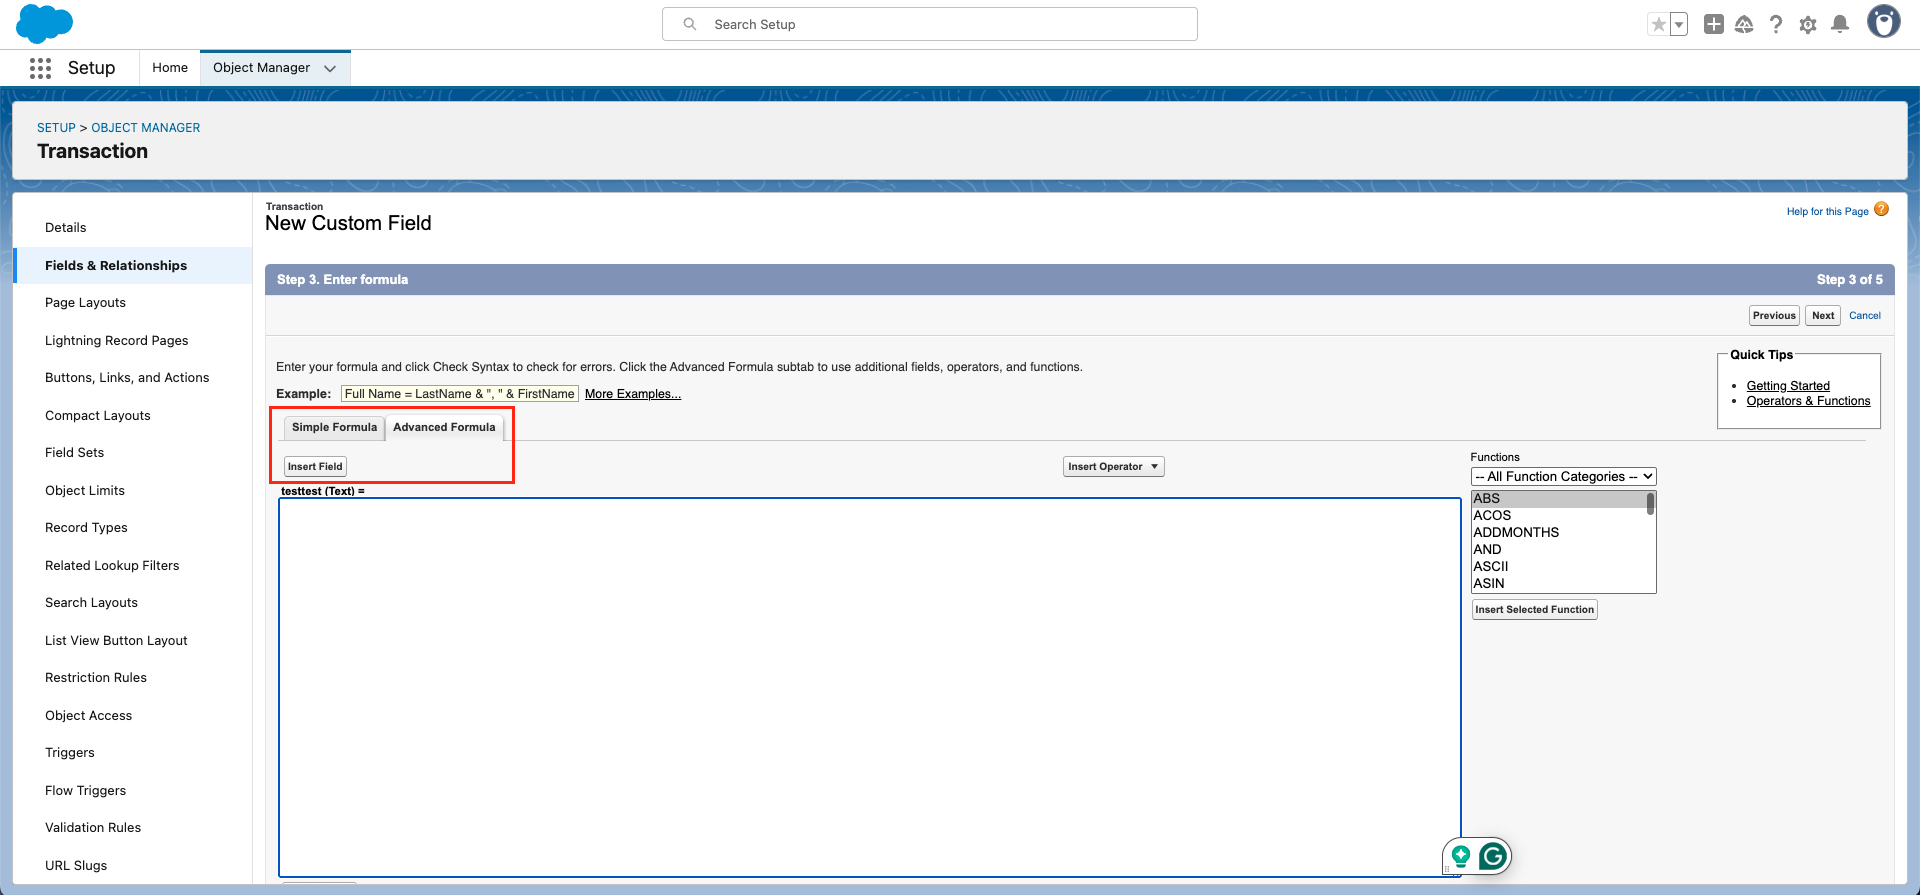
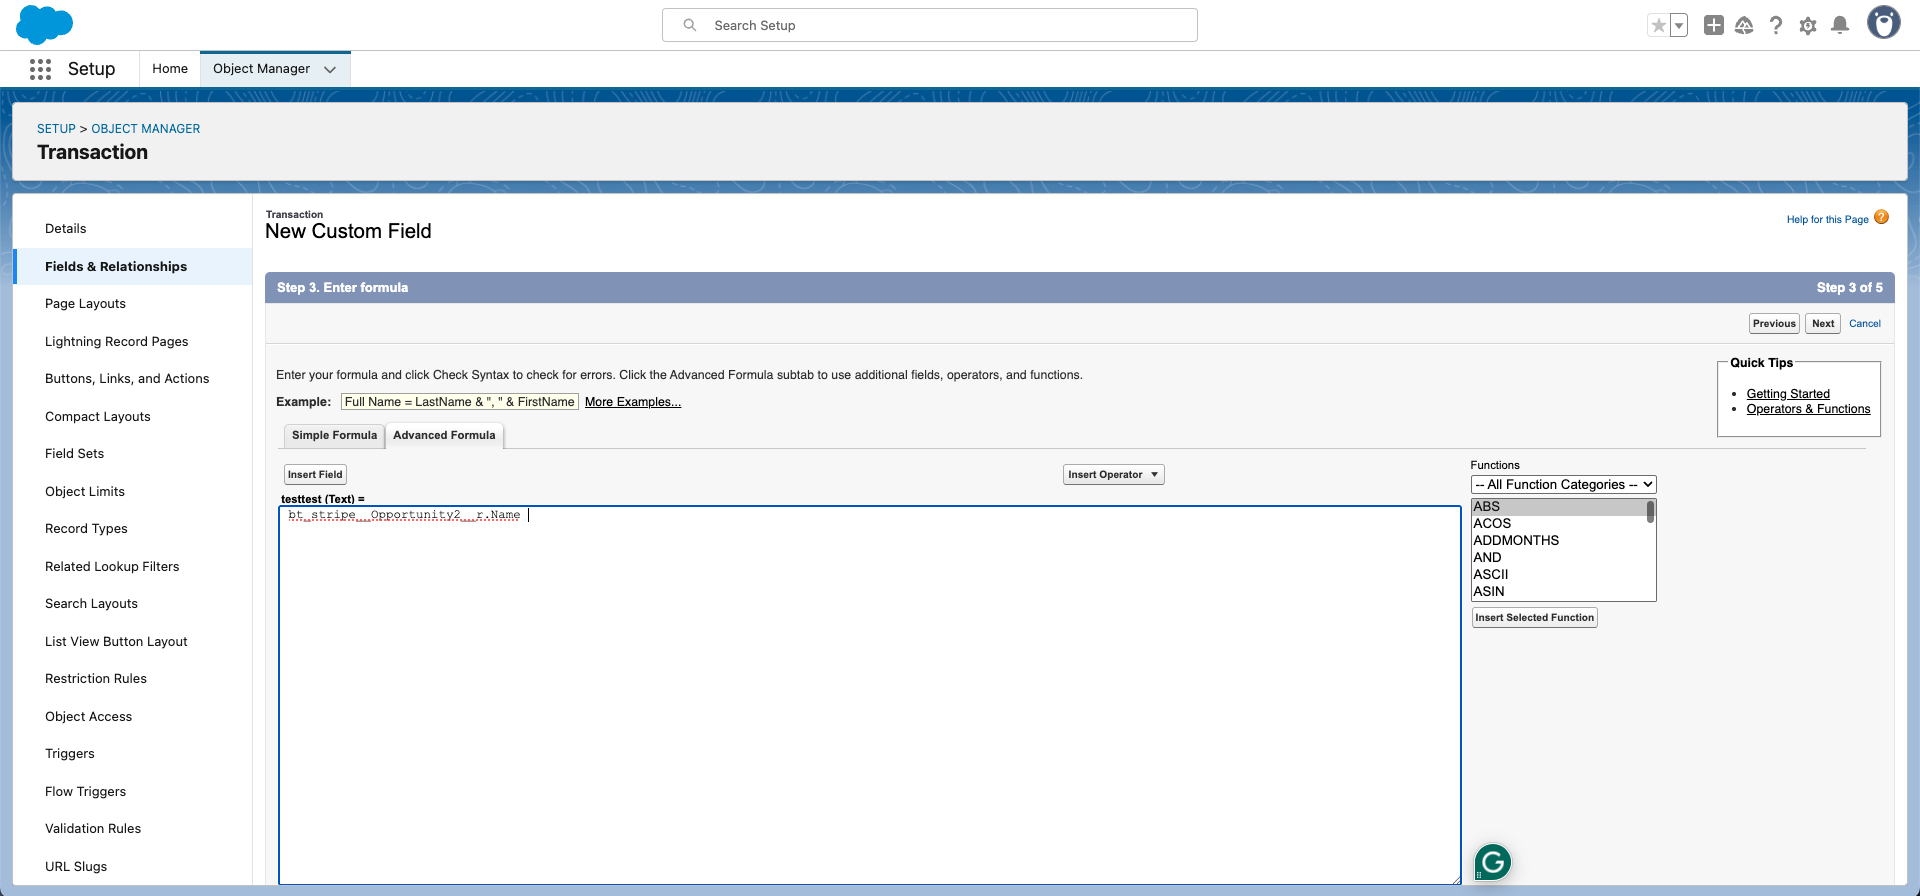
Click the Advanced Formula tab.
Click the Insert Field button.
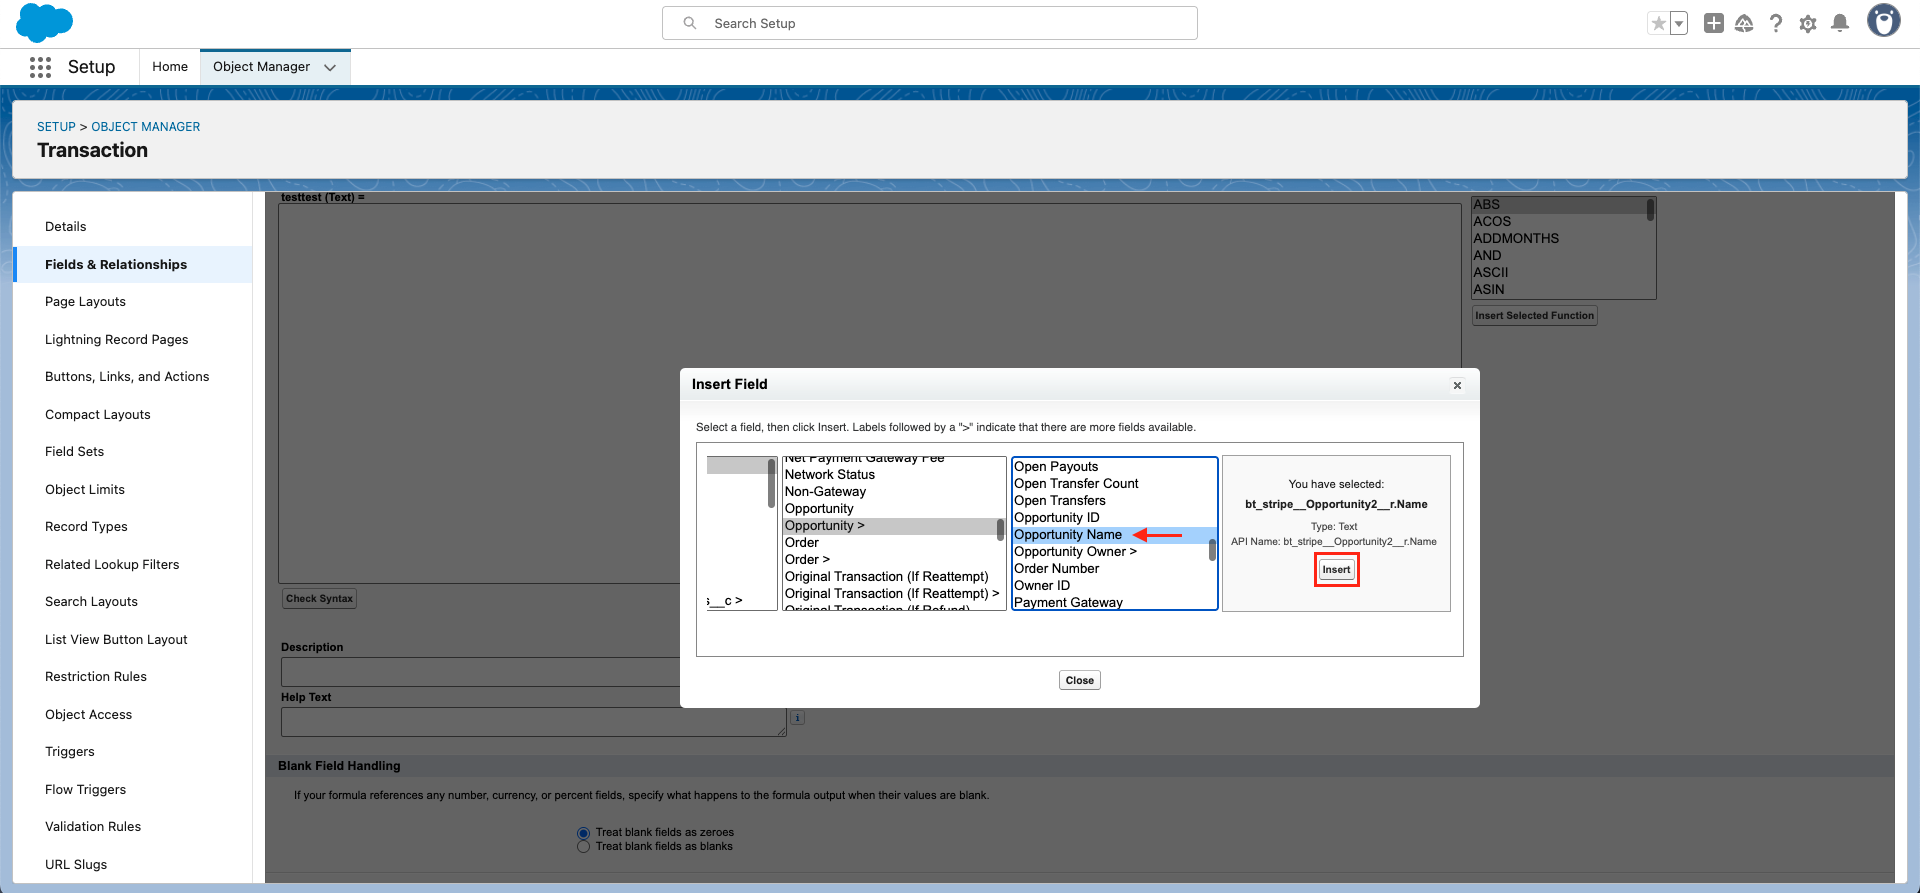
The first column should be set to “Transaction >.”
In the second column, select “Opportunity >.”
In the third column, select “Opportunity Name.”
Click Insert in the fourth column.
Click Next.
Confirm the field-level security.
Click Next.
Confirm which page layouts the field will be added to.
Click Save.
NOTE: Some field types need special handling. You may need to wrap the field name in a Text(fieldnamehere) OR Value(fieldnamehere). Picklist fields need a value(fieldname), and number fields need a text(fieldname).
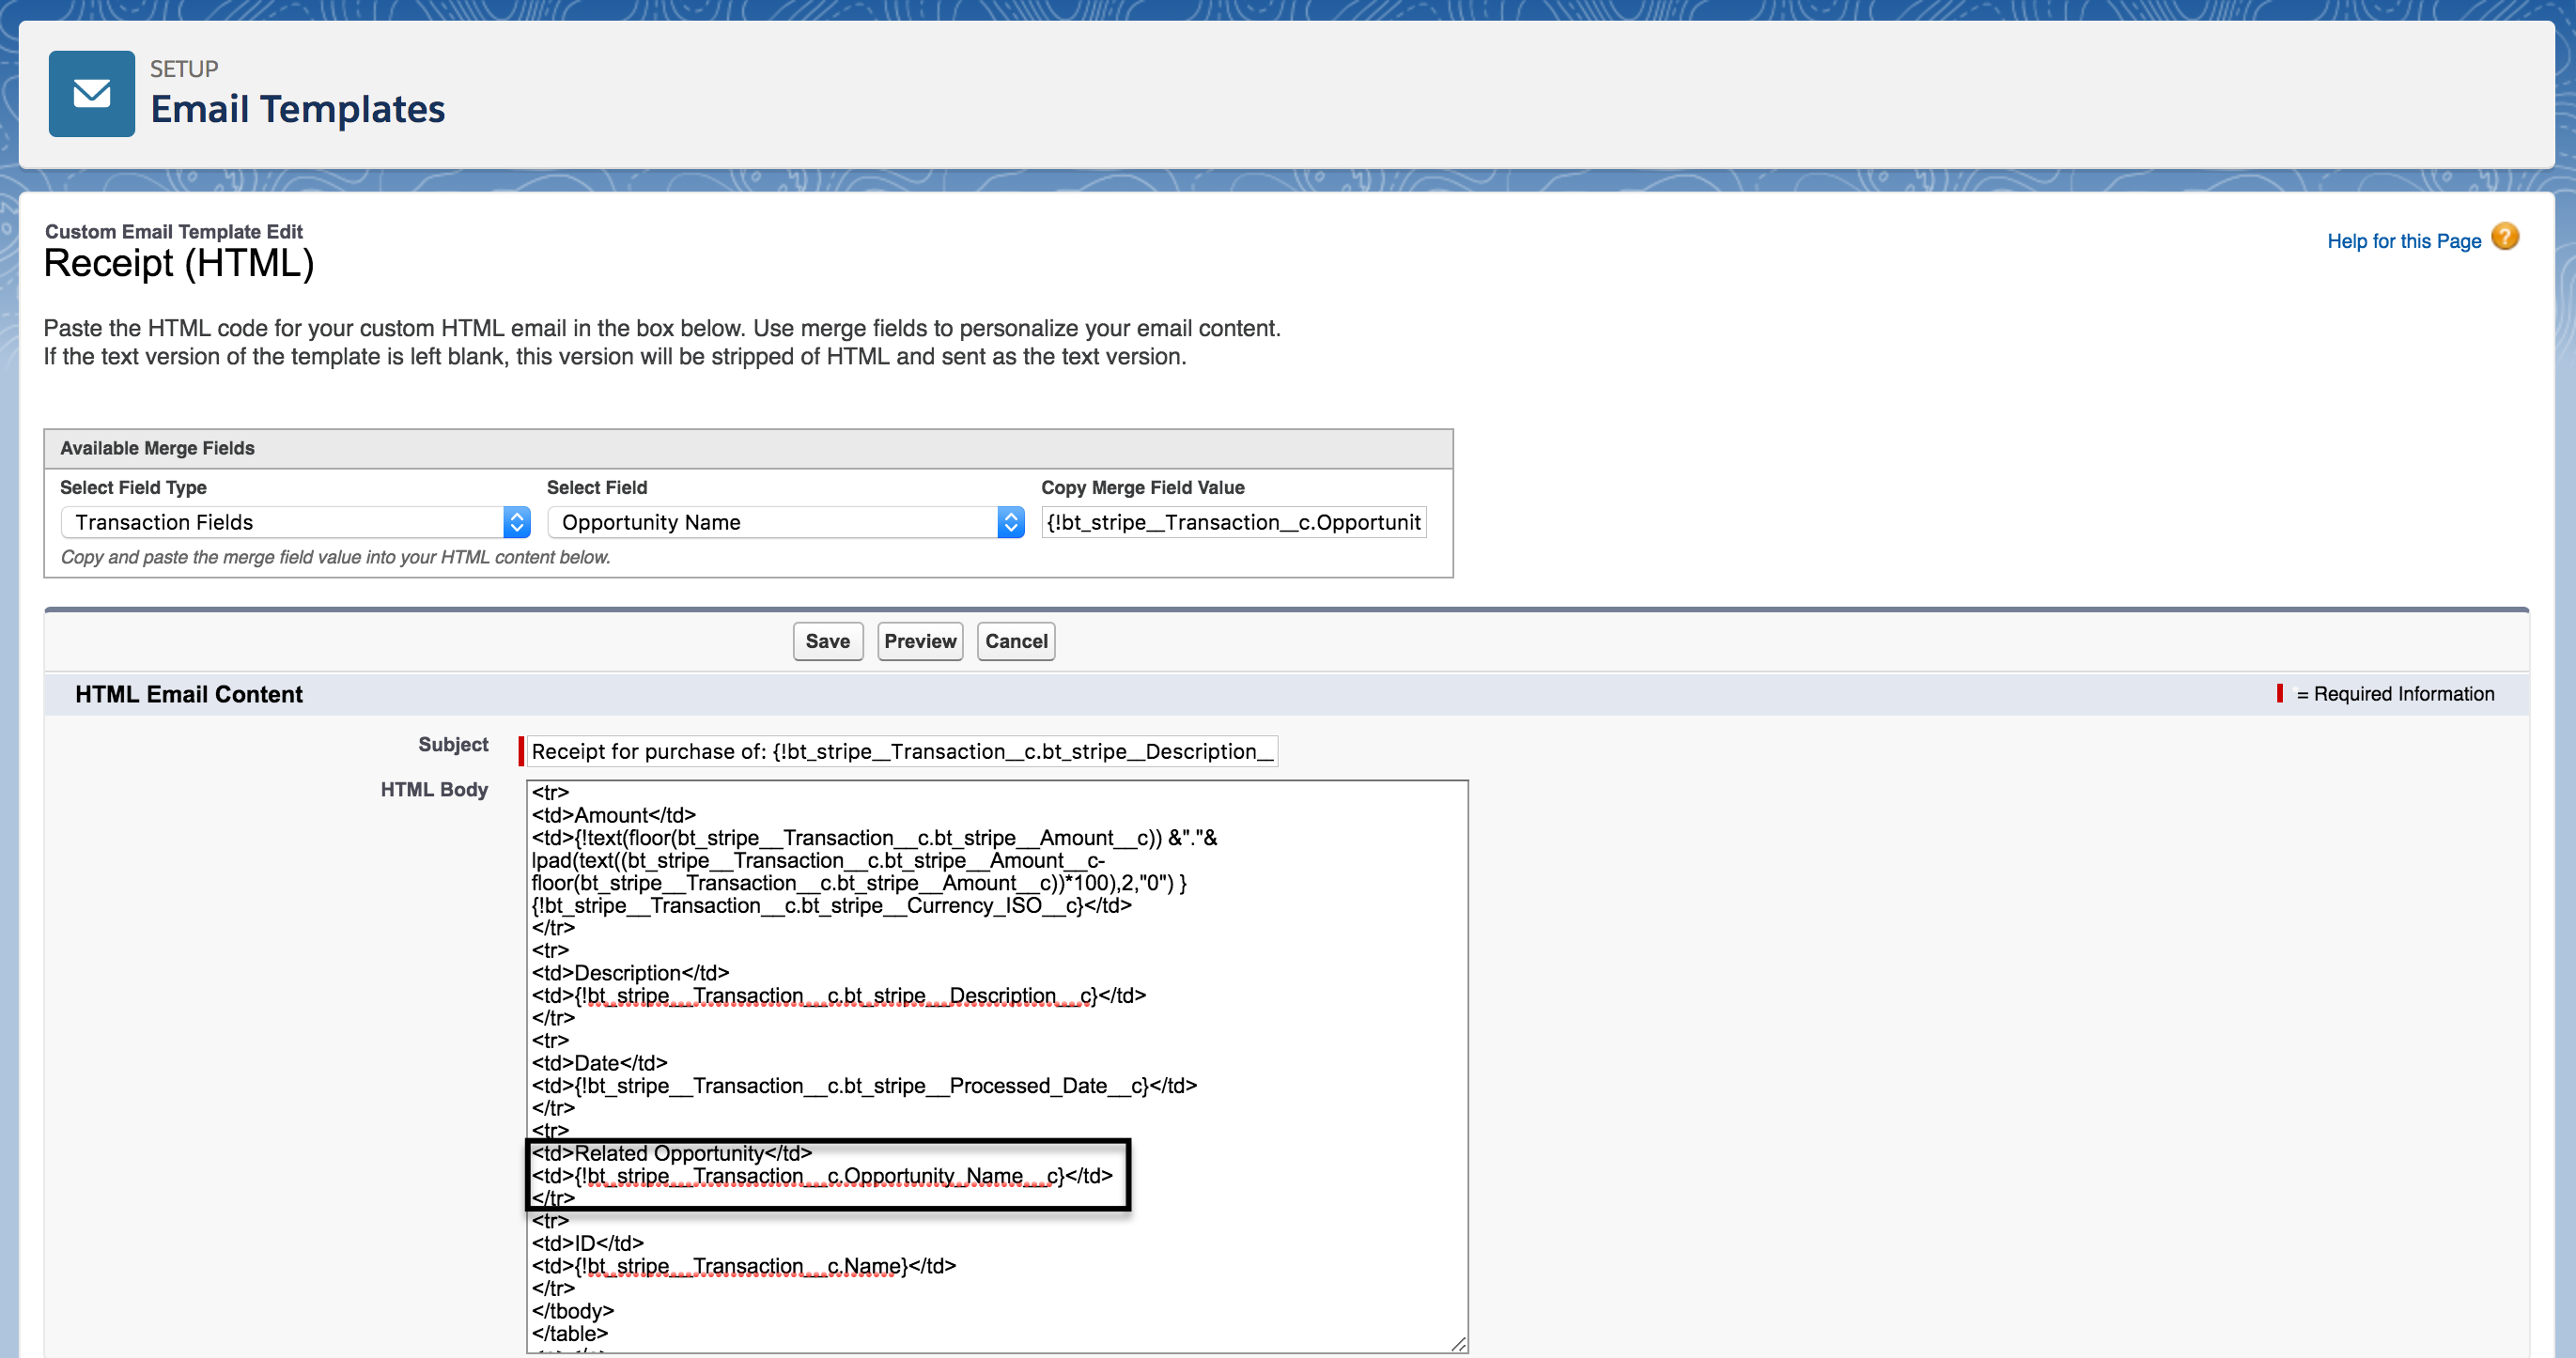
Step Two: Update the Blackthorn | Payments Email Receipt Template
Go to Setup
In the Quick Find box, enter “Email Templates.”
Select “Classic Email Templates.”
In the Folder drop-down, select “Blackthorn | Payments.”
Click "Receipt (HTML)" to select the template.
Click the Edit HTML Version button.
Complete the steps below to add the field created in Step One.
In the Select Field Type column, select “Transaction Fields.”
In the Select Field column, select the “name of new field.”
Copy the "Merge Field Value" from the third column and paste it into the message text (HTML Body).
Click Save.
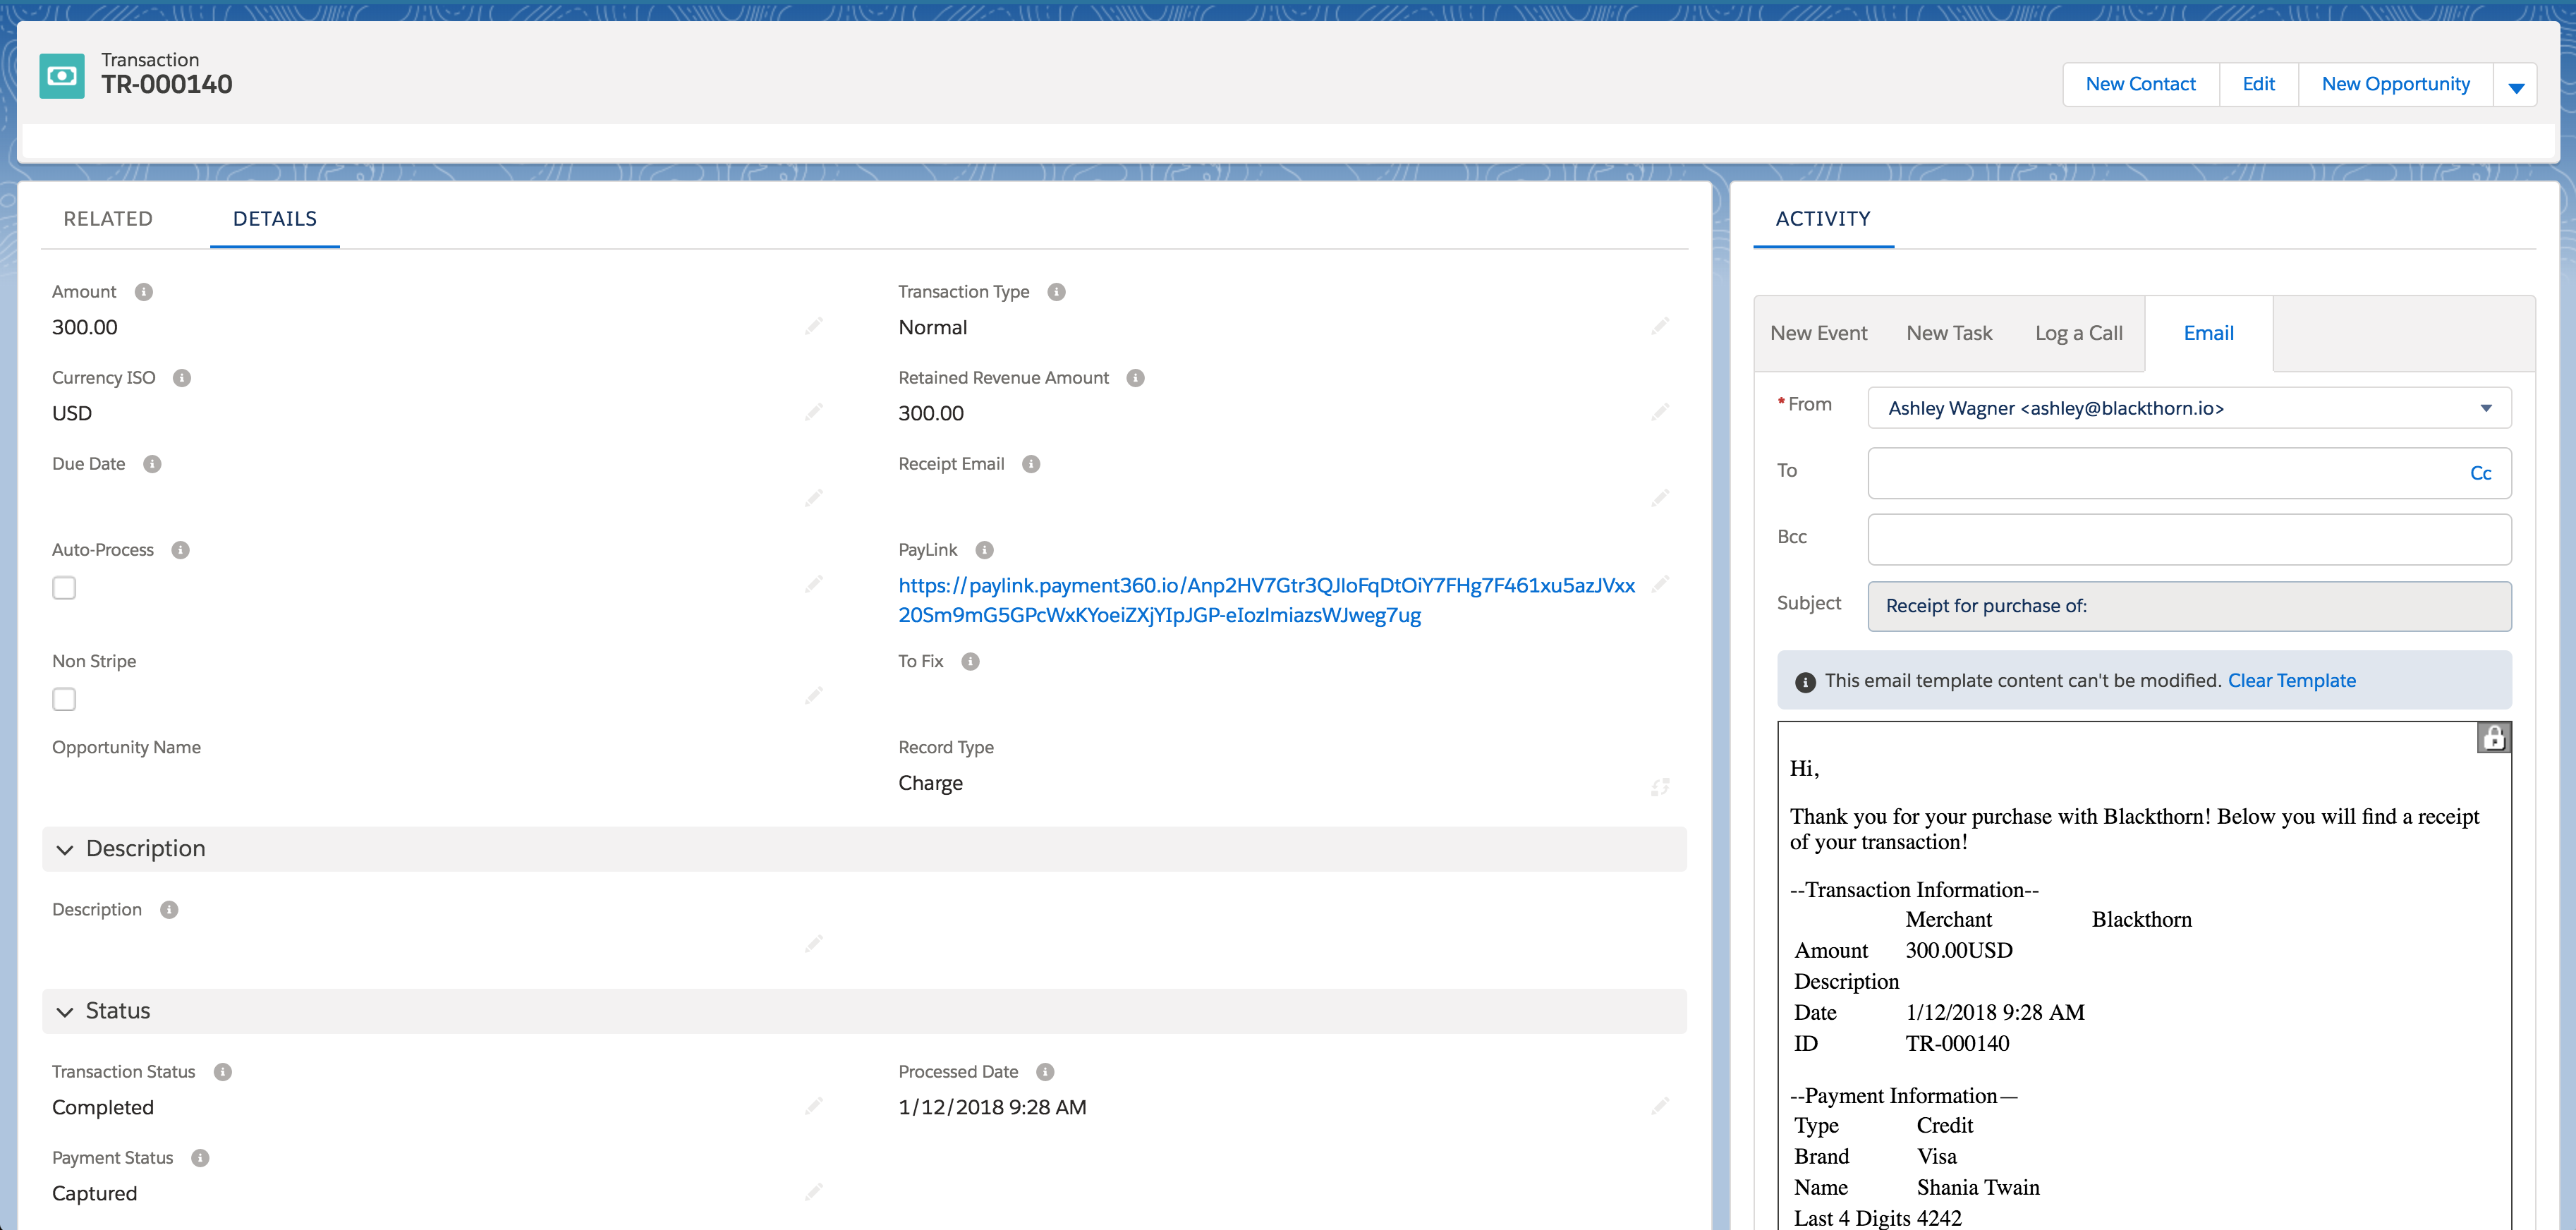
Manually Send an Email Receipt
Open a Transaction record.
Go to the Activity History Related List.
Click the Email tab.
To change formatting type, click Switch to Text-Only or Switch to HTML.
Click Select Template and select the "Transaction Receipt" (HTML or Text).
Update the fields.
Click Send.
Troubleshooting
If you have received an error regarding email receipts or have a question, please view our Troubleshooting or FAQ page. If you still have Default Payment Method questions, please contact Blackthorn Support. We're happy to help!