Short-term Known Issue
The following is a known issue with Version 1.4.0. Currently, the Mobile Check-in app won’t ask a user to log in again if they are logged out on the back end. This causes only cached data to appear after refreshing the Events list.
We recommend keeping the Mobile Check-in app’s policies set to the default setting to prevent this issue. Once the problem is fixed, you can configure the app’s policies as needed.
Date Added: August 15, 2025
Enable Swift Mode
Open the Mobile Check-in app.
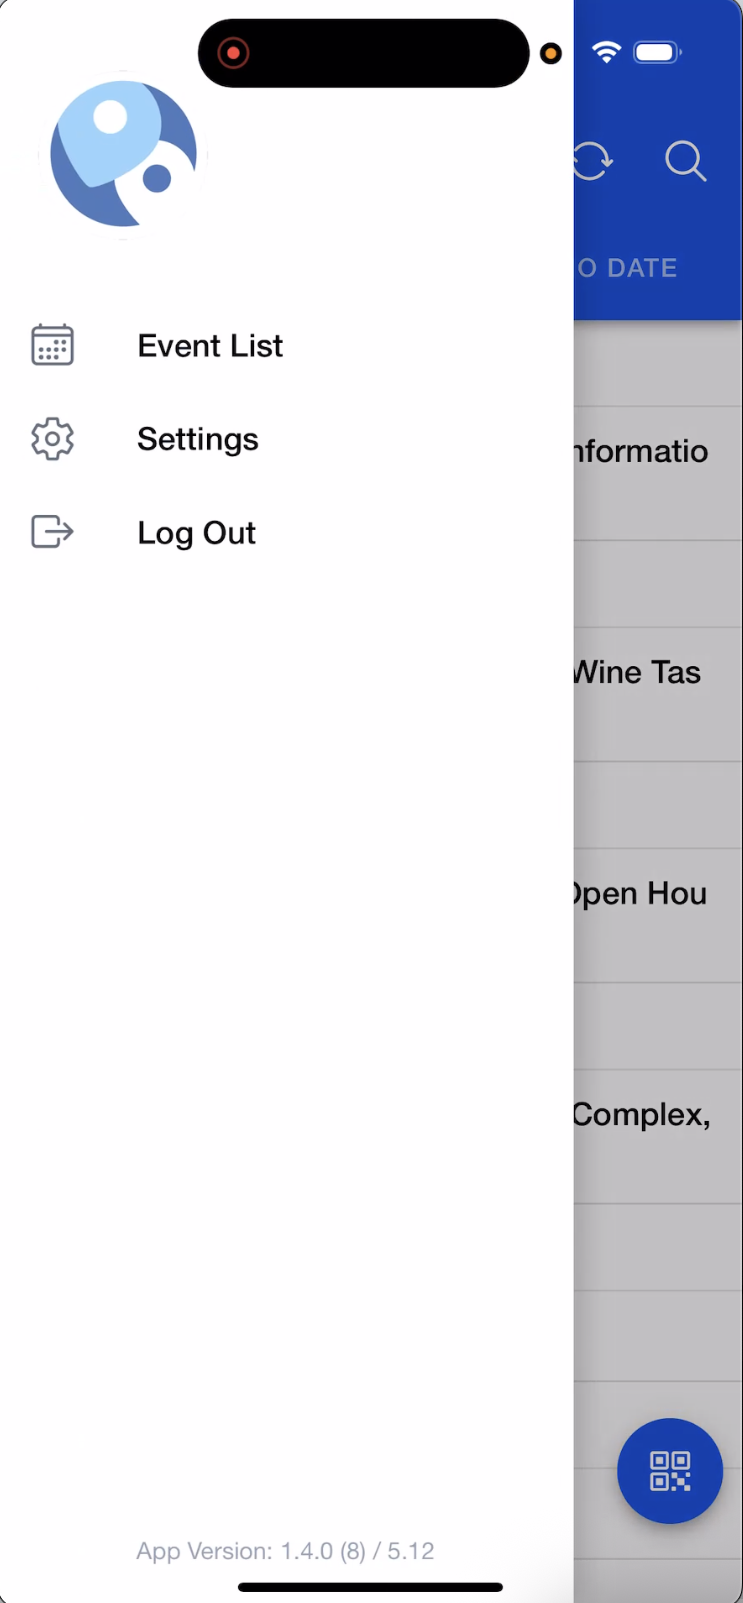
Tap the hamburger navigation button in the upper left-hand corner.
Click Settings.
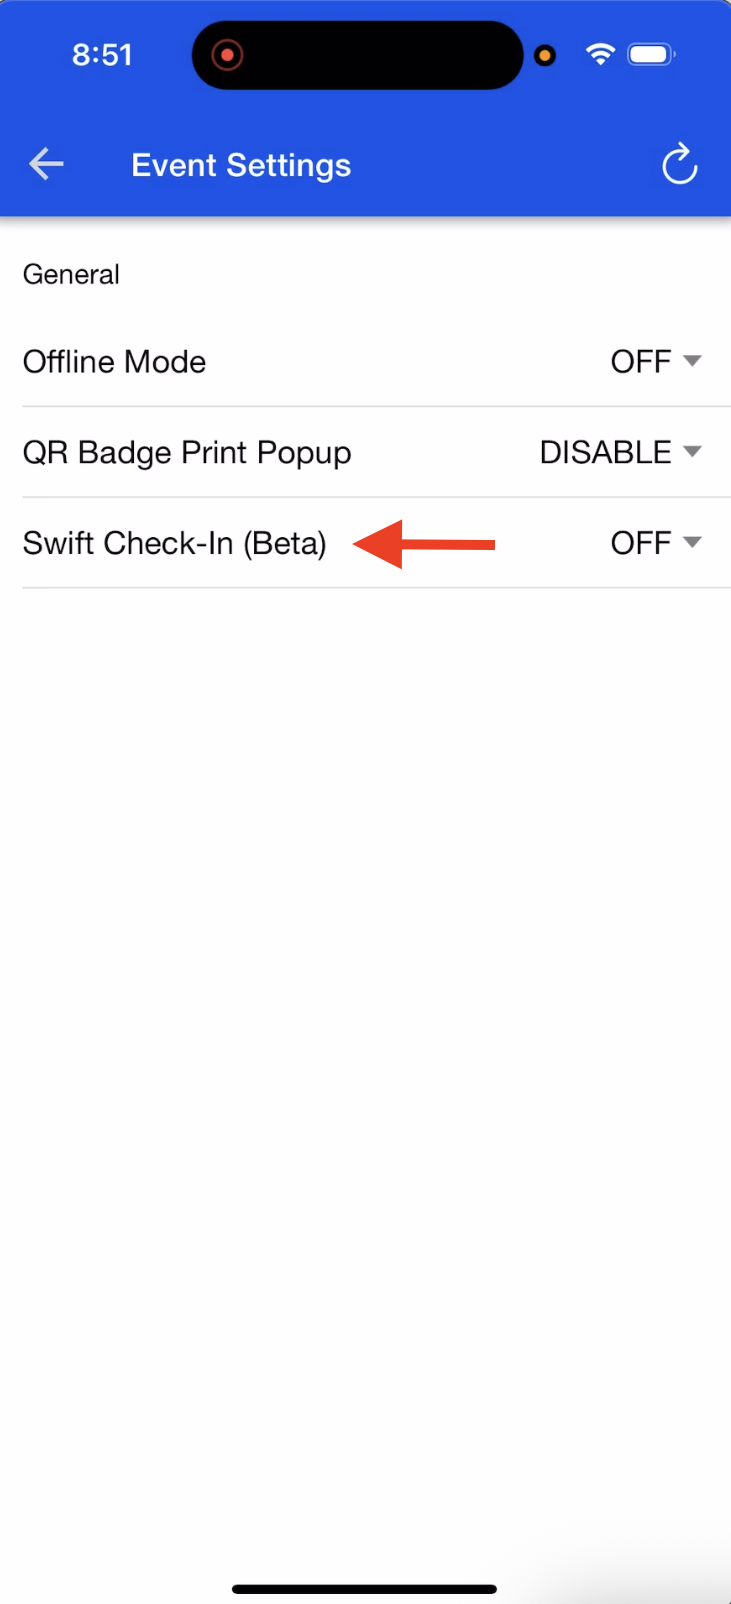
Set Swift Check-In Mode to “ON.”
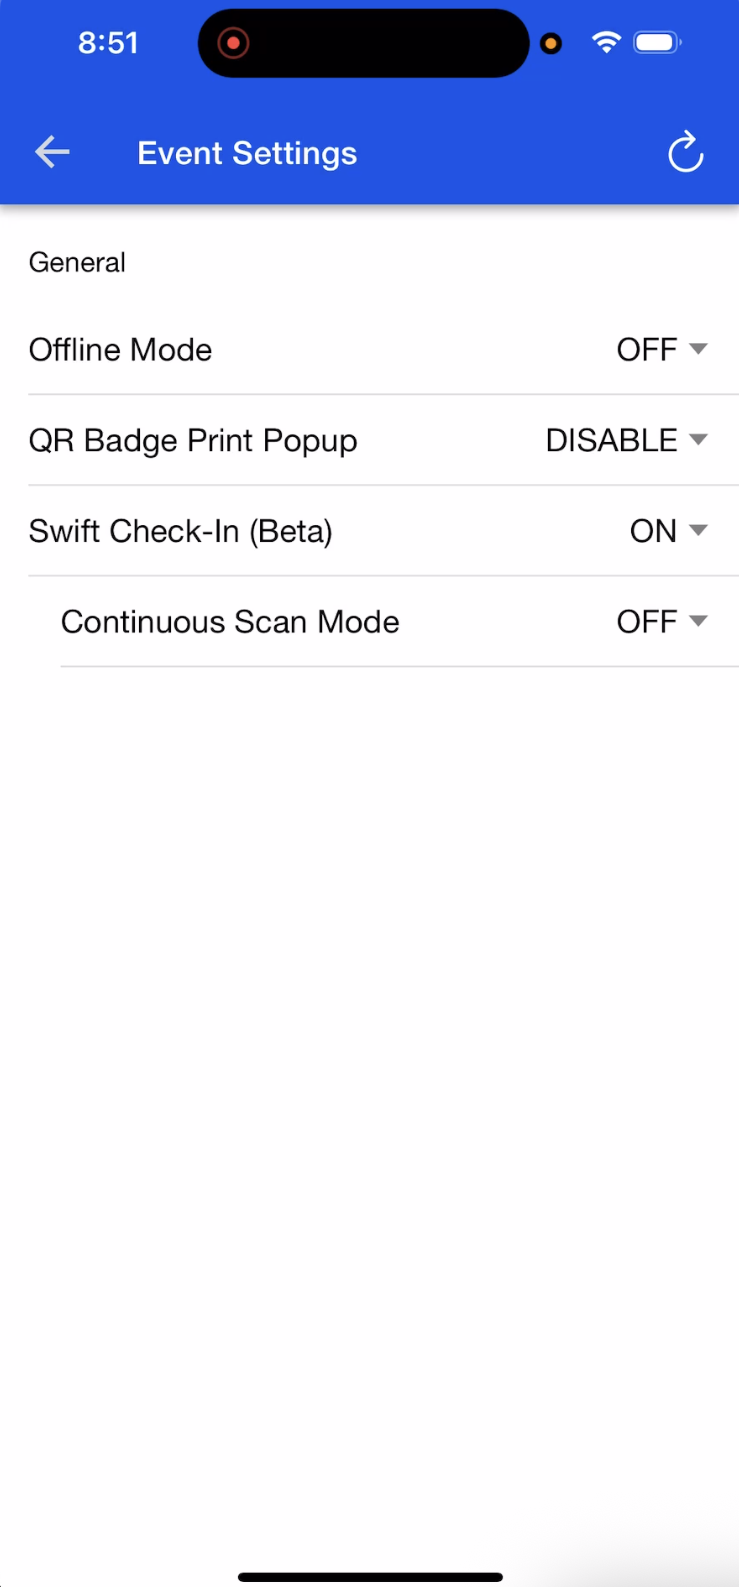
Optional: Set Continuous Scan Mode to “ON” for rapid scanning when speed is more important than verifying Attendee details. See “Optimize for Speed” for more details.
While connected to Wi-Fi, open the relevant Event and click IMPORT SF ATTENDEES if this is the first time opening that Event. This will load the Attendee data onto your device. The initial load time for large Events may take time, but subsequent loads are instant.
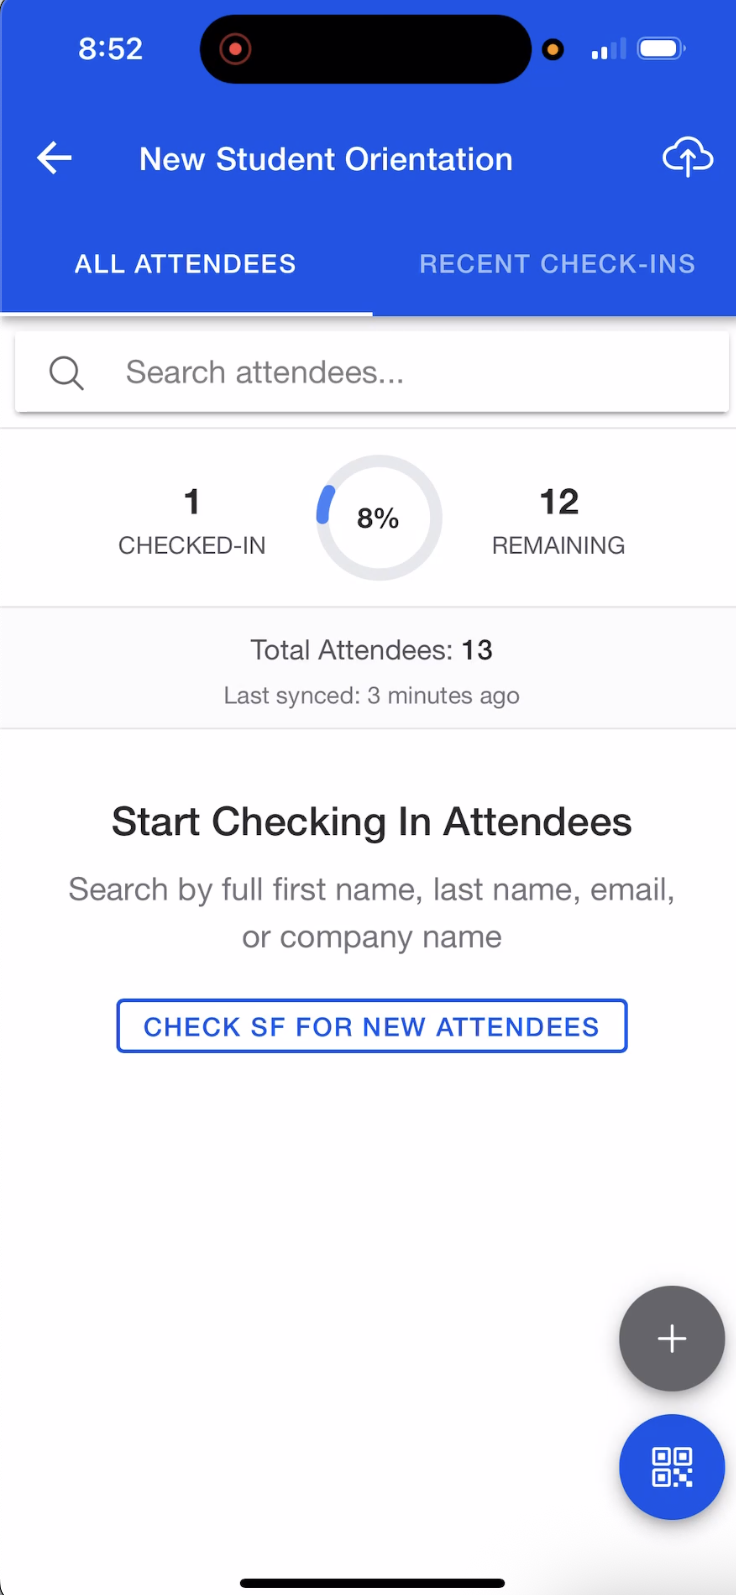
If you have already loaded the Event, you will see the CHECK SF FOR NEW ATTENDEES button. Clicking this button will load any Attendees who were not included in the initial group.
Once the Event is loaded, Swift Mode will operate the same way whether or not the device is connected to Wi-Fi.
Check In Attendees by Name or Email
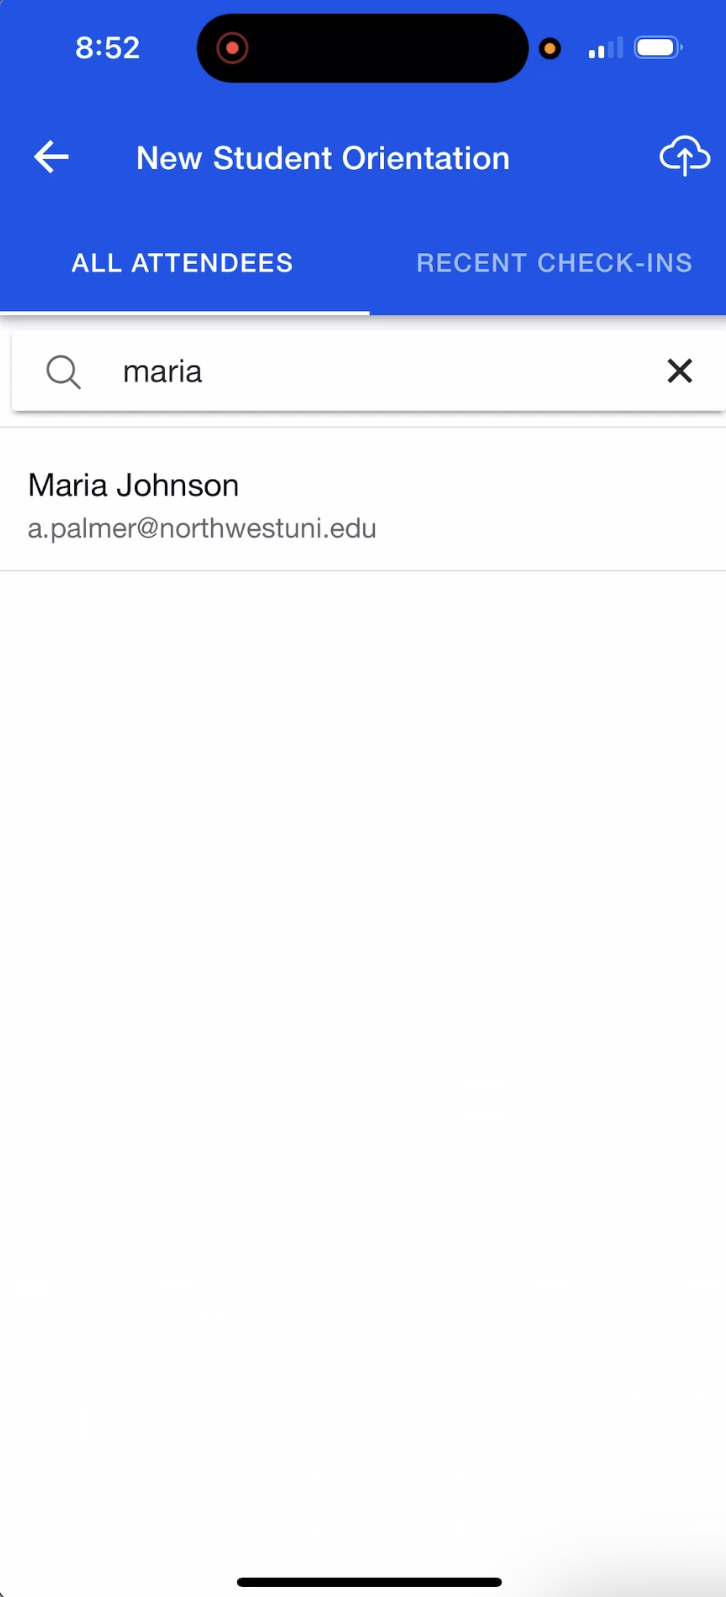
Click into the Search bar.
Enter an Attendee’s full First Name, full Last Name, full Email, or full company name (Account) in the search bar. You must enter the exact information. Partial names (e.g., just “Jo” for “John”) will not return results.
Use one of the following methods to check in the Attendee.
Swipe left on the Attendee’s name and click the green checkmark OR
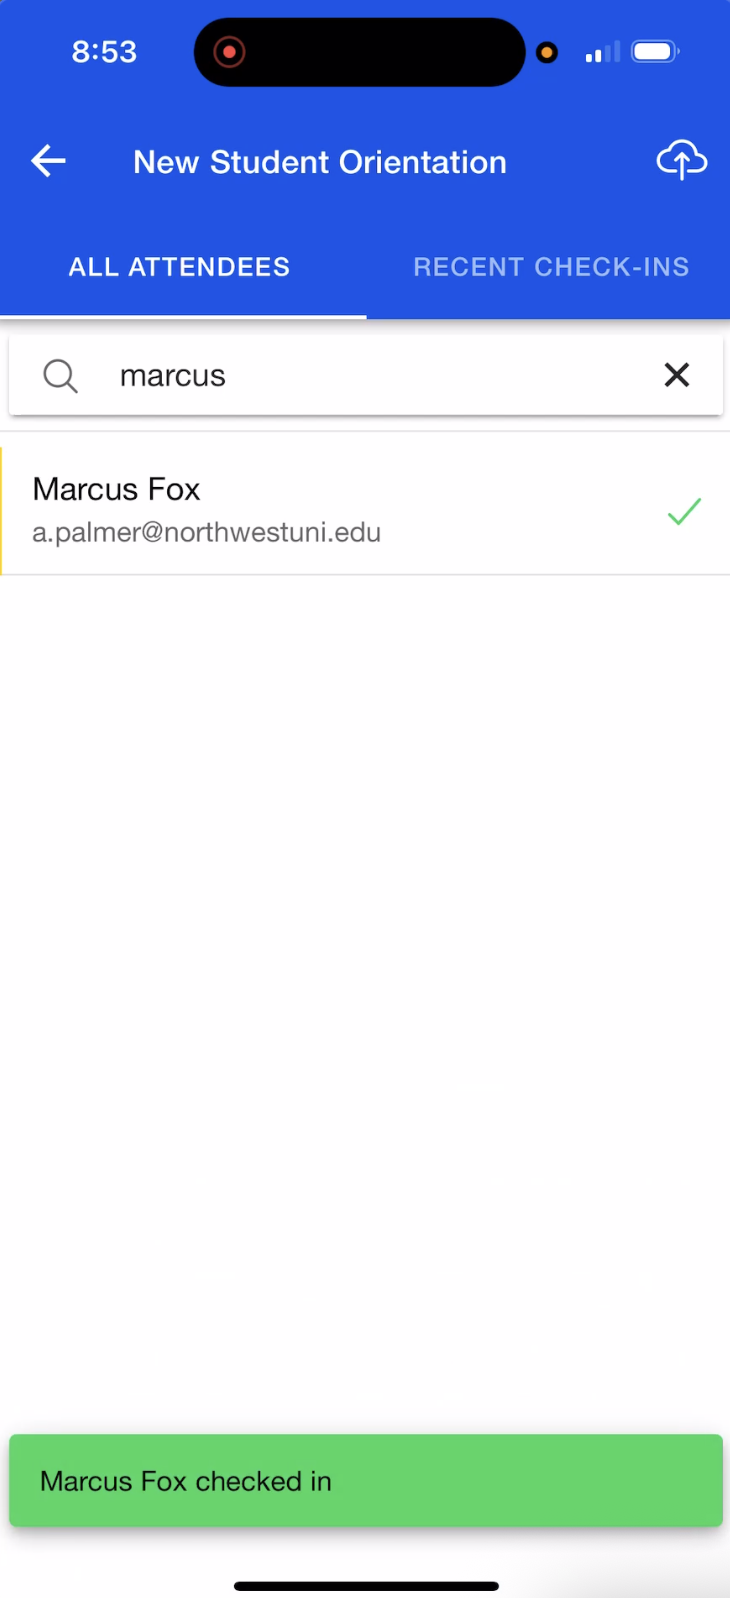
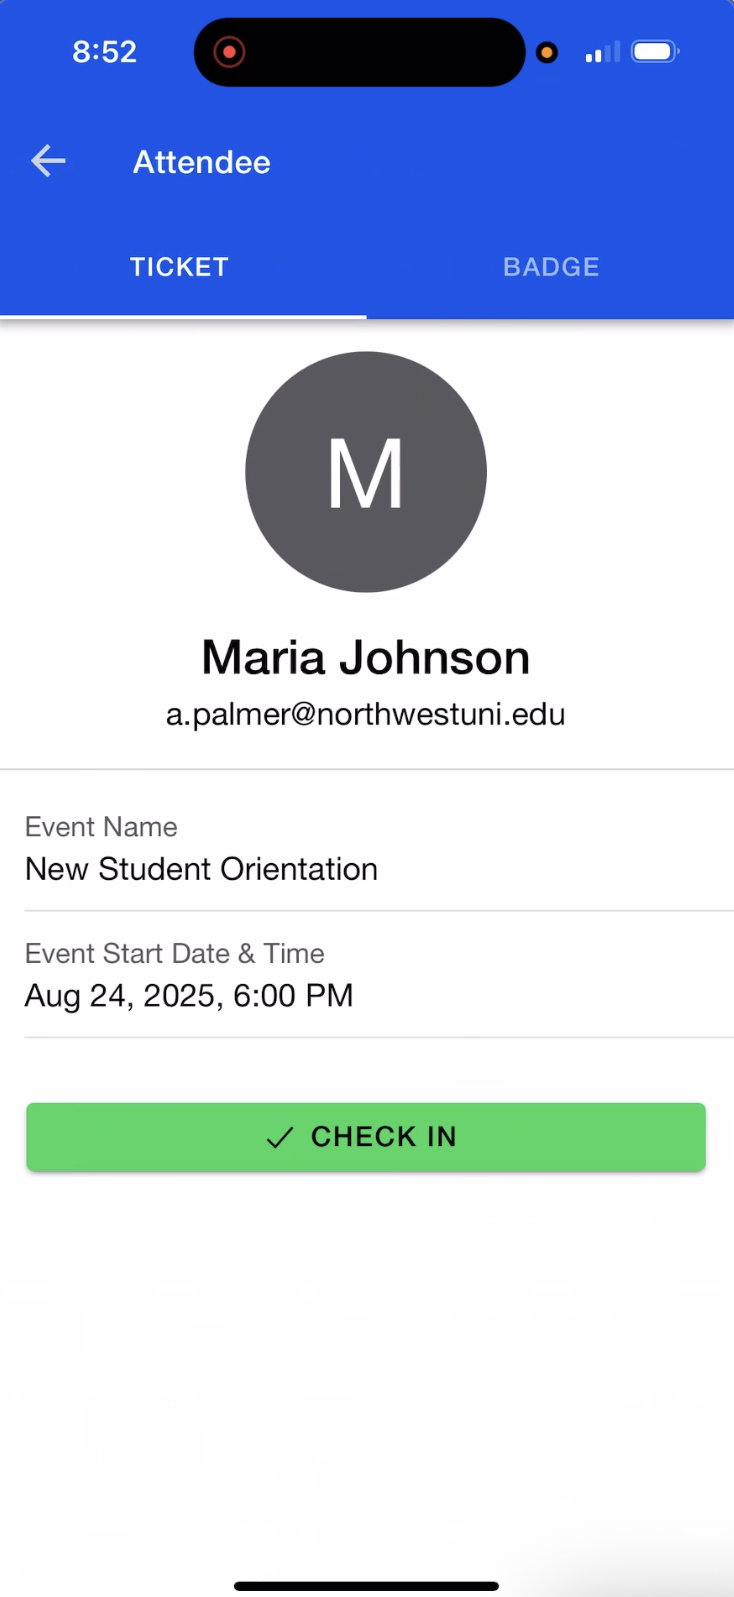
Tap the Attendee's name to view their profile, and then click the green CHECK IN button.
You can review the Attendees who have checked in by clicking the "Recent Check-Ins" tab.
Tip 1: The main screen shows the number of Attendees who have checked in, the number who have not, and the sync status.
Tip 2: To undo accidental check-ins, open the search bar and enter the Attendee’s name. Tap their name and click UNDO CHECK IN.
Check In Attendees by Scanning a QR Code
Note: The first time you use the QR code scanner, you must allow camera access on your phone.
Verify Attendee Information and/or Print a Badge
Leave Continuous Scan Mode set to “OFF” to verify an Attendee’s information or print a badge for them.
Tap the blue QR code button in the bottom right-hand corner to open the scanner.
Scan the Attendee’s QR code. Check-in happens instantly.
Review the Attendee’s details in their profile.
Print a badge, if needed.
Tip: If you inadvertently scan the same QR code twice, the check-in will still be successful.
Optimize for Speed
Set Continuous Scan Mode to “ON” to optimize for speed. Use this setting if you do not need to verify the Attendee’s information or print a badge.
Tap the Hamburger navigation button in the upper left-hand corner.
Click Settings.
Verify that Swift Check-In Mode is set to “ON.”
Set Continuous Scan Mode to “ON.”
Open an Event.
Click the QR code button in the bottom right-hand corner.
Scan Attendee QR codes without closing the scanner between Attendees.
Pause, restart, or stop as needed.
Tip: If you inadvertently scan the same QR code twice, the check-in will still be successful.
External ID QR Code Scanning
External ID QR code scanning works with Swift Mode with Continuous Scan Mode set to “ON” or “OFF.”
You can create new Attendees with External IDs only if your mobile device is connected to Wi-Fi.
External IDs can be used to check in existing Attendees with or without Wi-Fi.
Tip: If you inadvertently scan the same QR code twice, the check-in will still be successful.
Attendee Group Check-in
Set Continuous Scan Mode to “ON.”
Scan a QR code for an Attendee who belongs to an Attendee Group.
Click View Profile to access the Attendee details screen.
Click the “Group” tab.
Click Check In for All at the bottom of the Attendee Group list to check in all Attendees in the group.
Tip: If you inadvertently scan the same QR code twice, the check-in will still be successful.
View Attendee Check-Ins
Attendee Records
Each Attendee entry should include the following details:
Attendee Name; if available, otherwise it will read "Unknown Attendee"
Attendee Email
Attendance Status will be set to "Attended" or will be blank
Timestamp indicating when the transaction occurred
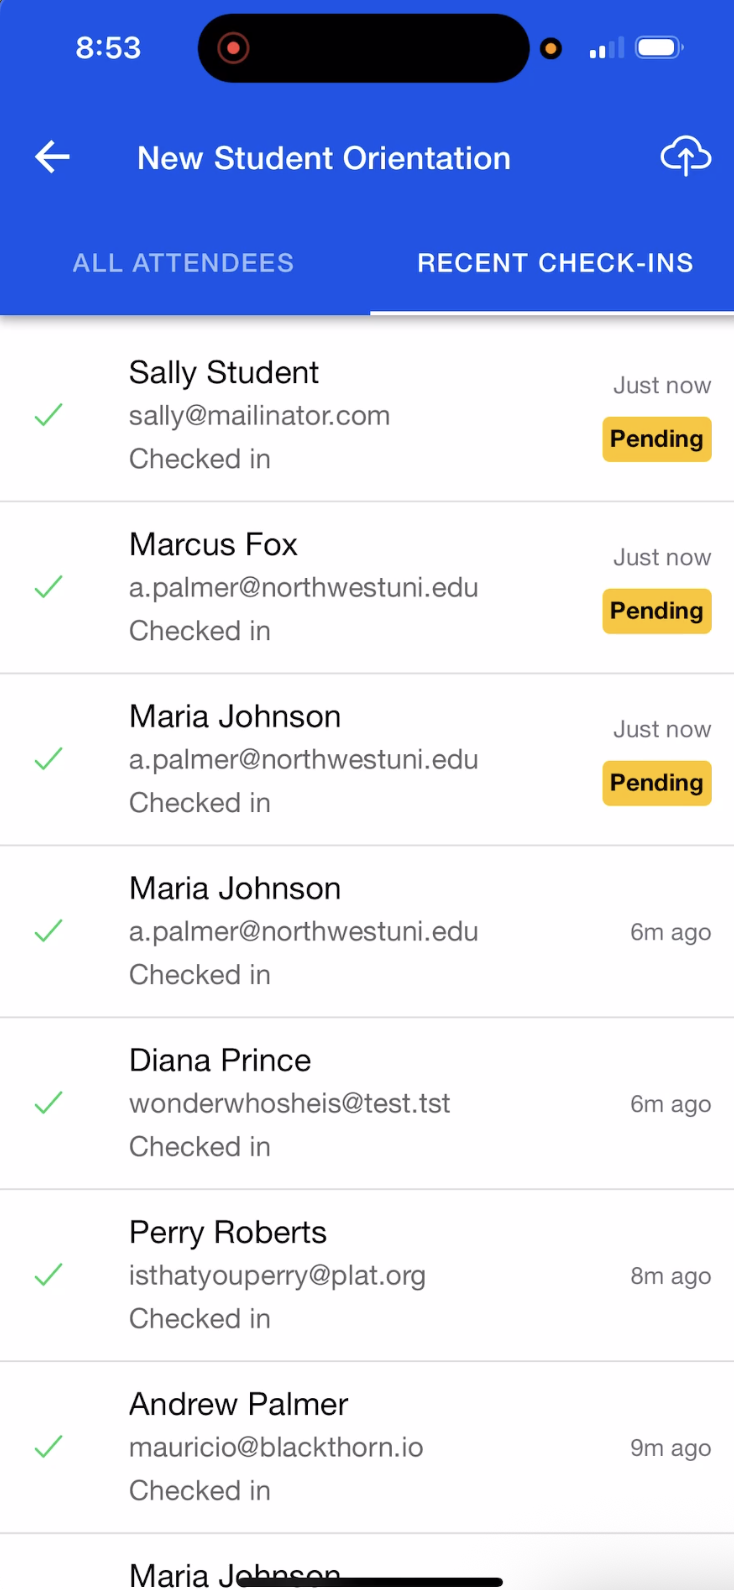
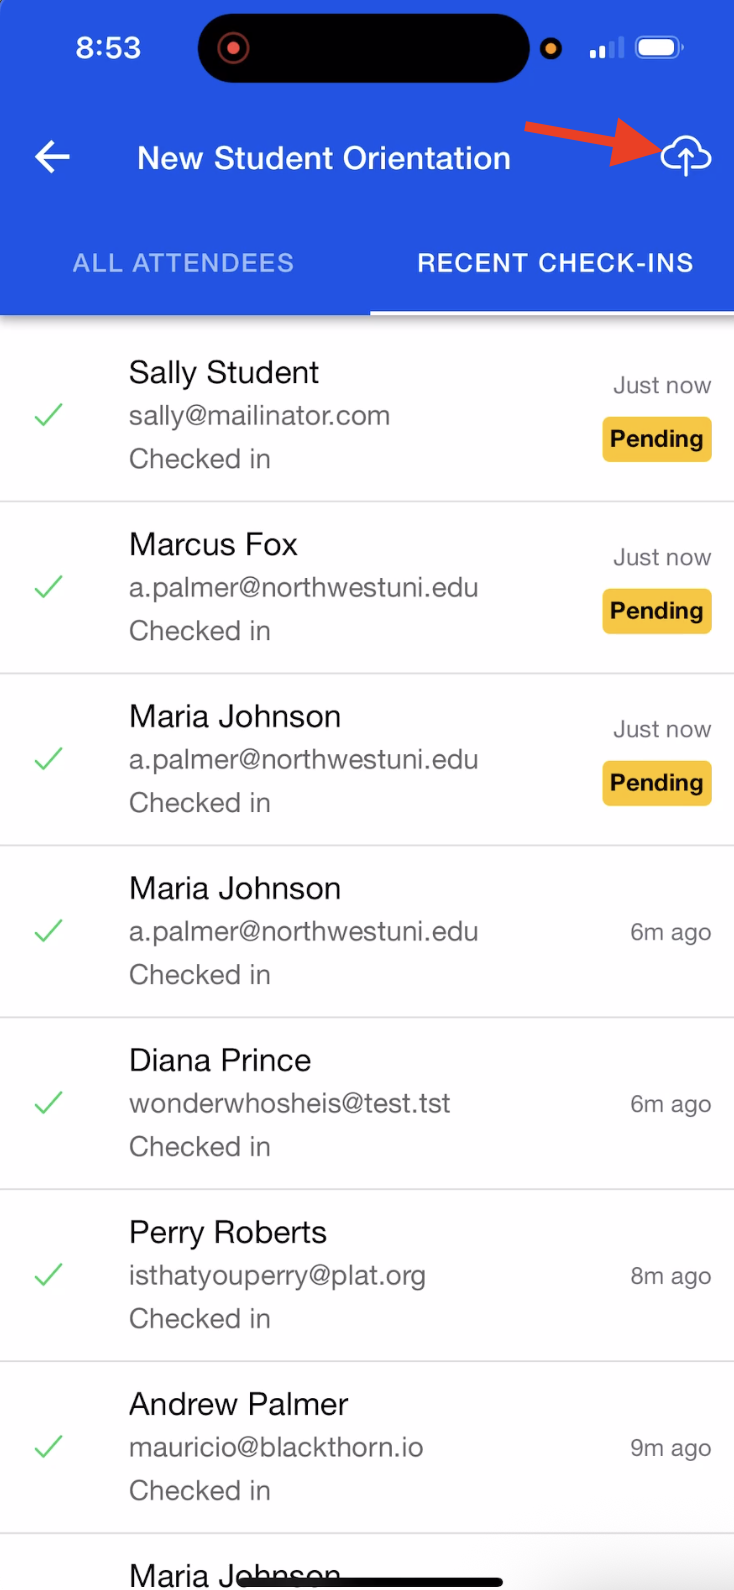
Recent Check-Ins Tab
The “Recent Check-Ins” tab is next to the “All Attendees” tab. Once the Mobile Check-in app captures activity offline, the history will be listed and sorted by most recent (top to bottom).
Mobile Check-in app users will see a “Pending” flag next to an Attendee's name until the app is synced. Users can also scroll down to see all the Attendees, which ones have checked in/out, and their attendance update.
Green checkmark = Checked in or “Attended”
Red X = Checked out (undo)
Blue + = New Attendee
Sync Attendees to Salesforce
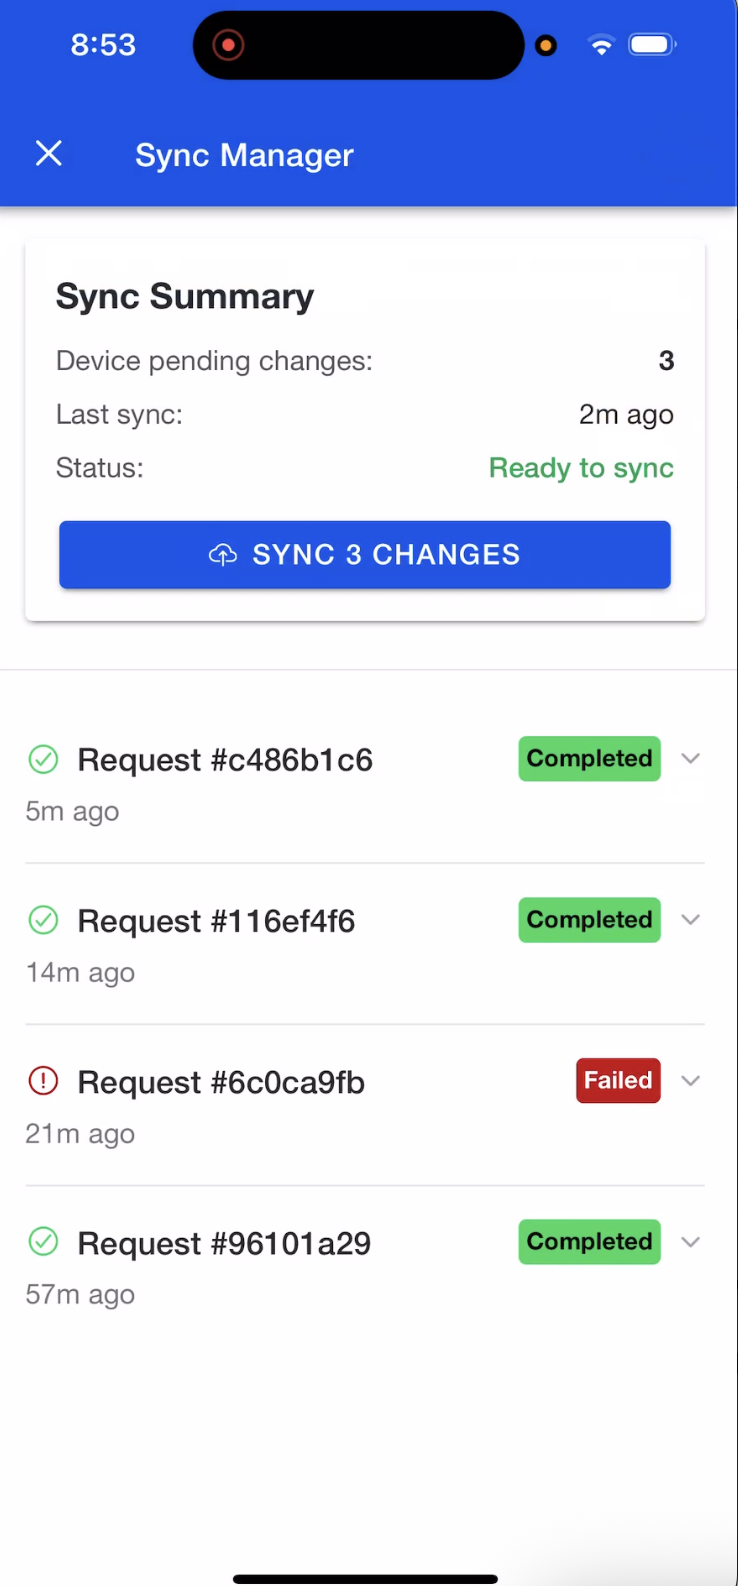
Sync Manager
The Sync Manager is accessed via the Cloud button in the top right-hand corner and shows the following information:
Device pending changes
Last sync
Status
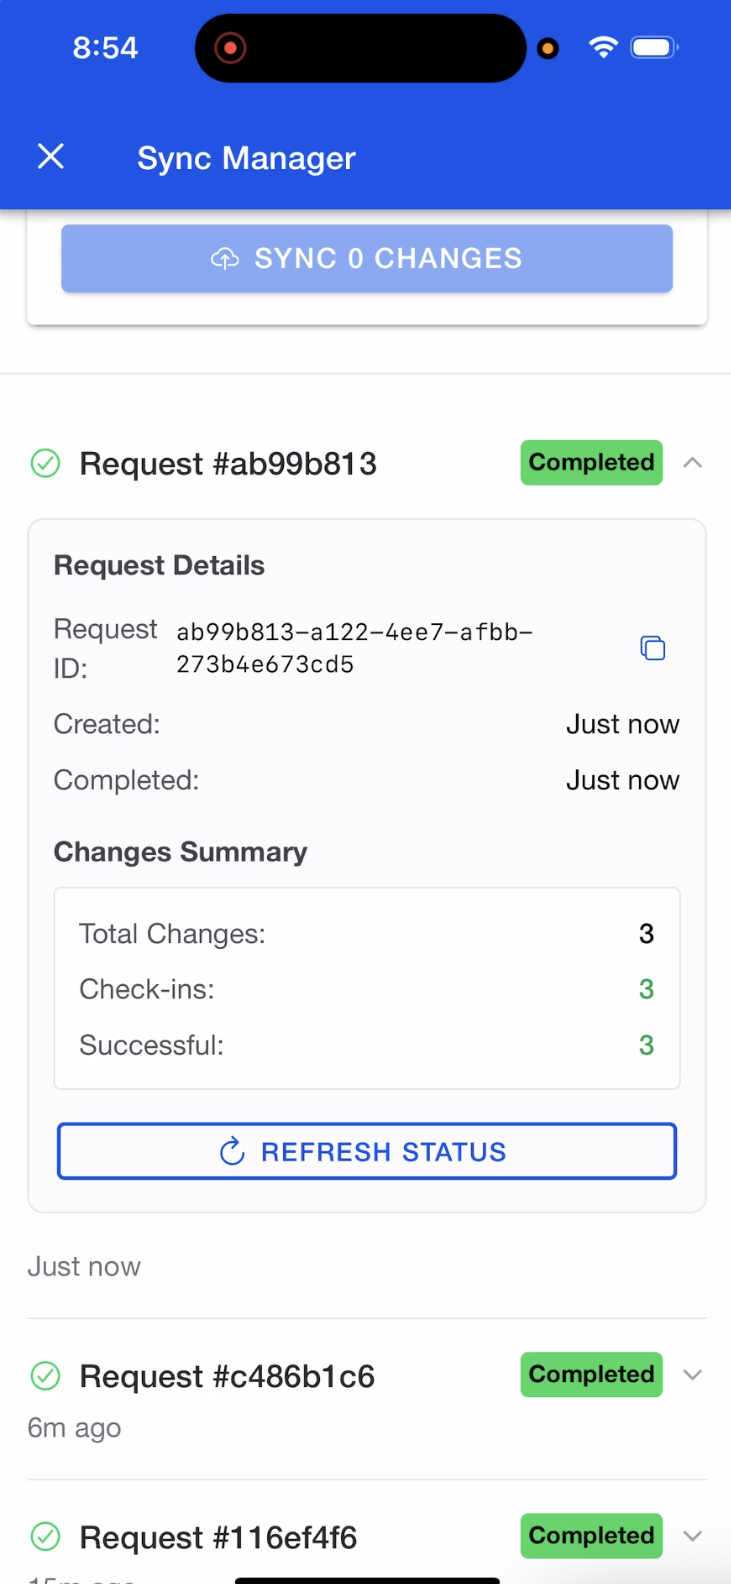
Sync history with each Request Id
The status for each sync request (ex. completed or failed)
Sync to Server
Syncing in Swift Mode is a manual process. Unlike the legacy offline mode, connecting to Wi-Fi does not trigger a sync in Swift Mode.
Connect to Wi-Fi.
Tap the Sync Manager or Cloud button in the top right-hand corner.
Click SYNC X CHANGES.
Click on the completed Request Id to open the details.
If the sync fails, tap the Cloud button again, and a new Request Id will be generated.
If you are unable to complete the sync, please copy the Request Id and include it in your support request to Blackthorn.
Add Attendees
Manually
If an Attendee isn’t found, tap the "+" button (bottom right) to add a new Attendee. Wi-Fi is not required to manually add an Attendee.
Tip: When adding a new Attendee via the “+” button, after saving, the Attendee is immediately checked in and appears in both the “All Attendees” and “Recent Check-Ins” tabs.
Via an External ID
Use the QR Code Scanning steps above to create Attendees. Wi-Fi is required to add Attendees using this method.