Configure the Transaction Object
- Click the Gear icon.
- Click Setup.
- Click the Object Manager tab.
- In the Quick Find box, enter and click "Transaction."
- Click the Page Layout tab.
- Click the FSL Charge Transaction Layout.
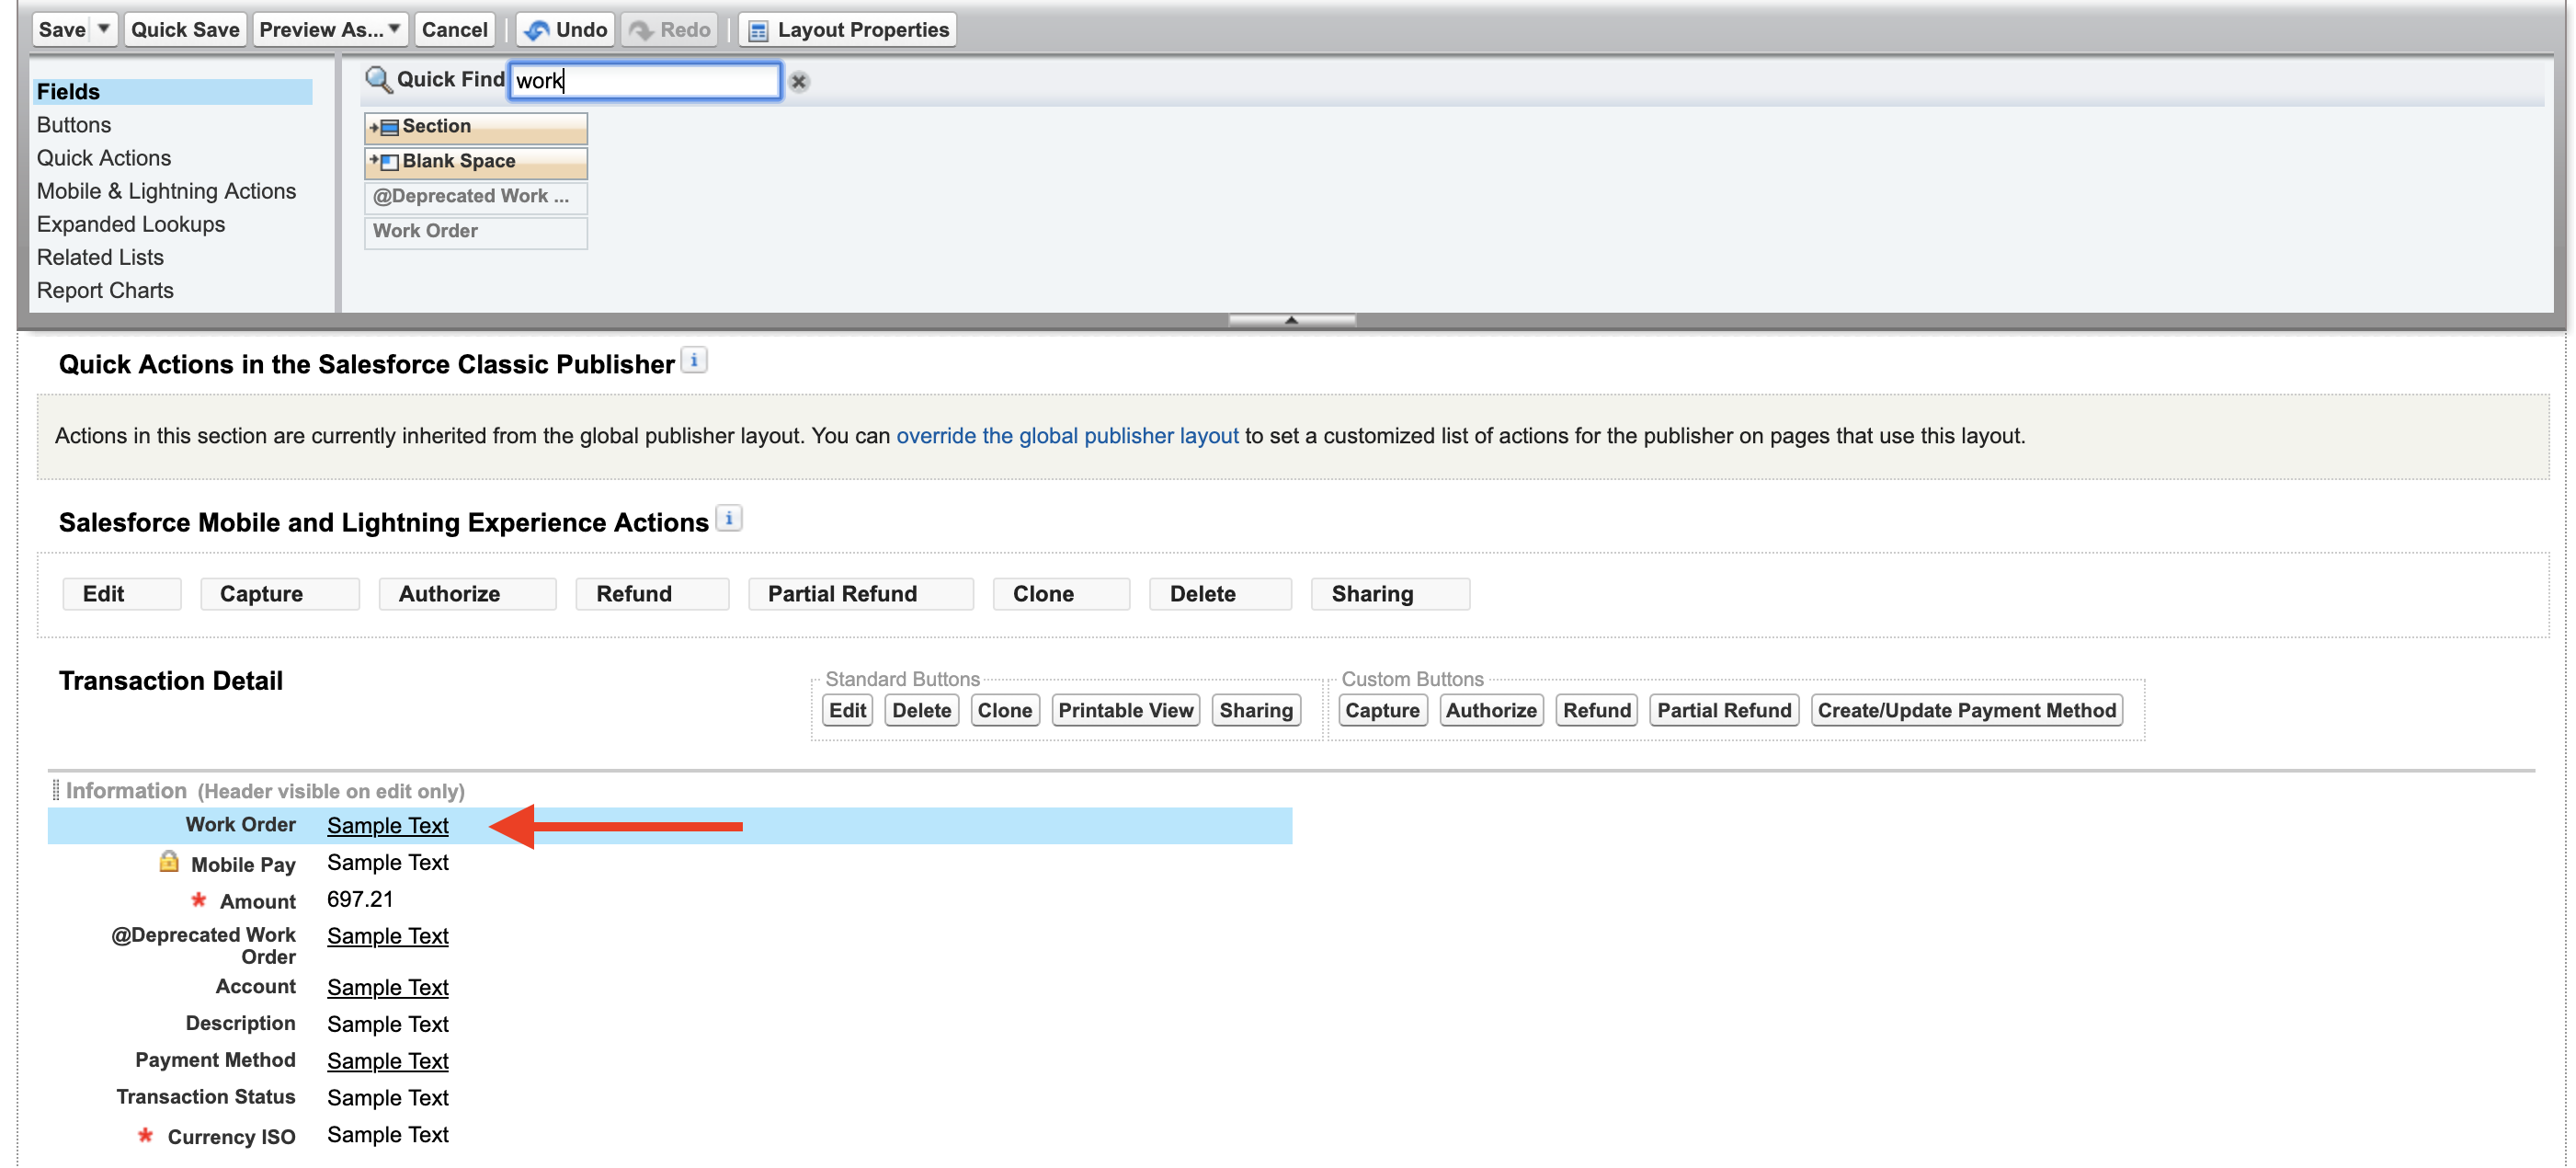
- Drag and drop the Work Order field on the page layout.
- Click Save.
- Navigate to the Transaction object in Setup.
- Click Edit on the Page Layout.
- Add the Work Order lookup to the page layout.
Configure the Work Order Object
- Click the Gear icon.
- Click Setup.
- Click the Object Manager tab.
- In the Quick Find box, enter and click "Work Order."
- Click the Page Layout tab.
- Click FSL Work Order Layout.
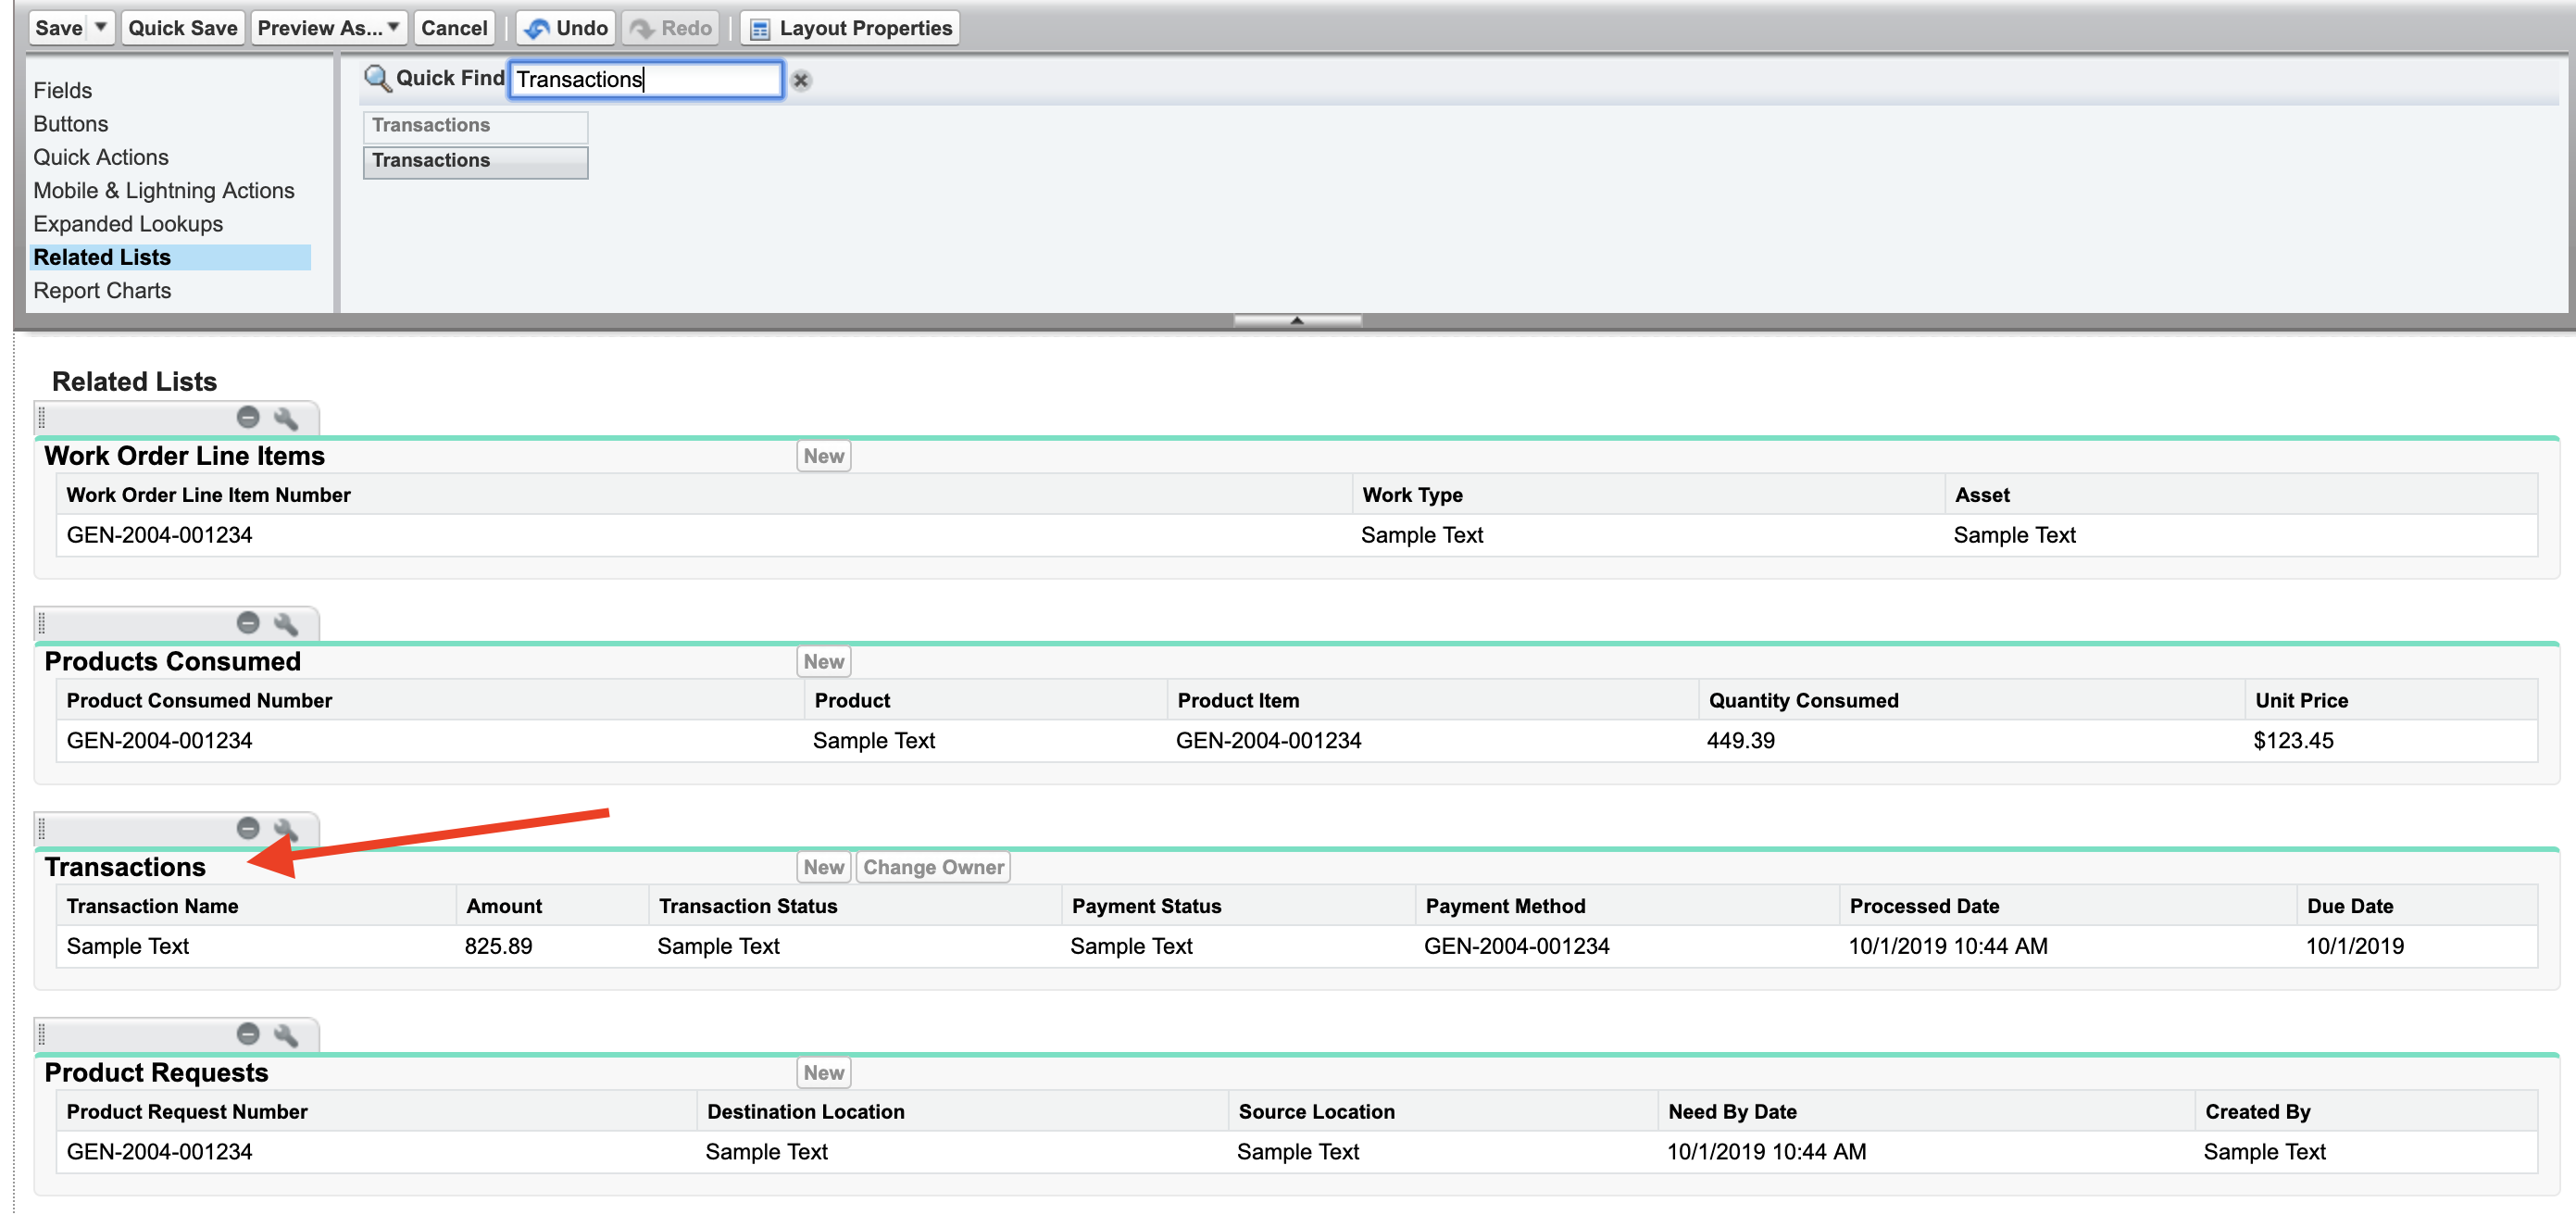
- Click Related Lists.
- Drag and drop the Transactions Related List to the page layout.
- Click Fields.
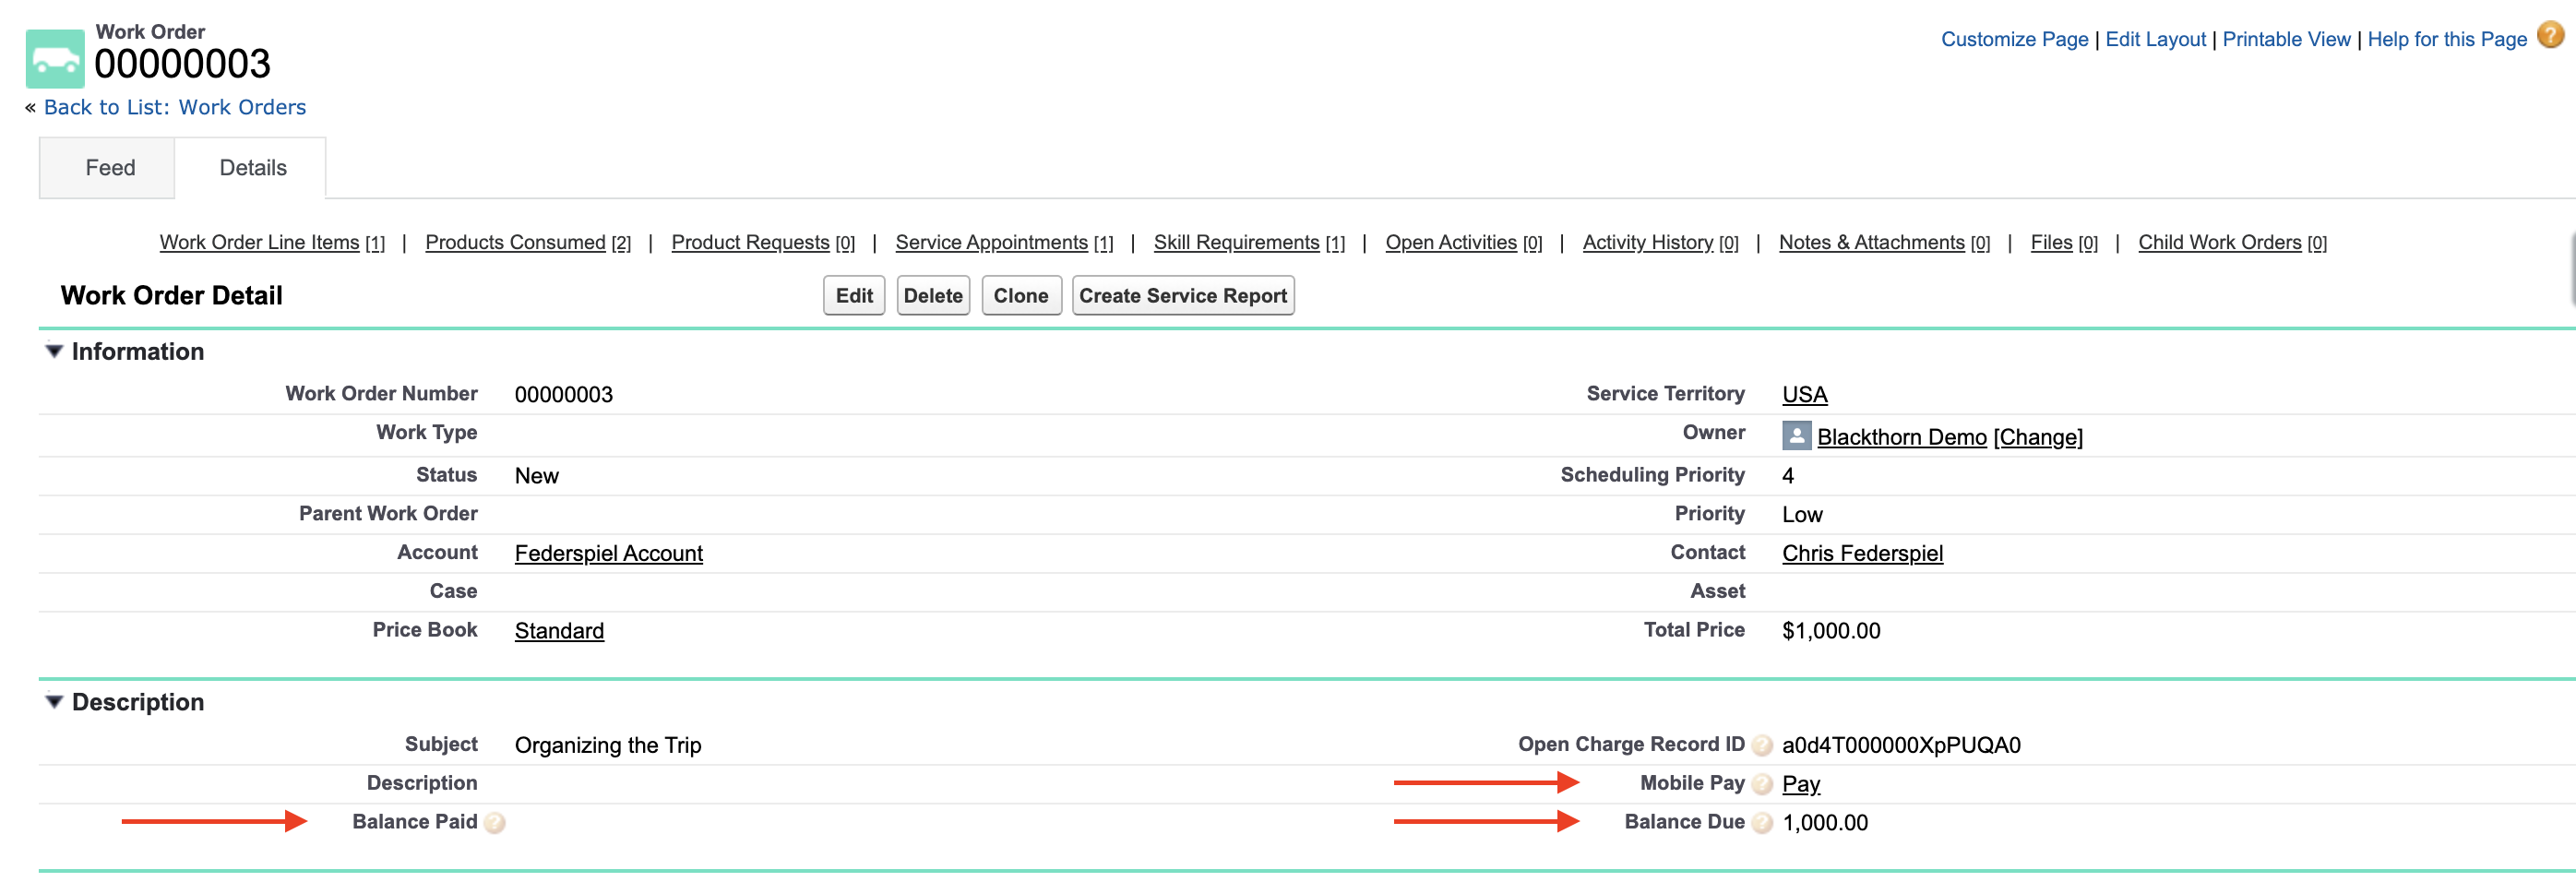
- Drag and drop the Mobile Pay, Balance Paid, and Balance Due fields on the page layout.
- Click Save.
Assign Permission Sets
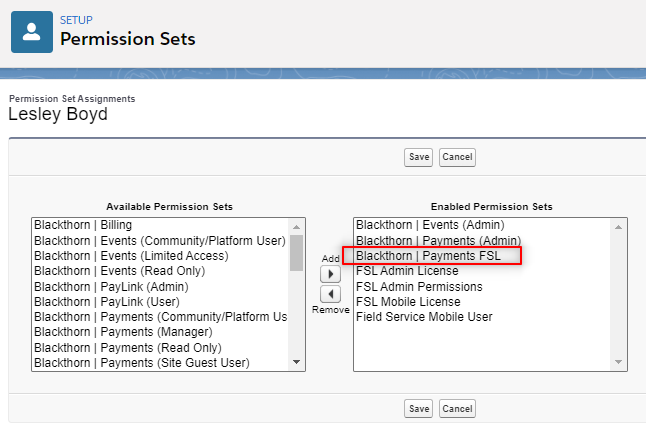
- Identify the users that will be using the Blackthorn FSL Extension Package.
- Assign the Blackthorn | Payments FSL permission set to those users.
Add Field Service Permissions
- From the App Launcher, type "Field Service Settings" and navigate to the app.
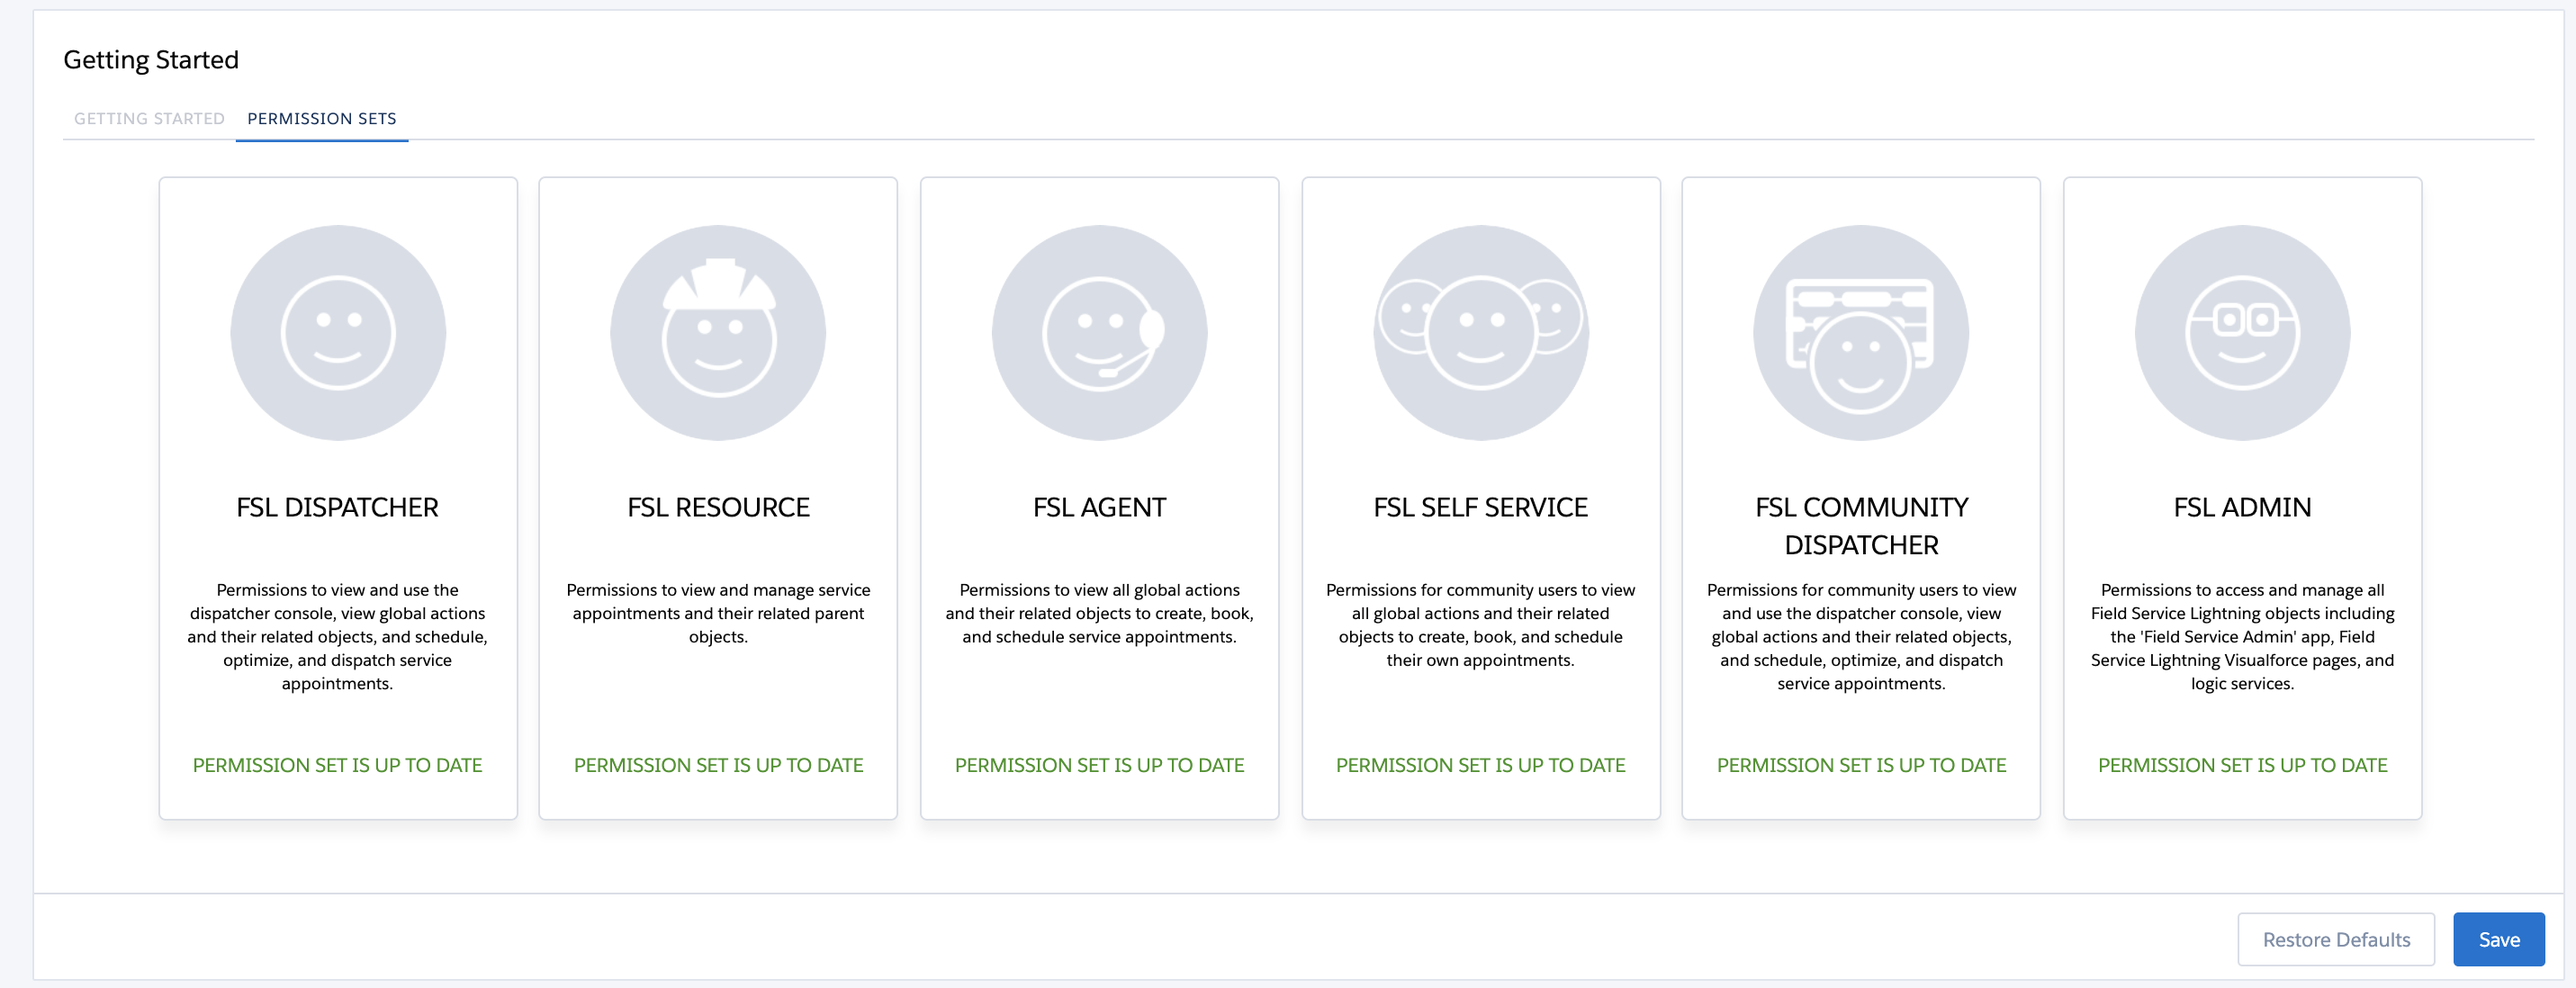
- From the Getting Started step, click the Permission Sets tab.
- Click Create Permissions for all the Roles.
- Click Save.
Add Field Service Territory, Work Type, and Service Resource
- Click the Getting Started tab.
- Click Go to Guided Setup.
- Create a Service Territory, Work Type, and Service Resource.
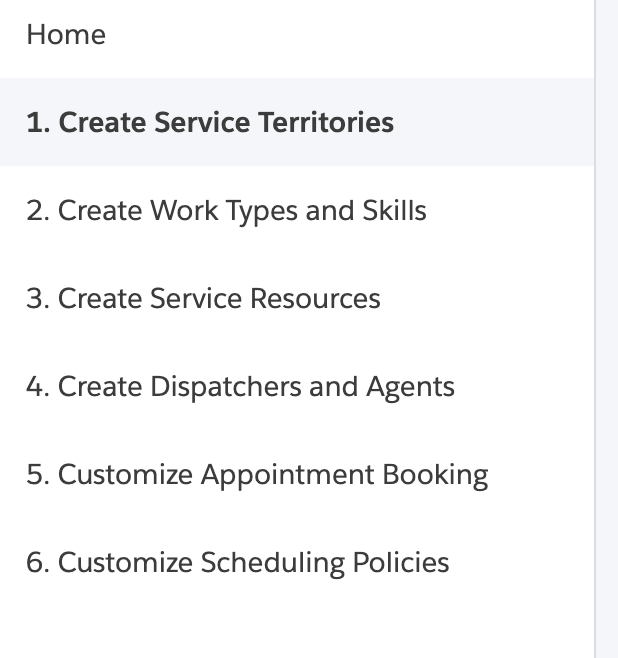
- Click the Create Dispatchers and Agents step and click Add.
- Choose users from Assign Service Territories to Select User.
- Select the Service Territory.
- Click Assign Service Territory.
