The Smart Capture web portal provides an alternate method to manage leads, field mappings, teams and more. Users can also modify lead fields and set up Custom Question fields before an event to ensure their team collects the best information.
Log In
Log in to the Smart Capture web portal.
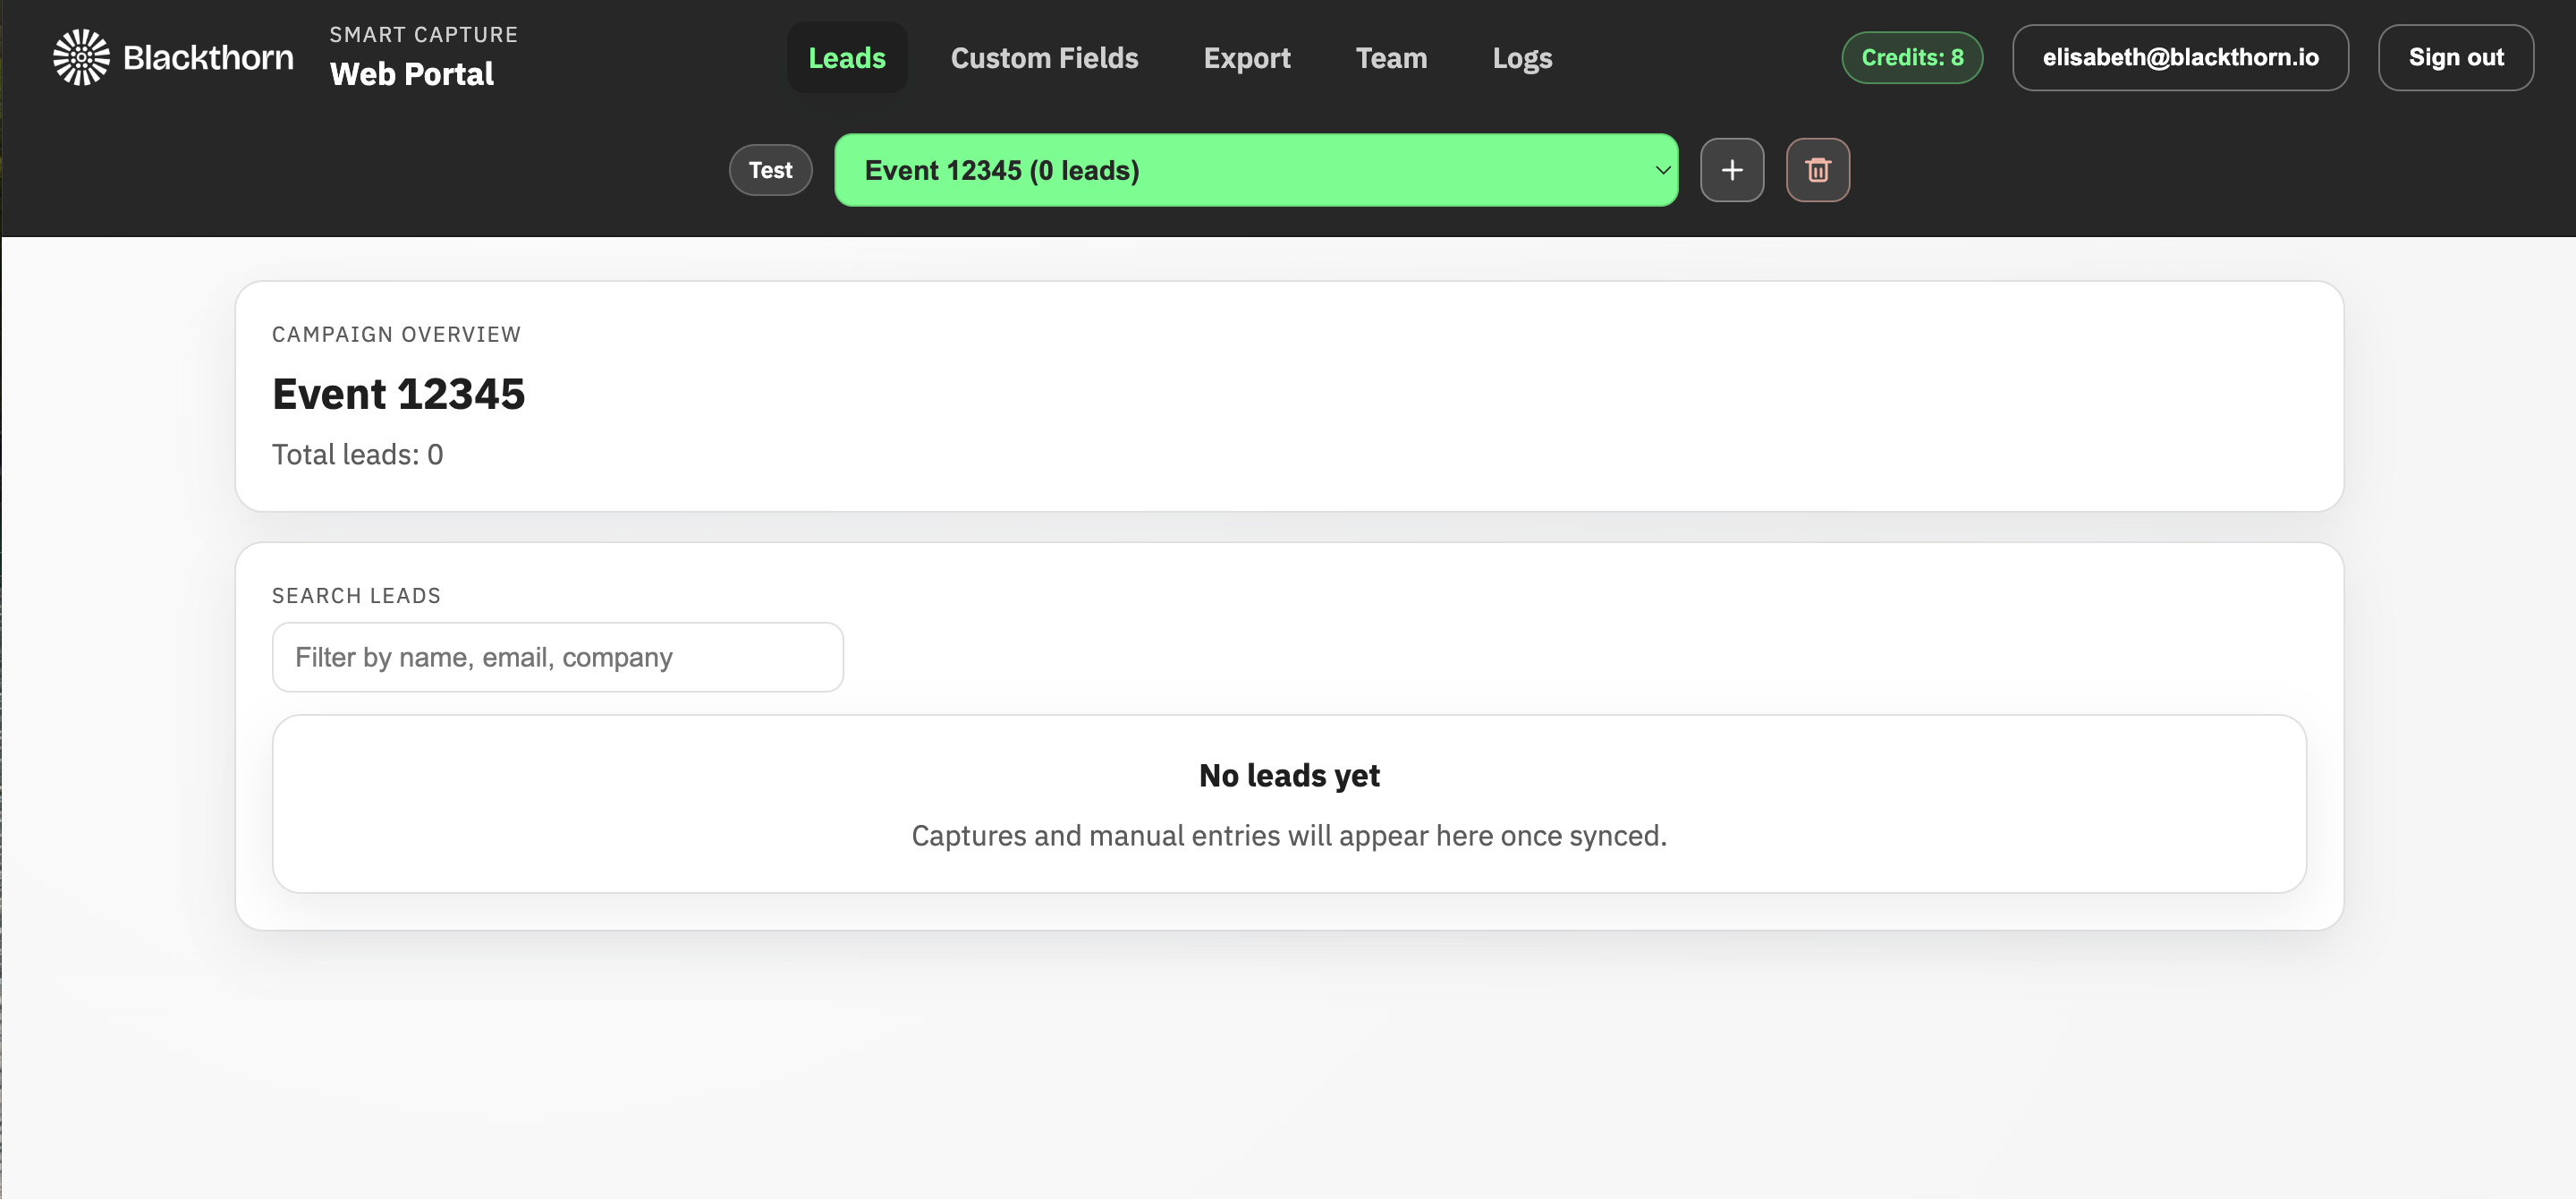
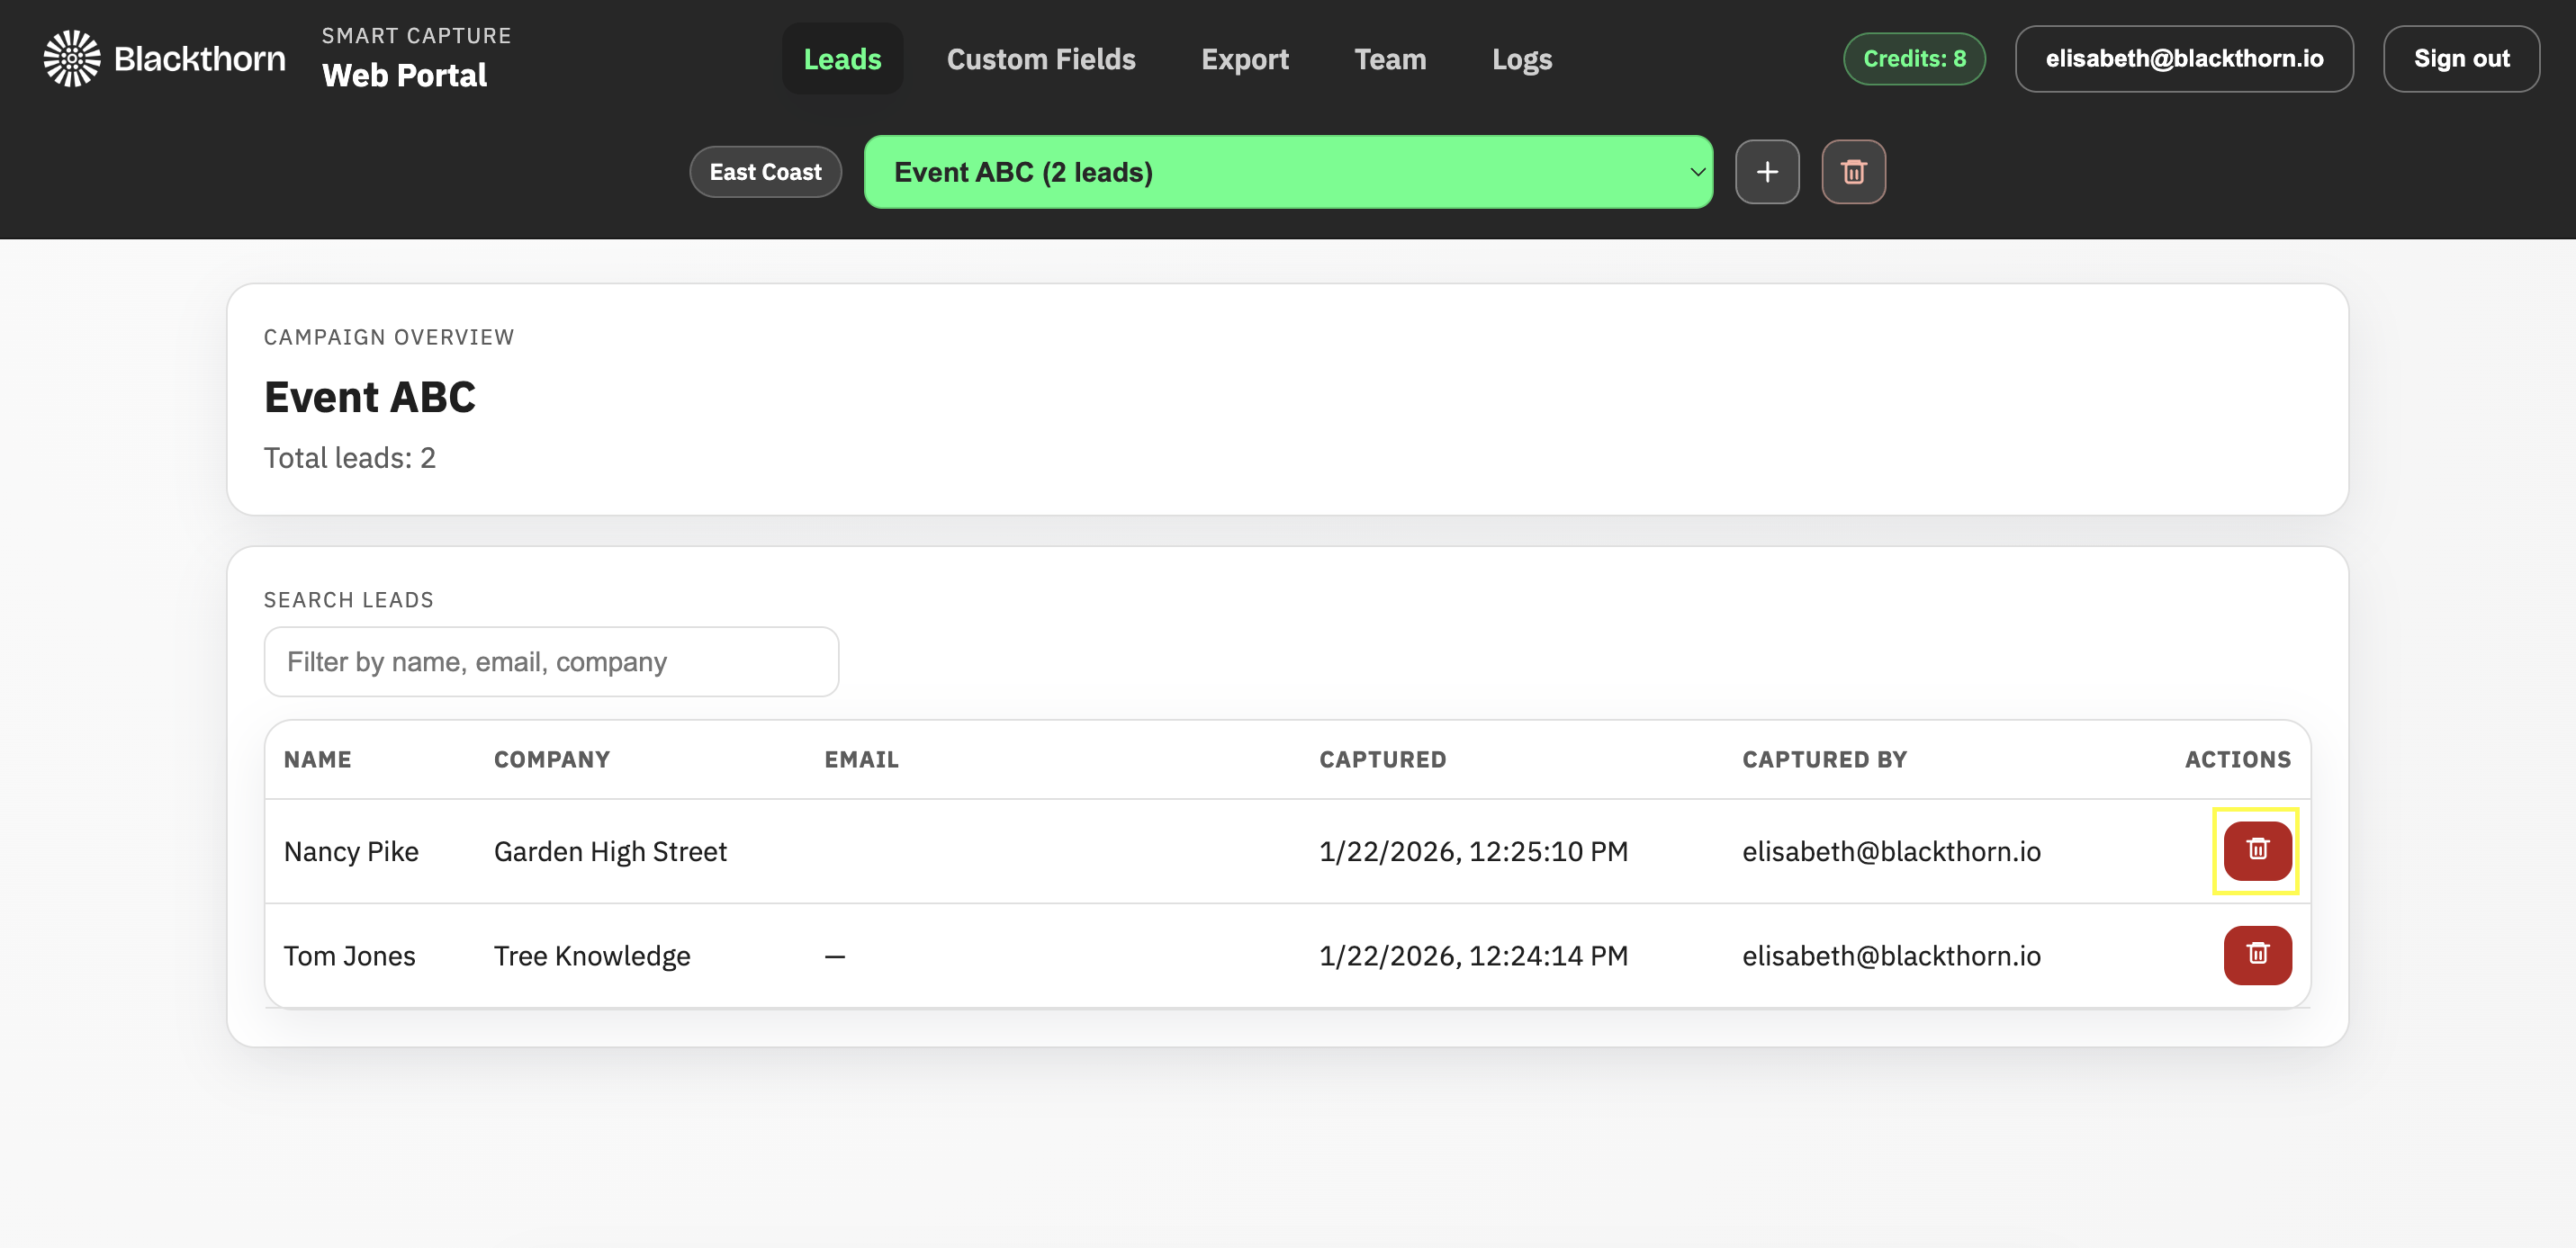
Events
The current event is located in the green box. You will see any existing leads related to the event listed below.
Add a New Event
Click the + icon next to the green box.

Enter the new event's name.
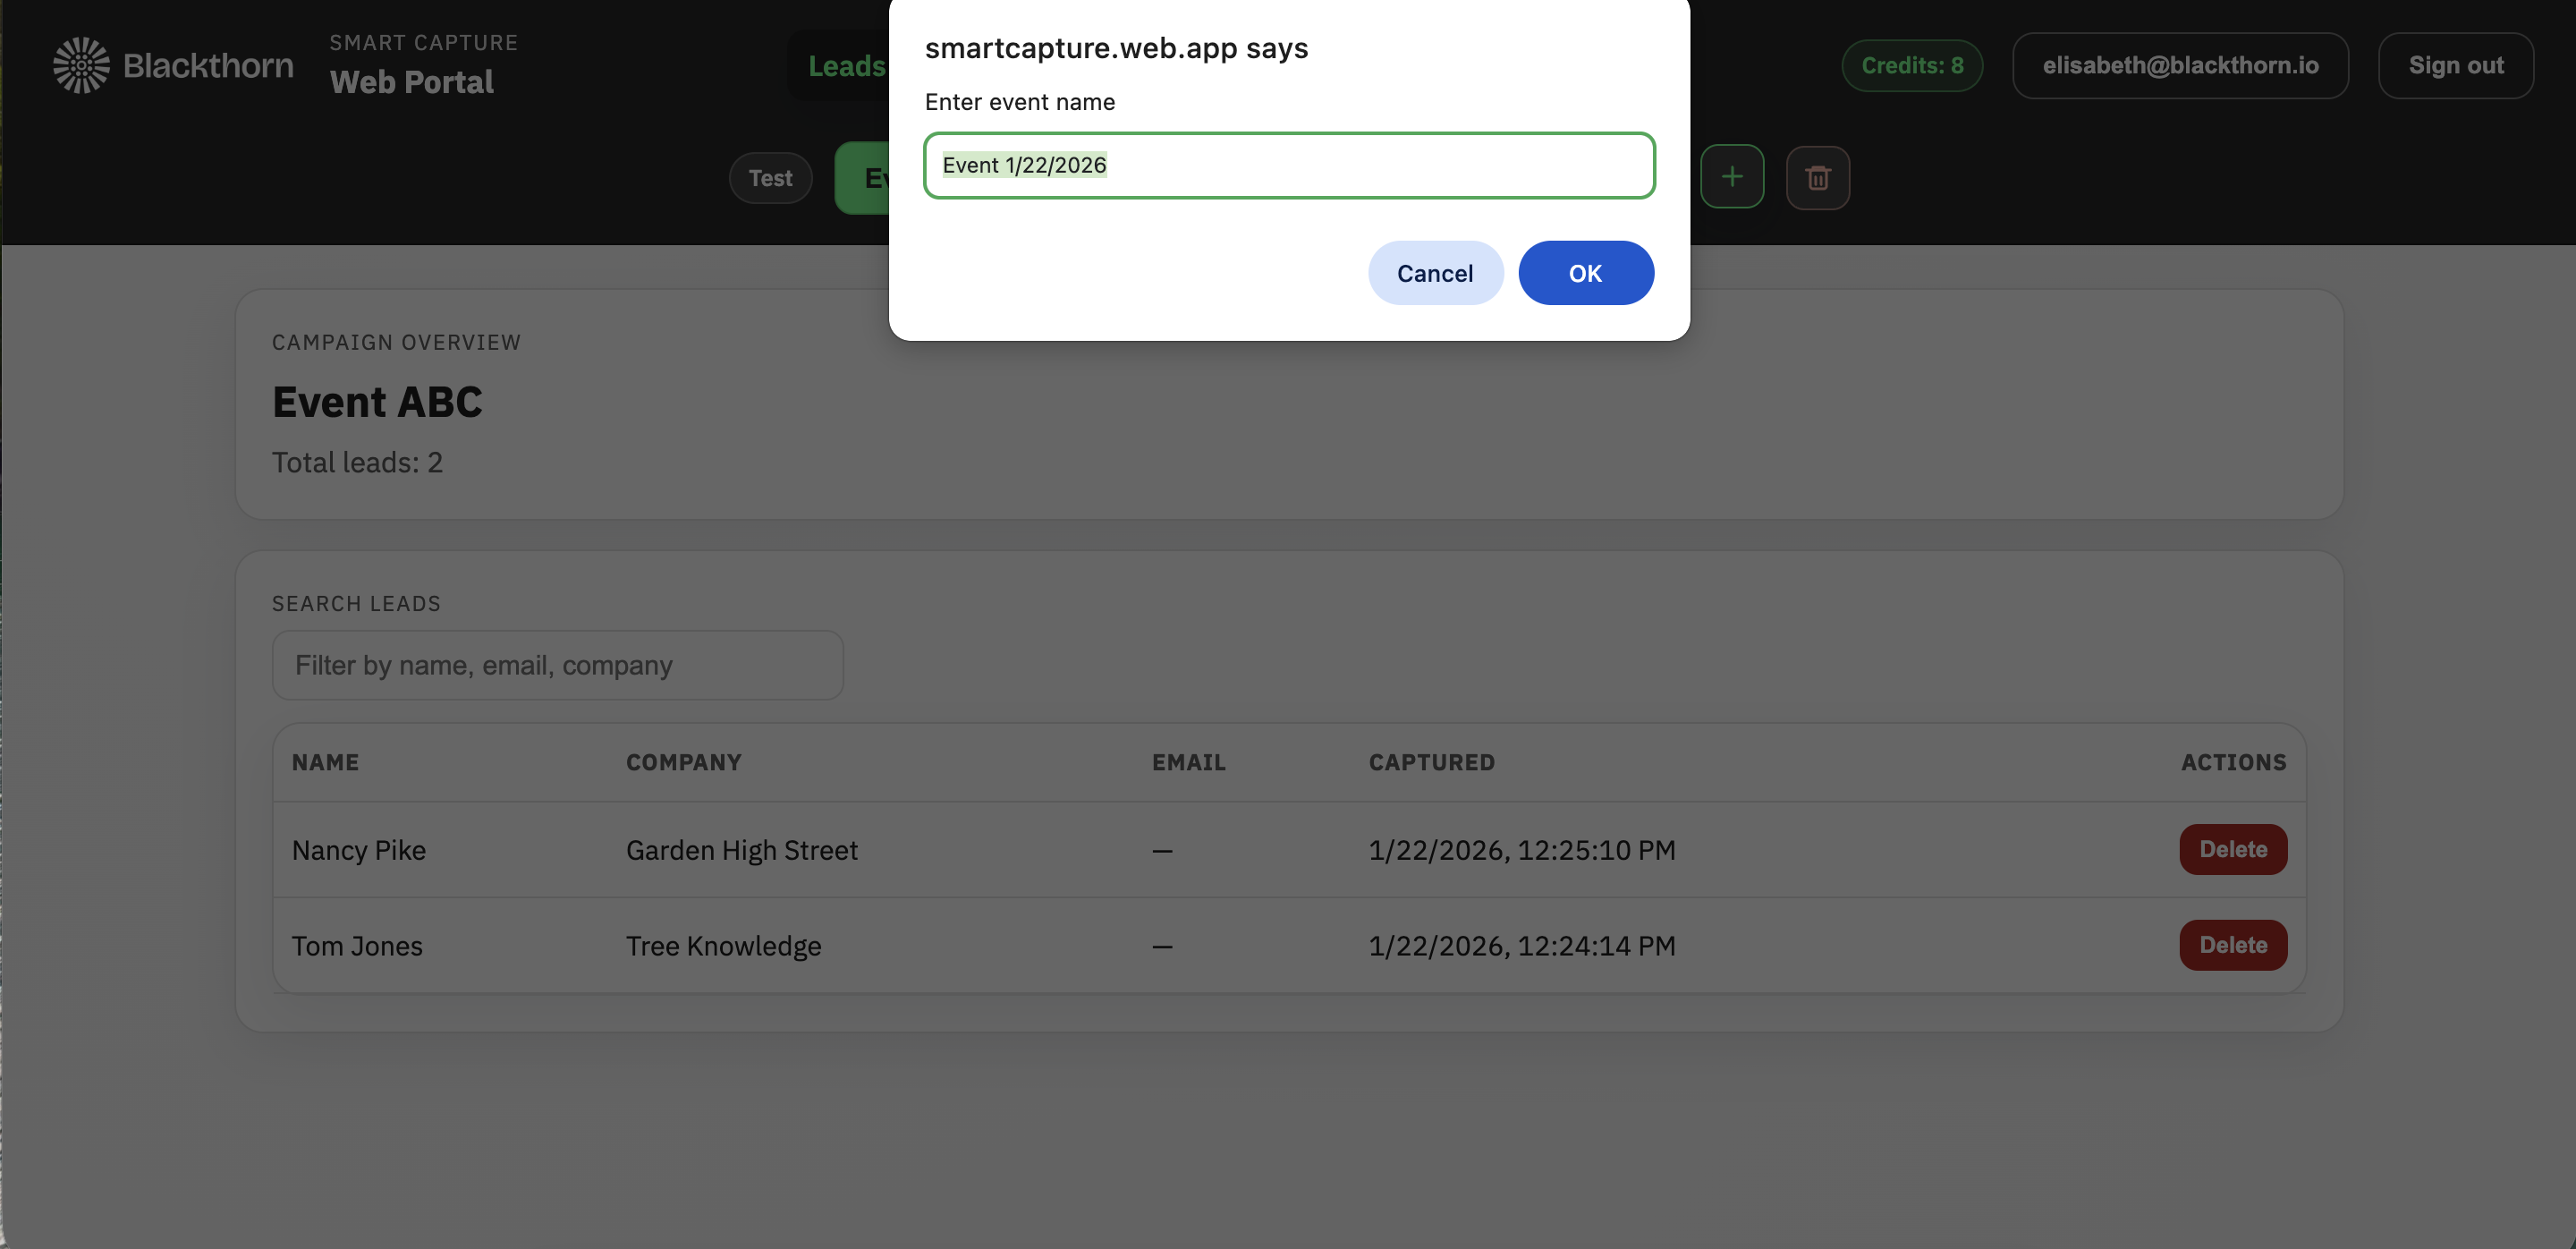
Click OK.
You now have a new event without any leads.
Delete an Event
Note: This feature will delete the event that you are currently viewing.
In the green box, select the event you want to delete.
Click the Trash Can icon.

Type “DELETE.”
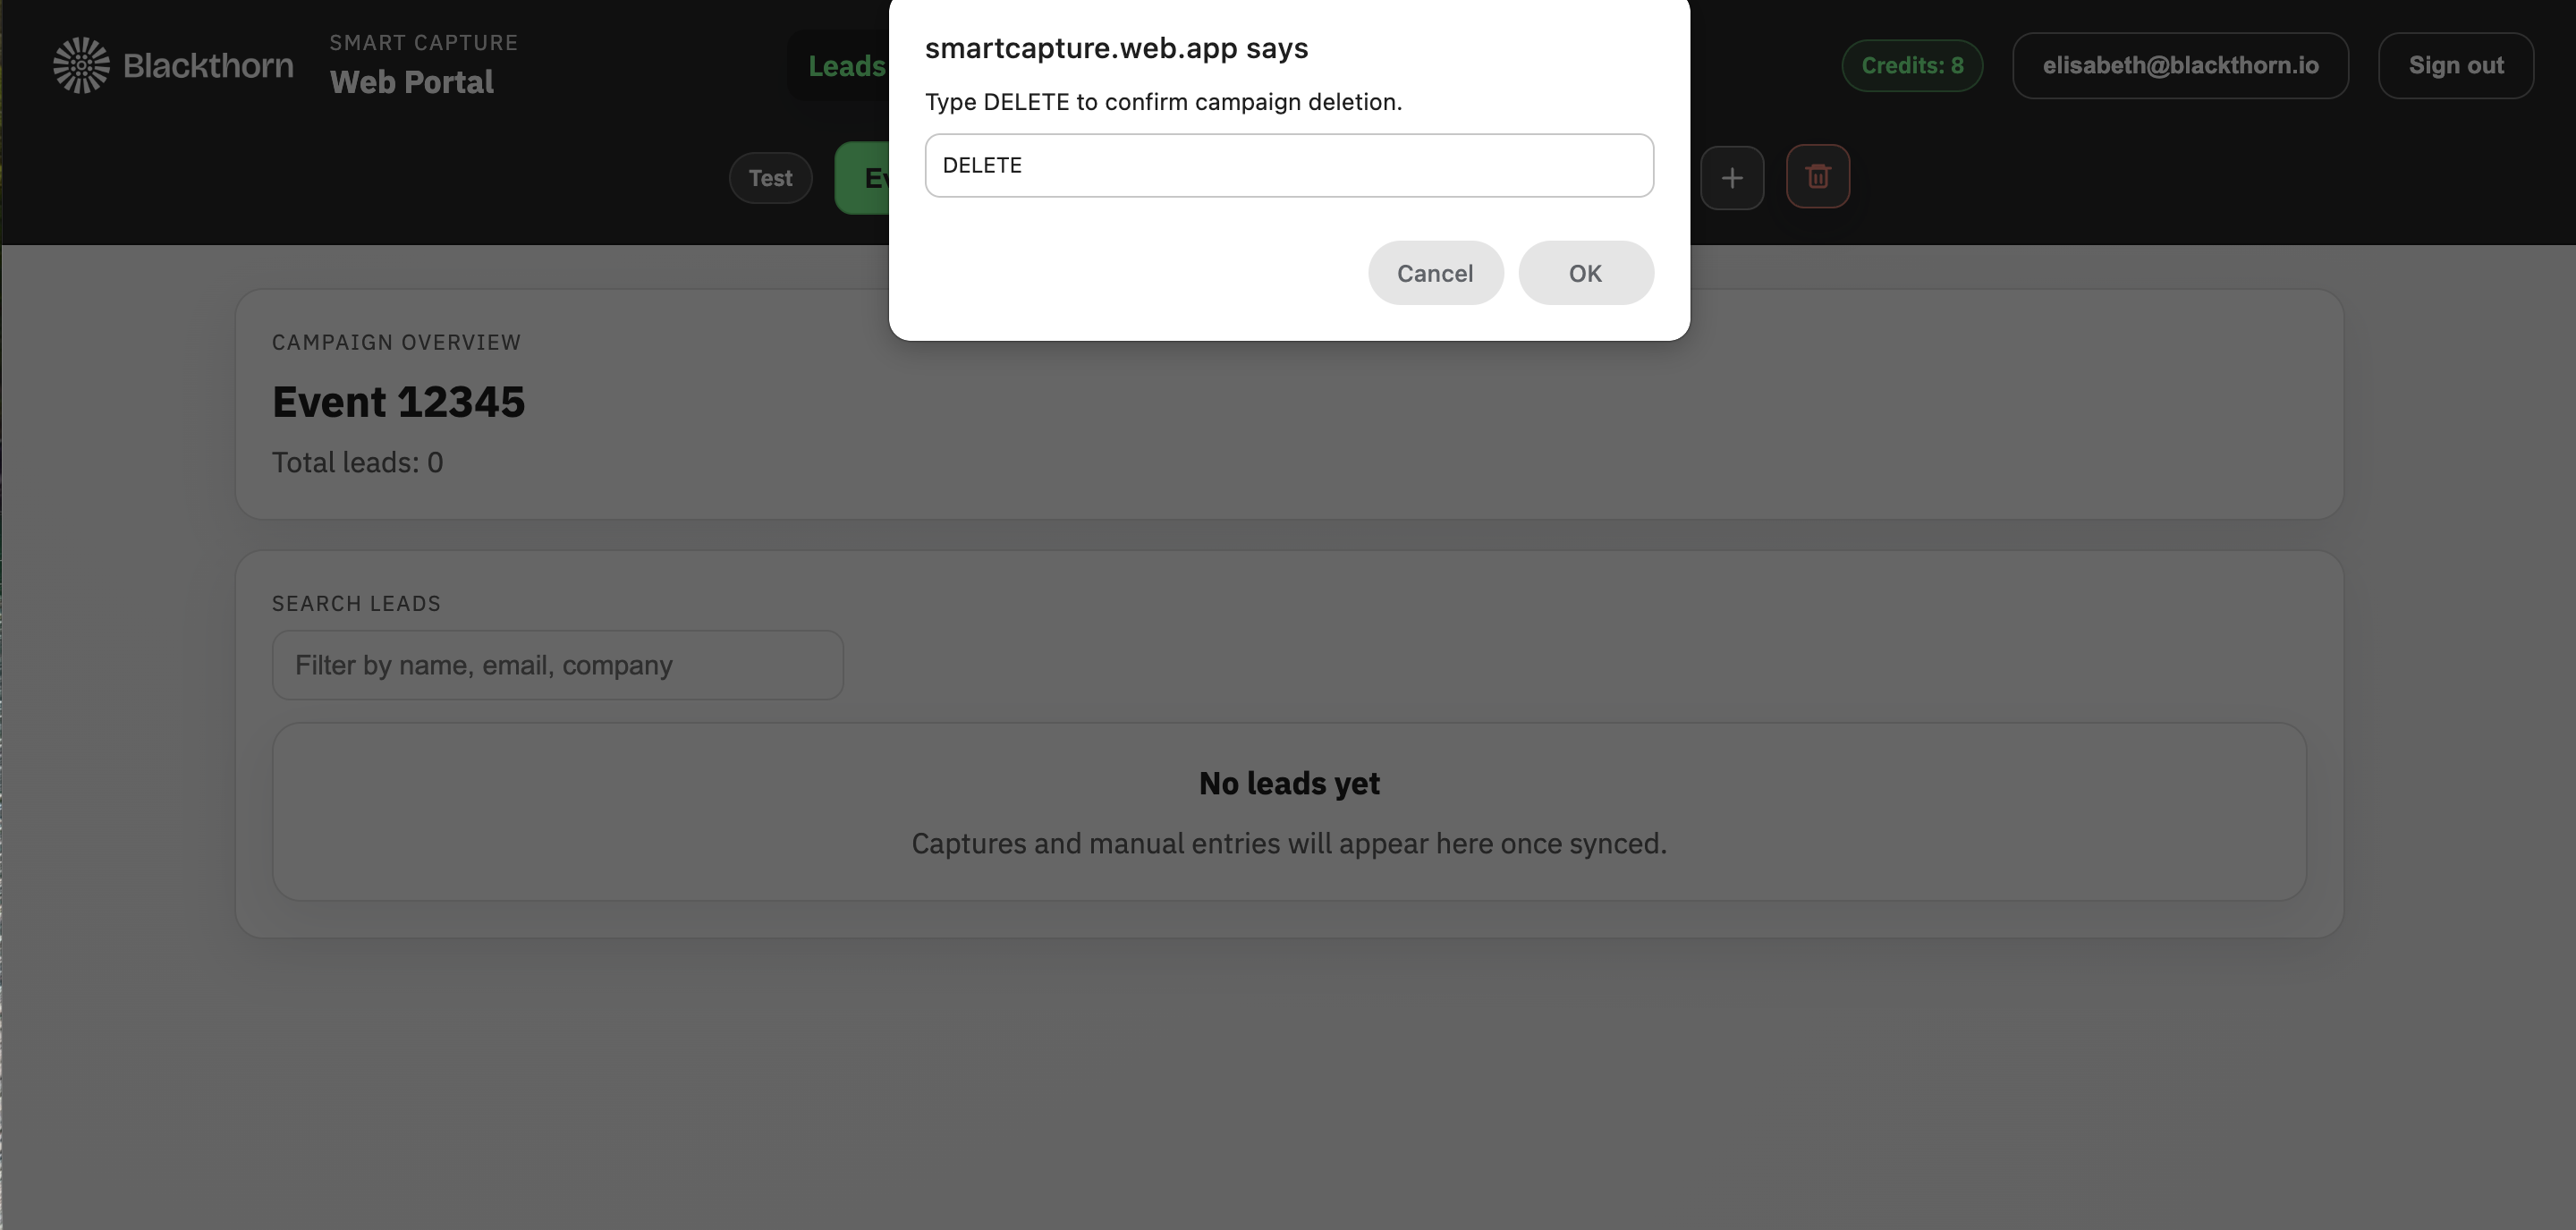
Click OK.
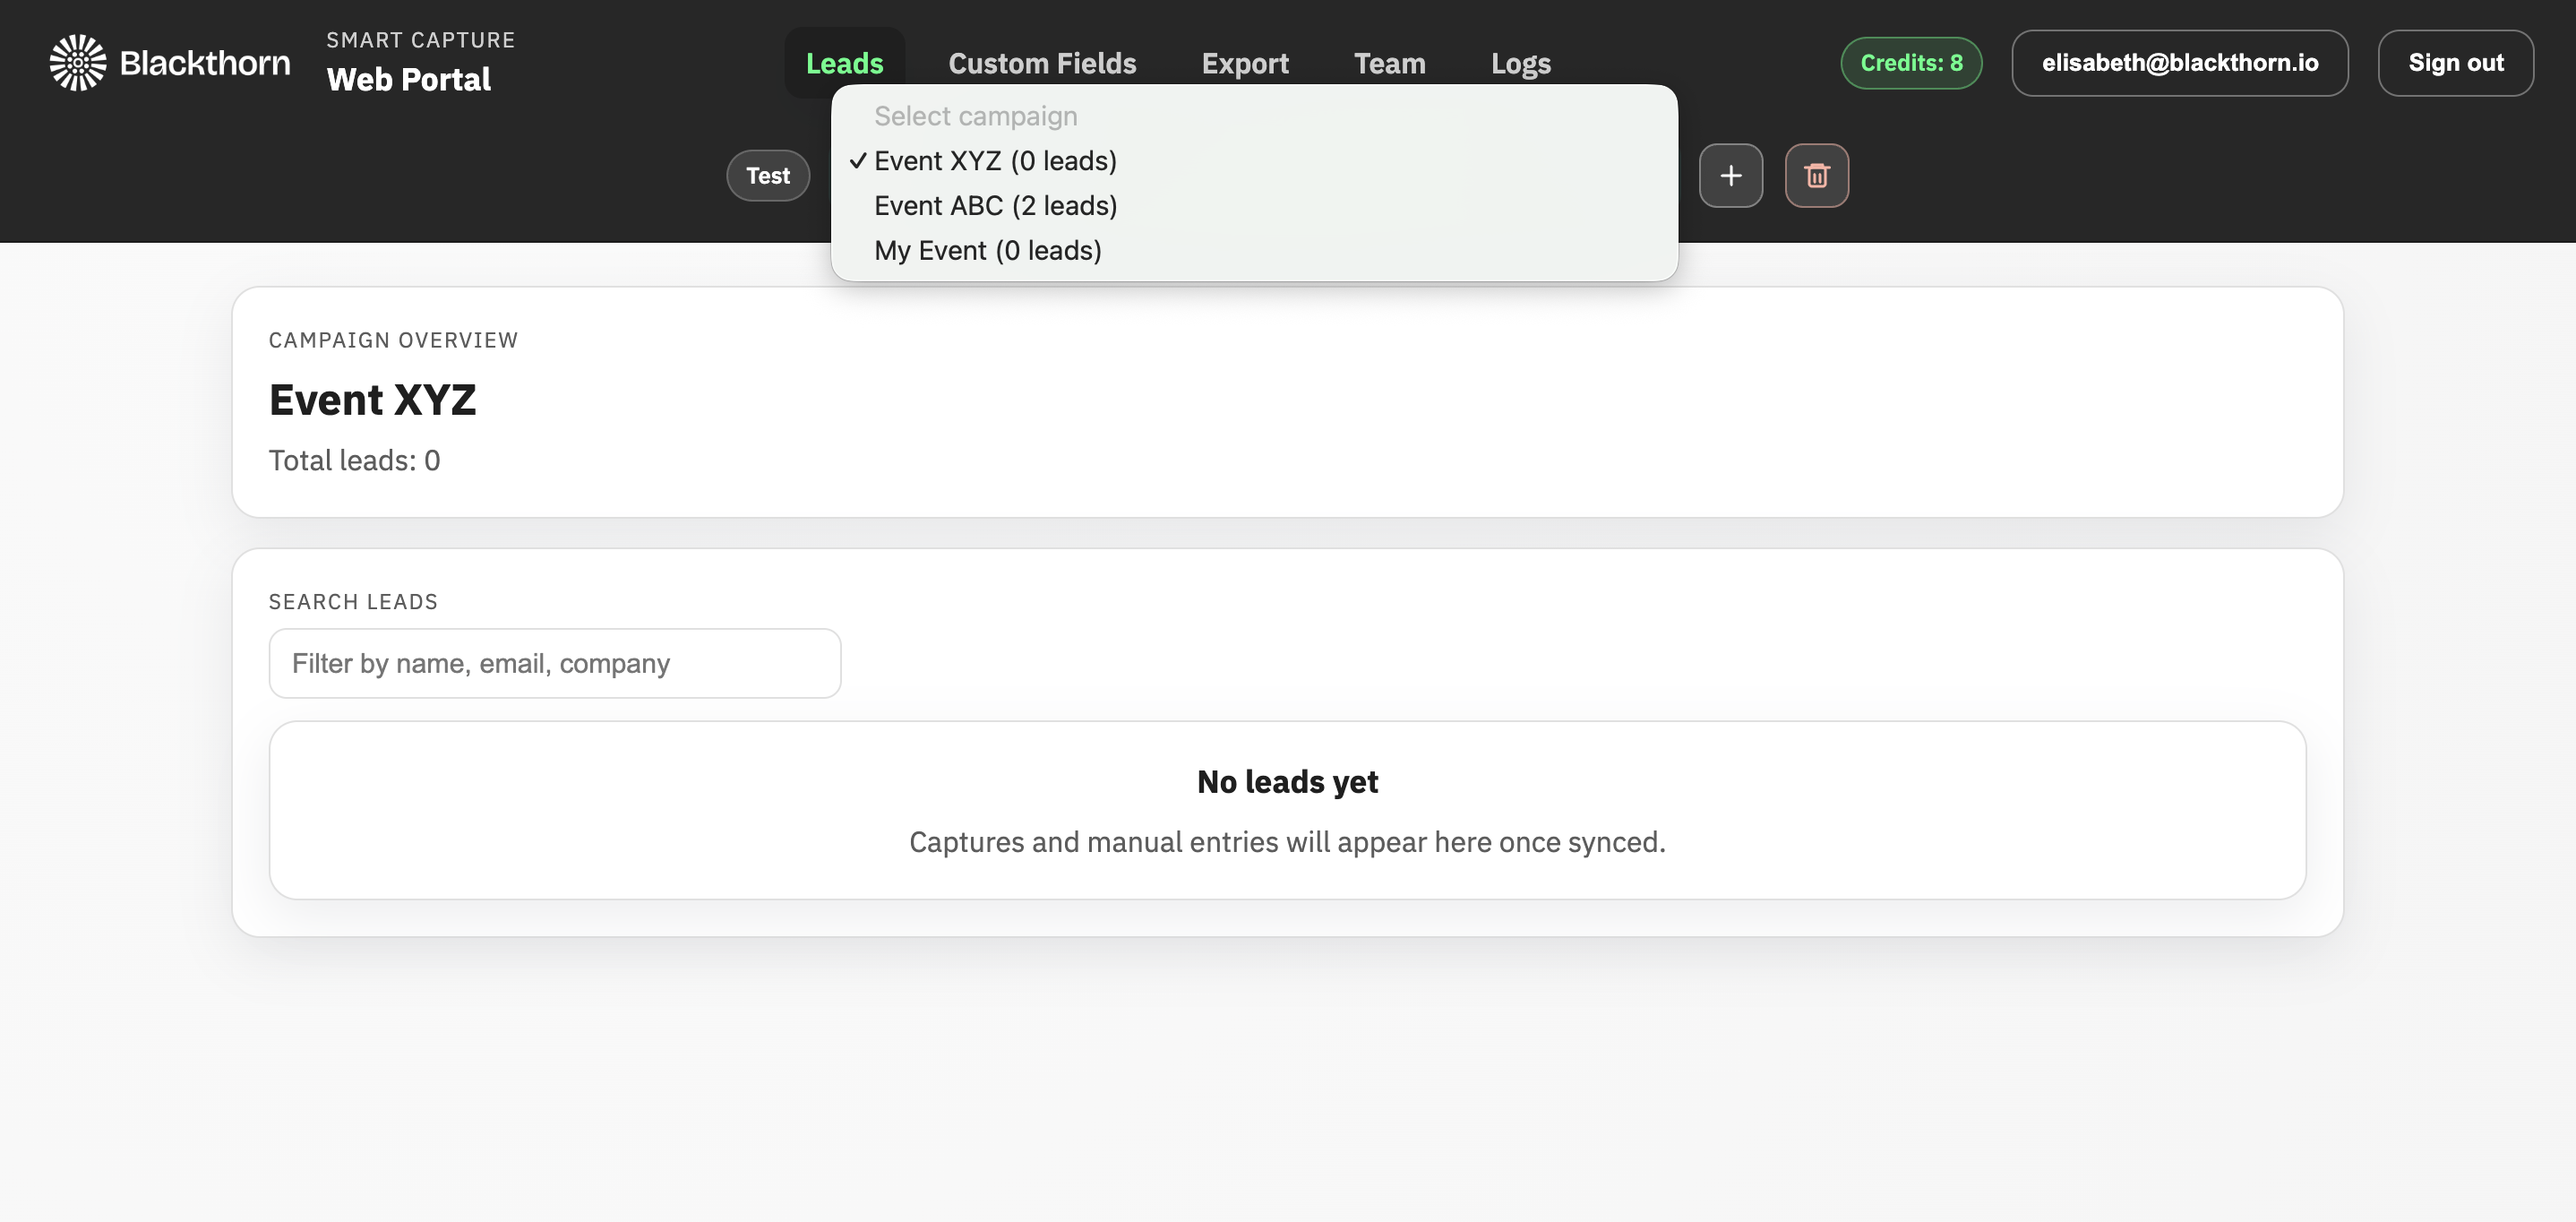
Leads
To see the leads related to an event, select an event in the green box and click the Leads tab, if it isn't already selected.
Edit an Existing Lead
Click the lead's name.
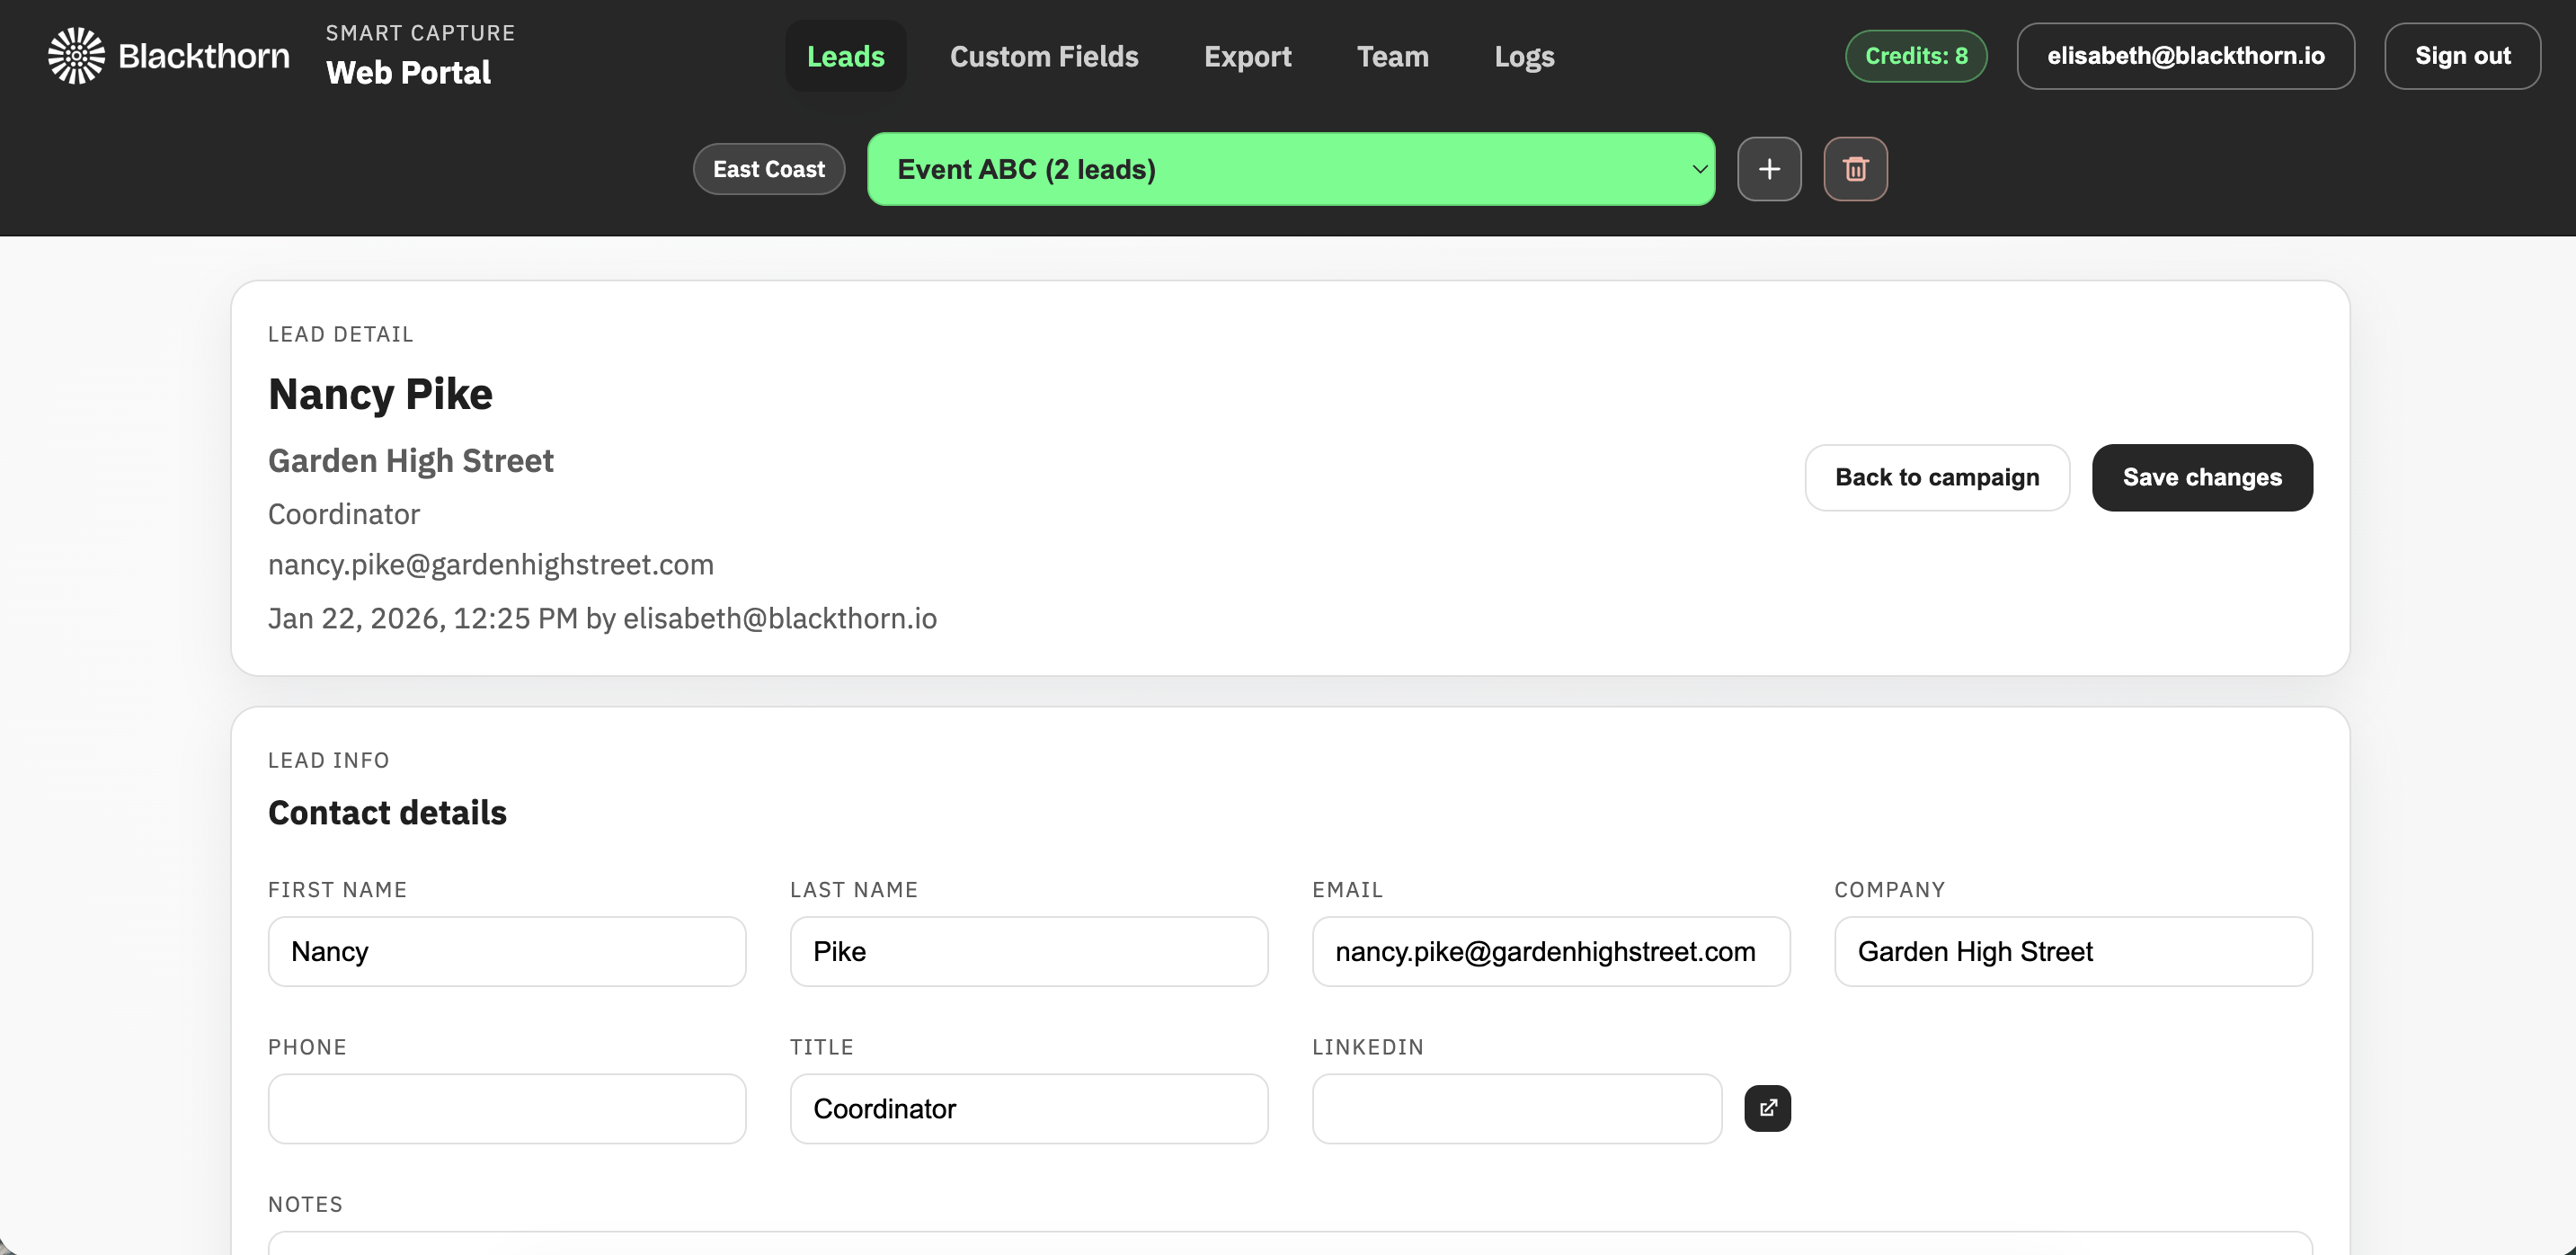
Scroll to the field you want to update.
Update the information.
Click Save changes.
Search Leads
Enter a full or partial name in the Search Leads box. A list of leads that match the search criteria will appear below.
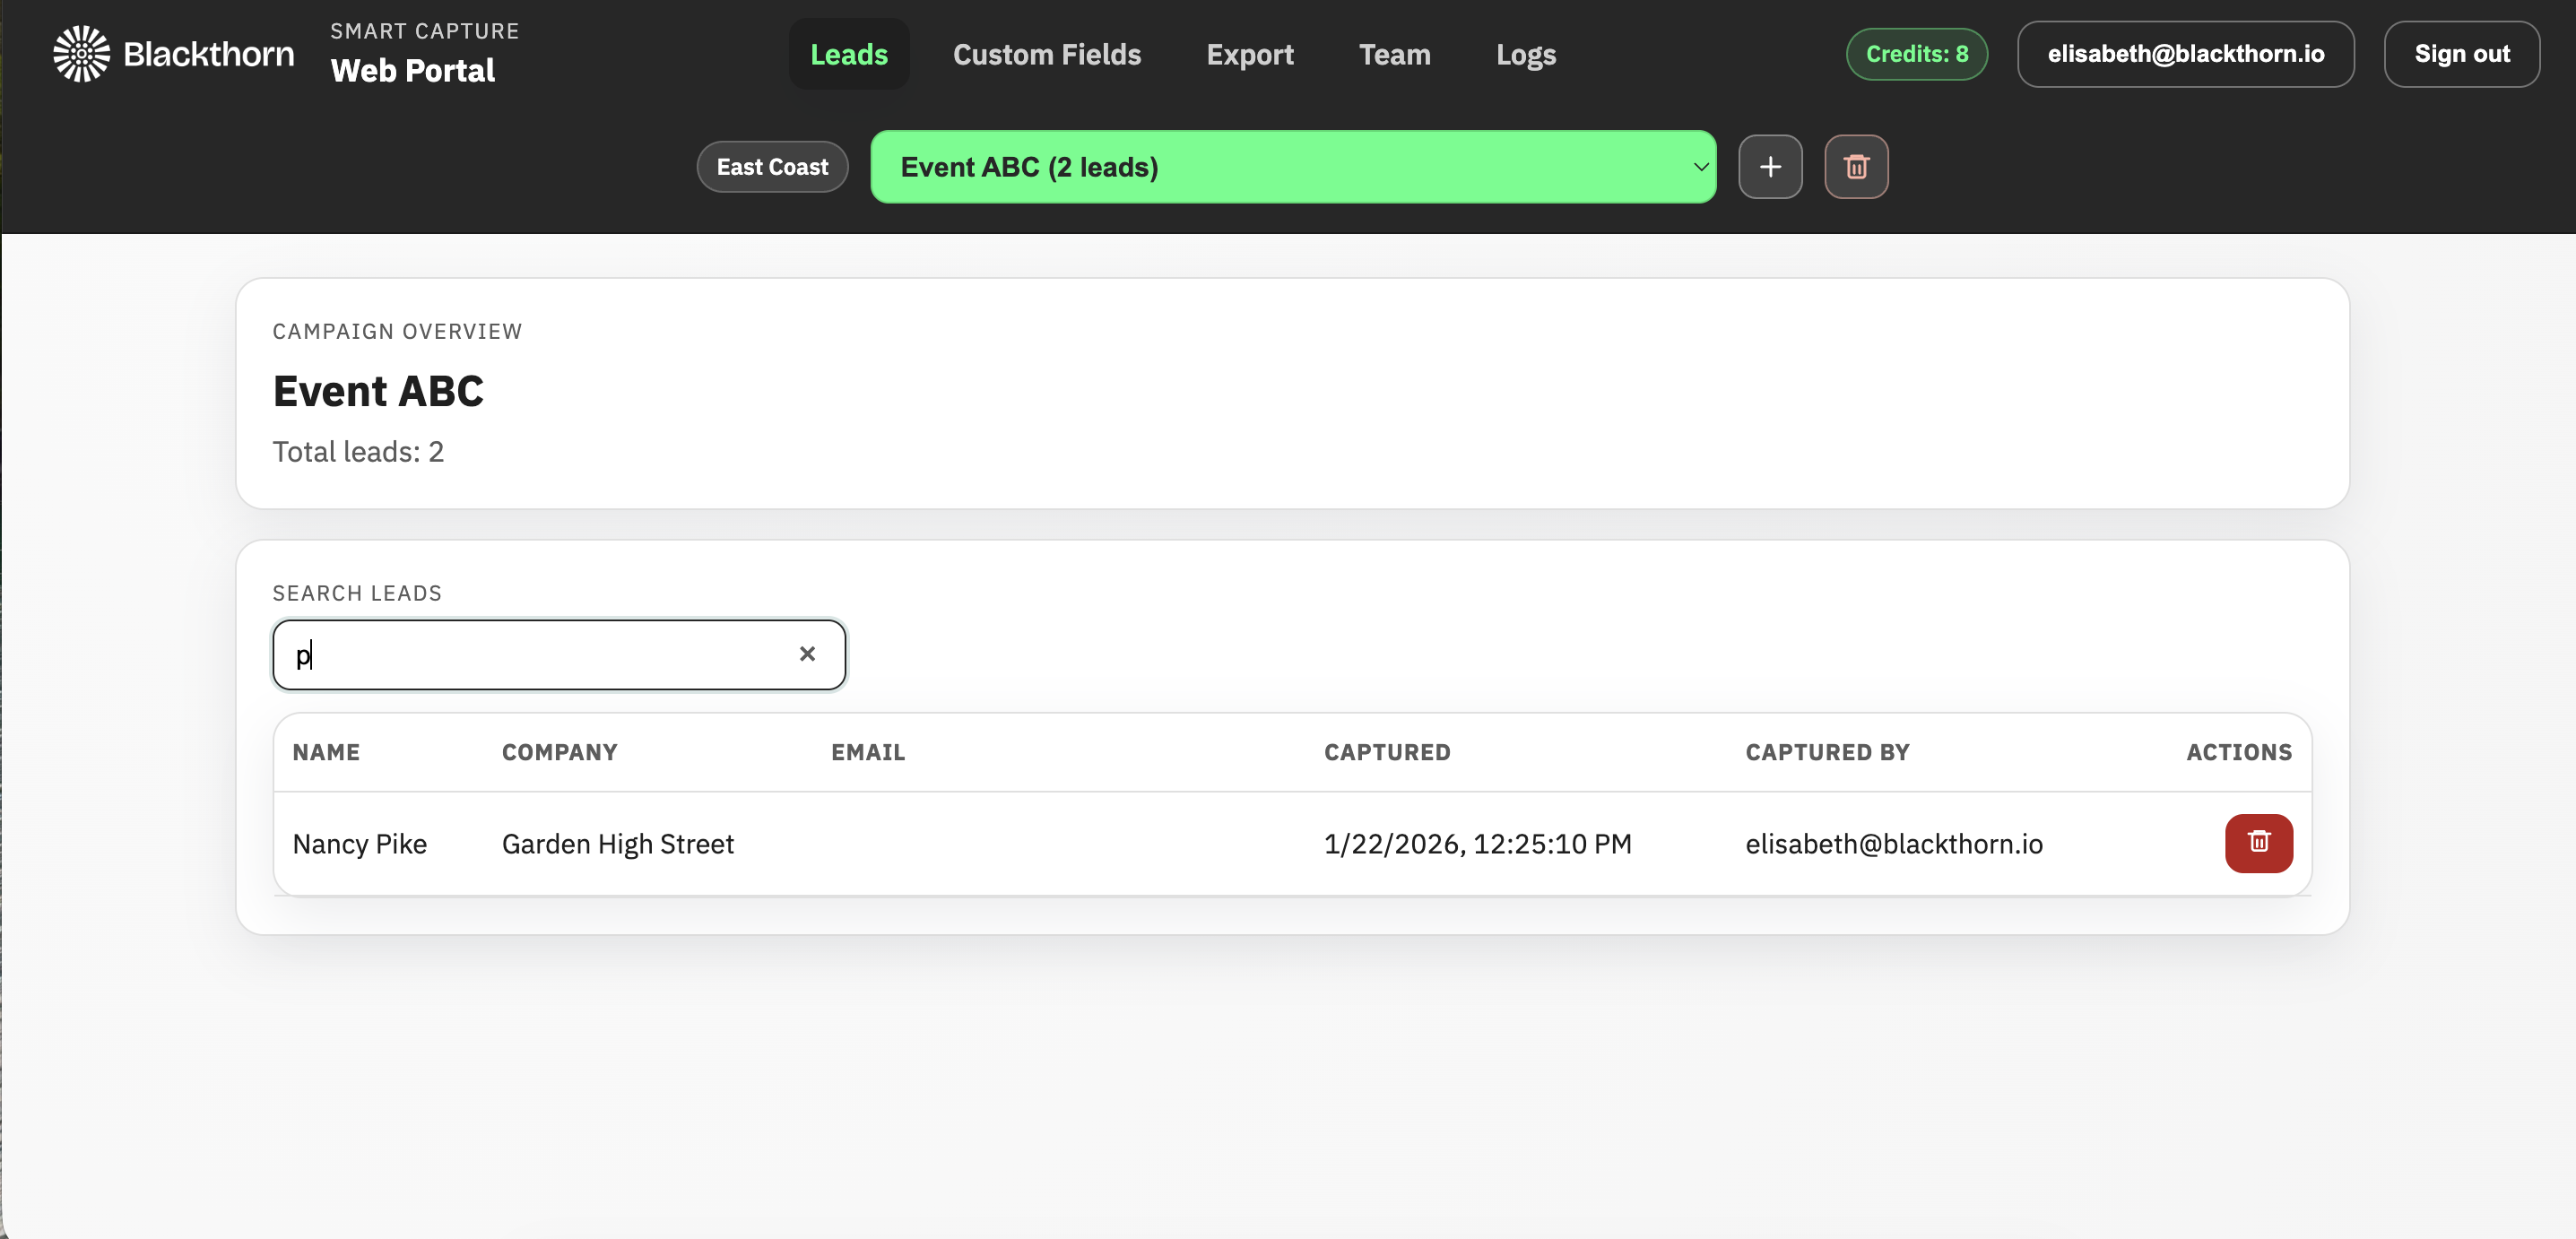
Delete a Lead
Locate the lead you want to delete and click the Trash Can icon next to their name.
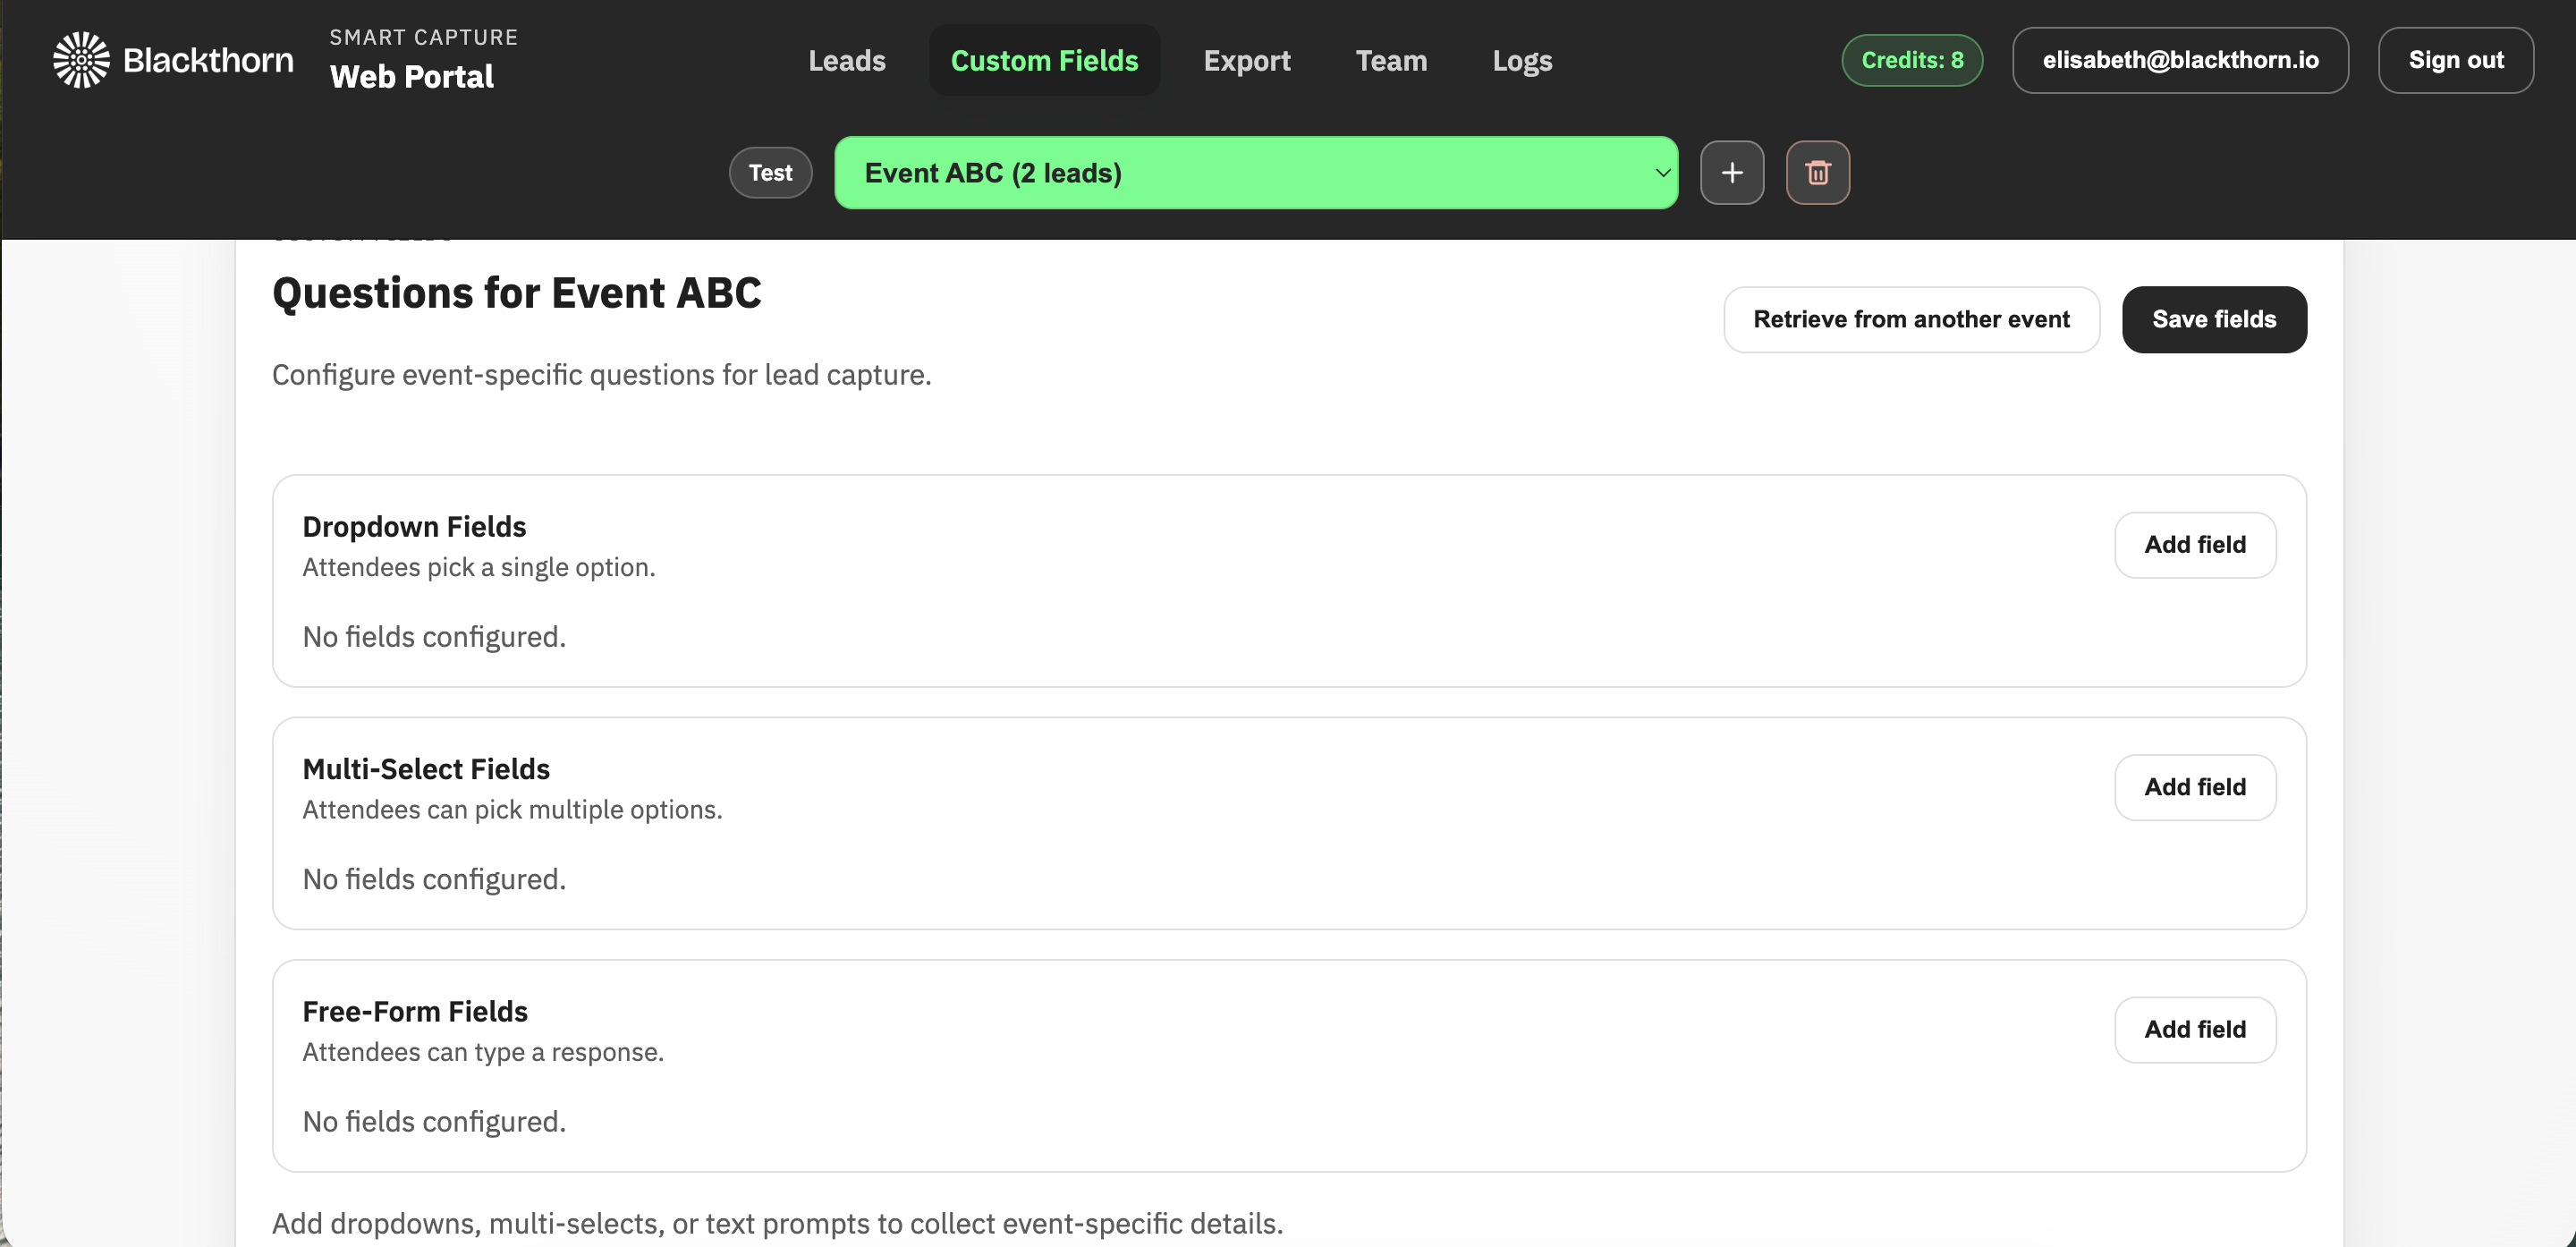
Custom Question Fields
Use the following steps to add or remove existing Custom Question fields just like in the mobile app.
Three types of custom question fields can be added: dropdown, multi-select, and free-form. These allow users to add optional custom fields to the Lead form and capture event-specific data, such as badge type, breakout sessions, or survey responses.
The answers to these questions are then exported to Salesforce along with the related Lead record.

Add Custom Question Fields
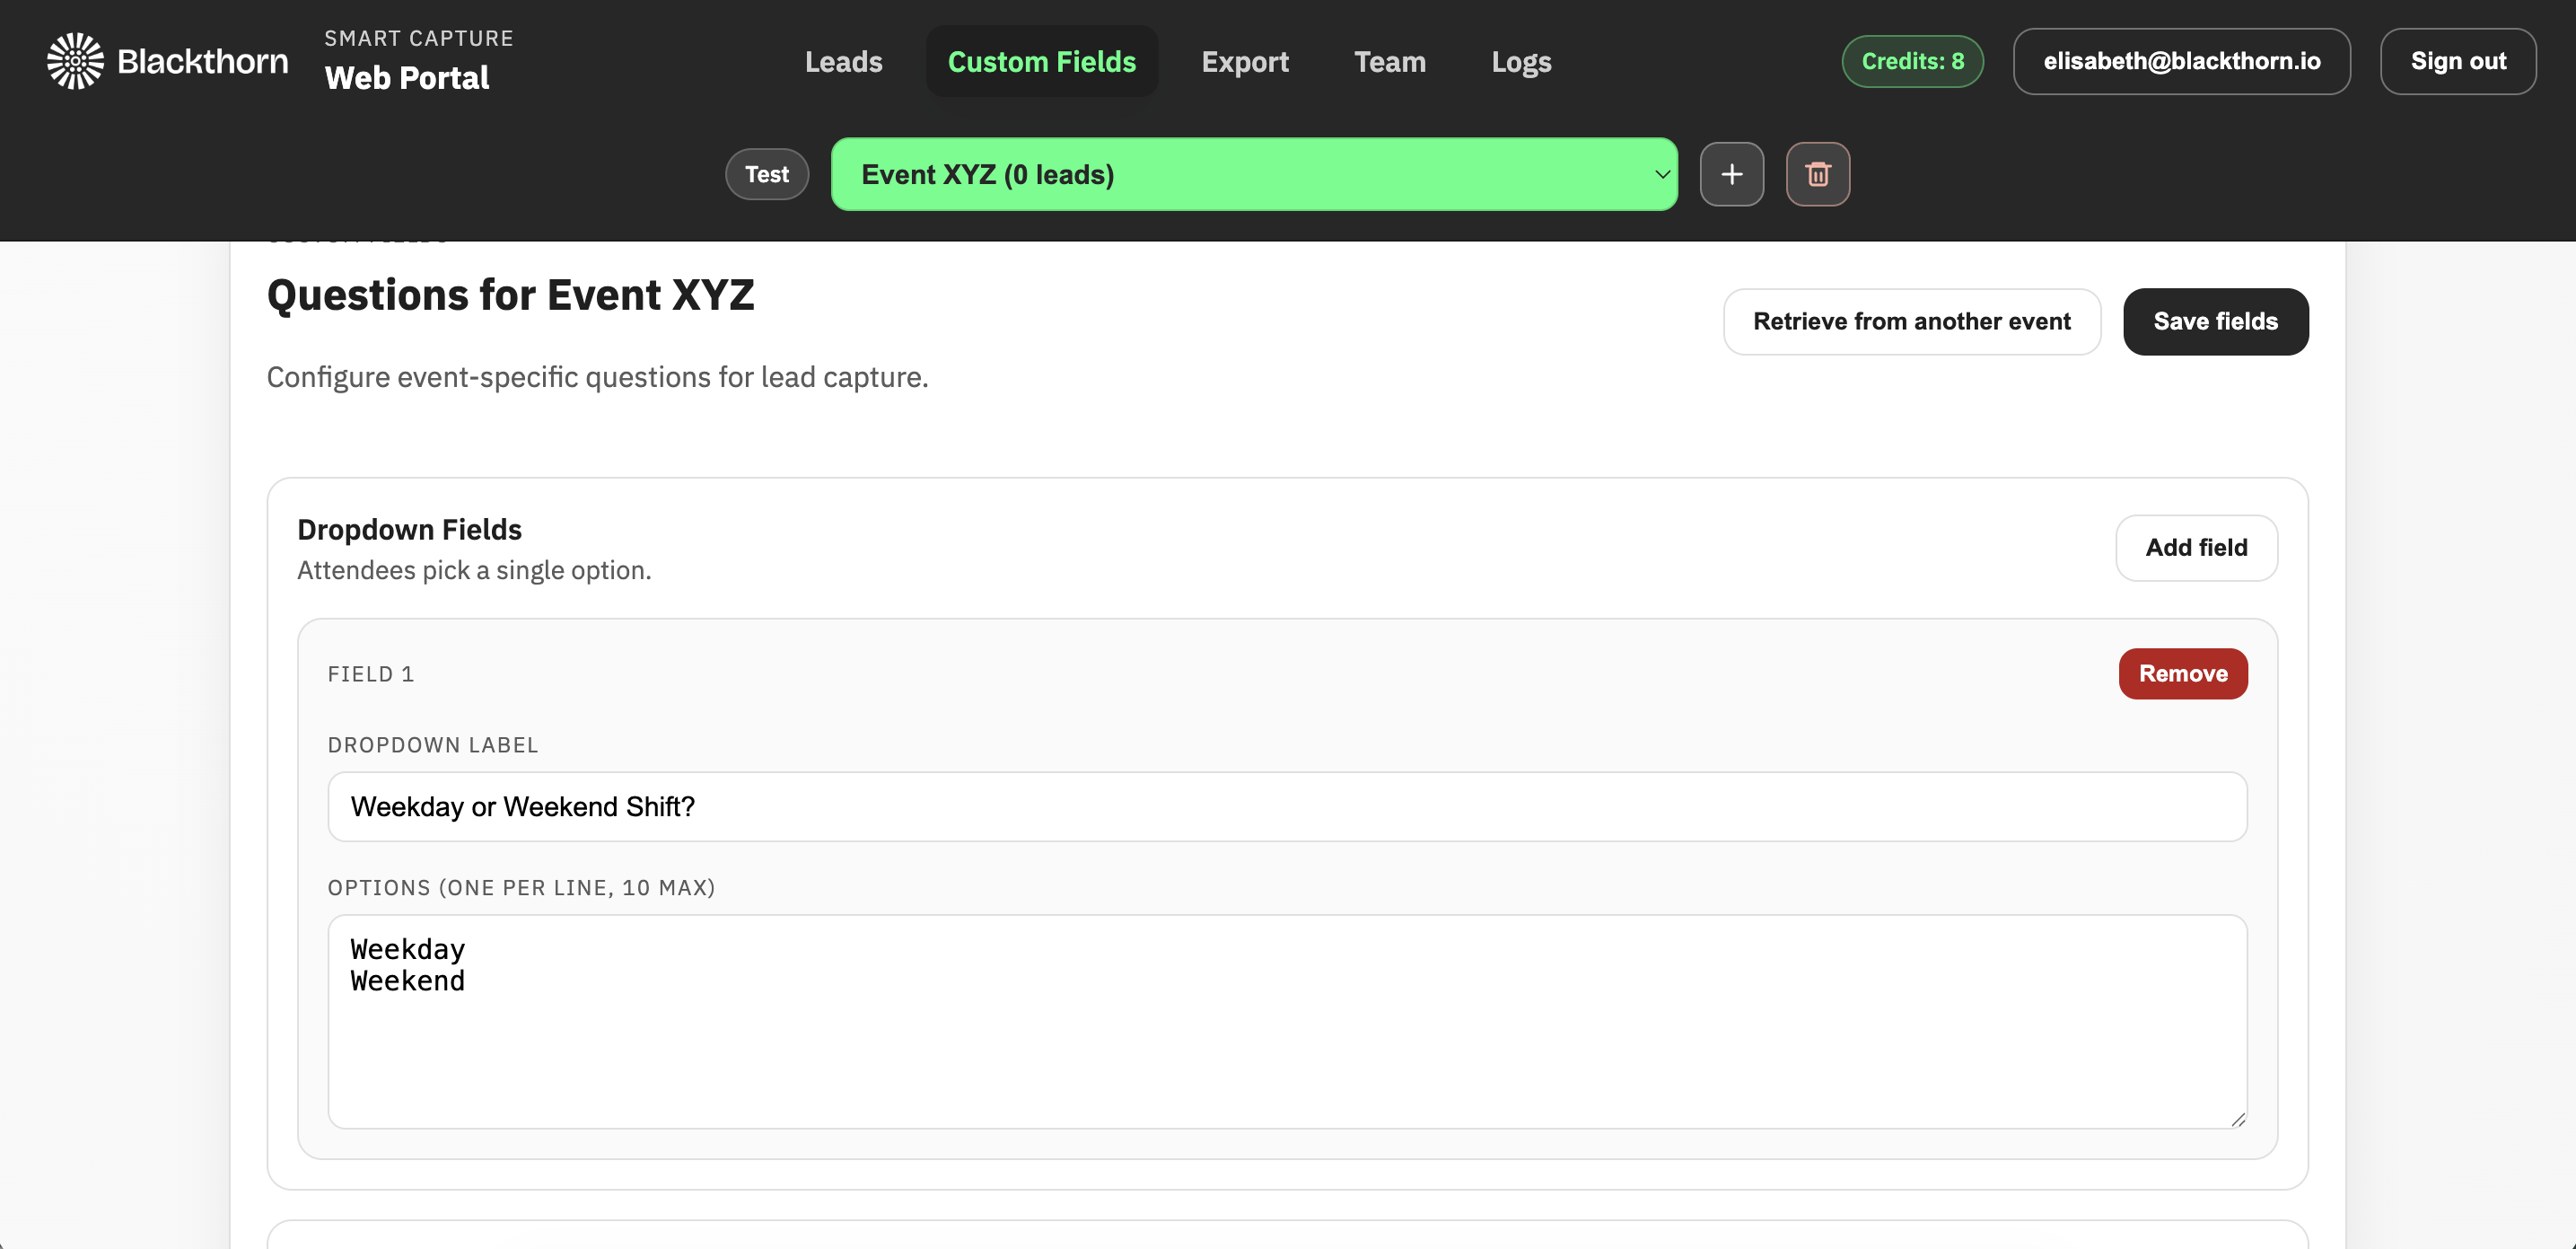
Add a Dropdown Field
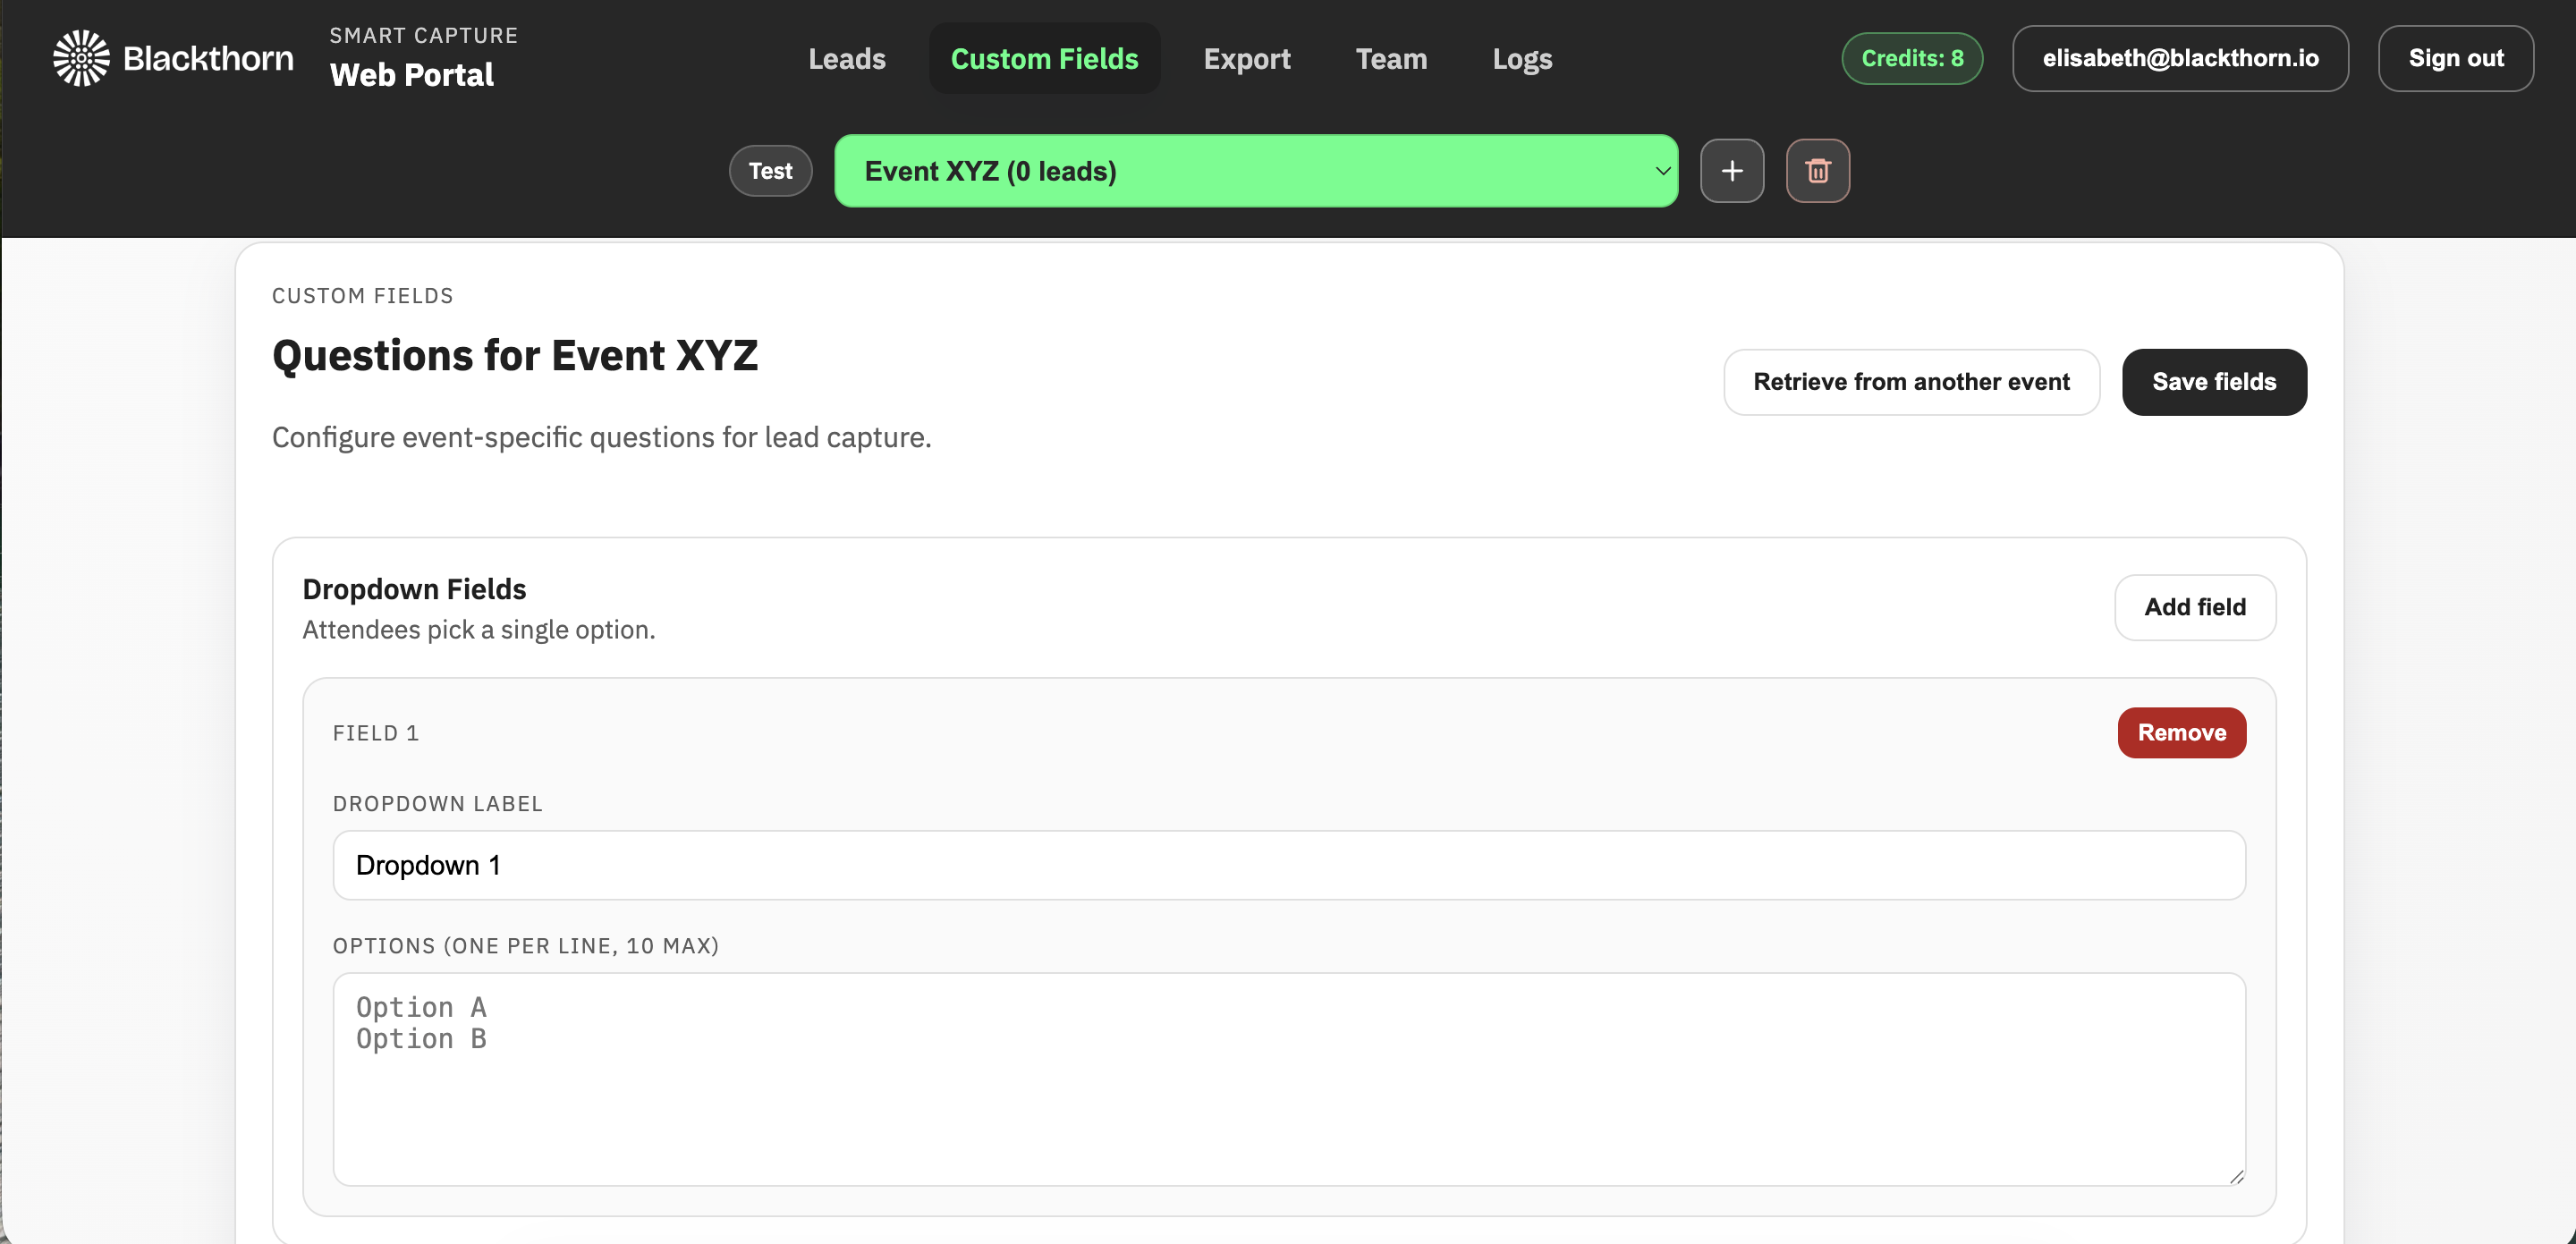
If you aren’t already there, select the event you want to add the Custom Question fields to.
Click the Custom Fields tab.
Click Add field in the Dropdown Fields box.
Enter a Dropdown Label.
Enter two or more options.
To add a second question in the Dropdown Fields section, click the Add field button again and fill in the fields.
If you need to add Multi-Select or Free-Form questions, click Add field in the appropriate section, then complete the steps below. Don’t click Save fields yet.
If you don’t need to add any of the other question types, click Save fields.
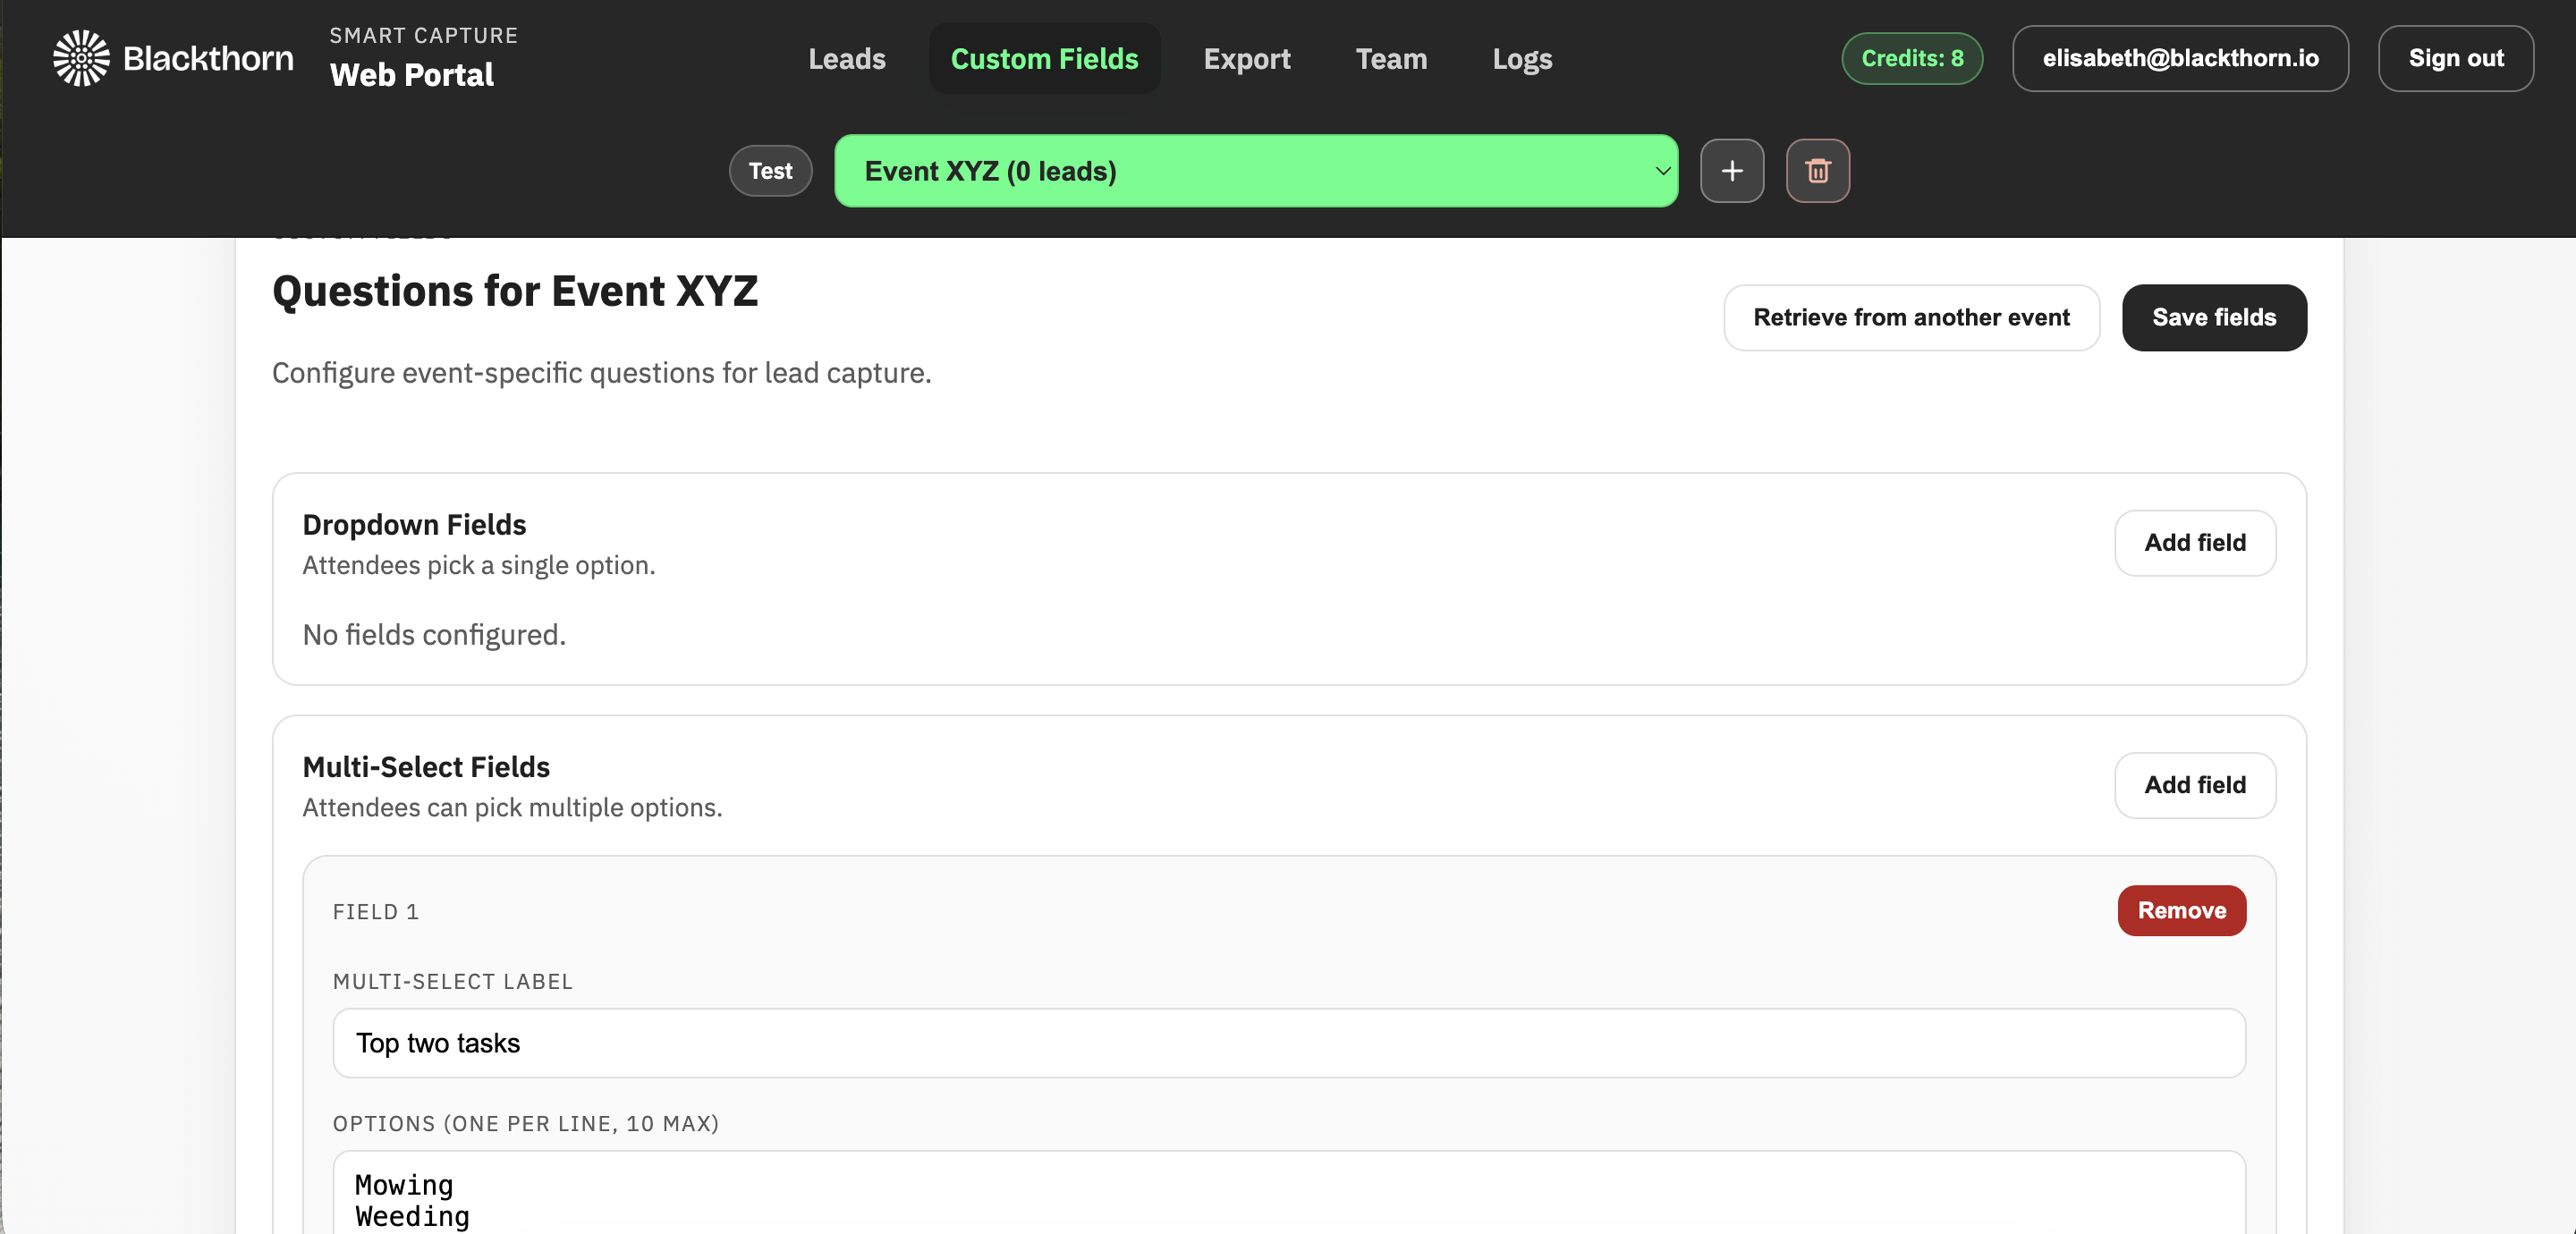
Add a Multi-Select Field
If you aren’t already there, select the event you want to add the Custom Question fields to.
Click the Custom Fields tab.
Click Add field in the Multi-Select Fields box.
Add a Multi-Select Label.
Enter two or more options.
To add a second question in the Multi-Select Fields section, click the Add field button again and fill in the fields.
If you need to add Dropdown or Free-Form questions, click Add field in the appropriate section, then complete the steps below. Don’t click Save fields yet.
If you don’t need to add any of the other question types, click Save Fields.
Add a Free-Form Field
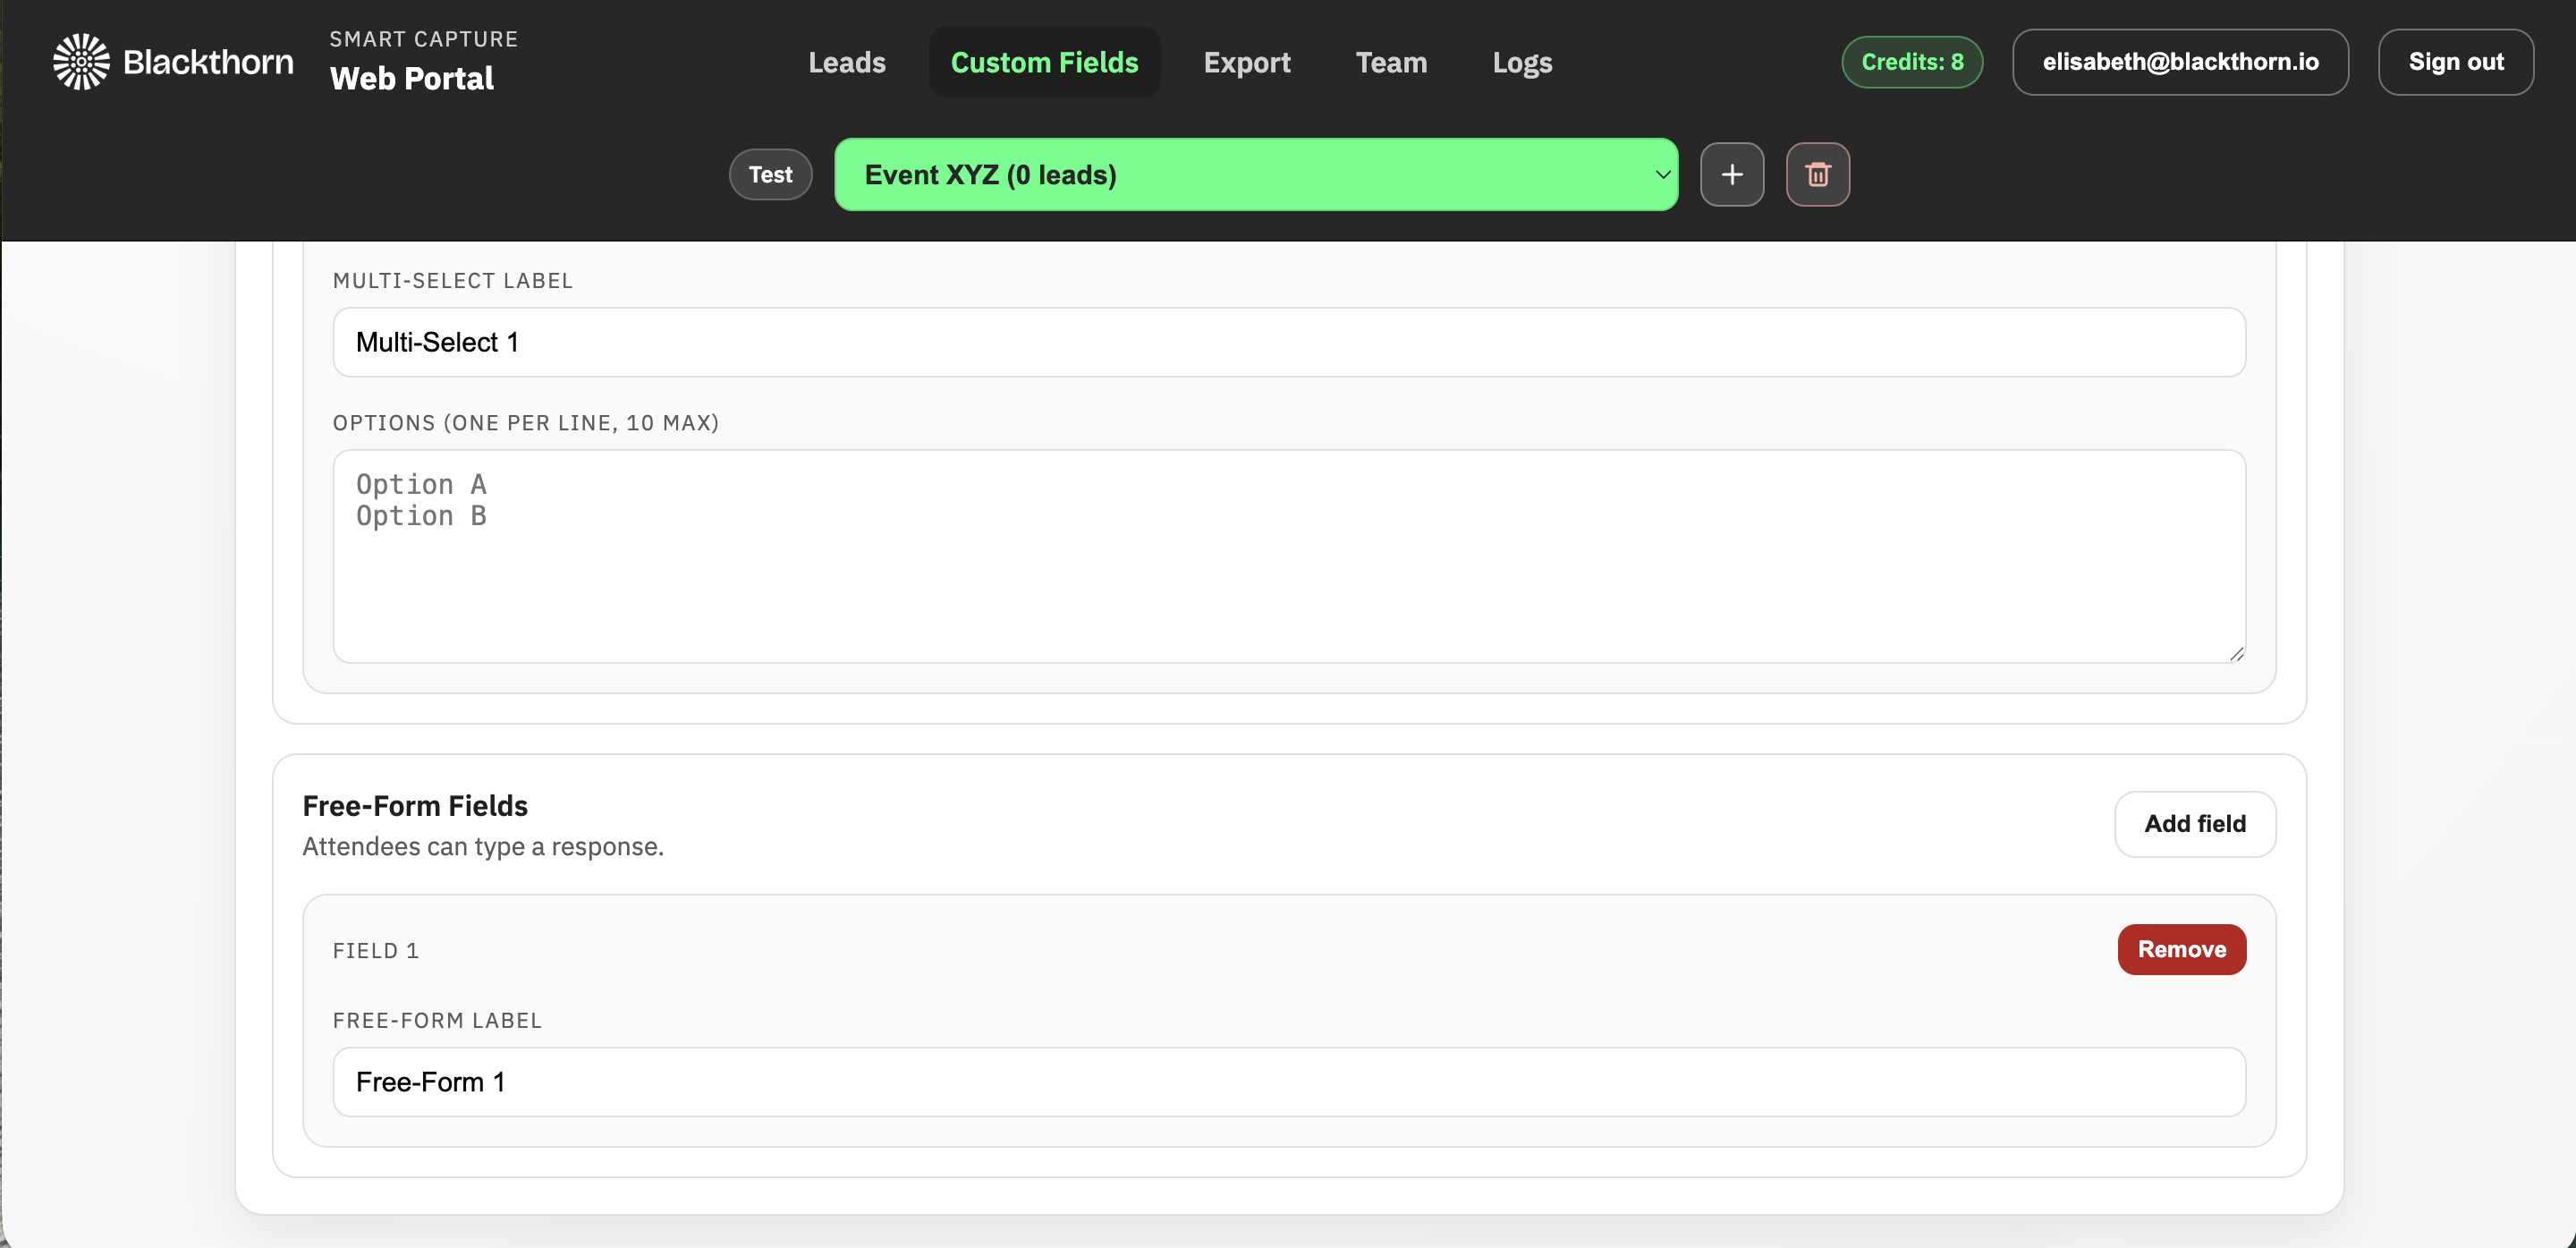
If you aren’t already there, select the event you want to add the Custom Question fields to.
Click the Custom Fields tab.
Click Add field in the Free-Form Fields box.
Add a Free-Form Label.
To add a second question in the Free-Form Fields section, click the Add field button again and fill in the fields.
If you need to add Multi-Select or Dropdown questions, click Add field in the appropriate section, then complete the steps below. Don’t click Save fields yet.
If you don’t need to add any of the other question types, click Save fields.
Delete a Custom Question Field
Click the Custom Fields tab.
Select the event that includes the Custom Question field you want to delete.
Click Remove next to the Custom Question field.
Click OK.
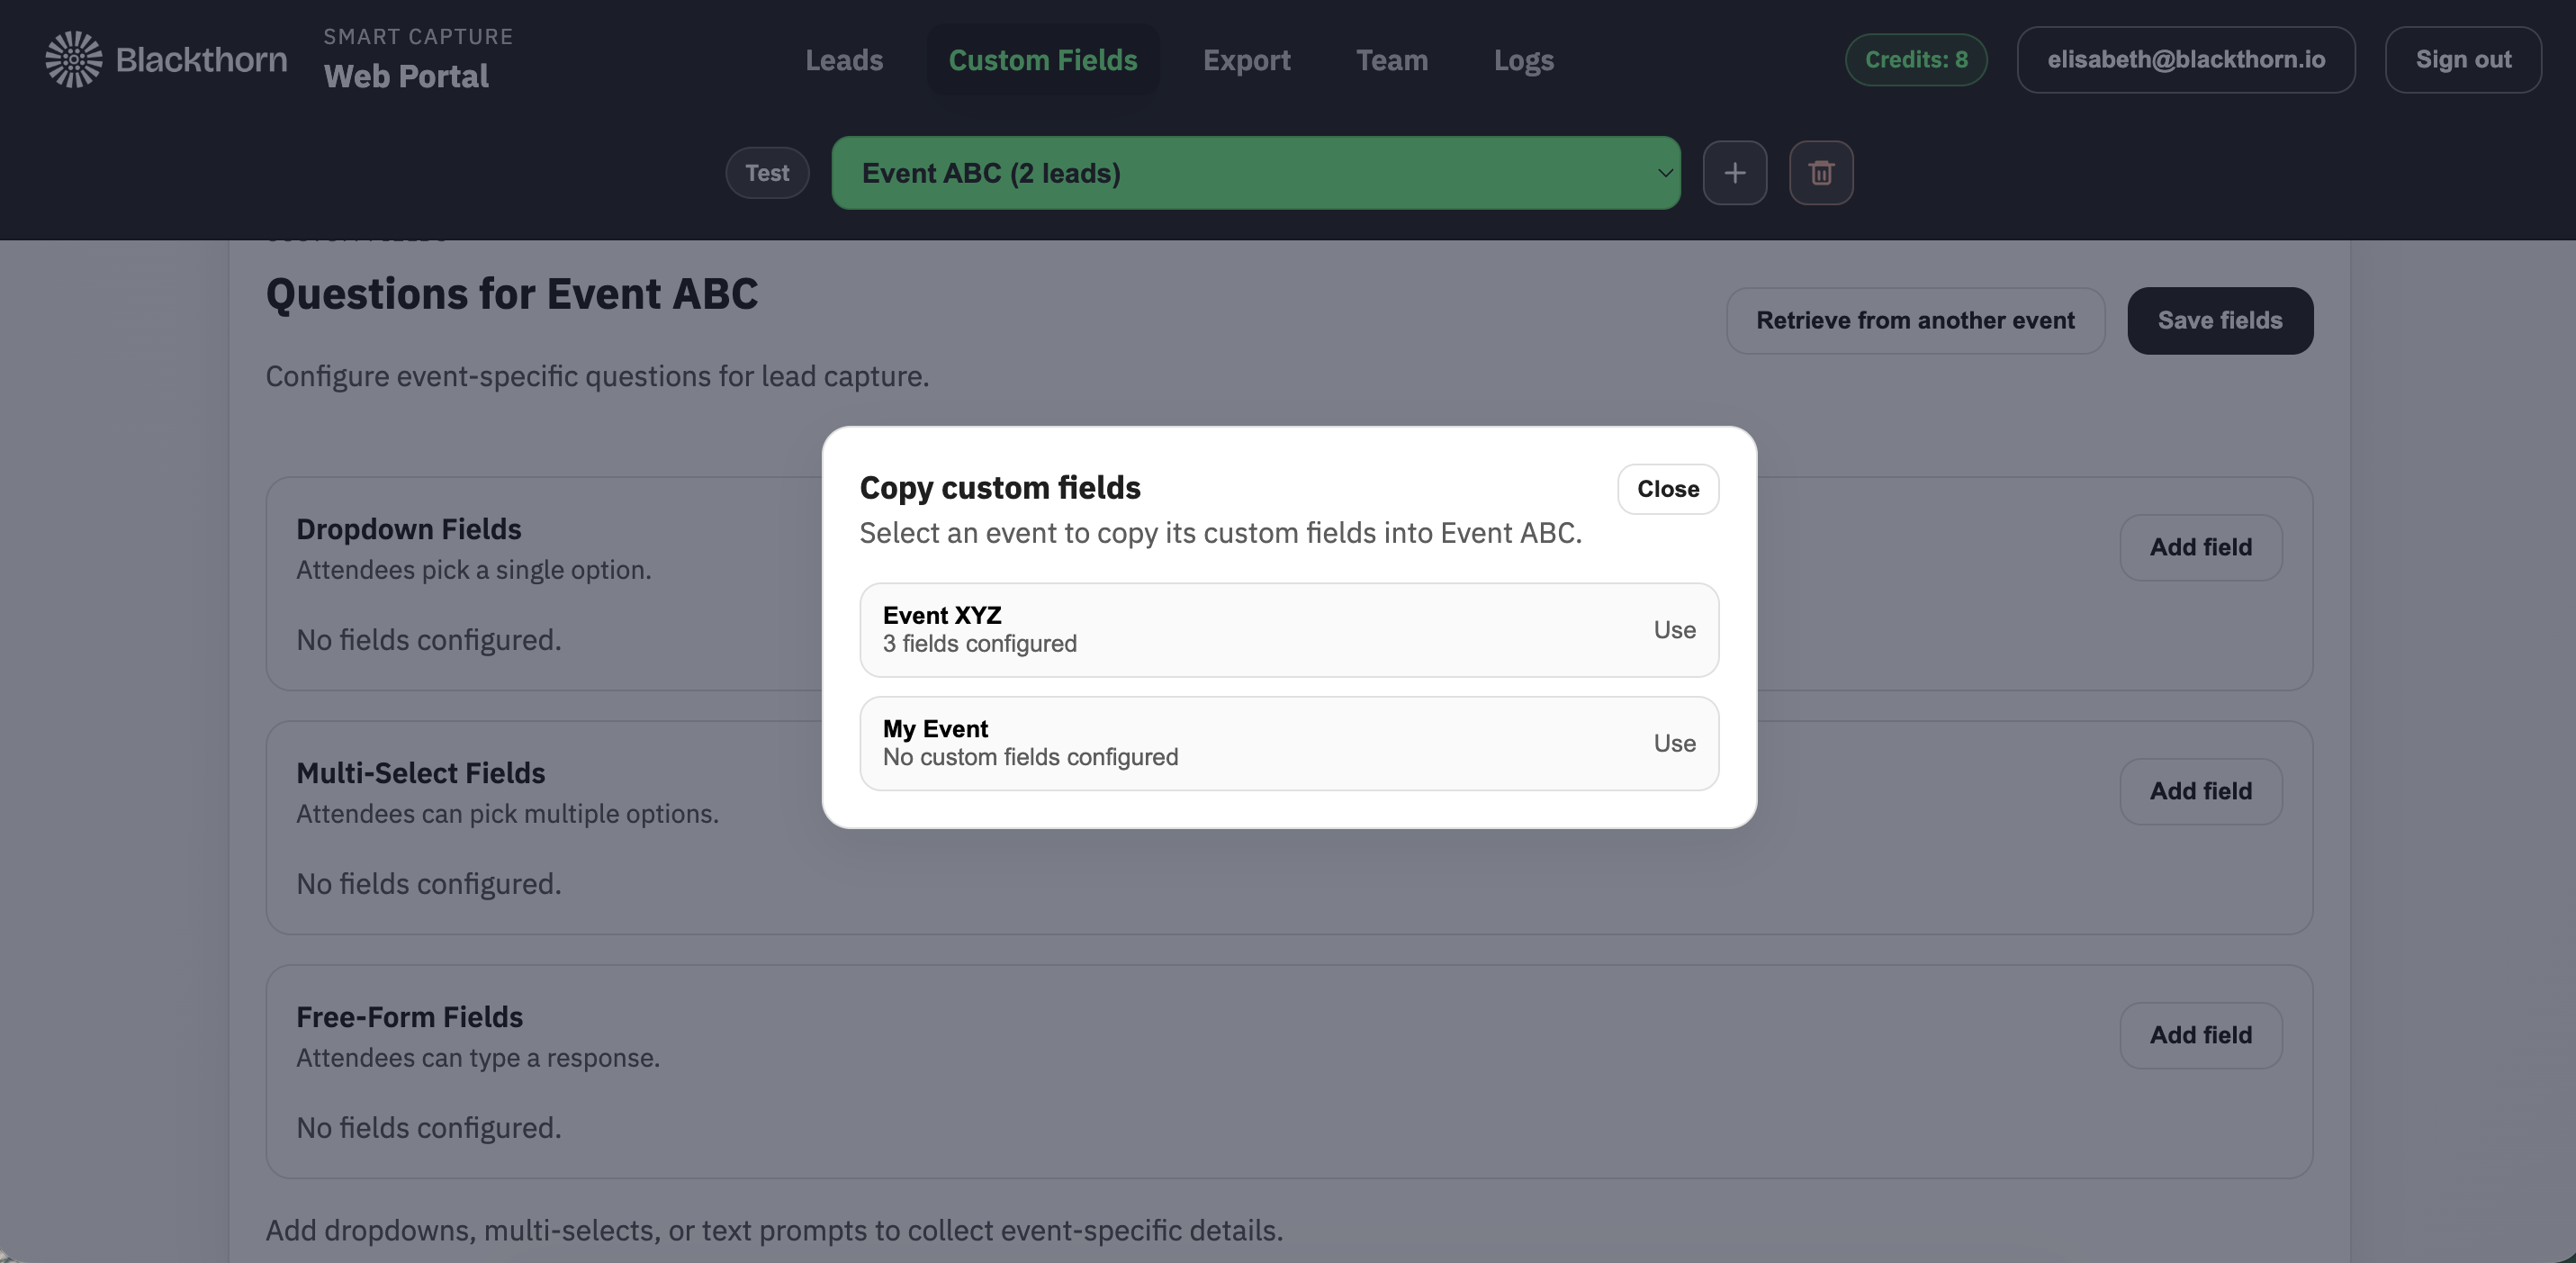
Share Custom Question Fields Between Events
If a previous event contains a set of Custom Question fields you want to use for a new event, you can share those fields between the two events.
Select the Event that will receive the Custom Question fields.
Click Retrieve from another event.
Select the event that contains the Custom Question fields you want to use.
Click OK.
Click Save fields.
The Custom Question fields are now visible in the event.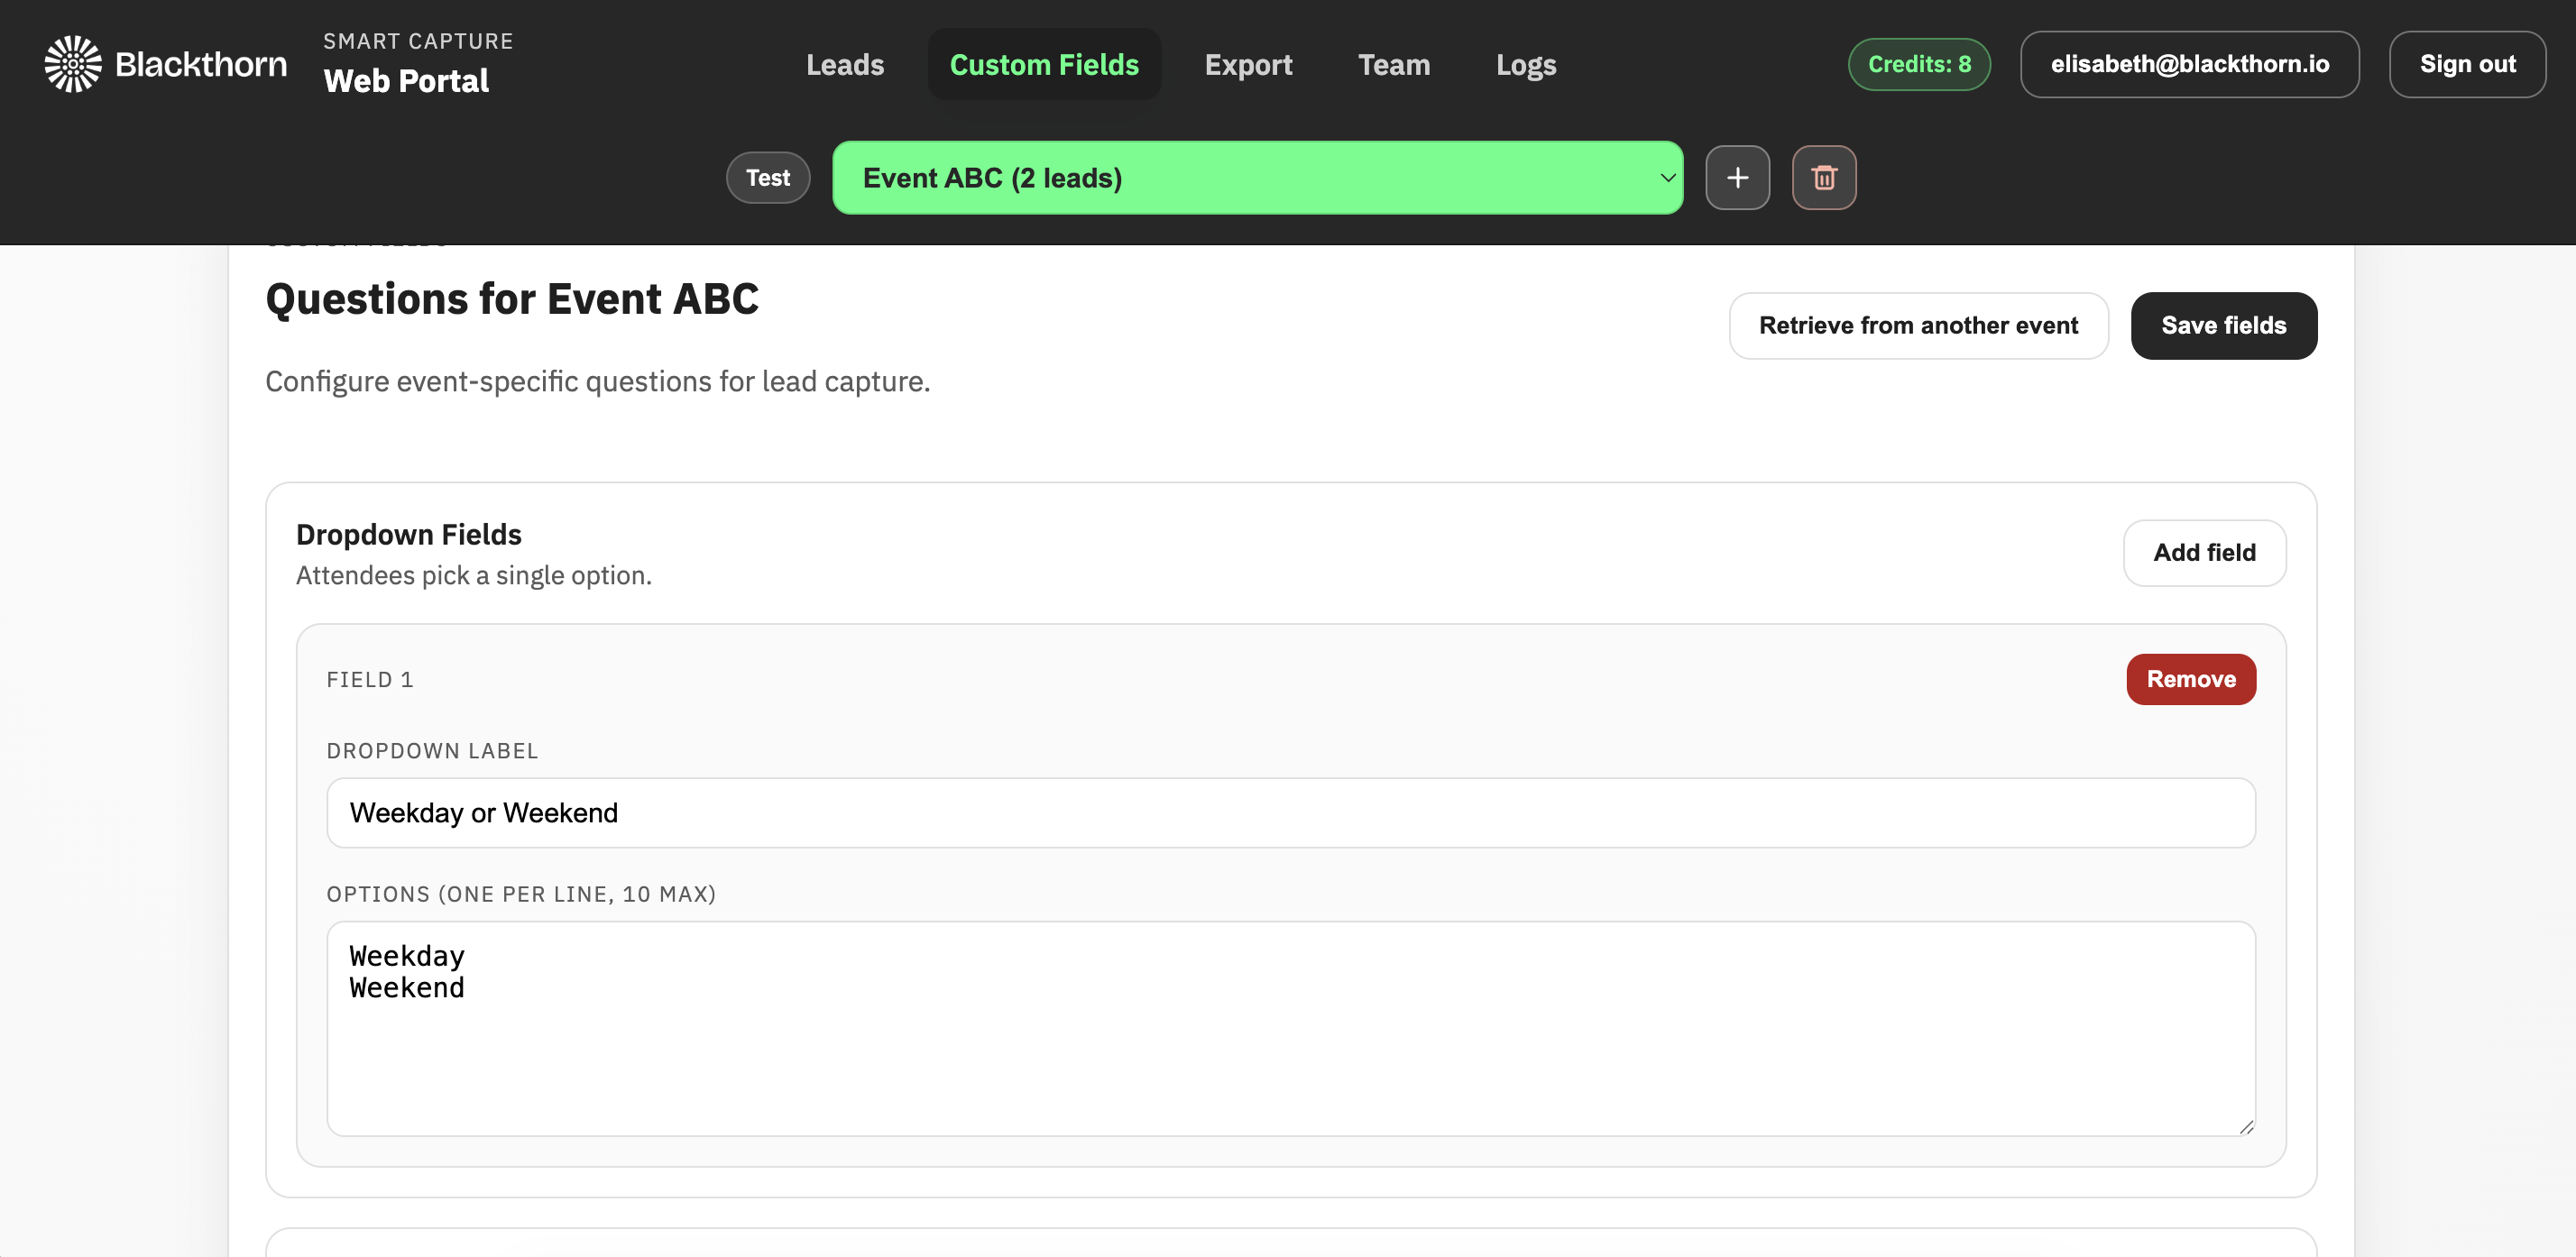
All leads related to that event will now include the shared Custom Question fields.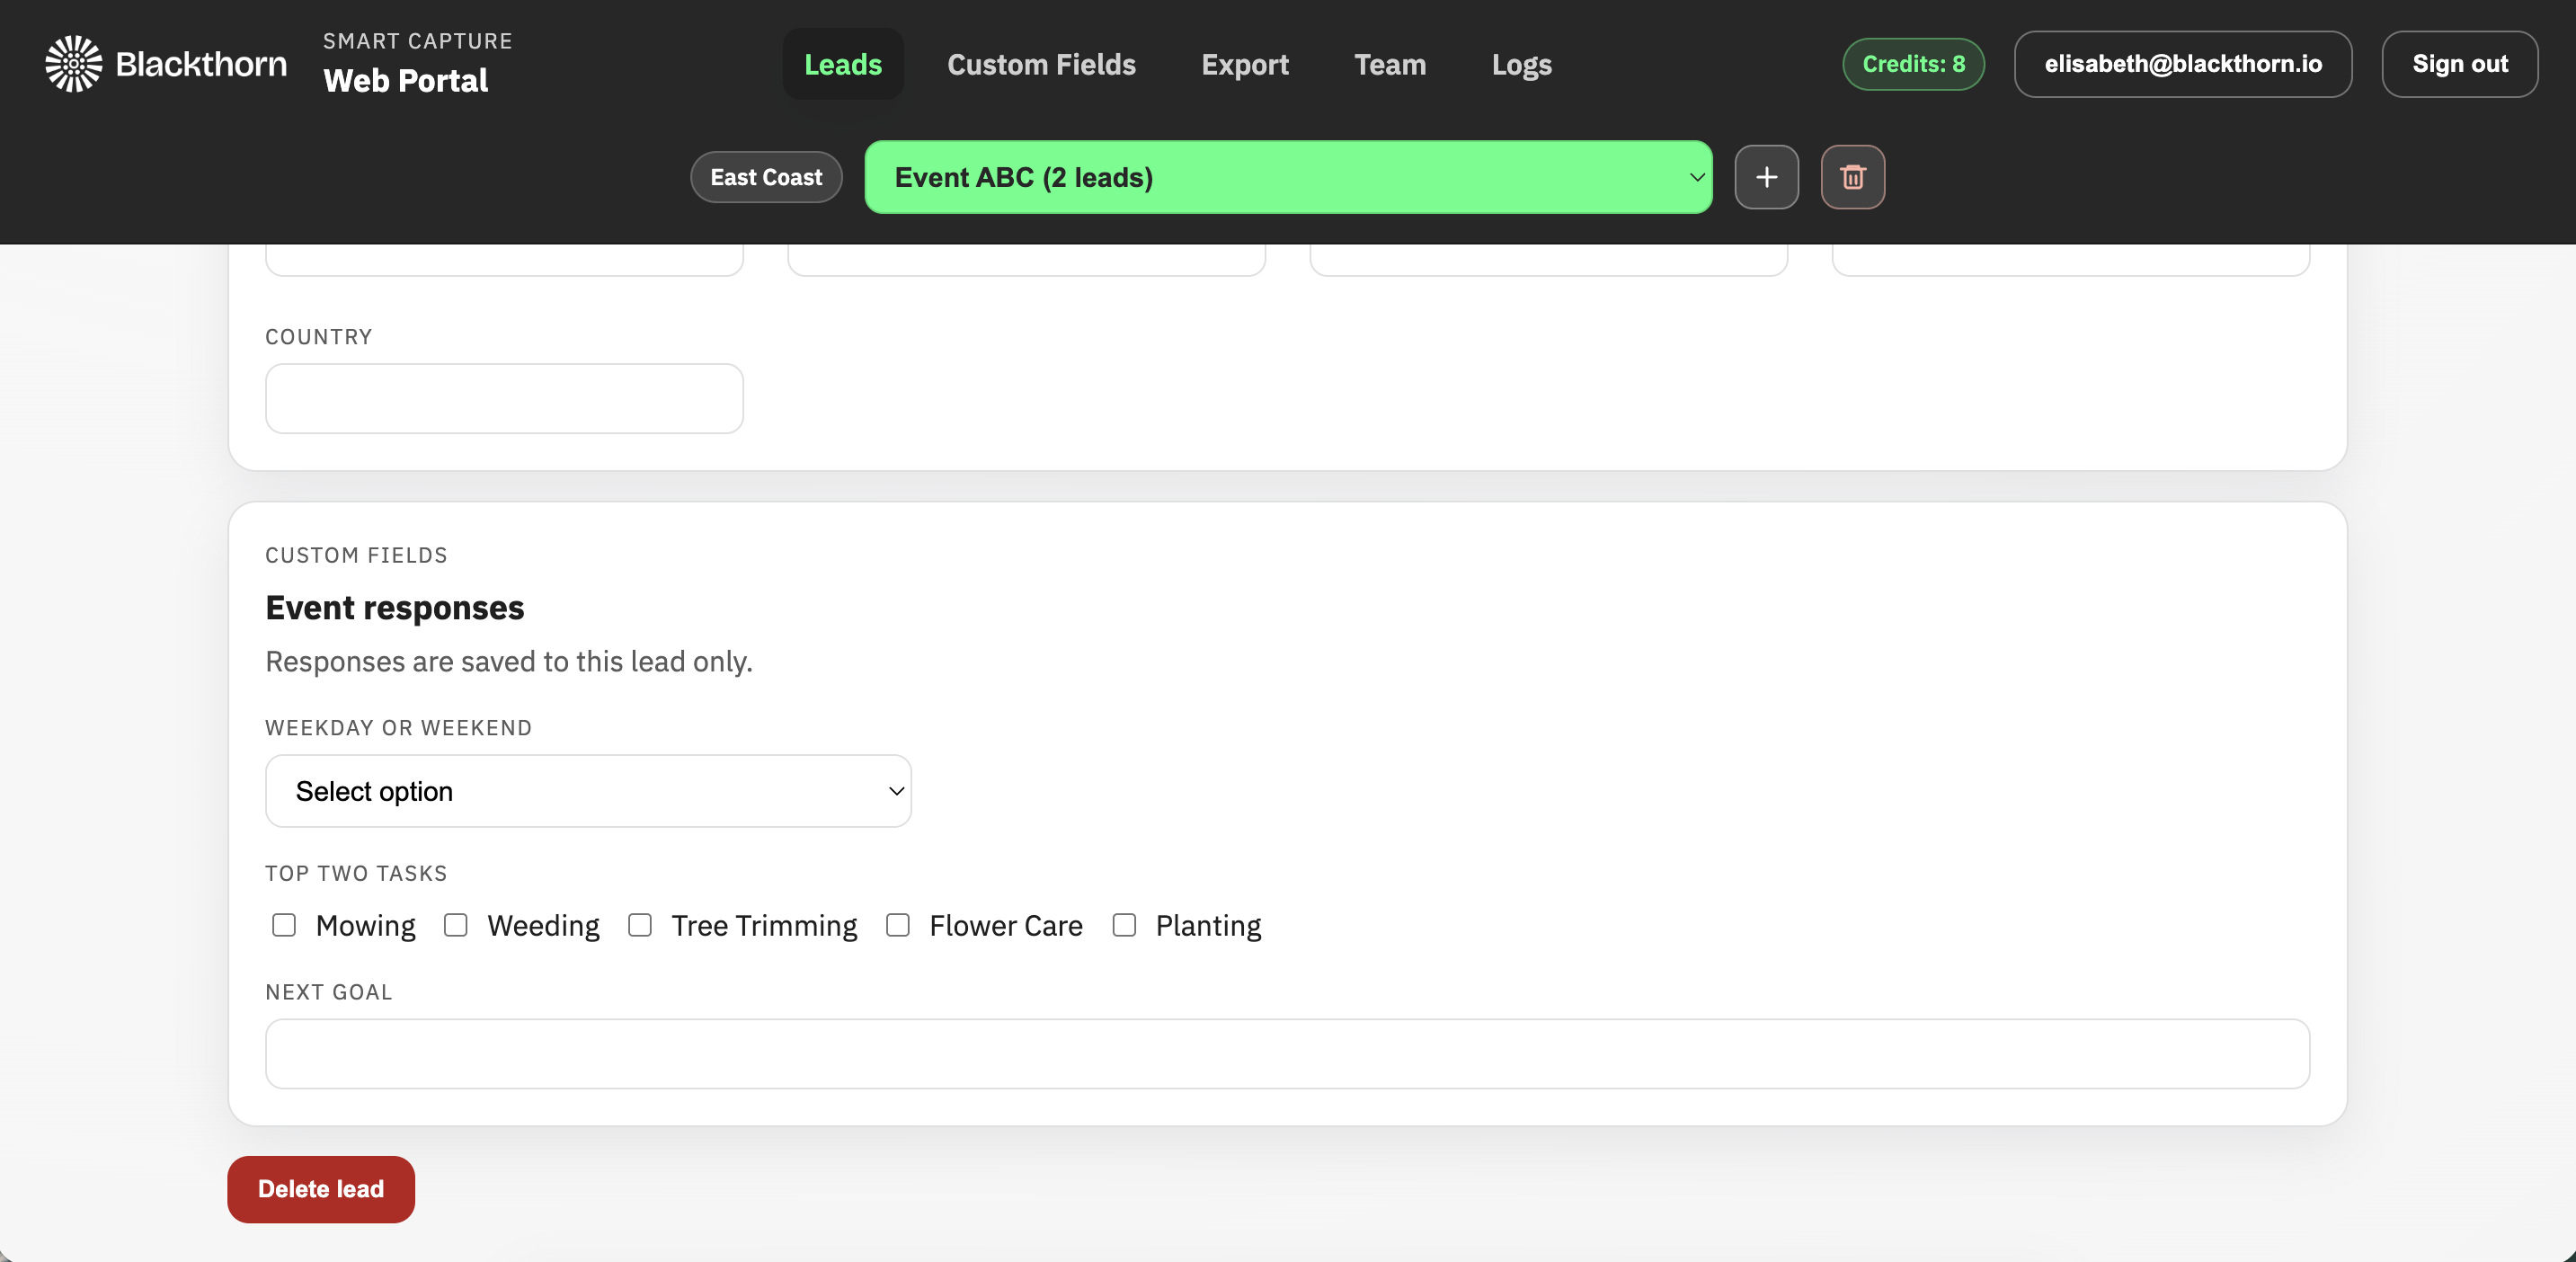
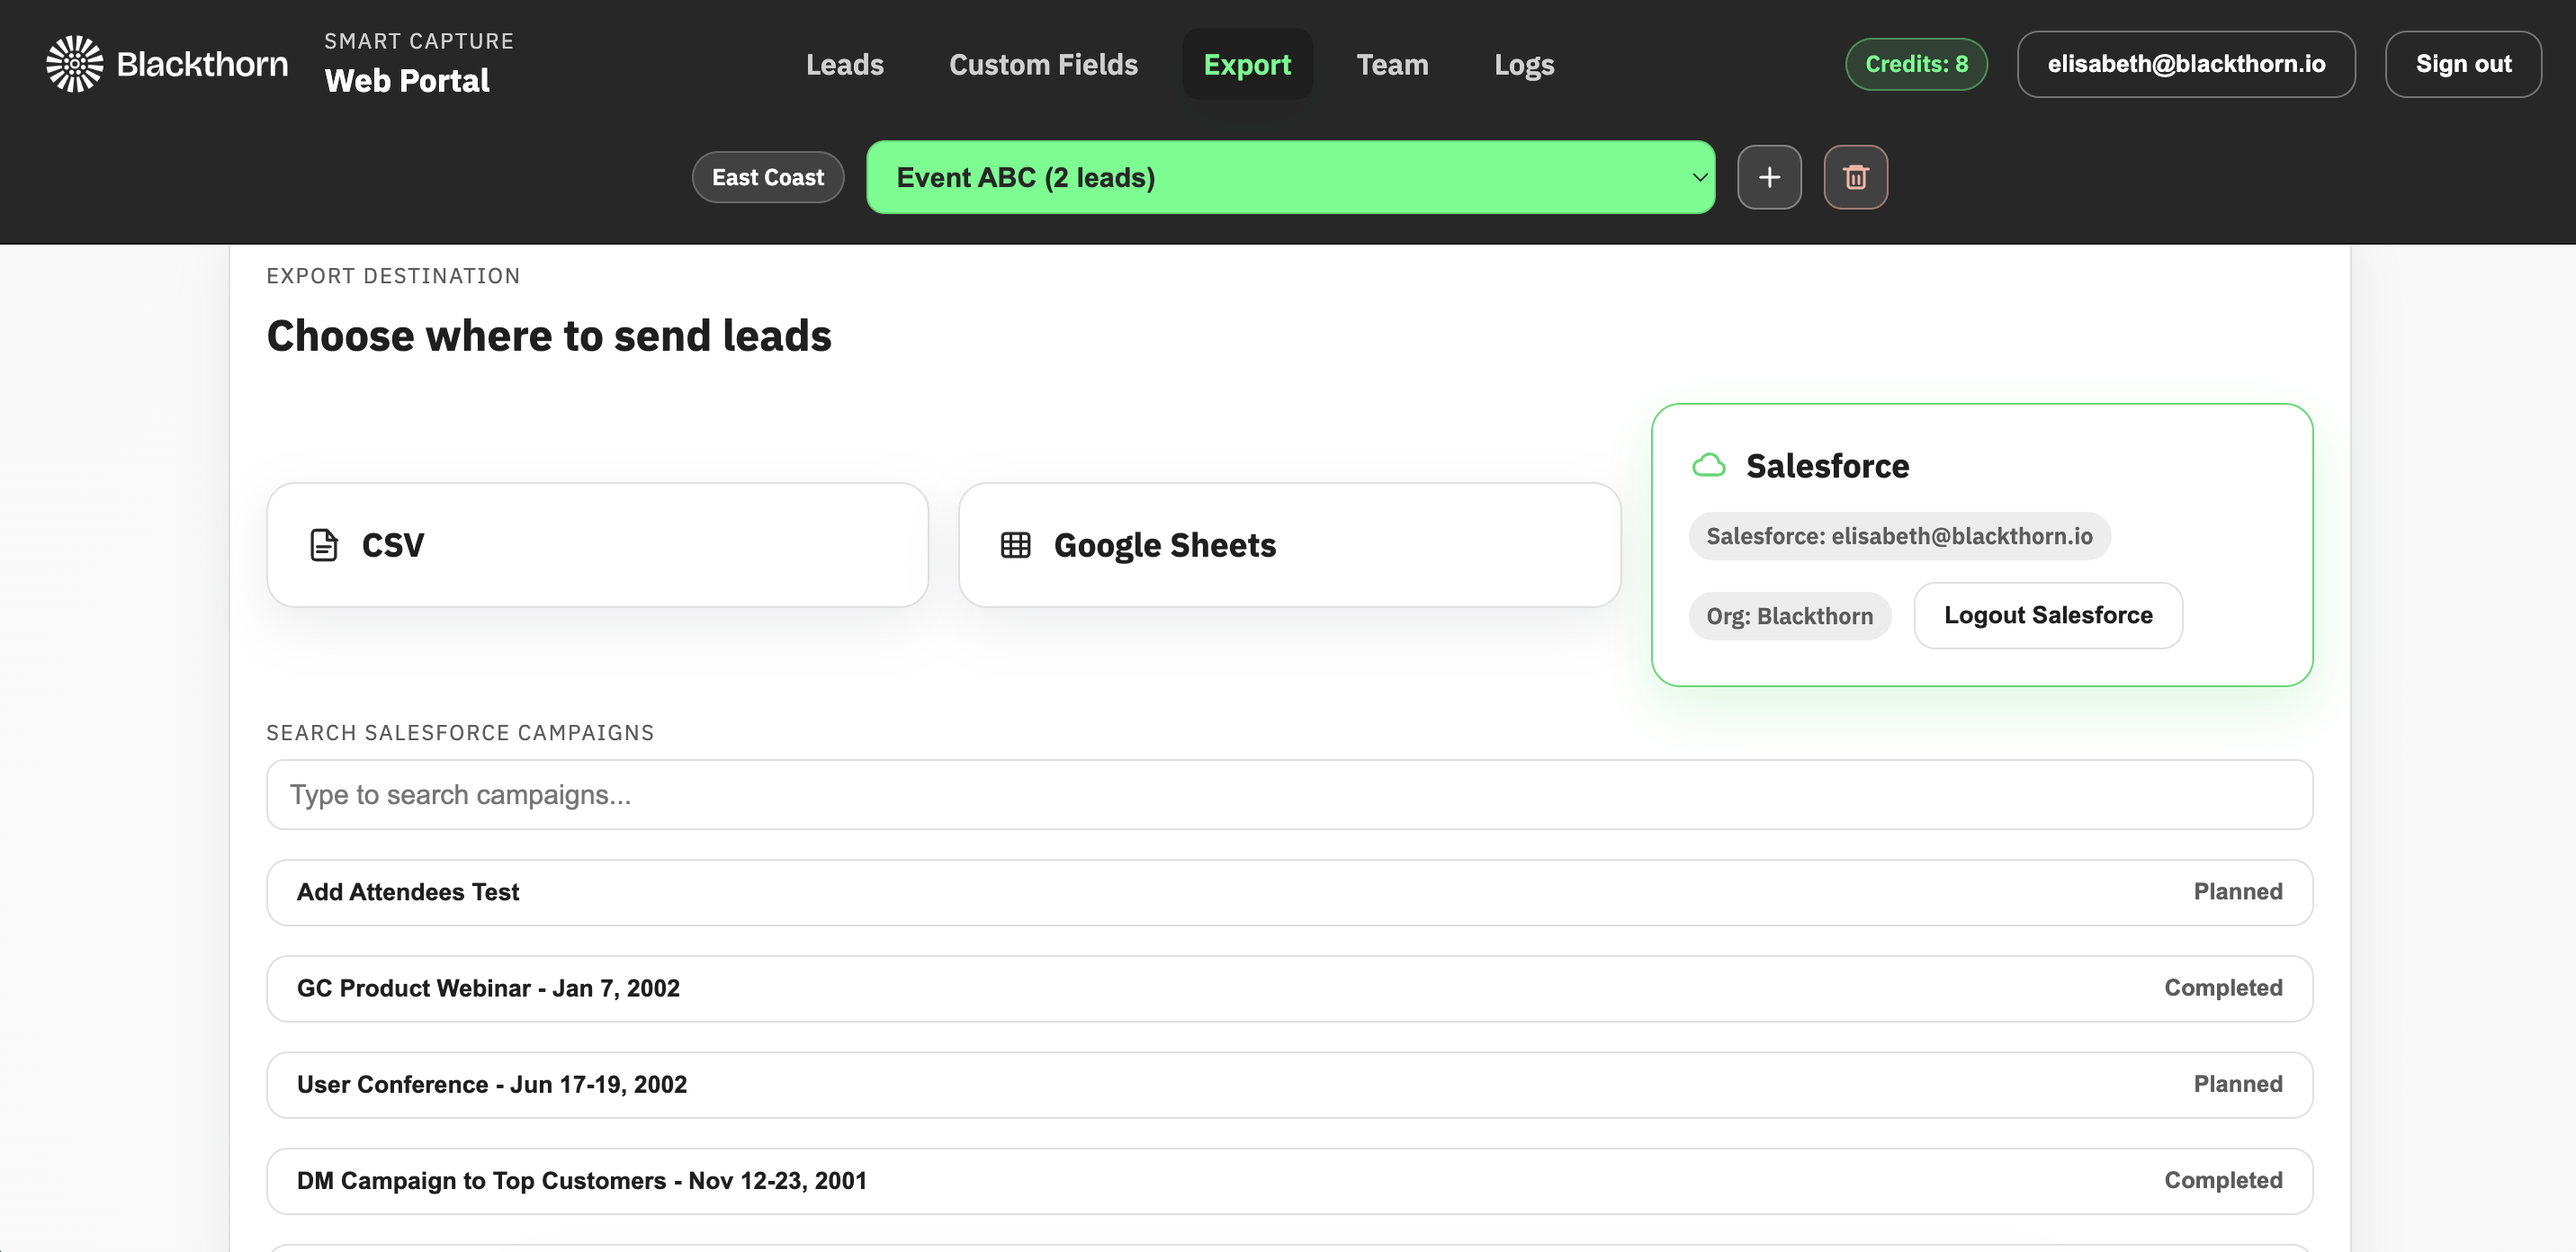
Export
Salesforce
Prerequisite: Confirm you have the following before trying to export leads to Salesforce:
Salesforce Account (Production or Sandbox)
Appropriate permissions to create Leads/Contacts and manage Campaigns
An active team and a Smart Capture event with captured leads in the app
Note: Leads that say “needs credits” will not be exported until additional credits have been purchased.
Before you export leads to Salesforce, you have the option to either map Custom Question fields from a Smart Capture event to leads’ records and/or retrieve mappings from a different event to Salesforce for the new event.
Log in to Salesforce
Click Salesforce.
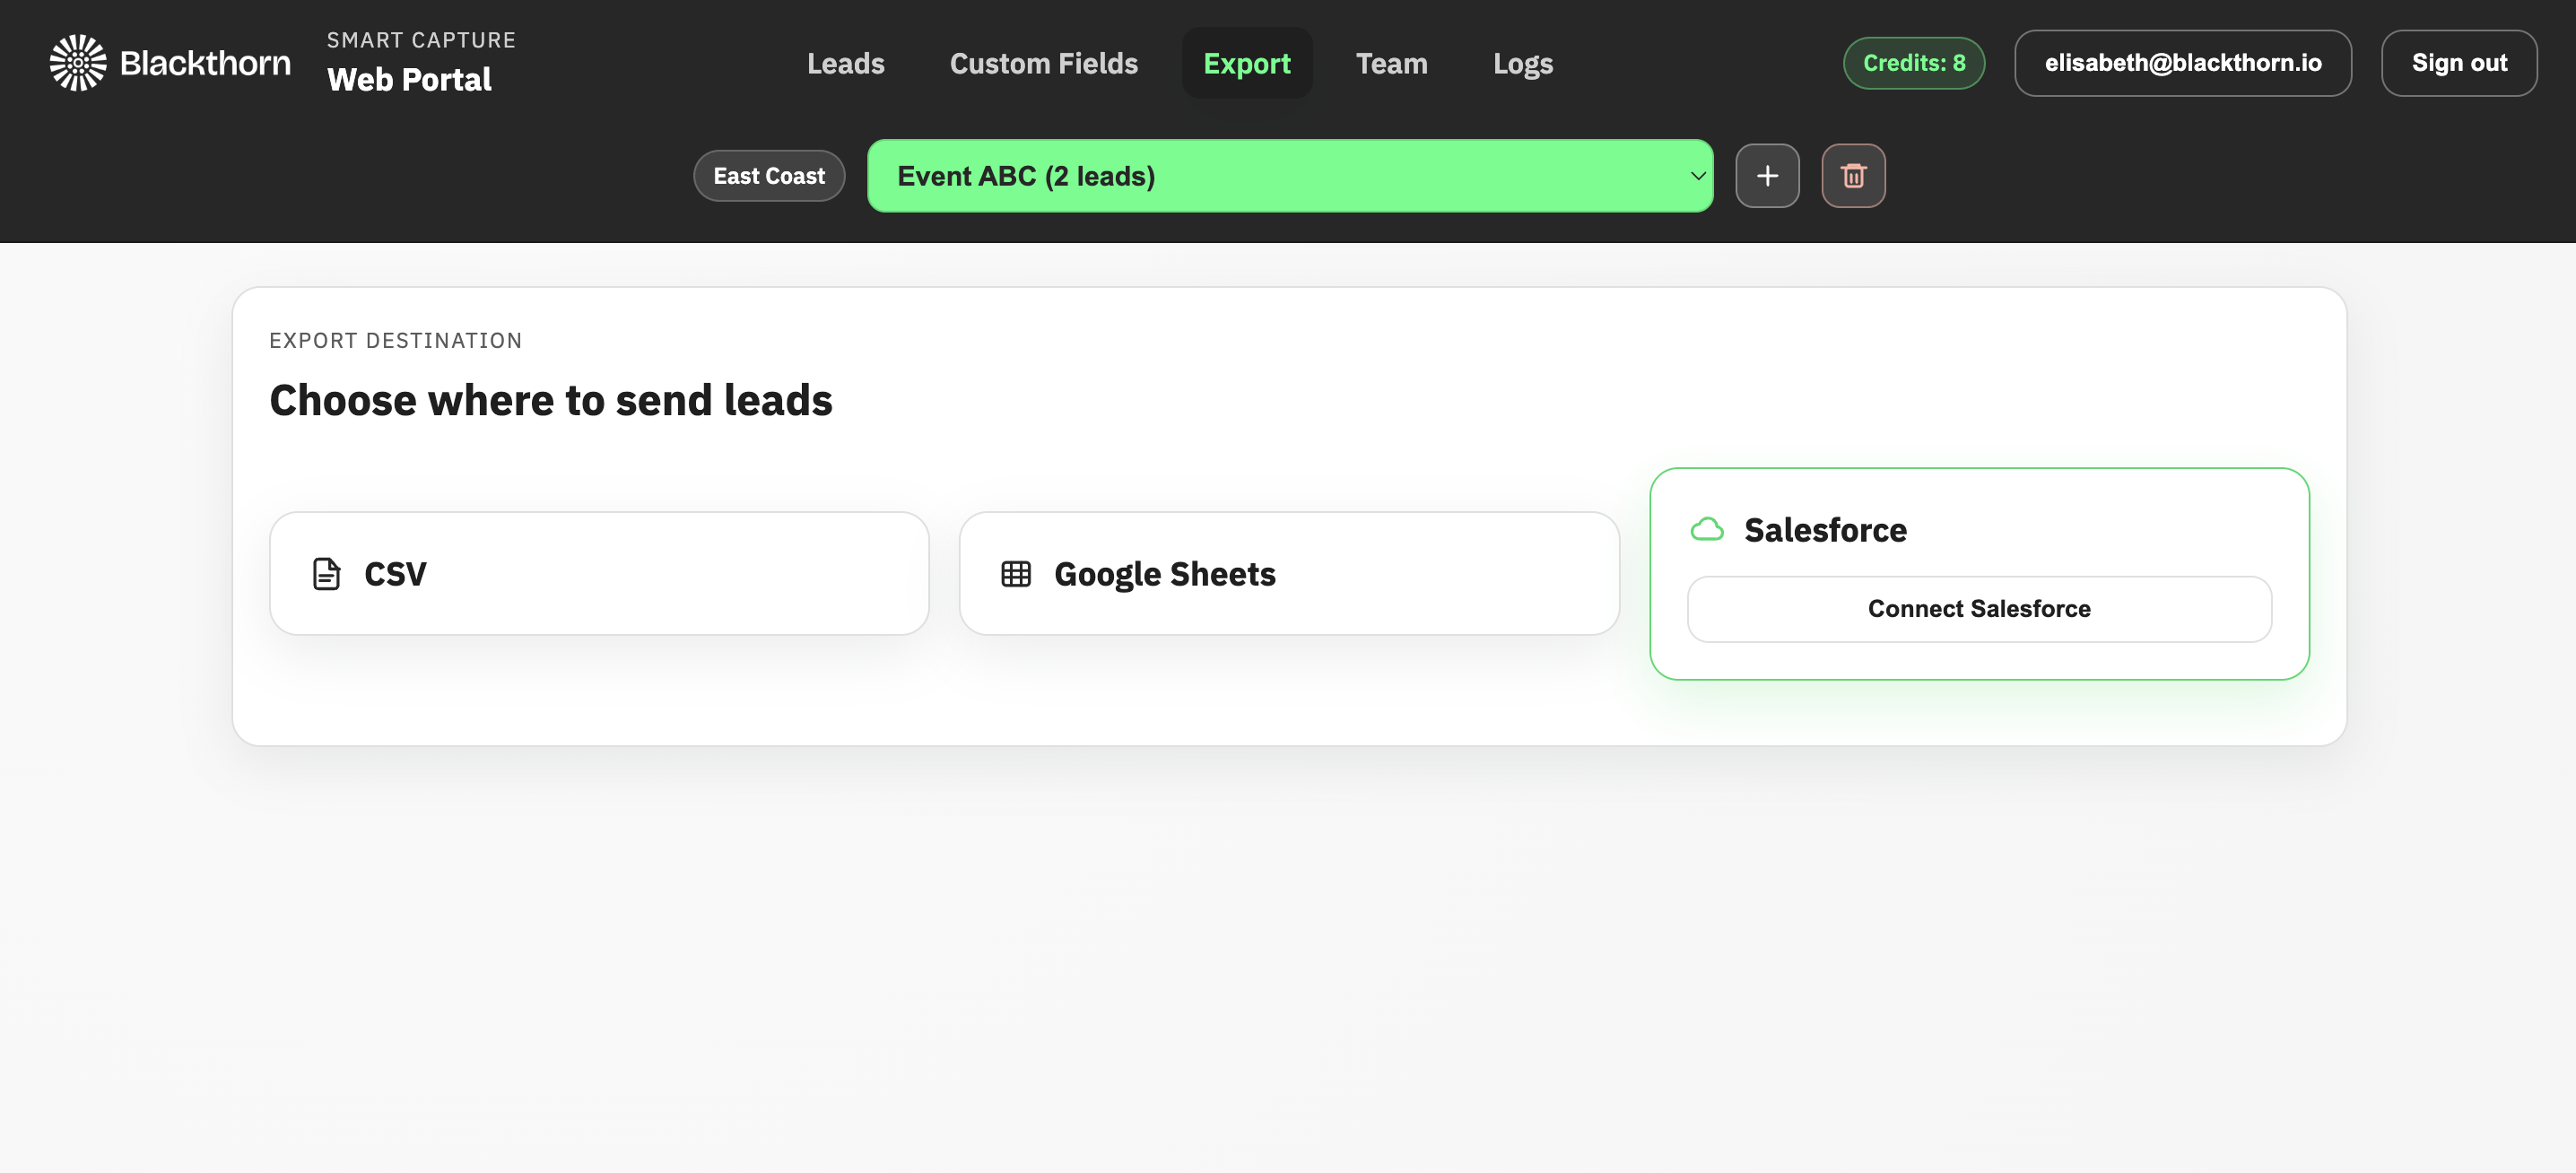
Click Connect Salesforce.
Enter your Salesforce credentials.
Tap Allow to grant the Blackthorn Smart Capture app access to your org.
Once the app is connected, it will present you with the option to select a Salesforce Campaign or map Salesforce fields.
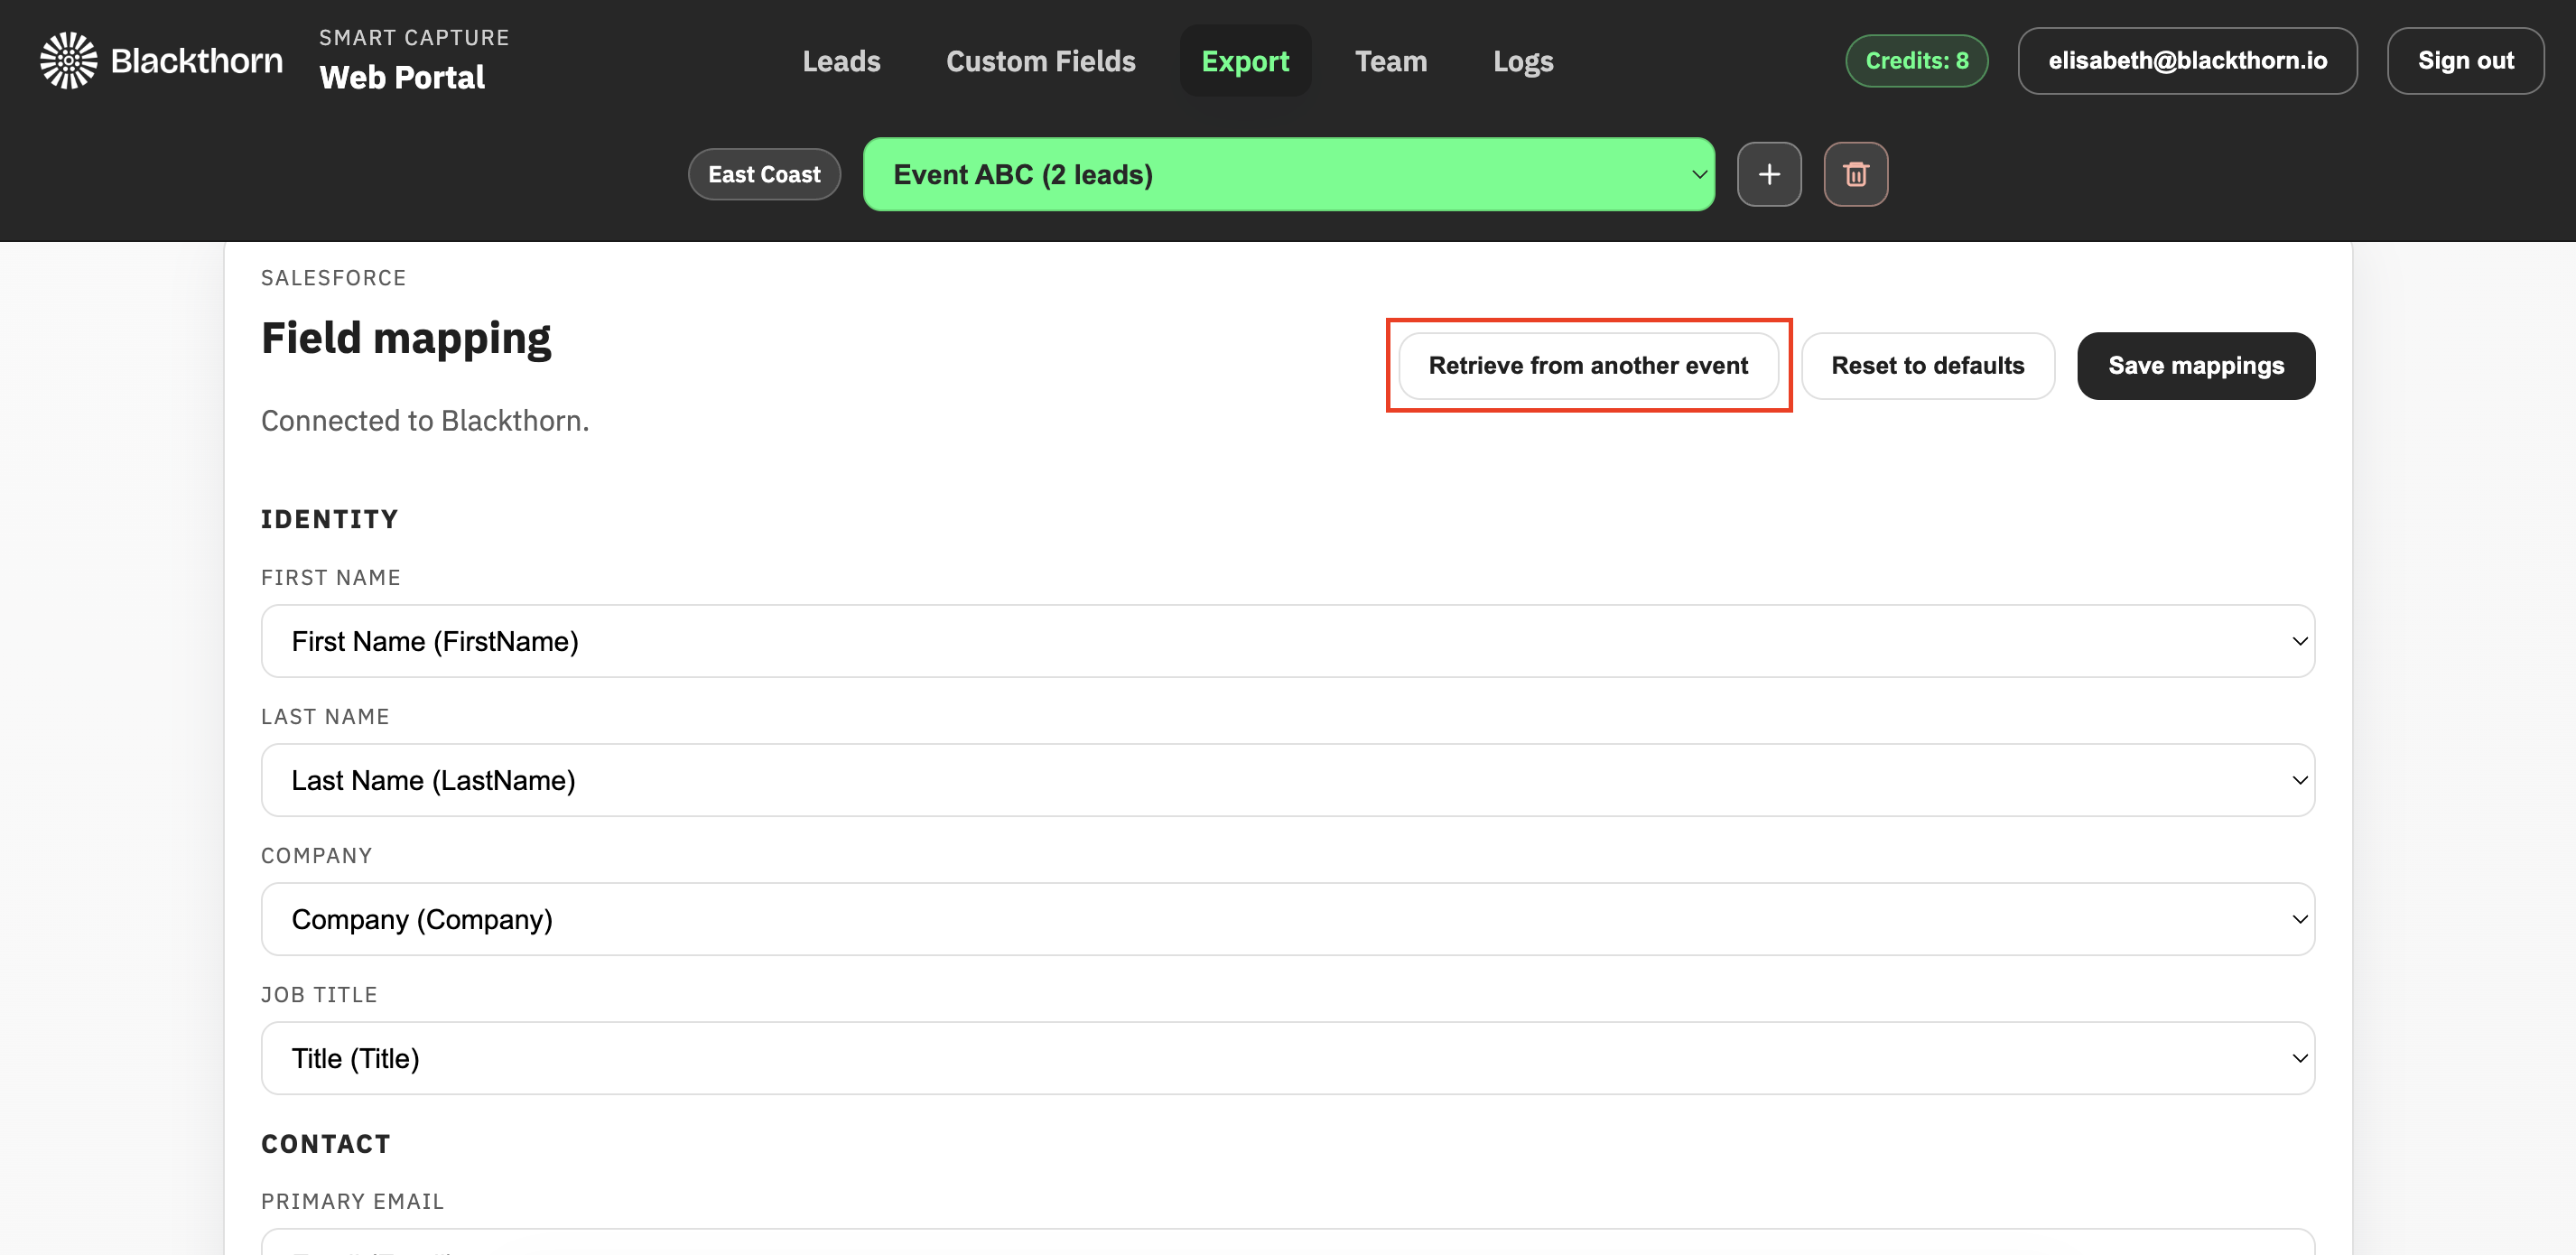
Update Field Mapping
You can map leads’ fields from the Smart Capture web portal to the Salesforce Lead records’ fields.
NOTE: By default, fields in Smart Capture that lack a standard Salesforce field to map to are mapped to the Description field.
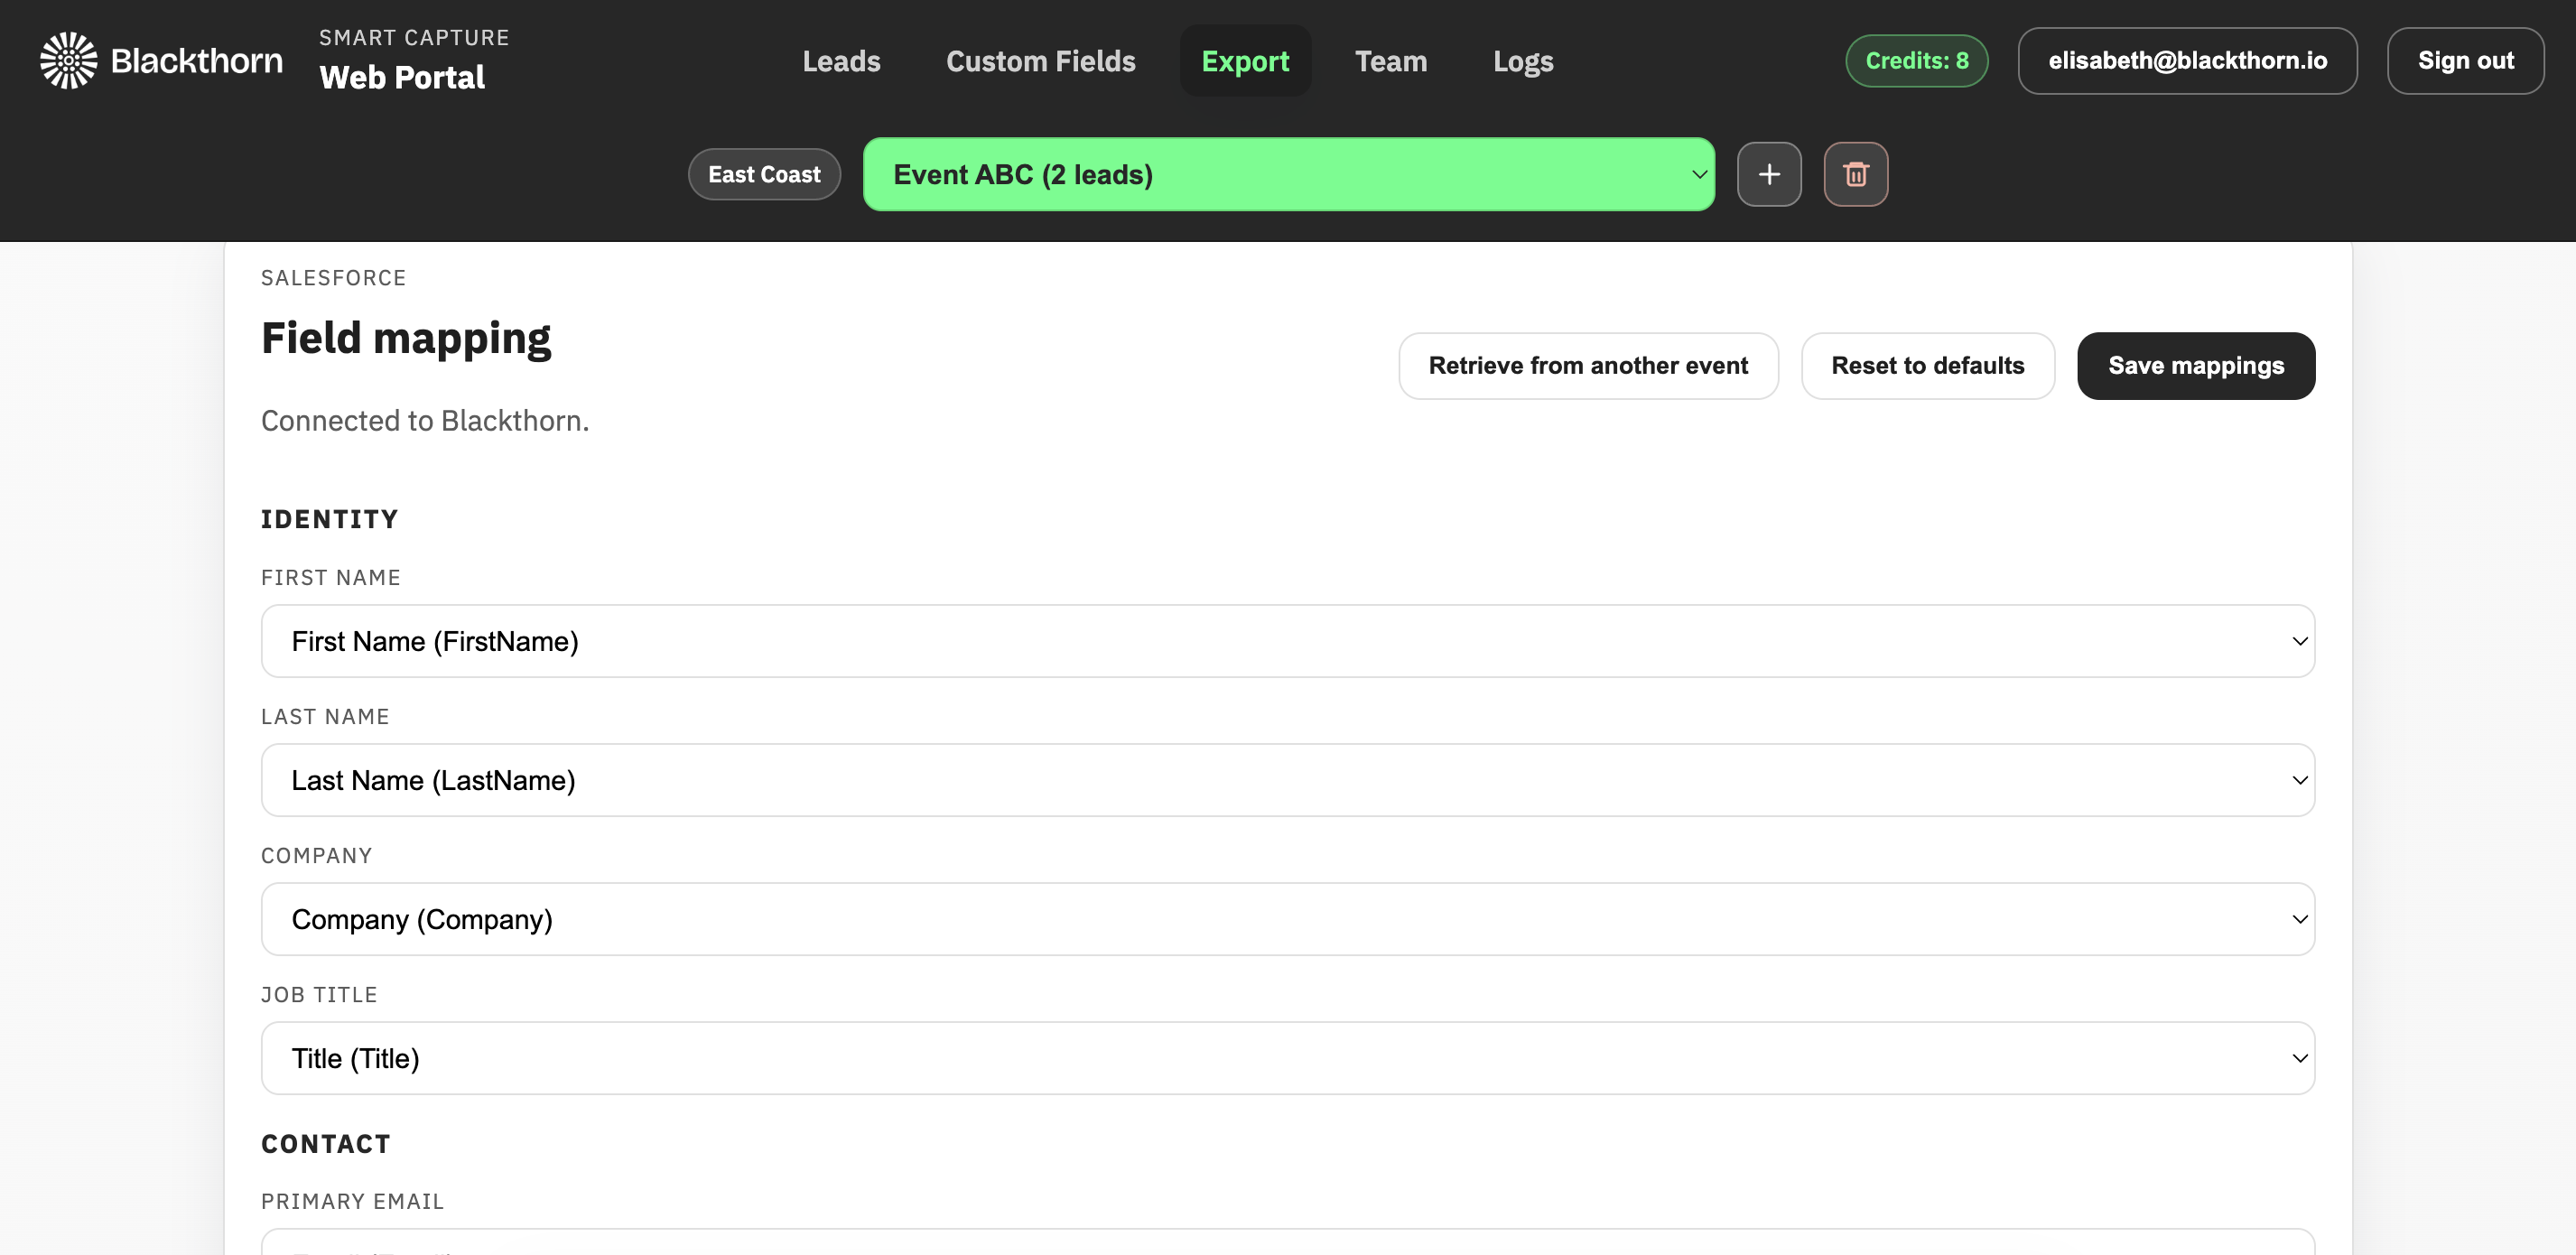
Click into the Smart Capture field you want to update. You will see a list of available Salesforce fields.
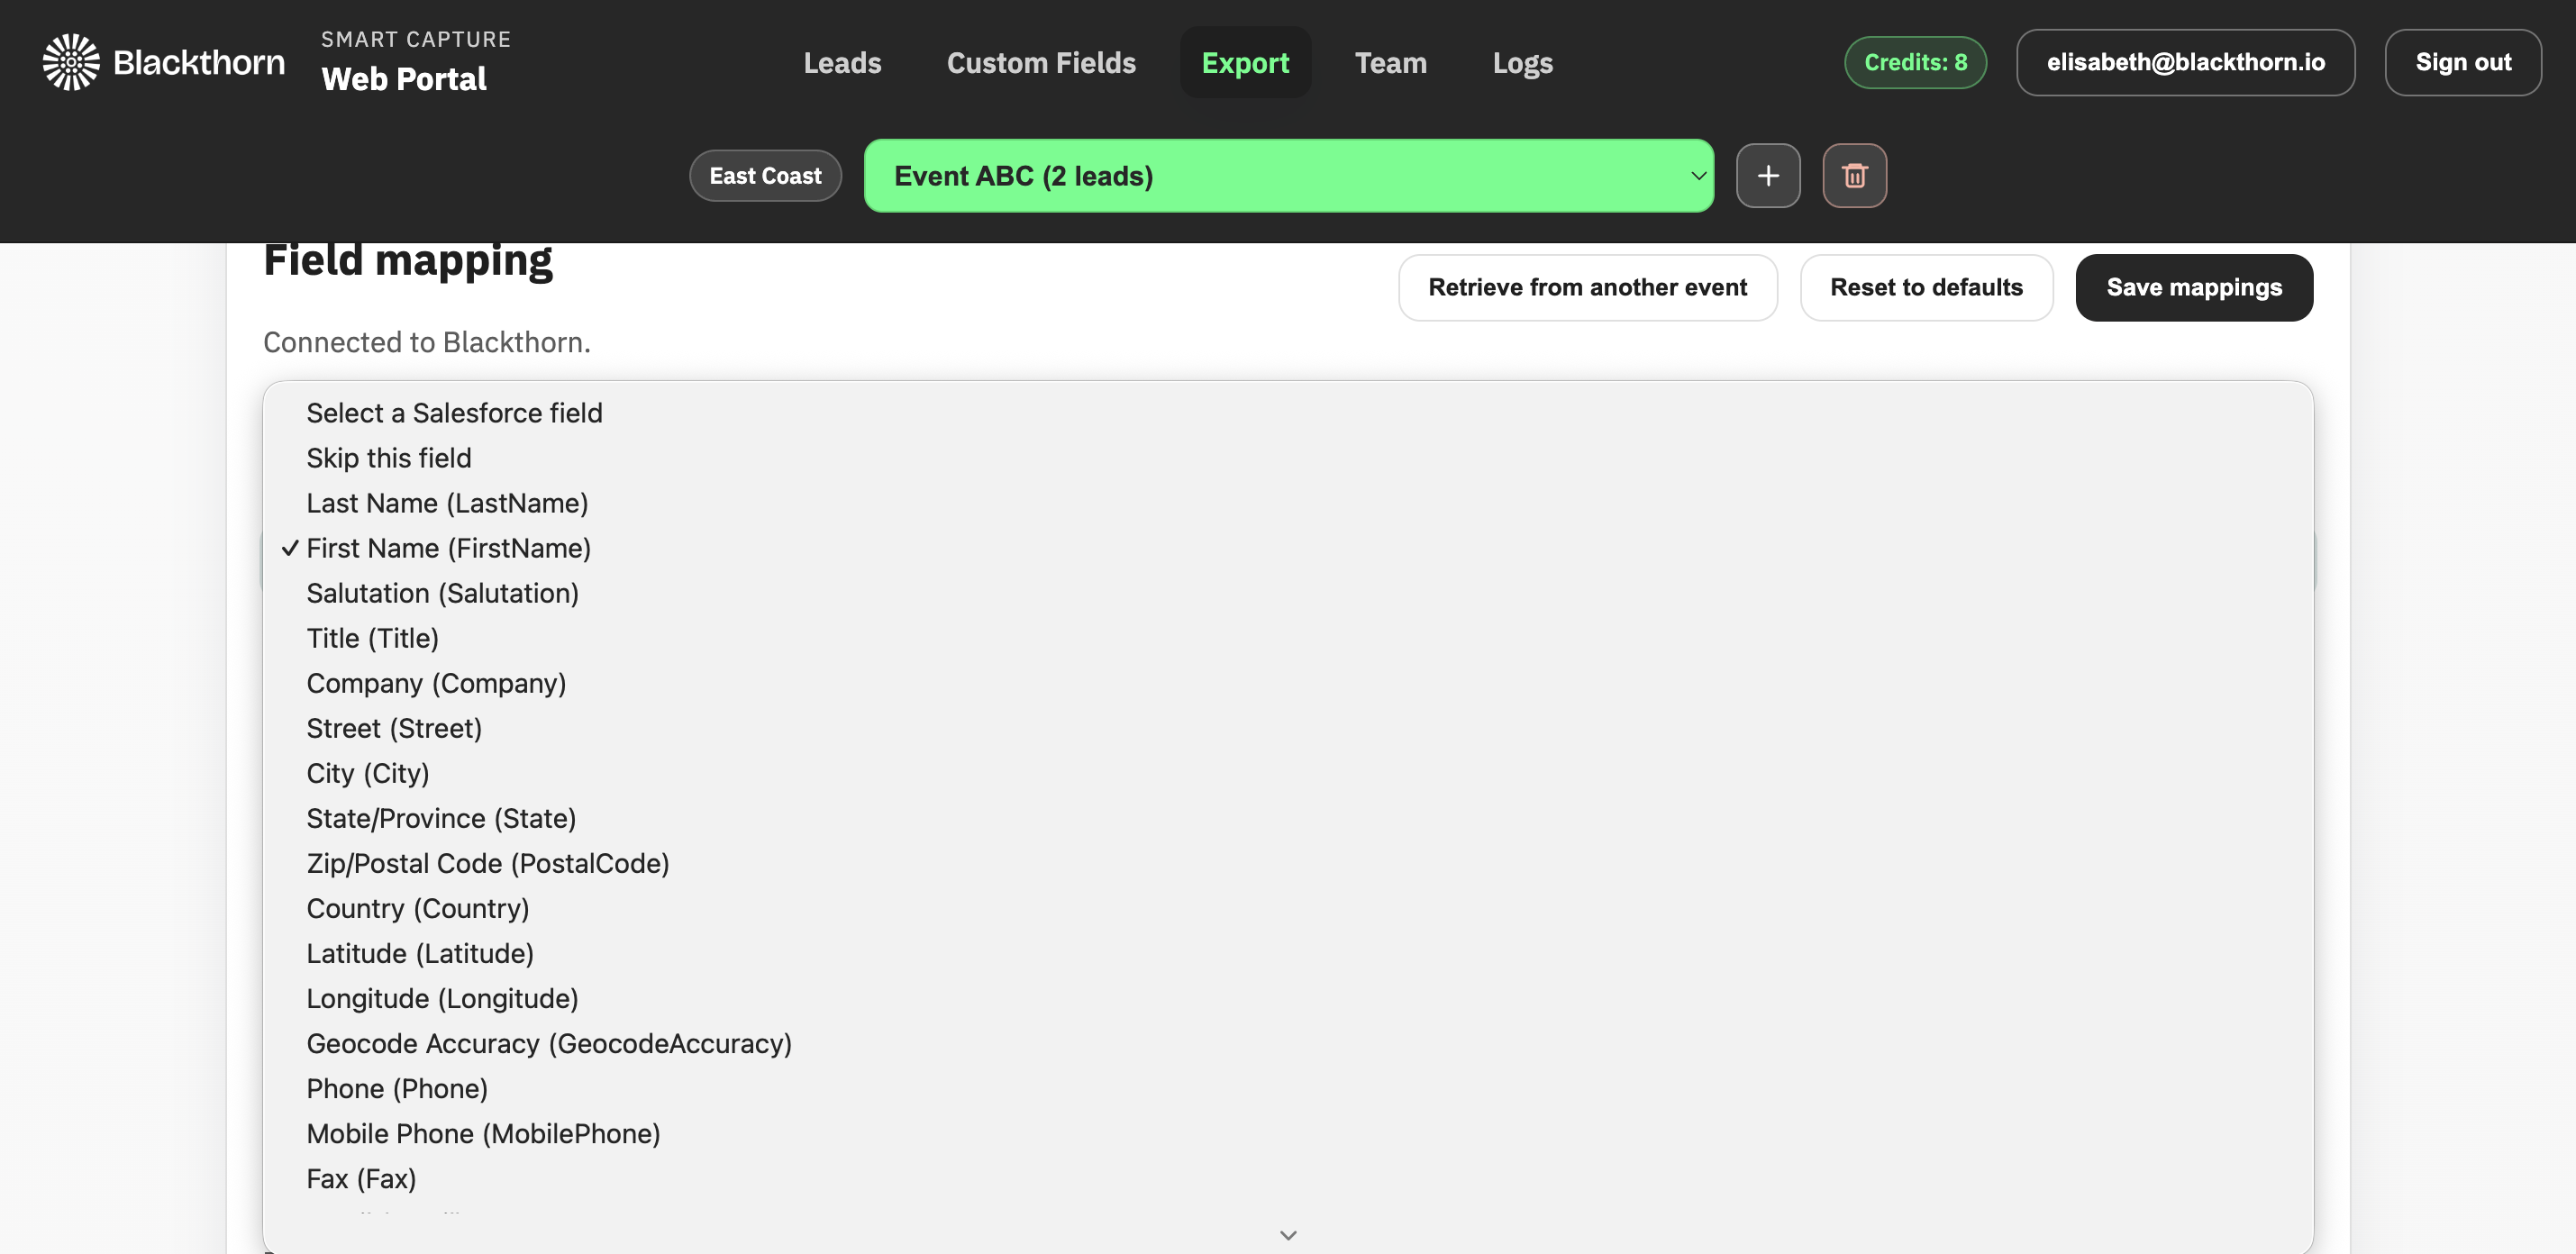
Select a field.
Once you have made all your updates, click the Save mappings button.
If you are ready to export leads, follow the Export Leads steps.
Retrieve Mapping from Another Event
Click Retrieve from another event.
Select an event.
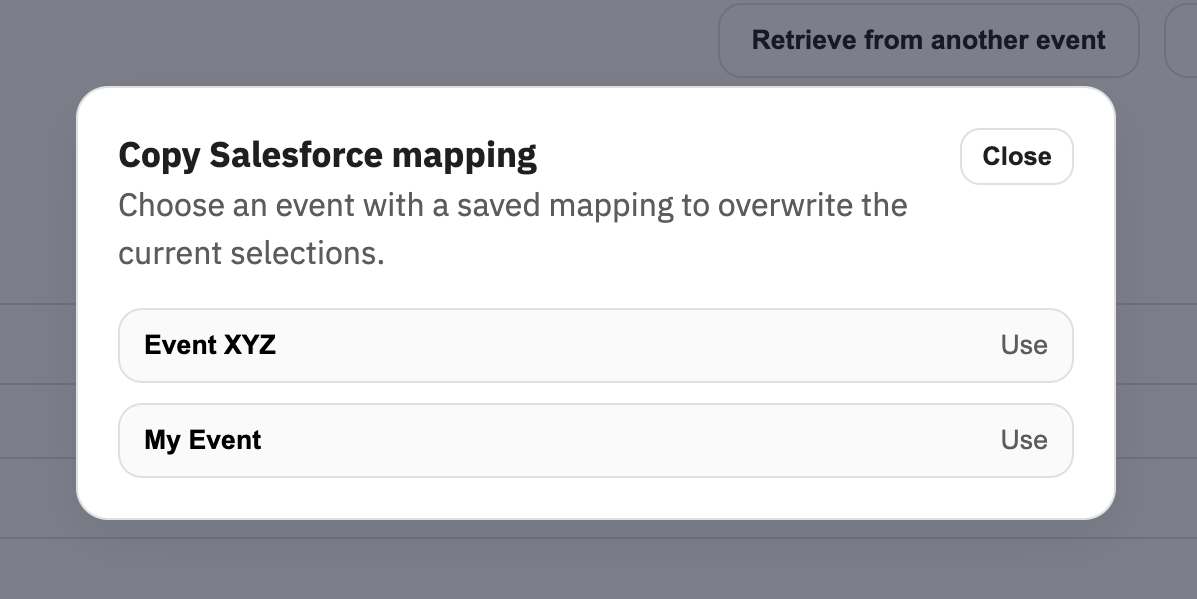
Click OK.
Click Save mappings.
If you are ready to export leads, follow the Export Leads steps.
Export Leads
Enter the Salesforce Campaign’s Campaign Name (a partial name is okay) and select it.
Click Export X Leads.
CSV
Prerequisite: Before you can export leads, please ensure you are part of an active team and have a Smart Capture event with captured leads in the app.
Note: Leads that say “needs credits” will not be exported until additional credits have been purchased.
Click CSV.
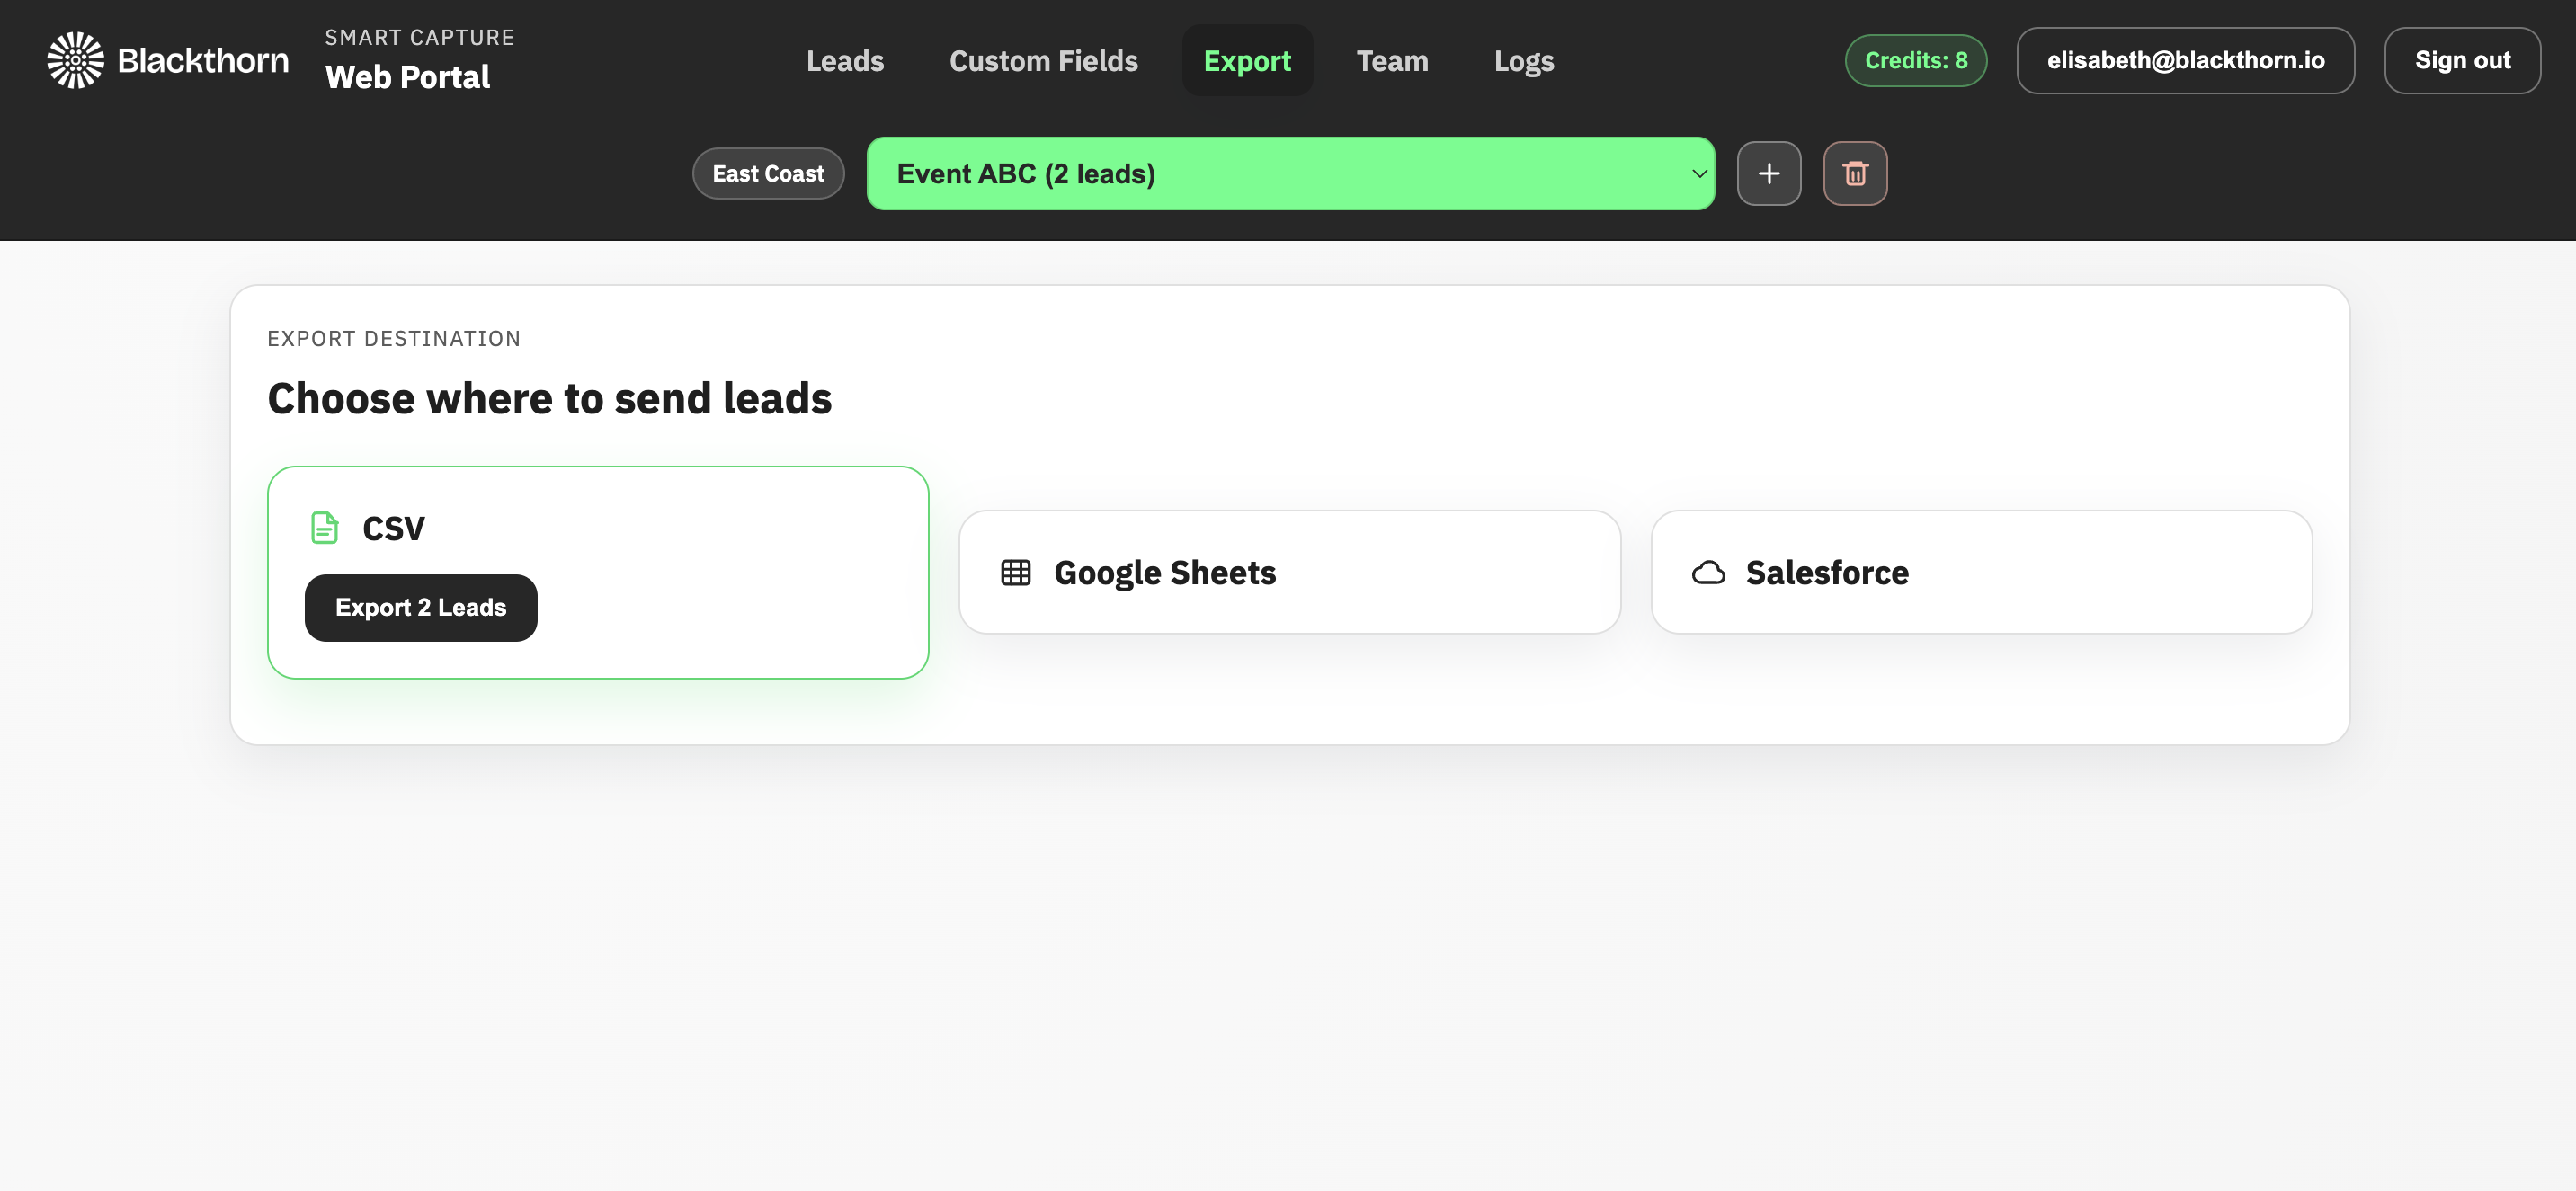
Click Export X Leads.
The leads will be downloaded to your computer.
Google Sheets
Prerequisite: Before you can export leads, please ensure you are part of an active team and have a Smart Capture event with captured leads in the app.
Note: Leads that say “needs credits” will not be exported until additional credits have been purchased.
Click Google Sheets.
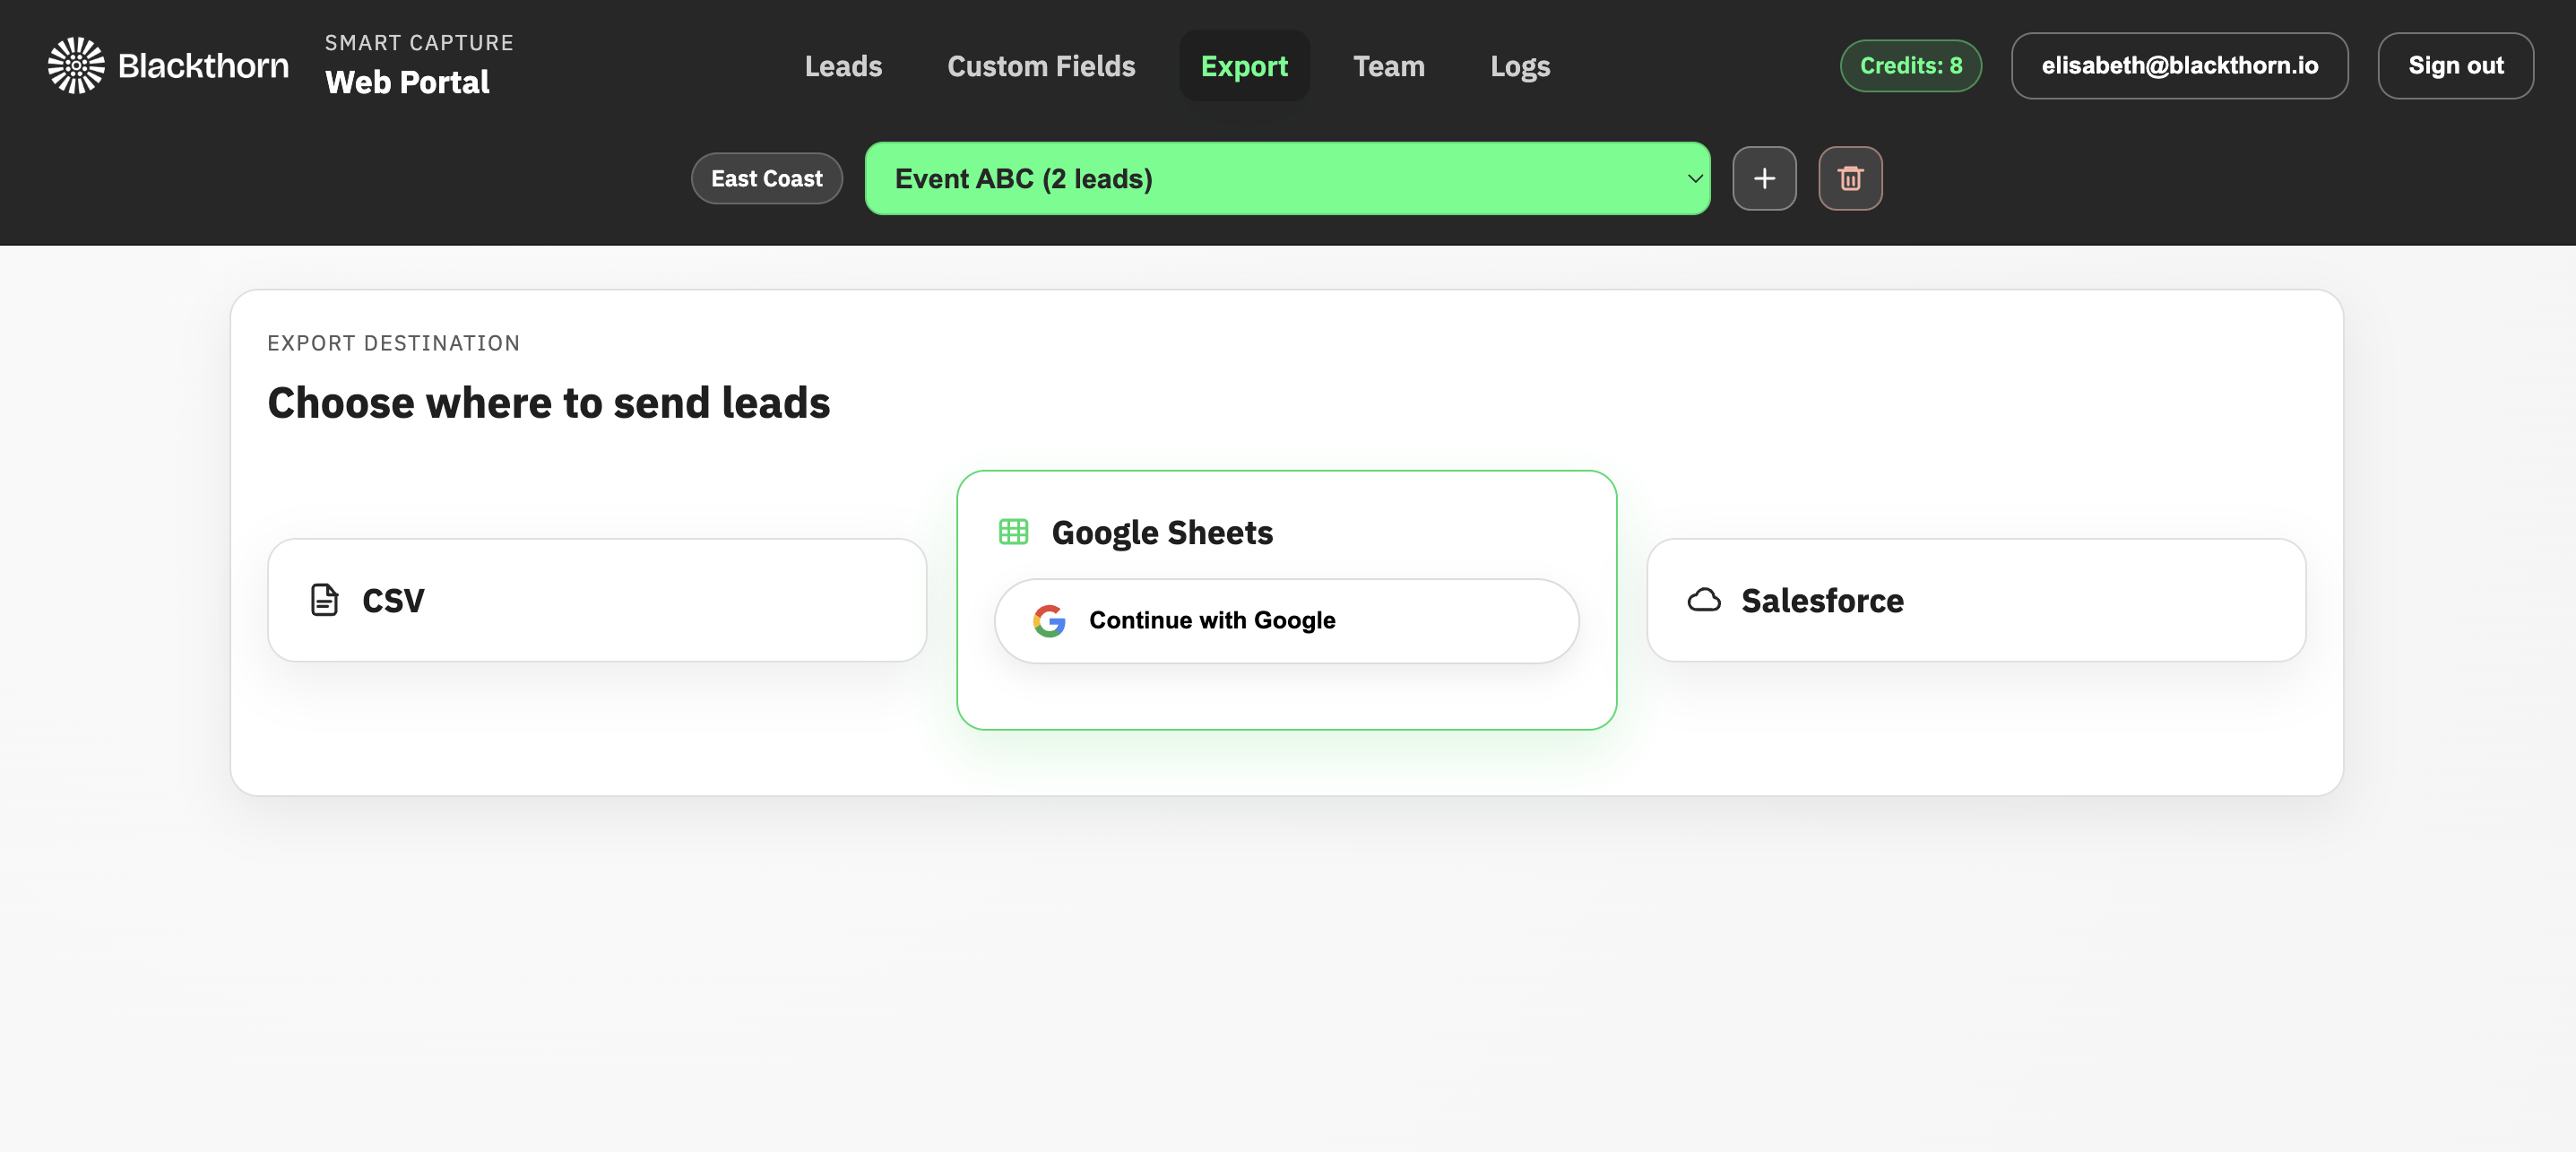
Click Continue with Google.
Sign in to your account.
Select where you would like to store the file.
Teams
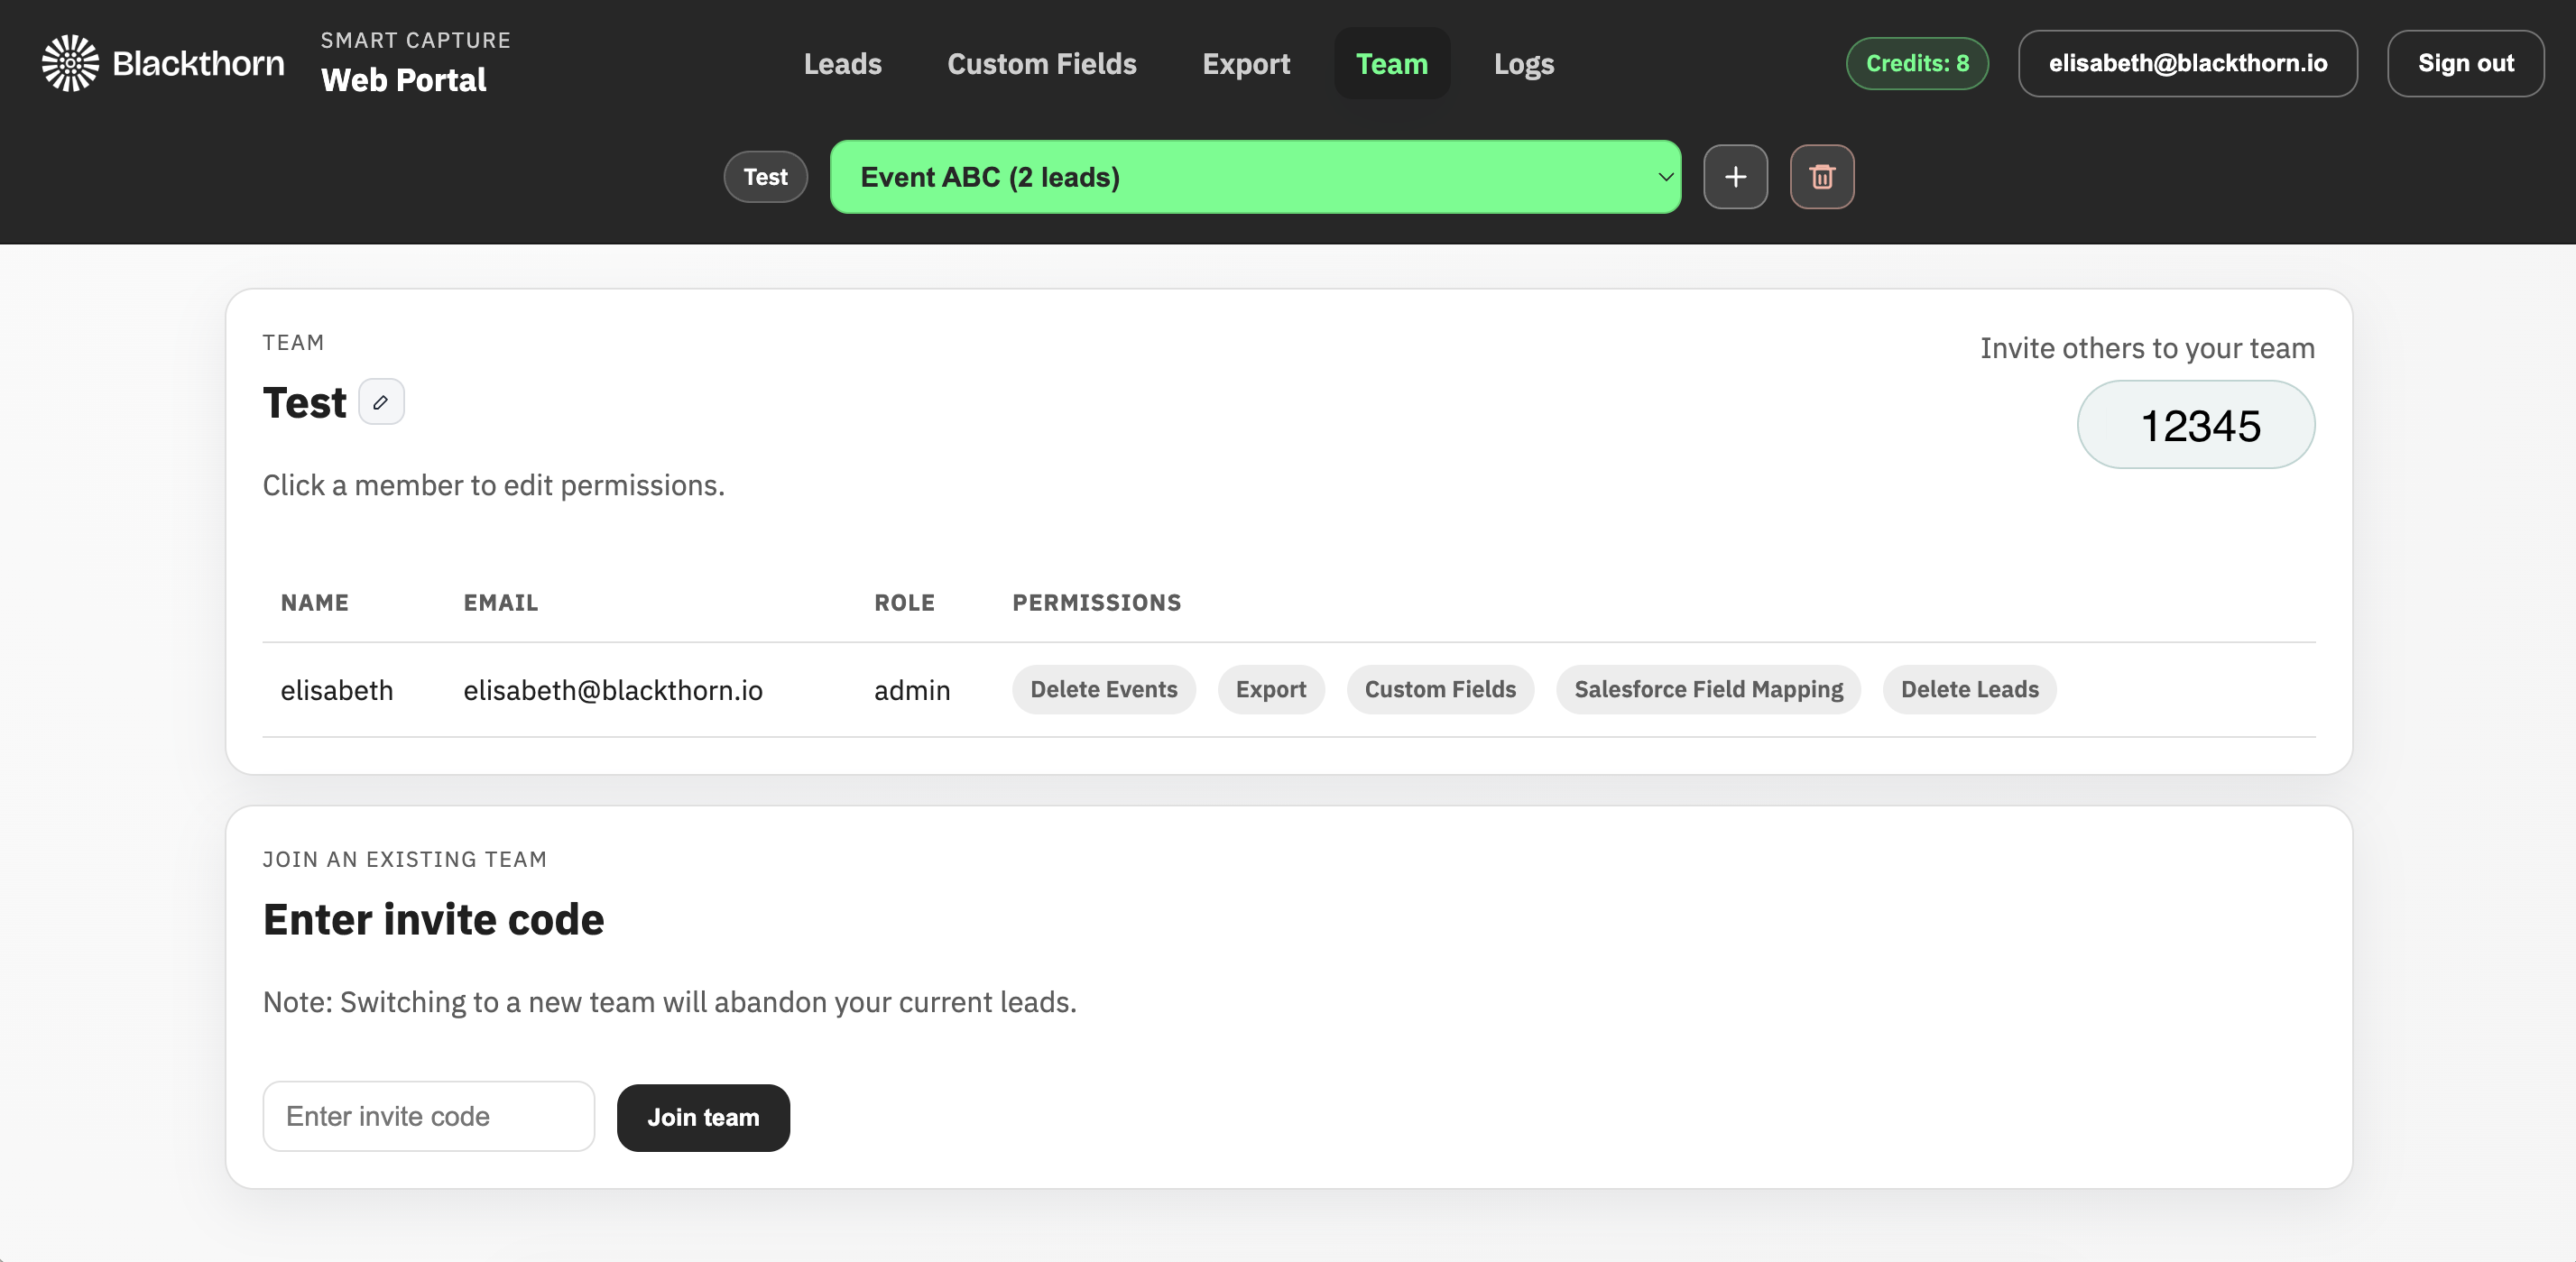
The Team tab allows users to perform several tasks related to team members.
Edit permissions for team members.
Enter an invite code from a different team.
Copy and share your team’s invite code with those not on your team.
Remove team members.
Edit Permissions
Each Team Member can have one or all the following permissions:
Admin – Grant this user all permissions, including user removal and admin permission granting.
Delete Leads - Allow deleting leads from events.
Delete Events – Allow deleting events, including all leads in the event.
Custom Fields – Allow editing the custom fields of events.
Export – Allow exporting leads to Salesforce, CSV, or Sheets.
Salesforce Field Mapping – Allow editing of Salesforce field mappings.
Prerequisite: You must be an Admin to change permissions for other users.
Click the name of the person whose permissions you need to update.
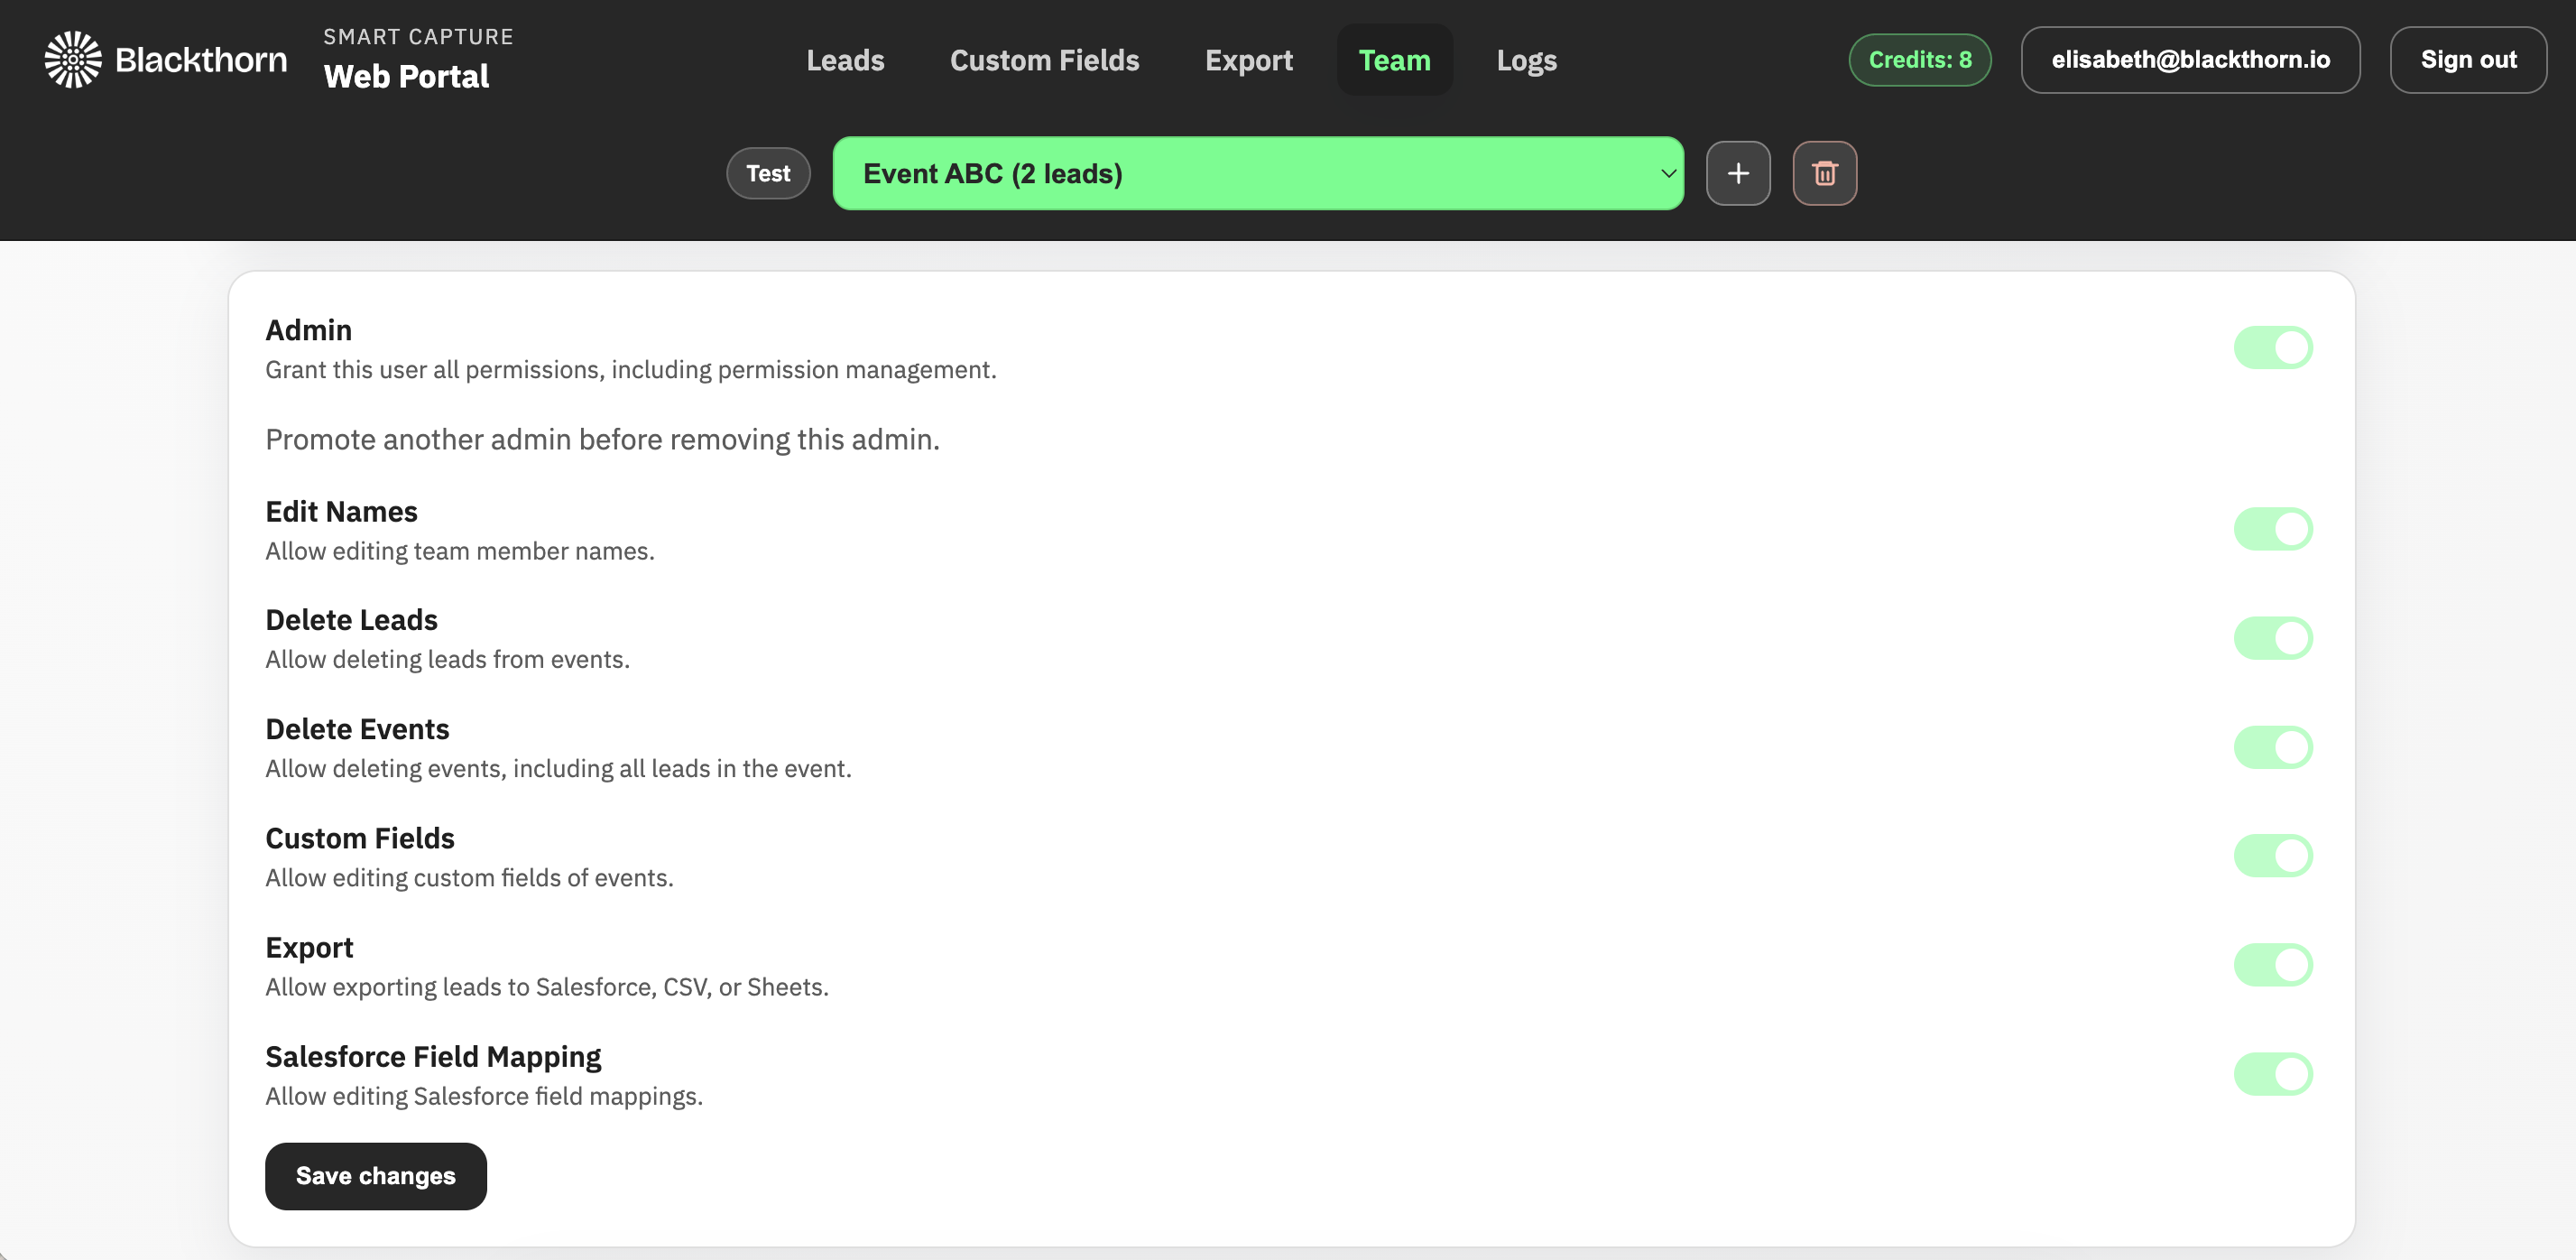
Toggle each permission on or off as needed.
Click Save changes.
Note: A user with Admin permissions cannot change their own permissions.
Remove a Team Member
Click the name of the person whom you need to remove.
Scroll to the bottom of the page and click Remove member.
Invite Codes
Read Before Changing Teams
Entering a new invite code to switch teams will abandon your current leads. Please export existing leads before switching teams.
Share with Others: Share the invite code in the top right corner of the screen with others so they can join your team.
Join a New Team: Enter a different team’s invite code in the field in the bottom left corner of the screen.
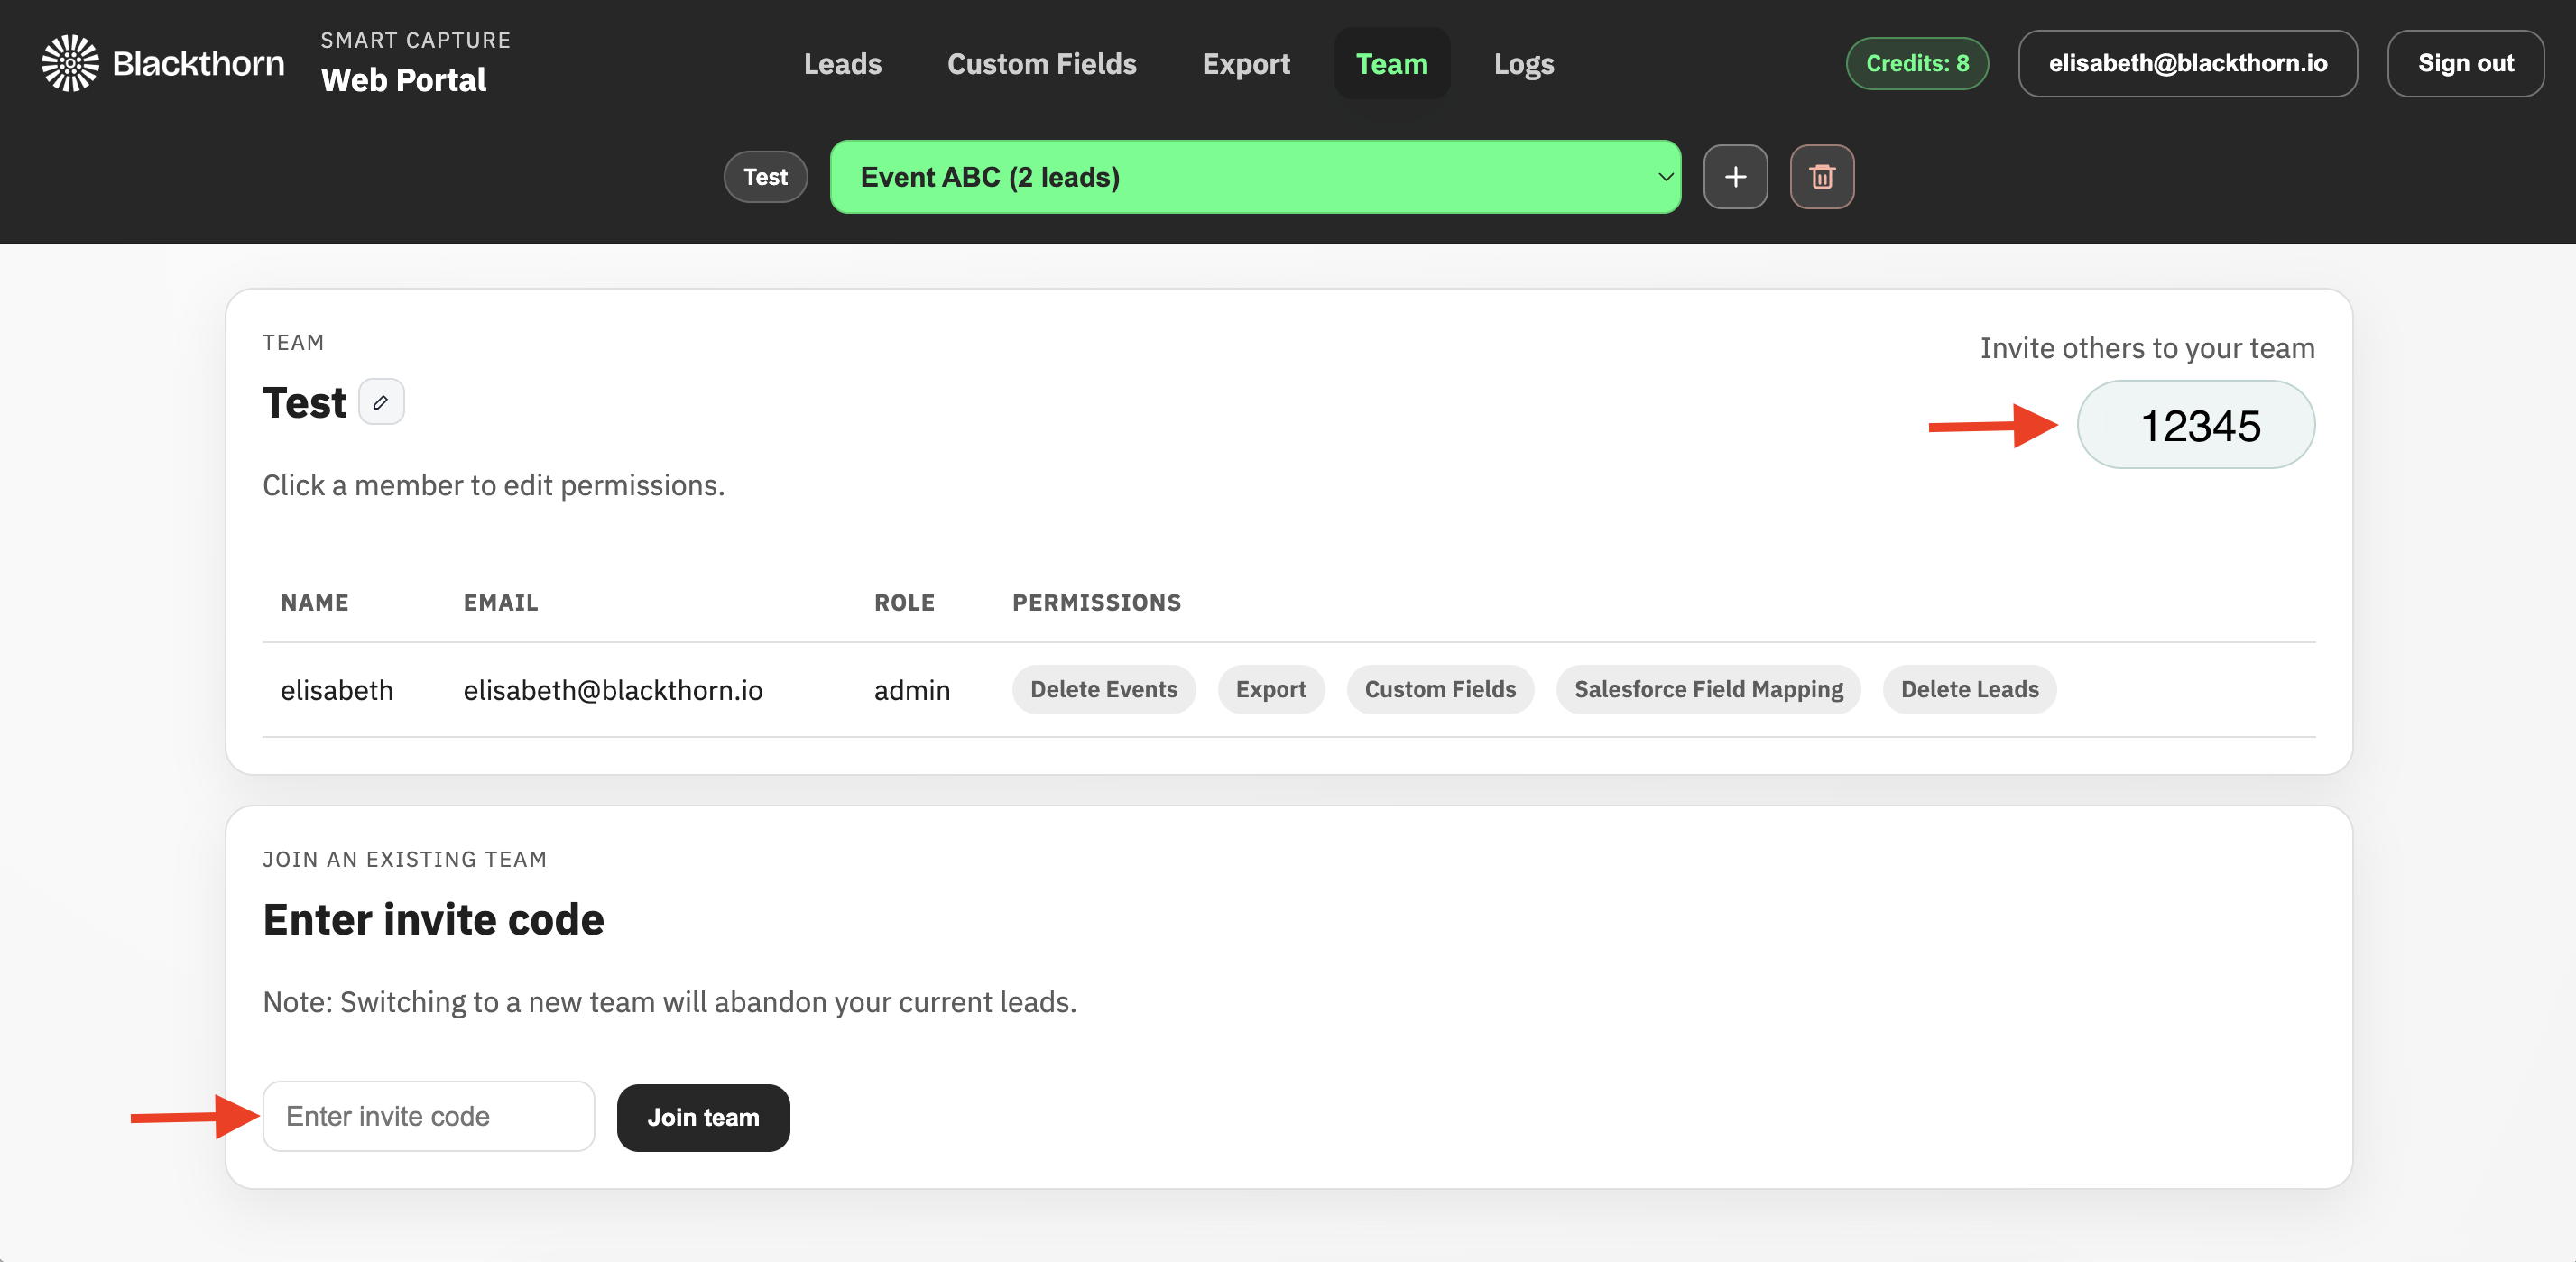
Entering a new invite code to switch teams will abandon your current leads. Please export existing leads before switching teams.
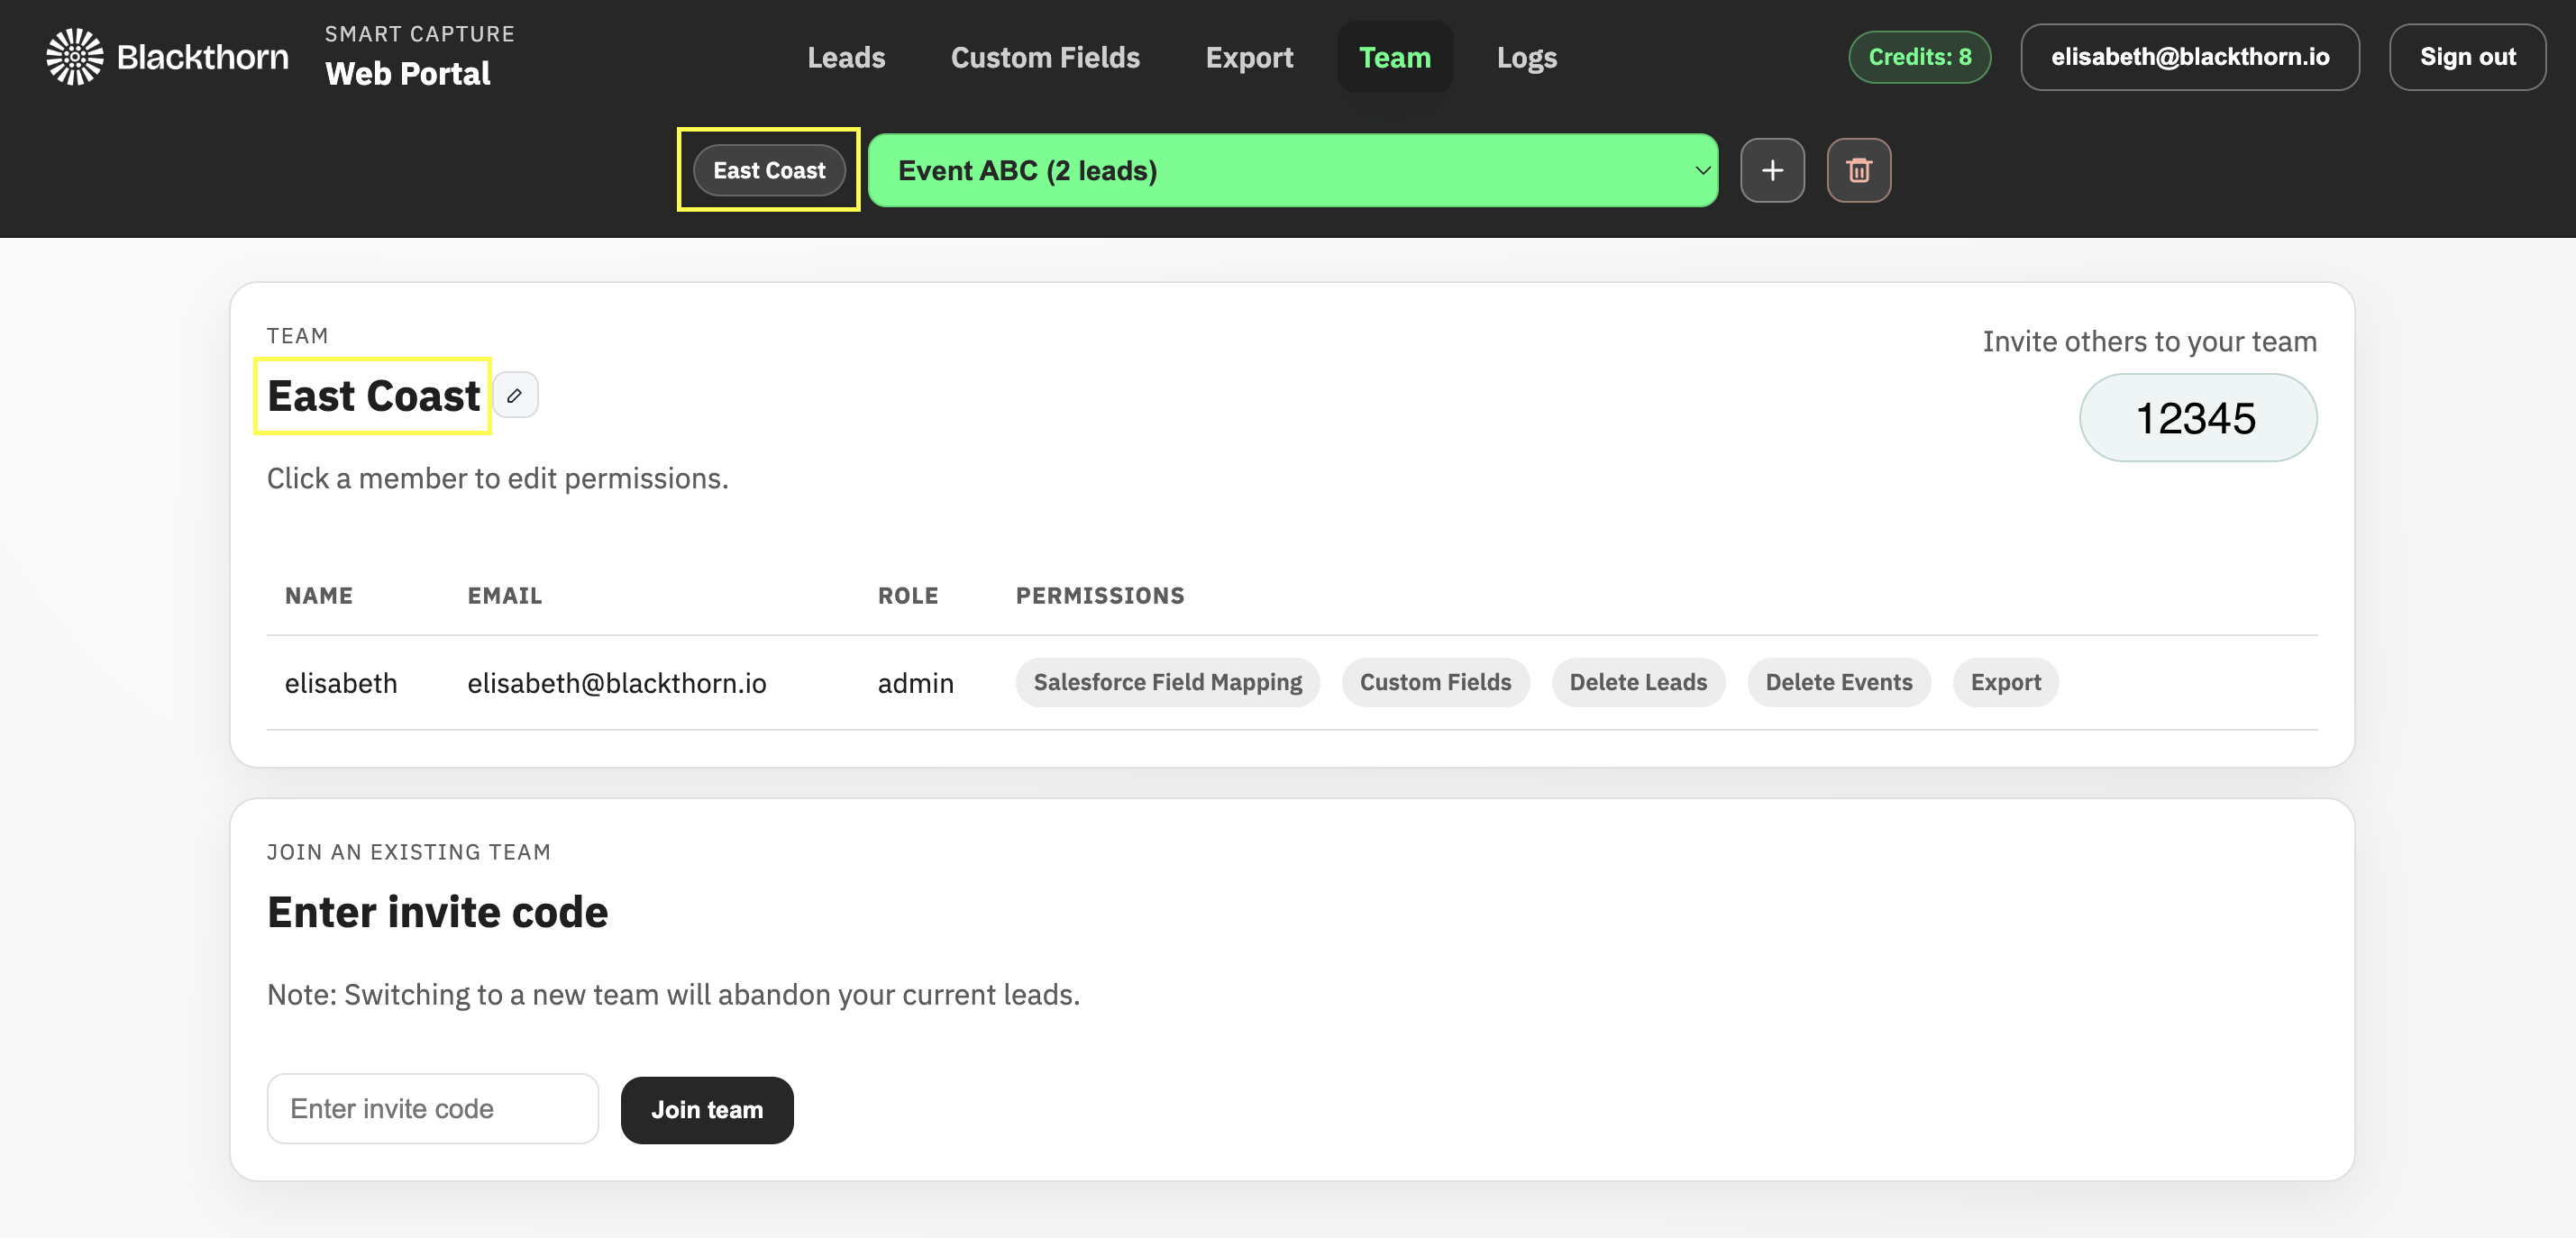
Change the Team Name
To change the name of your team, click the Edit icon next to the team's name.
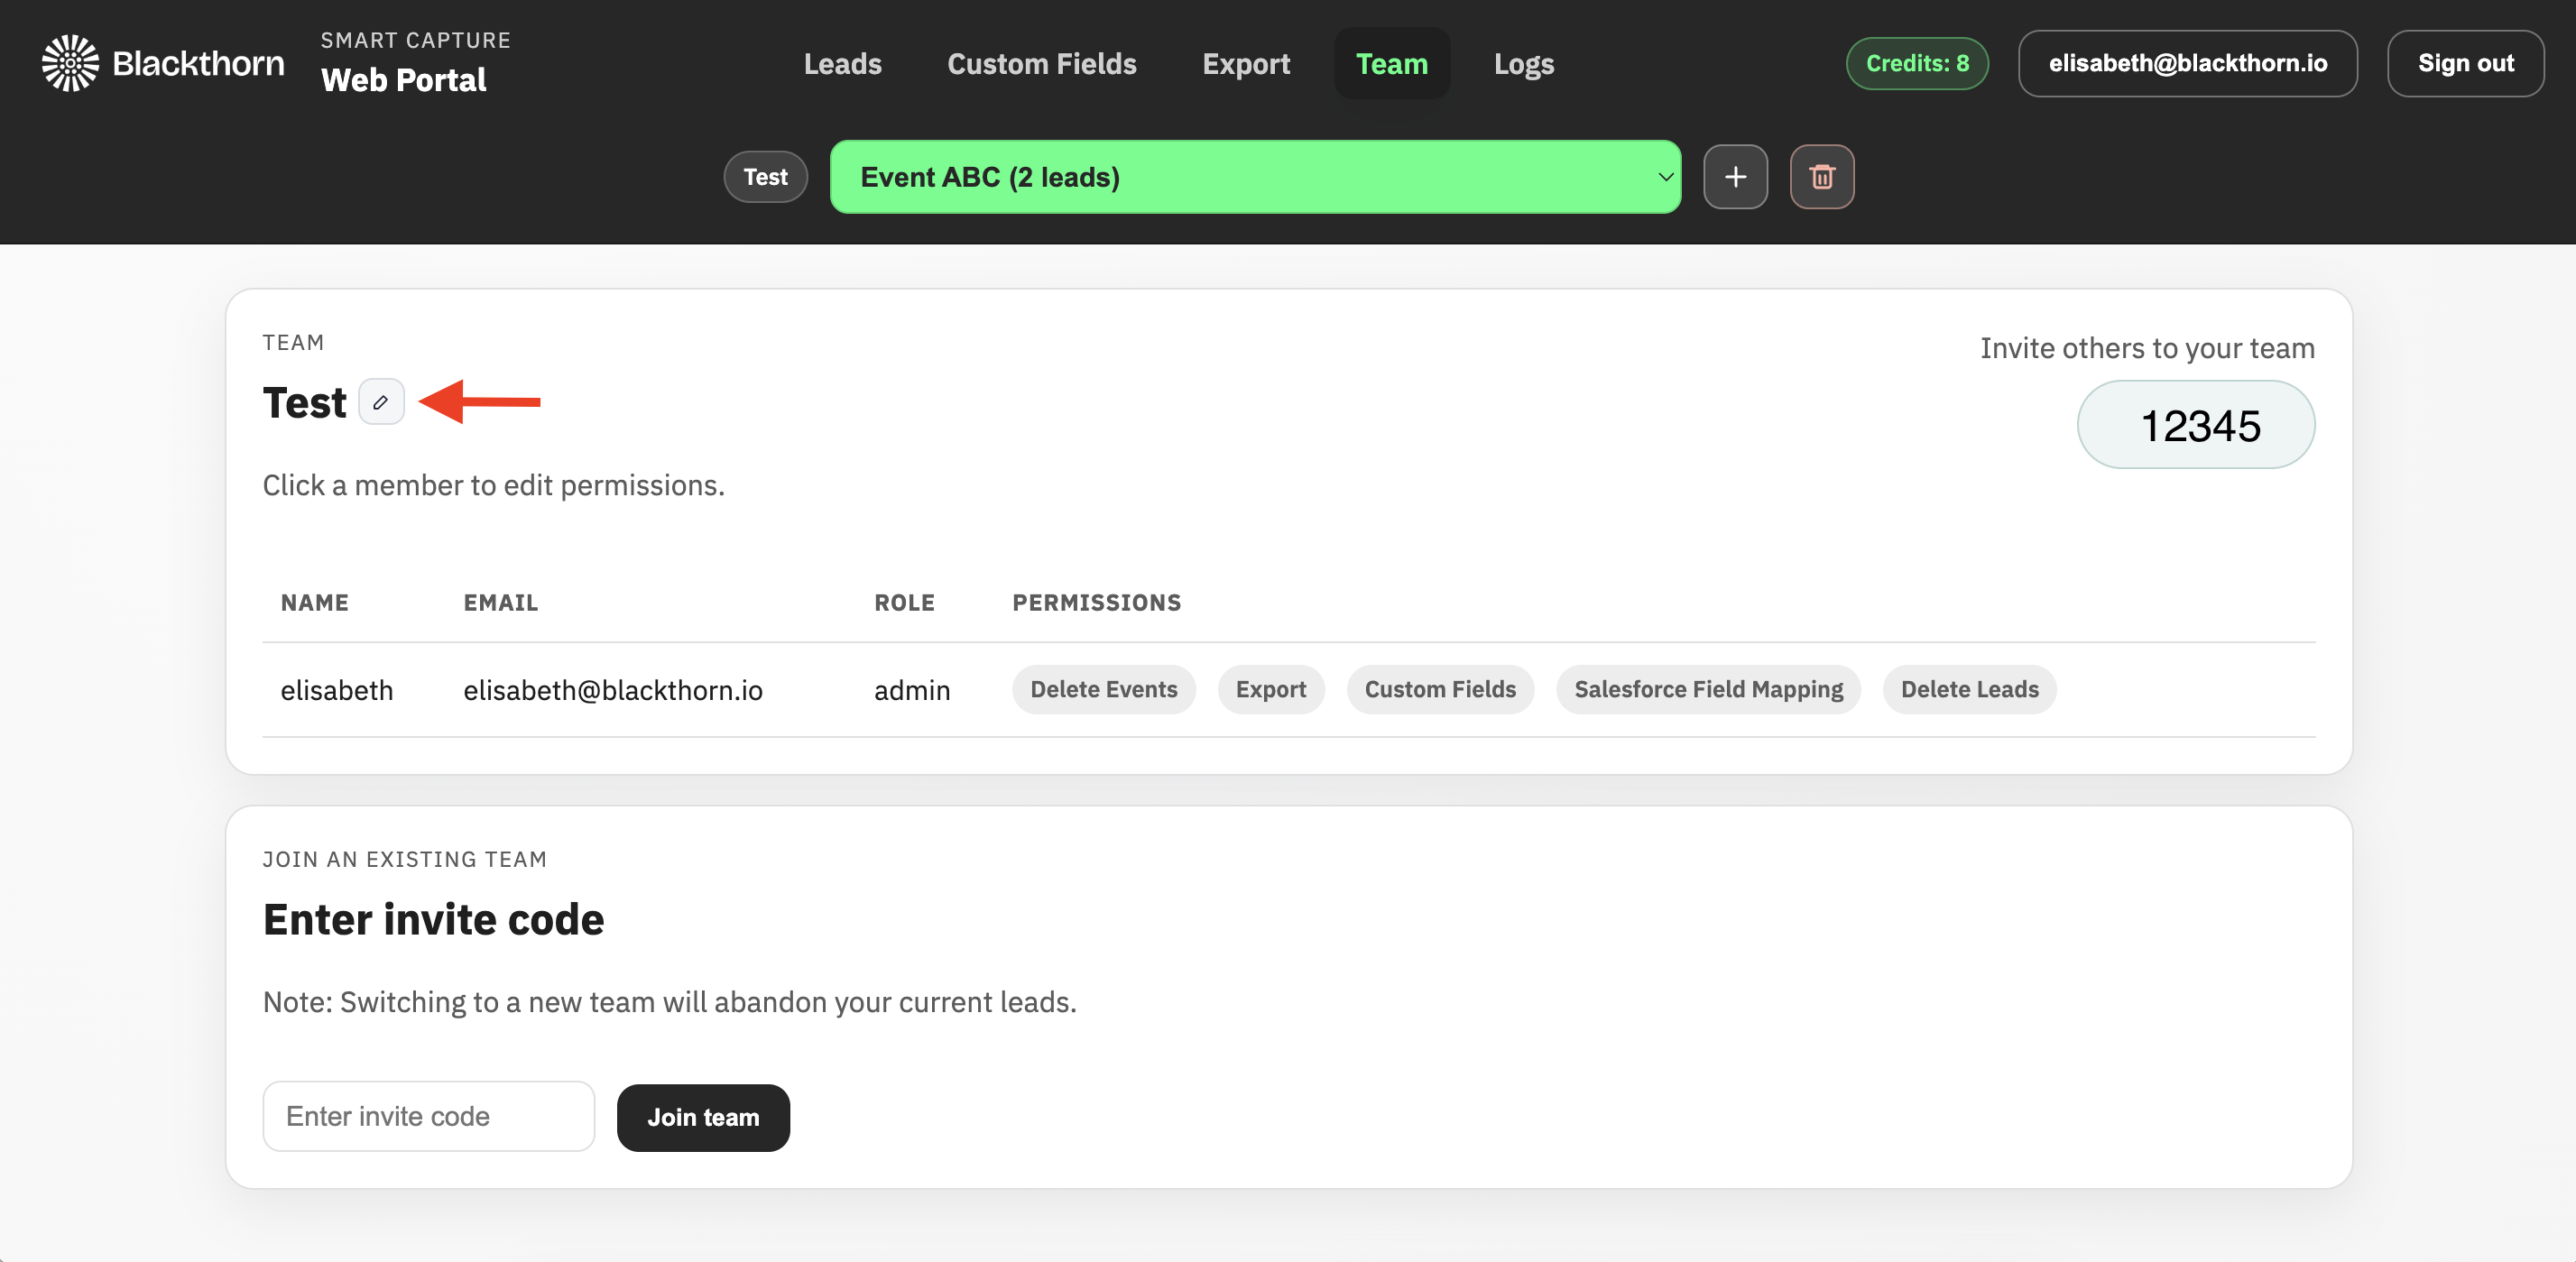
The updated team name will appear in two places.
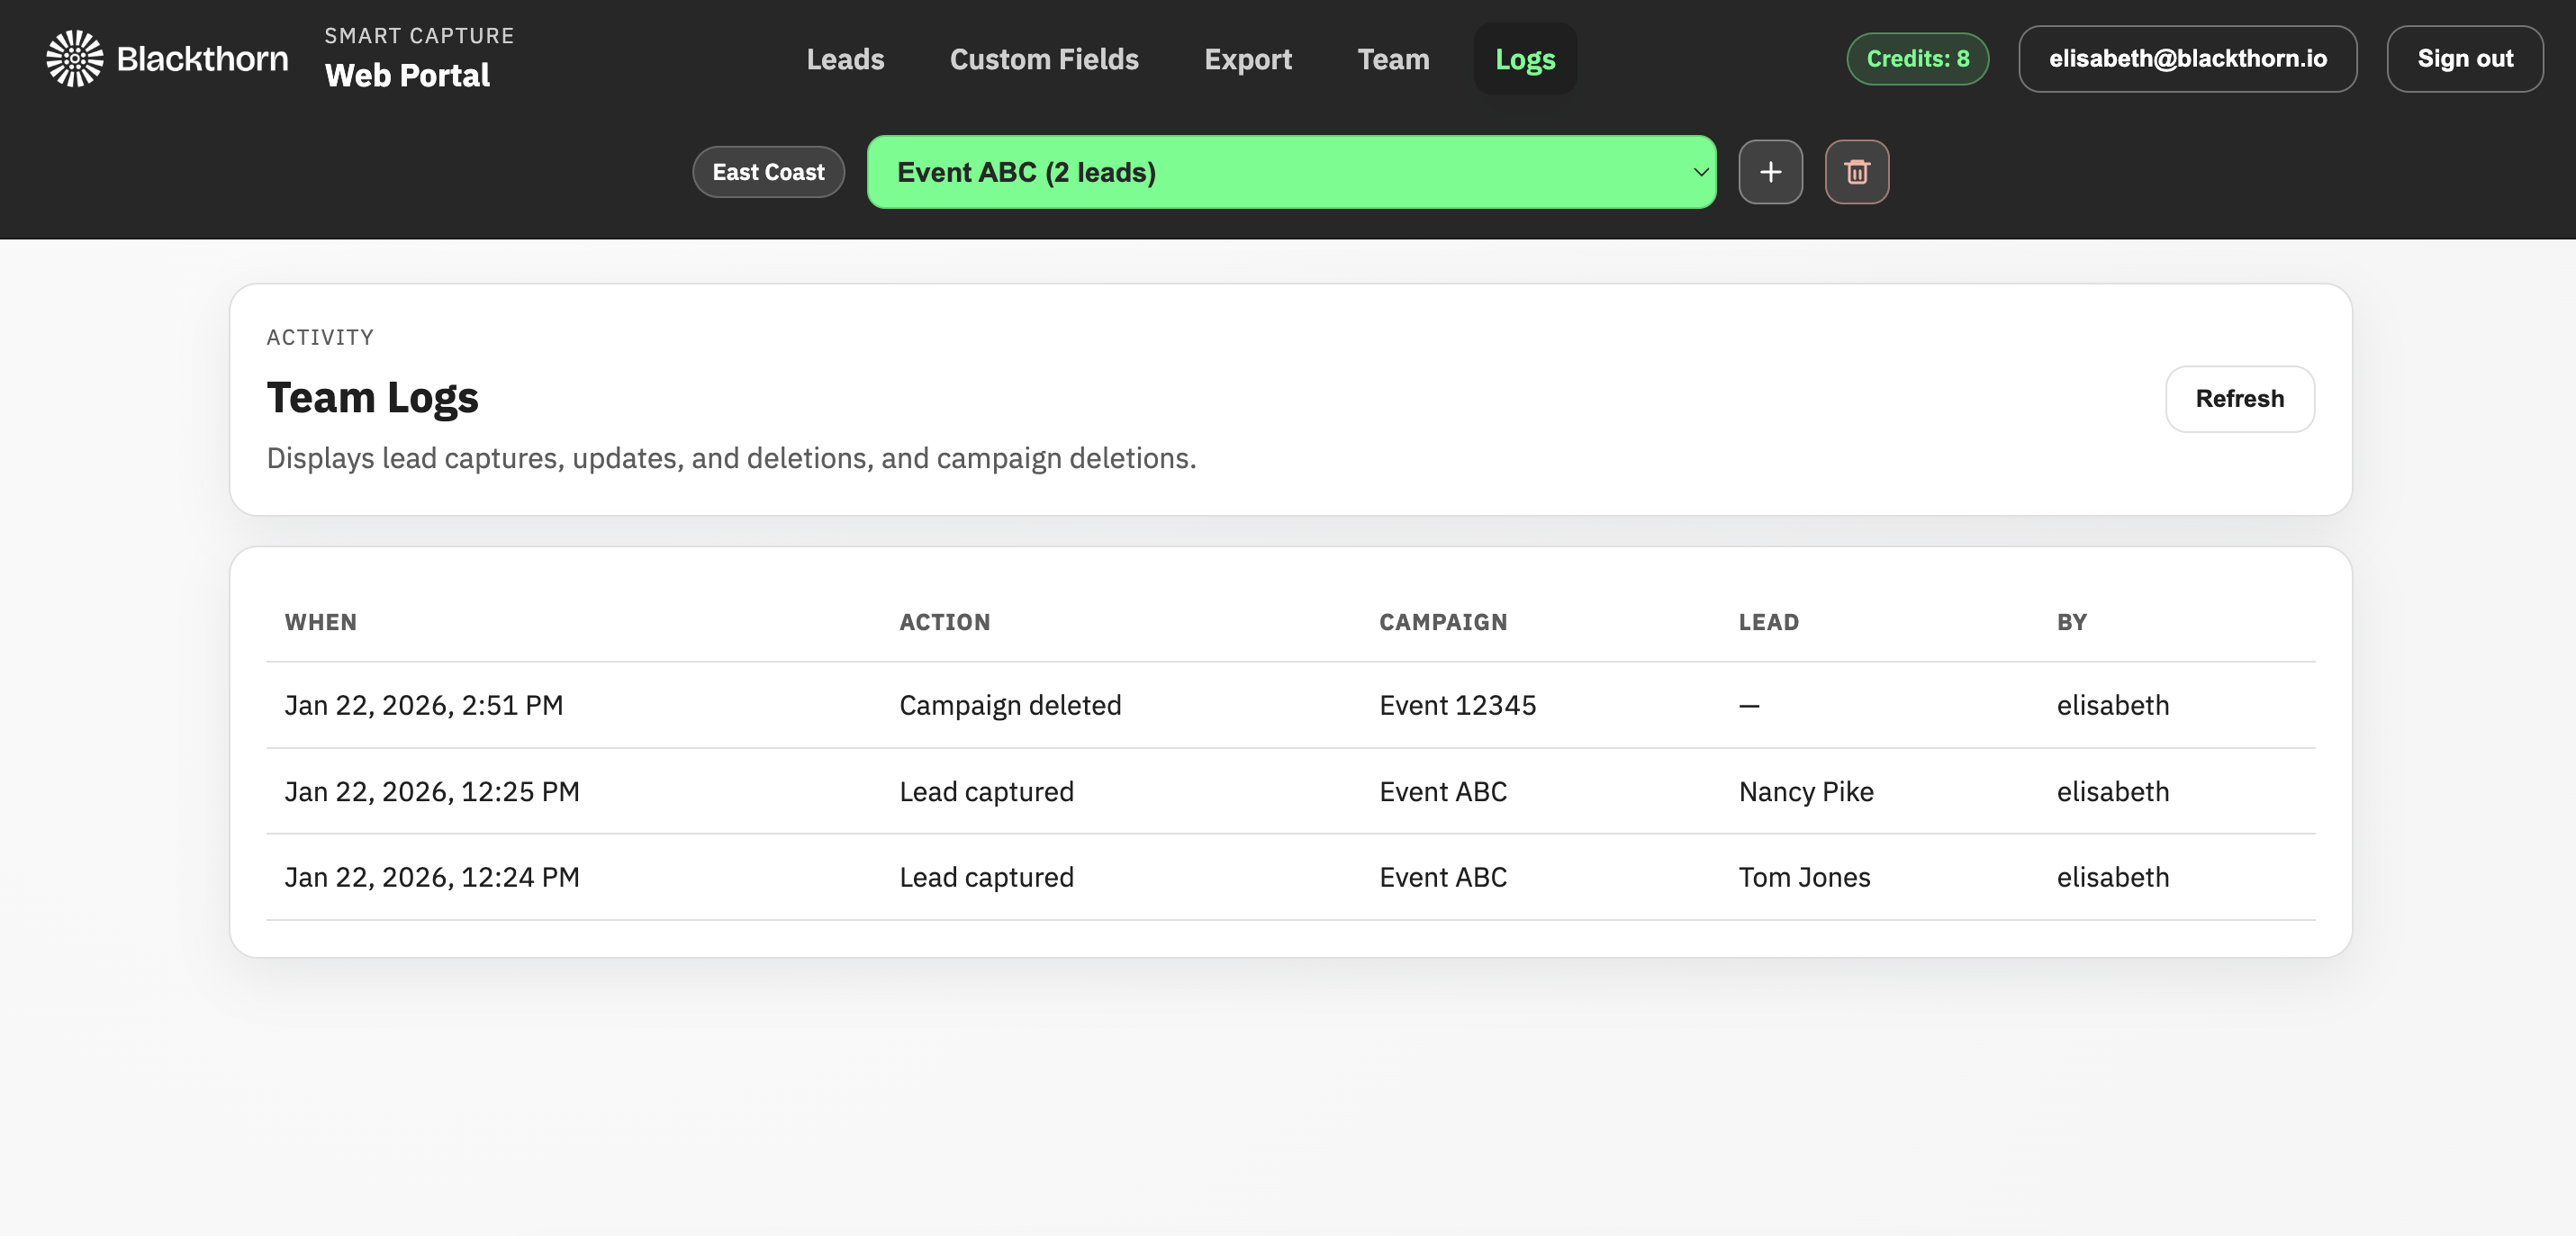
Logs
The Logs tab gives users with Admin permissions a general idea of the tasks a team has performed, including the capture, update, and deletion of leads, as well as the deletion of Smart Capture events.
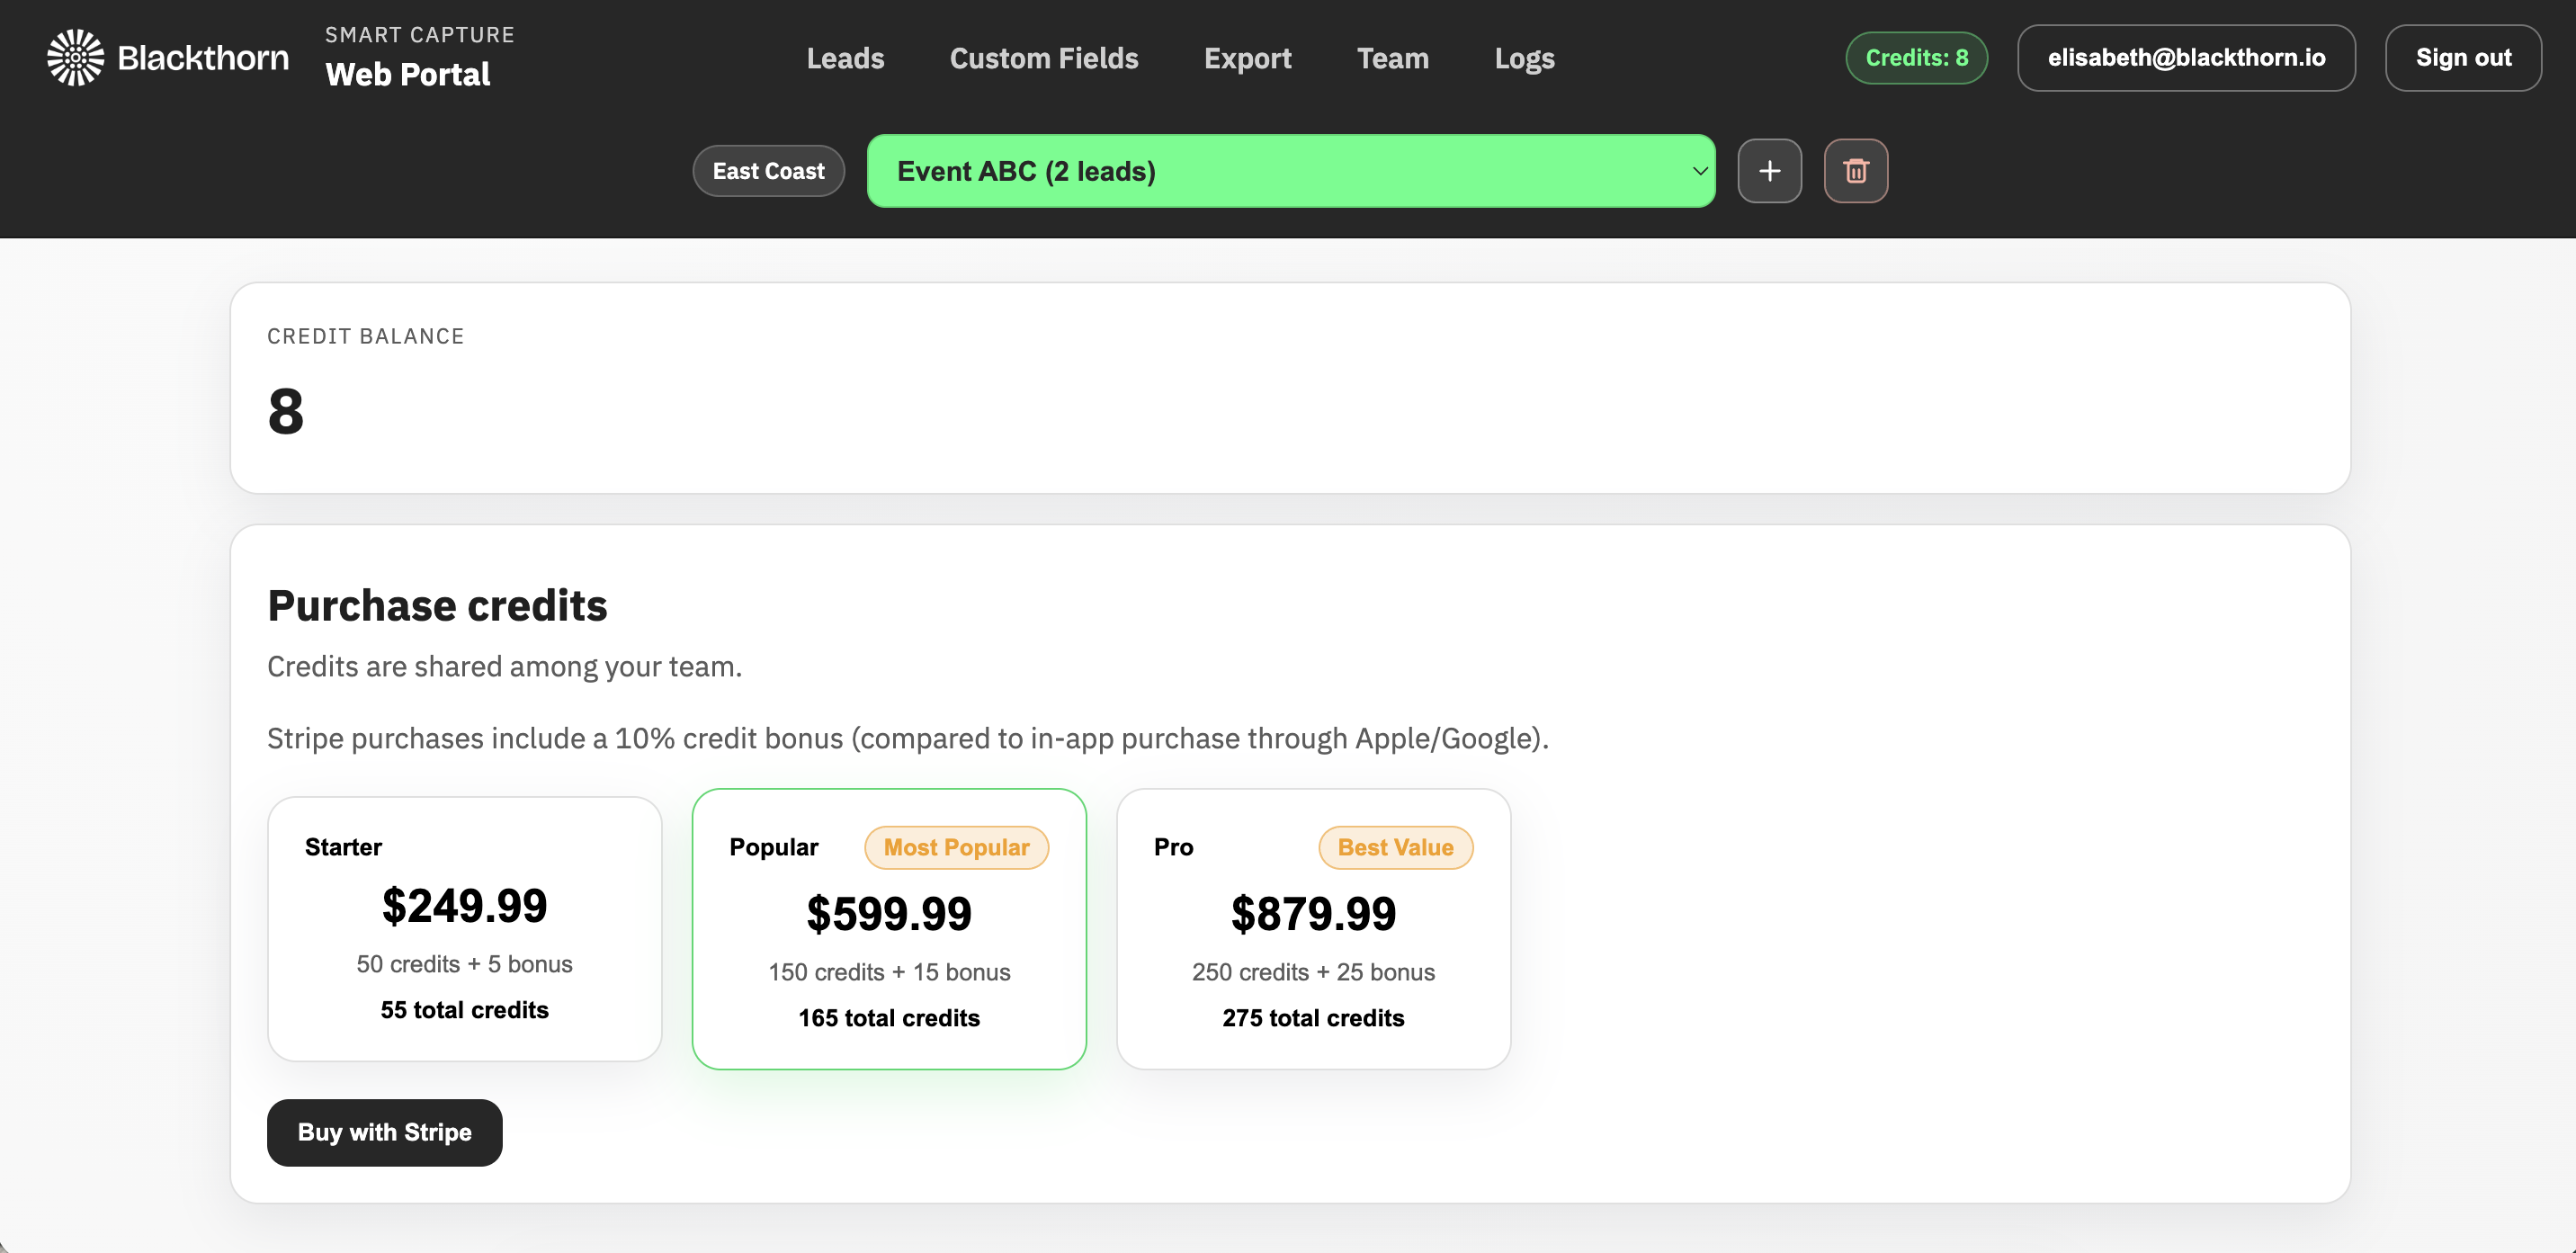
Purchase Credits
The Purchase Credits screen displays your current balance and lets you purchase new credits via Stripe (on U.S. iOS devices) or via an in-app purchase.
Note: You can still capture leads if the credit balance is 0. However, any leads in excess of the credit balance will not be enriched or exported until enough credits have been purchased.