The first step in the embedding process is to allowlist any domains you plan on using.
Allowlisting Domains
The domain page must be HTTPS and set up with an SSL certificate. If you want this domain allowlisted for multiple organizations, you must manually add the domain to each organization.
In the App Launcher, enter and click “Blackthorn | Events (Admin).”
Click the Blackthorn | Events Admin tab.
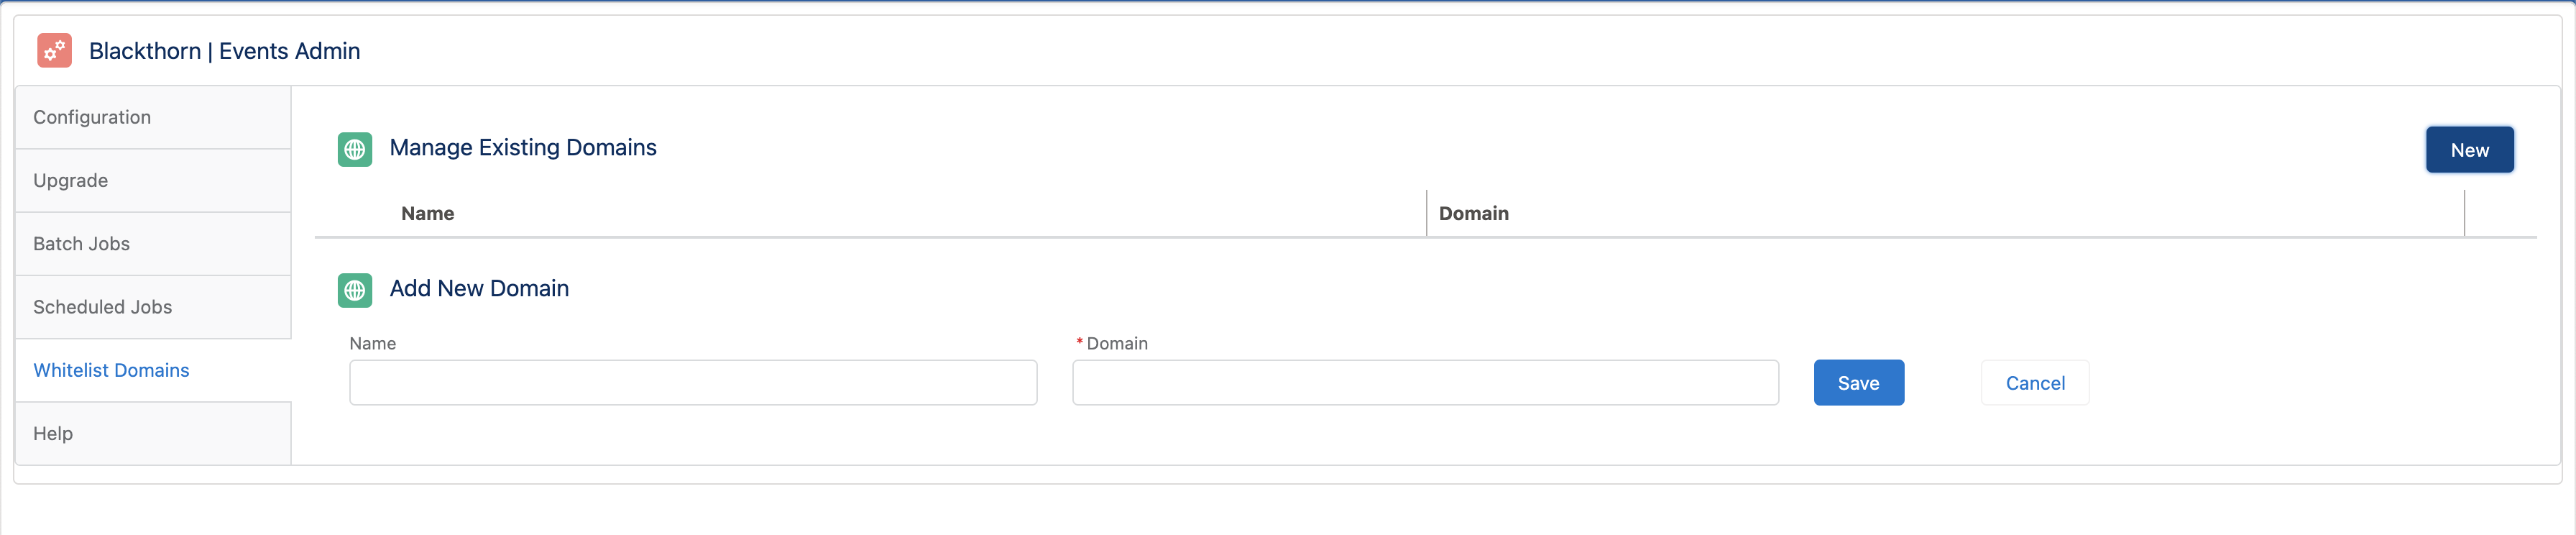
Click the Allowlist Domains tab.
Click New.
Enter a Name.
Set Domain = the domain you want to allowlist. (required) The "www" is not required.
Click Save.
 NOTE: Users no longer need to contact Blackthorn Support to share their domain when allowlisting a domain. However, if you have trouble setting up your vanity domain using these steps, please contact Blackthorn Support.
Add a Demo Domain
Complete the following steps to add the demo domain.
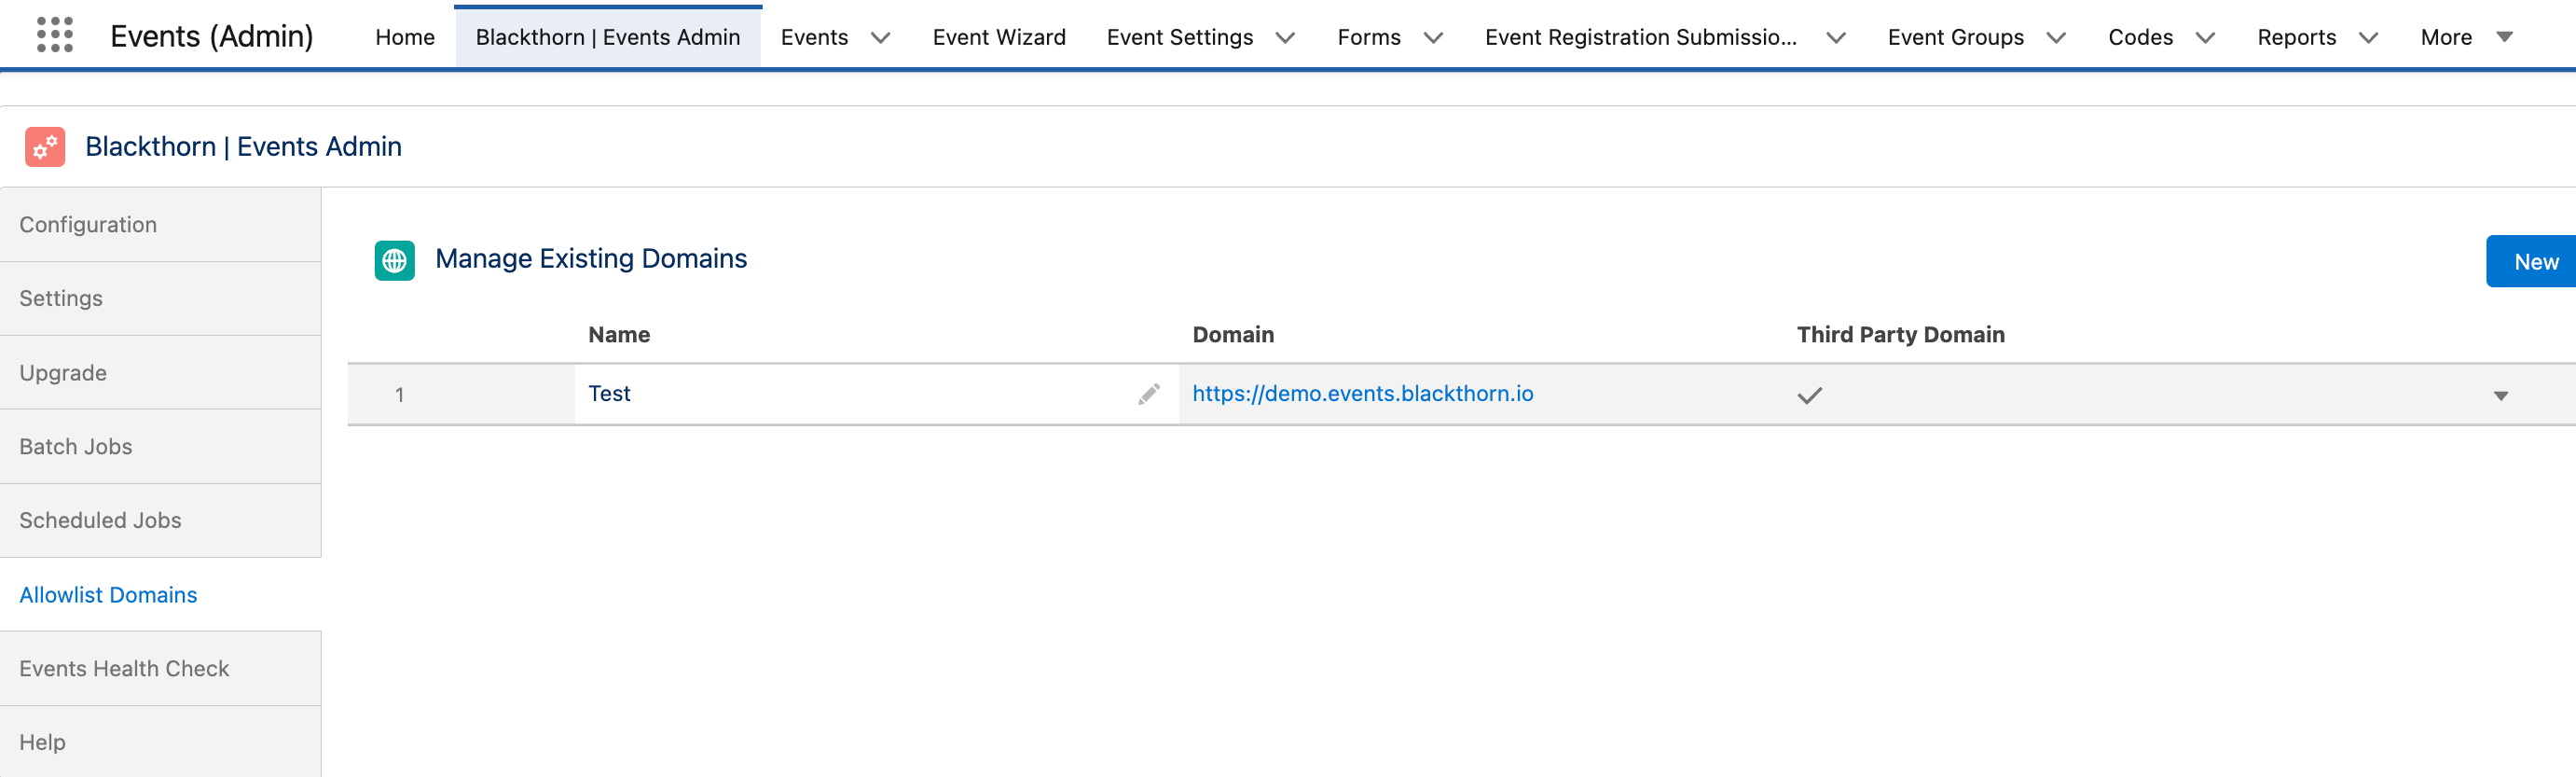
- In the App Launcher, enter and click “Events (Admin).”
- Click the Blackthorn | Events Admin tab.
- Click the Allowlist Domains tab.
- Click New.
- Enter a Name.
- Set Domain = “https://demo.events.blackthorn .io”. (required)
- Check the Third Party Domain checkbox.
- Click Save.
Set Up an Advanced Embedded Site
If you want to control every aspect of the Event's iframe, we recommend using the Advanced Embedding tool. This tool provides the option to use Events Listeners. Event Admins can use them to control the iframe's behavior and perform actions when the Events are triggered.
The Basics
For this example, we will use an Event Group with the Event Group URL set to “https://events.blackthorn.io/en/3itLbC6/g/ZZ8AC6qtdC”.
The first thing the Event Admin needs to do is initialize the BT Events embed.js. You do this by pasting the following script on the parent website where the Event will be embedded:
<script src=https://events.blackthorn.io/embed.js></script>
Now, you need to get the orgId and path parameters from the Event/Event Group webpage that will be embedded.
The orgId will be the same for all Events in your org. It is the first parameter immediately after the language parameter. In this example, the orgId parameter is “3itLbC6”.
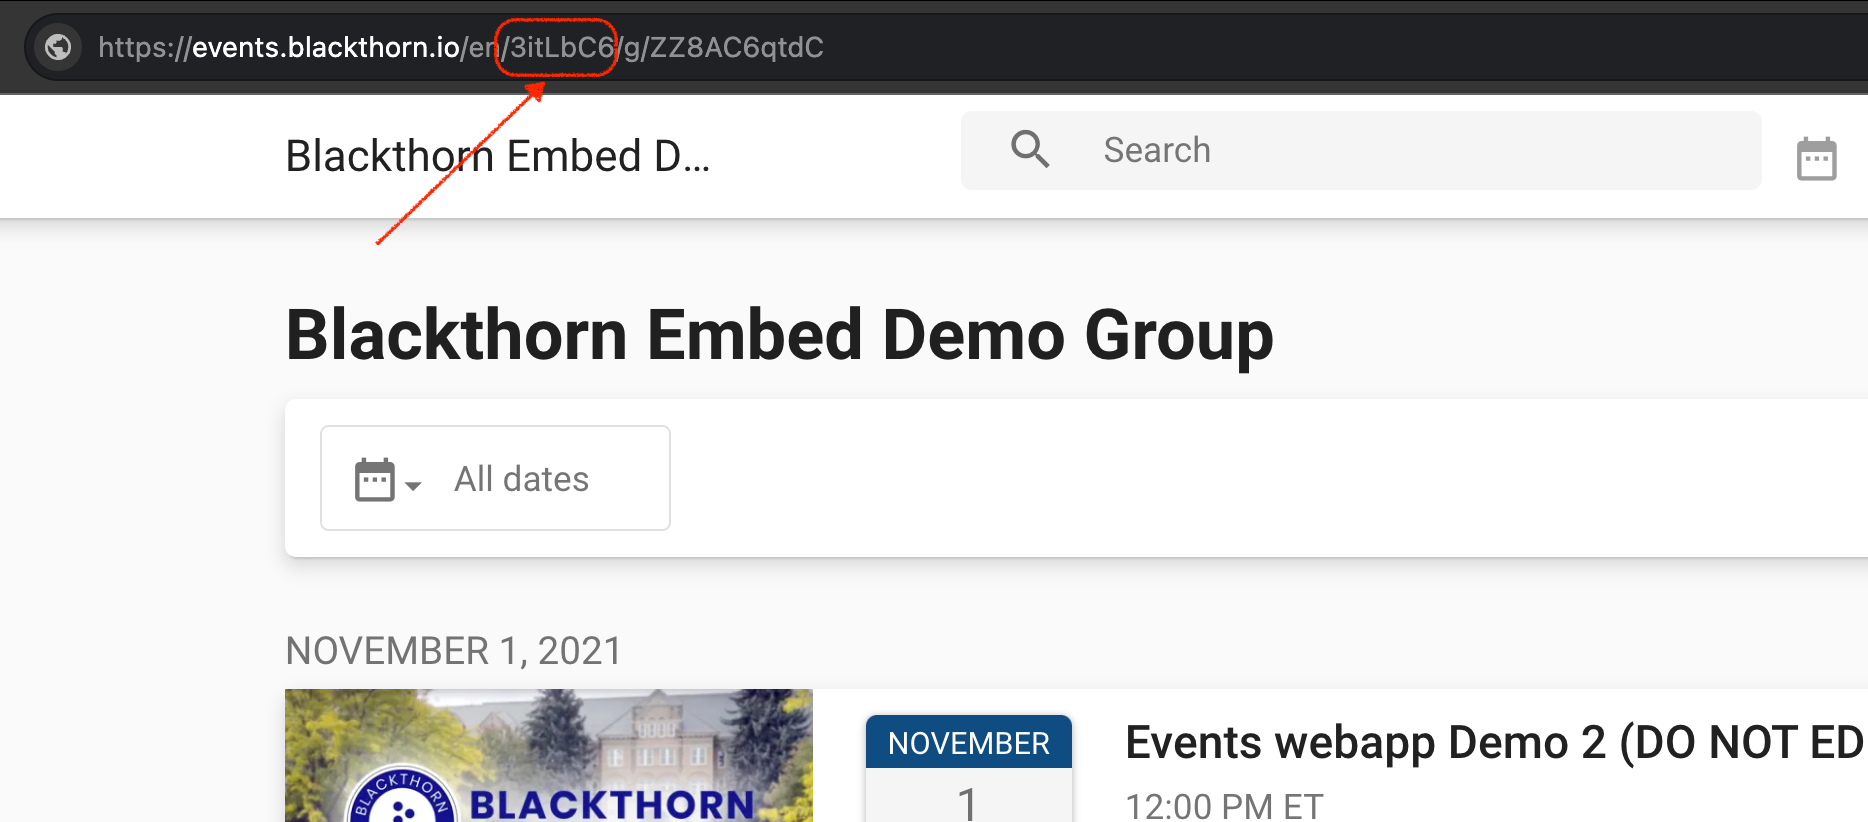
Now, you need to extract the path, which is the remainder of the Event Page URL or Event Group URL. In this example, the path is “/g/ZZ8AC6qtdC”.
Next, you need to create an HTML container that will contain the iframe. It will look something like this:
<html>
<div class="events-container"></div>
</html>
The container is currently empty, but you will insert the iframe later. To embed the Event or Event Group webpage, create the following:
// The minimal code to create an embed events in your page
var app = new EventsApp({
  orgId: '3itLbC6',
  path: '/g/ZZ8AC6qtdC',
});
app.mount('.events-container');
Notice that the app.mount targets the .events-container class. This lets the parent container know where the iframe will live on the parent page.
The whole snippet will look like this. There are also some basic styling parameters, such as height, min-height, and width, that you can update as needed.
<html>
  <body>
    <div class= "content" style="min-height: 100vh;">
      <div class="events-container" style="min-height: 100vh;"></div>
        <!--This is where the iFrame gets called-->
        <script src=https://events.blackthorn.io/embed.js></script>
        <script>
          var app = new EventsApp({
            orgId: "3itLbC6",
            path: "g/ZZ8AC6qtdC",
            height: "100%",
            width: "100%",
          });
          // This indicates where the iFrame will be mounted
          app.mount('.events-container');
          </script>
      </div>
  </body>
</html>
Example 1
Event Group embedded on a sample website
Example 2
Event Group embedded on a website with a footer and header
Using Script Tags
For advanced embedding in Digital Experience sites, script tags can only be used with Visualforce Pages. HTML Components in Digital Experience sites do not support script tags.
- Go to Setup.
- In the Quick Find box, enter and click “Visualforce Pages.”
- Click New.
- Check the Available for Lightning Experience, Experience Builder sites, and the mobile app checkbox.
- Add the code.
- Click Save.
- Go to your Experience Cloud/Community.
- Create a new page or locate the existing page where you want to add the component.
- Go to Components and look for Visualforce Pages.
- Select the page created previously.
- Add a height.
- Publish the Event.
Event Listeners
CONTENT_SIZE_CHANGED
Placing an iframe in a parent website creates two scrollbars - one for the iframe and one for the parent website. To remove one of the scrollbars and improve the user experience, use the CONTENT_SIZE_CHANGED Event Listener that the Events iframe offers. It will set a custom height based on the size of the content.
Using the following iframe structure, this is how it works.
<html>
  <body>
    <div class= "content" style="min-height: 100vh;">
      <div class="events-container" style="min-height: 100vh;"></div>
        <script src=https://events.blackthorn.io/embed.js></script>
        <script>
          var app = new EventsApp({
            orgId: "3itLbC6",
            path: "g/ZZ8AC6qtdC",
            height: "100%",
            width: "100%",
          });
          app.mount('.events-container');
          </script>
      </div>
  </body>
</html>
Add scrolling: “no”, as a parameter to remove the iframe scrollbar.
Add the Event Listener code.
listeners: [
{
event: "CONTENT_SIZE_CHANGED",
handler: function (params) {
// We are targeting here the events-container (Where the iframe is)
const container = document.querySelector(".events-container");
if (container) {
// Apply the dynamic height
container.style.height = params.height + "px";
}
// This is the parent container where the events-container is.
const content = document.querySelector(".content");
if (content) {
content.style.minHeight = params.height + "px";
content.style.height = params.height + "px";
}
},
},
]
The new code will appear as follows:
<div class= "content" style="min-height: 100vh;">
      <div class="events-container" style="min-height: 100vh;"></div>

      <!--This is where the iFrame gets called-->
      <script src=https://events.blackthorn.io/embed.js></script>
      <script>

        var app = new EventsApp({
          orgId: "5e53zvb7",
          path: "g/7BBXYj8cW9",
          height: "100%",
          width: "100%",
          scrolling: "no",
          listeners: [
            {
              event: "CONTENT_SIZE_CHANGED",
              handler: function (params) {
                // We are targeting here the events-container (Where the iframe is)
                const container = document.querySelector(".events-container");
                if (container) {
                  // Apply the dynamic height
                  container.style.height = params.height + "px";
                }
                // This is the parent container where the events-container is.
                const content = document.querySelector(".content");
                if (content) {
                  content.style.minHeight = params.height + "px";
                  content.style.height = params.height + "px";
                }
              },
            },
          ],
        });
        // This indicates where the iFrame will be mounted
        app.mount('.events-container');

      </script>

    </div>
Example:
Here’s a sample of the website with the updates.
ROUTE_CHANGED
Another common issue with iframes is how they scroll when opening a new page. For example, if the iframe is smaller than the page you are scrolling, the iframe doesn’t always scroll up automatically when an Event is opened from an Event Group listing.
Use the ROUTE_CHANGED Event Listener to prevent this from happening whenever the iframe changes routes.
This code instructs the iframe to start from the top of the screen instead of remaining in the previously scrolled position.
“{
event: 'ROUTE_CHANGED',
handler: function(params) {
routeChangeCount++;
// The reason for this is so that the page doesn't scroll to the iFrame on page load.
// (There are two route changes before the iFrame actually loads)
if (routeChangeCount <= 2) {
return;
}
// Scroll the page to bring the iframe to the top
const container = document.querySelector('.content');
//What this does is that when route changes it will move the focus to the top of the iFrame
if (container) {
const containerTop = container.getBoundingClientRect().top + window.scrollY;
window.scrollTo({ top: containerTop, behavior: 'smooth' });
// Ensure the container fills the viewport
container.style.height = '100vh';
}
}
}”
The new code will appear as follows:
<div class= "content" style="min-height: 100vh;">
    <div class="events-container" style="min-height: 100vh;"></div>

    <!--This is where the iFrame gets called-->
    <script src=https://events.blackthorn.io/embed.js></script>
    <script>
      let routeChangeCount = 0; // Counter for route changes
      /*
      We are defining org id whoch is the first parameter of event group url
      The reason for height and width parameters is to ensure the iFrame take all the available space on
      the parent container. That is later updated by a variable as page changes.
      */
      var app = new EventsApp({
        orgId: '5e53zvb7',
        path: "g/7BBXYj8cW9?date=ALL,ALL",
        height: "100%",
        width: "100%",

        listeners: [
          {
            event: 'ROUTE_CHANGED',
            handler: function(params) {
              routeChangeCount++;
              // The reason for this is so that the page doesn't scroll to the iFrame on page load.
              //  (There are two route changes before the iFrame actually loads)
              if (routeChangeCount <= 2) {
                return;
              }
              // Scroll the page to bring the iframe to the top
              const container = document.querySelector('.content');
              //What this does is that when route changes it will move the focus to the top of the iFrame
              if (container) {
                const containerTop = container.getBoundingClientRect().top + window.scrollY;
                window.scrollTo({ top: containerTop, behavior: 'smooth' });
                // Ensure the container fills the viewport
                container.style.height = '100vh';
              }
            }
          },
          {
            event: 'CONTENT_SIZE_CHANGED',
            handler: function(params) {

              // We are targetting here the events-container (Where the iframe is)
              const container = document.querySelector('.events-container');
              if (container) {
                // Apply the dynamic height
                container.style.height = params.height + 'px';
              }
            // This is the parent container where the events-container is.
              const content = document.querySelector('.content');
              if (content) {
                content.style.minHeight = params.height + 'px';
                content.style.height = params.height + 'px';
              }
            }
          },
        ]
      });
      // This indicates where the iFrame will be mounted
      app.mount('.events-container');

    </script>

  </div>
To review, we have made the following changes to the code above.
- We added a count to the ROUTE_CHANGED Event Listener, so the scrollbar only scrolls to the top after the second ROUTE_CHANGED. This is because a redirect occurs as soon as the page loads. If we don’t add the count, the user’s focus will be on the iframe when the page loads, which we don’t want.
- The added “window.scrollTo” instructs the browser to focus on the container with the class name “.content” which is the parent container where the iframe was inserted. This occurs while maintaining the code for content-resizing (see above).
You can see the new behavior on this sample website with the embedded iframe.
Notice how the iframe integrates better with the parent website. There is a smooth transition to the top of the page, so the reader’s eye always remains focused on important content on the parent page.
FORM_SUBMITTED
The FORM_SUBMITTED Event Listener has many use cases, ranging from redirecting users to a new page after completing the registration process or extracting data from the registration form directly to the parent website. (Post-registration Form answers will not trigger the Event Listener.)
When an Attendee submits a Form, the host page receives a FORM_SUBMITTED event with the following details from the pre-registration Form.
path- form submission URL pathname- form namedata- form submission data
Event Admins can set up and use the listener as needed. Here’s a demo of how it can be used.
Tracking Form Responses with Google
Your organization’s Google Analytics account can "listen" to Events in an iframe to link the Attendee journey to your main Google Analytics account with an Event Listener. The Google Analytics ID entered in the Salesforce org will determine which Google Analytics account the collected data will go to.
In this example, the Google Analytics account will use the FORM_SUBMITTED Event Listener to complete the following steps.
- “Listen” to Form changes
- Extract the changes from the iframe
- Collect the data for the Google Analytics account
- Redirect the Attendee to a new page after completing the checkout process
In this example, you will see this code.
{
event: “FORM_SUBMITTED”,
handler: function (params). {
		logEvent(“FORM_SUBMITTED:  “ + JSON.stringify(params)};
		onFormSubmitted(): // Call the function to handle the submission
},
},
and
// Function to handle the form submitted event
function onFormSubmitted( ) {
// Open Google.com in a new tab when the event is triggered
window.open(“https://www.google.com”, “_blank”);
}
While an Attendee registers for an Event, the Event Listener listens and then opens a separate page, www.google.com, in a new blank tab outside the iframe. This process can also be performed using the Event Page URL or the website of your choice.
- Complete the Event registration process, but don’t click the Register button.
- Before clicking Register, look at the code to see that no Forms have been submitted.
- Click Register.
- You will be redirected to the URL that was added to the code. In this case, a blank Google.com tab opens.
- The ERS records are processed in the background.
- The resulting code shows the Attendee form data (first name, last name, email, language, question answers, and the
path(where the form was submitted)).
APP_READY
The APP_READY Event Listener notifies the parent page when the iframe is done loading and emits a boolean value that the Event Admin can use to perform tasks. Those tasks may include showing a custom preloader on the whole website while the iframe is loaded or a message instructing the user that something is loading.
By default, Blackthorn shows a loader screen, but if you want to customize the user experience, the APP_READY Event Listener is available.
Embed a Media Player
Iframe Injectors injectors allow Admins to embed iframes on a Custom Content record. This feature is behind a feature flag, which means it can be enabled on a per org basis on the License record (LMO).
To enable it, add a License Metadata entry for CONTENT_IFRAME_ENABLED with the value true.
To add an iframe to a Custom Content record, enter iframe data, like the following example, in the Content rich text field.
"[embed prop1="xxx" prop2="xxx" .... propn="xxx"] [/embed]" where props are the required properties for the iframe (width, height, src, ….).
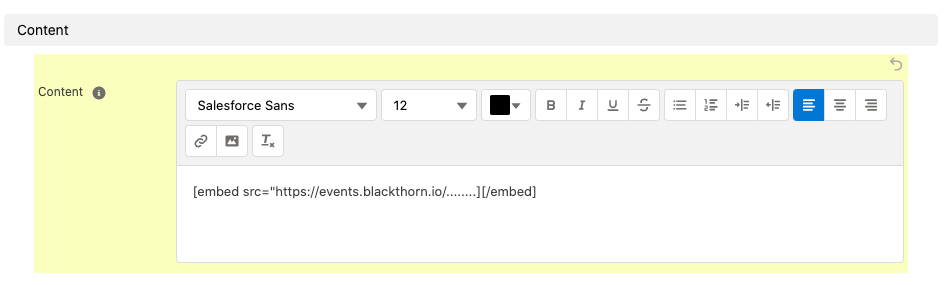
If the feature is not enabled via License Metadata, the embed tag will be shown as plain text.