The Data Dictionary feature provides the flexibility to override button labels and other static text on your hosted Event pages. This gives you the ability to further customize the experience for your Attendees, and even better, it supports multi-language Events and merge fields as well!
Required Permission Sets and Licensing
To use the Data Dictionary feature, you must also have a Blackthorn Payments license, as well as access to the following objects:
Data Dictionary Group: Create/Read/Update
Data Dictionary Entry: Create/Read/Update
Supported Languages
We do not currently support all languages. The following is a list of the languages we support.
Arabic
Chinese (Simplified)
Chinese (Traditional)
Czech
Danish
Dutch
Finnish
French
German
Haitian Creole
Hindi
Hmong
Hungarian
Indonesian
Italian
Japanese
Korean
Norwegian
Polish
Portuguese
Romanian
Russian
Somali
Spanish
Swedish
Thai
Turkish
Vietnamese
One-to-One Relationships
Data Dictionary Groups and Data Dictionary Entries
Each Data Dictionary Group can contain only one Data Dictionary Entry record per language (Language / Locale).
For example, a Data Dictionary Group contains three Data Dictionary Entries. Each one contains its own language: English, Spanish, and French. If you create a fourth Data Dictionary Entry record using French, the new Data Dictionary Entry record will replace the original Data Dictionary Entry record in French.
If, instead of French, your fourth Data Dictionary Entry record contains Polish, your Data Dictionary Group will include four Data Dictionary Entry records: English, Spanish, French, and Polish.
Keys and Values
For each Data Dictionary Entry’s Language / Locale, there can only be one Value per Key. Creating a new Data Dictionary Entry for an existing Key will replace the current Value with the new one.
Create a Data Dictionary Group
If a label or button isn't translating correctly (we use Google Translate) or if you want to override a value with your own label, you can manually define the label for your Event.
If you want to override out-of-the-box values, the first step is to create a Data Dictionary Group and populate it with Data Dictionary Entries.
In the App Launcher, enter and click "Data Dictionary Group".
Click New.
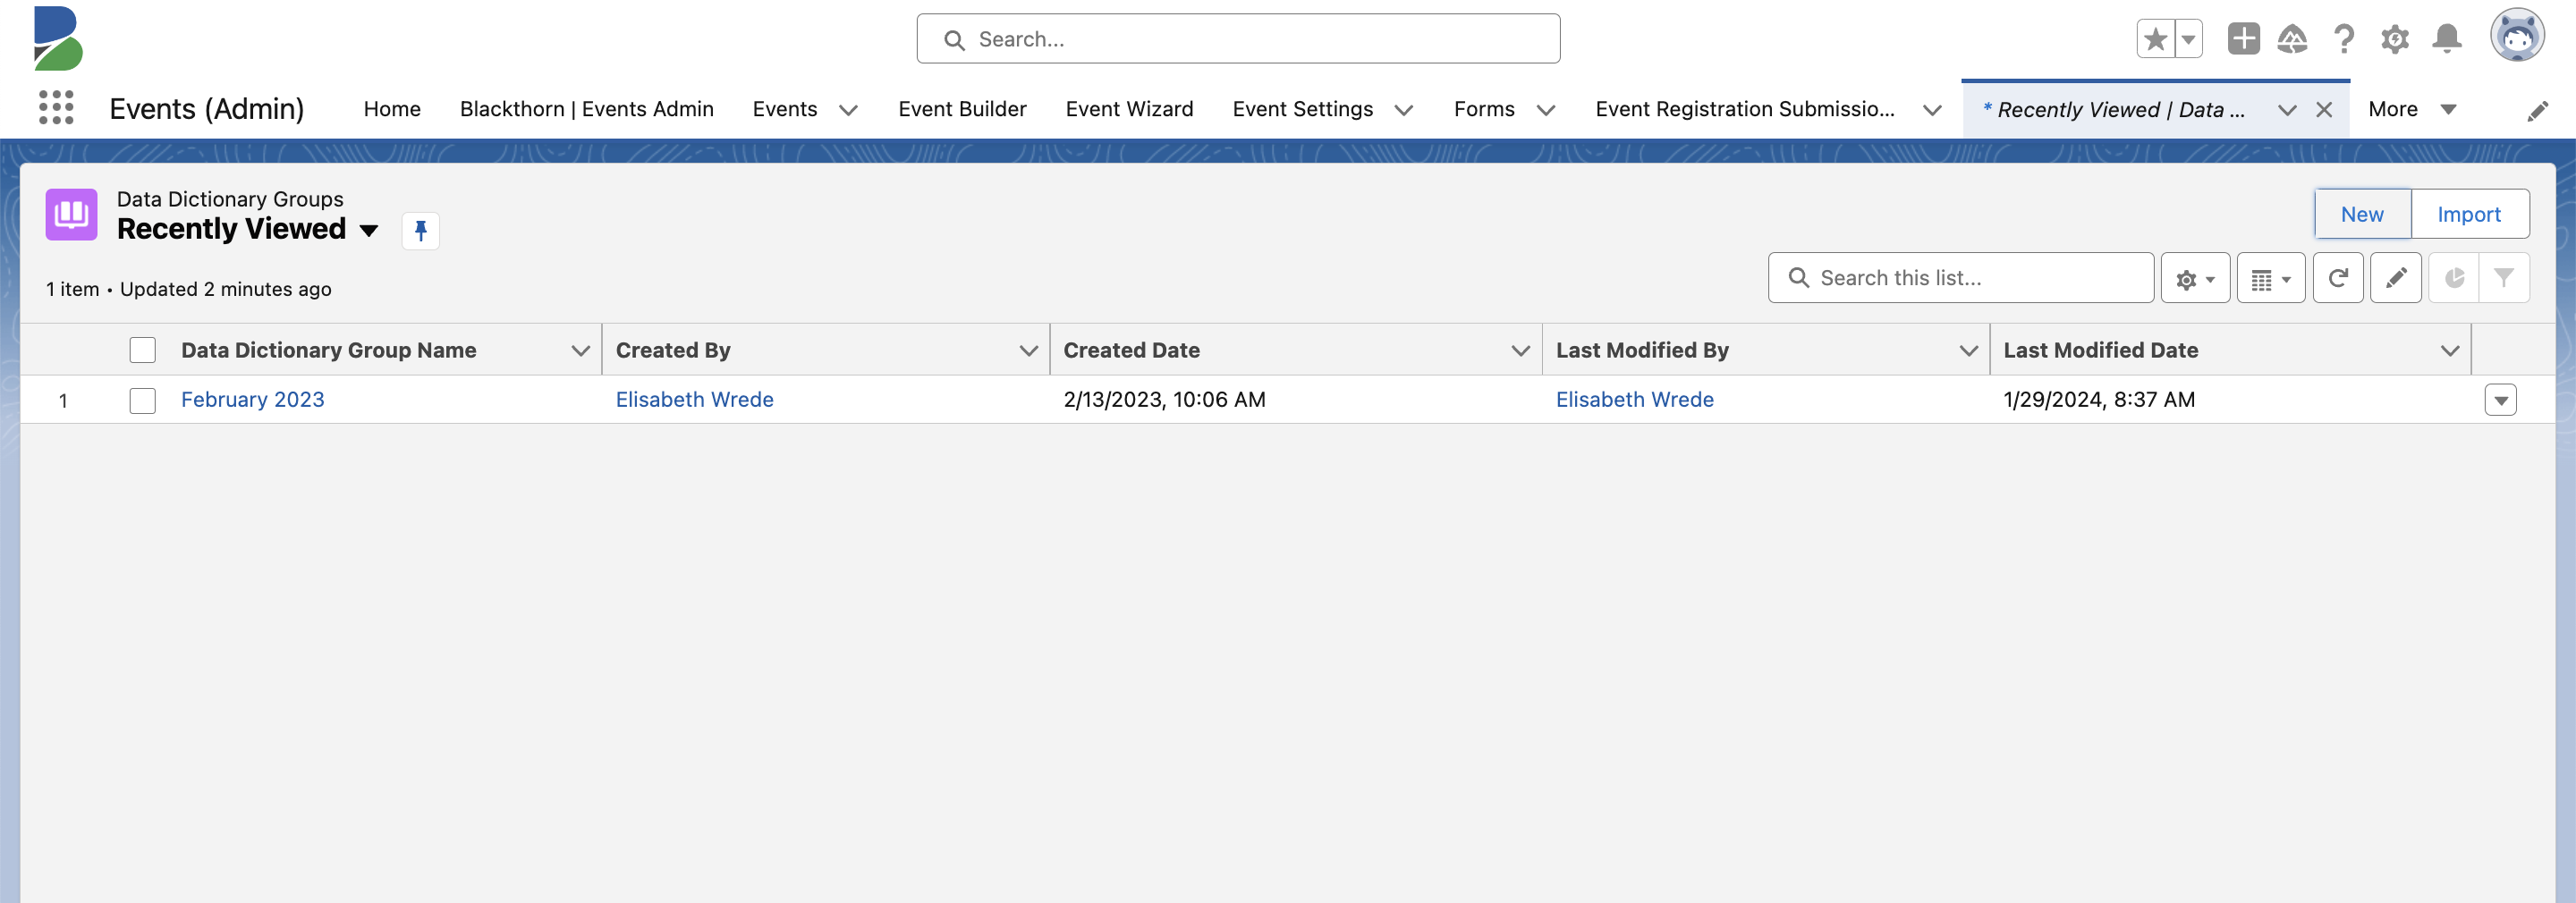
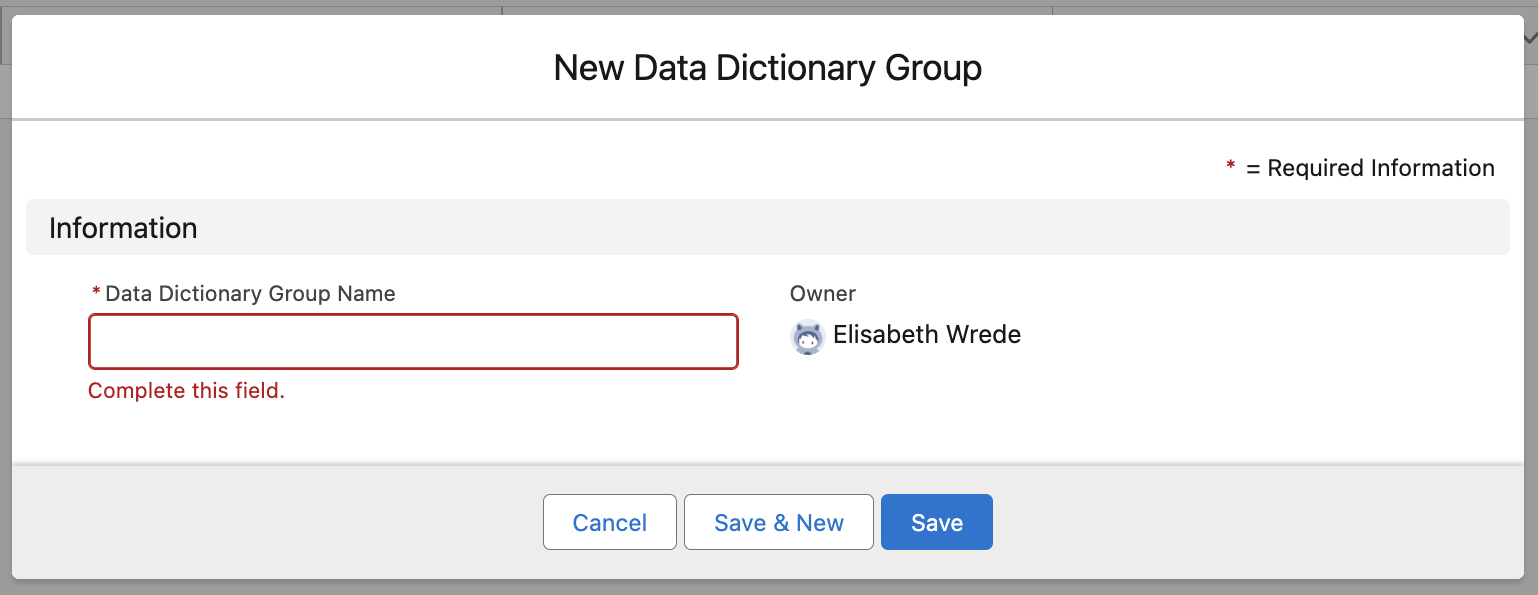
Enter a Data Dictionary Group Name.
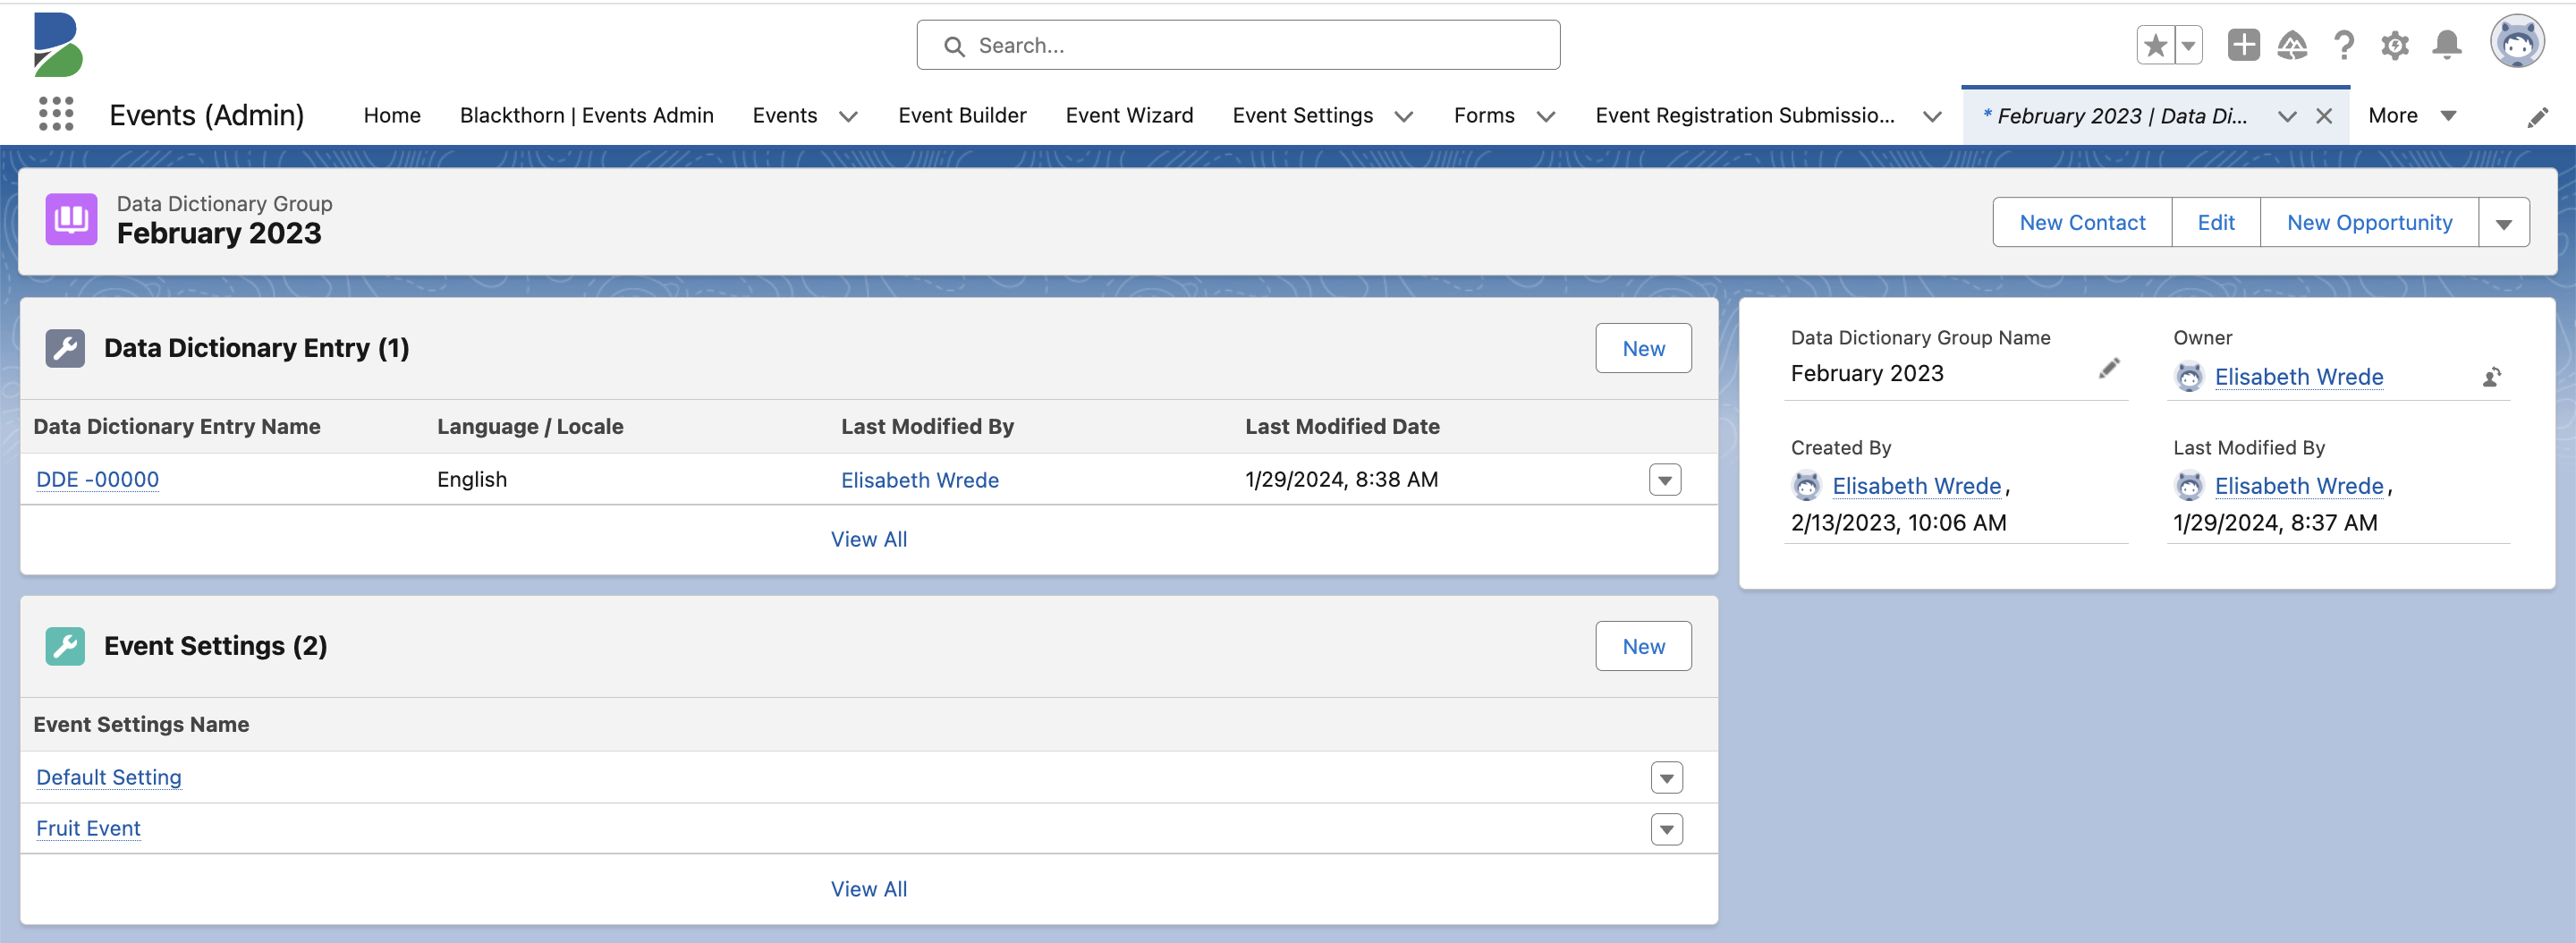
Click Save.
Click New next to the Data Dictionary Entry. In a Data Dictionary Group, each Data Dictionary Entry can only support one language.
The Data Dictionary Values field contains the Language / Locale, Key, and Value. There can only be one Value per Key for each Language / Locale. Creating a new entry for an existing Key will replace the current Value with the new one. Click here for the full Events Data Dictionary list. Capital letters must be used in the Key field. These are some of the most frequently used options.
Key = "ACT_ADD_ATTENDEE" and Value = "Add Attendee"
Key = "ACT_DONE" and Value = "Done"
Key = "LBL_FREE" and Value = "Free"
Key = "ACT_REGISTER" and Value = "Registration"
Key = "MSG_REGISTRATION_CONFIRMED" and Value = "You are registered!"
Select the Language / Locale you'd like to change.
Enter a Key and Value.
Click Add Row to add additional entries or click Save.
Click Back to return to the Data Dictionary Group record.

Add Additional Keys to a Data Dictionary Entry
If you need to add additional keys to the Data Dictionary Entry, click the menu (upside-down triangle) next to the Data Dictionary Entry. From there, click Add Row to add a new Key and Value. When you are done, click Save and Back to return to the Data Dictionary Group.
Edit an Existing Data Dictionary Entry
From the Data Dictionary Group, locate the Data Dictionary Entry you want to update.
Click the upside-down arrow and click Edit.
Change the Key and/or Value or delete the Key and Value.
Click Save.
Click Back to return to the Data Dictionary Group.
USE CAPITAL LETTERS
Use capital letters in the Key field.
Example
For this example, we will set Language / Locale = "English". Now, we can select any word or phrase to replace an action with. For this example, we set Key = “ACT_COMPLETE“ and Value = “Complete”. Make sure to use all capital letters for the Key.

Here's the expected result.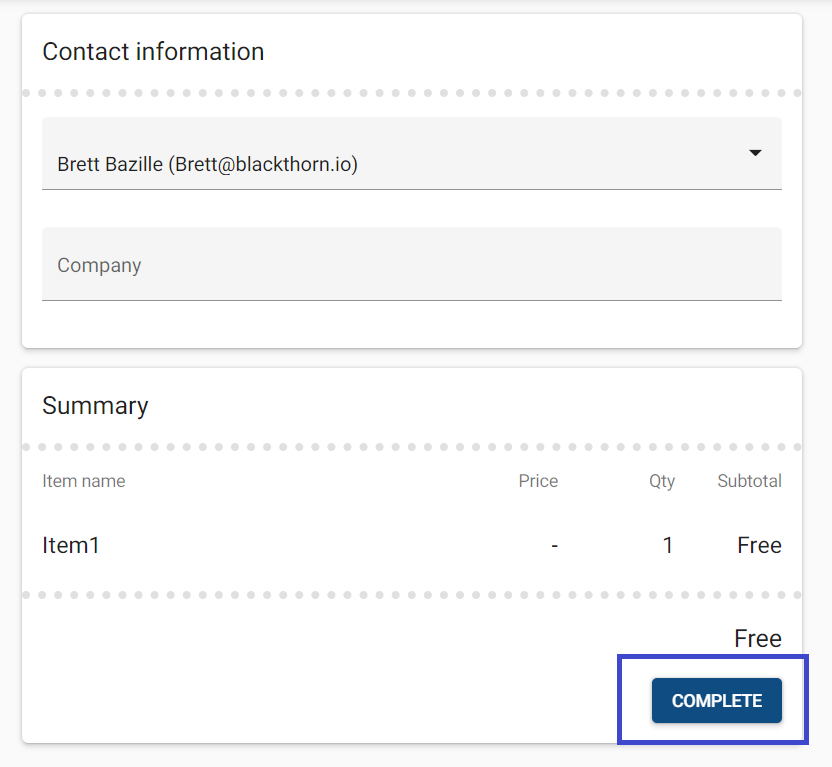
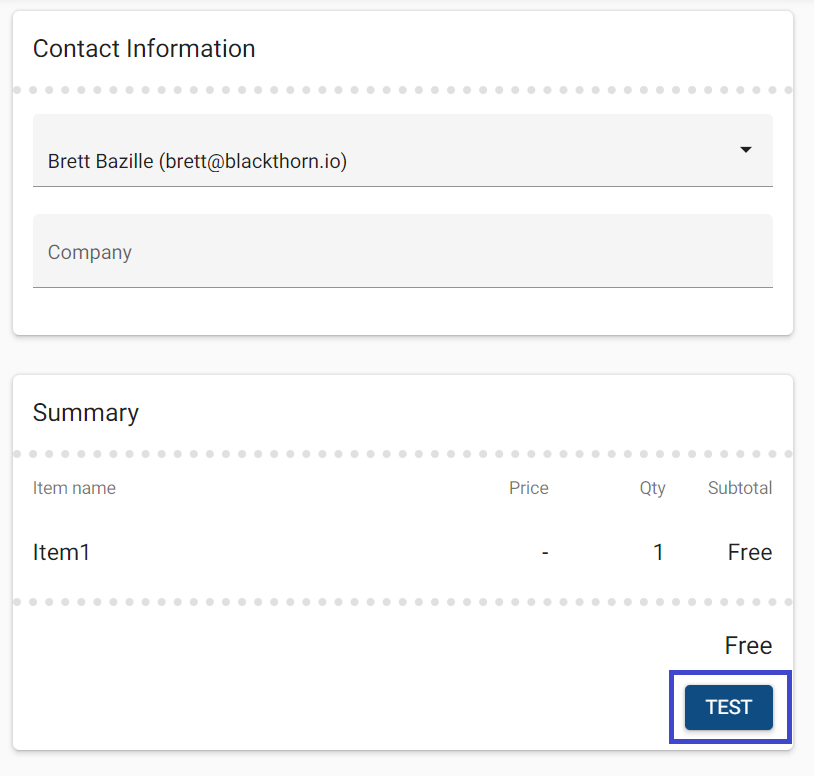
However, if we were to change Value = "Complete" to Value = "Test", this would be the result.
Override a Specific Key
Event Webpages
If you are looking for a specific Key you want to override, click the Event Page URL field, and swap the language in the domain with "debug". You will see the keys on a specific Event, or in other words, the debugged version of the Event with each field identified.
See the images below to see how swapping "https://events.blackthorn.io/en/" with "https://events.blackthorn.io/debug/" shows the keys.
"https://events.blackthorn.io/en/"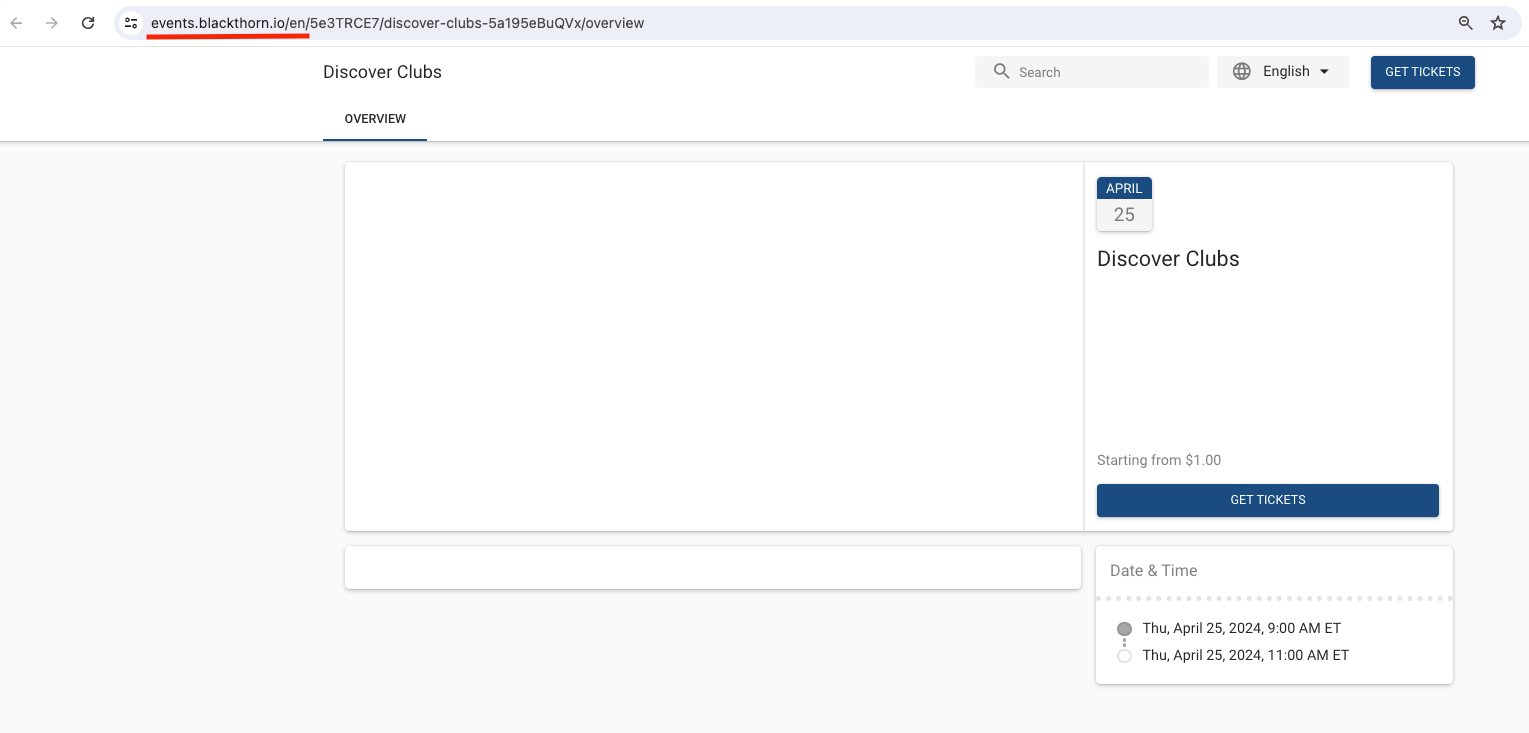
"https://events.blackthorn.io/debug/"
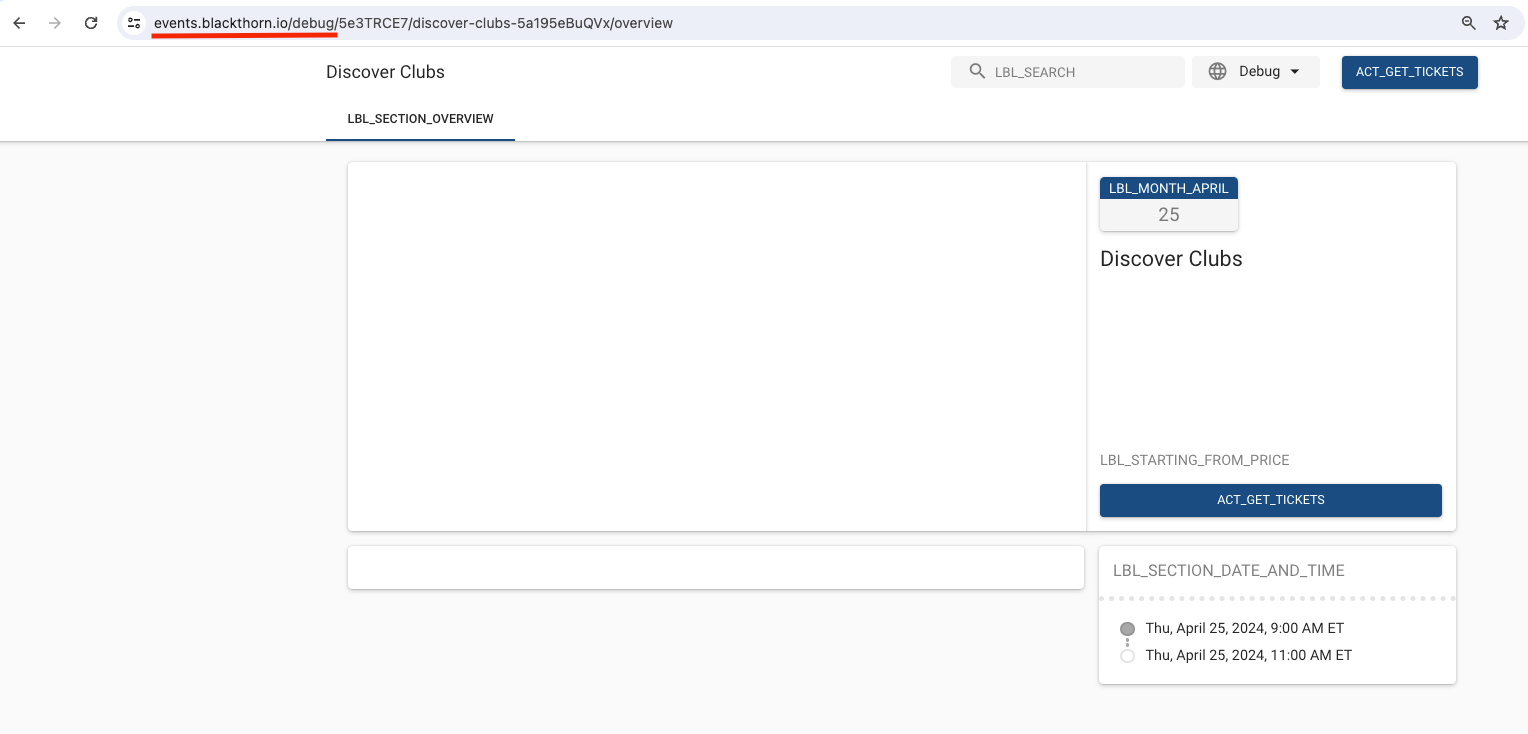
The Keys/Values on this Event webpage are the following.
Key = “LBL_SEARCH” and Value = “Search”
Key = “ACT_GET_TICKETS” and Value = “Get Tickets”
Key = “LBL_SECTION_OVERVIEW” and Value = “Overview”
Key = “LBL_MONTH_APRIL” and Value = “April”
Key = “LBL_STARTING_FROM_PRICE” and Value = “Starting from”
Key = “LBL_SECTION_DATE_AND_TIME” and Value = “Date & Time”
Forms
If you are looking for a specific Key you want to override on a Form, open the Form URL in a new tab.
In this example, the Form URL is “https://events.blackthorn.io/5e3TRCE7/s/…”

Add “debug” after “events.blackthorn.io/”.
You can now see the Keys on a specific Form, or in other words, the debugged version of the Form with each field identified.
The debugged URL is “https://events.blackthorn.io/debug/5e3TRCE7/s/…”

The Keys/Values on this Form are the following.
Key = “MSG_SURVEY_TITLE” and Value = “Thank you for attending this event. Please take a few moments to answer our survey.”
Key = “ACT_COMPLETE” and Value = “Complete”
Add a Data Dictionary Group to an Event Settings Record
Open an Event Settings record.
Click the Pencil icon next to the Data Dictionary Group field.
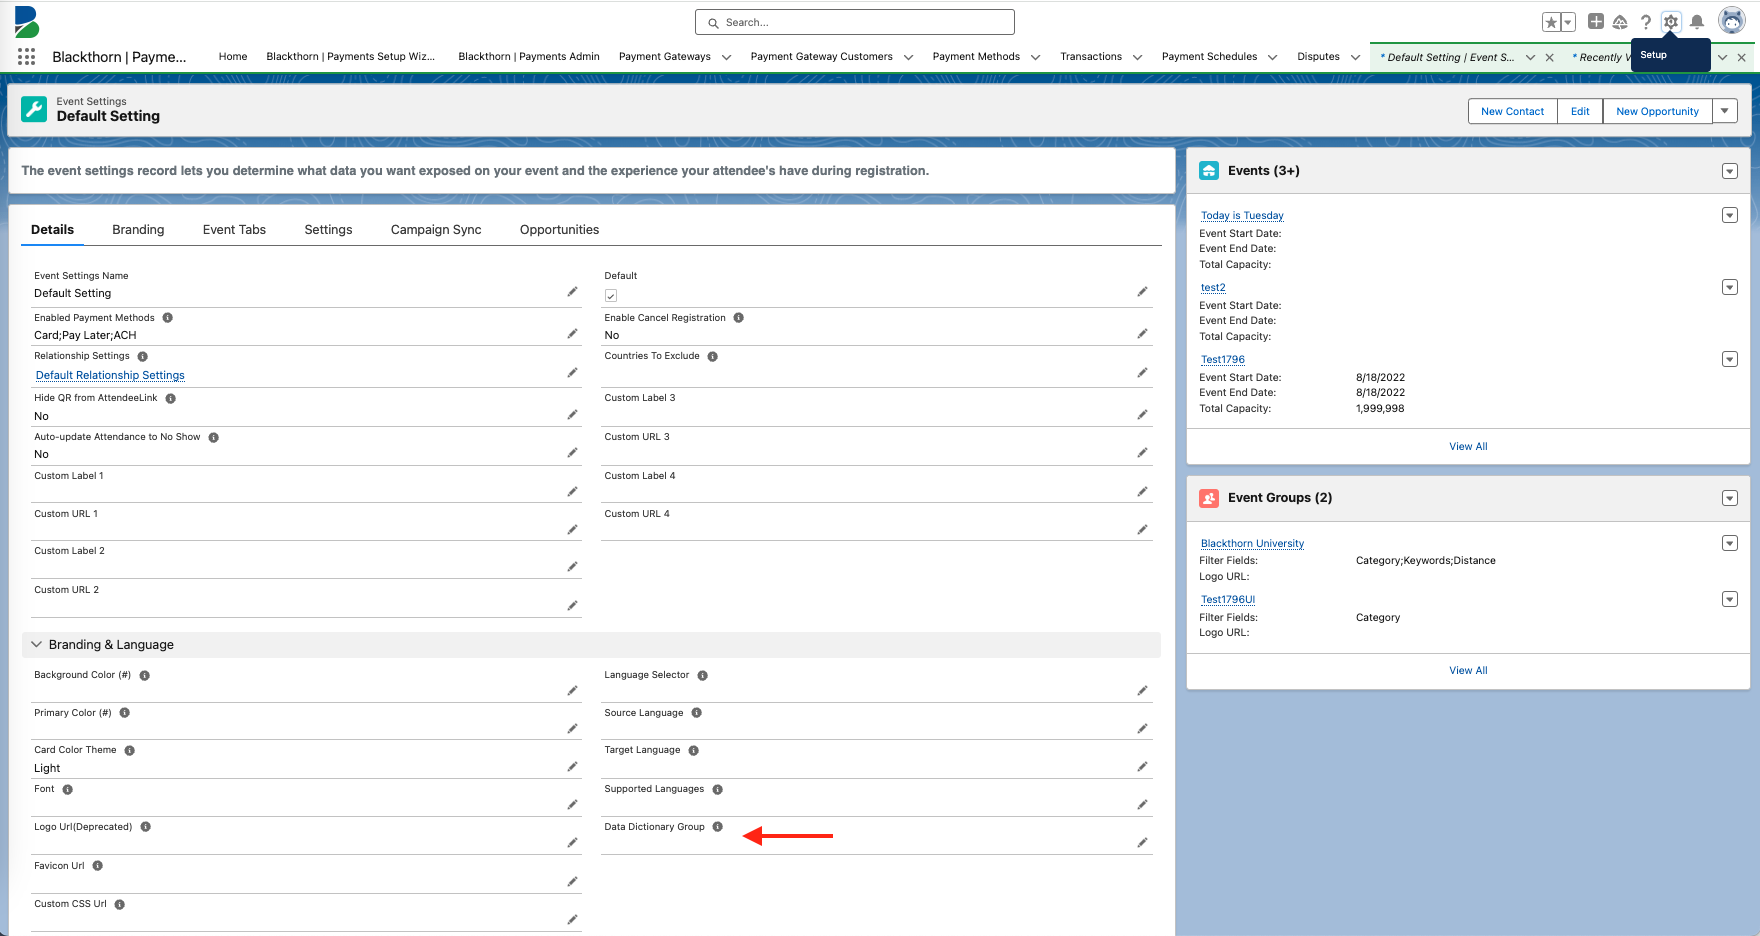
Select a Data Dictionary Group.
Click Save.
Remove the Paid/Free Verbiage
IMPORTANT: This currently only applies to the Event Group URL.
There are currently two ways to remove the "Free" and "$XX.XX" pricing.
Reach out to Blackthorn Support to disable this throughout the entire org.
If you would like to only remove the "Free" verbiage from the Event registration, you can do so by setting the Value field to a "Space bar" entry.
Going back to this Google Document, we can find the key we're looking for. In this case, let's remove the "Free" from the Subtotal column. The key we will be using is LBL_SUBTOTAL. Next, for the Value field, simply click the space bar to enter an empty value.
And voila! Now, we can see that the text has been removed from the page.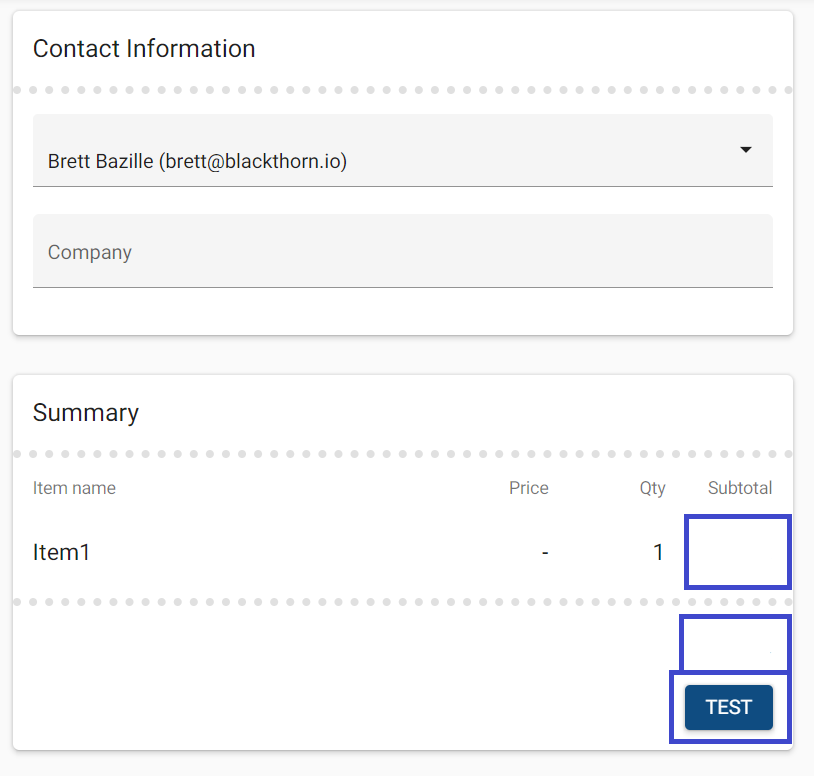
With the Data Dictionary, it is completely up to you what you'd like each field to represent in your checkout process.
Use Merge Fields with Data Dictionary
While we do not support merge fields in the Data Dictionary out of the box, we do have ICU formatted messages that, by default, give you the ability to insert dynamic text within the message. Syntax is {variable}.
Click here for more information on Salesforce Supported ICU Formats.
Use Cases
Use Case 1 - Change the Welcome Message
To update the text in the “Personal Welcome Message” message that appears in the AttendeeLink, set Key = “MSG_ATTLINK_PERSONAL” and Value = text that includes the Attendee’s "{name}". The Attendee’s First Name will automatically be added.
Example: Welcome {name}. Thank you for your interest in the upcoming event.
Use Case 2 - Update the Starting From Price
To override the “Starting from {price}” on the Event’s webpage, set Key = “LBL_STARTING_FROM_PRICE” and Value = text that includes “{price}”. The cost of the lowest-priced Event Item will automatically be added.
Example: Price starts at {price}!
Use Case 3 - Change the Registration Canceled Message
To override the text in the “Registration Canceled” message that appears in the AttendeeLink, set Key = “MSG_REGISTRATION_CANCELED” and Value = text that includes "{name}" and "{date}". The Event Name and Event Start Date will automatically be added.
Example: Your registration to {name} on {date} is canceled.
Use Case 4 – Modify the Get Tickets Button
To change the text on the Get Tickets button to “Join or Renew Membership”, set Key = “ACT_GET_TICKETS” and Value = “Join or Renew Membership".