Custom Fonts let you bring your brand typeface into the Page Designer. You can either reference a font via URL (from a CDN or font hosting service) or upload a WOFF/WOFF2 file directly using the Browse Fonts button. Once added, your custom font appears at the top of the font picker alongside all 1,945 Google Fonts: shared across every event in your organization.
Adding a Custom Font
Font URL
Paste a direct, publicly accessible URL to your font file (e.g. https://cdn.example.com/brand-font.woff2). The URL must be reachable by any browser without authentication: public CDN links work best. Private S3 buckets or localhost paths won't work.
Browse Fonts
Click Browse Fonts to upload a font file directly from your computer instead of using a URL. Supported formats: WOFF2, WOFF, TTF. The file is hosted by Blackthorn and a URL is generated automatically.
Font Name
The label that appears in the Family picker. Use your actual brand font name (e.g. Acme Sans). Avoid names that exactly match an existing Google Font. This can cause the picker to load the Google version instead of yours.
Format
The file format of your font. WOFF2 is strongly recommended: best compression, supported by all modern browsers. Fall back to WOFF or TTF only if your font provider doesn't offer WOFF2.
Add Font
Saves the font to your organization. Once added, it's immediately available in the Family picker for Title Font and Paragraph Font across all events. You can add multiple custom fonts: each appears as its own entry.
💡Custom fonts are org-wide: add your brand font once and it's instantly available on every event page in your organization without re-uploading.
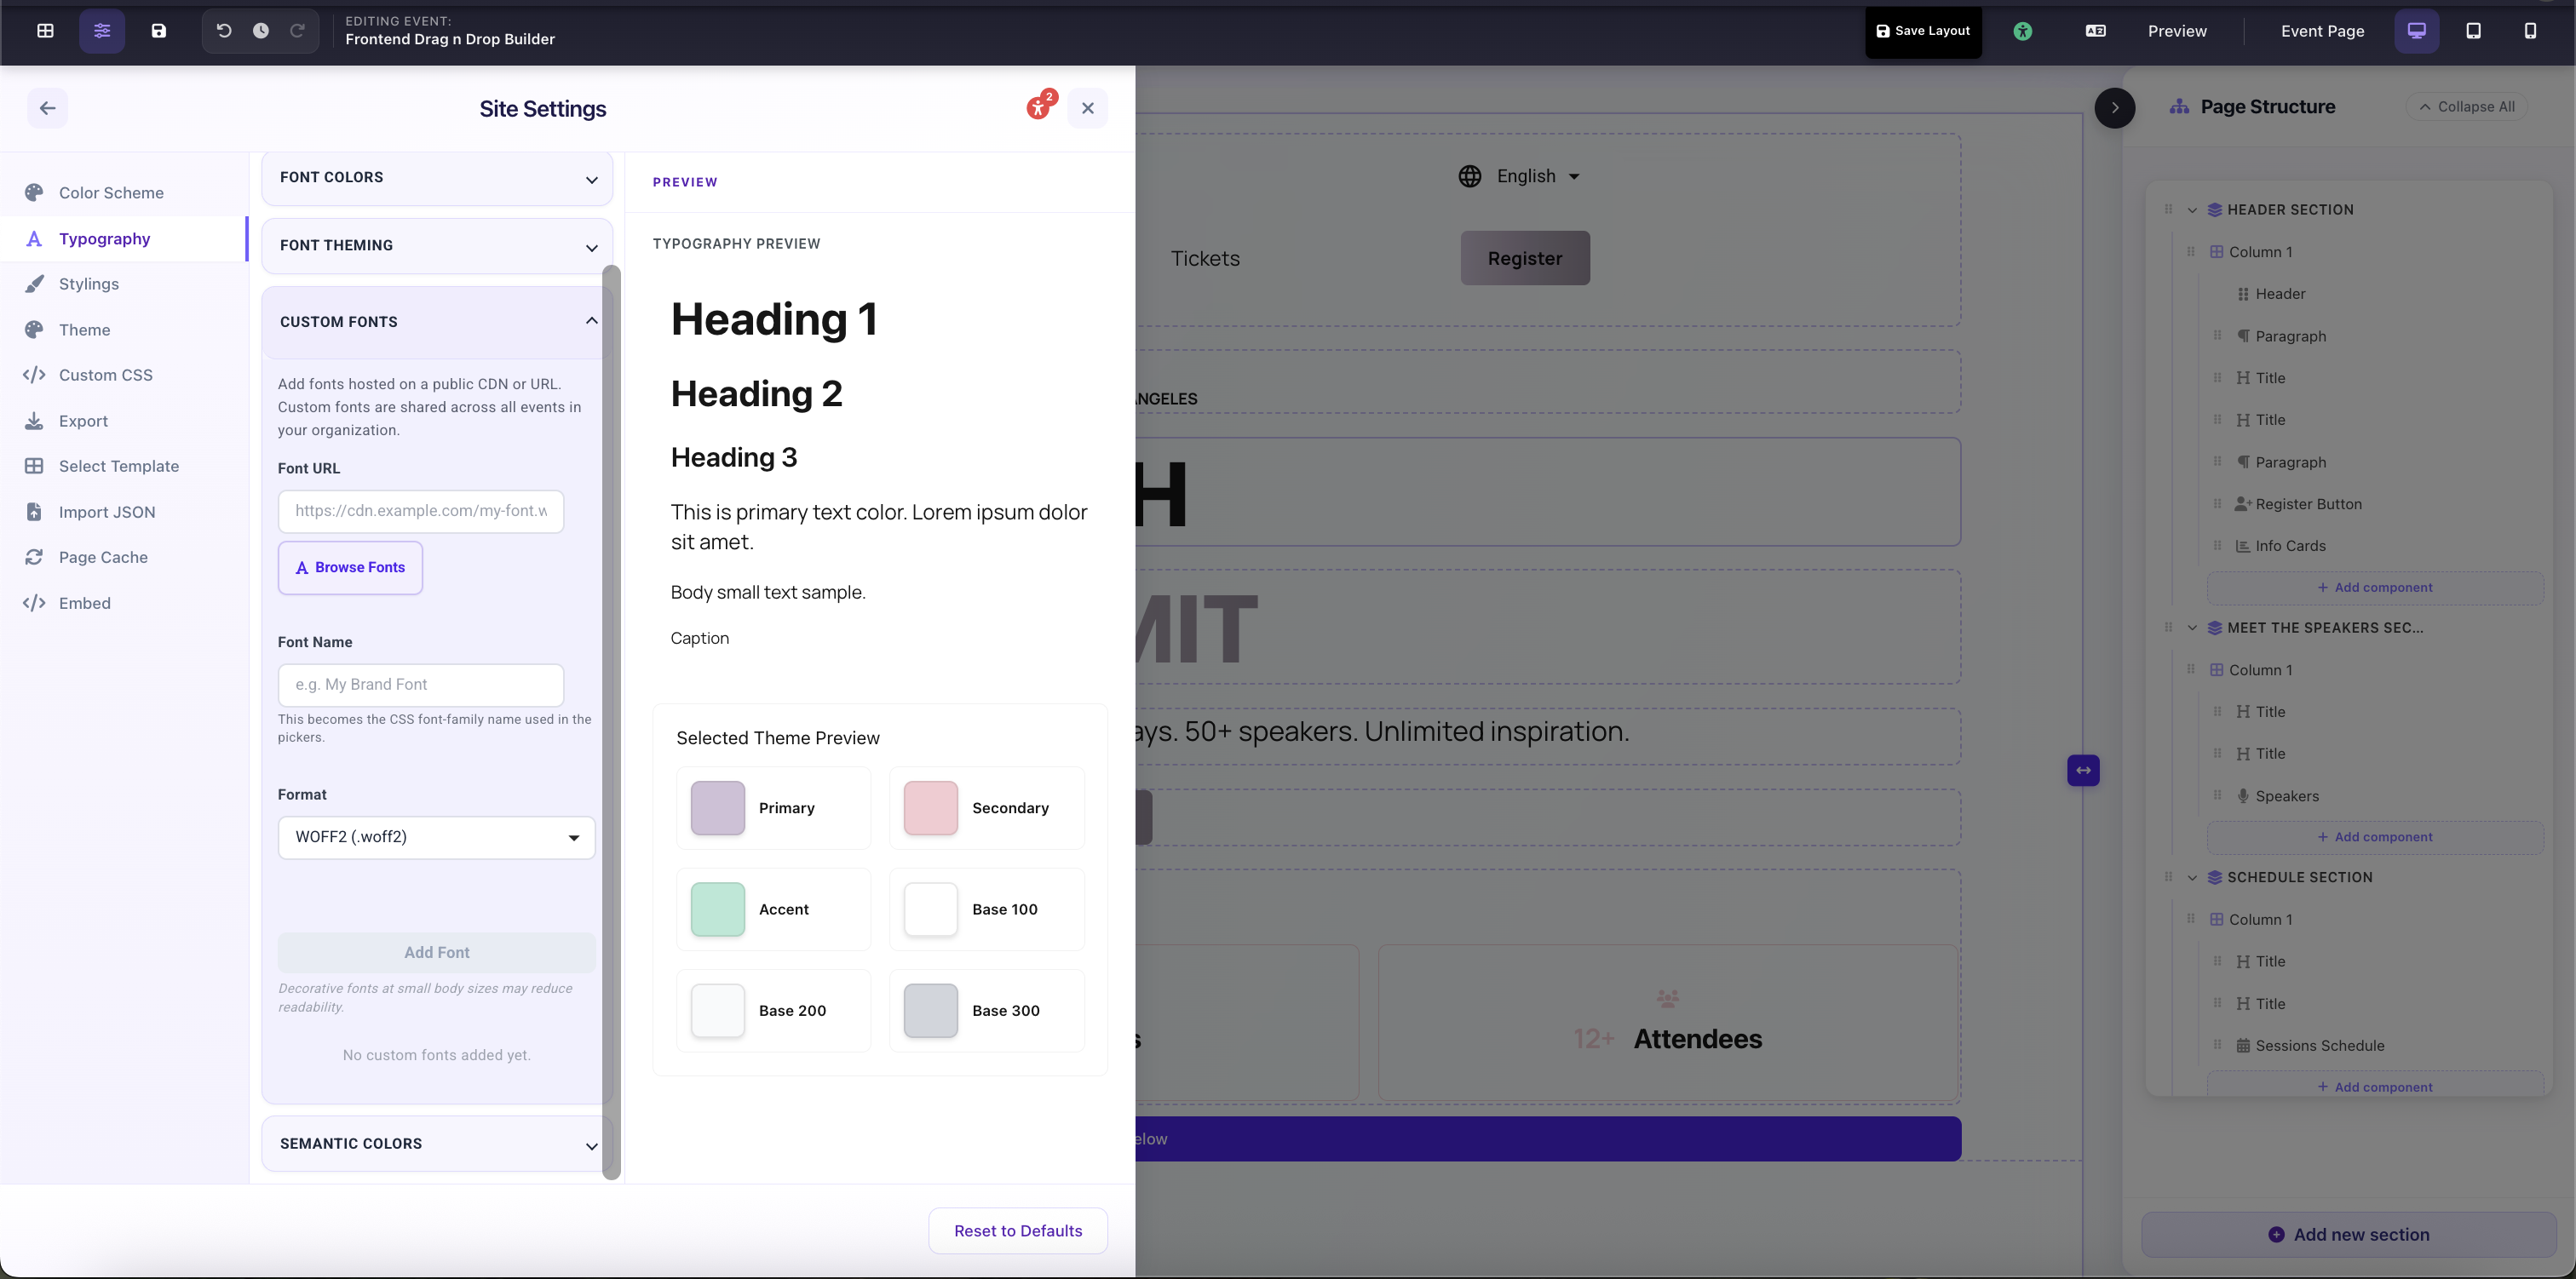
Site Settings → Typography → Custom Fonts: Font URL, Font Name, Format fields with Browse Fonts and Add Font actions