Did you install Events from the Candy Shop?
You do not need to authorize Events if you used Blackthorn Candy Shop to install Events. The app was already authorized for you.
By authorizing the Events app, the Event data you create in Salesforce will be visible on your registration page. We recommend reauthorizing the app if the initial authorized user has new permission sets or a new user has taken over the role (this can be avoided by using an Integration User). If there is an authentication error after clicking the Event Page URL, you will need to reauthorize the app.
The authorizing user must have a standard System Administrator profile and be assigned both an Events and Payments license, along with the following permission sets.
Blackthorn | Events (Admin)
Blackthorn | Payments (Admin)
Manually Authorize/Reauthorize Events
Complete the following steps to manually reauthorize the Blackthorn Events app after re-assigning permission sets or licenses.
From the App Launcher, navigate to the Blackthorn | Events (Admin) app.
Click the Blackthorn | Events Admin tab.
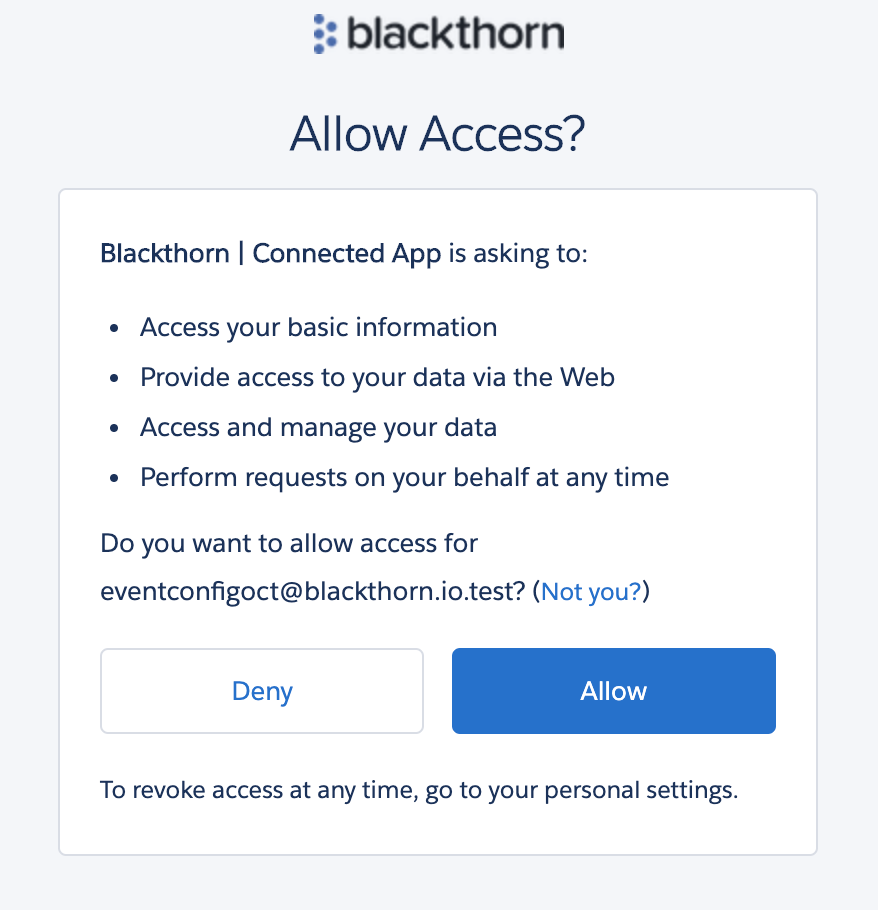
Click Authorize the App.

Click Allow.
If the authorization is successful, you'll receive a success message like the one below.

If reauthorizing as a new user (changing the existing authorized user), please reschedule all Blackthorn Events scheduled jobs as the new authorized user. Please follow the below steps:
Navigate to the Blackthorn | Events Admin tab.
Click Scheduled Jobs.
Click Schedule Recommended Event Jobs.
You can see our scheduled jobs in Setup - Jobs - Scheduled Jobs. All of our job names start with Blackthorn | Events. These should all have the new authorized user listed under Submitted By.
Enable a Fixed IP Address on Profiles
Complete the following steps to implement the IP address restriction on a profile.
Send Blackthorn Support your org ID and ask them to enable it.
If you use a custom proxy URL, please share it with Support. (A custom proxy is not necessary unless your organization needs one to meet your security restrictions.)
If you use Blackthorn Events with iframes, please share your domain with Support.
Once Support enables it via our LMO, select an IP address for the Events webapp / Conect360 from the table below.
Complete the steps to authorize the Events app manually.
AWS Region | AWS IPs |
us-east-1 (Virginia) | 35.175.67.37 |
54.83.187.87 | |
us-west-2 (London) | 3.9.71.98 |
13.43.139.207 | |
ap-southeast-2 (Sydney) | 13.238.52.100 |
3.24.236.249 | |
ap-southeast-1 (Singapore) | 54.251.181.141 |
13.228.230.156 |
Transact (CashNet) and TouchNet Gateway Users
The Events webapp, by default, uses the proxy for Transact (CashNet) and TouchNet. If you enable IP restrictions for Transact (CashNet) and TouchNet, you must also update those systems directly.
Update Network Access Settings
You must update your Network Access Settings before the Events app can be authorized if you are using a VPN and there are network access restrictions.
Go to Setup.
In the quick find box, enter and click "Network Access".
Click New.
Fill in the following fields.
Start IP Address (required)
End IP Address (required)
Description
Click Save.