Coming in 2026: Deprecation of Aura Virtual Terminal Component
New Virtual Terminal configurations should utilize our modern and feature-rich Lightning Web Component version. We plan to sunset the Aura Component and related Flow Screen Charge Component in 2026.
Don’t worry! Customers will receive advance notice of the sunset date to ensure a smooth transition.
-
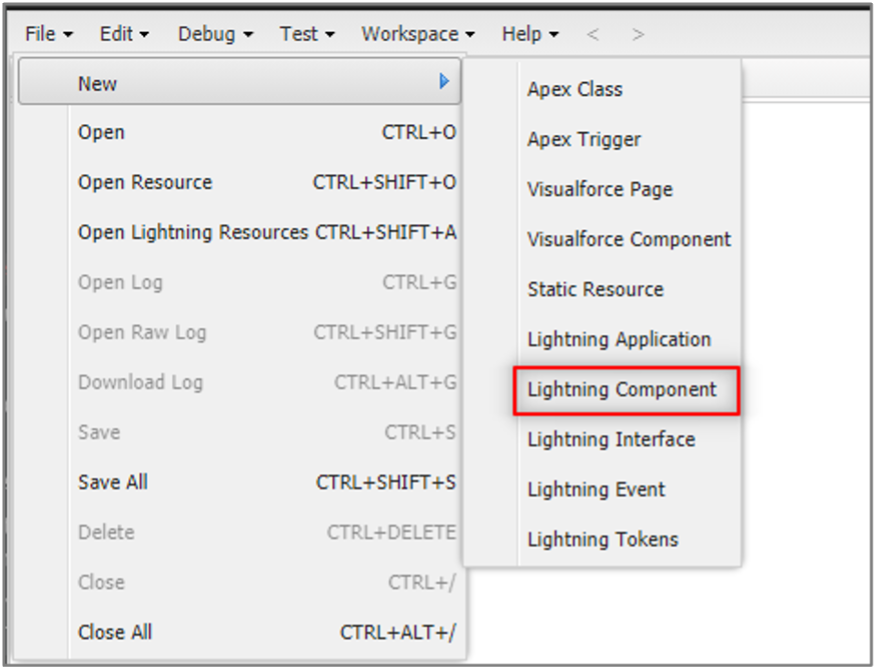
Create a Lightning Component using the Developer Console.
-
Add a Name, select "Lightning Page" and "Lightning Record Page" in the Component Configuration section, and click Submit.

-
In the .cmp, add the following code, but replace the recordId and parentId with IDs from your org.
BT Payments Virtual Terminal Custom Component Sample
`<aura:component                         implements="flexipage:availableForAllPageTypes,flexipage:availableForRecordHome,
            force:hasRecordId" access="global" >
  <aura:handler name="chargeTransaction" event="bt_stripe:chargeTransaction"                        action="{!c.handleEvent}"/>
    <bt_stripe:VirtualTerminal recordId="0035400000ewEgvAAE"
                sObjectName="Contact"
        parentObjName="bt_stripe__sales_document__c"
                parentId="a0V540000020e7LEAQ"
            disableACH="true">
    </bt_stripe:VirtualTerminal>
</aura:component>`
- Add a controller.js file if you would like to add an event handler.
Controller.js
`({
    handleEvent : function(component, event, helper) {
                    var success = event.getParam("success");
            var errorMessage = event.getParam("errorMessage");
            var transactionId = event.getParam("transactionId");
            console.log (' success ' , success);
            console.log (' errorMessage ' , errorMessage);
            console.log (' transactionId ' , transactionId);
    }
})`
Adding a javascript file like the one above can allow customers to pass in variables that can be used in flows to meet the needs of a business requirement.
-
Save your file.
-
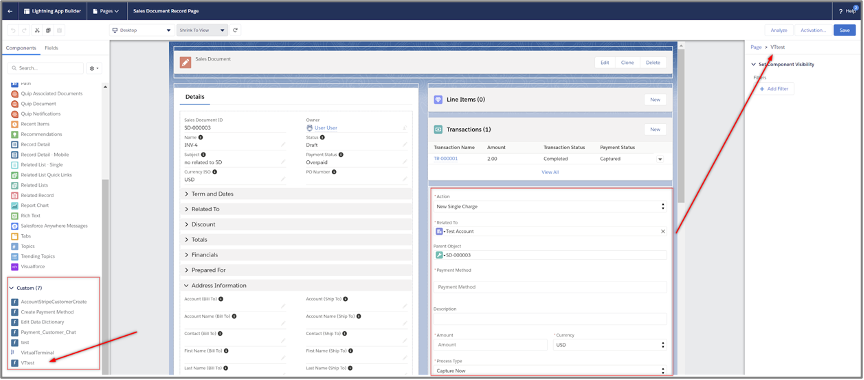
Navigate to the record page where you want this custom component to live. (ex: Invoice)
-
Use the page editor to drag your custom component onto the page.
-
Click Save.
Now you'll have more flexibility when using your own custom component.