Enhancements
Region-based Changes
The following changes were made to the activation of Blackthorn Messaging to accommodate differing regional requirements.
US
After you've completed the installation steps, it’s time to activate your Blackthorn Messaging account. When we say "activation," we are referring to a one-time process that will create a Messaging account and link it to your Salesforce org.
-
Go to the Messaging Administration tab.
-
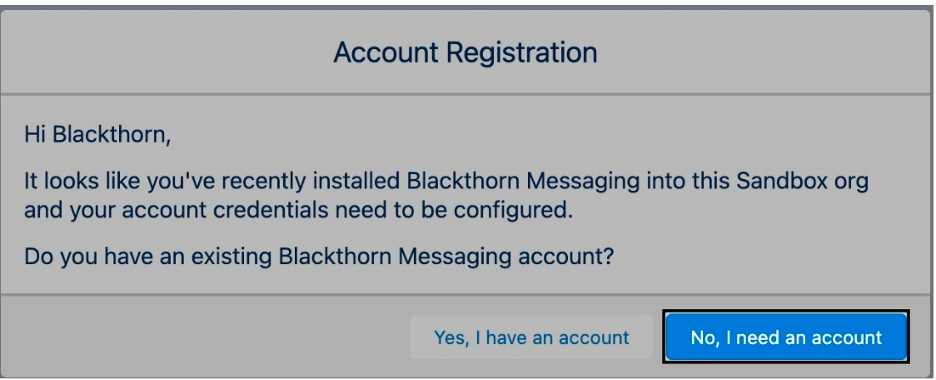
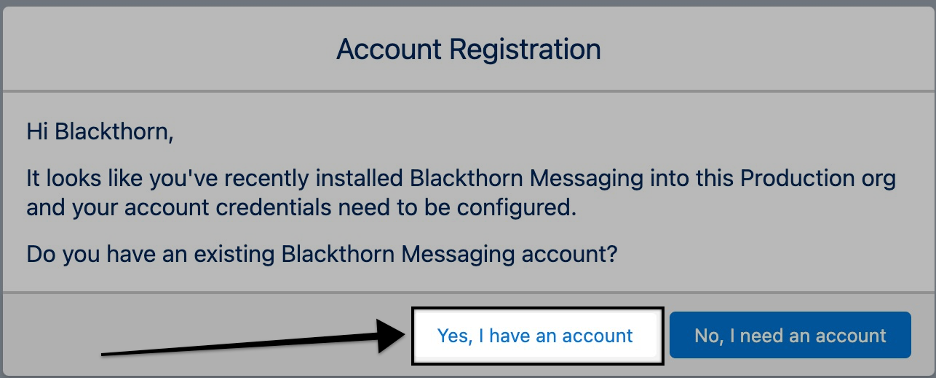
You will see a dialog that asks if you already have a Messaging account. Click No, I need an account to indicate that you do not have a Messaging account.

-
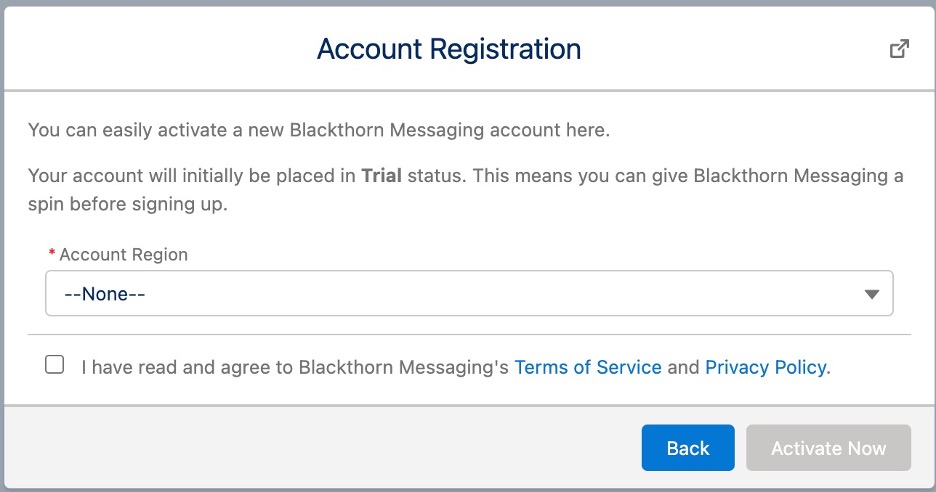
This will open the Account Registration dialog box.
- Set
Account Region= “United States (US1)”. - Review our Terms of Service and Privacy Policy.
- Click the
I have read…checkbox. - Click Activate Now.

- Set
-
Click Yes, I have an account.

-
Set
Account Region= “United States (US1)”. -
Contact Blackthorn Support for the Account Number & API Key.
-
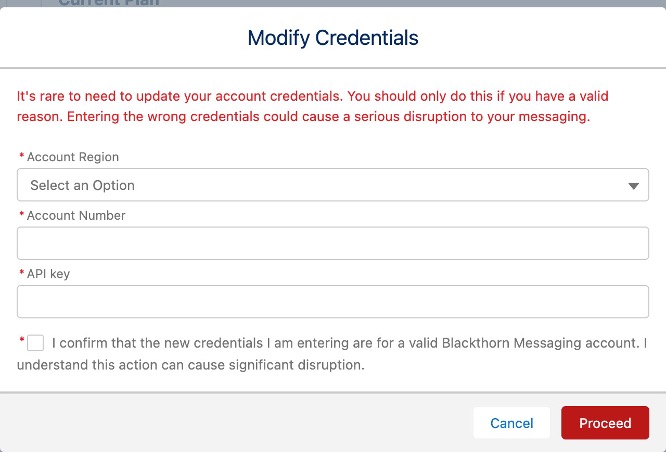
Once you have the Account Number & API Key, enter them in the
Account NumberandAPI Keyfields. -
Click Save. Your account is now registered and activated.

-
To change the credentials, click the Change Credentials button.
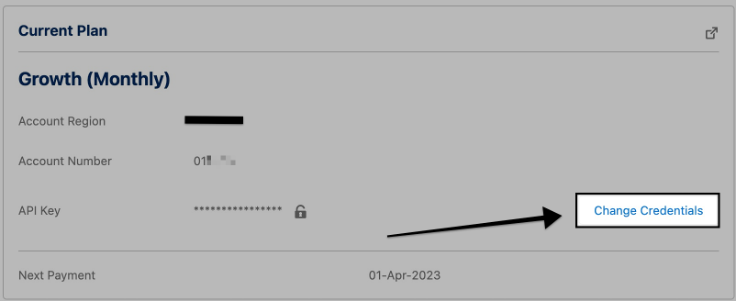
-
Update the fields as needed and click Proceed.
EMEA
After you've completed the installation steps, it’s time to activate your Blackthorn Messaging account. When we say "activation," we are referring to a one-time process that will create a Messaging account and link it to your Salesforce org.
-
Go to the Messaging Administration tab.
-
You will see a dialog that asks if you already have a Messaging account. Click No, I need an account to indicate that you do not have a Messaging account.
-
This will open the Account Registration dialog box.
- Set
Account Region= “Europe (EU1)”. - Review our Terms of Service and Privacy Policy.
- Click the
I have read…checkbox. - Click Activate Now.
- Set
-
Click Yes, I have an account.
-
Set
Account Region= “Europe (EU1)”. -
Contact Blackthorn Support for the Account Number & API Key.
-
Once you have the Account Number & API Key, enter them in the
Account NumberandAPI Keyfields. -
Click Save.
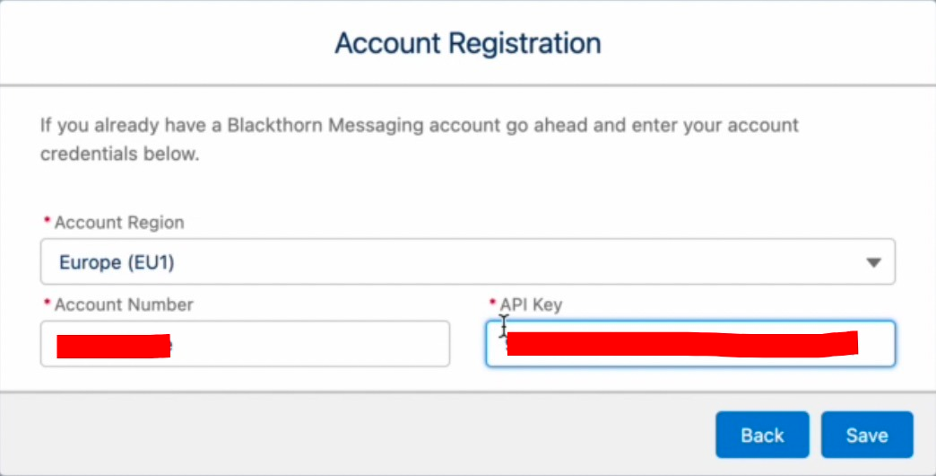
Your account is now registered and activated.
Card UI Changes
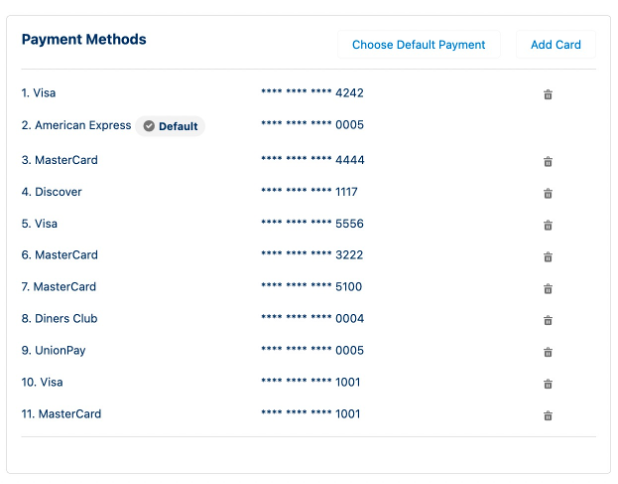
The UI for the Payment Methods section has been modified to be more user-friendly.
-
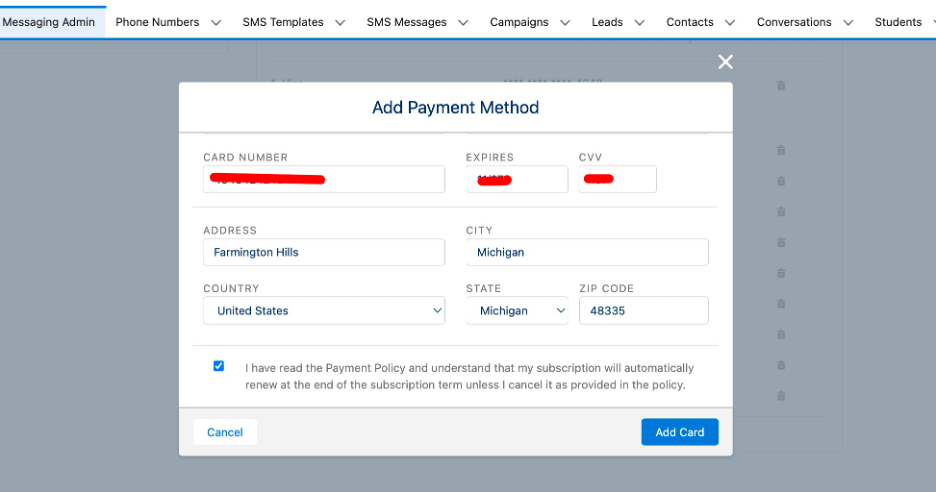
Clicking the Add Card button opens a new window. This provides an easy and faster way to enter the
First Name,Last Name,Card Number,Expiry Date,CVVand other details.
-
Alternatively, the user can click Choose Default Payment to make payments using the default Payment Method. Users can change the Payment Method at any time.
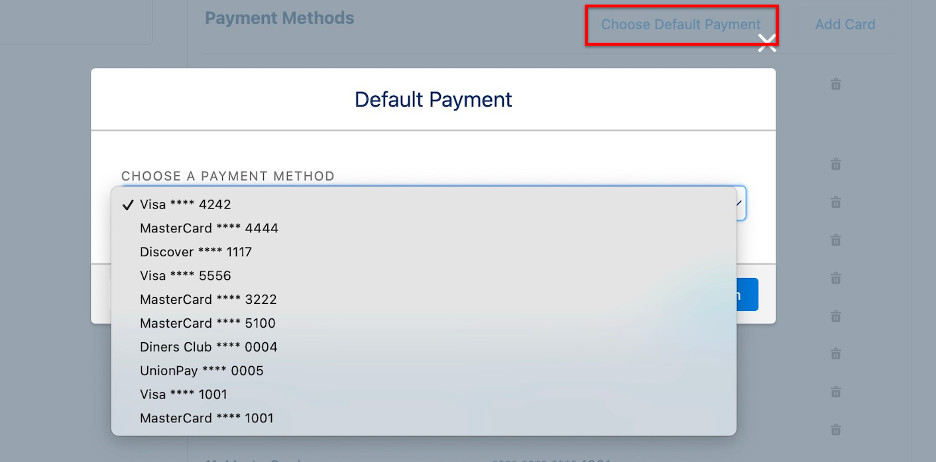
-
Once a card is set as the default Payment Method, it will remain the default Payment Method until changed.
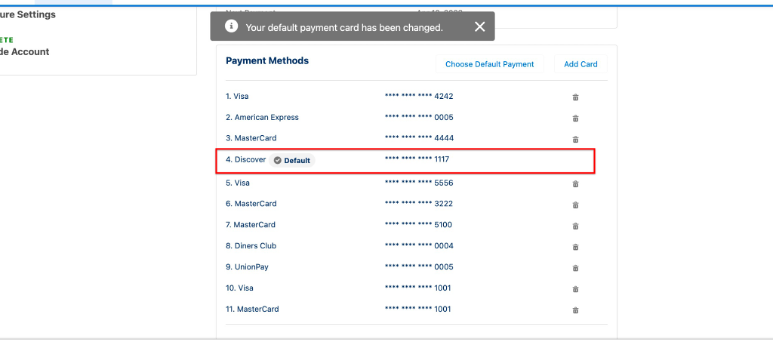
-
User cannot delete a card if it is set as the default Payment Method.
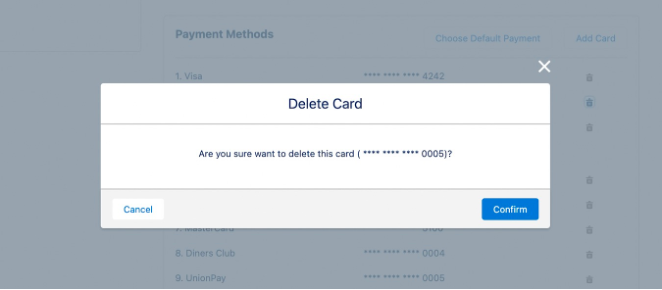
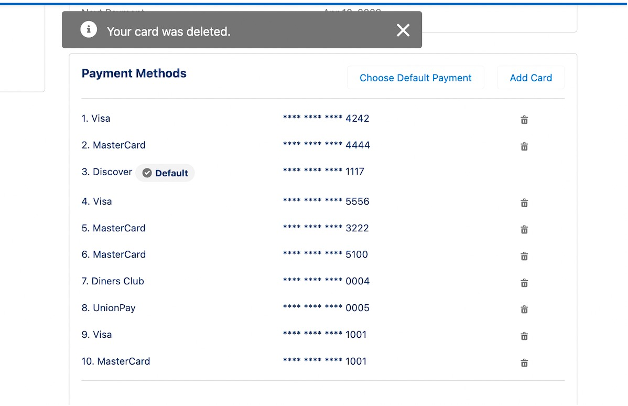
-
Cards not set as the default Payment Method can be deleted at any time.
Bug Fix
Community User Permission Set
Description
Users received the following error when trying to assign a Community user the standard Community permission set. “Can’t assign permission set Blackthorn Messaging Standard User - Community to user [name]. The user license doesn’t allow Assigned Apps”.
Resolution
To resolve this issue, we removed the Assigned Apps’ permissions. Complete the steps below to set up a Community user and share From Phone Numbers.
Setup Steps for Assigning Permission Sets to a Community User
- Click the Gear icon in the upper right-hand corner.
- Click Setup.
- Type “Permission Sets” in the Quick Find box.
- Click Permission Sets.
- Click Clone next to the permission set “Blackthorn Messaging Standard User – Community”.
- Set the
Labelto “Custom Blackthorn Messaging Standard User – Community”. - Set the
API Nameto “Custom_Textey_Standard_User_Community” - Click Save.
- Open the permission set that you just created.
- In the Apps section, click Assigned Apps.
- Click Edit.
- Remove the following Enabled Apps.
- simplesms.Textey (simplesms__SimpleSMS)
- simplesms.Textey (simplesms__Textey_ltng)
- Click Save.
You can now assign this permission set to Community users.
Create Community Users
-
Create a new Account.
- Enter “Accounts” in the All Apps menu search.
- Click Accounts.
- Click New.
- Enter an
Account Name. (We suggest using “Community Account”, but theAccount Namecan be anything.) - Click Save.
-
Create a new Contact.
- Enter “Contacts” in the All Apps menu search.
- Click Contacts.
- Click New.
- Enter a
First NameandLast Name. - Set
Account Nameto the Account created in Step 1. - Enter a phone number in the
Phonefield. - Click Save.
-
Create a new user.
- In the Contact you just created, click the Enable Customer User button. (The button is only available if your org has Community access enabled.)
- Enter an
Email. - Enter a
User Name - Set
License= “Customer Community Login”. - Click Save.
-
Assign a permission set.
- Click the Gear icon in the upper right-hand corner.
- Click Setup.
- Type “Permission Sets” in the Quick Find box.
- Click Permission Sets.
- Click the permission set you created in Setup Steps for Assigning
- Permission Sets to a Community User.
- Click Manage Assignments.
- Click Add Assignment to assign users to the permission set.
- Add the user you created in Step 3 and click Assign.
Sharing From Phone Number to the Community users
- Add an Account lookup to the Phone Number object.
- Click the Gear icon in the upper right-hand corner.
- Click Setup.
- Click the Object Manager tab.
- In the Quick Find box, enter “Phone Number”.
- Click Phone Number.
- Click the Fields & Relationships tab.
- Click New.
- Select
Lookup Relationship. - Click Next.
- Set
Related To= “Account”. - Click Next.
- Enter a
Field LabelandField Name. - Click Next.
- Click Next.
- Click Next.
- Click Save.
- Populate the Account in a Phone Number record.
- Go to the Messaging app.
- Open the Phone Number Tab that you want to share with a Community user.
- In the
Accountfield, add the Account you created in Create Community Users – Step 1. - Click Save.
NOTE: If you want to make Phone Numbers available to other communities, clone the Phone Number record and add different Accounts to the Phone Number record.
- Your Phone Number sharing journey begins here.
- Go to Setup.
- In the Quick Find box, search for “Digital Experiences”.
- Open the Digital Experiences folder and click Settings.
- Scroll down to the Sharing Sets section.
- Click New.
- Set
Label= “BT Messaging Phone Number Sharing”. - Click into the
Sharing Set Namefield. - In the Select Profiles section, select the profile of the Community users that you want to use the
From Number.
Example: Customer Community Login User and Customer Community Plus Login User - In the Select Objects section, add the Phone Number object to the Selected Objects column.
Note: The Phone Number object should be Public Read Only for Default External Access in OWD. - In the Configure Access section, click Set-up.
- Set the
Accountfor the user. - Set
Target Phone Number= “Account__c”. - Set
Access Level= “Read Only”. - Click Update.
- Set the
- Click Save.