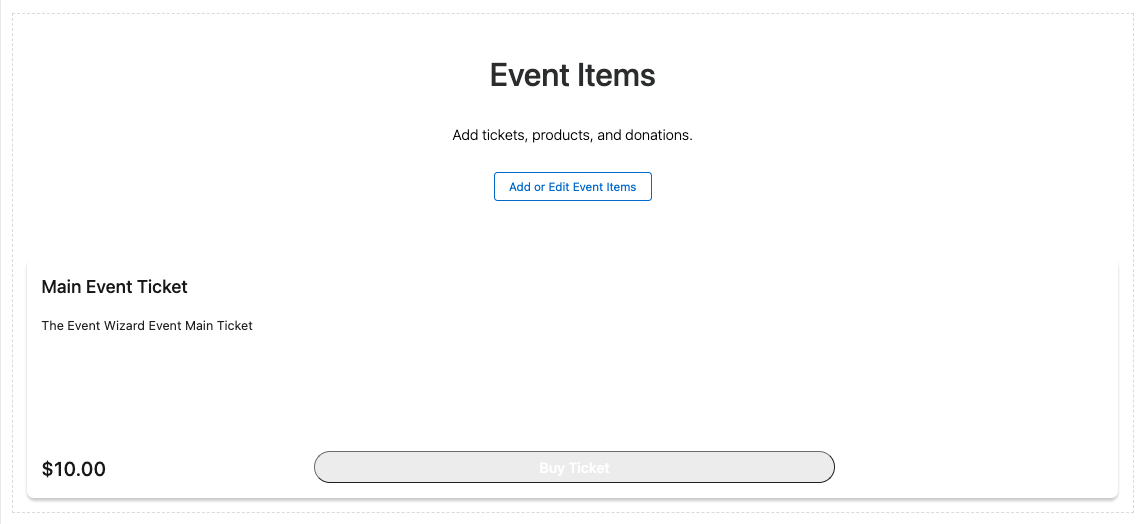
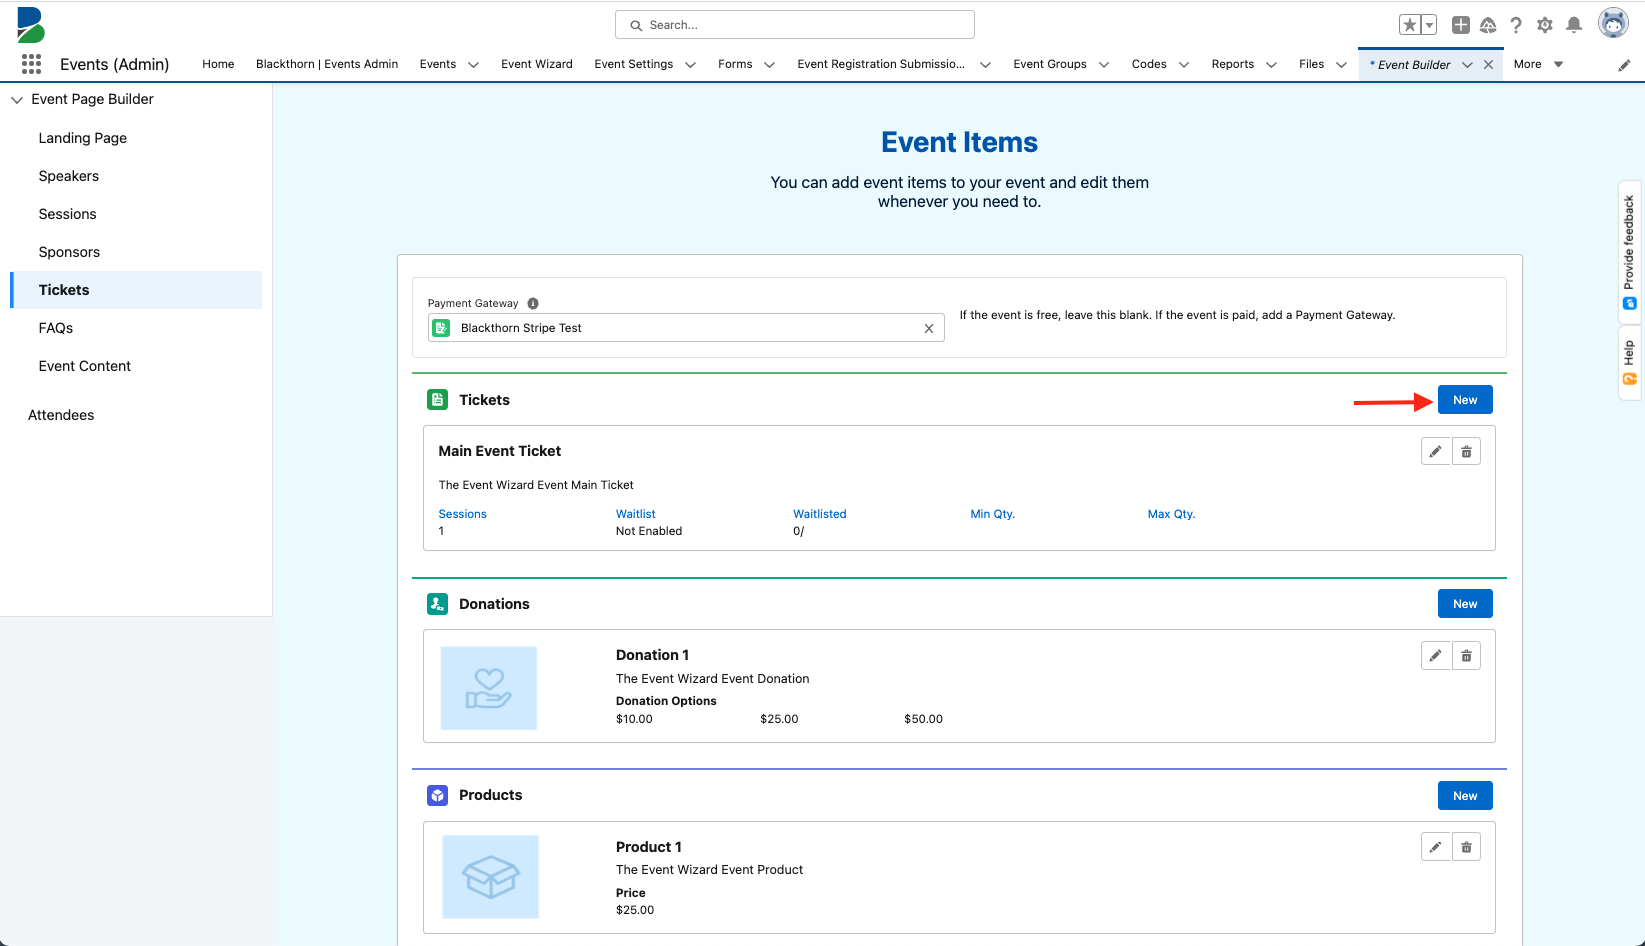
- To edit or add Tickets from the Landing Page, scroll down to the Event Items section and click Add or Edit Event Items.
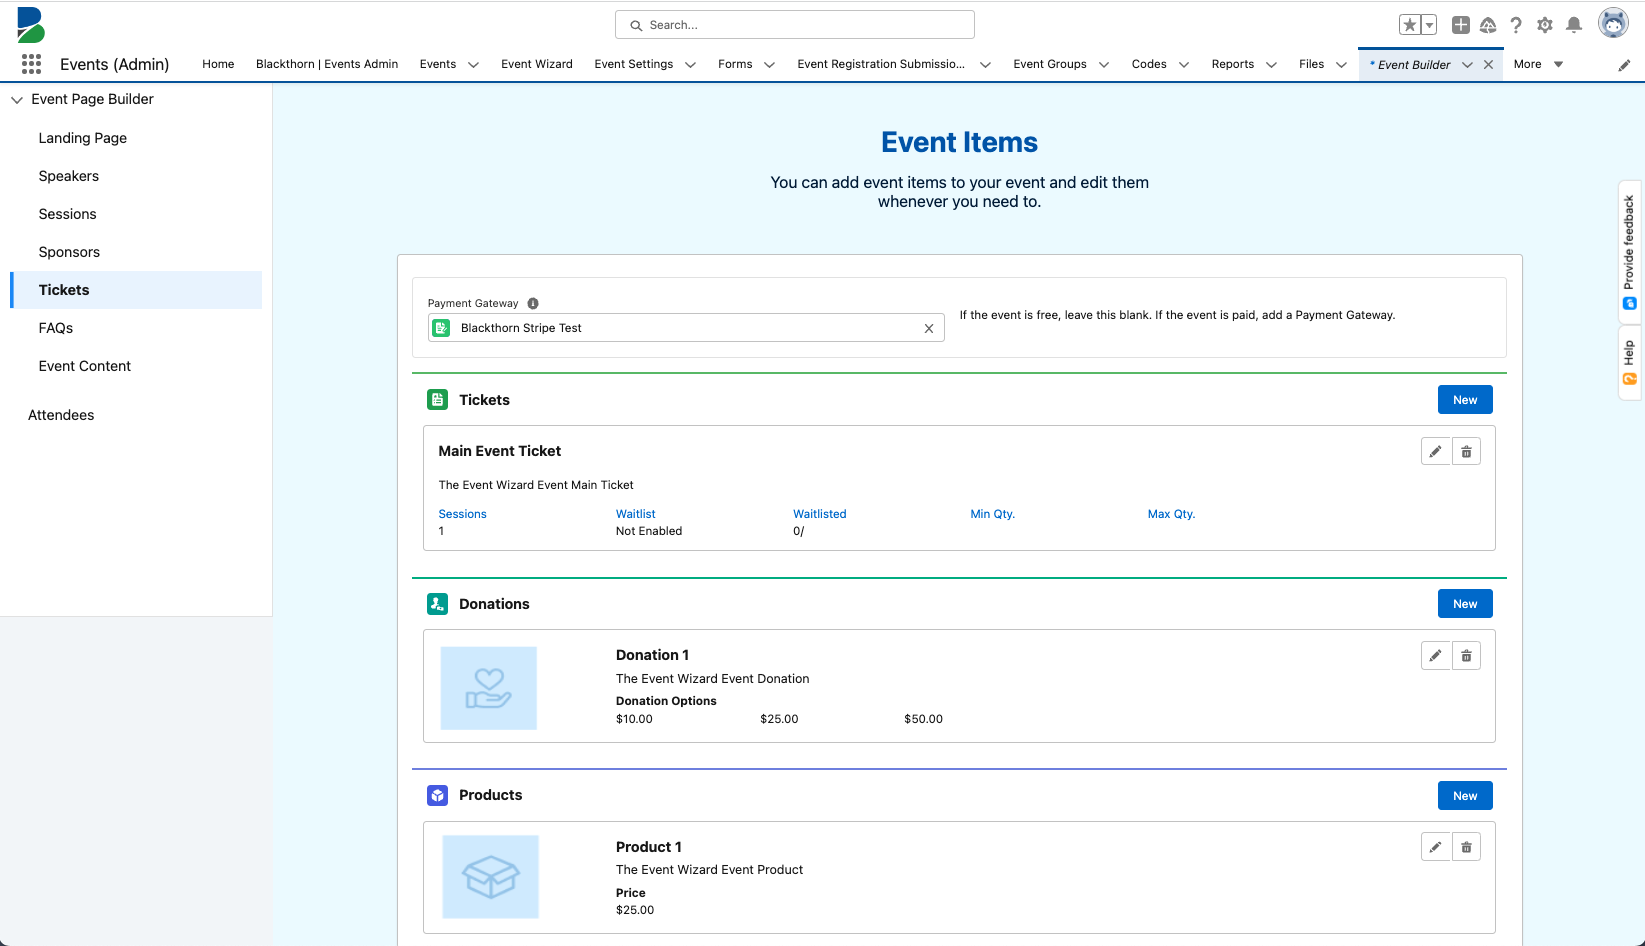
- Update the existing Payment Gateway or select a new one. (Leave this field blank if the Event is free.)
Edit or Delete a Ticket
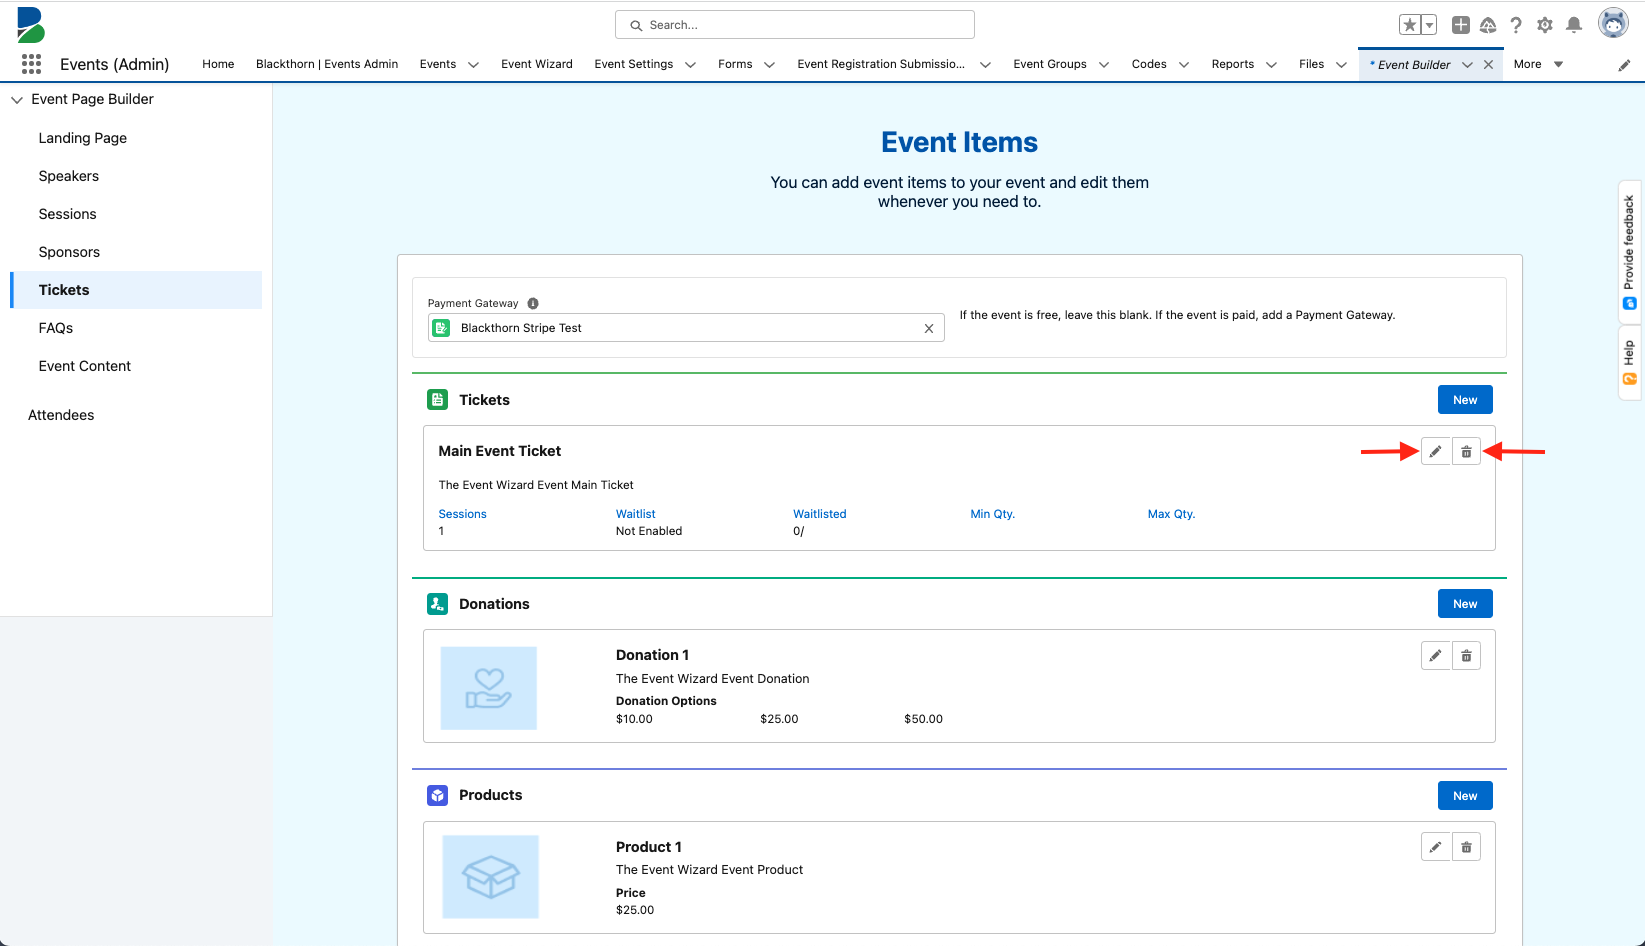
- To delete a Ticket, click the Waste Bin icon. To edit a Ticket, click the Pencil icon on the Ticket’s card.
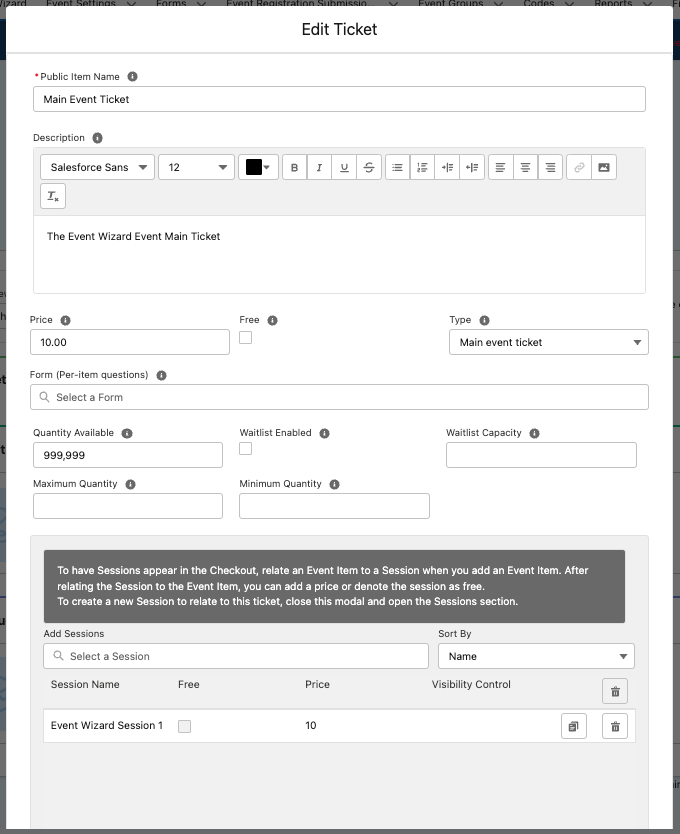
- Make any necessary updates and click Save & Close.
Create a Ticket
- Click New.
- In the New Ticket window, add the following information.
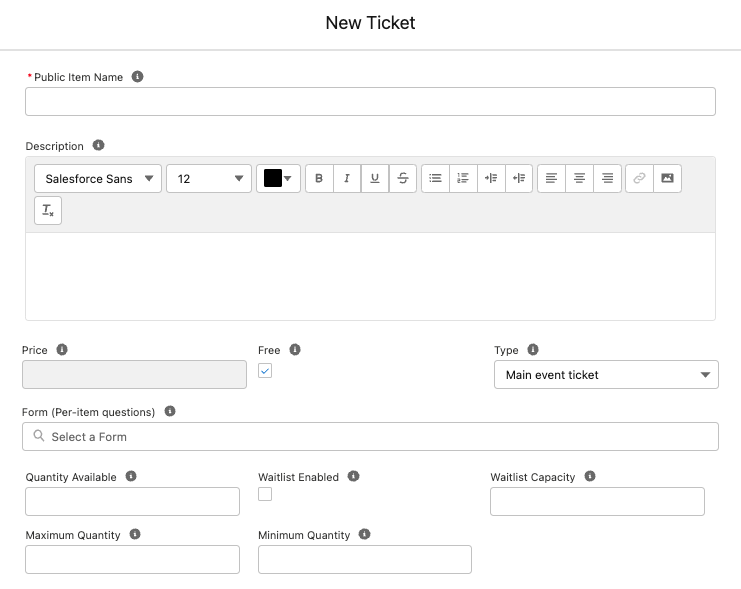
- Public Item Name (required)
- Description
- Is the Ticket free or paid? If the Ticket is paid, enter the amount in the Price field. If the Ticket is free, check Free.
- Select a Ticket Type. Each Event must have at least one "Main event ticket."
- Select a Form (Per-item questions) or create a new one. Click here for more information about creating Forms and Form Elements.
- Enter the Quantity Available. If the field is blank, the Quantity Available will say “999,999”.
- To set a minimum or a maximum number of Event Items allowed per order, enter the amounts in the Maximum Quantity and/or Minimum Quantity fields. More information is available here.
- Check the Waitlist Enabled checkbox to enable waitlisting and enter an amount in the Waitlist Capacity field if you are using it. For more information about waitlisting, click here.
- Add one or more free or paid Sessions to a Ticket.
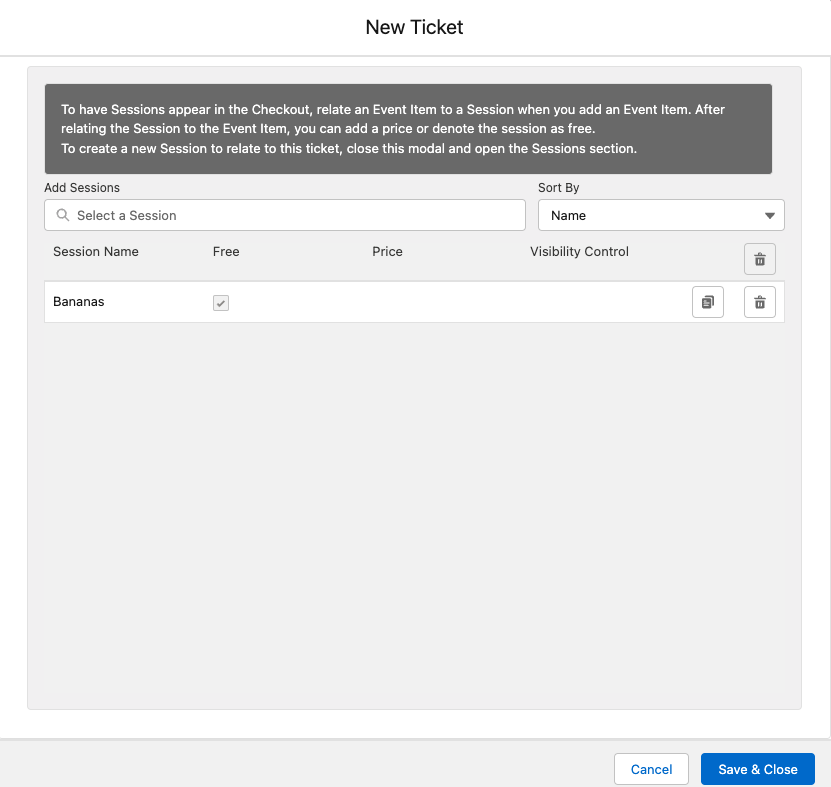
- Add Sessions = Select an existing Session OR click Add All Sessions to add all existing Sessions in bulk to the Ticket.
- Sort By = Select “Name” (default) or “Date.”
- Each Session can only be added once to each Ticket. However, users can duplicate a Session from the Sessions Table once a Session has been added.

- Click Save & Close.
Important Notes
- Guest Tickets: This type of Event Item can be configured differently from “Main event item” Tickets. Please take a moment to review each of the three guest Ticket configuration options before creating Guest Tickets.
- Create a Contact record
- Do not create a Contact record
- Allow anonymous guest registration
- Session Visibility: If you only want Attendees to see Sessions on their AttendeeLink and not on the Event registration page, complete the following steps.
- Relate a Session to an Event Item, creating an Event Item Session.
- Update the Event Settings' Tab Visibility setting for Sessions to “Post Registration.”
- Sort Order: To change the order of the Event Items on the registration page, add the Sort Order field to the Event Item object and enter a value in the Sort Order field.