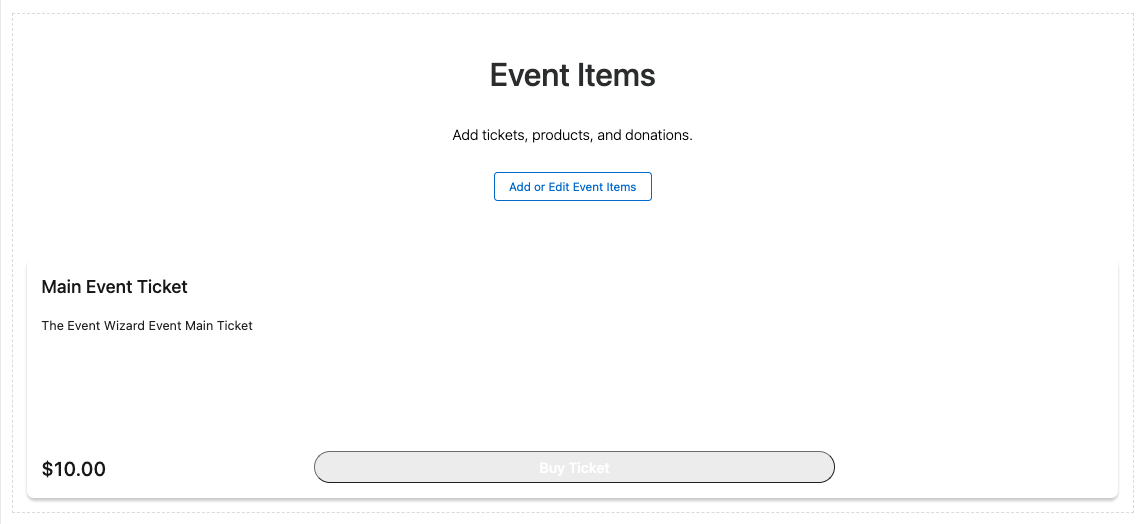
- To edit or add Tickets from the Landing Page, scroll down to the Event Items section and click Add or Edit Event Items.
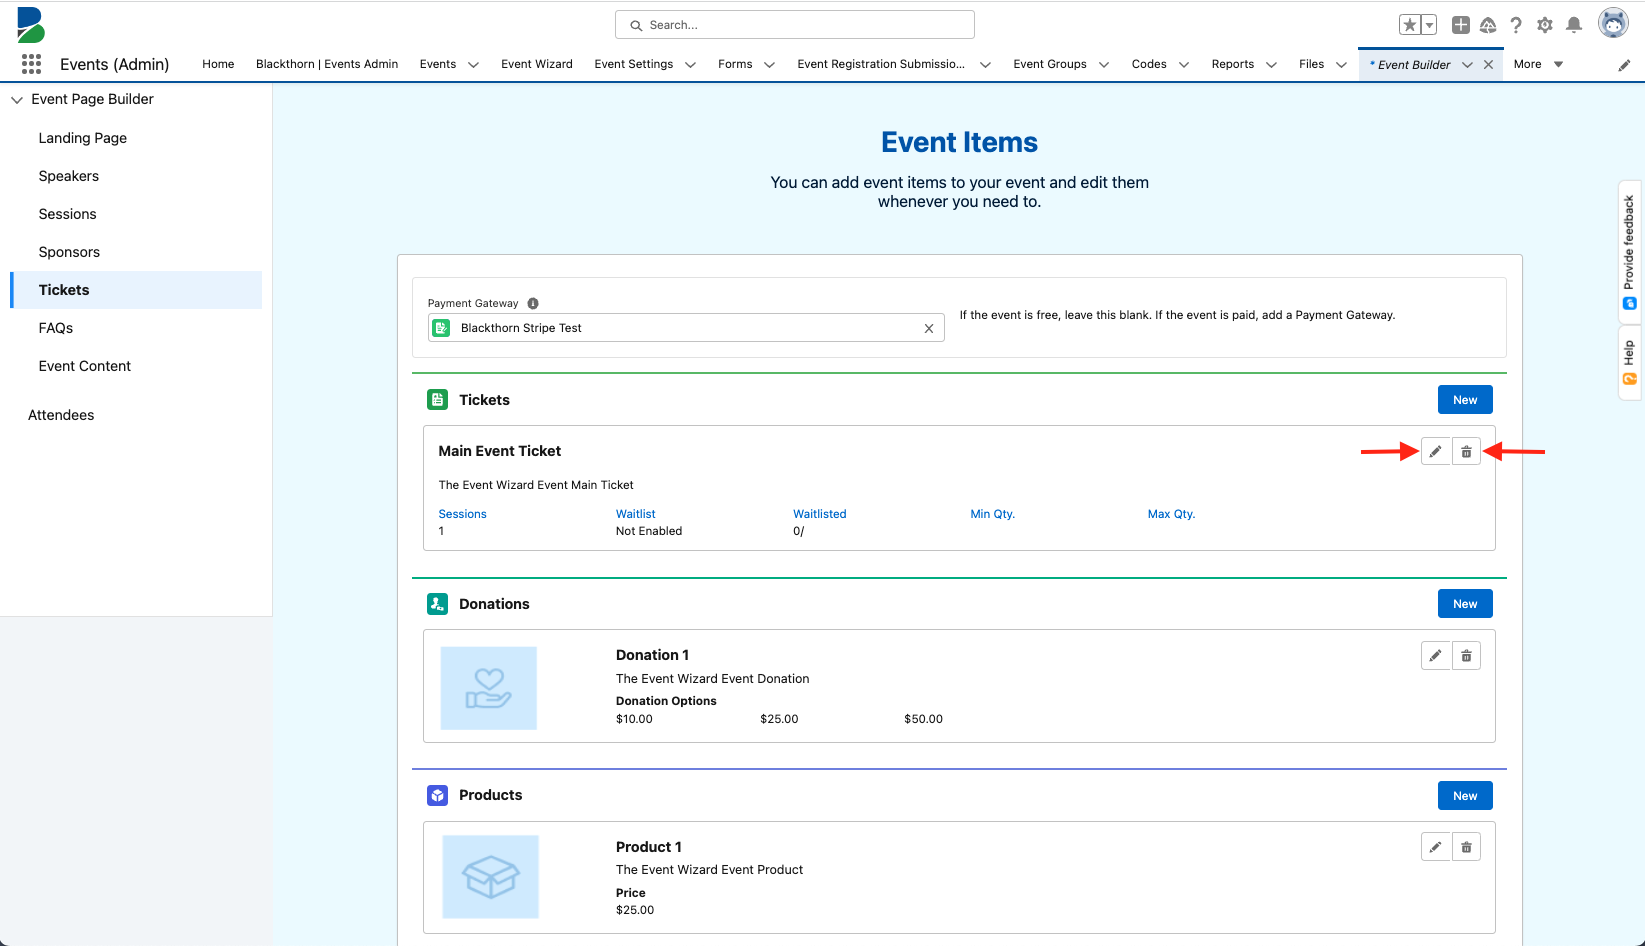
- Update the existing Payment Gateway or select a new one. (Leave this field blank if the Event is free.)

Edit or Delete a Ticket
To delete a Ticket, click the Waste Bin icon. To edit a Ticket, click the Pencil icon on the Ticket’s card.
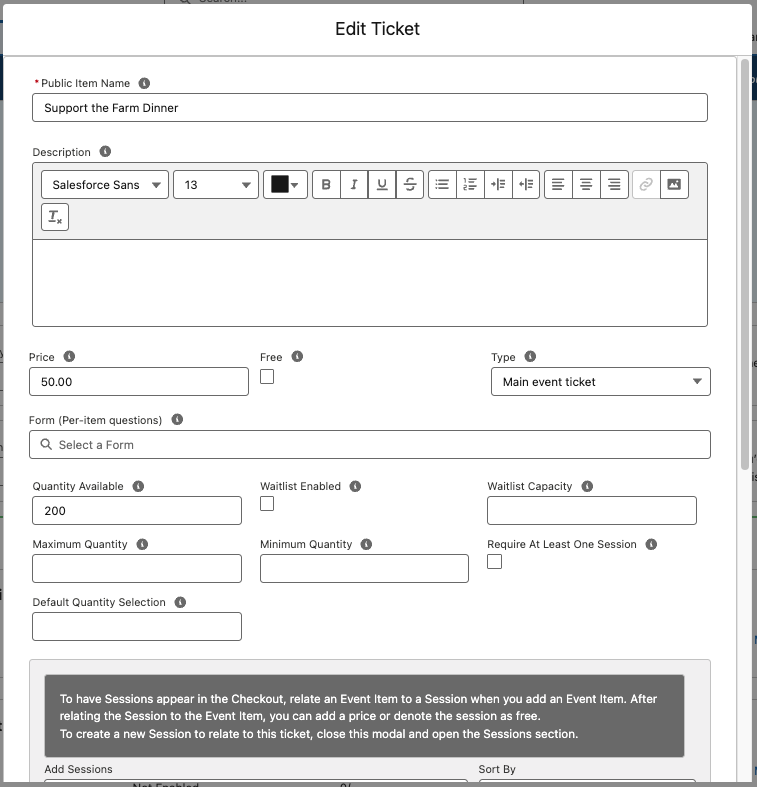
Make any necessary updates and click Save & Close.
Create a Ticket
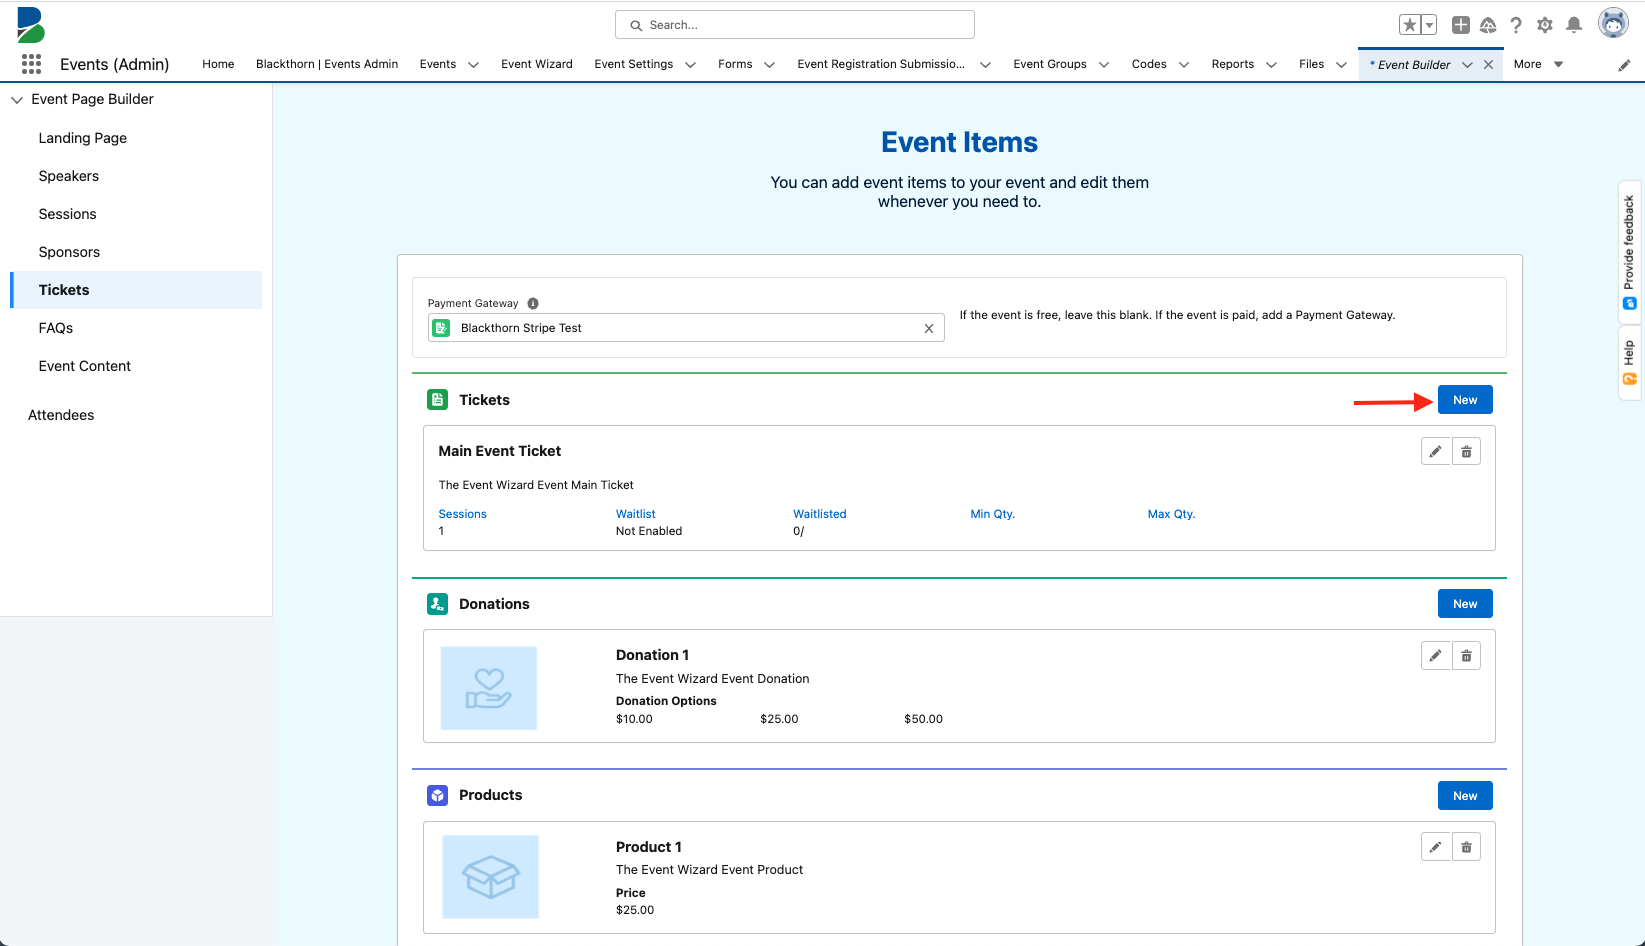
Click New.
In the New Ticket window, add the following information.
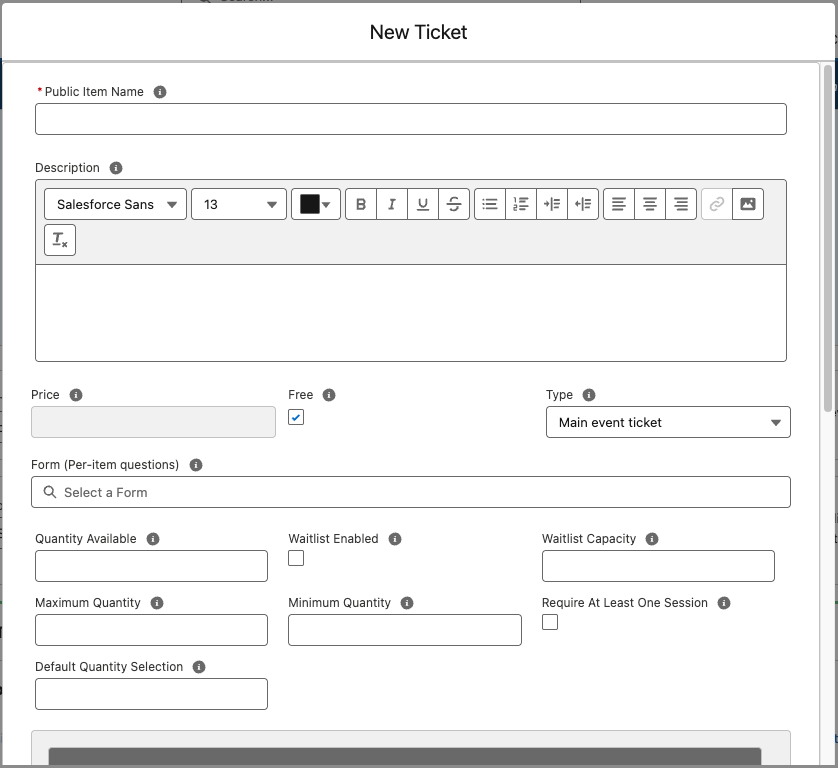
Public Item Name (required)
Description
Is the Ticket free or paid? If the Ticket is paid, enter the amount in the Price field. If the Ticket is free, check Free.
Select a Ticket Type. Each Event must have at least one "Main event ticket."
Select a Form (Per-item questions) or create a new one. Click here for more information about creating Forms and Form Elements.
Enter the Quantity Available. If the field is blank, the Quantity Available will say “999,999”.
To set a minimum or a maximum number of Event Items allowed per order, enter the amounts in the Maximum Quantity and/or Minimum Quantity fields. More information is available here.
Enter a value in the Default Quantity Selection field to define the default quantity of Tickets, Guest Tickets, or Products that will be automatically added to the cart when an Attendee reaches the ticket selection step. If the number of remaining tickets is greater than 0 but less than the Default Quantity Selection, all remaining tickets will be added to the cart.
NOTE: When an Attendee purchases Tickets, Guest Tickets, or Products from their AttendeeLink, the default quantity will not be added to the cart. (The original behavior is unchanged.)
Check the Waitlist Enabled checkbox to enable waitlisting and enter an amount in the Waitlist Capacity field if you are using it. For more information about waitlisting, click here.
Check Require At Least One Session if you want to ensure Attendees select at least one Session when registering for an Event.
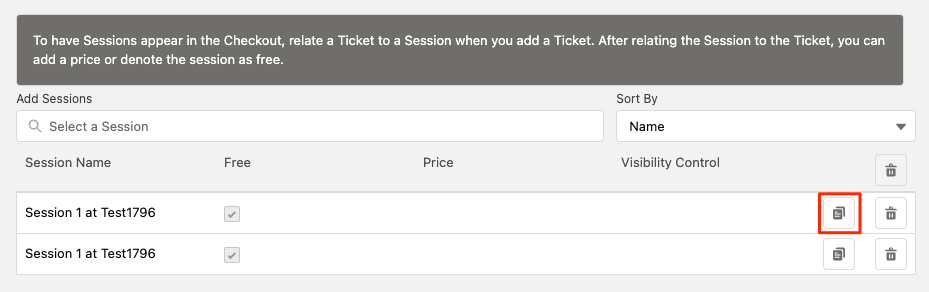
Add one or more free or paid Sessions to a Ticket.
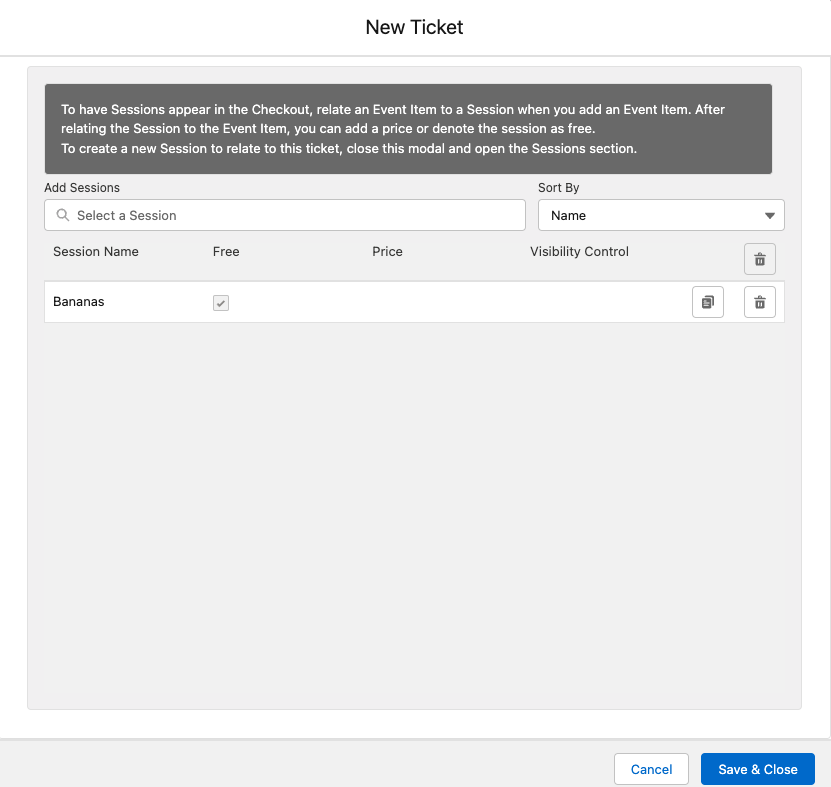
Add Sessions = Select an existing Session OR click Add All Sessions to add all existing Sessions in bulk to the Ticket.
Sort By = Select “Name” (default) or “Date.”
Each Session can only be added once to each Ticket. However, users can duplicate a Session from the Sessions Table once a Session has been added.
Click Save & Close.
Important Notes
Guest Tickets: This type of Event Item can be configured differently from “Main event item” Tickets. Please take a moment to review each of the three guest Ticket configuration options before creating Guest Tickets.
Create a Contact record
Do not create a Contact record
Allow anonymous guest registration
Session Visibility: If you only want Attendees to see Sessions on their AttendeeLink and not on the Event registration page, complete the following steps.
Relate a Session to an Event Item, creating an Event Item Session.
Update the Event Settings' Tab Visibility setting for Sessions to “Post Registration.”
Sort Order: To change the order of the Event Items on the registration page, add the Sort Order field to the Event Item object and enter a value in the Sort Order field.