Create a Webinar Account
Click the App Launcher.
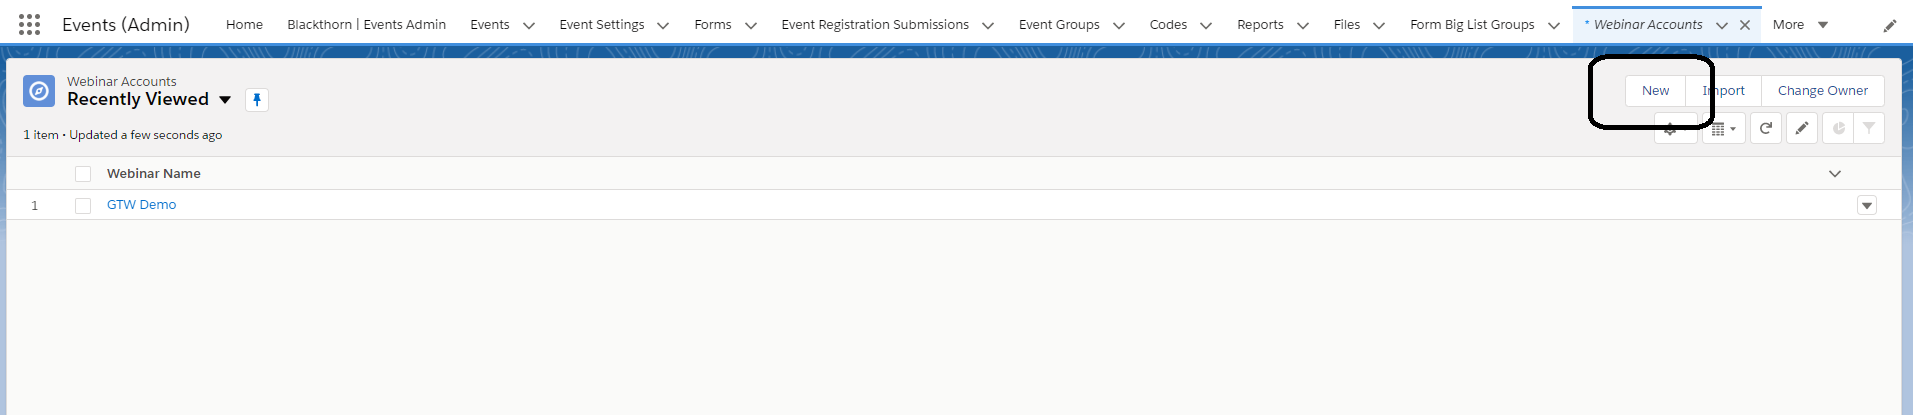
In the Quick Find box, enter and click "Webinar Accounts."
Click New.
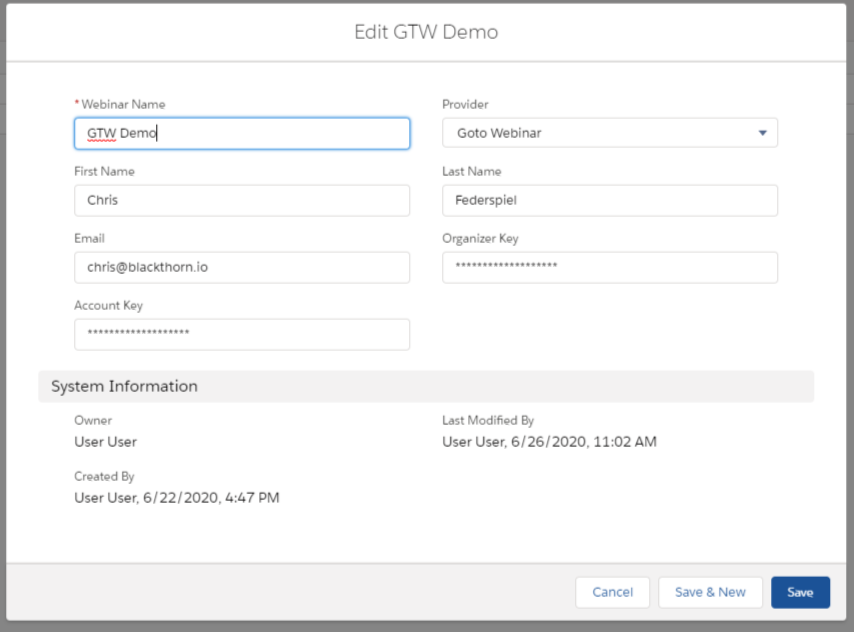
Fill in the following fields.
Provider = "Zoom", "GoToWebinar", or "Webex" (required)
Webinar Name (required)
First Name, Last Name, Email, Organizer Key, and Account Key will be populated once you connect the account to your provider.
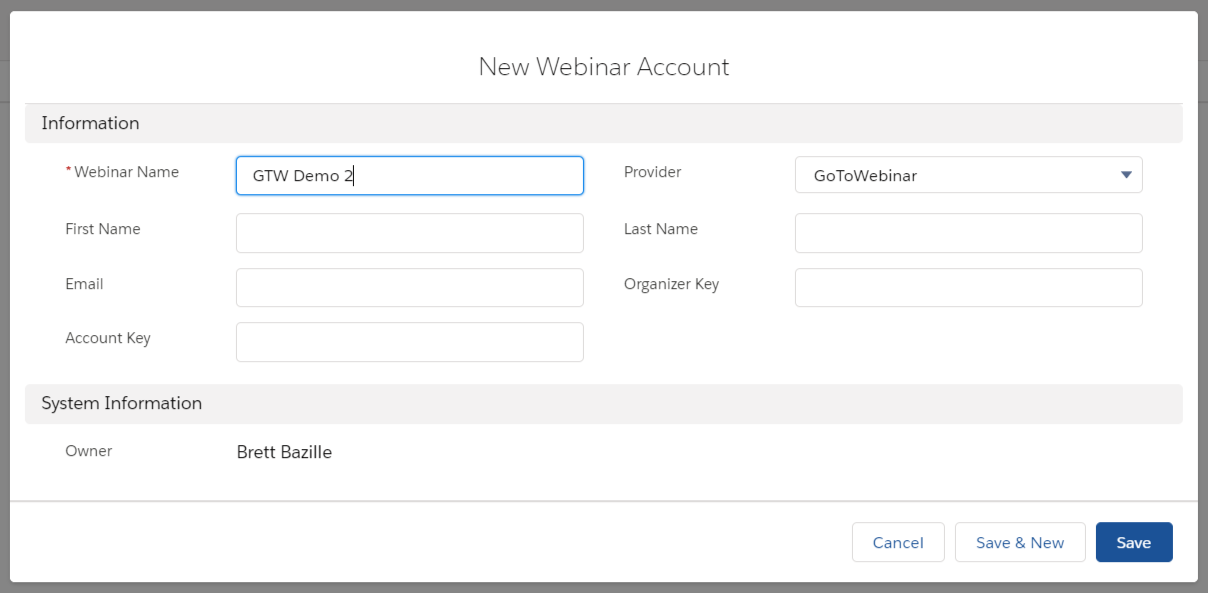
Click Save.
Open the Webinar Account record and click Authorize.
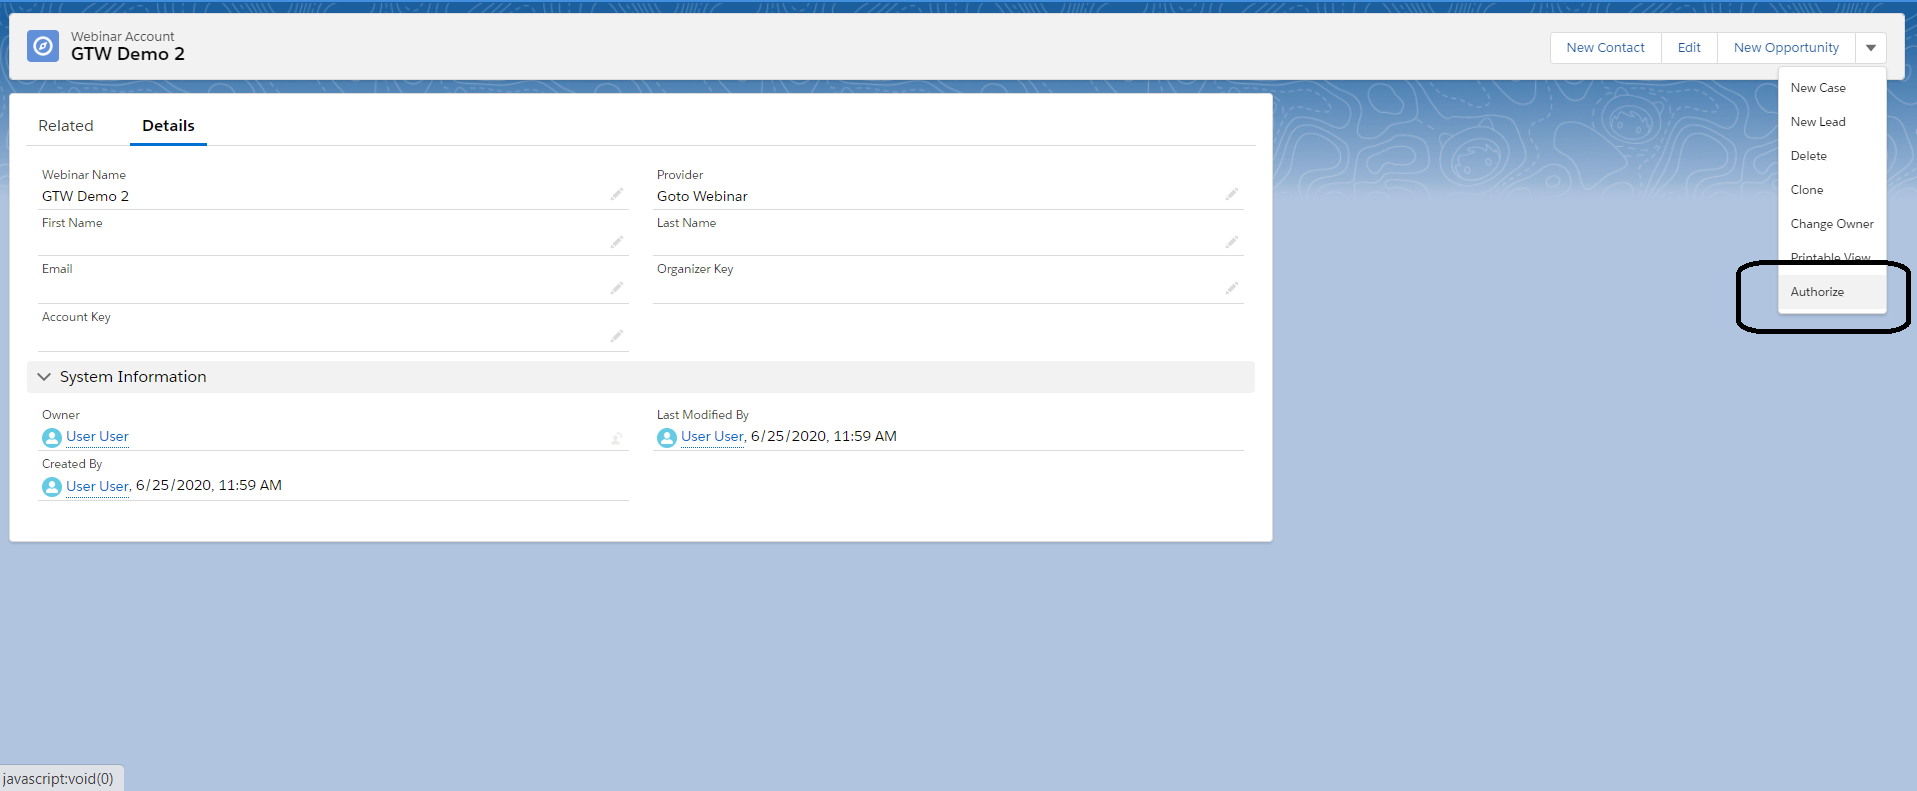
Complete the OAuth by clicking Connect and entering your webinar account credentials.
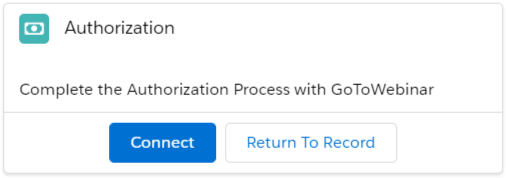
Your Webinar Account should be automatically updated with the First Name, Last Name, Email, Organizer Key, and Account Key.
Authentication Error
If you receive the following error message when authorizing a Zoom account, please complete the steps below.
Error Message: "It looks like you are already authenticated to use the Zoom Integration. If you are receiving other errors, please contact Blackthorn Support."
Navigate to: https://marketplace.zoom.us/.
Click Manage.
Click Added Apps.
Find "Blackthorn Events" and click Remove.
Zoom Configurations
Events / Zoom Integration Update
The following changes have been made to prevent an Attendee from being added to a Zoom meeting or webinar as a cohost.
If the integration between Events and Zoom fails to automatically register an Attendee with Zoom, the AttendeeLink will revert to a generic “join” link instead of the link used by the host. Zoom may also require the Attendee to enter their name/register when joining the meeting.
Zoom Registration Approval
The Zoom Registration Approval Type field was added to the Event object to enforce the approval type as a required value.
Field Label: Zoom Registration Approval Type
API Name: Zoom_Registration_Approval_Type__c
Data Type: Picklist
Description: Use this field to define the type of approval a meeting registration requires. The three types of approval are “No registration required” (default setting), “Manually approve registration,” or “Automatically approve registration.” The default setting is “No registration required.”
Each approval type uses the following workflow.
0 - Automatically approve registration
Attendees can join with their join URL
Users must register for the Meeting/Webinar in advance and will be given the option to join directly after. The host can deny attendees after they have registered.
1 - Manually approve registration
Attendees must complete a form before they can join the meeting/webinar.
Users must register for the webinar in advance and will only be given options to join after the host approves their registration within the Zoom platform.
Note: The Zoom join link is unavailable to Attendees until they are manually approved in the Zoom dashboard. Upon approval, Attendees will receive a Zoom email. Event Organizers can also manually add the Zoom join link to the Attendee's Webinar/Meeting Join URL field once the link is available.
2 - No registration required
Attendees are NOT required to complete a form before joining the meeting/webinar.
The Zoom Registration Approval Type field is not automatically added to the Event page layout. To add it, complete the following steps.
Click the Gear icon.
Click Setup.
Click Object Manager.
In the Quick Find box, enter and click “Event (conference360__Event__c).”
Click the Page Layouts tab.
Click "Event Layout."
Drag and drop the Zoom Registration Approval Type field on the page layout.
Click Save.
Go to an Event record.
Click the Pencil icon next to Zoom Registration Approval Type.
Select a value.
"0 - Automatically approve registration"
"1 - Manually approve registration"
"2 - No registration required"
Click Save
Confirm that the Event record is linked to the Event Settings record.
If a user selects “Manually approve registration,” the Event Organizer must log in to Zoom and manually approve the new registrants to complete the registration process.
Click here to go to Zoom’s documentation to learn more.
Zoom’s Personal Meeting ID (PMI)
The Webinar Account’s new Disable Zoom PMI (conference360__Disable_Zoom_PMI__c) field allows Event Organizers to disable their Zoom account’s Personal Meeting ID (PMI) when Event registrations are required.
If an Event Organizer sets the Webinar Account’s Disable Zoom PMI field to “True” (checked) after enabling their Zoom account’s Personal Meeting ID (PMI), registered Attendees will be synced from Events to Zoom for meetings with unique Meeting IDs.
The following chart shows how the three variables, Webinar Account’s Disable Zoom PMI, Zoom account's PMI, and Event's Zoom Registration Approval Type, can determine the outcome.
Zoom Email Notifications
The Zoom Email Notifications (conference360__Zoom_Email_Notifications__c) field controls whether Zoom email notifications are sent to registrants for the associated Event or Session. Located on both the Event and Session objects, the field allows users to toggle email notifications using the Zoom Meeting API, ensuring flexibility in communication settings. This field is only available for Zoom meetings/webinars.
Both fields use the following picklist values.
Use Zoom Account Settings (default): When selected, do not send a value to the Zoom API (the same as the current functionality).
Send Zoom Emails: When selected, send “True” for both the registrants_confirmation_email and registrants_email_notification settings.
Do not send Zoom Emails: When selected, send “False” for both the registrants_confirmation_email and registrants_email_notification settings.
If the value is null (blank), do not send a value to the Zoom API. (the same as the current functionality)
Zoom URLs in Calendar Descriptions
The Include Zoom URL In Calendar Description (conference360__ Include_Zoom_URL_In_Calendar_Description__c) field on the Event object allows Event Organizers to show or hide Zoom links in the invite’s Calendar Description field after an Attendee clicks the Add to Calendar button.
When the Event’s Include Zoom URL In Calendar Description field is checked, Attendees will see text similar to “To join the meeting directly, click here: [link]” in the Calendar’s description.
NOTE: Attendee who join via the direct Zoom link will NOT have their attendance status updated in Salesforce.
Create a Webinar
Prerequisite
Only use webinar-related fields for Webinar Account integrations. Using fields such as Webinar/Meeting ID or Webinar/Meeting Password as placeholder fields for Events will cause issues when users try to join the webinar.
Update Page Layouts
Add the Webinar/Meeting Account and Webinar/Meeting ID fields to your Event OR Session page layout.
This will hold the Webinar/Meeting Account and Webinar/Meeting ID for the specific webinar. You can set different accounts on multiple Events, depending on who is hosting the Event!
Optional: Add Webinar/Meeting Password if you will be enabling passwords. This field is automatically populated if passwords are required on your Zoom account.
Optional: Add Zoom Type if you will be using Zoom to determine between a Webinar and Meeting URL.
Here is a video that walks through the steps for adding webinars to Sessions.
Add the Zoom Personal Meeting ID Enabled checkbox field to your Event OR Session page layout.
If Zoom Personal Meeting ID Enabled = "True" (checked), and a Zoom account has Personal Meeting ID enabled, the Meeting IDs on the Blackthorn record and the AttendeeLink will match.
LIMITATION: There is a known limitation when using Blackthorn Events with Personal Meeting IDs. The Attendees must enter a name before joining the meeting.
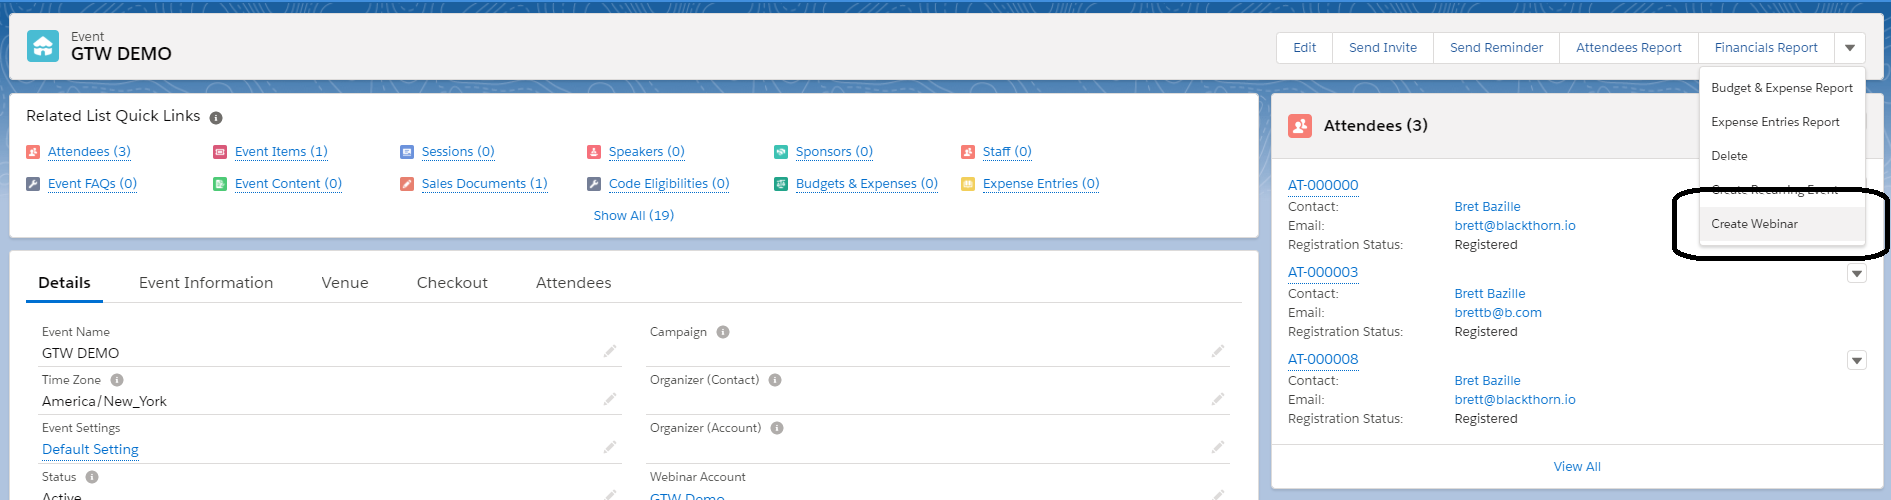
Add the Create Webinar/Meeting button to your Event OR Session page layout. This button will generate the meeting inside of Zoom, GoToWebinar, or Webex and populate the Webinar/Meeting ID field.
Add the Add to Webinar/Meeting button on the Attendee page layout. This button will add an Attendee to the webinar if the Attendee is created manually.
Add the Webinar/Meeting Join URL field on the Attendee page layout. This field sends the Attendee the direct URL to join the meeting.
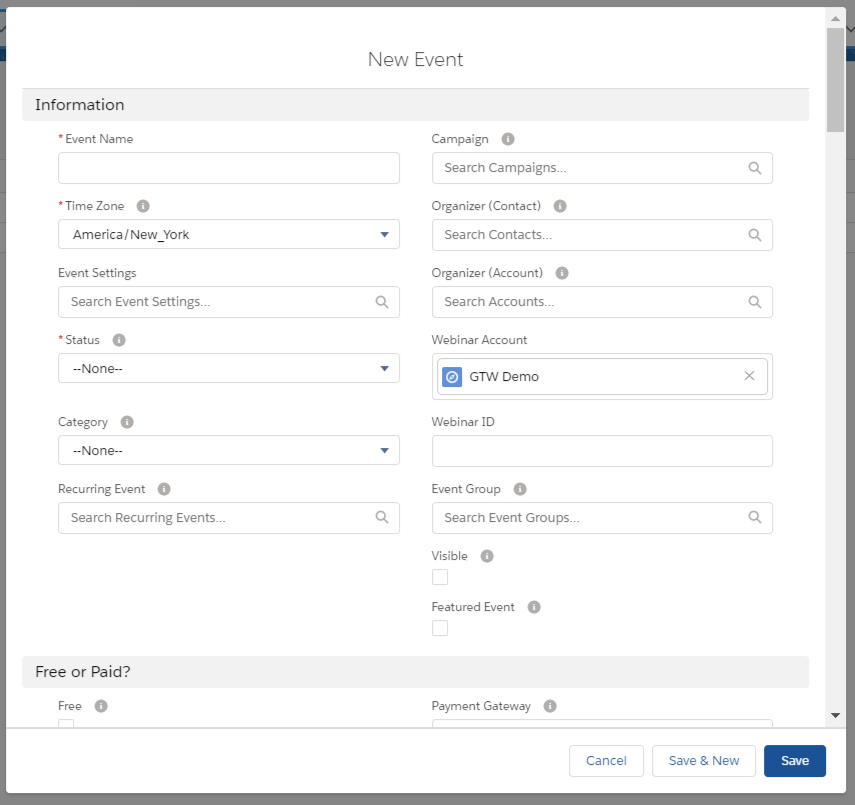
Configure the Event and Webinar
Create a new Event and add the Webinar Account you just created to the Webinar/Meeting Account field.
Zoom Users Only: Select a value for the Zoom Registration Approval Type field. If you leave the field blank or select the wrong value and later modify it in Zoom, the registration number in Zoom will not update as expected.
"0 - Automatically approve registration"
"1 - Manually approve registration"
"2 - No registration required"
Click Save.
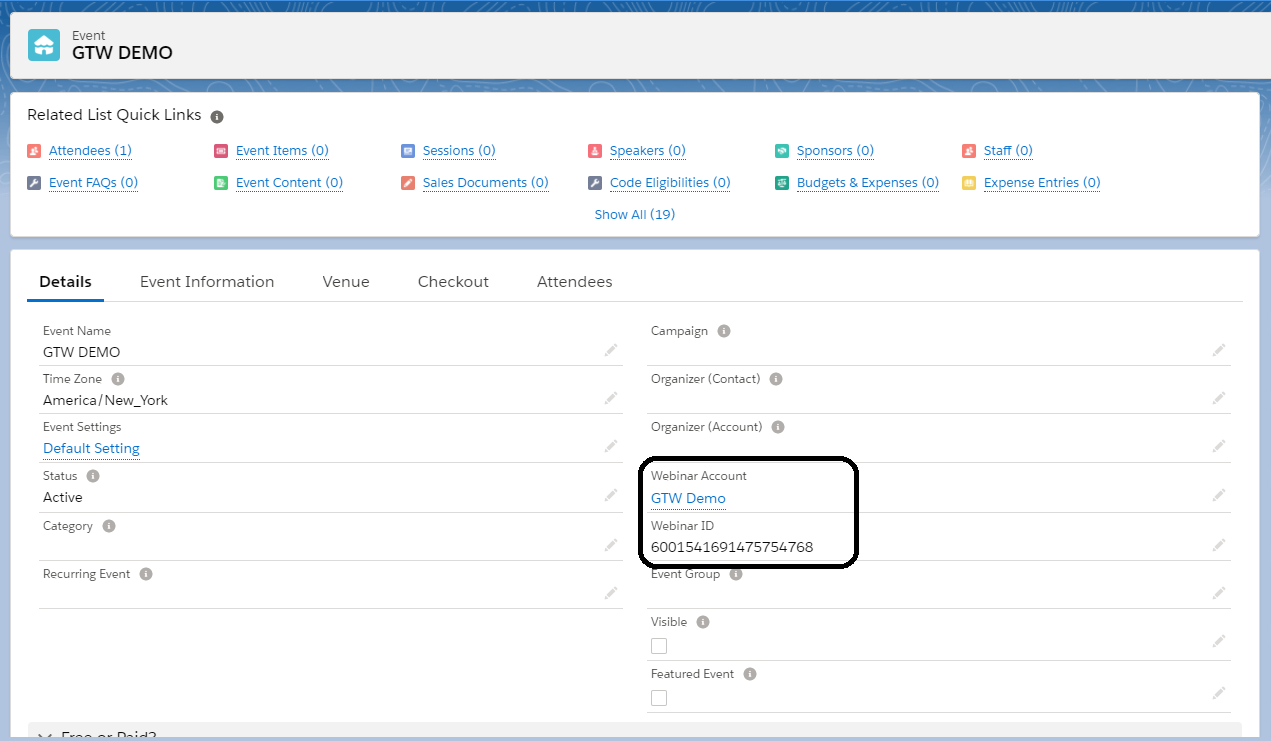
Click the Create Webinar/Meeting button.
The Webinar ID will populate automatically in the Event's Webinar/Meeting ID field. This value should not be edited, as changing it will prevent Attendees from joining your webinar.
If there is an issue, the user who authorized the Blackthorn Events app will receive email notifications for critical failures related to webinar URL generation.
Show/Hide the Join Video Stream Button
The Remove URL from Attendee Links field is located on the Event Settings object. This field allows users to show or hide the Join Video Stream button to Attendees on their AttendeeLink page when the value in the Event’s Webinar/Meeting URL field is removed.
Set Remove URL from Attendee Links to “No” or leave it blank if you want the existing behavior to continue.
Set Remove URL from Attendee Links to “Yes” if the value in the Event’s Webinar/Meeting URL (Webinar_URL__c) field is deleted, and you want the information in the Attendee’s Webinar/Meeting Join URL field (Join Video Stream button) to be removed.
Session Streaming
Attendees can also join a Session's video stream if they register for it. When creating a new Session, define the Session's Webinar/Meeting URL field.
NOTE: If the Session Attendee’s Webinar/Meeting Join URL field is blank, the webapp will use the Session’s Webinar/Meeting URL, ensuring the Session Attendee has the correct access.

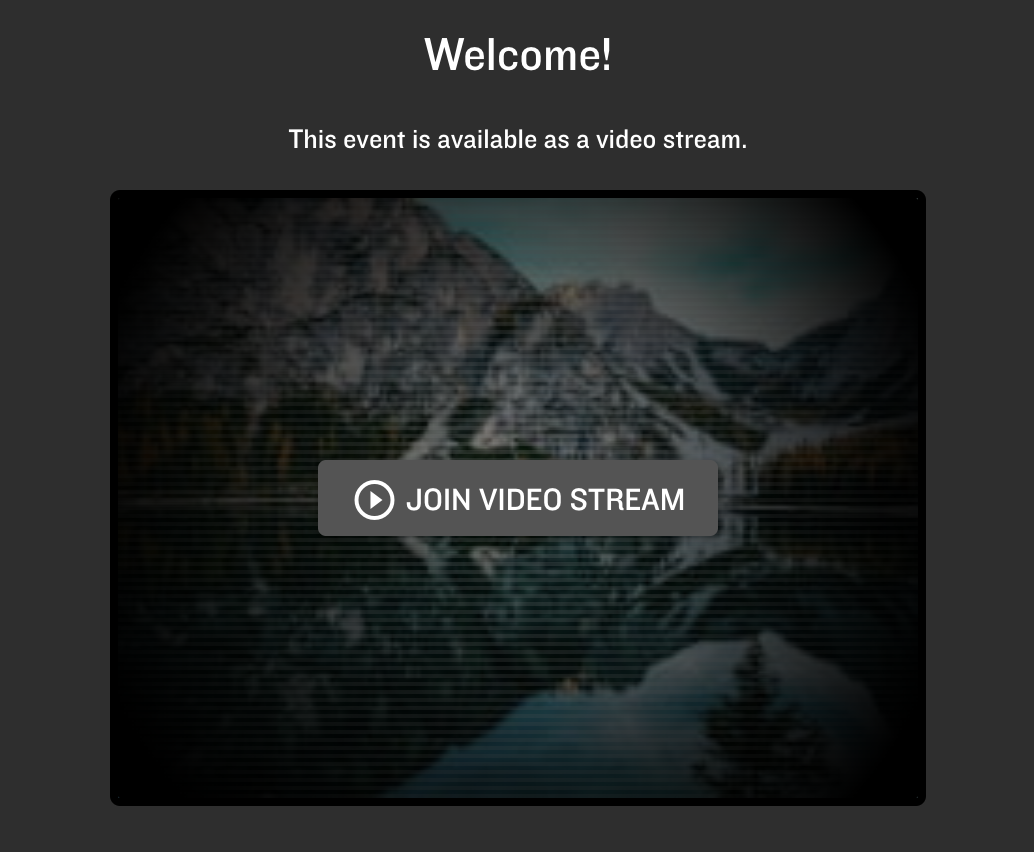
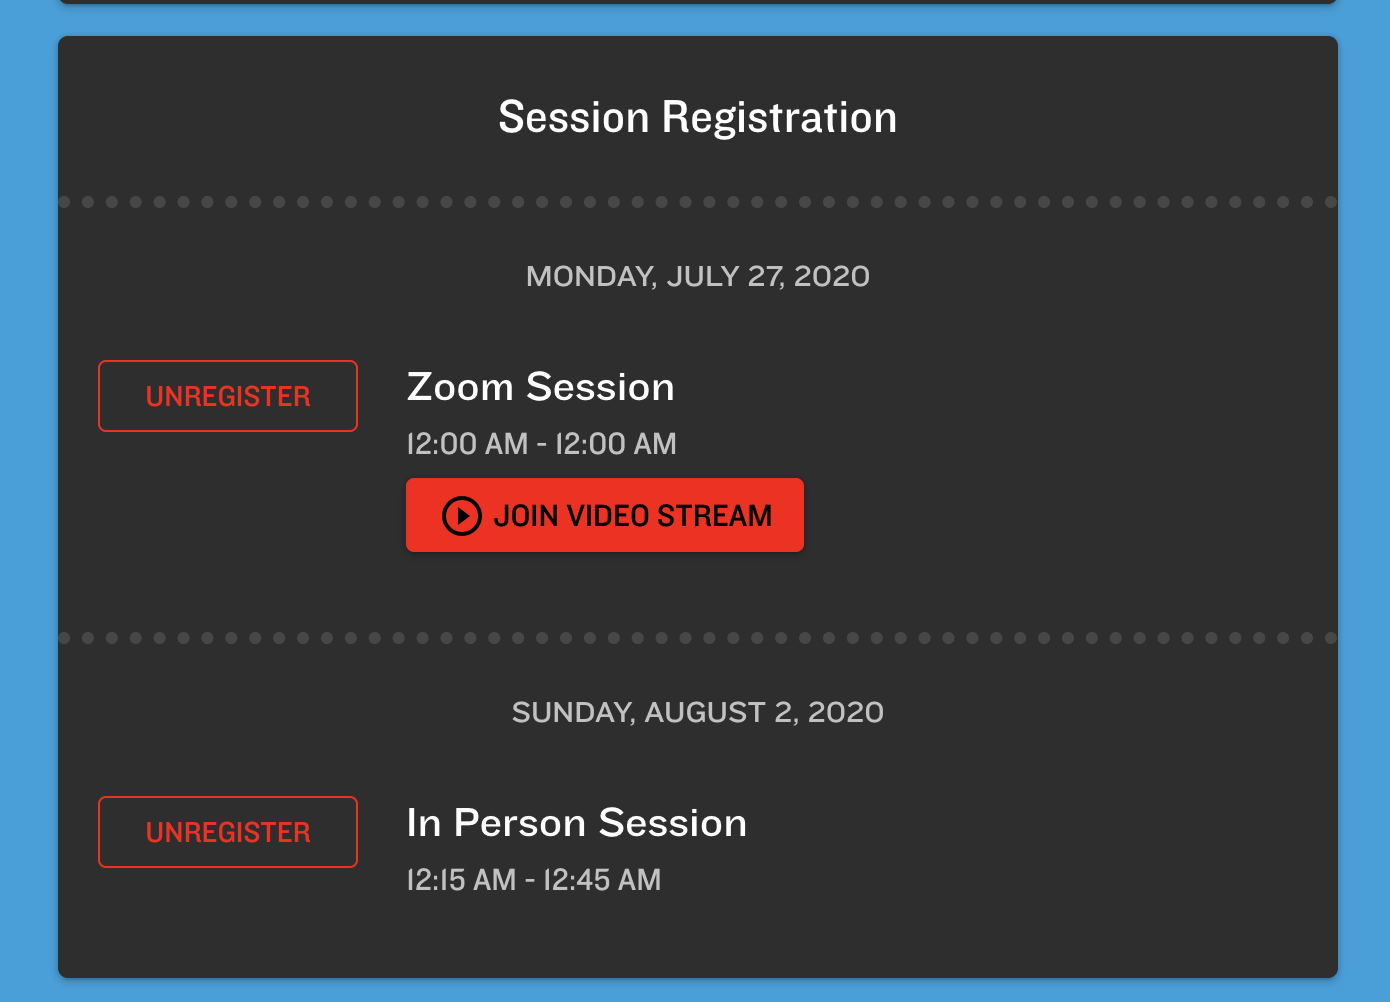
The Session’s Webinar/Meeting URL field controls whether the Join Video Stream button, which functions as a link to the Zoom meeting, is shown (see below).
Once an Attendee registers for an Event, they will have the option to register for Sessions. If they register for a Session with a Webinar/Meeting URL attached, they will have the option to join!
Update an Event’s Webinar/Meeting Account
Change the Webinar Time after Event Creation
If you need to change the time of a webinar after the Virtual Event is created, you must manually update the changes in Blackthorn. Virtual Event times are only synced at Event creation.
If you need to change an Event’s Webinar/Meeting Account, please make the following changes to the Event’ record and update your Attendee(s) records. This will ensure registered Attendees have the new Webinar/Meeting Join URL.
Go to the Event’ record.
Click the Pencil icon next to Webinar/Meeting Account.
Select a new Webinar Account.
Click Save.
Go to the Webinar Account record that you added to the Event.
Click Authorize.
Go back to the Event record and click Create Webinar/Meeting.
Click Update.
One Attendee
Complete the following steps to update the Webinar/Meeting Join URL field for one registered Attendee.
Go to the Attendee’s record.
Click the Pencil icon next to Webinar/Meeting Join URL.
Delete the existing value.
Click Save.
Click Add to Webinar/Meeting.
A Group of Attendees
Complete the following steps to update the Webinar/Meeting Join URL field for a group of registered Attendees.
Go to the Blackthorn | Events Admin tab.
Click the Batch Jobs tab.
Click Register Attendees for Webinars. NOTE: This batch job will only run when there is a Webinar/Meeting ID on the Event, and the Attendee's Registration Status = "Registered."
That's all there is to it! When an Attendee views their AttendeeLink, there will be a button to join the meeting!
Register Attendees
NOTE: Automatic registration will only occur if there is a Webinar/Meeting ID on the Event and the Attendee's Registration Status is set to "Registered."
After Attendees complete the checkout process and their Registration Status = "Registered," they will receive a separate email from the Webinar Account owner with the webinar details.
Attendees going to Zoom meetings will receive a link for the Zoom meeting in their AttendeeLink instead of a separate email.
For example, a GoToWebinar email looks like this: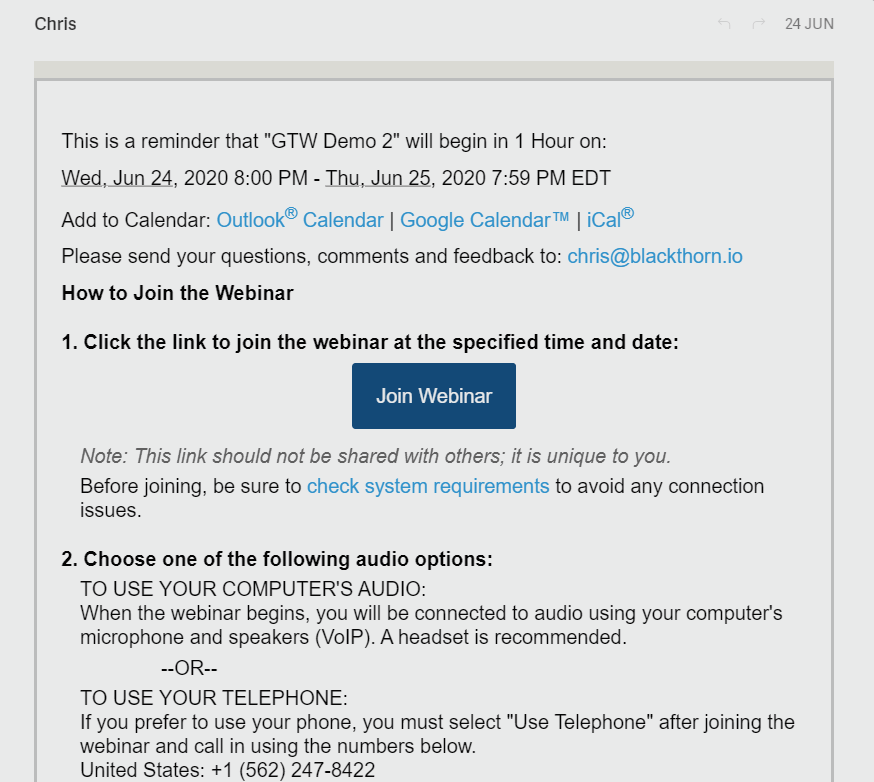
A Webex Event invite looks similar to this: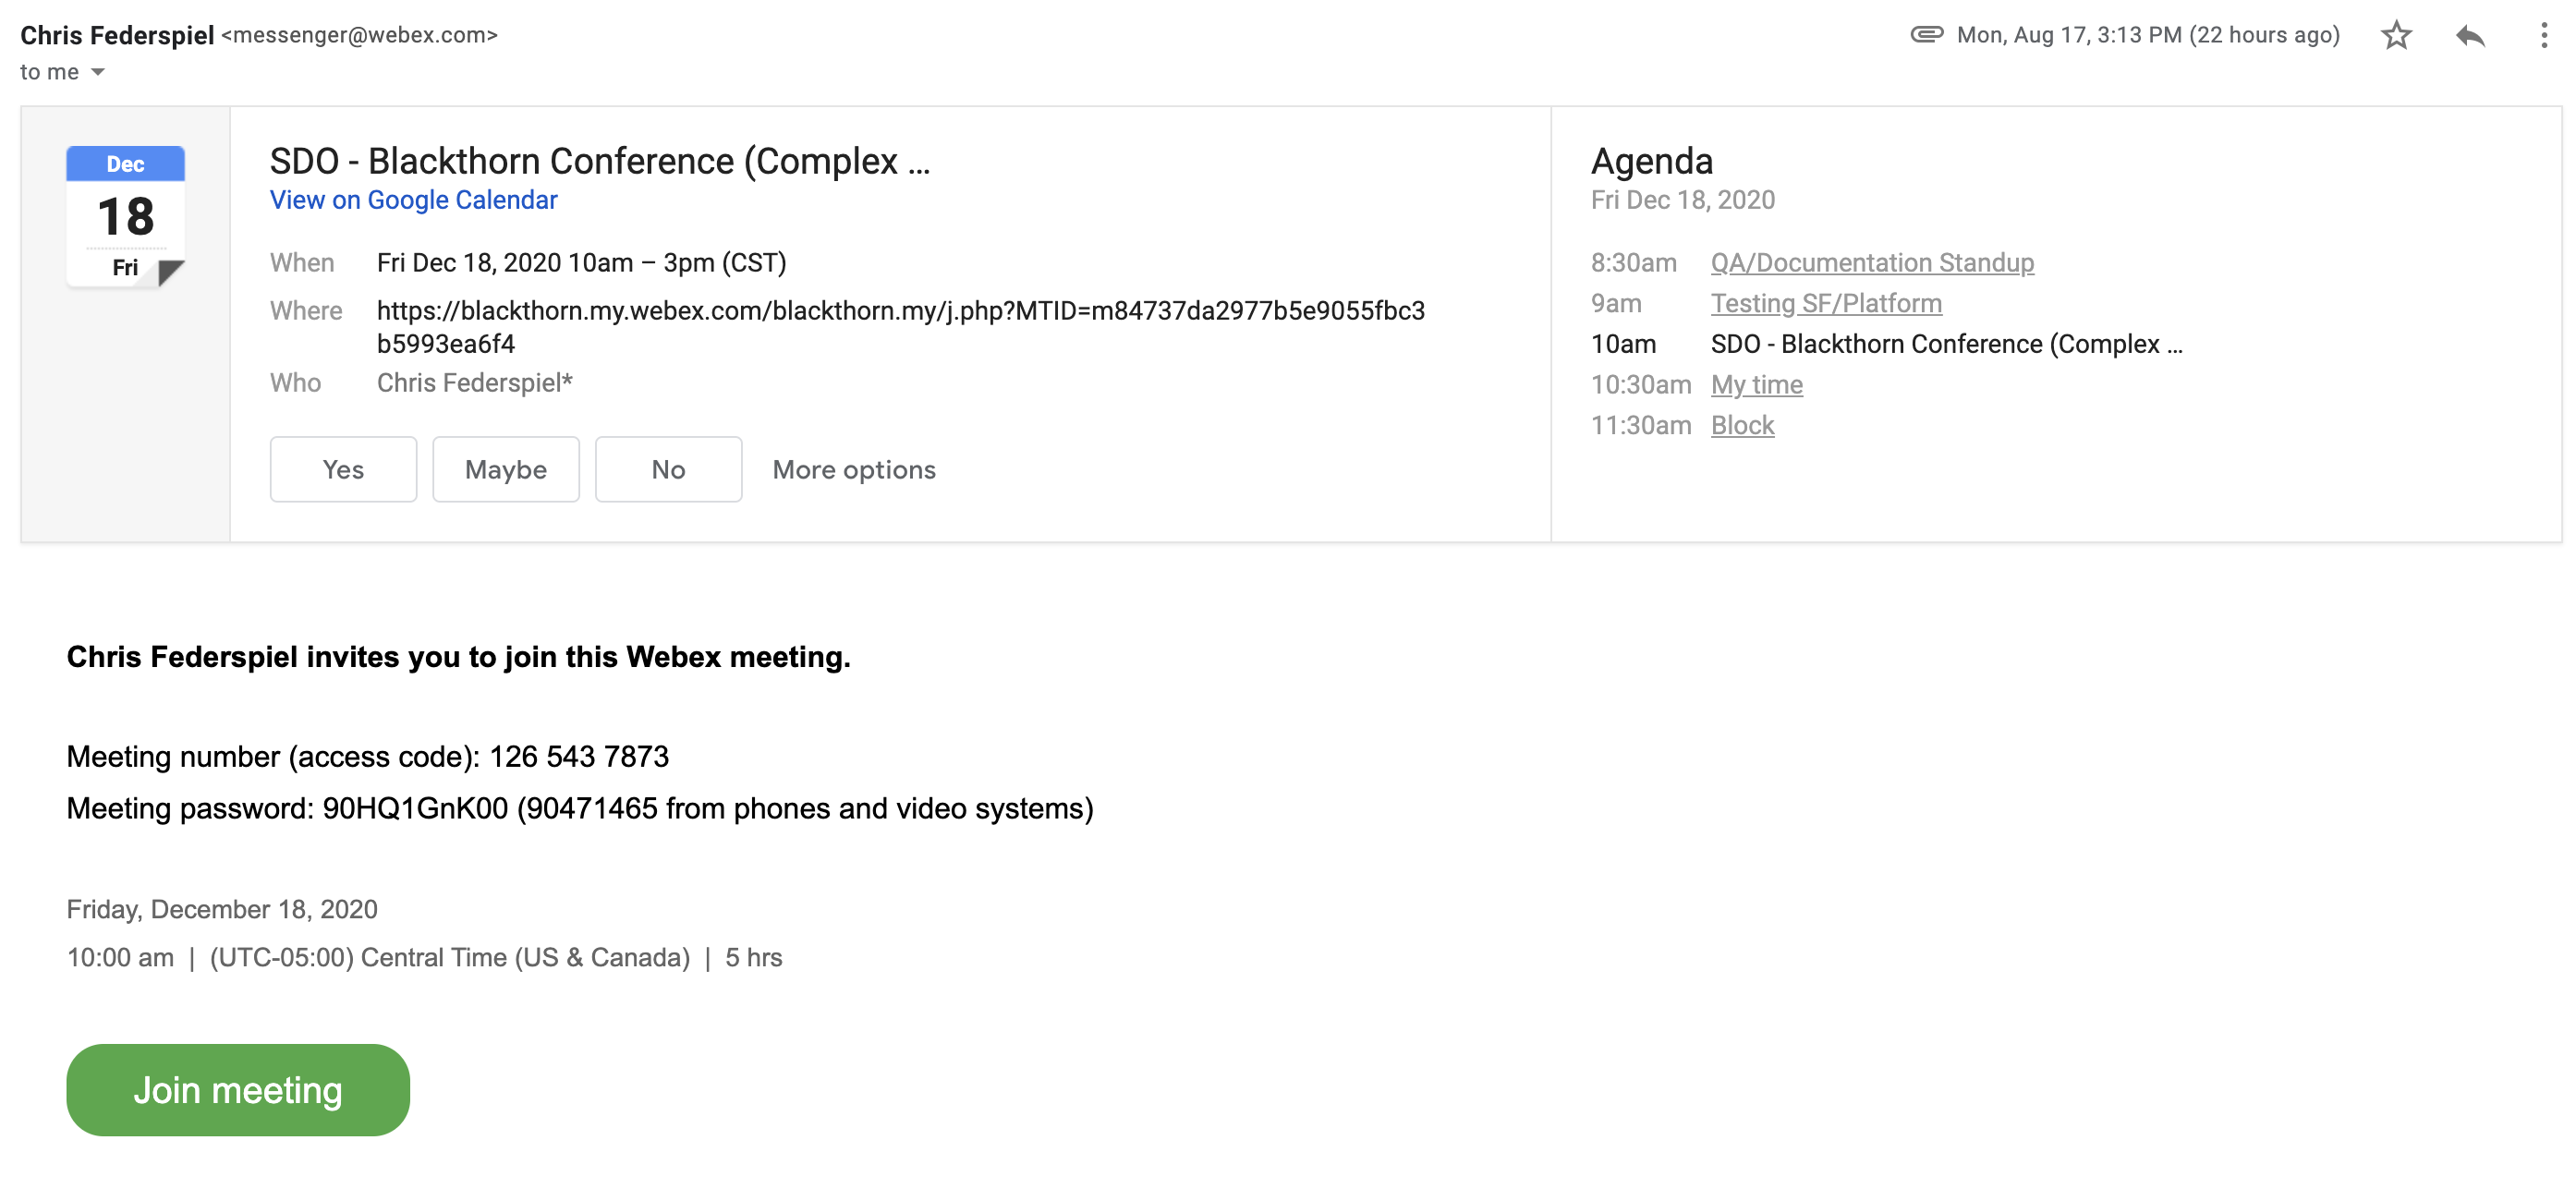
Opening Zoom and AttendeeLinks
When a user opens their AttendeeLink from their phone, they must open the link from either Safari or Chrome. If they use an email app, the AttendeeLink will open correctly, but Zoom will not.
Other Notes
When an Attendee clicks Join Video Stream their Attendance Status will be set to "Attended" if the stream is available. This is the case for any streaming service.
If using Zoom, make sure the password is embedded into your link, otherwise Attendees will not be able to join. If there is no password for the meeting, this is not required.
Ensure your webinar starts at the same time as the Event. If the webinar is set for 1 p.m. and the Event is set for 12 p.m., Attendees won't be able to join the webinar at 12 p.m.
Attendees can click Join Video Stream 15 minutes before the Event has starts.
If a host has not started the webinar, the Attendee will see "Meeting not started."
If the password is enabled, and no password is embedded in the link, Attendees will see "Password wrong" with no prompt to enter.
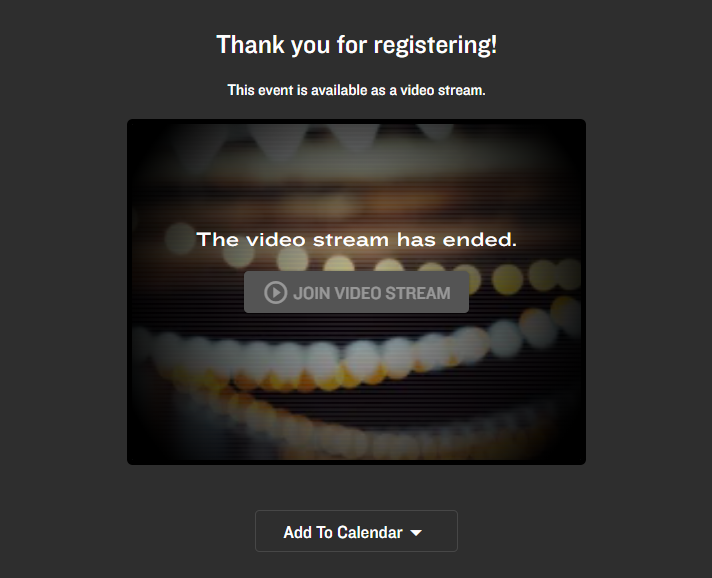
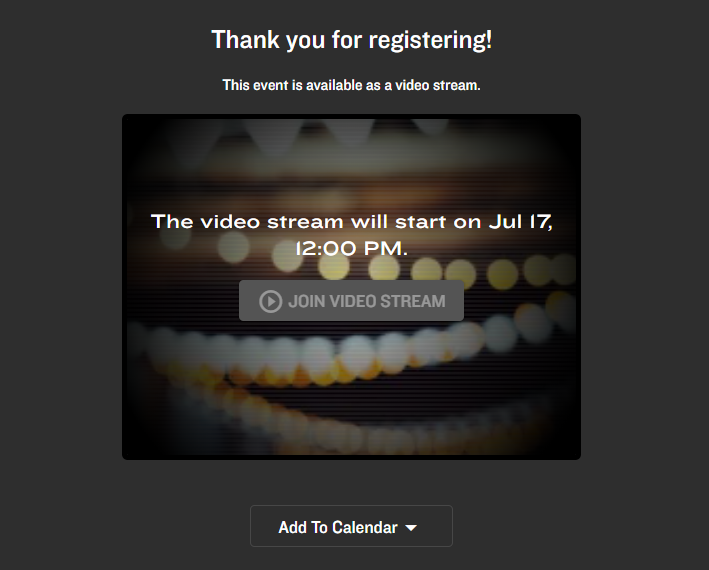
Attendees will see the following for each scenario.
Expired Webinar - The video stream has ended, the Join Video Stream button is grayed out and not clickable.
Upcoming Webinar - The video stream will start on... {date}, with a Join Video Stream button.
Ongoing Webinar - The Event is available as a video stream, with a Join Video Stream button.