In the Quick Find box, type "Custom Metadata Types".
Click Custom Metadata Types.
Click Manage Records next to Virtual Terminal Mapping.
Click New.
Add values to the following fields.
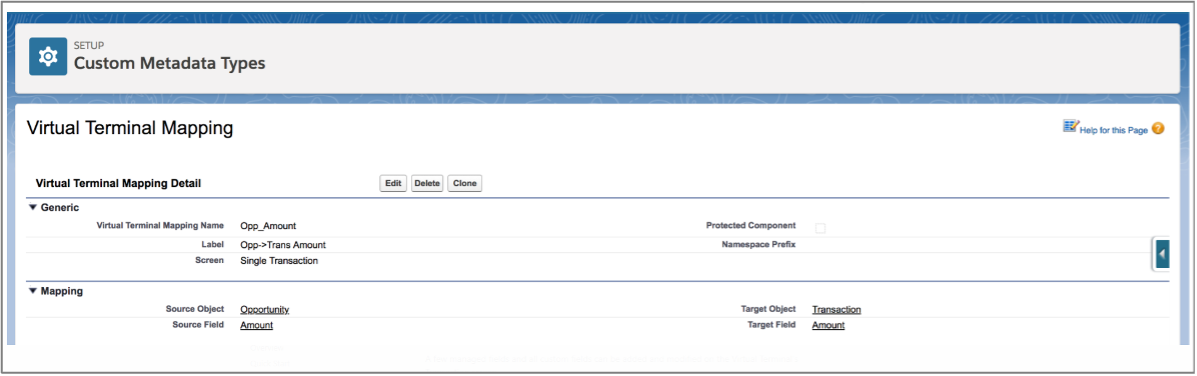
Virtual Terminal Mapping Name: This is the API name for the record. The API name can only contain underscores and alphanumeric characters. It must be unique, begin with a letter, not include spaces, not end with an underscore, and not contain two consecutive underscores. For example, "opp_amount."
Label: This is the label for the particular prepopulating record. For example, use "Opp > Trans Amount" for the label if you are prepopulating the Amount field.
Screen: Single Transaction. Use the Related To screen for prepopulating the Related To field on the Terminal's Transaction screen. See example here.
Source Object: Select the Parent Object. For example, the Opportunity Object.
Source Field: Select the field you want the value to come from. For example, if you want to prepopulate the Terminal's TransactionAmount with the Opportunity's Amount, then select the "Amount" field from the list.
Target Object: Select a Transaction [bt_stripe].
Target Field: Select the field you want the value to populate in. For example, you would select the Amount field.