Encourage Attendees to share your Event on social media!

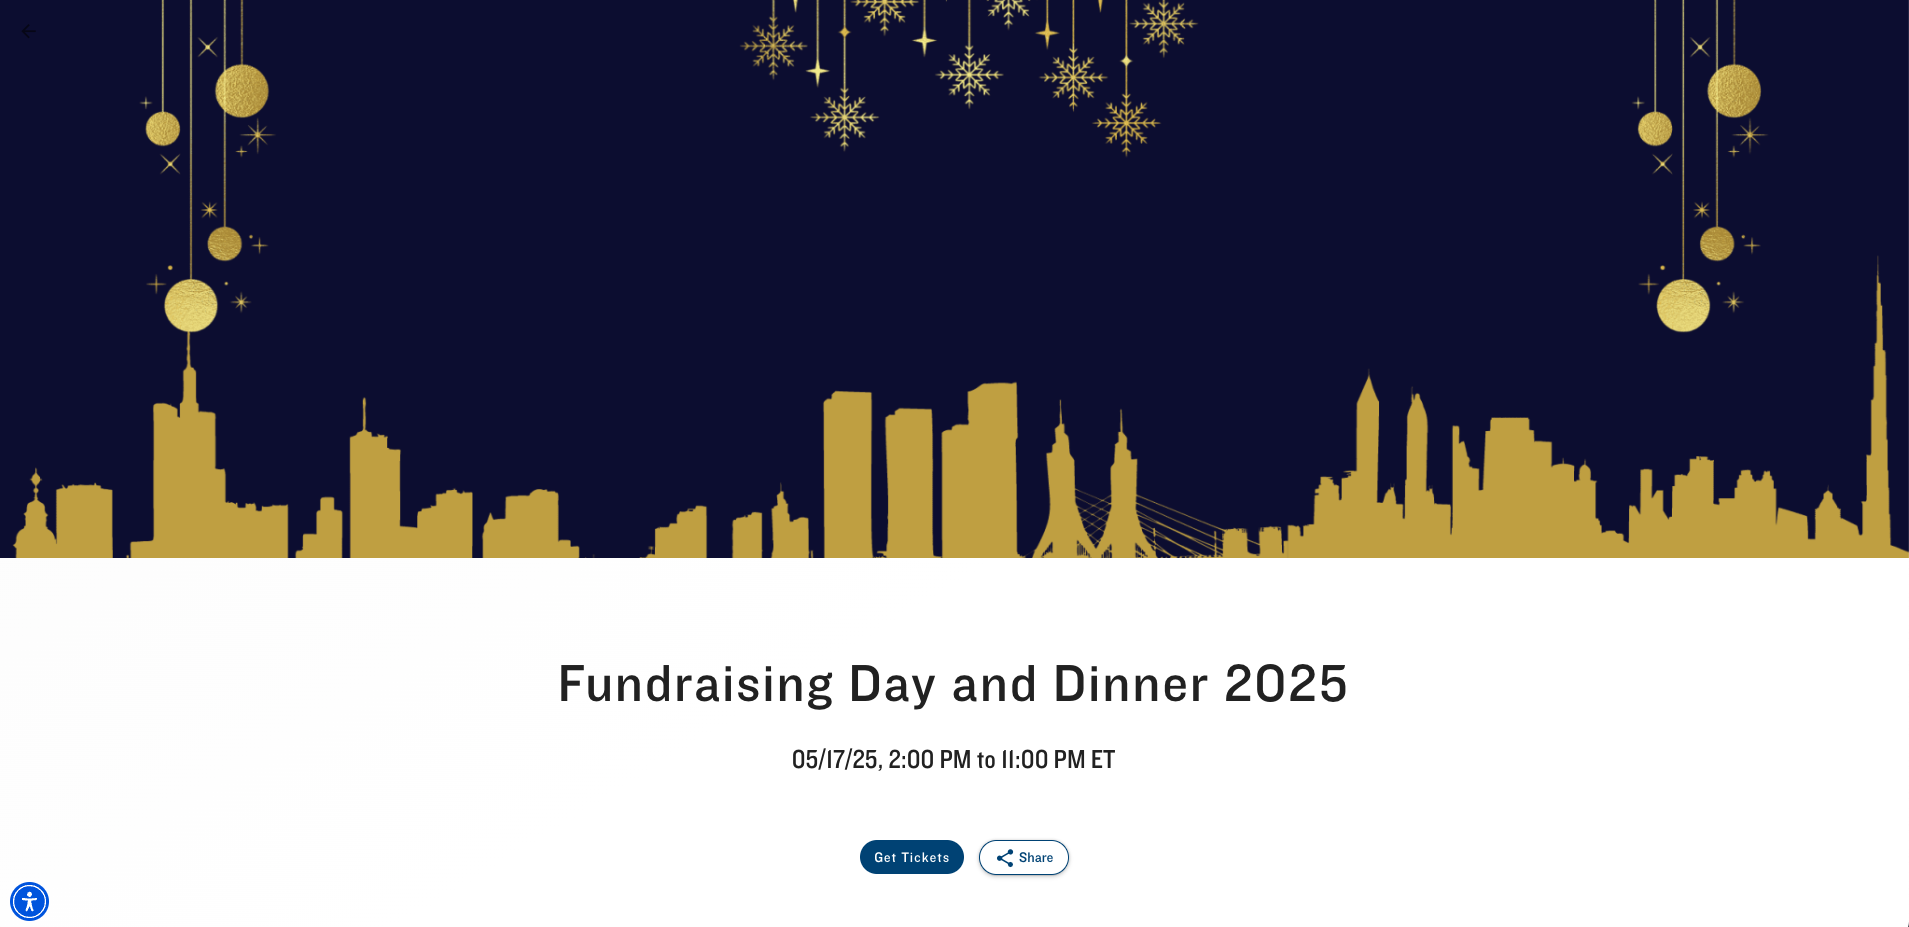
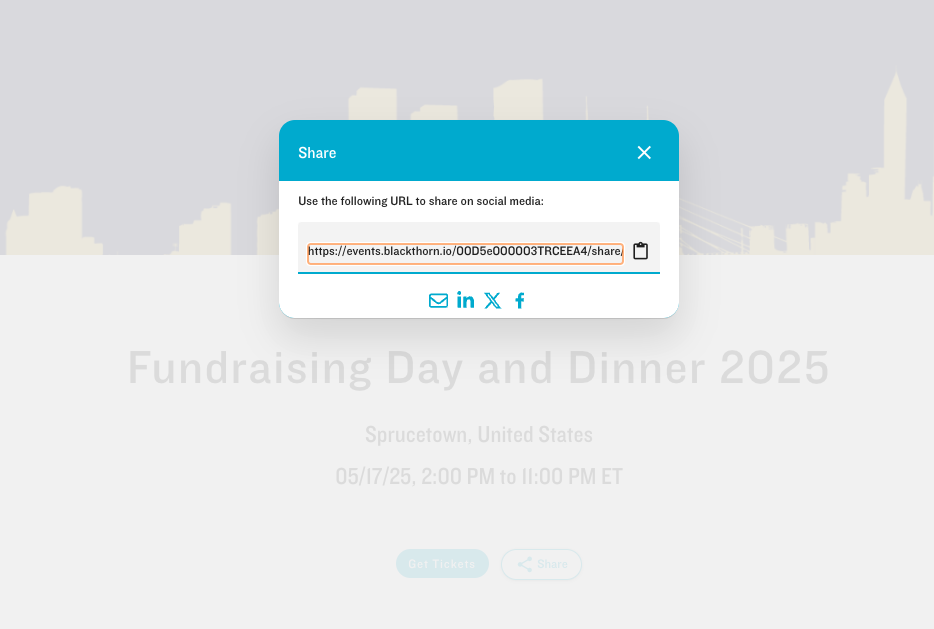
Use the Share button to generate a URL for Attendees to share Events via email or on LinkedIn, X/Twitter, or Facebook. The shareable link includes metadata like OG tags to generate a URL preview for the image, title, and description.
Please note that the Share button is not available for Event Groups.
Clicking the Share button from an Event webpage, the Experience Cloud, or an unregistered Attendee’s AttendeeLink opens a window with a shareable link and buttons for each platform. When you click the Email, LinkedIn, X/Twitter, or Facebook icon, the following happens.
- Email: Enter a "To" email address, add the remainder of the email's text, and click Send.
- LinkedIn: Enter a message to accompany the link and click Post.
- Twitter: Use the following message: “I am looking forward to attending [Event Name] - you can check it out here: [event social URL]") or edit it and click Post.
- Facebook: Enter a message to accompany the link and click Share.

Facebook will only correctly render images larger than 200x200px in Facebook posts.
Set Up and Enable
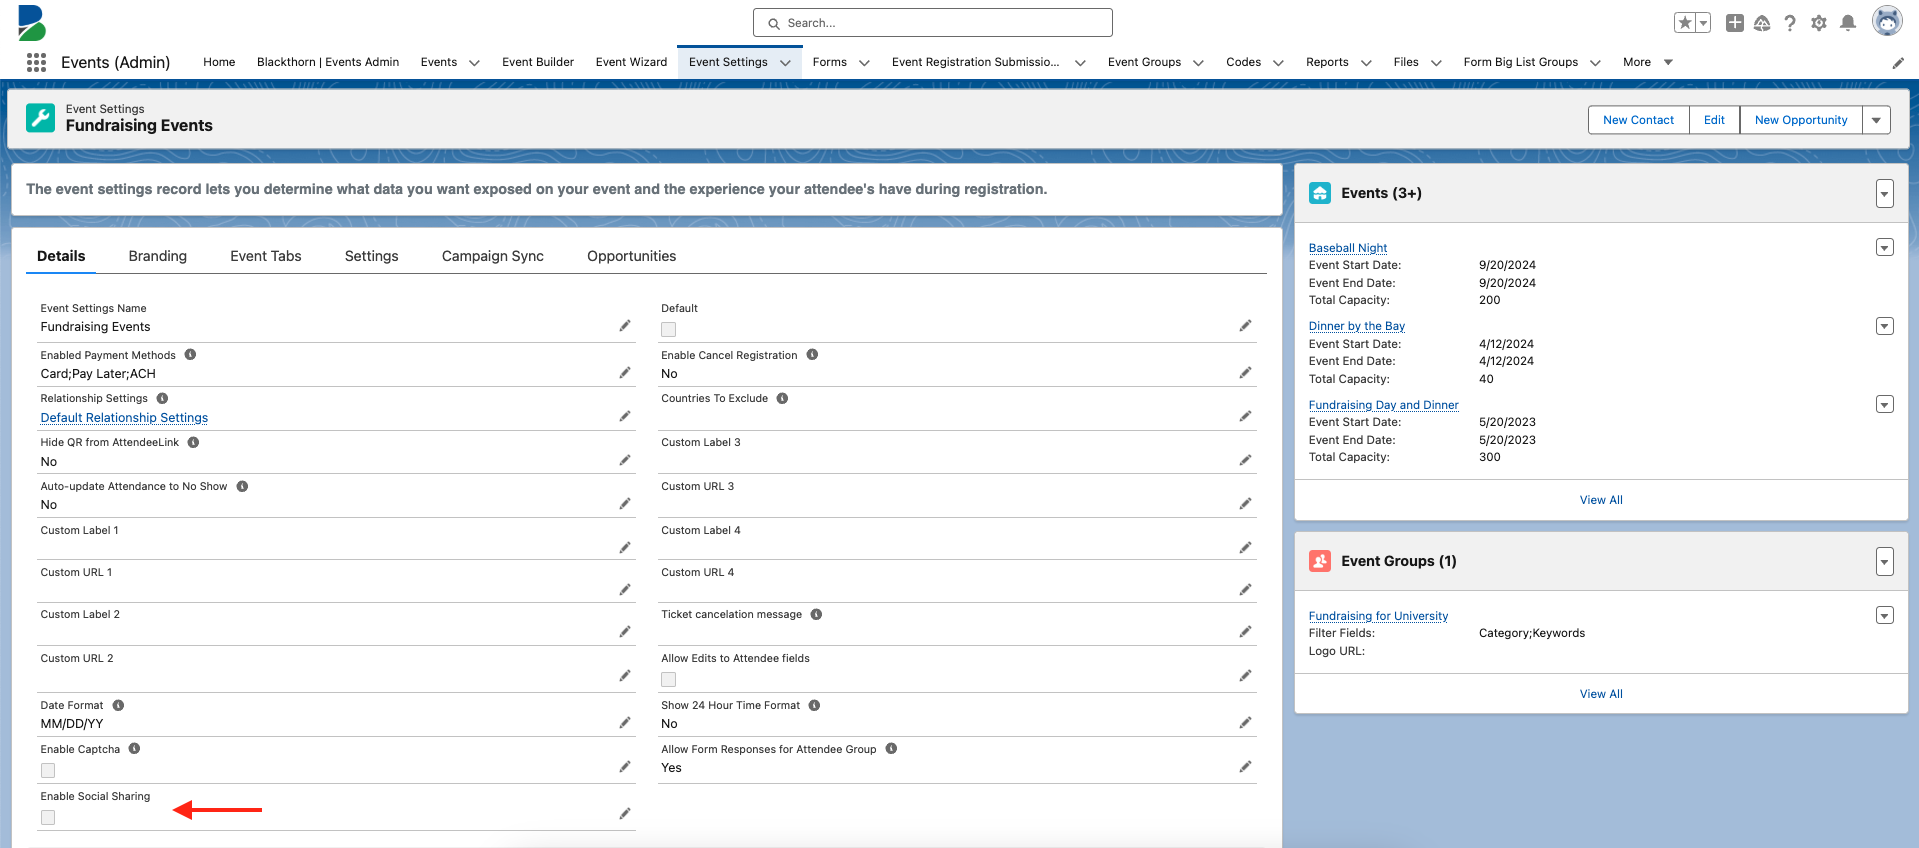
The Event Settings Enable Social Sharing checkbox allows Event Organizers to show or hide the Share button on an Event webpage.
- Object: Event Settings
- Field Label: Enable Social Sharing
- API Name: conference360__Enable_Social_Sharing__c
- Data Type: Checkbox
- Default: Unchecked (hide button by default)
- When enabled (checked), potential Attendees will see the Share button across all user interfaces.
- When disabled (unchecked), potential Attendees will not see the Share button.
If you don’t want Attendees to see the Share button, no additional action is needed.
To use the Enable Social Sharing checkbox, start by adding it to the Event Settings page layout.
- Click the Gear icon in the upper right-hand corner.
- Click Setup.
- Click the Object Manager tab.
- In the Quick Find box, enter and click “Event Settings.”
- Click the Page Layouts tab.
- Click the Page Layout Name.
- In the Quick Find box, enter “Enable Social Sharing.”
- Drag and drop the field on the page layout.
- Click Save.
- Go to the Event Settings record.
- Click the Pencil icon next to the “Enable Social Sharing field.
- Check the box.
- Click Save.
- Go to the related Event record and click Update.
