As an Event Organizer, do you have volunteers managing regional Events or university student groups that need a way to manage Events?
Experience Cloud can help. Volunteers or students can create Events with the Event Builder, configure emails, create Email Templates, and add Attendees with an Experience Cloud license.
Community User Permissions
Experience Cloud users with the Blackthorn | Events (Community/Platform User) permission set can perform the following tasks.
- Create and edit Forms and Form Elements and add them to Events or Event Items.
- Preview Forms and see and edit Blackthorn Events Form Submissions and Form Submission Answers.
- Edit existing Forms and Form Elements if the record has been created by or shared with the Experience Cloud user making the edits.
- View Forms created by other users (Cannot add Form Elements to Forms created by other users.)
- Community Users will need view access to the object to view Forms created by other users. You can also give Community Users edit permissions to existing Forms, depending on your use case.
Create Page Layouts
Use the following examples to create your page layouts in the Experience Cloud Builder.
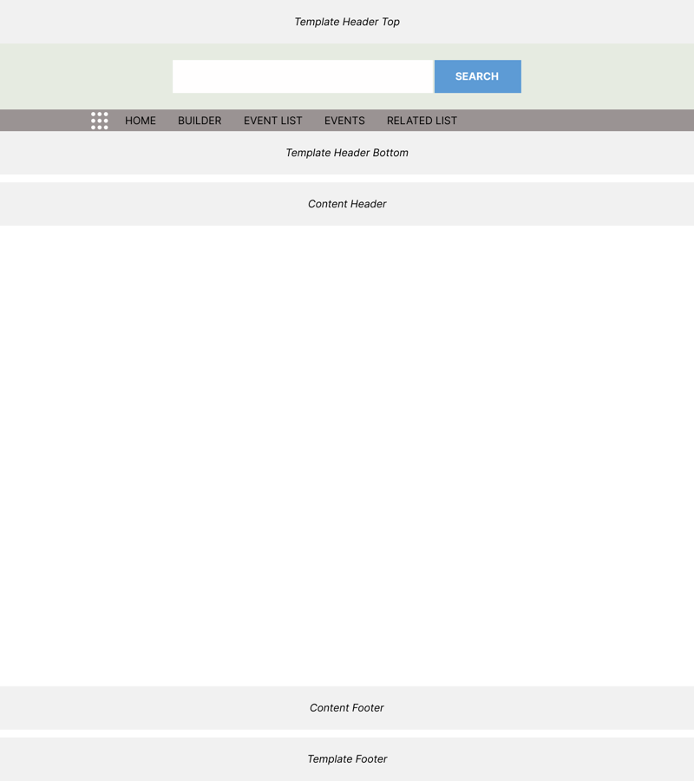
Page Title: BUILDER
The Event Builder is now available in the Experience Cloud. Users can create a tab on their Experience Site and add the Event Builder component. Experience Cloud users can then create, edit, and clone Events.
Component: Event Builder
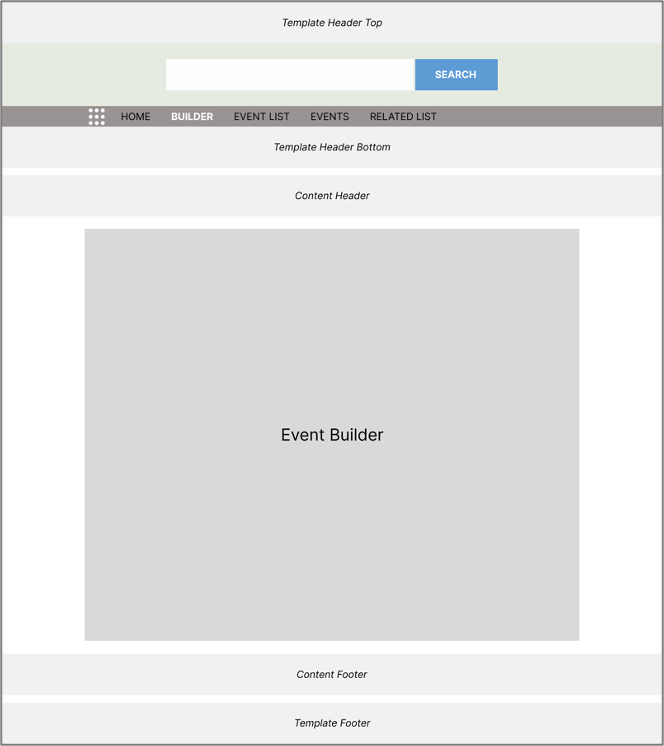
This component requires no additional configuration.
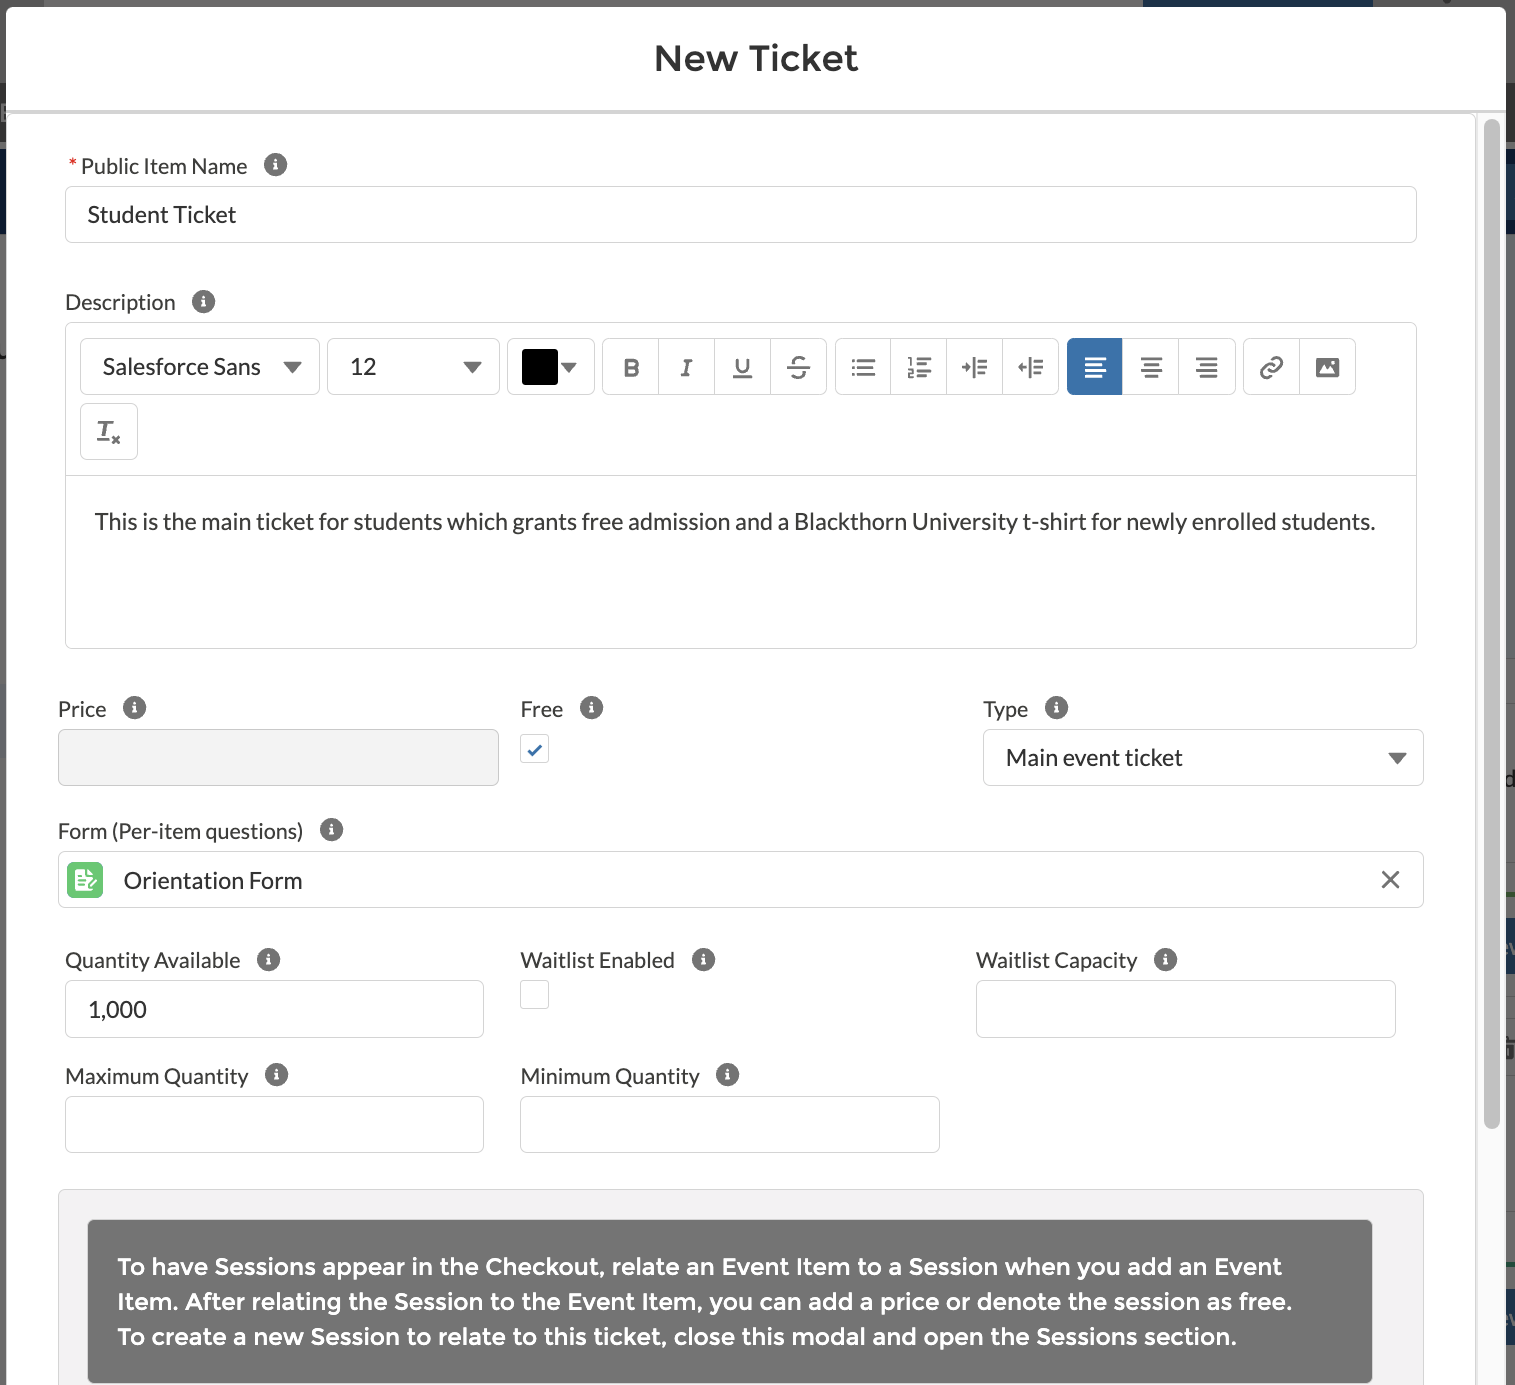
Sample Pages from the Event Builder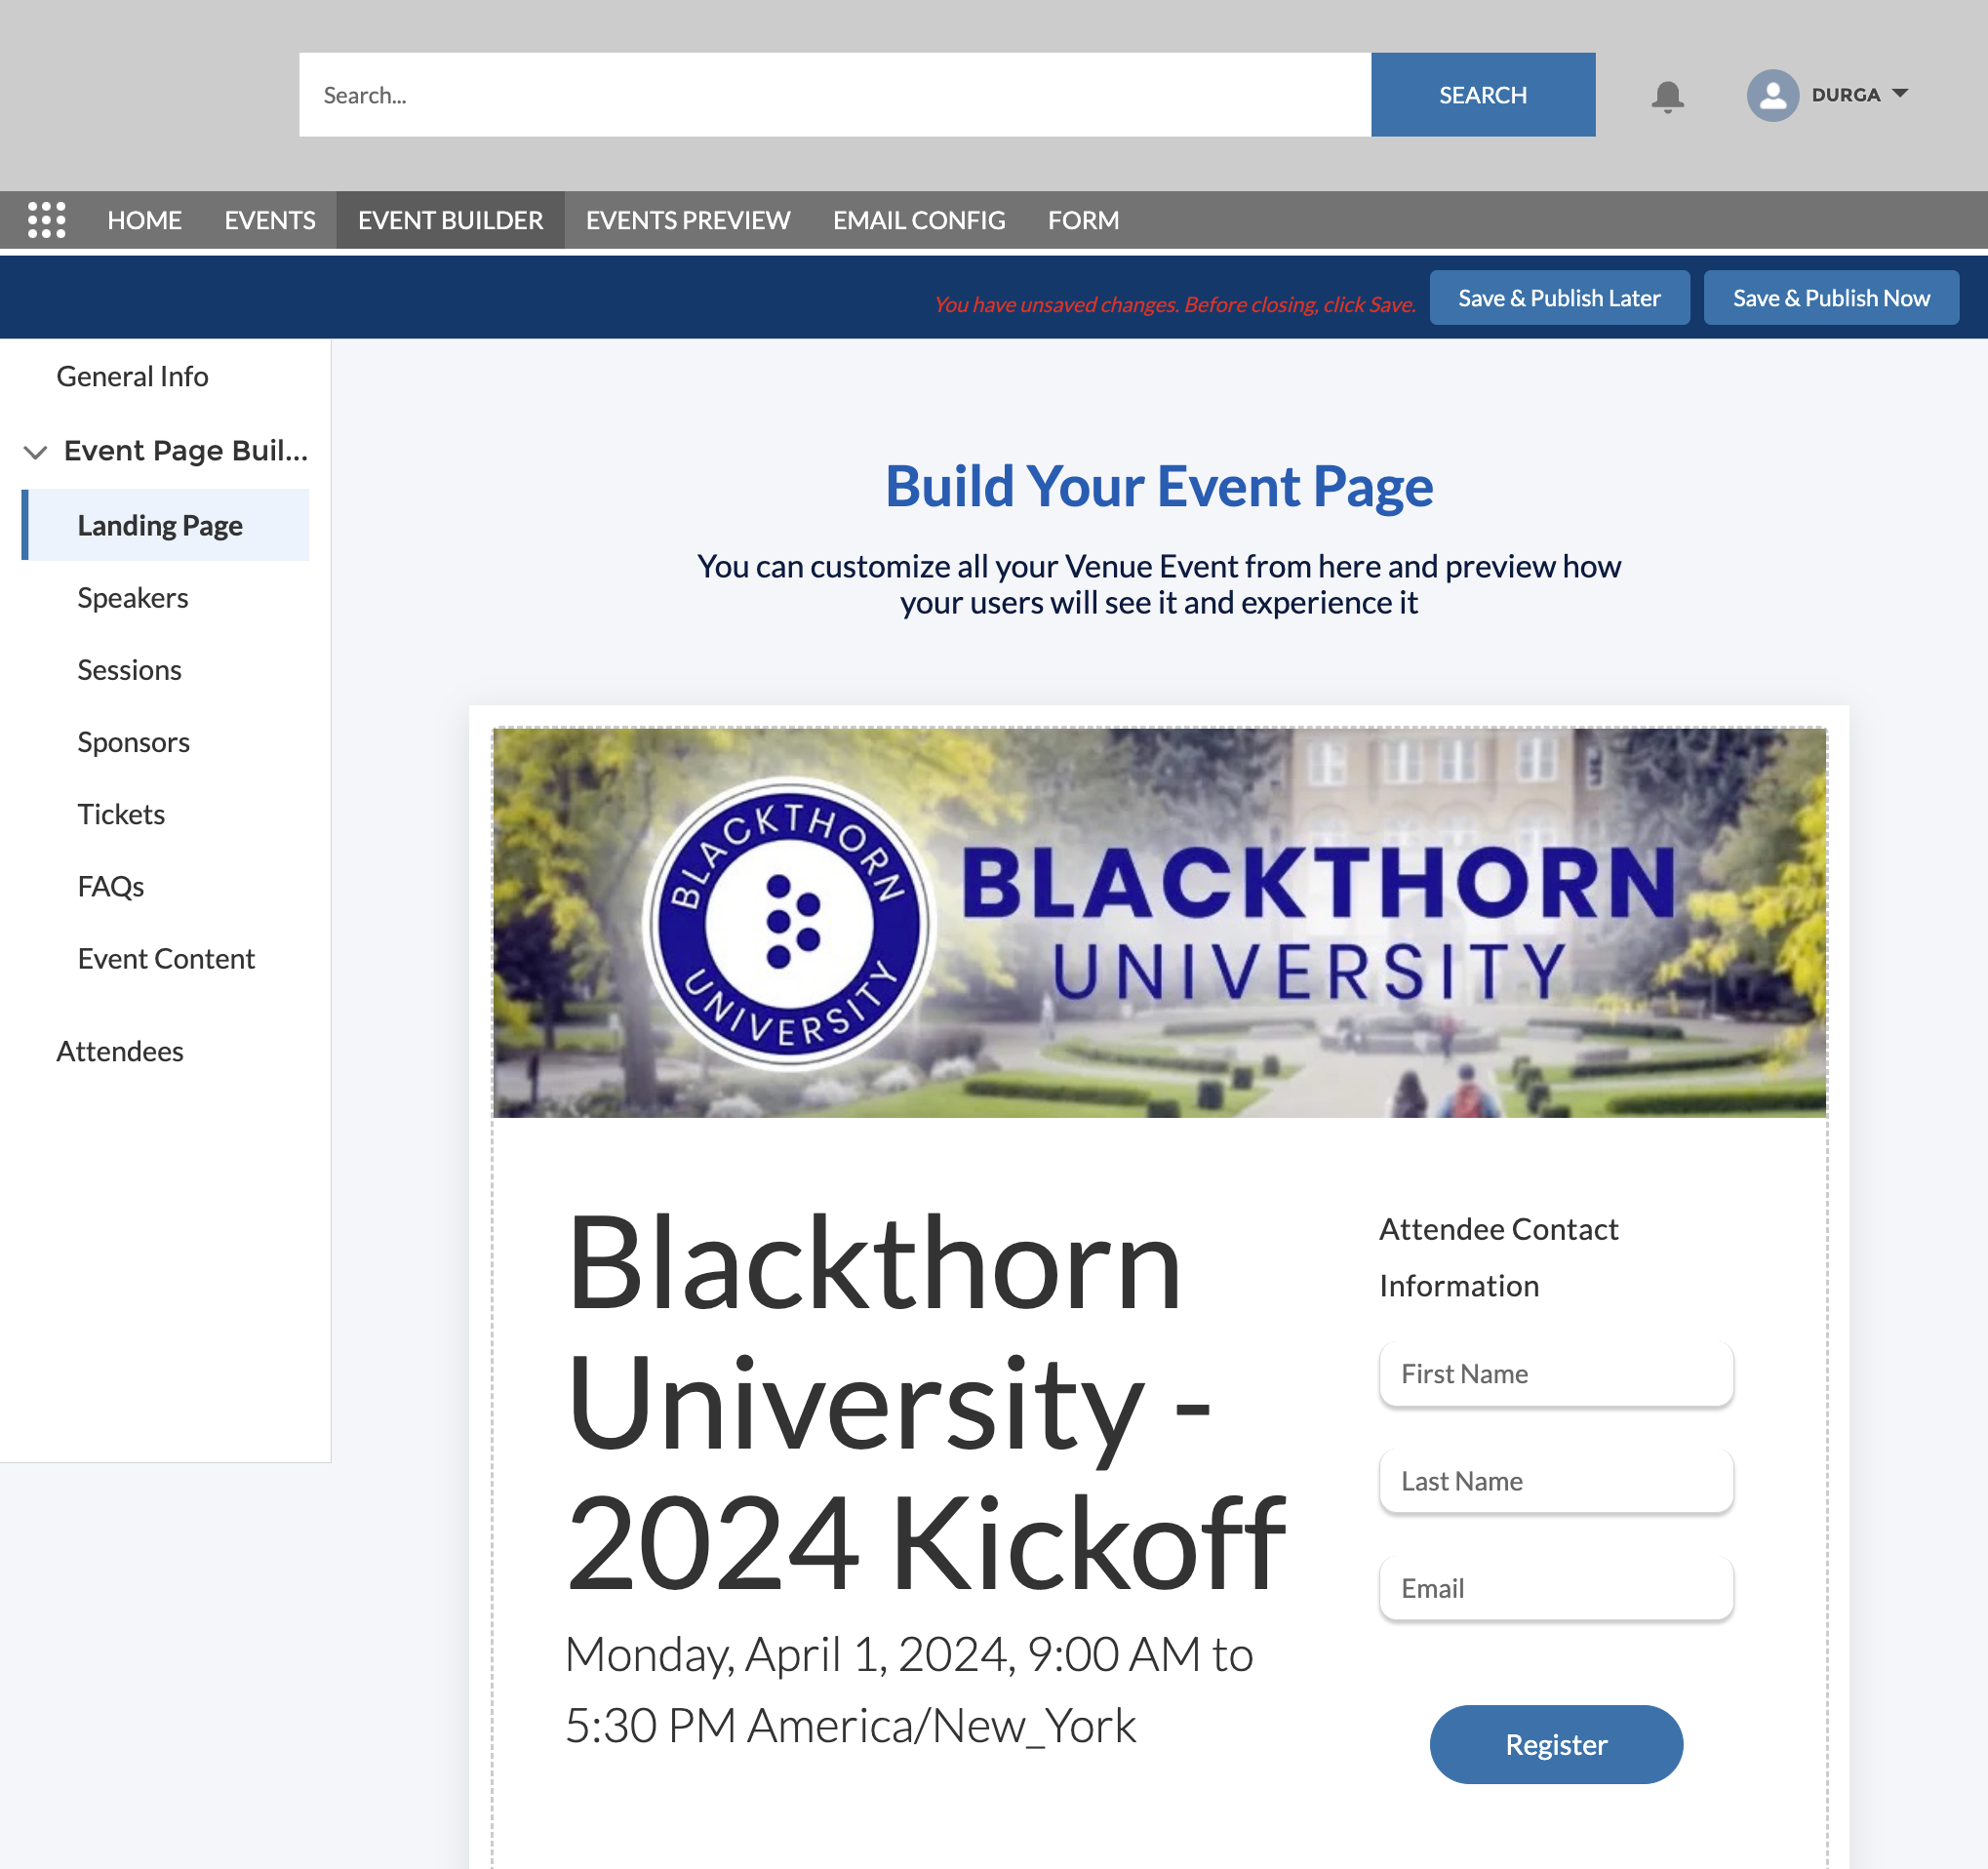
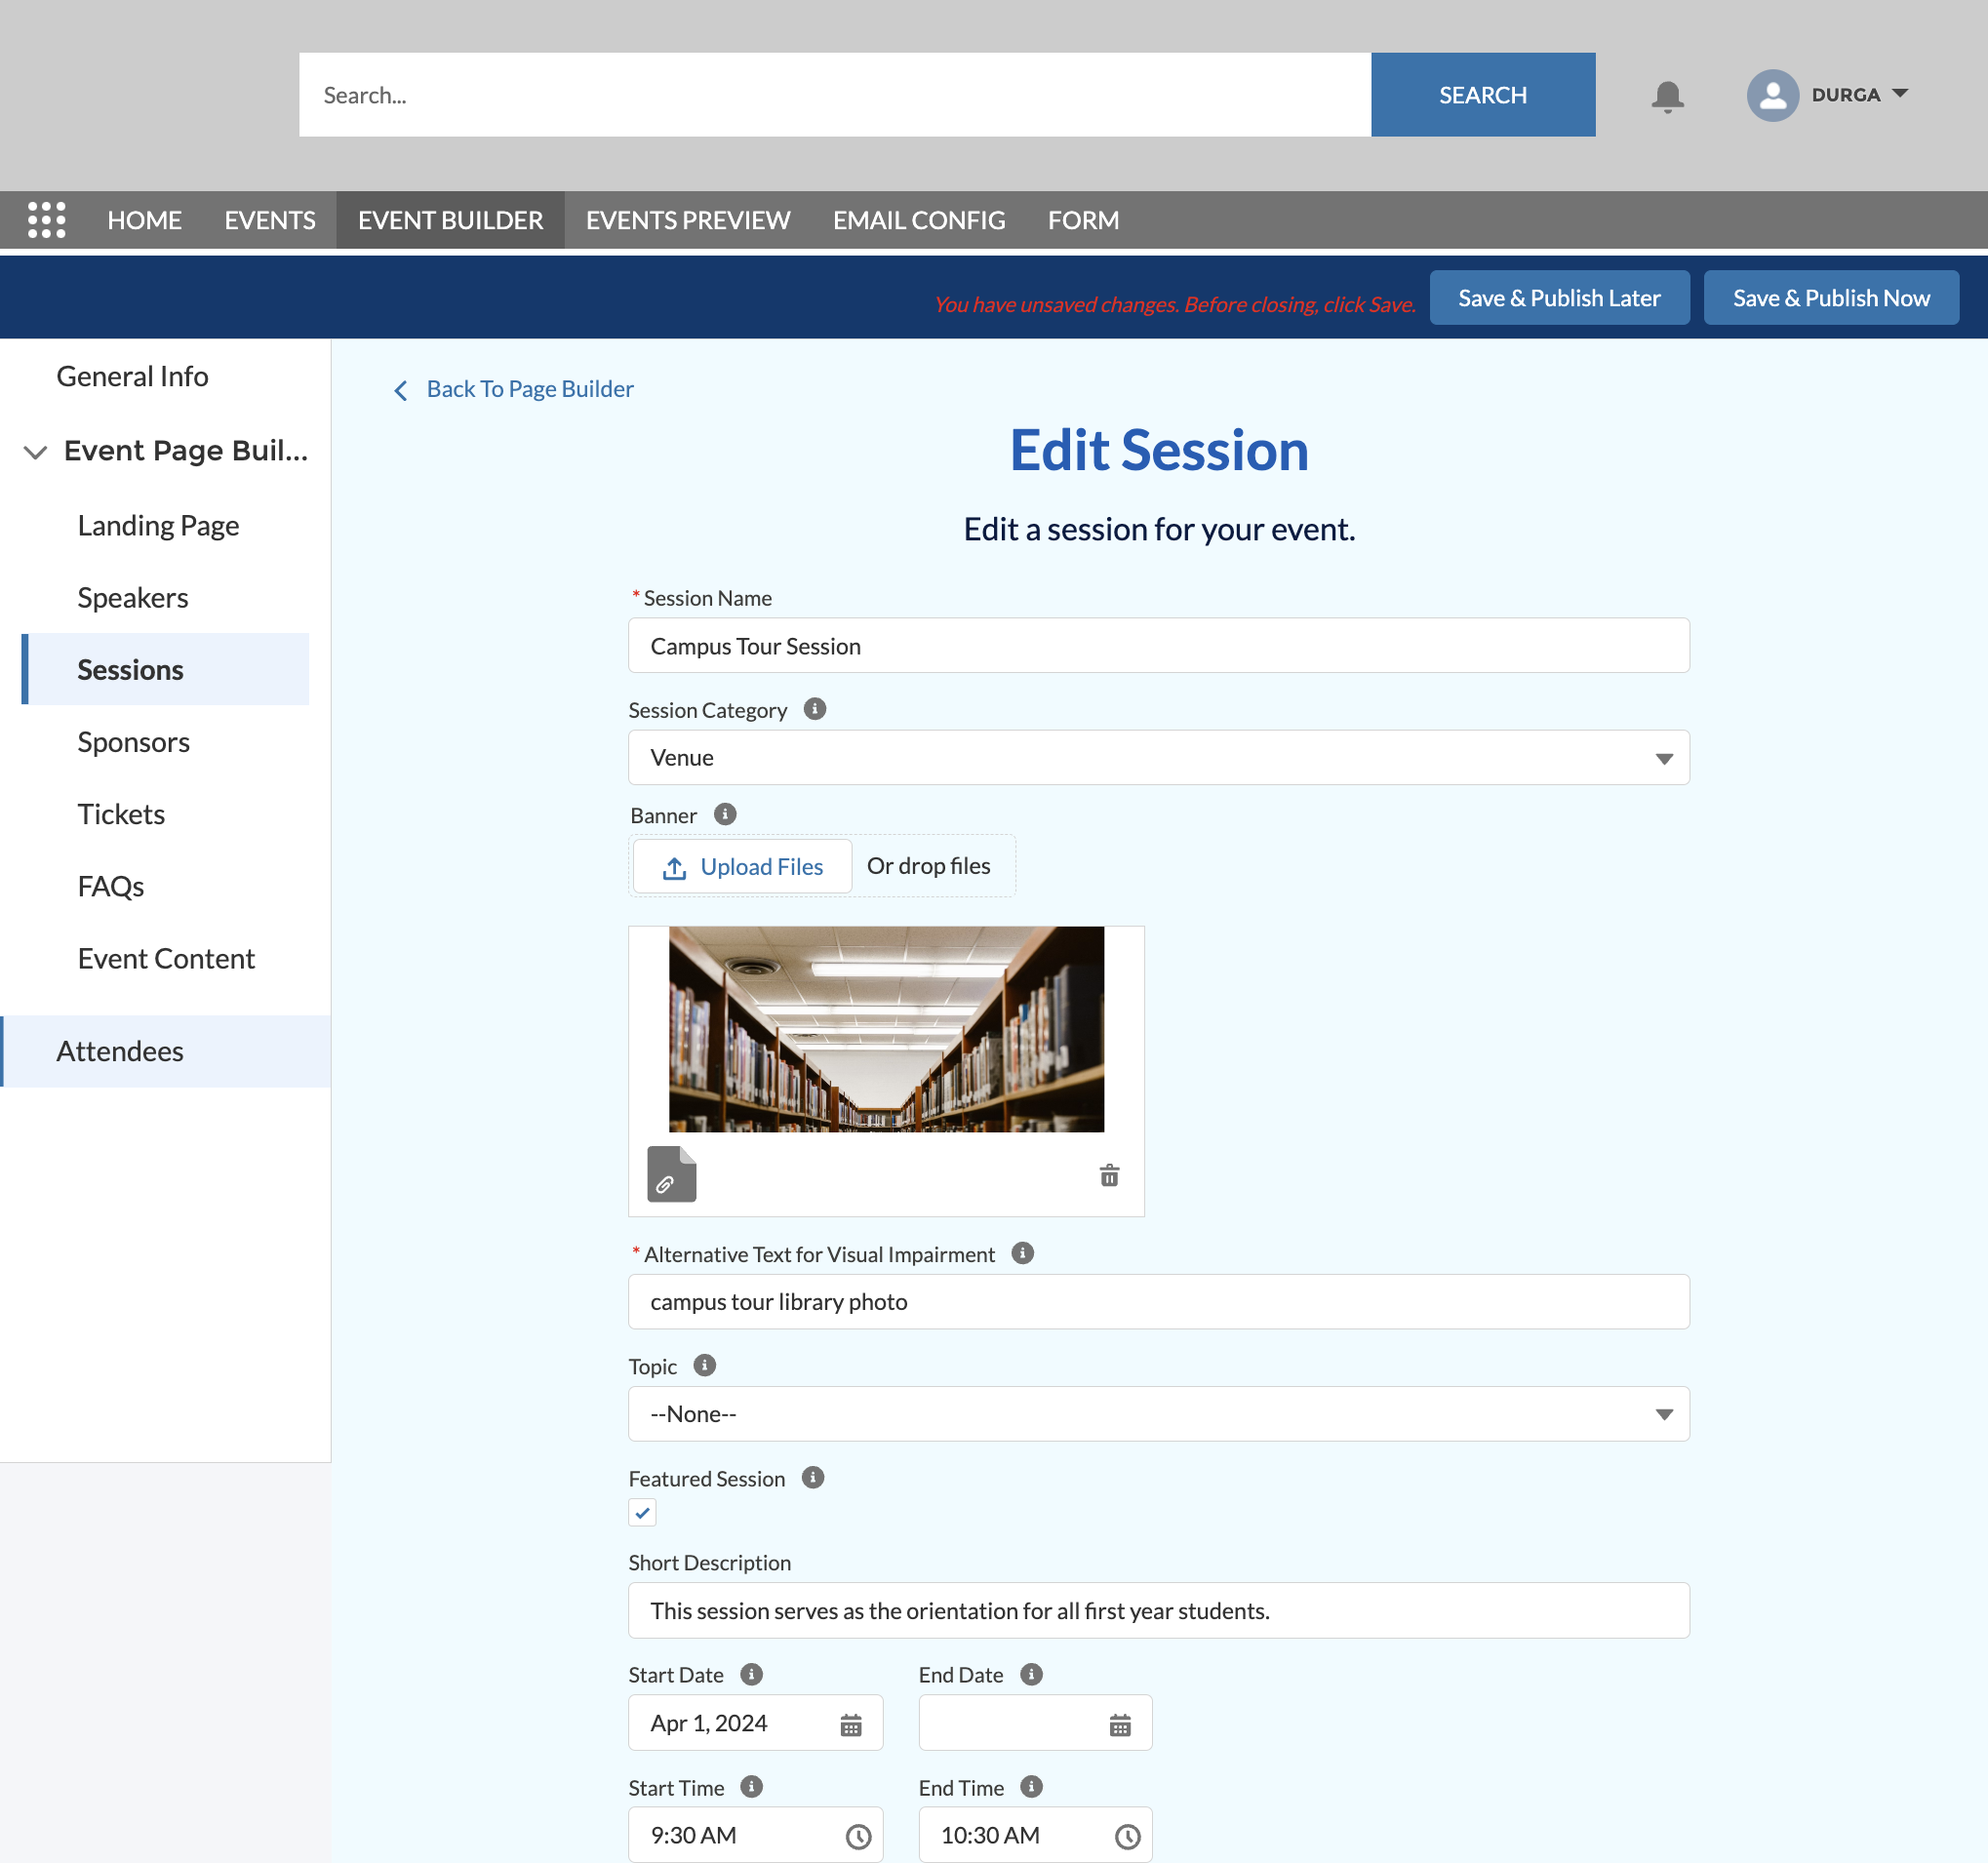

Page Title: EVENTS
Experience Cloud organizers can perform the following tasks.
- Preview an Event before publishing it using the BT Events Preview component.
- Register Attendees from the BT Events Preview component.
- Use the iframe preview feature to preview an Event page.
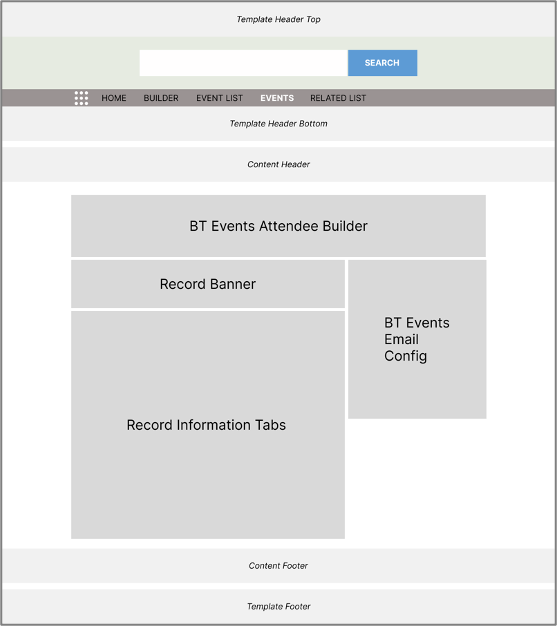
Component: BT Events Attendee Builder
- Record ID = “{!recordId}”
Component: Record Banner
- Record ID = “{!recordId}” (required)
Component: Record Information Tabs
- Record ID = “{!recordId}” (required)
- Tab 1 Type = “Record Details” (required)
- Tab 2 Type = “Related Records”
- Tab 3 Type = “Feed”
- Tab 4 Type = “None”
- Record Details Tab Label = “Details”
- Related Records Tab Label = “Related”
- Feed Tab Label = “Feed”
- Activity Timeline Tab Label = “Activity”
Component: BT Events Email Config
- Record ID = “{!recordId}”
Page Title: EVENT LIST
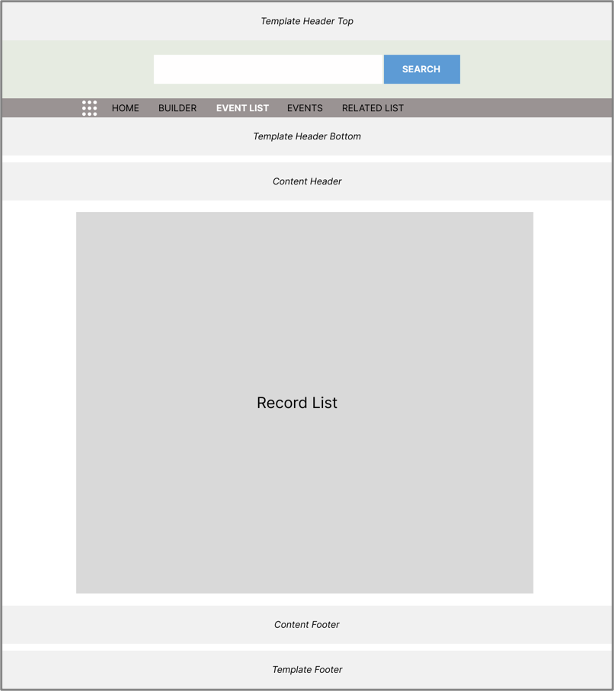
Component: Record List
- Number of Records = “25”
- Layout = “Full” (required)
- Object Name = “Page’s Object Name” (required)
- Filter Name = “Page’s Filter Name” (required)
- Allow list pinning = “True” (checked)
- Allow inline edit = “True” (checked)
- Header Properties
- Show image icon = “True” (checked)
- Show object name = “True” (checked)
- Show list actions = “True” (checked)
- Show list search = “True” (checked)
- Show refresh button = “True” (checked)
- Show charts button = “True” (checked)
- Show filter button = “True” (checked)
- Show display options = “True” (checked) - (required)
Page Title: RELATED LIST
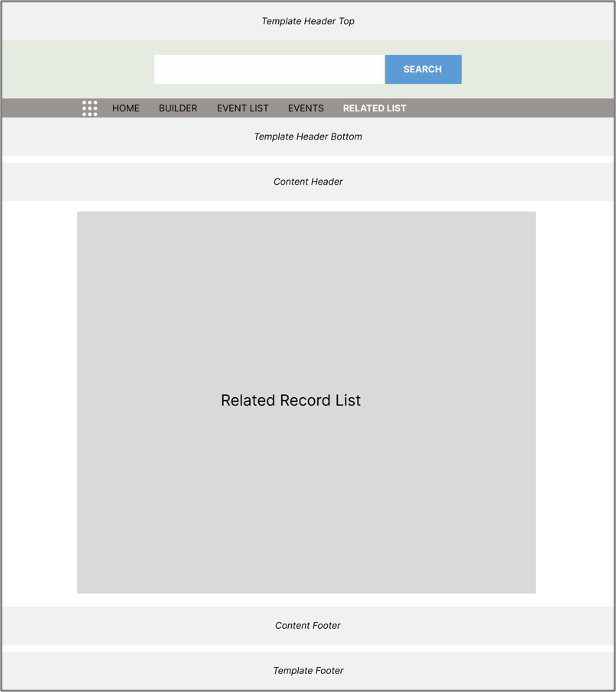
Component: Related Record List
- Parent Record ID = {!recordId}
- Related List Name = “Child Relationship Name”__r or {!relationshipApiName}
List Elements to Show
- Breadcrumbs = “True” (checked)
- Custom Title
- Row Numbers = “True” (checked)
- Refresh = “True” (checked)