There are two core objects: Invoice and Line Item. Line Items work as a related object to the Invoice.
You can send invoices to your customers for payment over the web using DocumentLink.
The Invoice record has a new field called Dynamic Fee Name. The field is populated only when an Invoice related to an Event with an associated tax Fee is created or updated. The field’s value will then be used in DocumentLink’s Invoice to override the Tax column’s label. Click here for more information about using Fees with Events.
Before Creating an Invoice
Before you create Invoice, you should create a Company Info record with your logo and company information and complete the Payments Setup Wizard.
- Complete the Payments Setup Wizard
- Create a Company Info record. (The address, name, and logo that you enter here are rendered on the Invoice.)
- Create a DocumentLink Template record. Set the lookups to the Payment Gateway and Company Info. When you create your Invoice, set the lookup to the DocumentLink Template to default your Invoice's configuration and merge fields.
- Authorize DocumentLink.
Check your browser's location setting. All date fields on an Invoice will reflect the appropriate date format based on your browser's location setting.
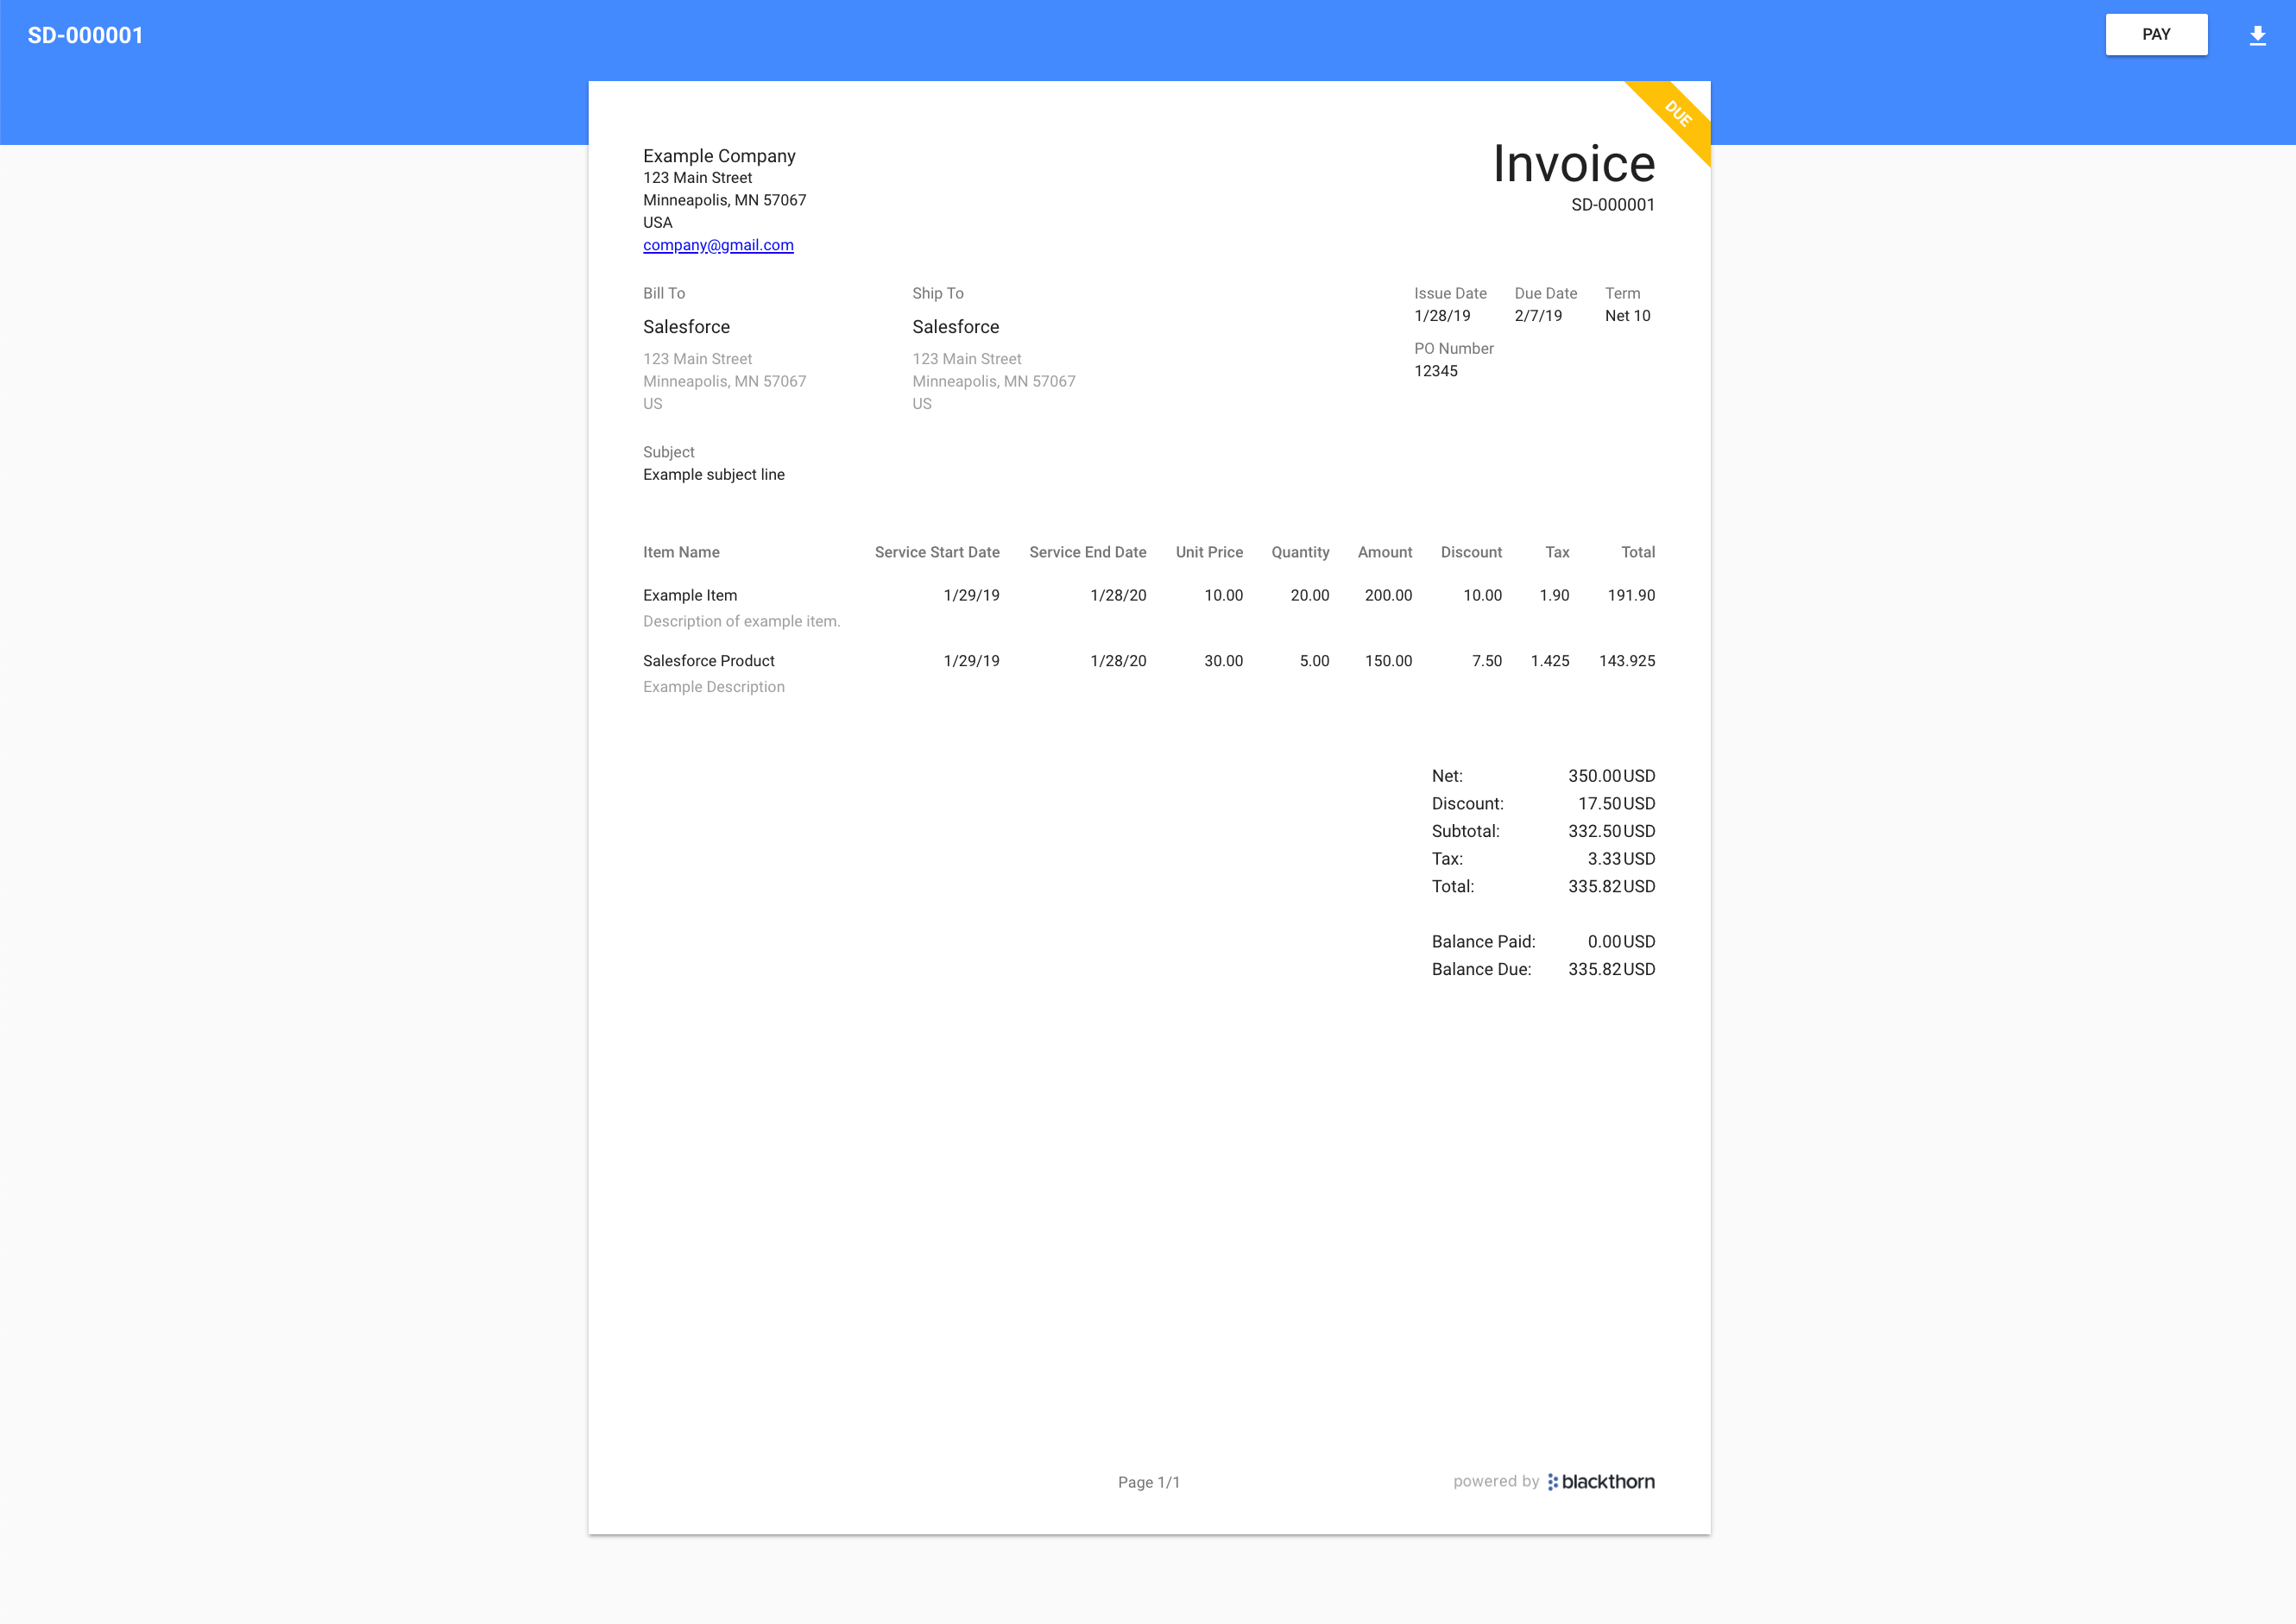
Invoice Calculations
Gross Amount
Gross Amount (bt_stripe__Net_Amount__c): The sum or total amount across all Line Item records before anything is deducted.
Discount
Discount (bt_stripe__Discount_Amount__c): The sum or total amount of all Line Item Discount and Line Item Code Discount Amount values for all related Line Items.
Net Amount
Net Amount (bt_stripe__Subtotal_Amount__c):
- = Invoice Gross Amount - Invoice Discount
OR
- = the sum or total amount of all Invoice Net Amount values for all related Line Items
Tax Amount (for Events only)
Tax Amount (bt_stripe__Tax_Amount__c): the sum or total amount of all Invoice Tax Amount values for all related Line Items.
Fee Amount (for Events only)
Fee Amount (bt_stripe__Fee_Amount__c):
- = the total amount due (without fees) * Event Payment Processing Fee
OR
- = the sum or total amount of all Invoice Fee Amount values for all related Line Items
Total Amount
Total Amount (bt_stripe__Total_Amount__c) = Net Amount + Tax Amount + Fee Amount
Create an Invoice
-
In the app launcher field, search for and click "Invoice" (the Blackthorn Custom Object, not the SF Standard Object).
-
Click New in the top-right corner.
-
Select either the "Stripe Invoice" or "Invoice" record type.
-
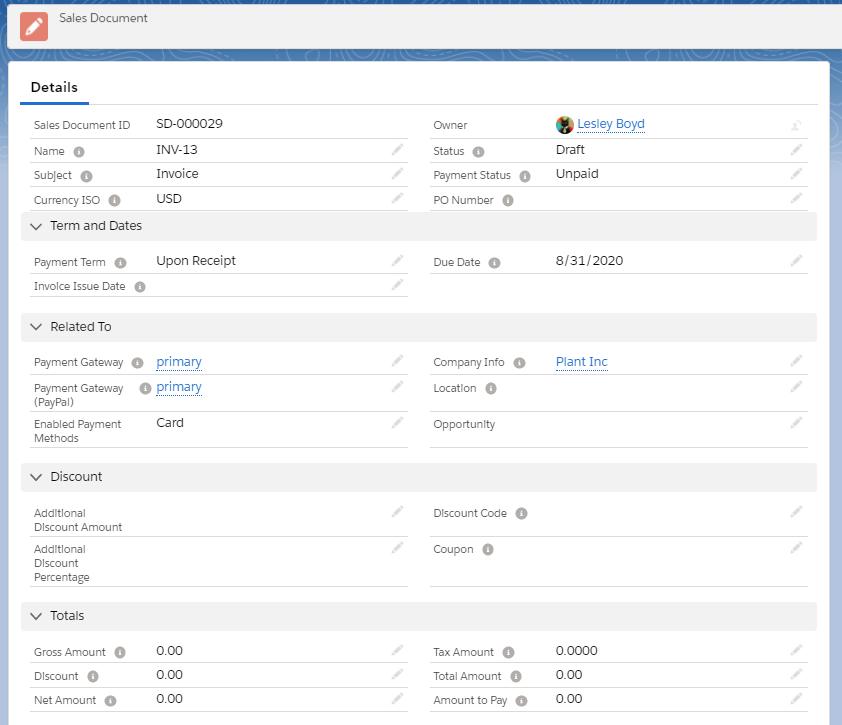
Set the values for:
- Name
The Name field is automatically generated with an "INV" prefix and an ordered numeric string. For example, your first Invoice will be named "INV-1". This can be edited for any custom needs. This value will be rendered beneath the word "Invoice" on the DocumentLink document. This value is also written to the Description field of the related Transaction record(s). - Subject
- PO Number
- Payment Term
- Due Date
- Payment Gateway
Defining the Payment Gateway tells the system which Stripe account the money should go to. - Enabled Payment Methods
Define how you would like to be paid for the Invoice - Card, ACH or both. Keep in mind that ACH transactions have a $5.00 capped fee which is an inexpensive fee compared to cards which have a percentage based fee. - Company Info
- Discount Code
If a discount Code has been created, define the record here. - Contact (Bill To) The Email and Phone fields will automatically pull in the related Contact's email and phone values.
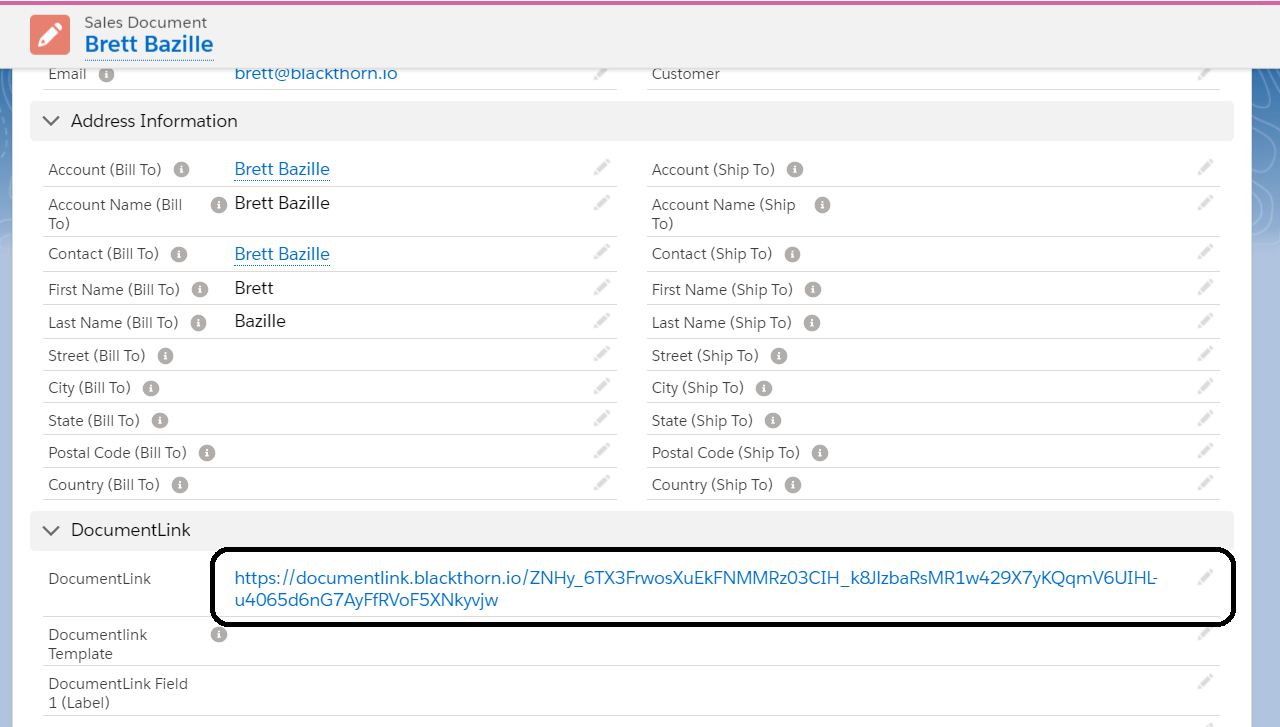
- Account (Bill To)
The address fields will automatically pull in the related Account's billing address. - Account (Ship To)
The address fields will automatically pull in the related Account's shipping address. - DocumentLink Template
The DocumentLink fields will automatically pull in the related DocumentLink Template fields. - Tax Amount
The Tax Amount field can be manually defined to calculate the percentage of taxes you want added to a Transaction. - Write Off Amount
If write-off Transactions are related, the Write Off Amount field is automatically populated. If there are no write-off Transactions present, then the field will be blank.
- Name
-
The Currency ISO, Status and Payment Status fields are automatically defined with default values.
- Currency ISO = "USD"
- Status = "Draft"
- Payment Status = "Unpaid" (only on Invoices)
-
The DocumentLink field is automatically generated with a random alphanumeric link. This link is used to render the Invoice online.
-
Click Save.
-
Click the DocumentLink link.
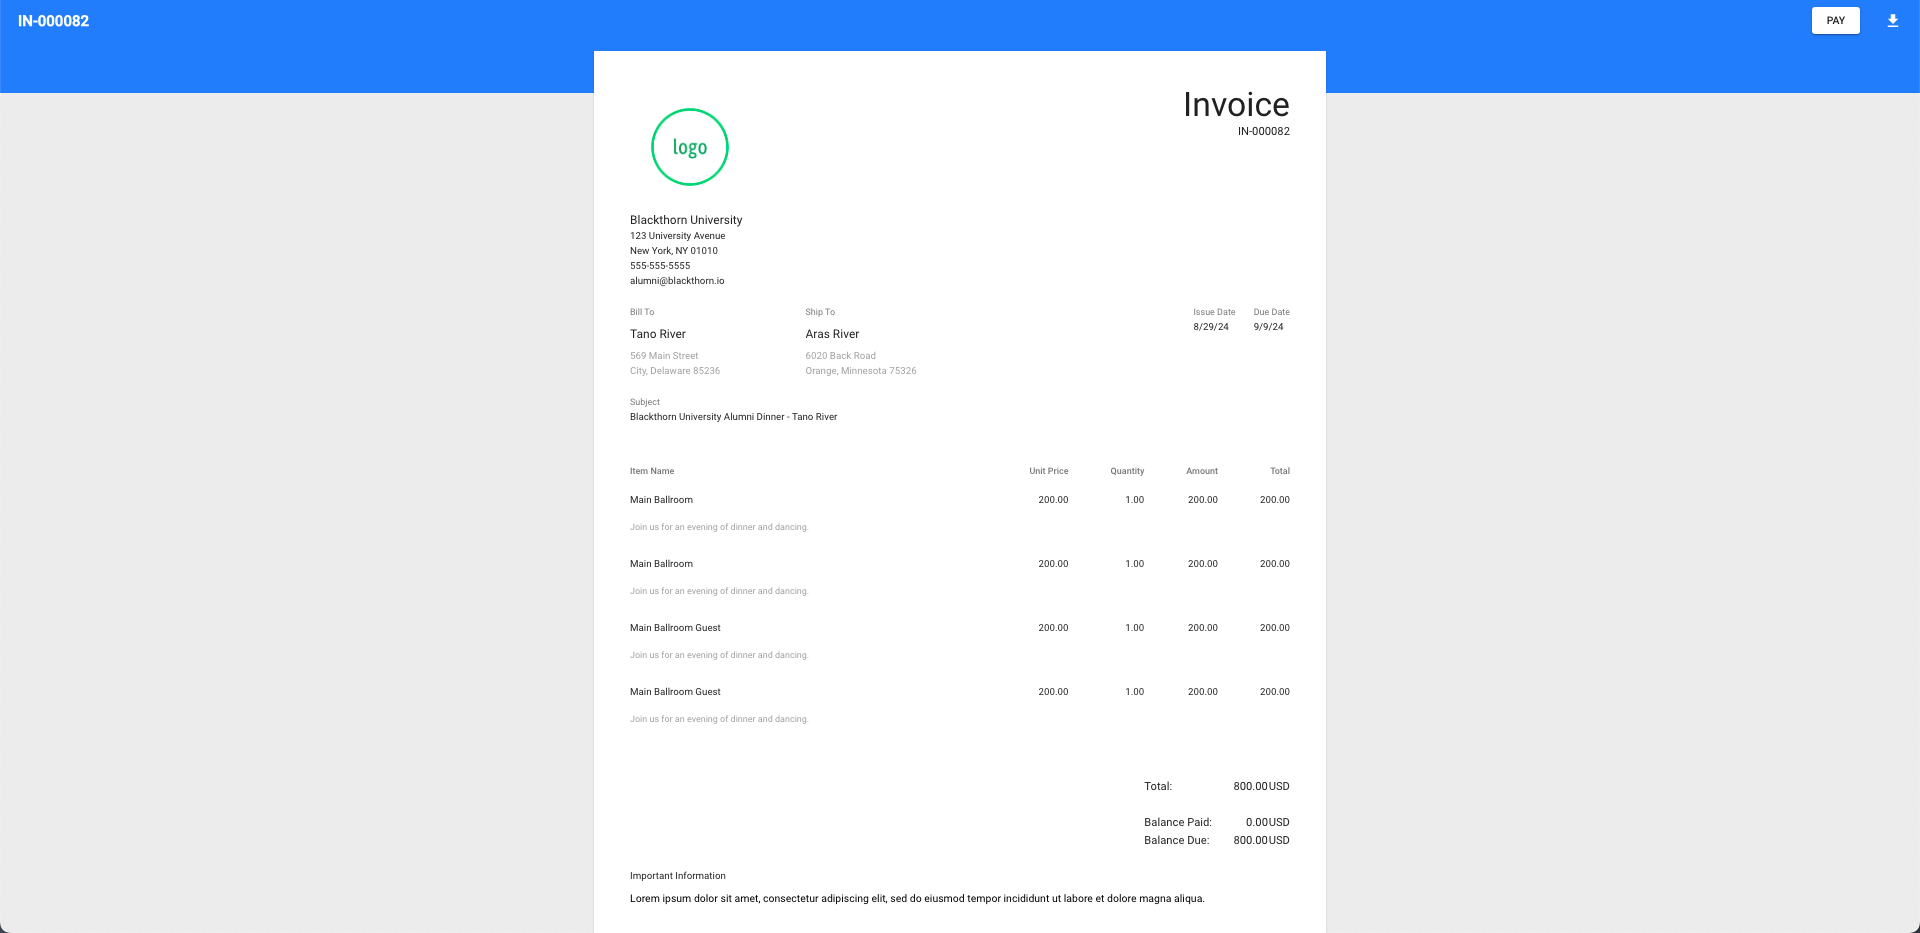
Once your Invoice is completed, you are ready to view the Invoice through the web-based and mobile responsive DocumentLink.
Allocation Rollup: Sum of all Allocations for this Invoice.
Auto-convert Opportunities to Invoices
If the Create Invoice button isn't already on the Opportunity page layout, you must add it before proceeding.
You can convert an existing Opportunity to an Invoice by clicking the Create Invoice button. All Opportunity Line Items will also be converted to Line Items on the Invoice.
The newly created Invoice will be linked to the original Opportunity via the Invoice's Opportunity lookup field. Since an Opportunity can be related to many Invoices, the Opportunity field is needed.
The Line Item lookup field on the Opportunity Product (OpportunityLineItem) facilitates mapping between the Invoice's Line Item and the Opportunity Product's Line Item.
This allows you to self-map additional Opportunity Product Line Item fields, such as the custom tax field, to the Invoice using a process builder when an Invoice is created from an Opportunity.
Yes, you can. Create a process builder that notifies the record owner when the Invoice's Status updates to accepted or rejected.
Invoice Payment
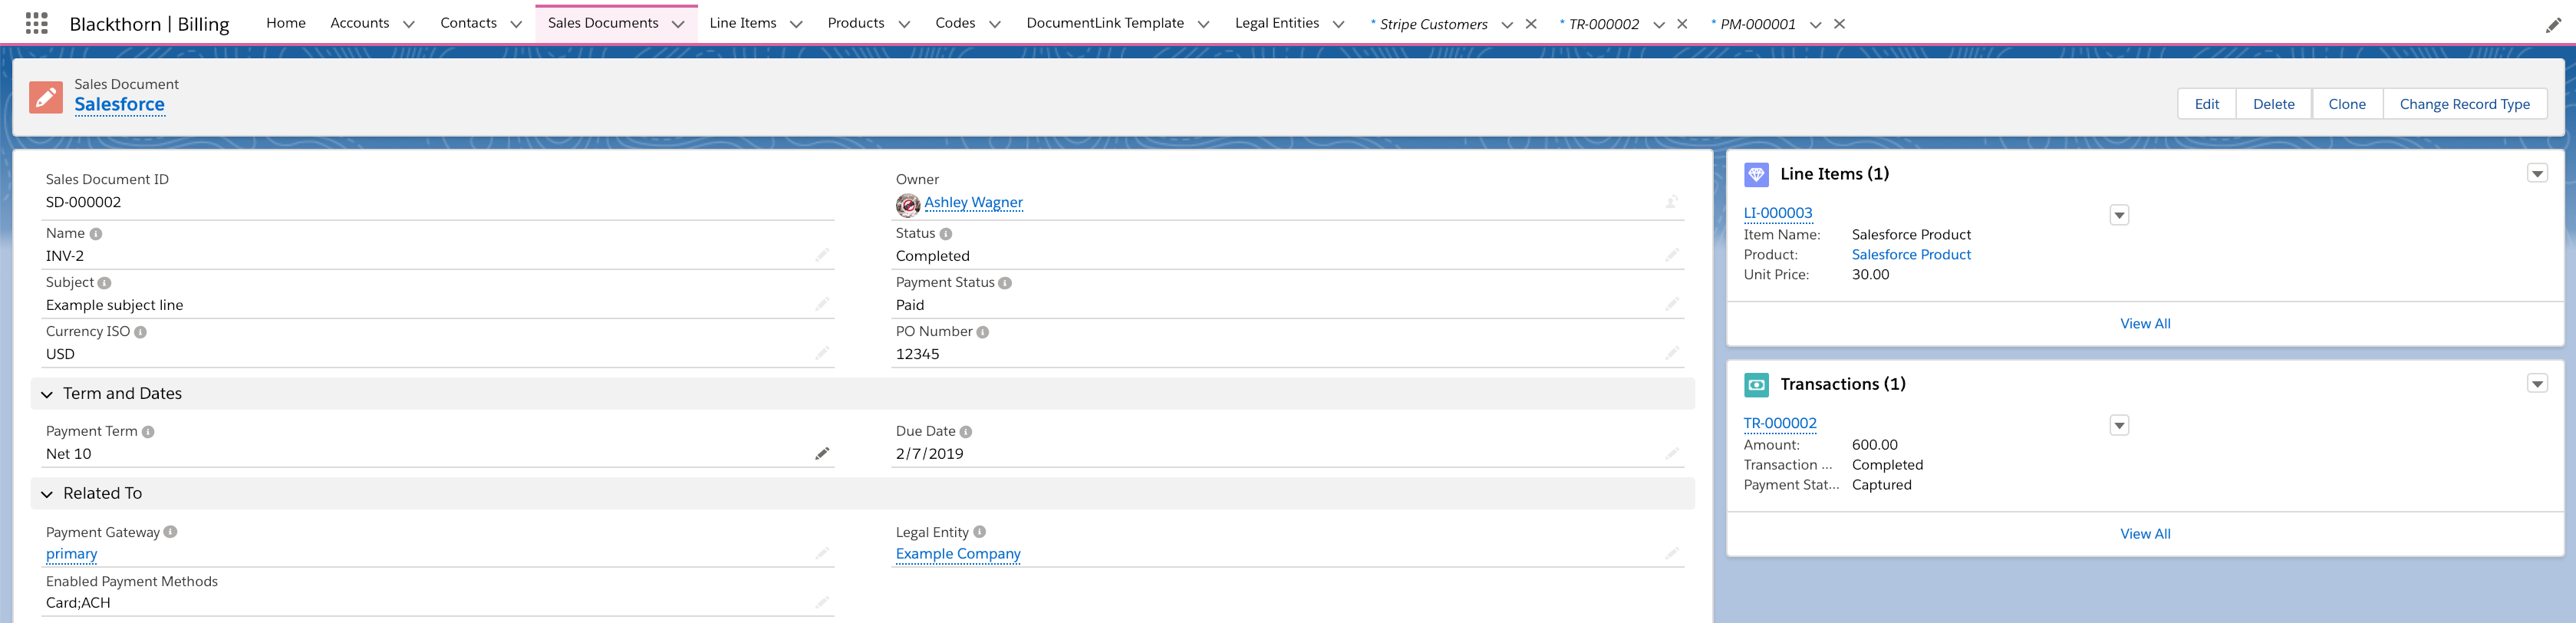
Once the Transaction related to the Invoice has been captured (manually or with DocumentLink) and if the Invoice Balance Due = "0", then the related Invoice Payment Status = "Paid", the Status = "Completed", and Paid In Full = the current date/time.
Refunds
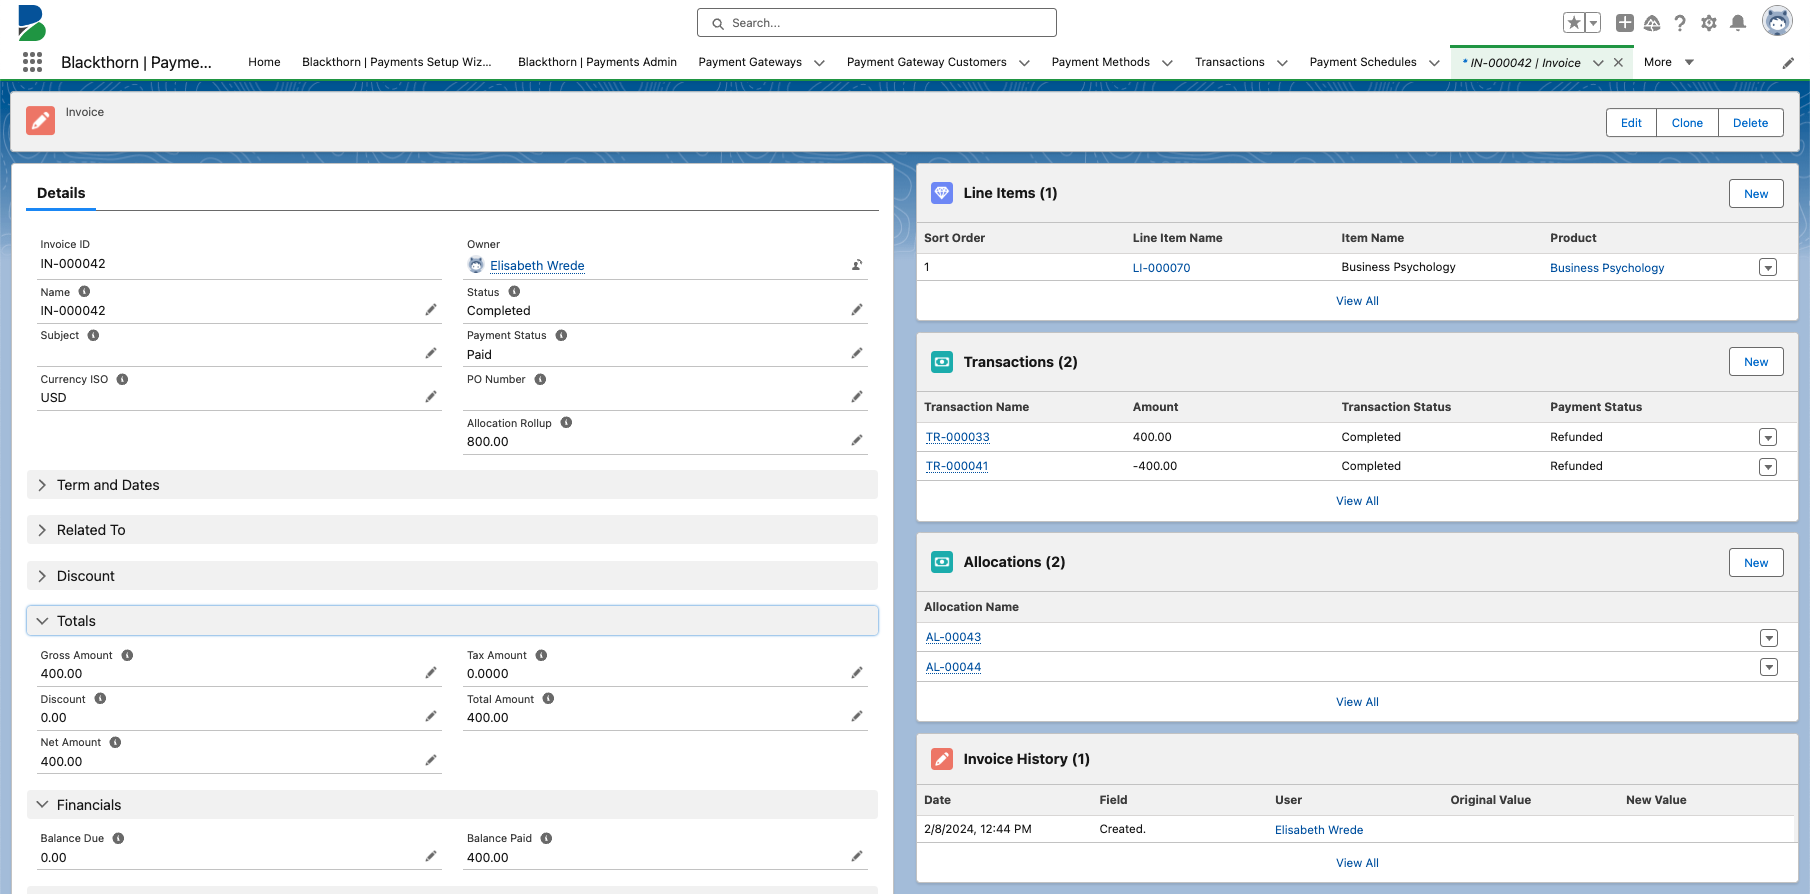
Sometimes you need to refund an Invoice. A refund can be either a full or partial refund. Refunding part or all of an Invoice won’t trigger a change to the original Invoice. The Invoice’s Payment Status will show "Paid" and the Balance Paid will show the amount of the original Transaction. The Invoice’s Balance Paid field is not changed after a refund occurs because refund & adjustment transactions are not considered in rollups.
A new Transaction will be created with the Amount equal to the refund amount, showing that part or all of the original Transaction was refunded.
Please be aware of the following functionality.
If changes are made to the Invoice before the Webhook Events related to the refunded Transaction are processed, the Invoice's Payment Status, Balance Paid, and Balance Due fields will revert to their original values.
To avoid this, please make any manual adjustments to the Invoice record’s refunded Line Item after the Webhook Events related to the refund Transaction have been processed.
The Webhook Event processing job runs every five minutes, so the waiting time after refunding the Transaction is usually up to five minutes. You will be able to see the Webhook Event records from the refunded Transaction on the Transaction’s Webhook Events Related List.
Rollup Fields
The logic used for refunds on an Invoice also impacts the rollup fields in the Event record’s financial summary.
If you want the Event’s Balance Paid, Gross, Net, and Total fields to be updated when a registered Attendee receives a full or partial refund, use the Blackthorn Pay - Trigger Settings custom settings’ Include refunds in rollup calculations (Include_Refunds_in_Rollup_Calculations__c) field. The field is unchecked (disabled) by default.
Full Refund
If an Event Organizer checks the Include refunds in rollup calculations field and processes a full refund, the refunded Transactions will be reflected on the Invoice record, and the Event’s Balance Paid field will be updated to “Paid - Refund” or zero.
Partial Refund
For partial refunds, the refunded Transactions are reflected on the Invoice record, the related Event’s Balance Paid field is updated to “Paid - Refund”, and the Gross, Net, and Total fields are updated.
Examples
Background: An Attendee registers for a paid Event and pays the $100 due. An Invoice is then generated for the Transaction.
Scenario 1: Full Refunds/Custom Setting Enabled
The Blackthorn Pay - Trigger Settings' Include refunds in rollup calculations field is checked (enabled), and a full refund is processed; the Event’s financial summaries will reflect a full refund.
Ex. When an Attendee receives a full refund ($100), the Event record’s Balance Paid field will be updated to “0.”
Scenario 2: Partial Refund/Custom Setting Enabled
The Blackthorn Pay - Trigger Settings' Include refunds in rollup calculations field is checked (enabled). When a partial refund is processed, the Event’s financial summaries will reflect a partial refund.
Ex. When an Attendee receives a partial refund of $50, the Event record’s financial summary fields will update as follows.
- The Balance Paid field will be updated to “$50.”
- The Gross field will be updated to “$50.”
- The Net field will be updated to “$50.”
- The Total field will be updated to “$50.”
Scenario 3: Custom Setting Disabled
If the Blackthorn Pay - Trigger Settings Include refunds in rollup calculations field is unchecked (disabled), and a full or partial refund is processed, the following will occur:
- The Invoice will not be updated with new totals.
- Only the initial payment Transaction amounts should be shown.