Reserved Tables and Seats allows you to create, organize, and track multiple seating plans for any Event.
There are two methods for creating and editing Tables and Seats.
Table Manager
Known Limitations
Attendees with only the First Name field populated will show as “FirstName undefined” in the Table Manager. Please enter their Last Name to avoid this issue.
Using the Blackthorn | Events (Limited Access) permission set results in an error when removing an Attendee from a Seat because of a missing permission.
Manually creating table and seat assignments can be difficult and often results in duplicate Attendees. The Events Table Manager is a new Salesforce Lightning component located on the Event object designed to efficiently manage your Event’s table and seat assignments.
It’s as easy as dragging and dropping Attendees into Table and Seat assignments. This user-friendly tool offers the following functionality.
Intuitive Drag-and-Drop Interface: Easily assign Tables and Seats by dragging Attendees right where you want them.
Efficiency: Reduce the effort required and the potential for errors in table and seat management. The tool can bulk-assign Seats and support up to 100 Tables with 50 Seats each, for a total of 5000 Attendees.
Improved User Experience: Visualize and alter Attendee seating as needed.
Validations: Prevent users from exceeding established limits on assignments and changes between saves.
Use Cases
Gala Dinners: Ensure VIP guests are seated according to preferences and Event requirements.
Corporate Events: Simplify seating employees and guests for large-scale meetings or parties.
Permission Sets
The Blackthorn | Events (Admin) and Blackthorn | Events (Organizer) permission sets have full access to the Table Manager.
The Blackthorn | Events (Limited Access) permission set can use the Table Manager to do everything but delete Tables.
The Blackthorn | Events (Lite User) and Blackthorn | Events (Read Only) permission sets can only read the information in the Table Manager.
Functionality
Users can perform the following tasks with the Table Manager.
Create new Tables.
Drag and drop Attendees on a Table or Seat to assign them to that spot.
Move Attendees between Tables and Seats.
Edit existing Tables and Seats.
Upload records into Tables and Seats
Filter and search for Attendees by Registration Status or name.
Use the Assign All button to assign registered Attendees to available Seats.
Any changes saved using the Table Manager will create or update the related Table and/or Seat records
How It Works
Newly created Tables cannot exceed 50 Seats per Table or 100 Tables per Event. If you need more Tables or Seats, you must create them outside of the Table Manager.
If you create Table or Seat records via a Related List, these validations do not apply.
But when loading Tables created outside of the Table Manager, only Tables that meet the 50 Seats per Table or 100 Tables per Event criteria will be loaded in the Table Manager.
If you try to view Tables that exceed those criteria, you will see an error message.
Table Manager Layout
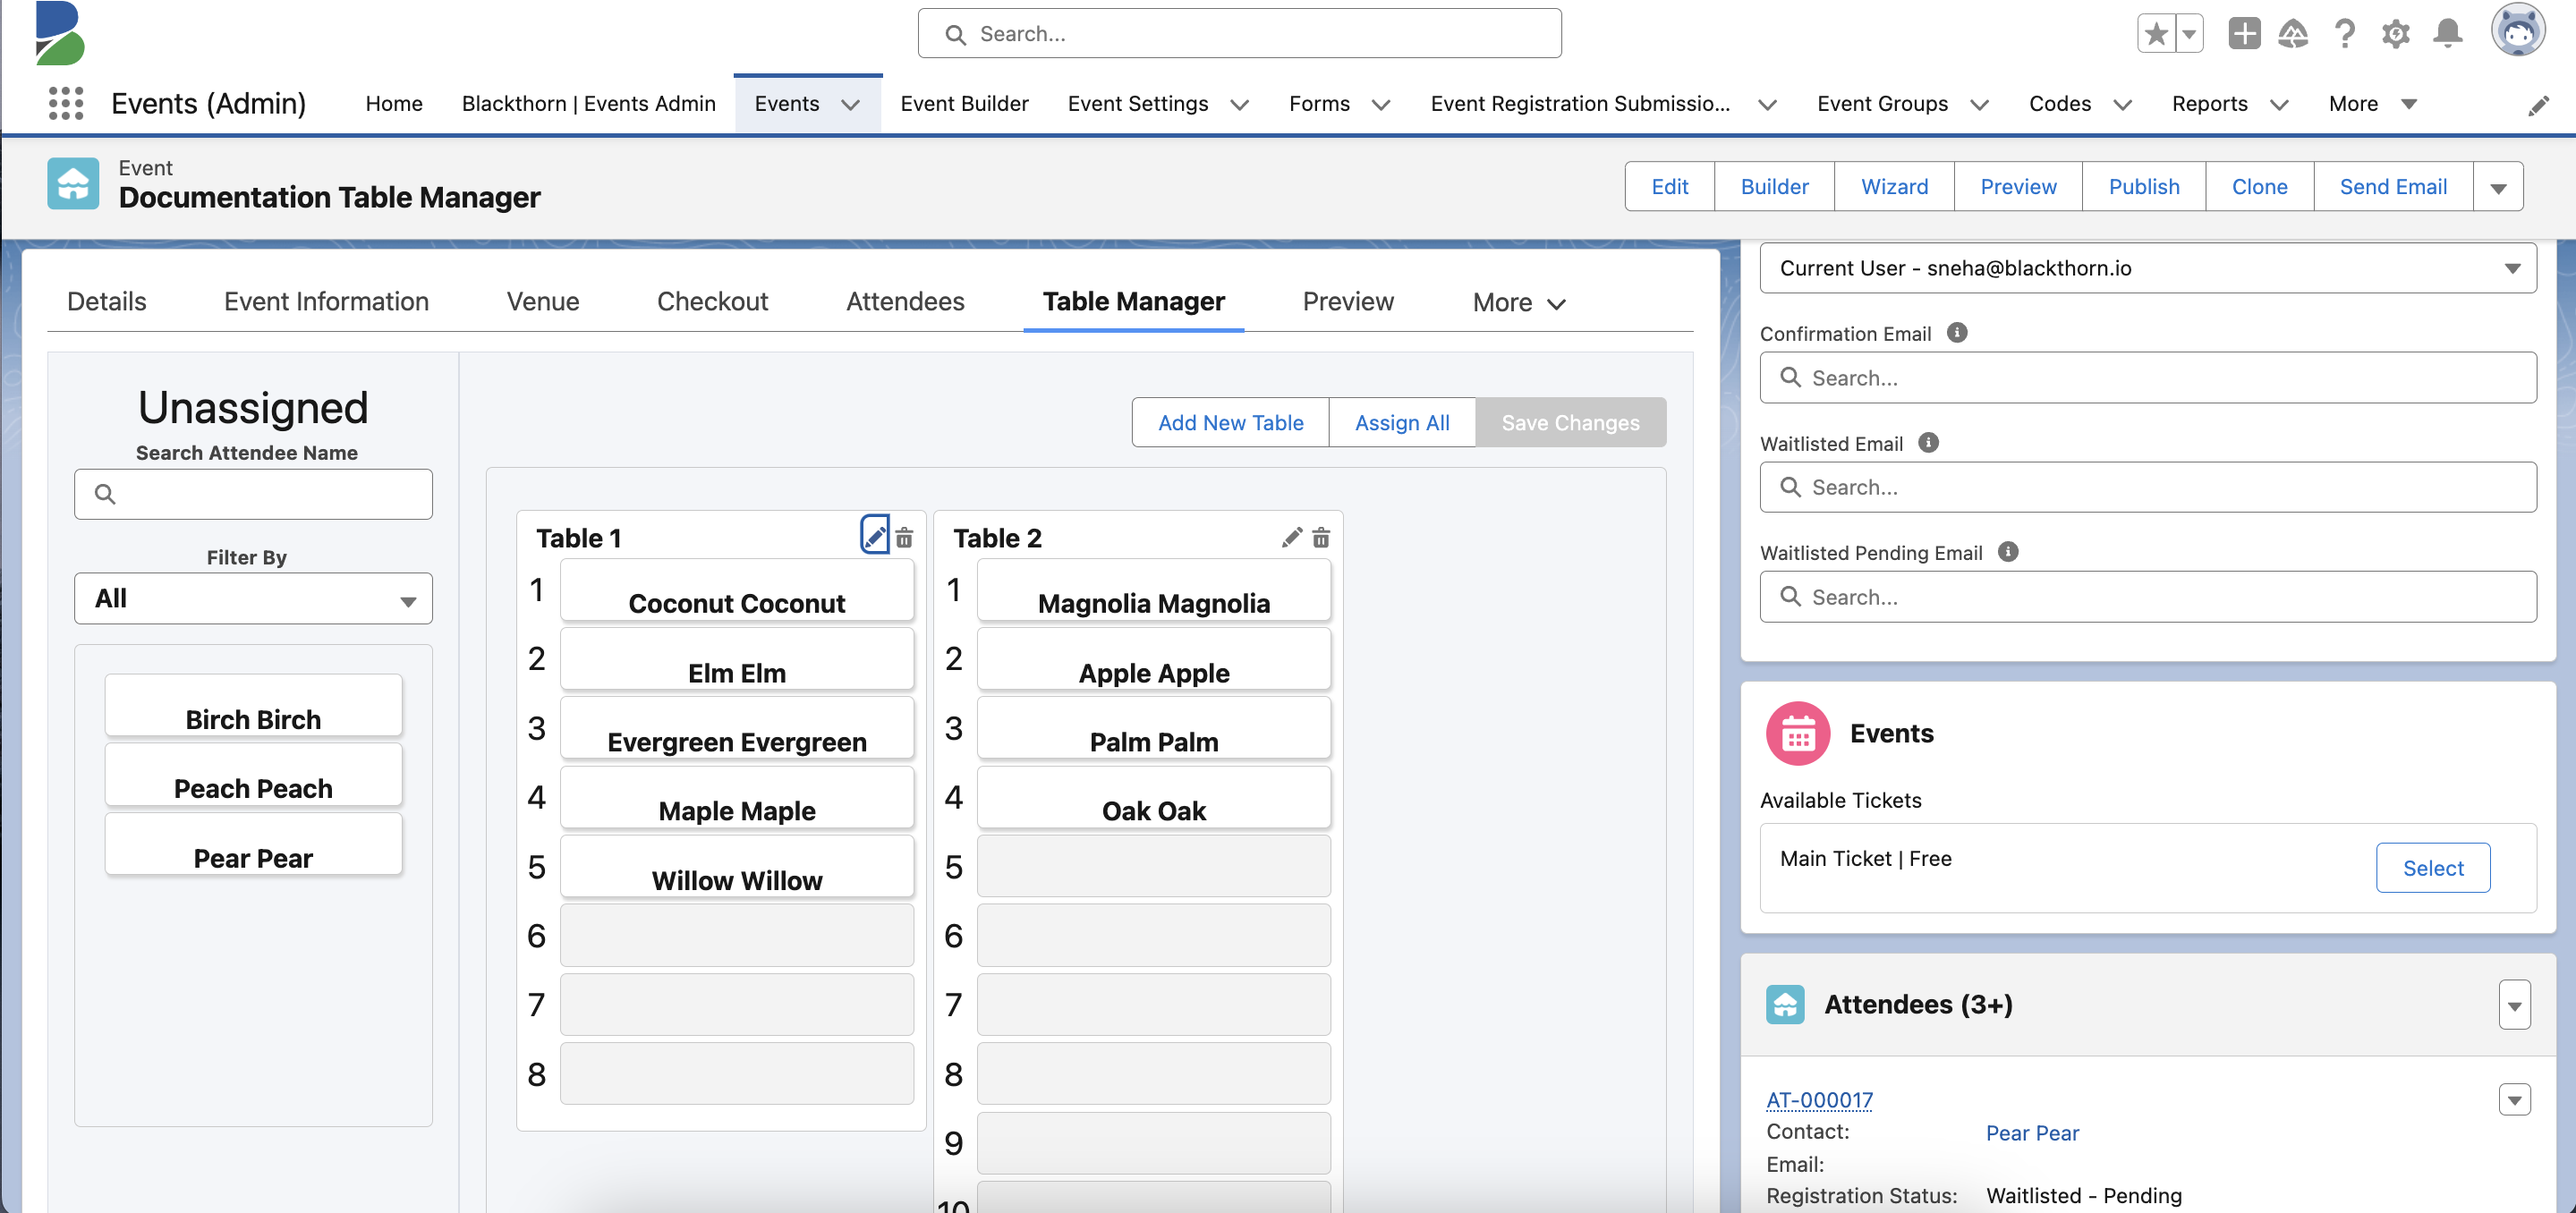
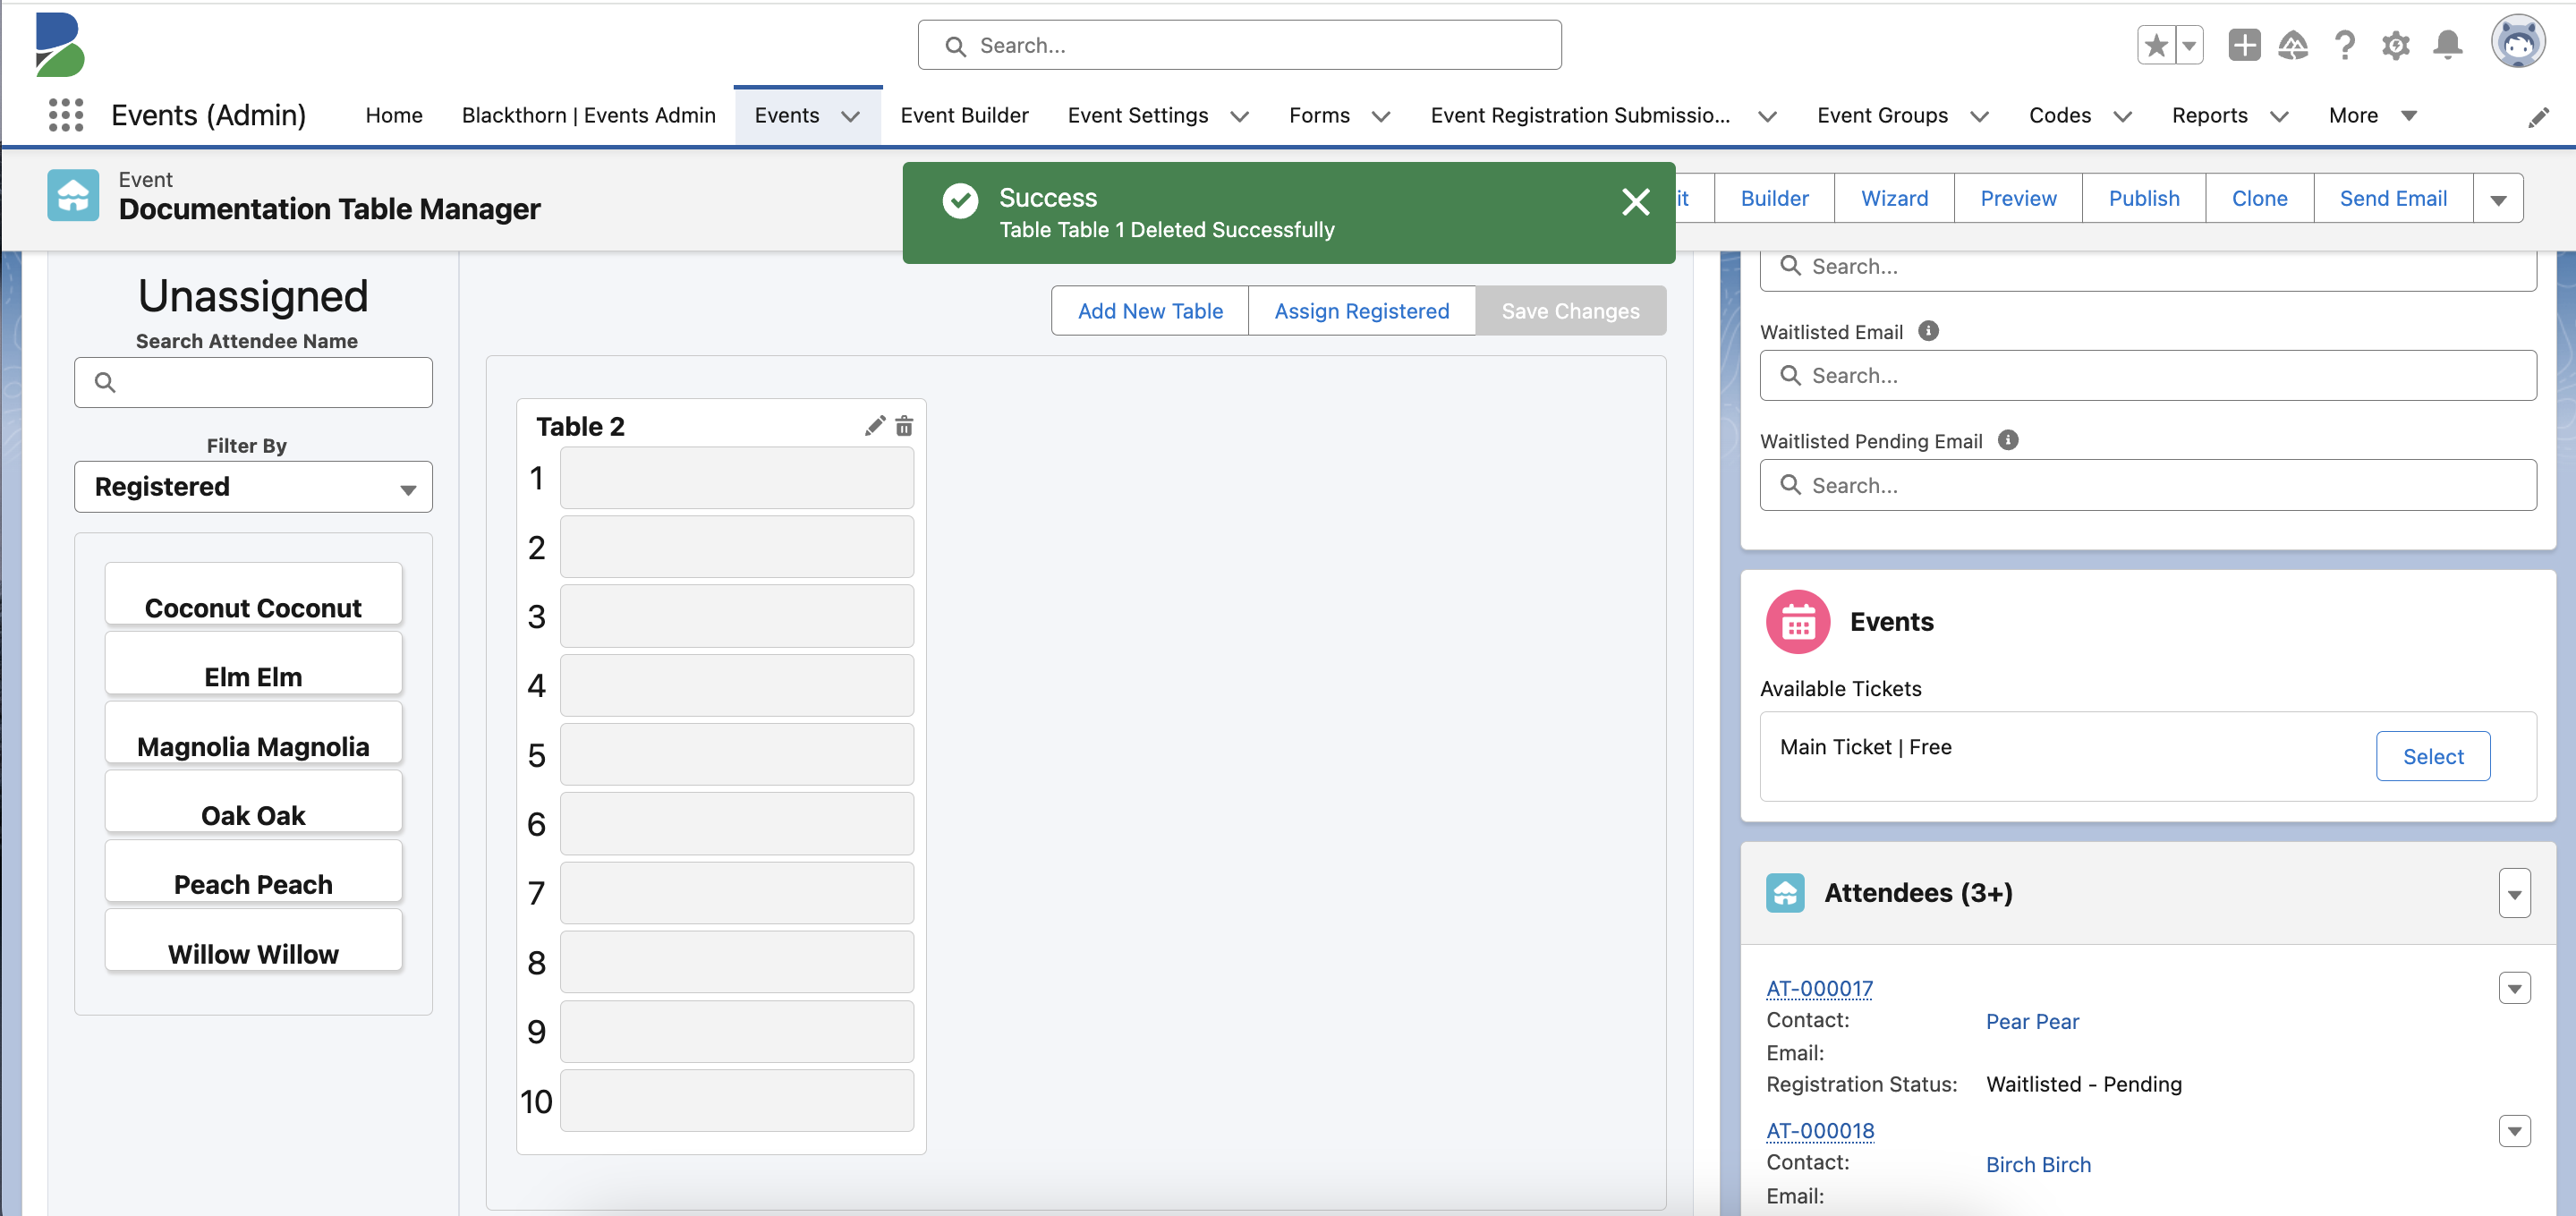
The left “Unassigned” column lists the Attendees who are registered for the Event. The right-hand side shows the Tables and Seats.
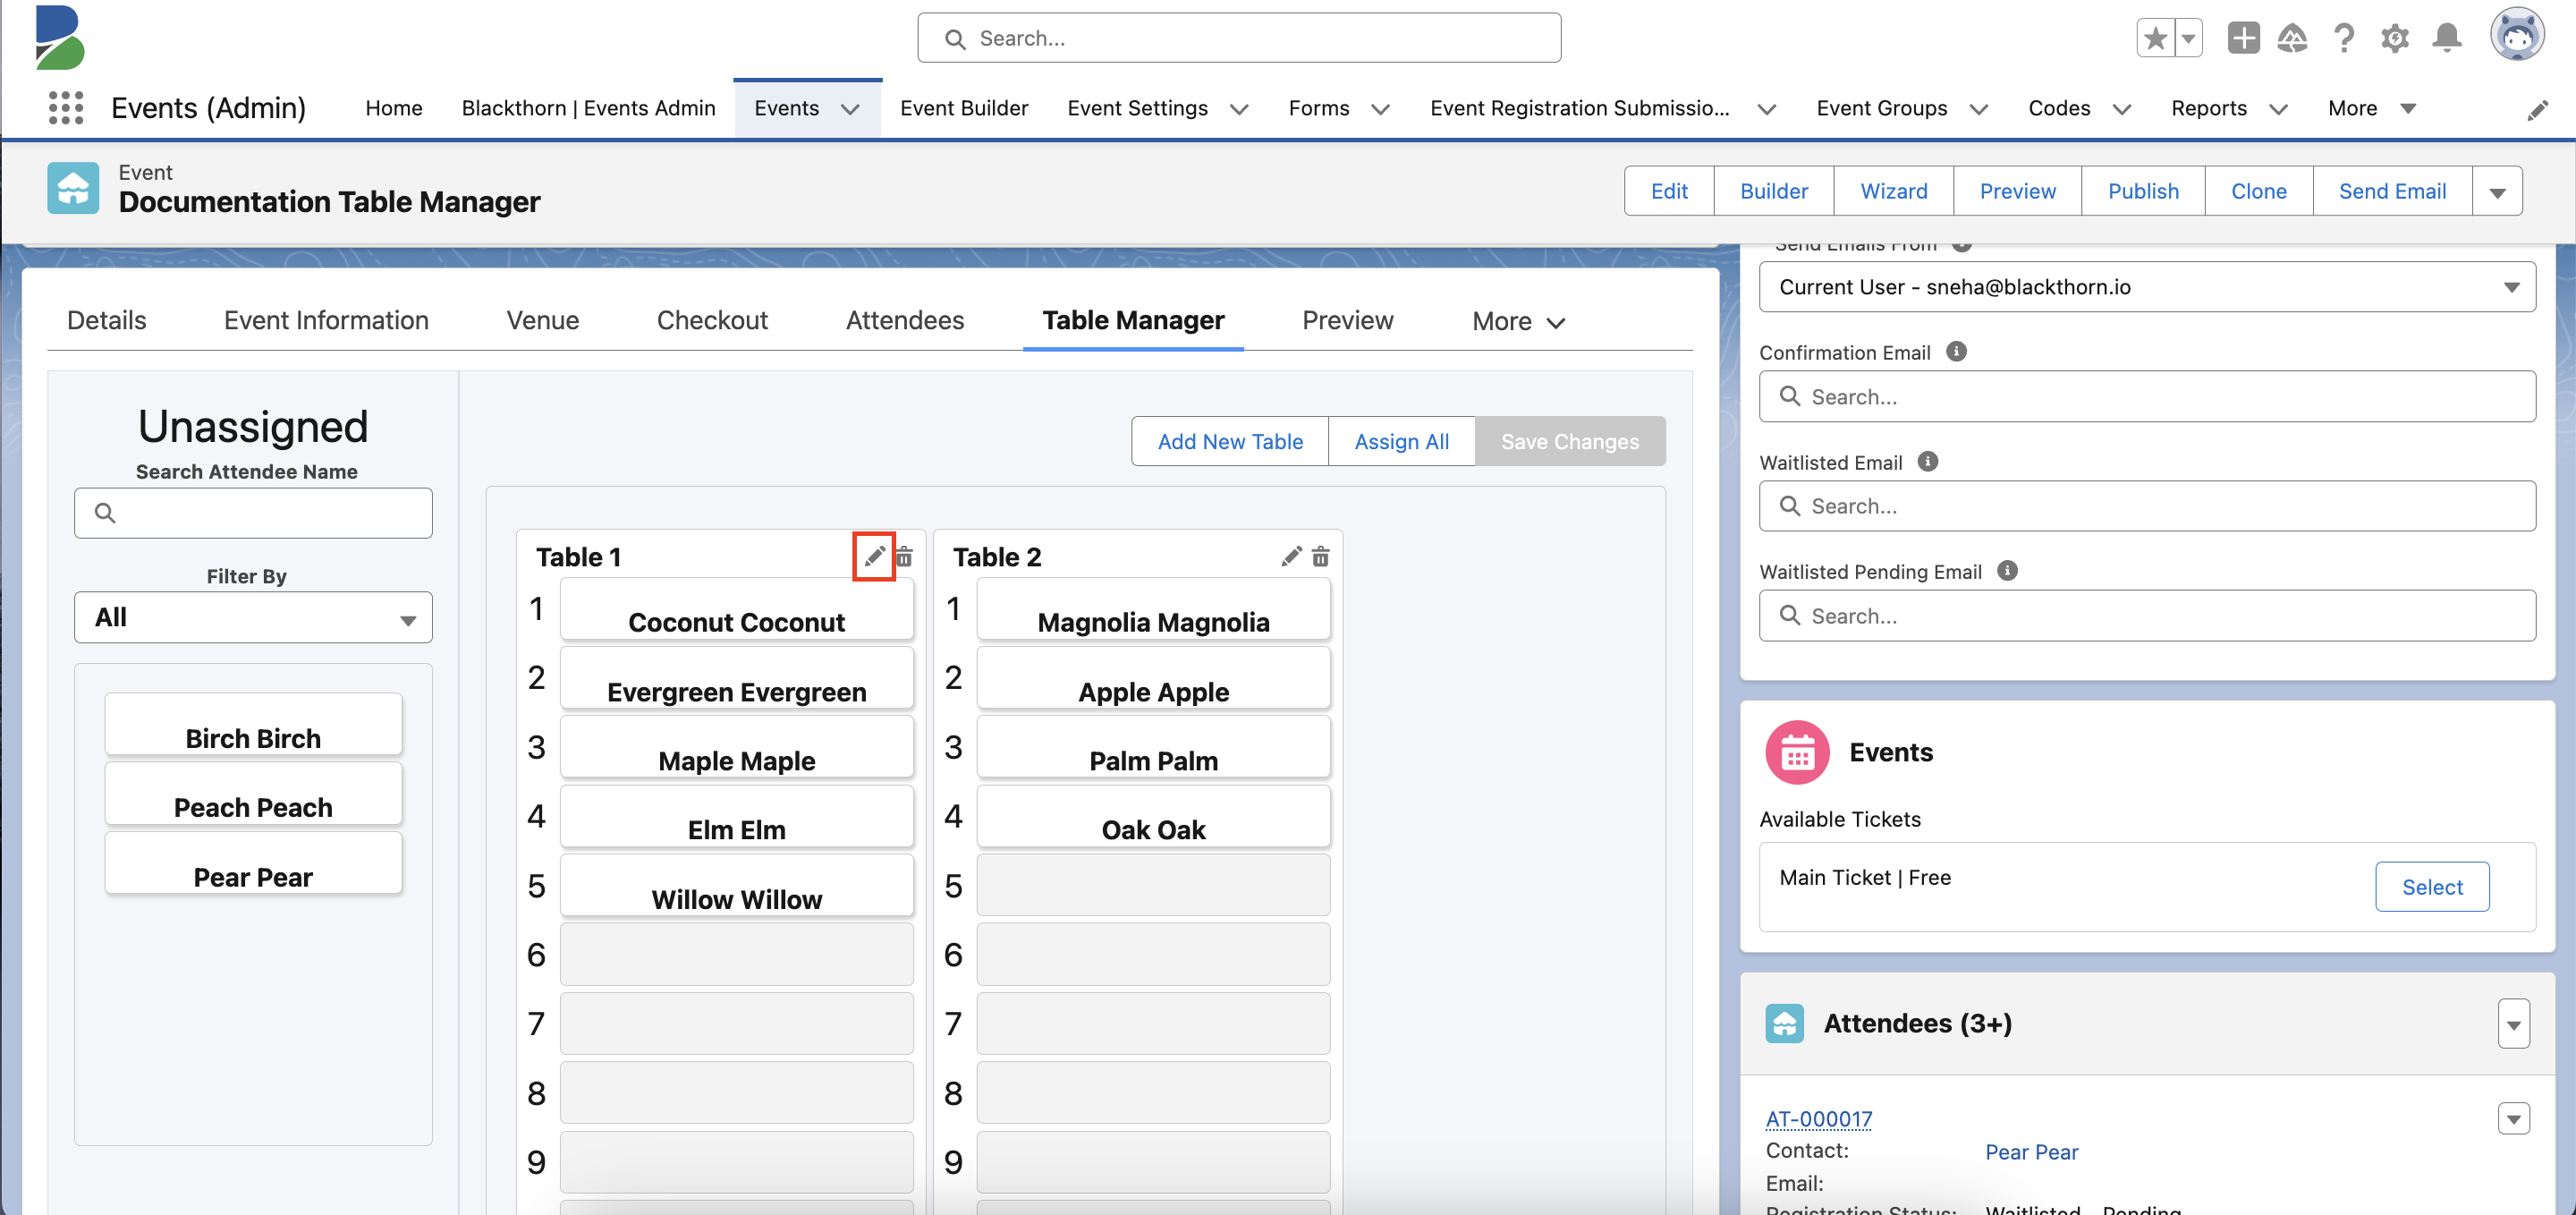
Each Table has a Pencil (edit) and Trash Can (delete) button located next to the Table’s Table Name.
Each assigned Seat at a Table has a Seat Number next to the assigned Attendee’s name.
Users can create a new Table with either a Table Name or a Table Number.
Tables with names will be sorted alphabetically.
Tables with numbers will be sorted by number, lowest to highest.
If a Table has both a Table Name and a Table Number, the Table Name will be displayed and sorted alphabetically.
Limitations
Newly created Tables in the Table Manager cannot exceed 50 Seats per Table or 100 Tables per Event.
You must click Save before closing the browser window; otherwise, you will lose your changes.
Dropping a second Attendee on top of an Attendee’s name replaces the original Attendee. It does not “shuffle” the other Attendees at the Table, as many drag-and-drop interfaces do.
Long Attendee names may not be fully displayed. (maximum character restriction)
Set Up the Table Manager
Before you can use the Table Manager, you must add it to the Event record. Note: You must be a Salesforce Admin to perform the following steps.
Open an Event record. (It can be any Event record.)
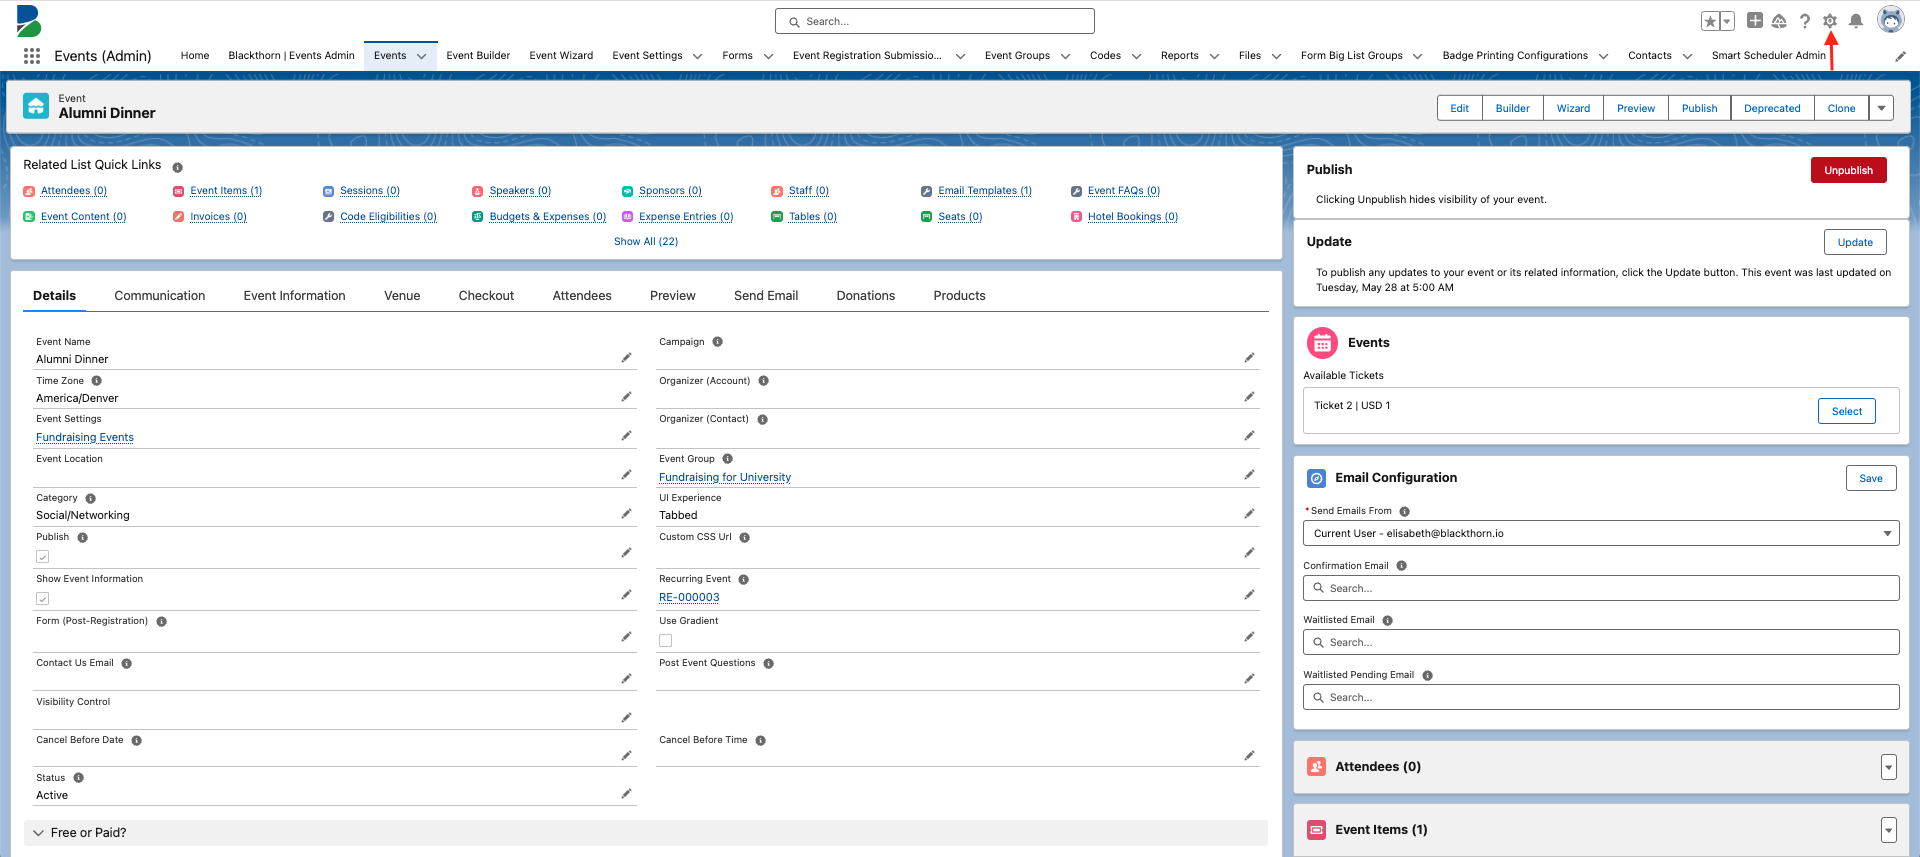
Click the Gear icon.
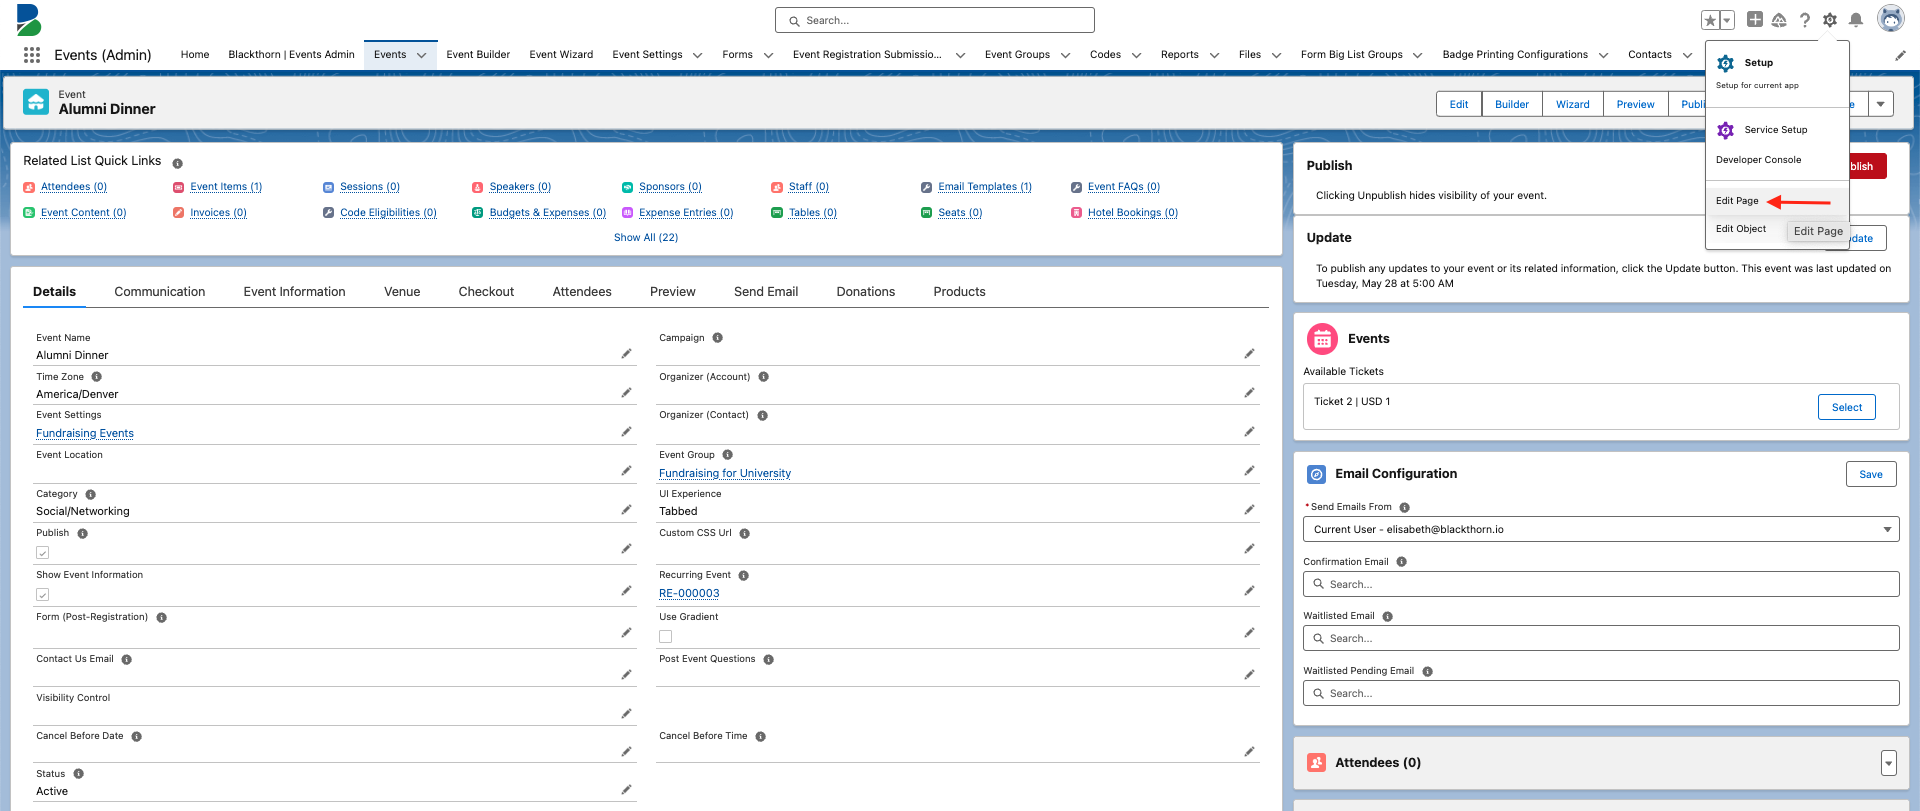
Click Edit Page. (This will launch the Lightning App Builder.)
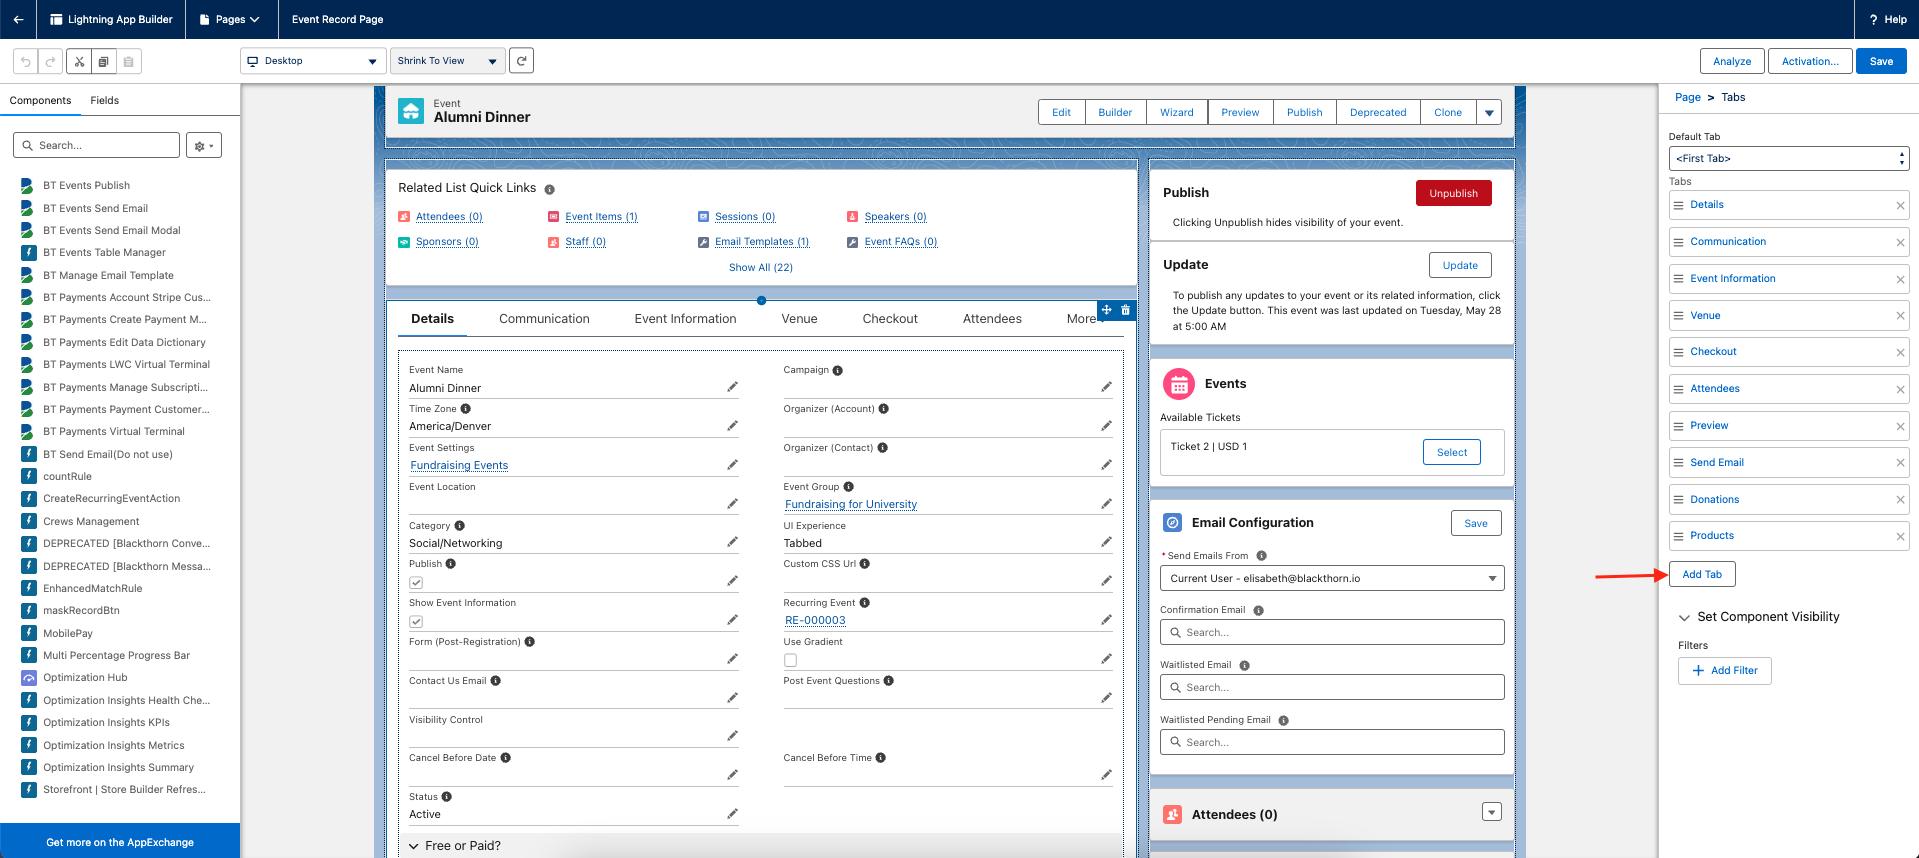
Click in the navigation tab above the Event information.
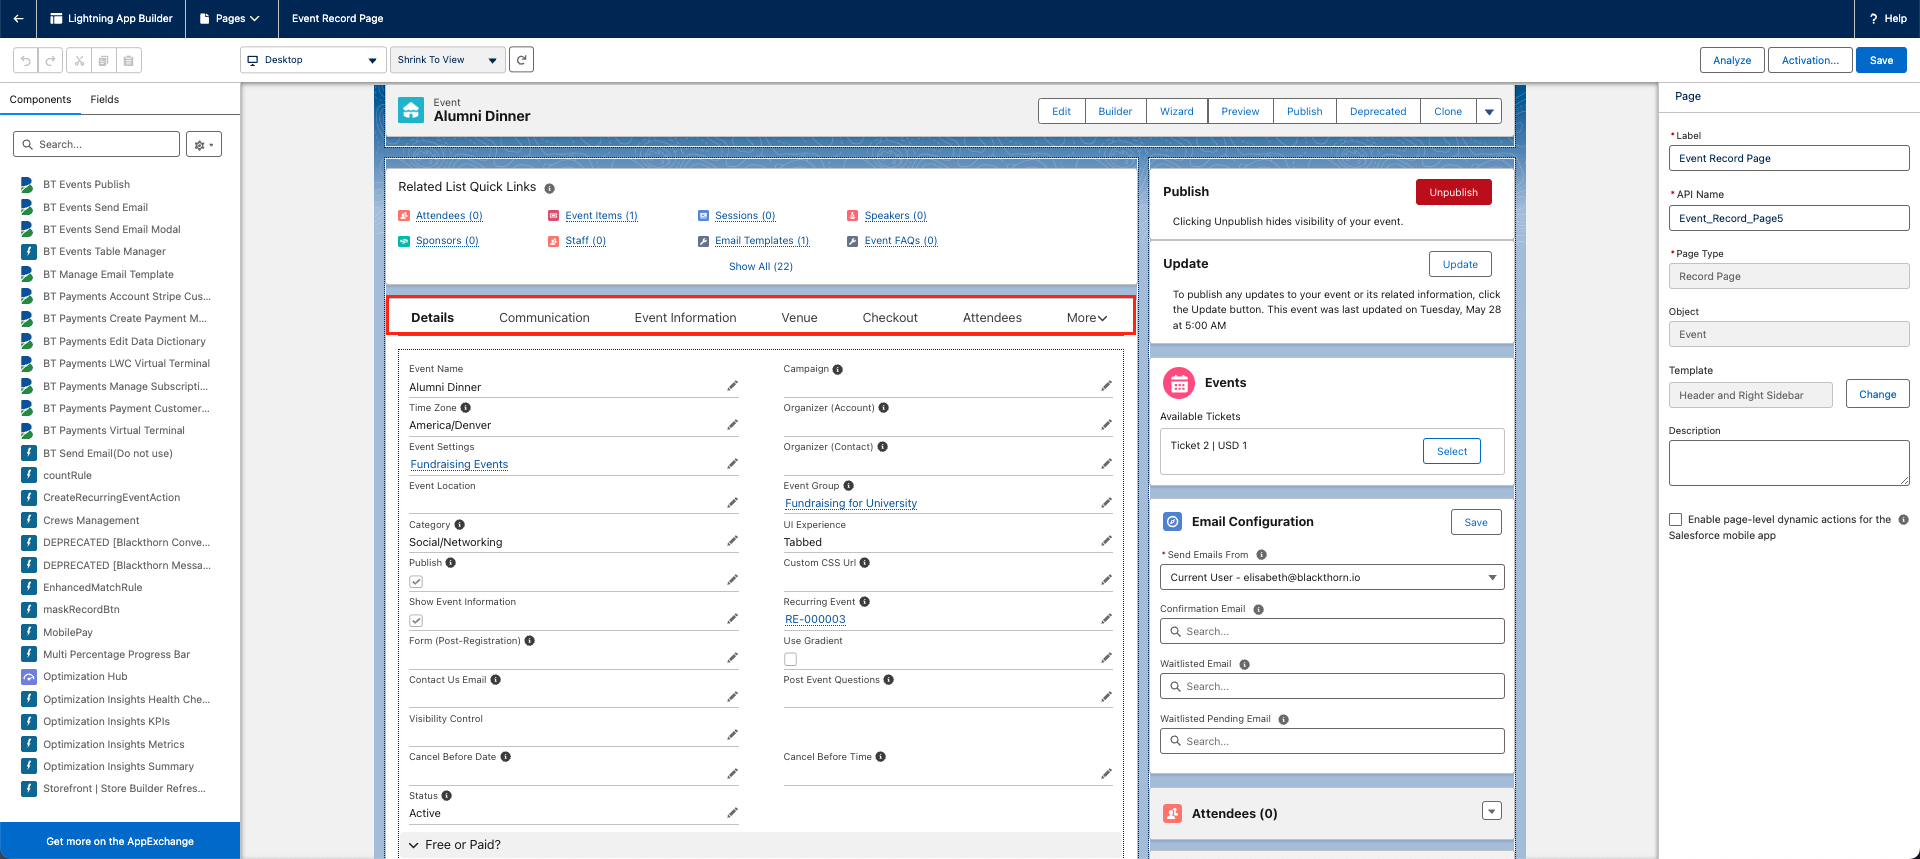
Click Add Tab. The newly added tab will automatically be labeled as “Details.”
Click Details (the new tab).
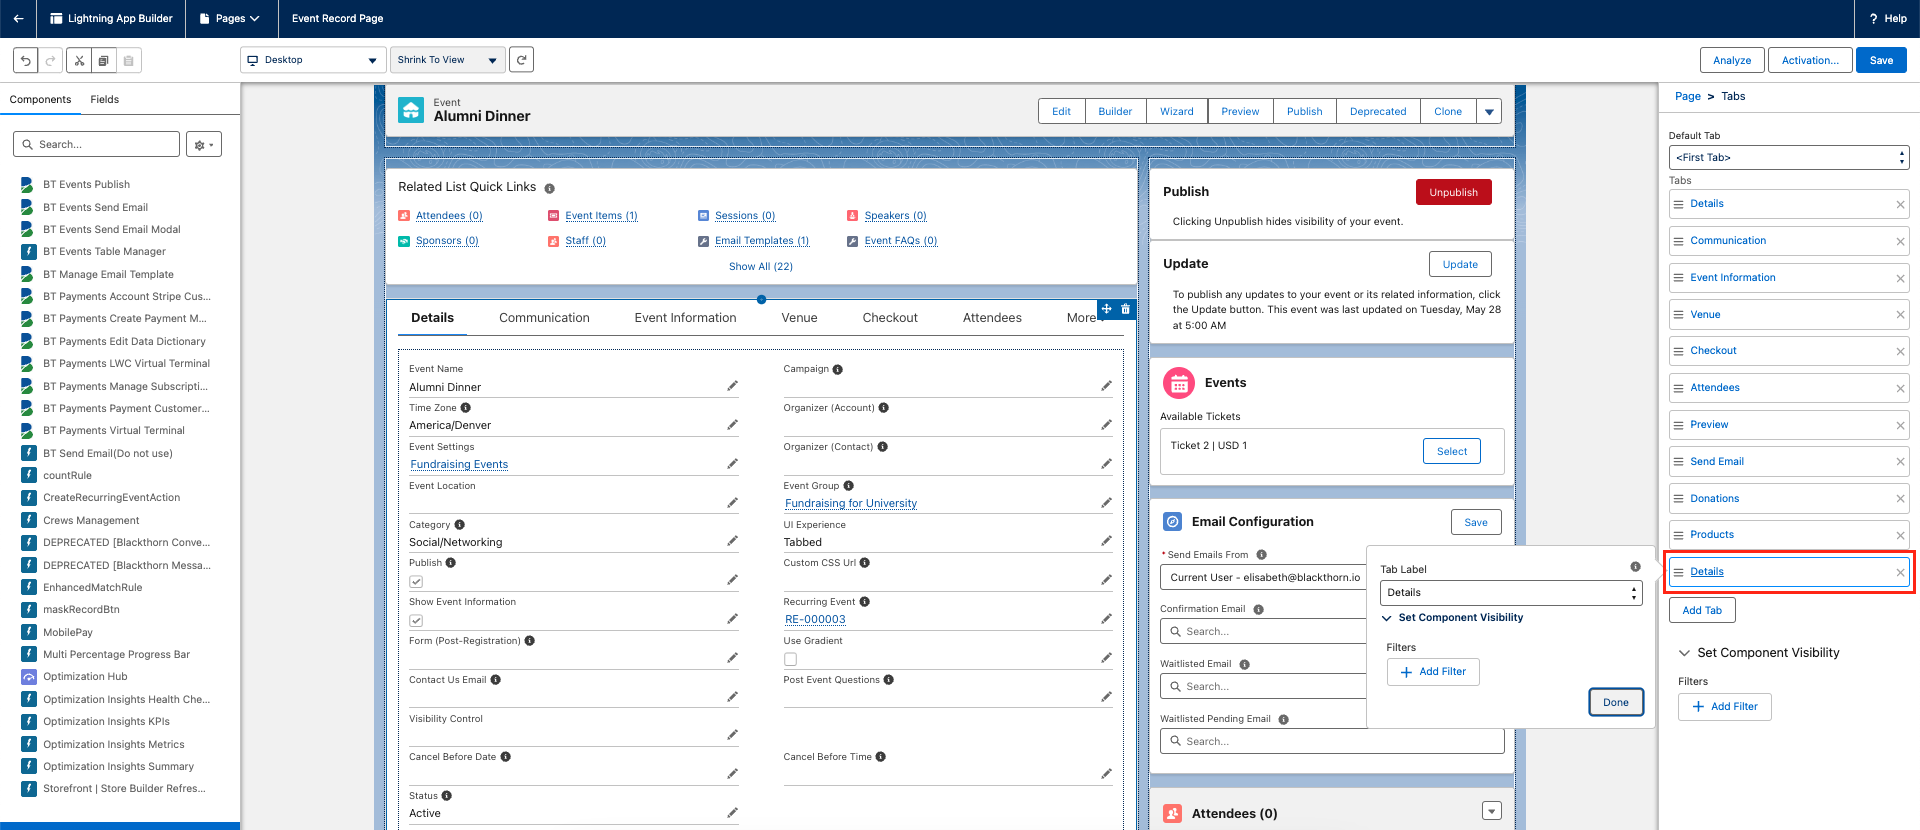
Set Tab Label = “Custom”
Set Custom Label = “Table Manager”
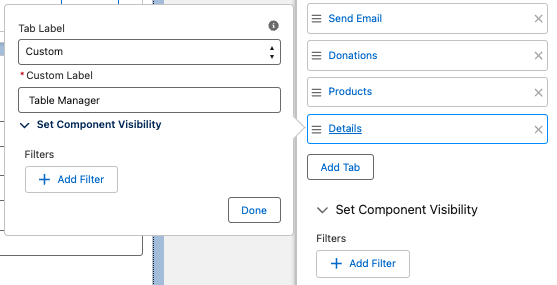
Click Done.
Click More in the navigation tab.
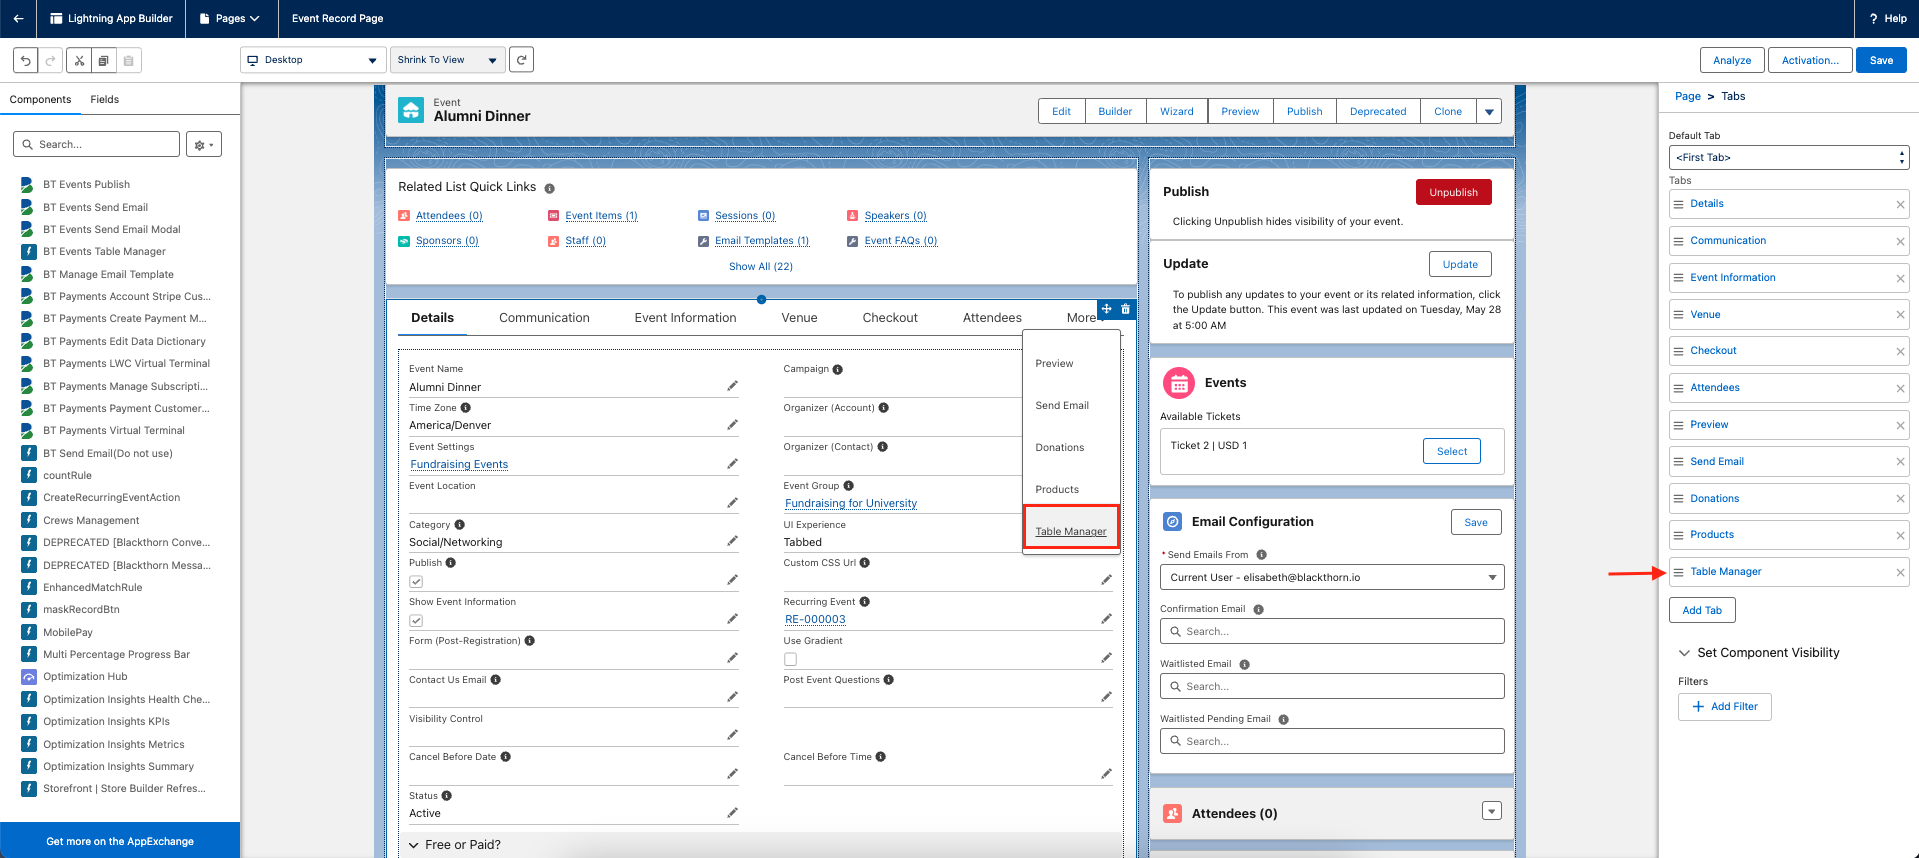
Click Table Manager.
In the Custom–Managed section of the Components menu, find “BT Events Table Manager.”
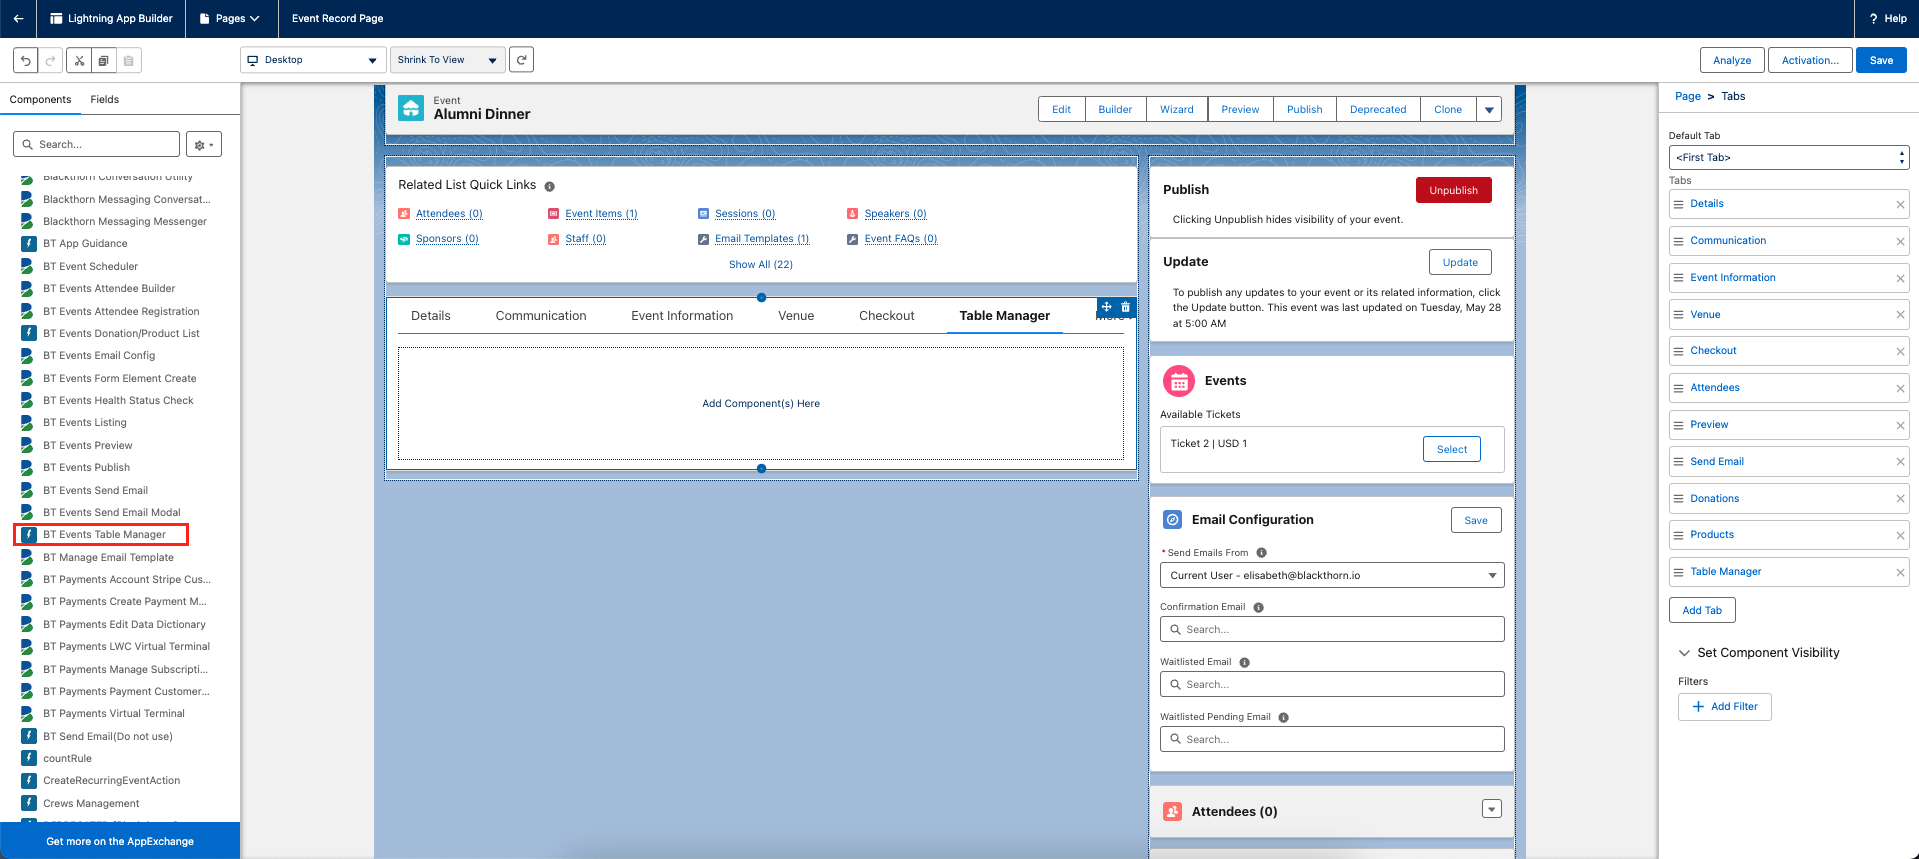
Drag and drop the component onto the page.
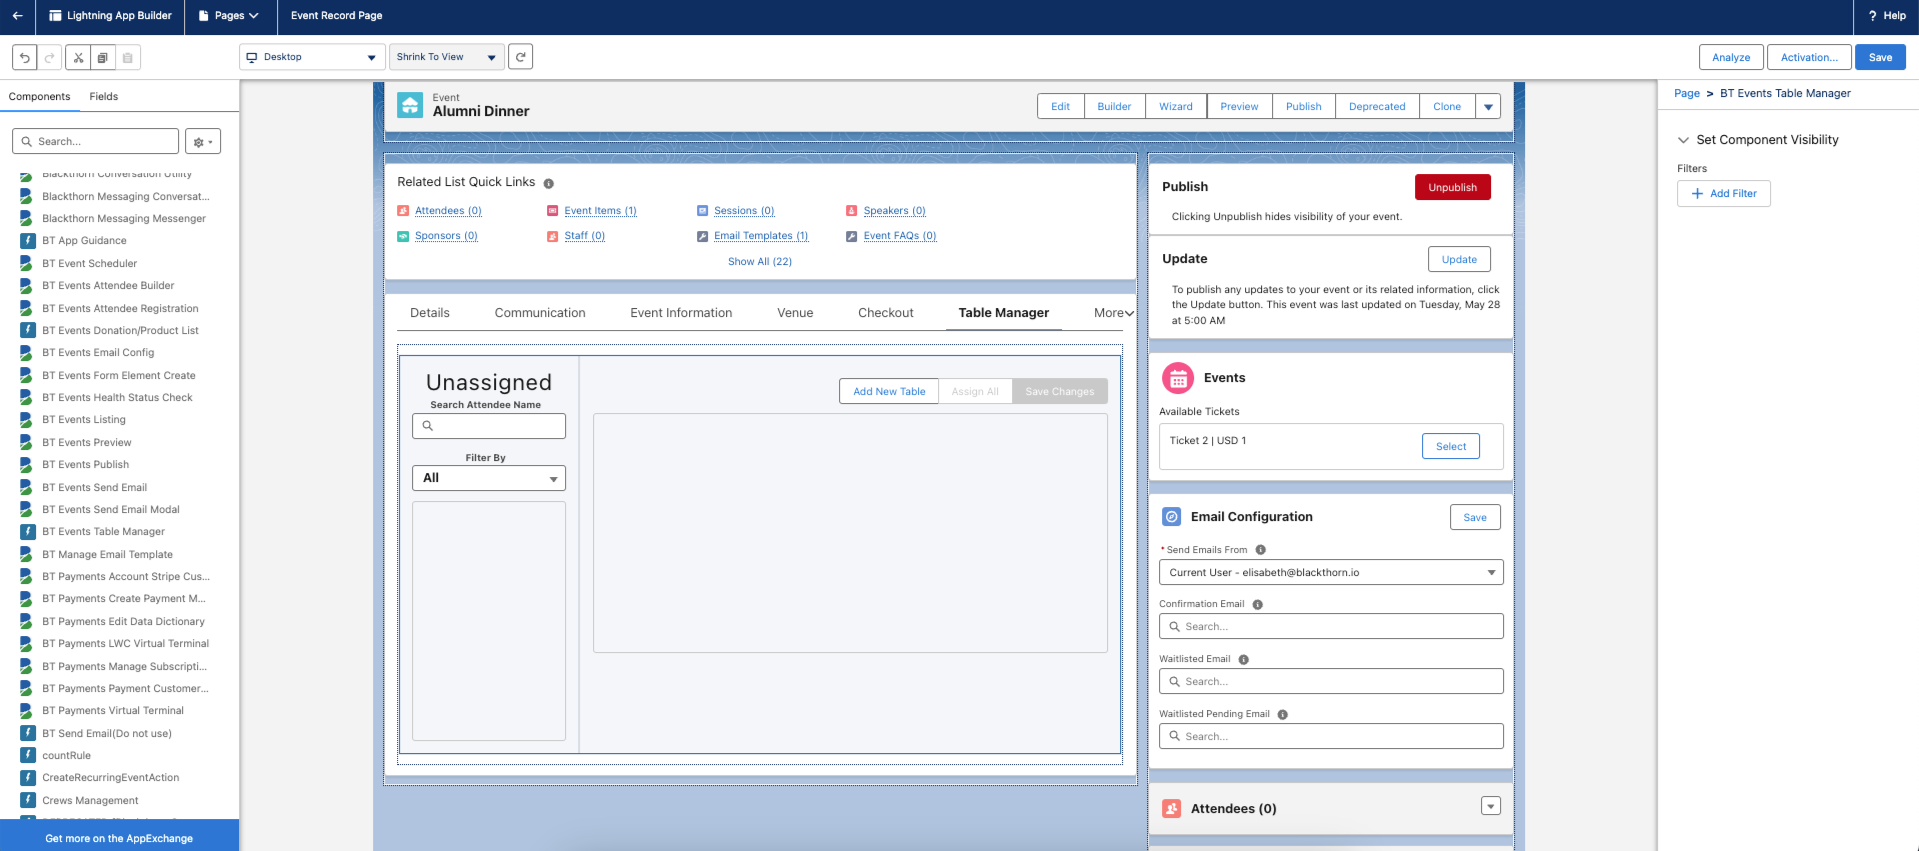
Click Save.
Click Activation: Event Record Page.
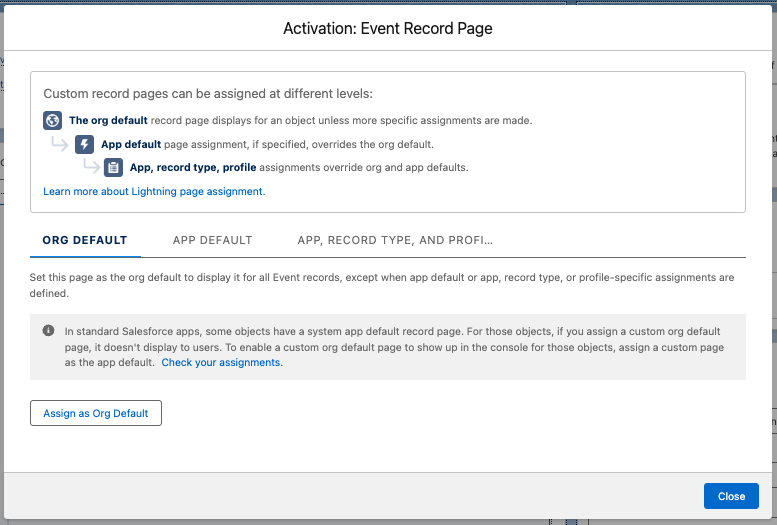
Review the settings and click Close.
Click the Back Arrow.
Click More.
Click Table Manager.
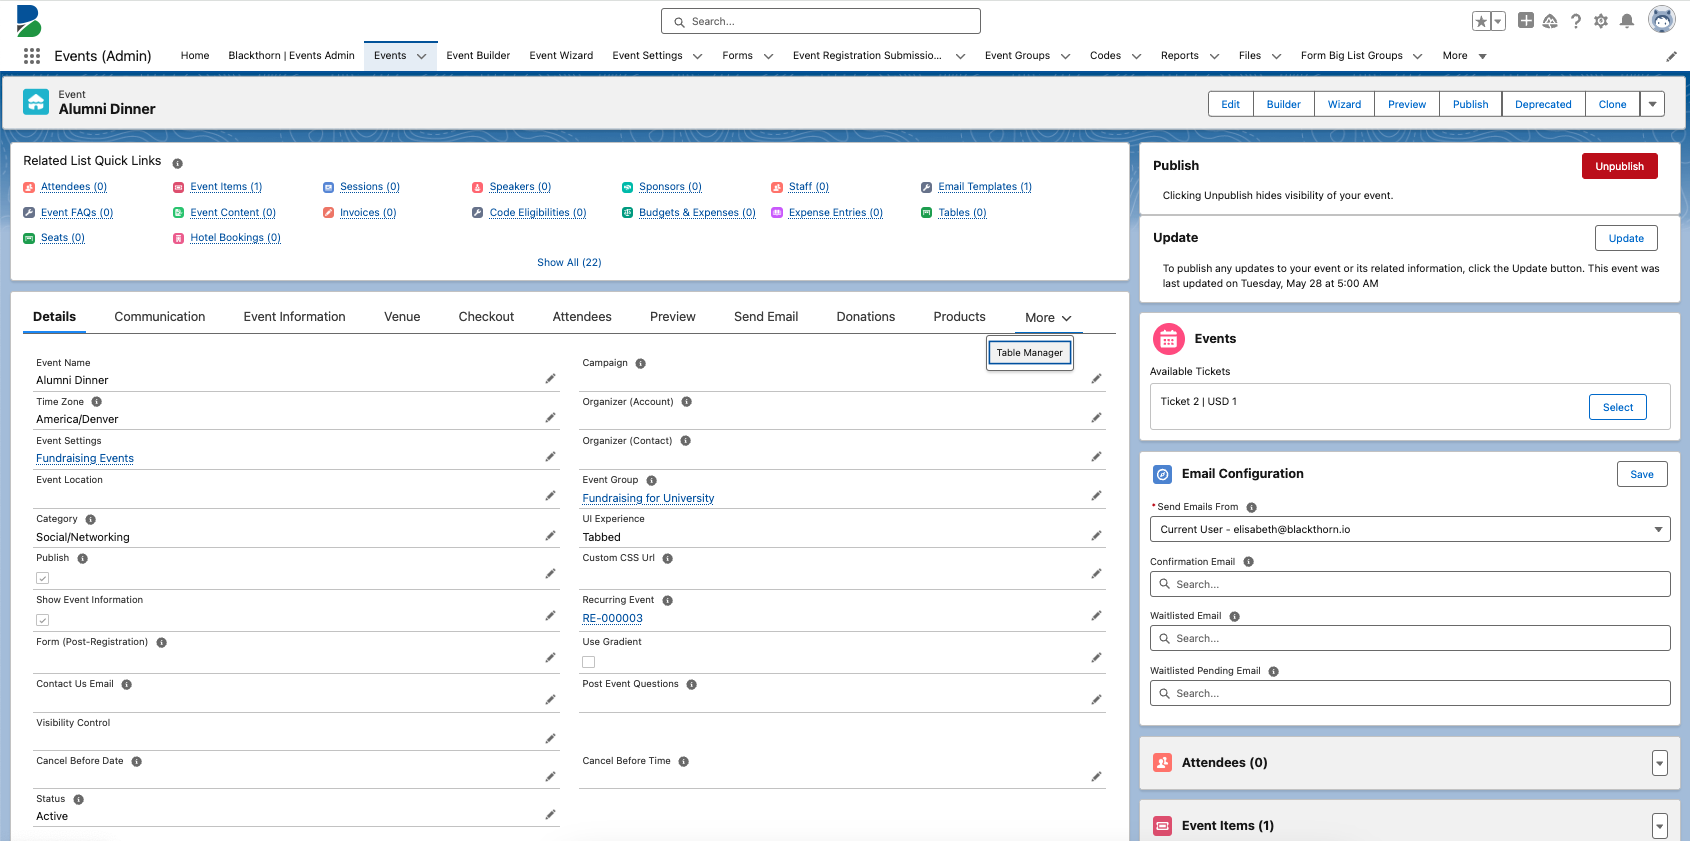
You now have access to the Table Manager tool!
How to Use the Table Manager
Create a Table
Click Add New Table to add a new Table to the Event.
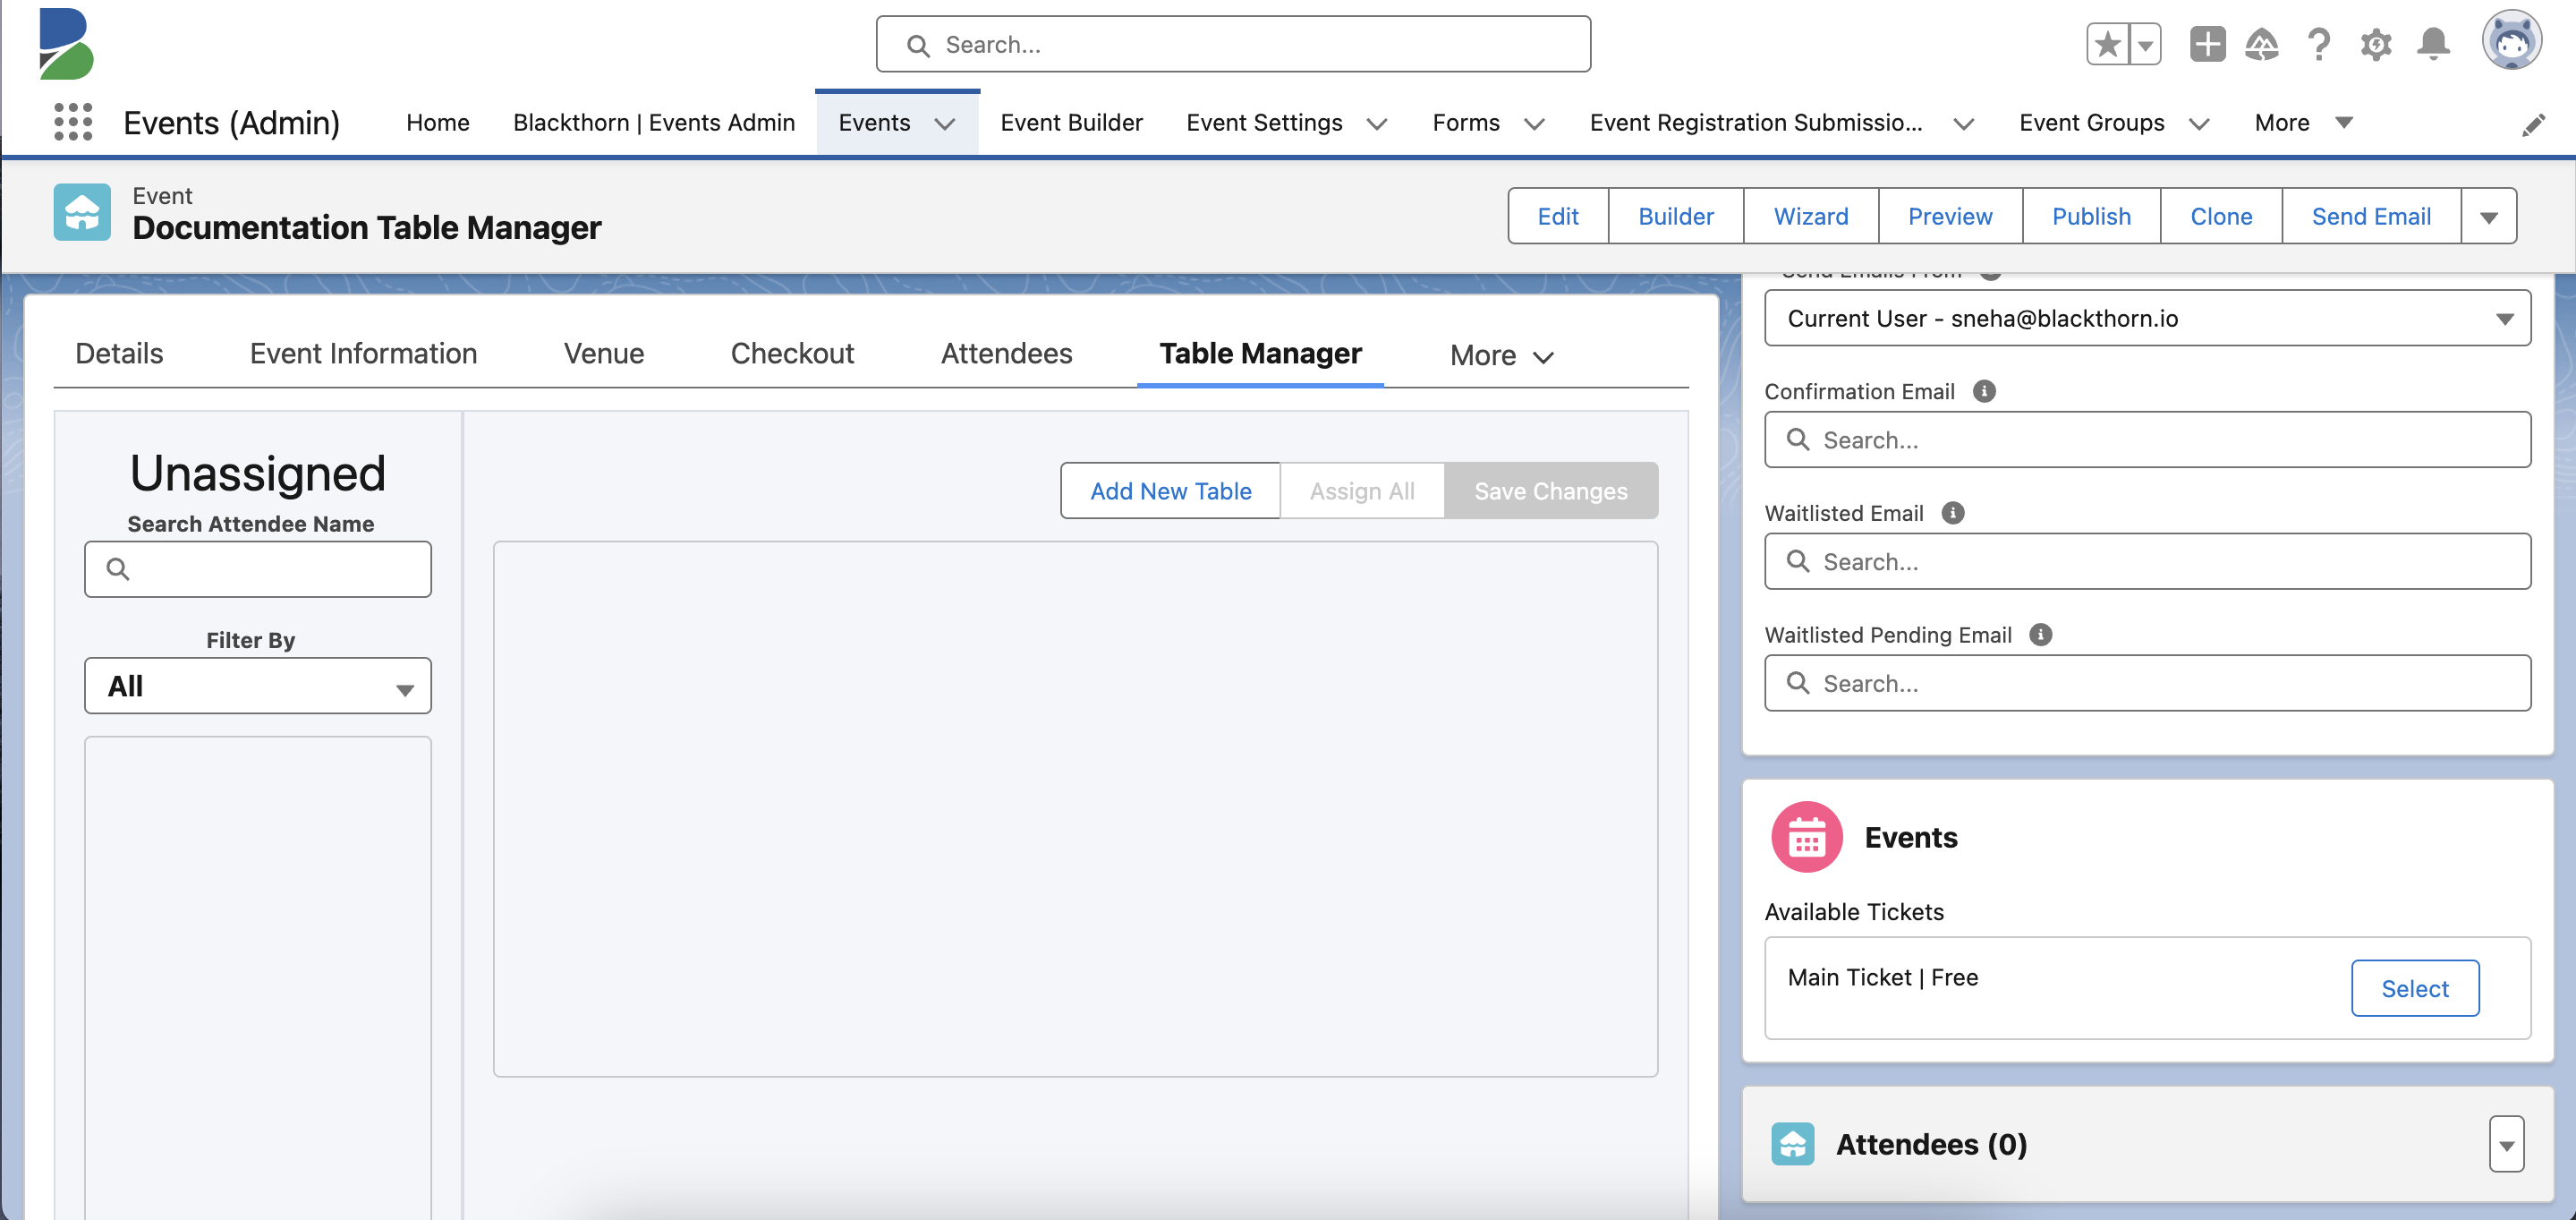
Fill in the following fields.
Table Name and/or a Table Number (If a Table has both a Table Name and a Table Number, the Table Name will be displayed and sorted alphabetically.)
Total Seats (required)
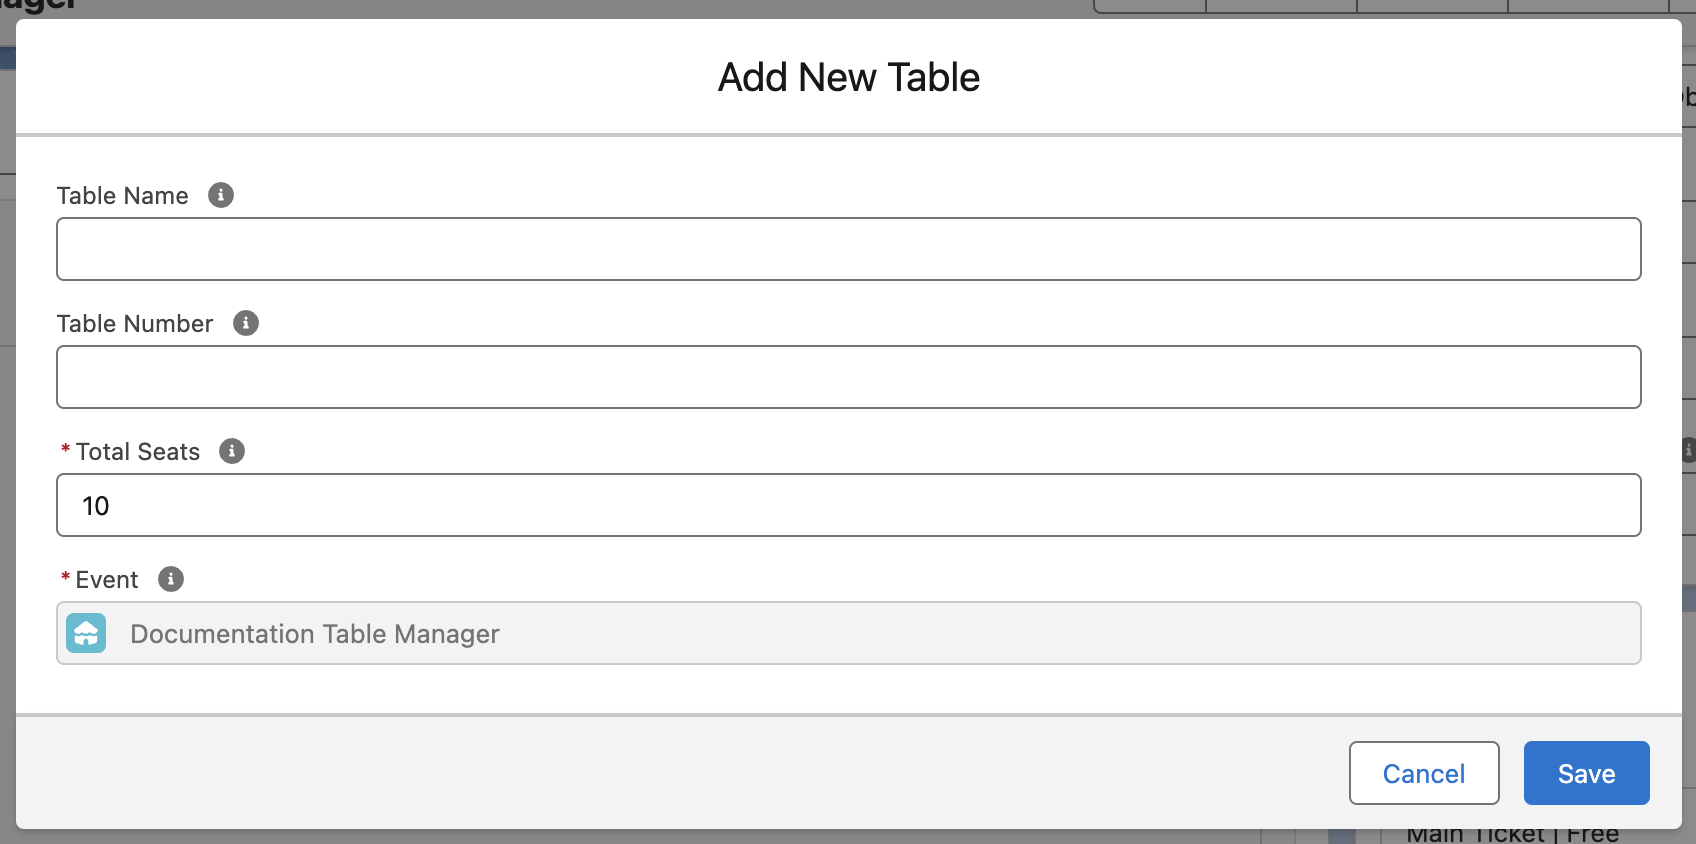
Click Save.
Add Attendees to a Table
There are multiple ways to search for and add Attendees to a Table.
Attendees who have not been assigned to a Table will be in the column labeled Unassigned. Drag and drop each Attendee’s name to a Seat at the Table. If there are more than 100 Attendees in the list, you must use the search feature since loading the full list could impact performance.
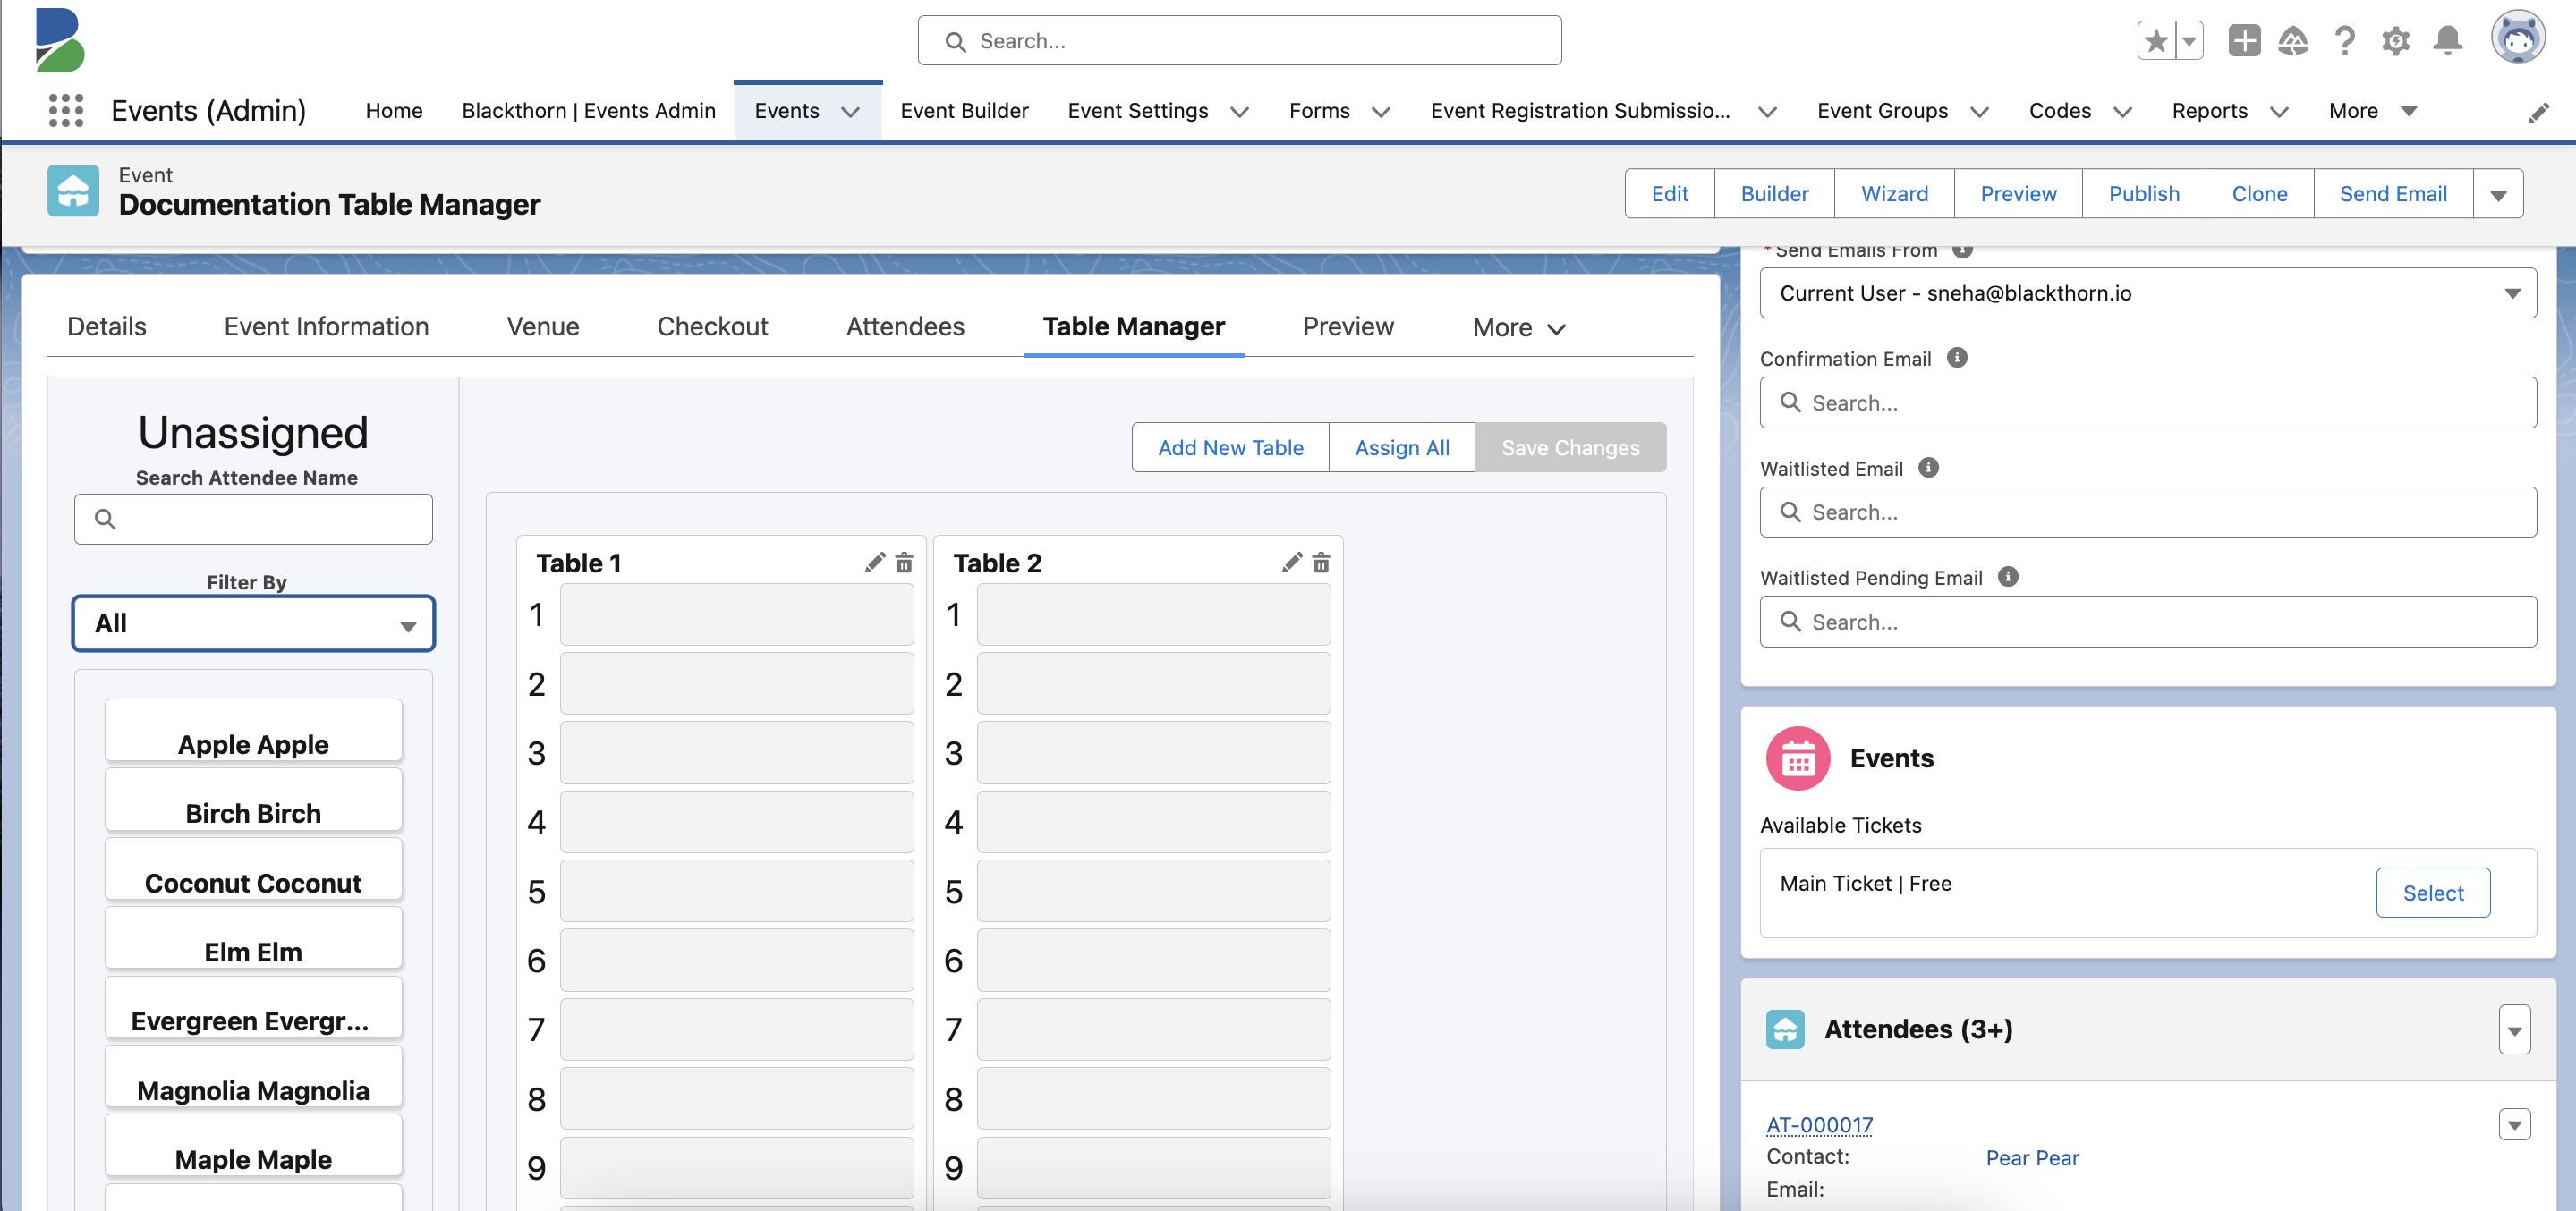
Click Assign All to assign all Attendees to the Tables.
Use the Search Attendee Name search box to locate an Attendee.
Use the Filter By search feature to filter Attendees by name or Registration Status.
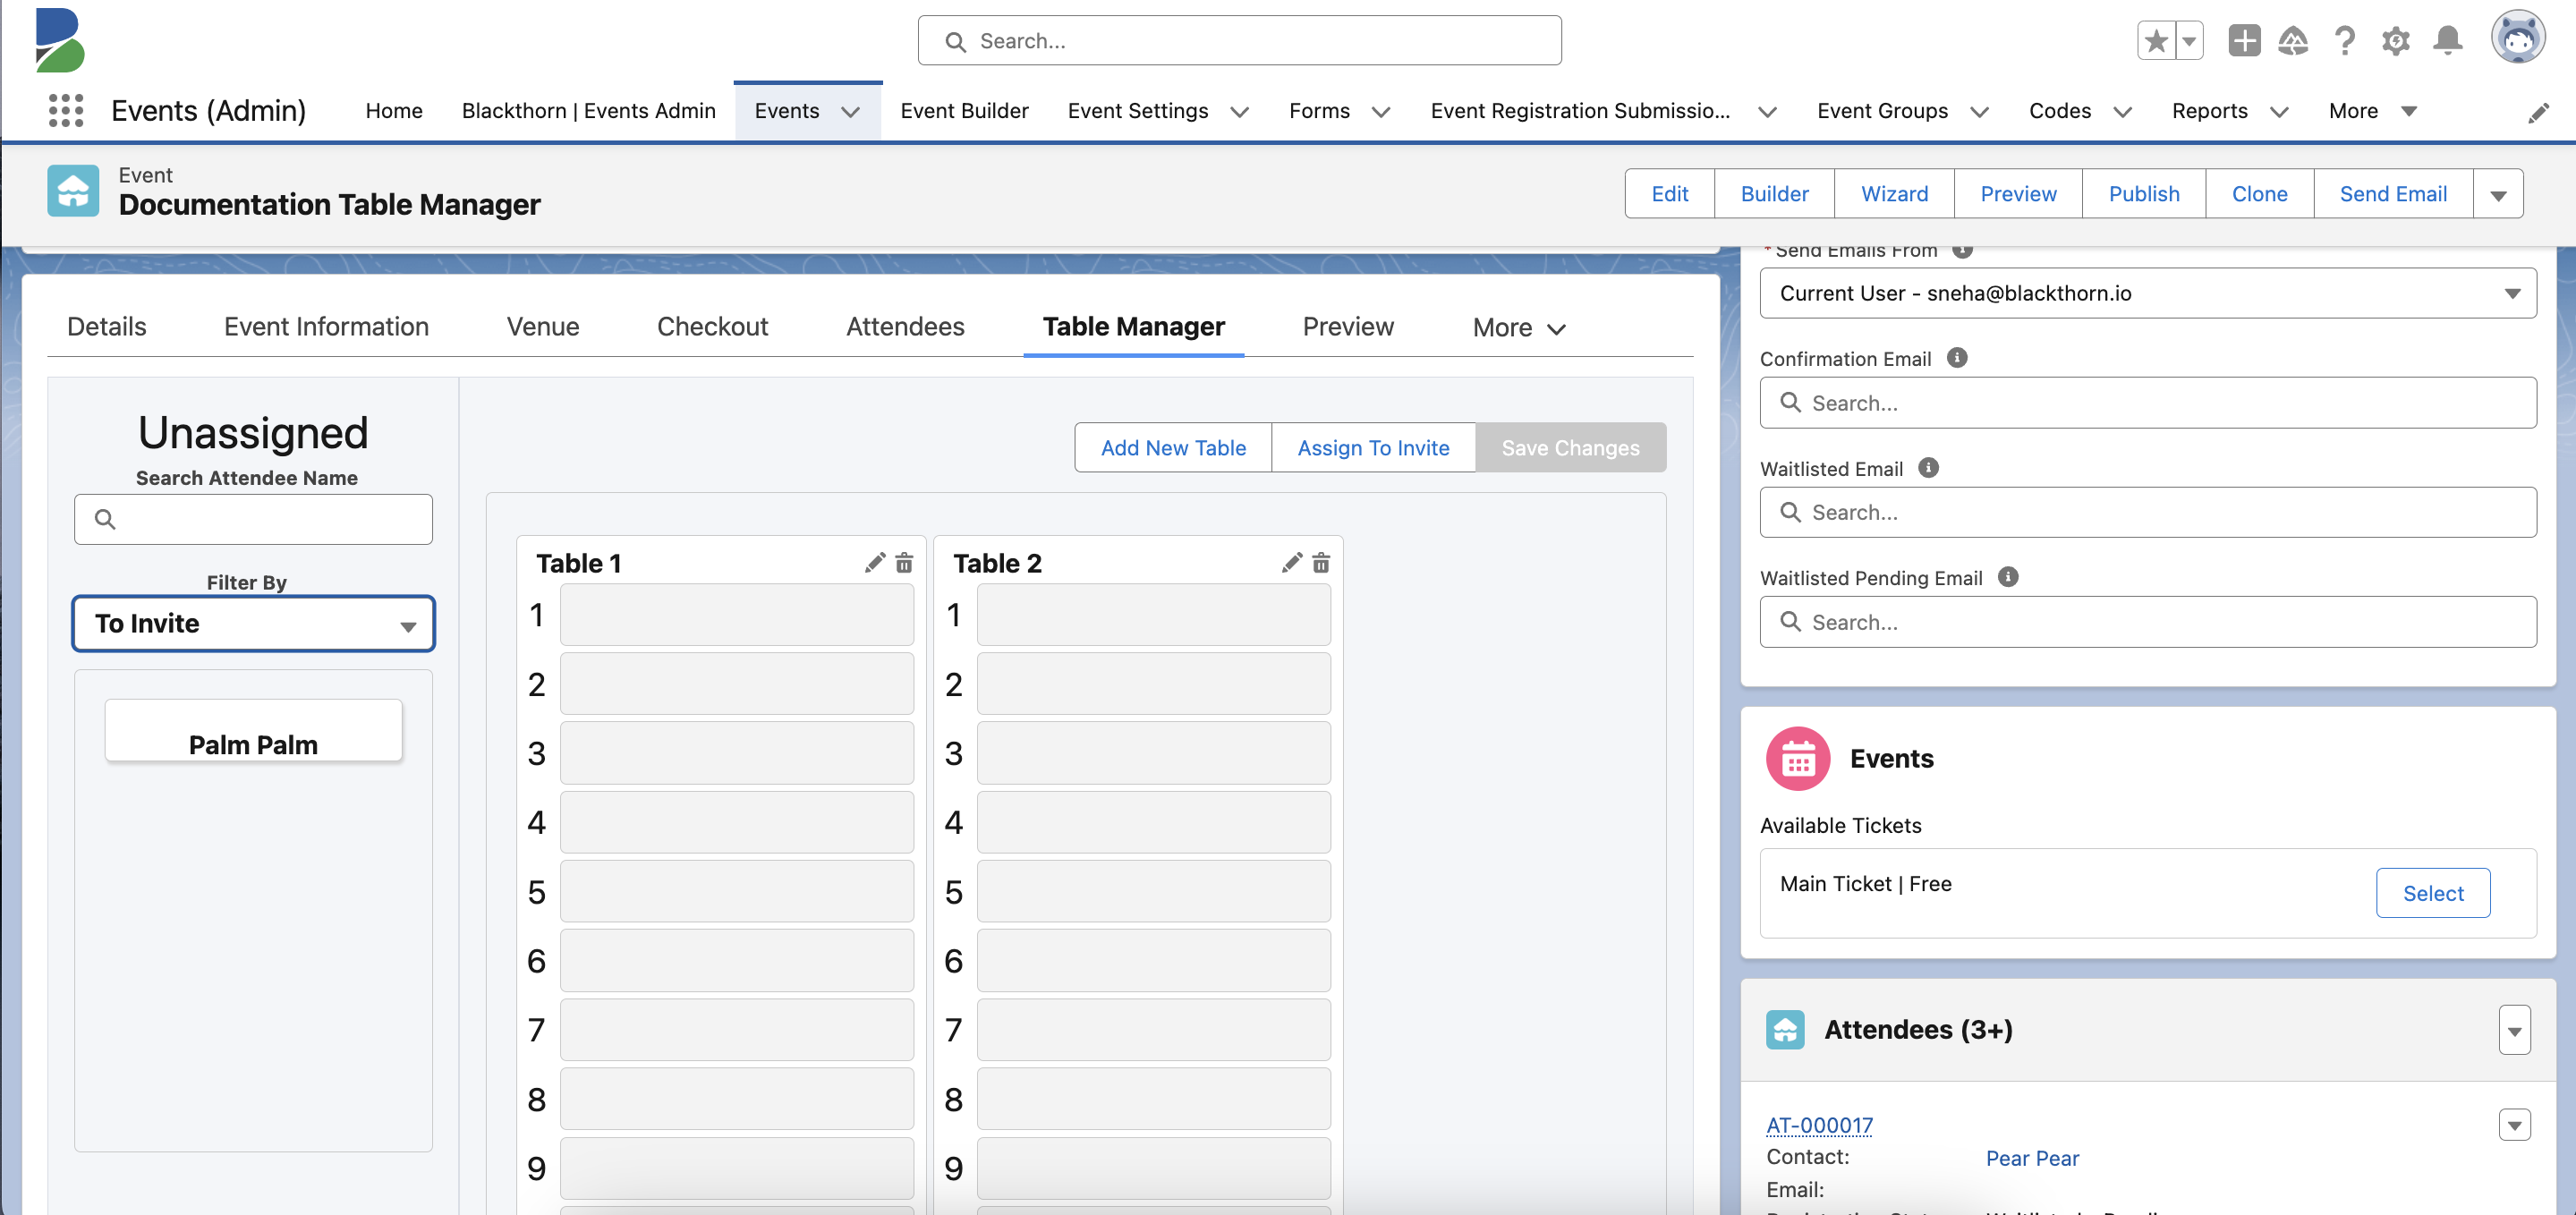
Click Save Changes to save any changes before closing the browser window; otherwise, you will lose your changes.
Edit a Table
Click the Pencil icon on the Table you want to edit.
Update the information.
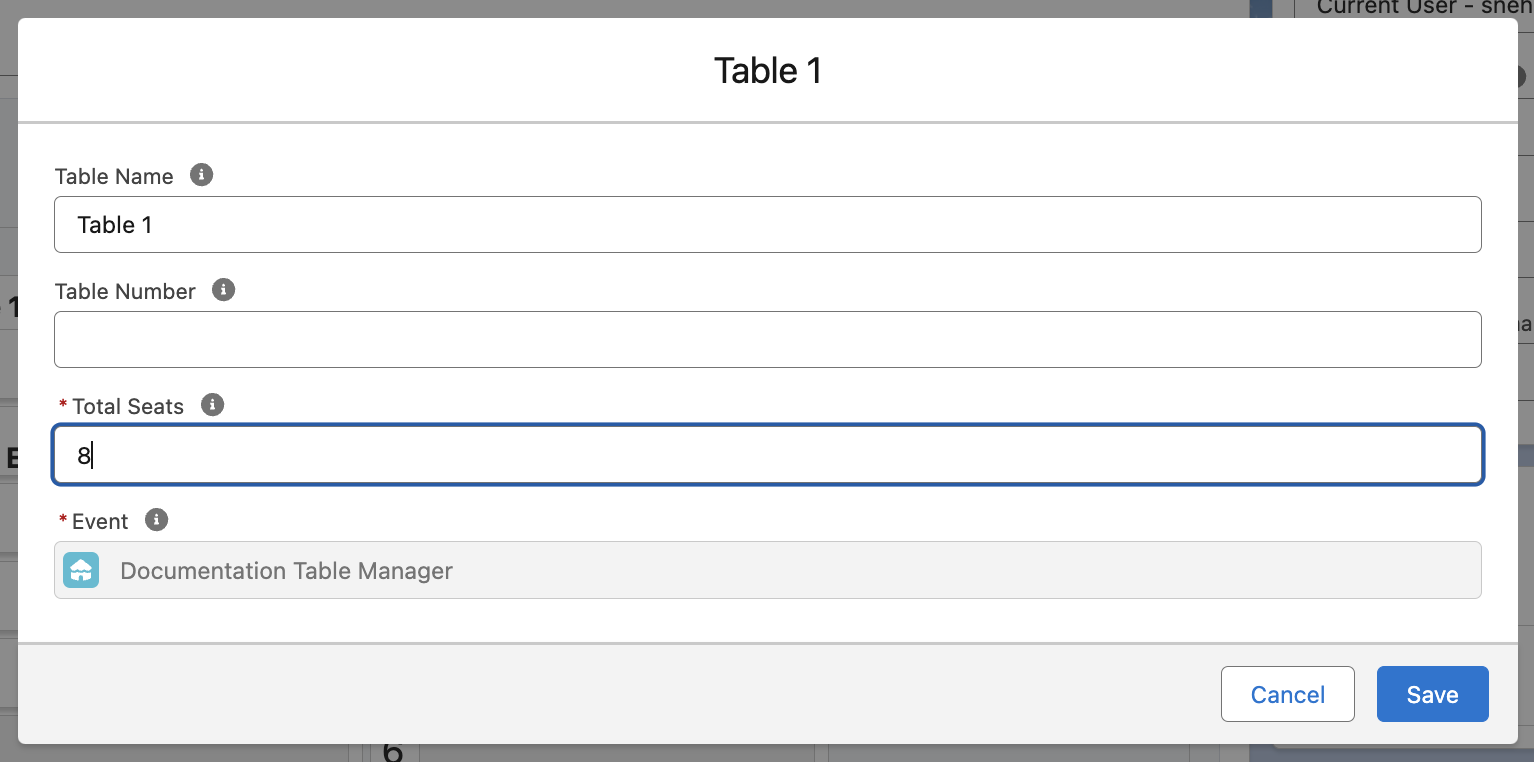
Click Save.

Show/Hide Tables
Prerequisite: There must be at least 101 Seats for the Select Tables button to be visible.
To manage large Events with a higher volume of seated Attendees, use the Select Tables button to show or hide different Tables.
Click Select Tables.
.png)
Use one of the following methods to select Tables.
Search for a Table by the Table Name.
Click Select All.
Click an individual Table to select it.
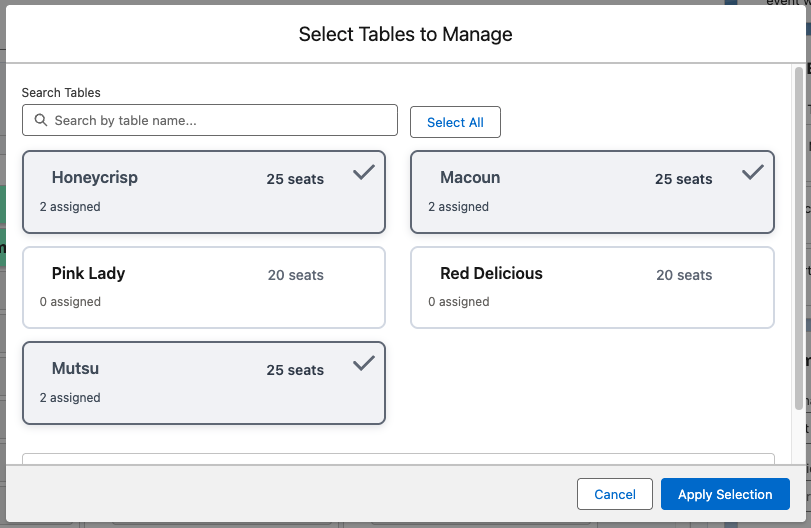
Click Apply Selection.
Delete a Table
Tables with assigned Attendees cannot be deleted until all Attendees are deleted from the Table.
Remove Attendees from the Table.
Drag and drop an Attendee’s name from the Table to the Unassigned column.
Repeat the process until the Table is empty.
Click Save Changes.
Click the Trash Can icon on the Table you want to delete.
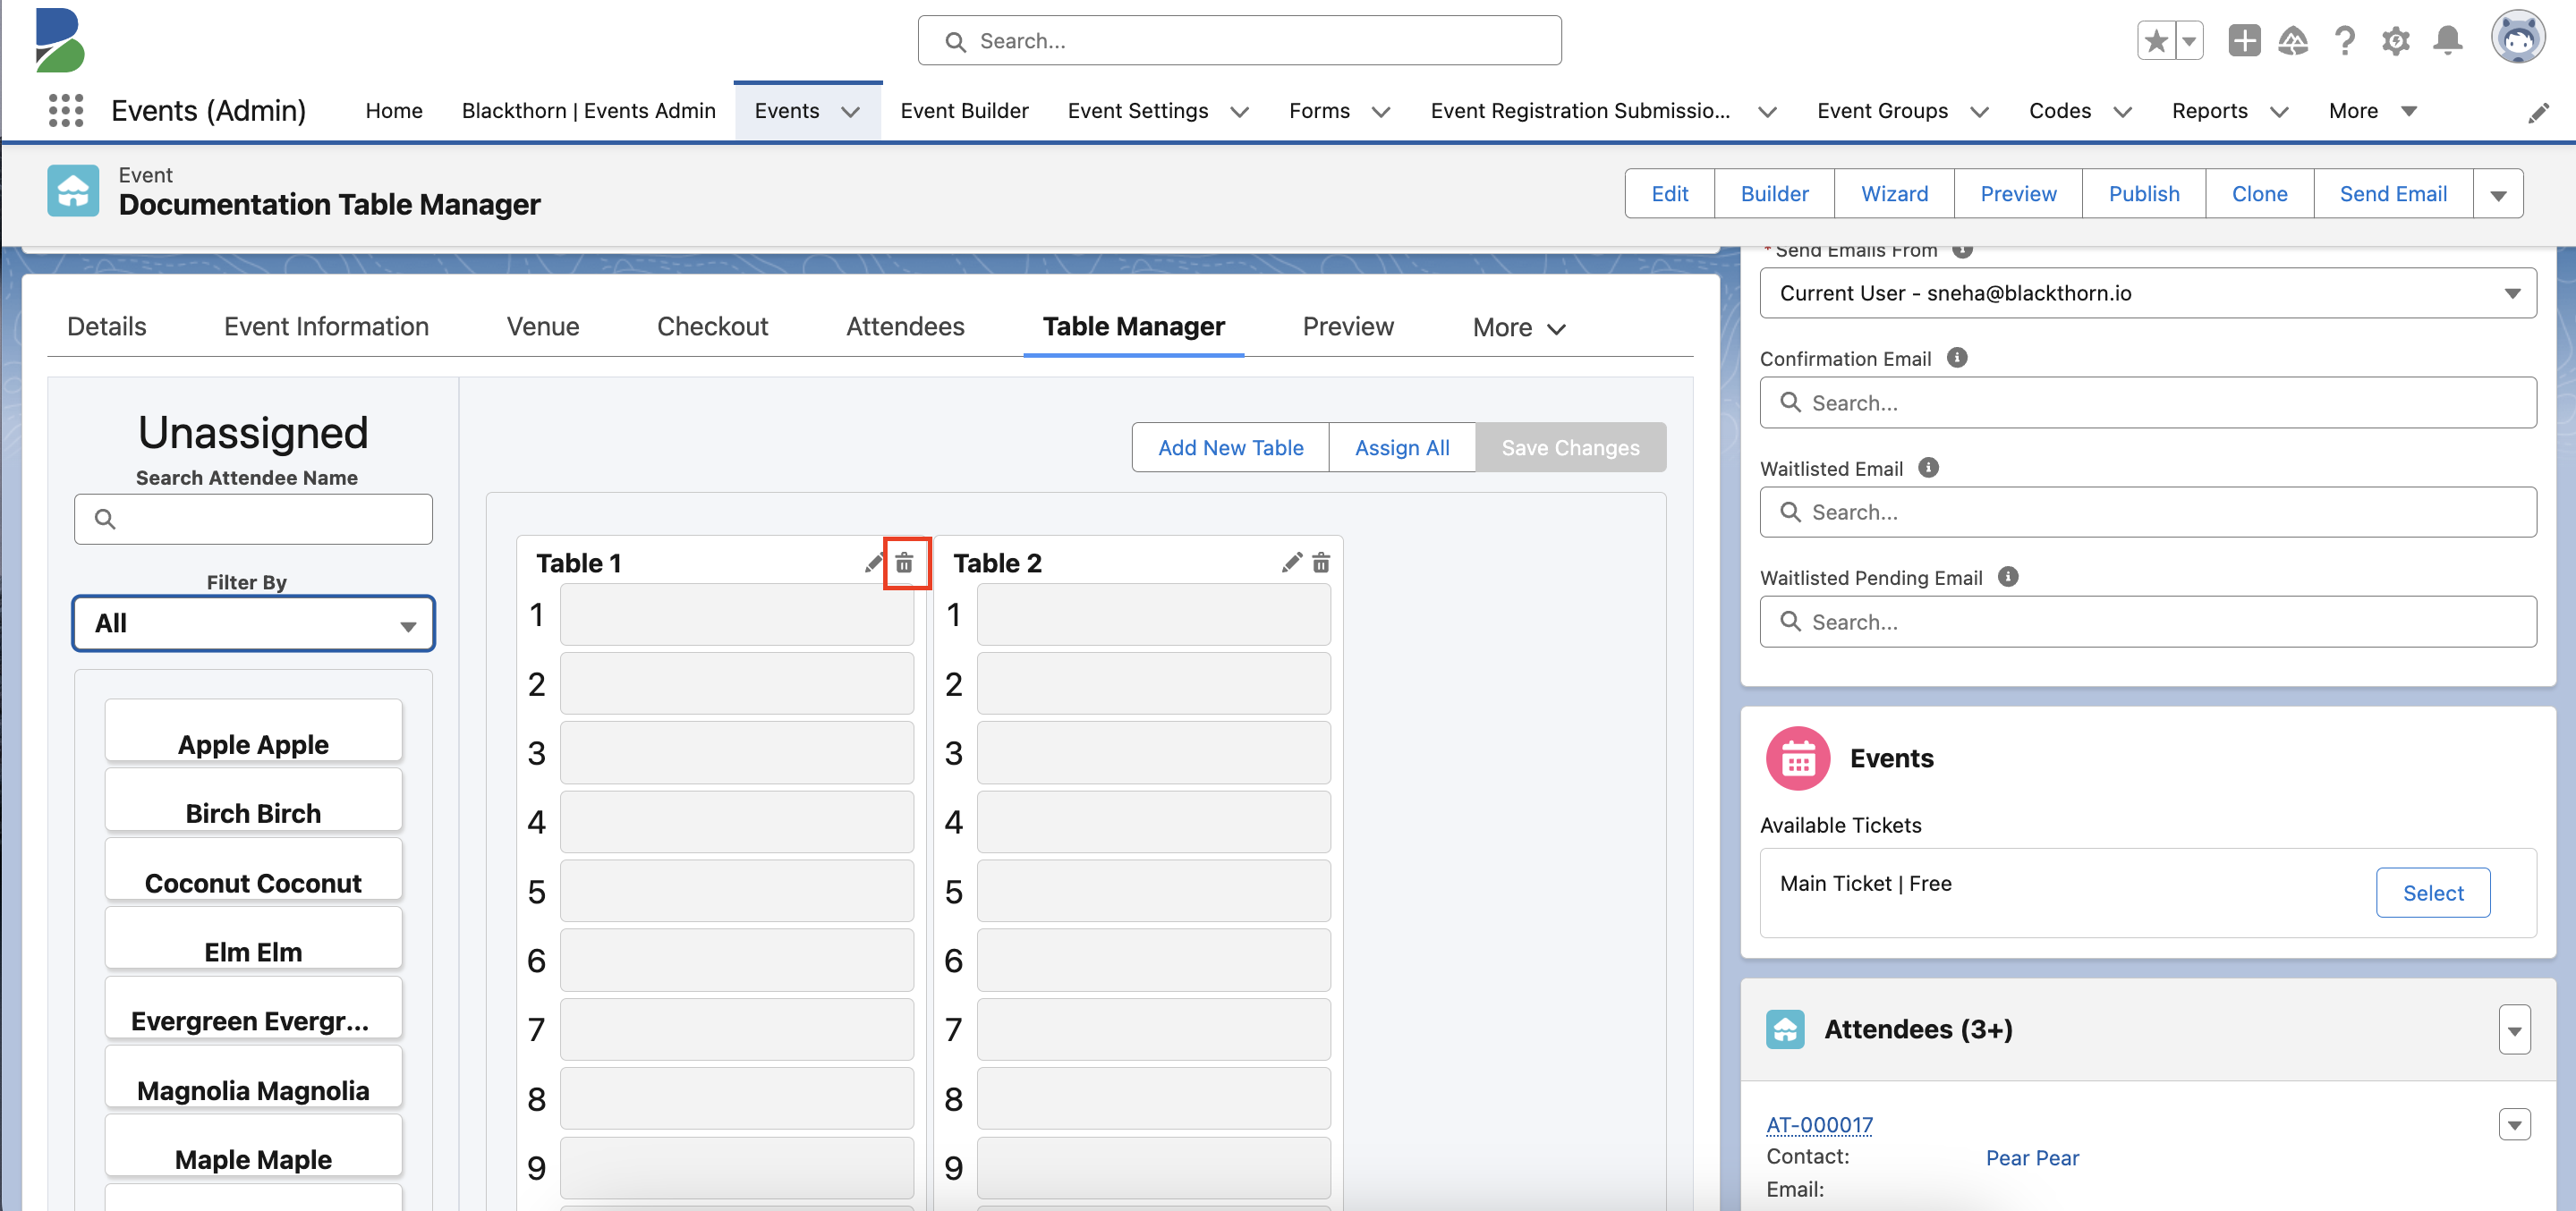
Click Yes.

Manually Create and Edit Records
Create a Table Record
Open and existing Event record.
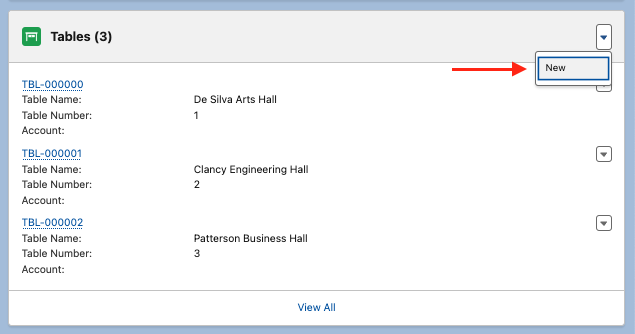
Go to the Tables Related List and click New.
Fill in the following fields
Table Name
Table Number
Total Seats (required)
Account
Main Contact (Attendee)
Main Contact (Contact)
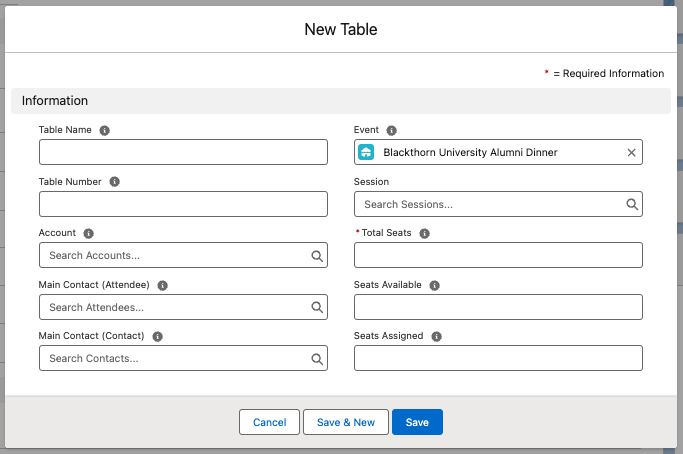
Click Save. The Seats Available and Seats Assigned fields will automatically update.
.png)
Assign Seats
There are two ways to assign Seats to Attendees. The first is to create a Seat record and assign the Attendee to the Seat record. The second is to go to the Attendee record and assign them from there.
Create a Seat Record
Go to the Table record.
Click New next to the Seats Related List.

Fill in the following fields.
Seat Number
Attendee
If the Seat is related to a Table at a Session, fill in the Session and Session Attendee fields as well.
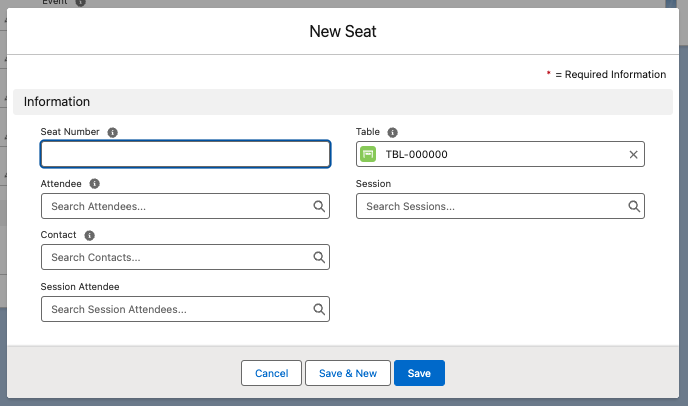
Click Save.
Here’s the new Seat record.
.png)
You will also see the new Seat record in the Table’s Seats Related List. The Event and related Contact records will update automatically.
Assign an Attendee to a Seat Record
Once an Attendee has registered for your Event, you can create a Seat record for them.
Open the Attendee record.
Click New next to the Seats Related List.
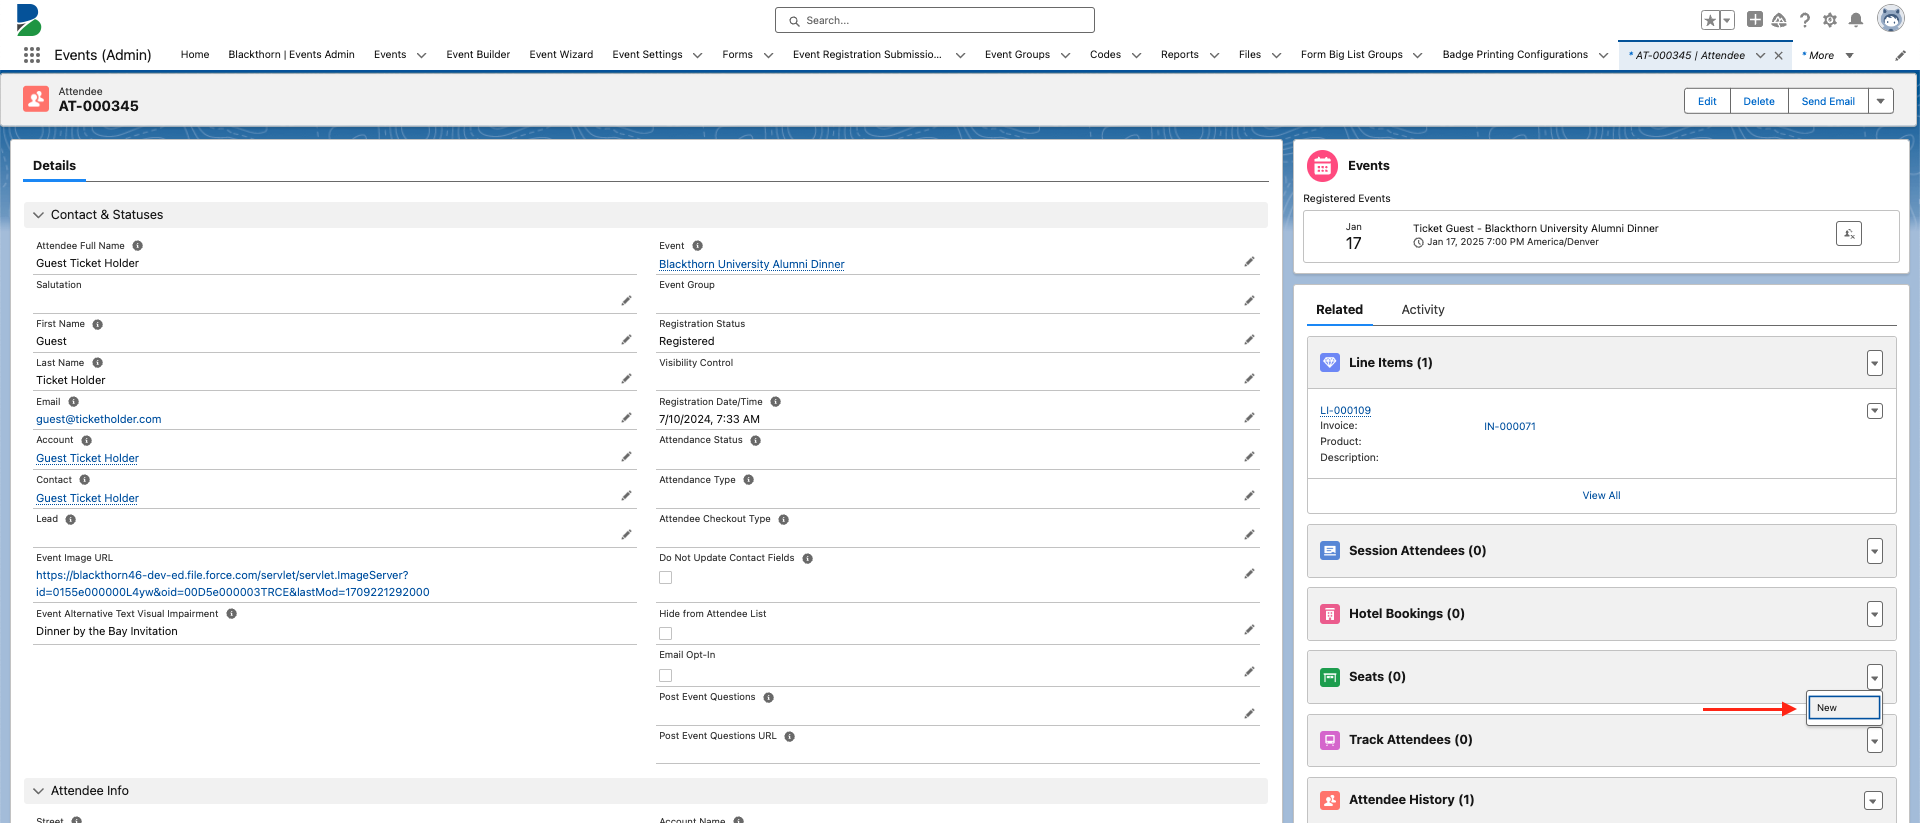
Fill in the following fields.
Table
Seat Number
If the Seat is related to a Table at a Session, fill in the Session and Session Attendee fields as well.
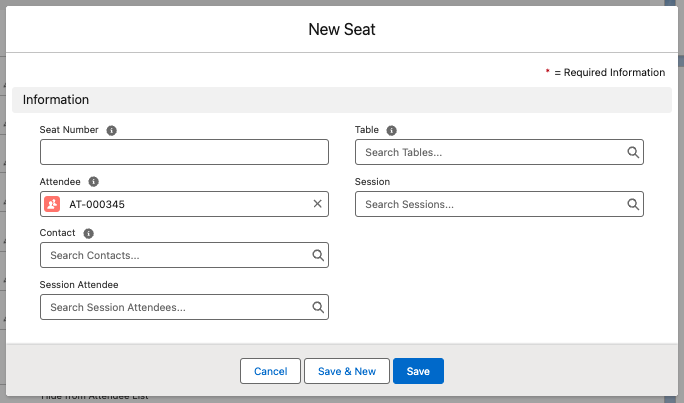
Click Save.
Here’s the new Seat record.
You will also see the new Seat record in the Table’s Seats Related List. The Event and related Contact records will update automatically.