Recurring Events allow you to create a series of forward-looking, scheduled Events based on criteria you define through our easy preset or advanced fields. You can:
Create Events for different dates automatically. If you have consistent dates and times, you can create multiple Events within minutes instead of creating each one manually.
Clone Smart Scheduler scheduled emails (Schedule and Schedule Action records) created from the master template.
Have a complex recurring schedule? Use our advanced scheduling feature to get close to your unique recurring dates and times.
For example, you can schedule a campus tour for the first Wednesday of every month. Continue reading to learn more!
Before you Create Recurring Events
Complete the following tasks before you create your first Event.
Webinars and Recurring Events
To ensure a Zoom URL from the parent or first Event appears in recurring Events, add the Webinar/Meeting URL field to the Deep Clone Layout field set on the Event object.
The resulting Zoom URL in the recurring Events’ Webinar/Meeting URL field will match the one in the parent Event.
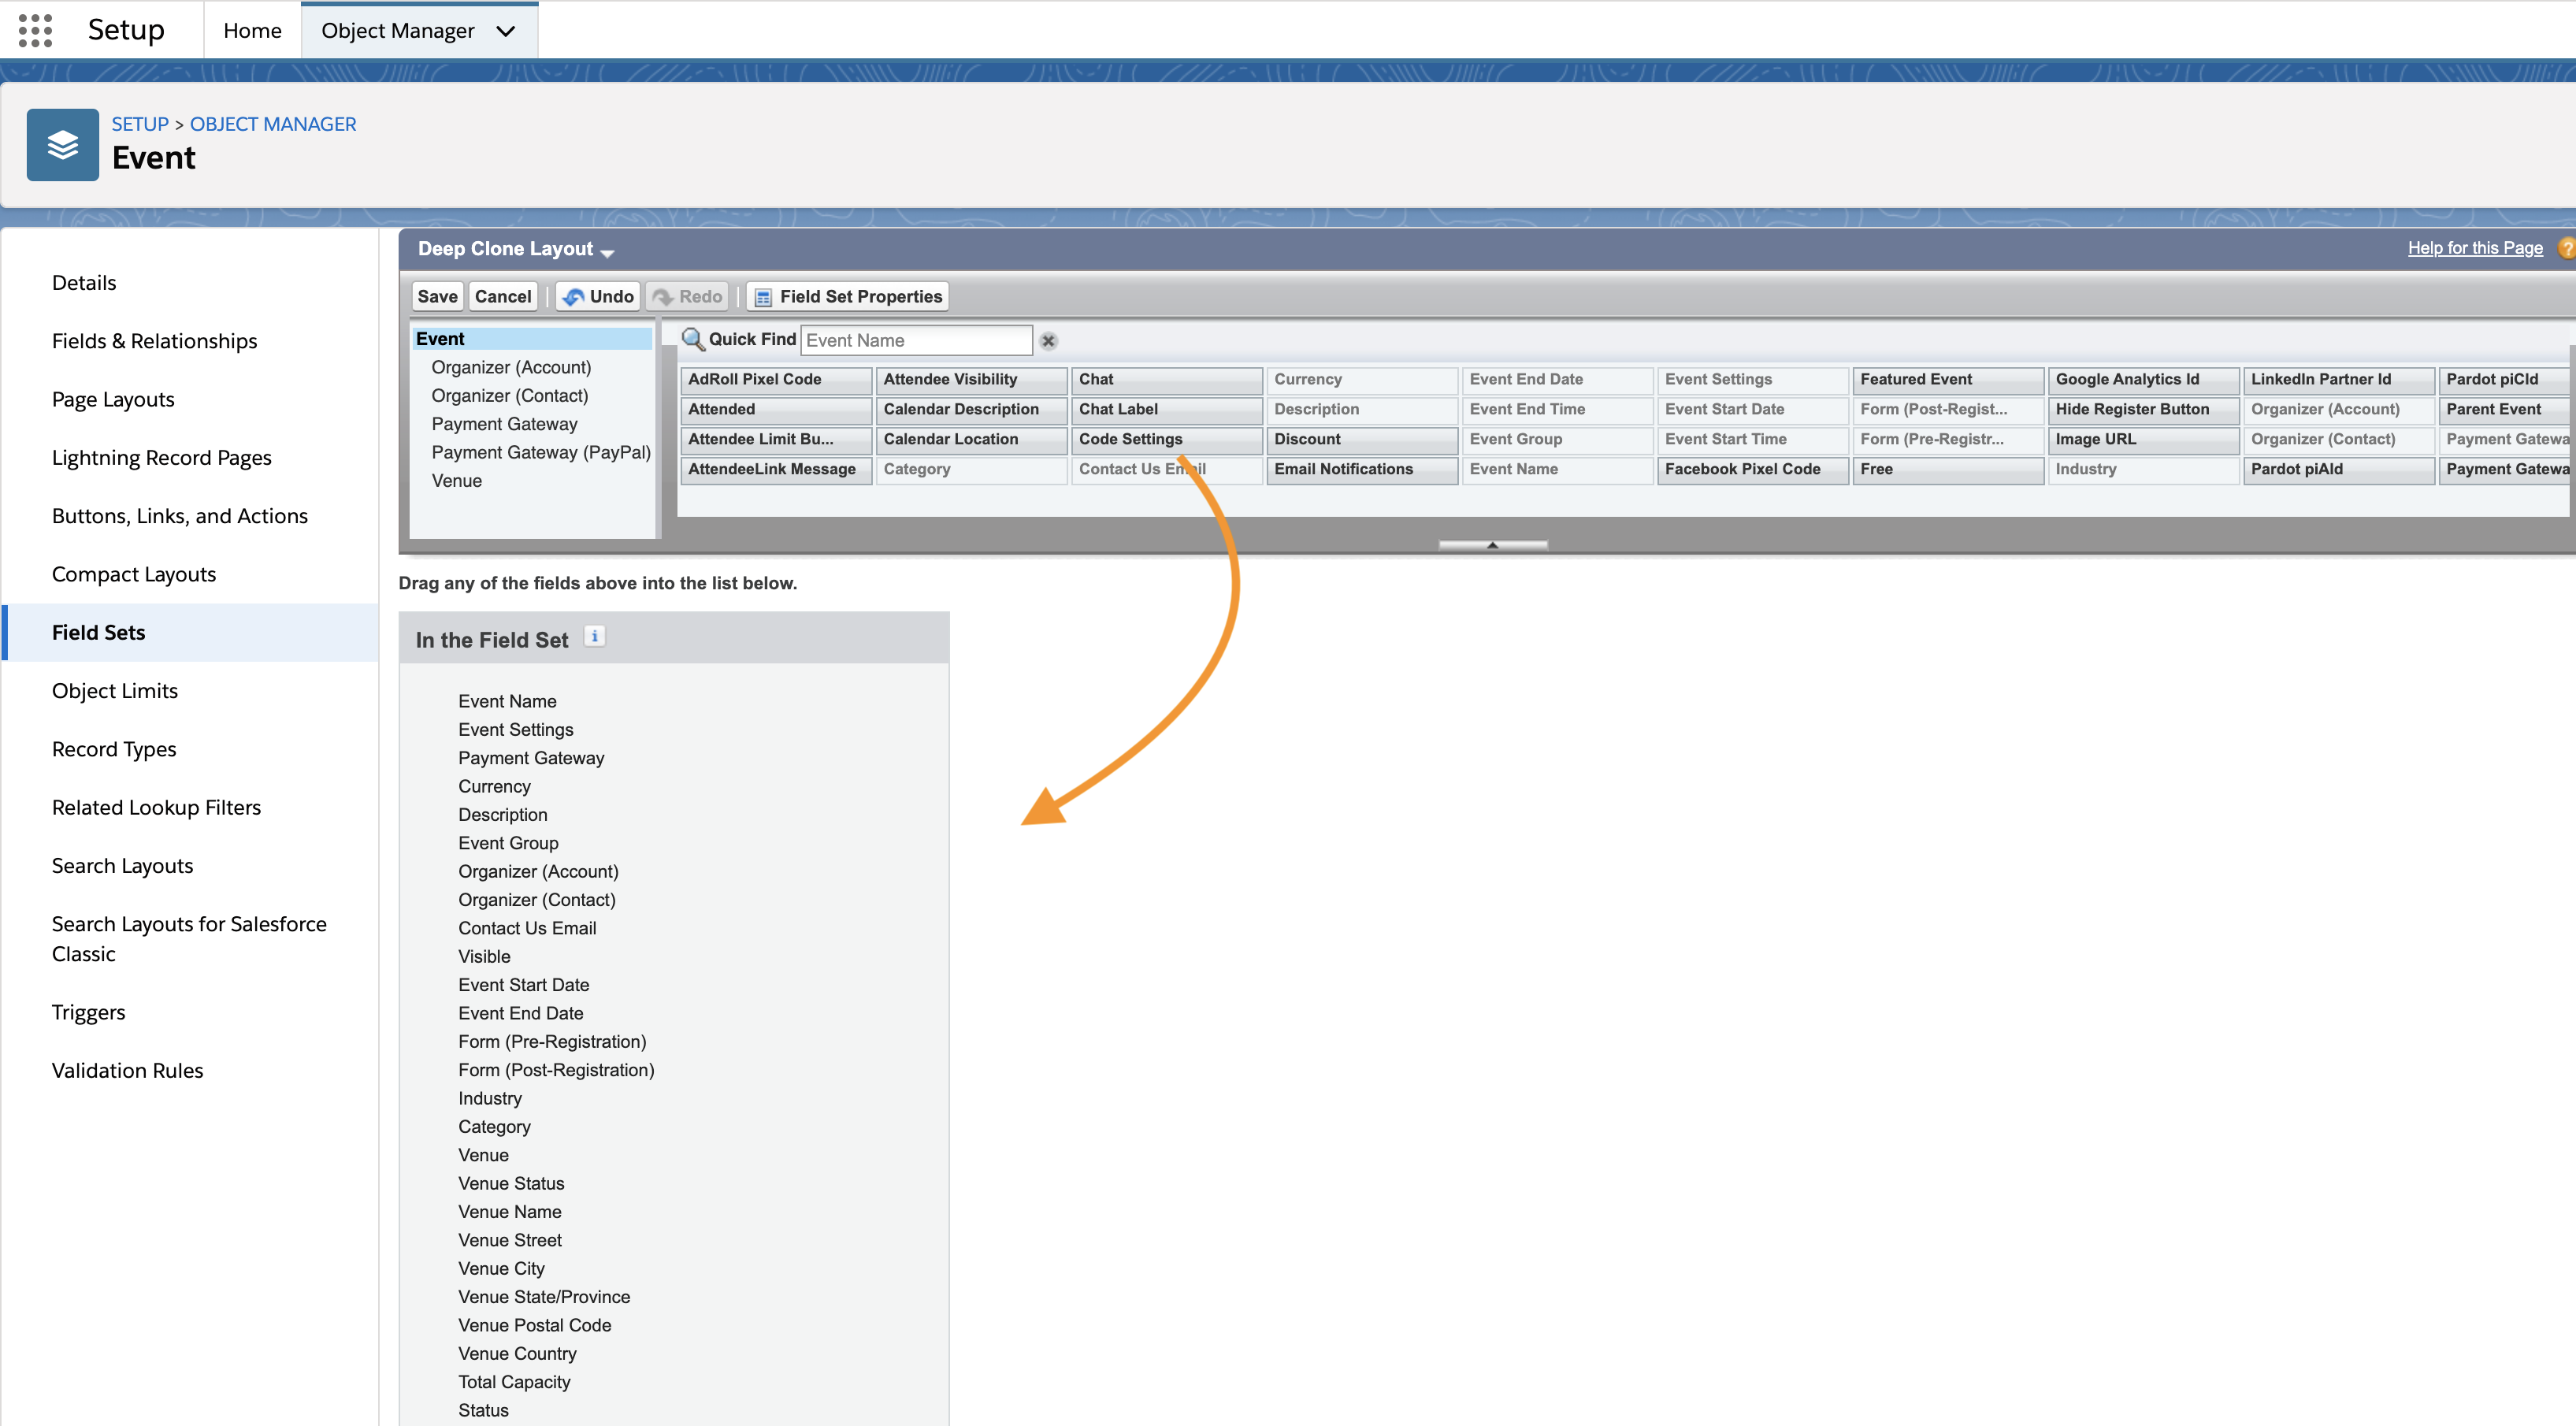
Add Fields to the Event Object’s Deep Clone Field Set
The first step is to add any fields that need to be cloned to the Event object.
Go to Setup.
Click the Object Manager tab.
In the Quick Find box, enter and click “Event” (conference360__Event__c).
Click Field Sets.
Click Deep Clone Layout.
Drag and drop the fields in the “In the Field Set” box.
Click Save.
Update the Event Settings Record
The second step is to update the Event Settings record that will be related to the first Event. This will allow you to create Recurring Events, but they won’t be published automatically.
Go to the Event Settings record.
Confirm that the Require At Least One Ticket To Publish field is on the page layout. If it is, go to the next step. If it isn’t, go to the steps below.
Click the Pencil icon.
Set to Require At Least One Ticket To Publish to “No”.
Click Save.
If the Require At Least One Ticket To Publish field isn’t on the page layout, complete the steps below.
Click the Gear icon.
Click Setup.
Click the Object Manager tab.
In the Quick Find box, enter and click “Event Settings”.
Click Page Layouts.
Click Event Settings Layout.
Drag and drop the Require At Least One Ticket To Publish field on to the page layout.
Click Save.
Go back to the Event Settings record and refresh the page.
Find the Require At Least One Ticket To Publish field and click the Pencil icon.
Set to Require At Least One Ticket To Publish to “No”.
Click Save.
Create a Recurring Event
Create an Event that will be referenced when creating Recurring Events. The logic uses the Event Status to determine if an Event is active. An Event will be cloned, and the dates will be updated based on the schedule defined. An open-ended Recurring Event is an Event that is created repeatedly, with no end date defined. The Recurring Event will continue to be created until you close it.
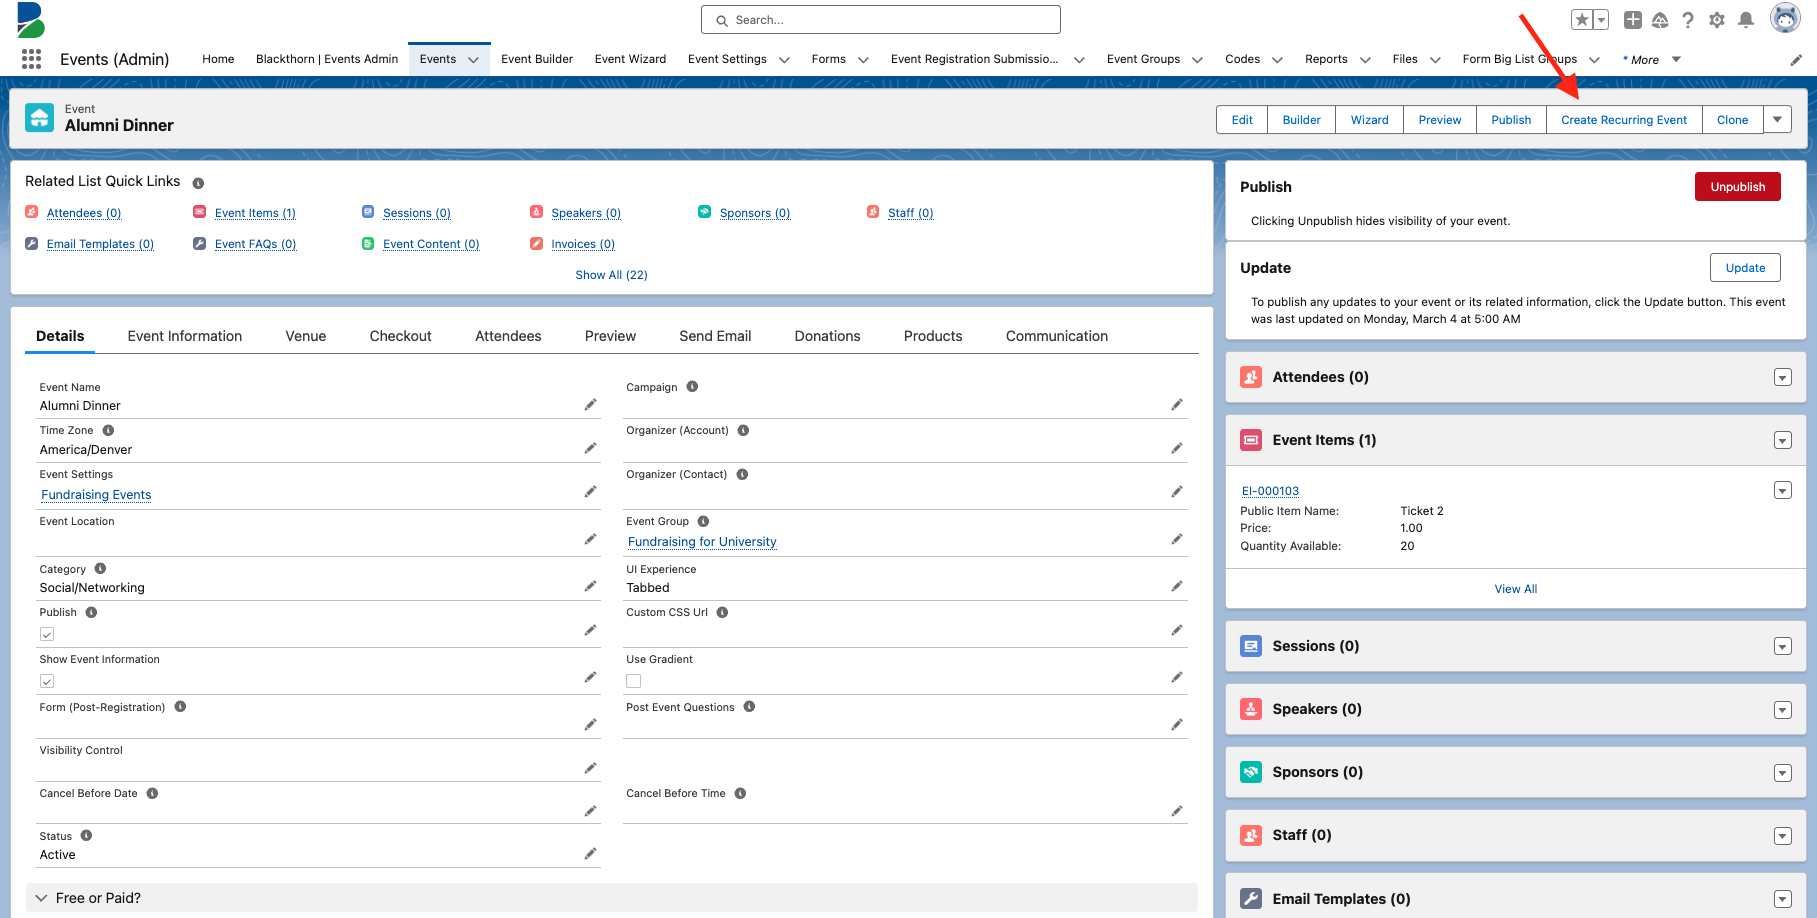
Click Create Recurring Event.
Complete the fields in the sections below.
Click Save.
Don’t Forget to Schedule the Batch Job
Please make sure to schedule the following batch job by clicking the Schedule Recommended Event Jobs button on the Blackthorn | Events Admin tab.
The Blackthorn | Events Recurring Event Generate scheduled job runs nightly at 3:00 AM and updates and creates Recurring Events set to “Keep One Open” or “Auto Renew.”
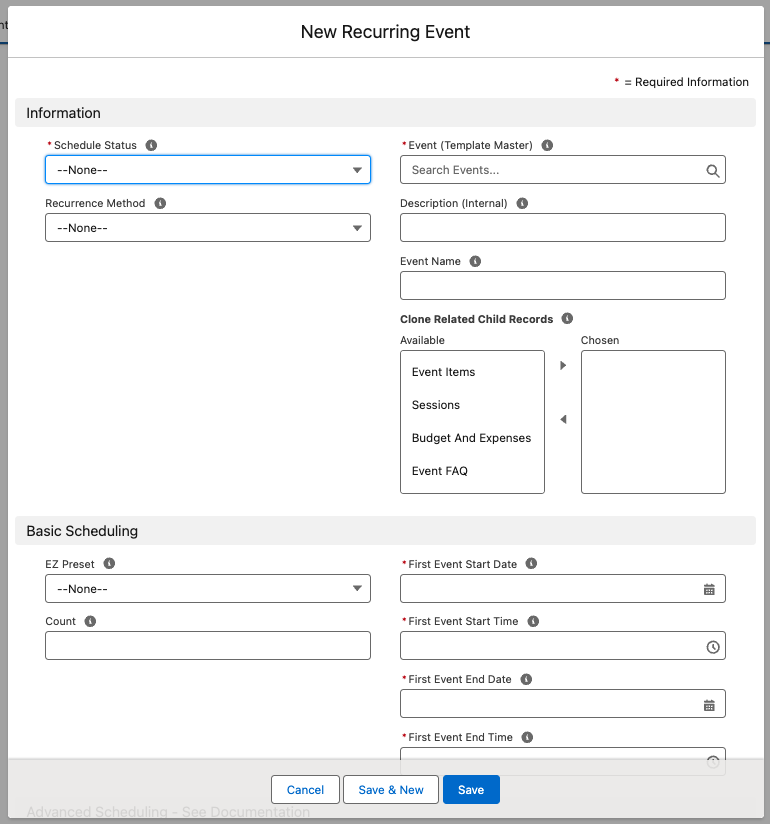
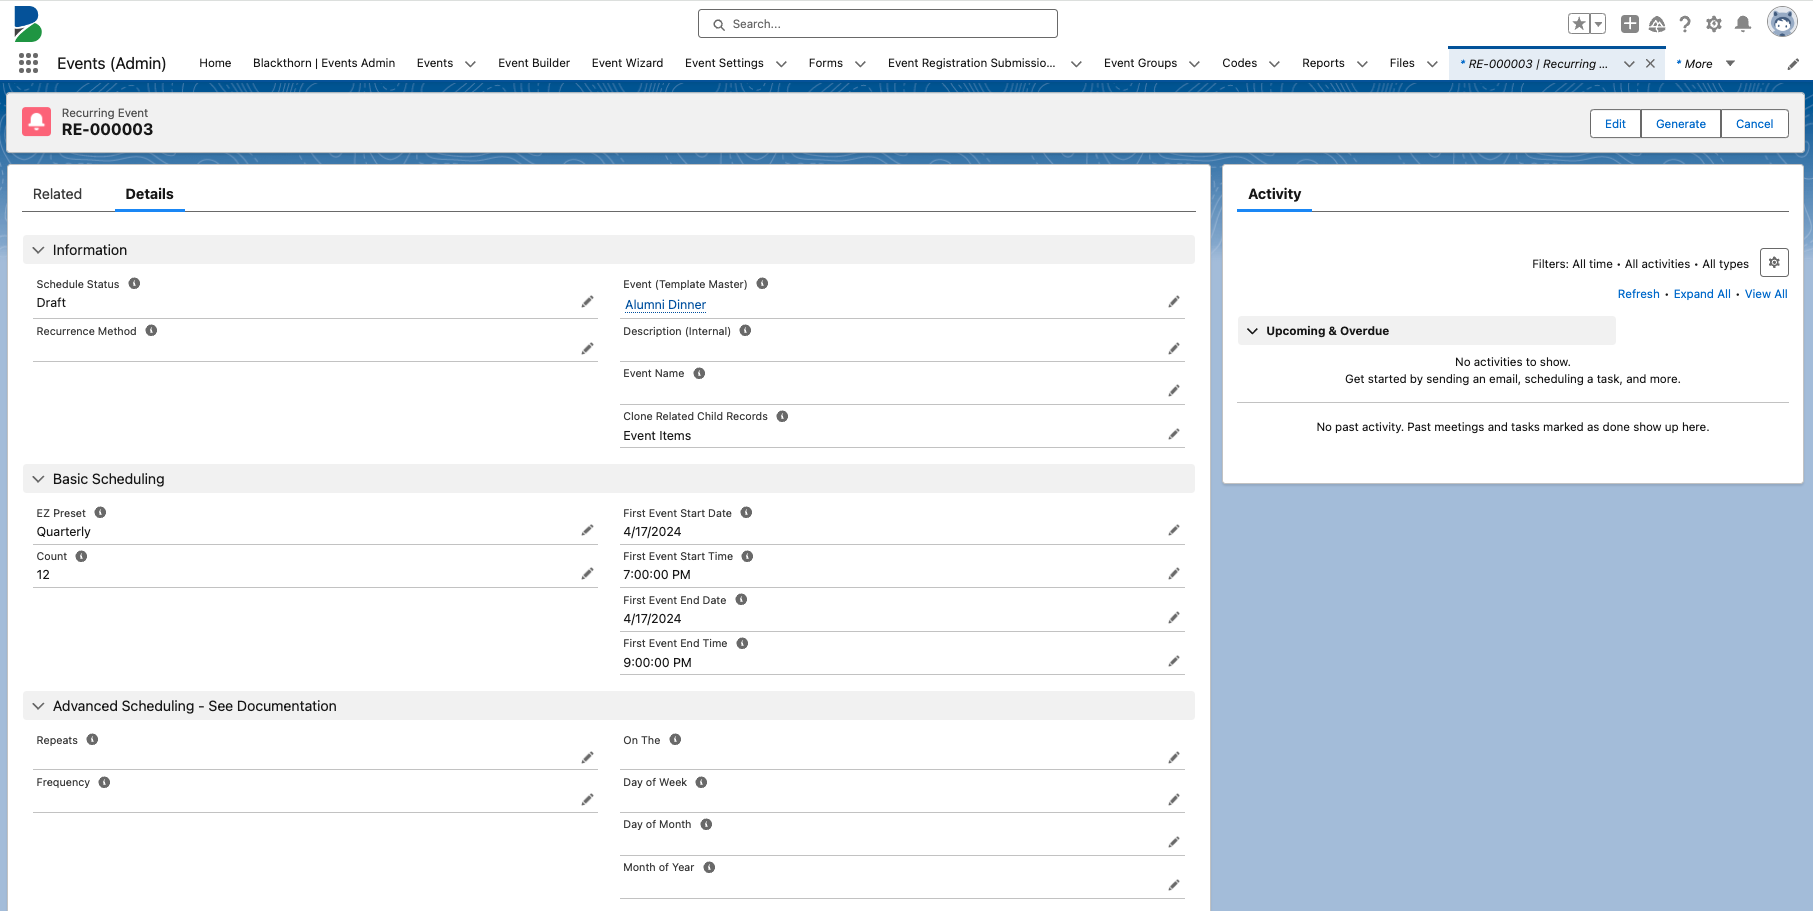
Information
What is the difference between Frequency and Count?
The Frequency field represents the interval between the repeating values. For example, a Monthly setting with a Frequency of "2" means every two months, while a Daily setting with a Frequency of "45" means every 45 days.
The Count is the number of times this Event will generate. For example, if the Count = "6", this Event will generate six Recurring Events.
Schedule Status(required)
To generate the Events for your Recurring Event, set Schedule Status to "Generate". This triggers the system to create all Recurring Events based on your Recurring Event's EZ Preset.
If you set Schedule Status to anything other than "Draft" or "Generate" nothing will happen. Those settings are meant to be automatically updated.
Event (Template Master) (required)
Recurrence Method:
If the Blackthorn | Events Settings custom setting Recurring Event Active Event Validation = “False” (unchecked), the Recurrence Method options work as follows.
“None”: The Recurring Event is not open-ended and will end after the number of completed Events matches the amount in the Count field.
"Keep One Open": After one Event is completed, one or more Events are generated according to the Count field. To ensure that a new/active Event will be added, set Recurrence Method = "Keep One Open" and the Count to "1" or more.
"Auto-Renew": After all initial Events are completed, the Recurring Event will generate the full Count again. For example, 3 original Events, now 3 new future Events.
If the Blackthorn | Events Settings custom setting Recurring Event Active Event Validation = "True" (checked), the Recurrence Method options work as follows.
“None”: The Recurring Event is not open-ended and will end after the number of completed Events matches the amount in the Count field.
"Keep One Open": After one Event is completed and there are no more Events with Status = Active” in the Recurring Event series, a new Event will be generated.
Example:
Recurrence Method: "Keep One Open"
Count: "3"
EZ Preset = "Daily"
First Event Start Date = "Today"
Three Events will be created.
Event 1’s Event Start Date will be today.
Event 2’s Event Start Date will be tomorrow.
Event 3’s Event Start Date will be two days from today.
The night that Event 3’s Status is “Completed,” a new Event (Event 4) will be created. Event 4’s Event Start Date will be three days from today.
"Auto-Renew": After all initial Events are completed and there are no more Events with Status = Active,” the Recurring Event will generate the full Count again. For example, 3 original Events, now 3 new future Events.
Description Internal: Use this field to set an internal-facing description about what the Recurring Event is about.
Event Name: Use this field to identify the name of the Recurring Event. This field offers an easy way to tell your master Event from the Recurring Events.
Clone Related Child Records (optional): This field allows Recurring Events to clone Event Items, Sessions, Event FAQs, etc. to all child Events.
Basic Scheduling
EZ Preset: This field determines when the related Recurring Events should be created. For example, if you want an Event to reoccur every day, you would select "Daily". If the frequency of your Recurring Event is more complex, then leave the EZ Preset field blank and go to the Advanced Scheduling section.
Count: This field will set the number of Events to occur. For example, If you set the EZ Preset to "daily" and Count to "5", the Event will occur daily for the next 5 days. (The default is set to "12" if custom settings are created. If the Count field is blank, or custom settings are not created, the logic defaults to Count = “3.”)
First Event Start Date: This date determines when the first Event should start.
First Event Start Time: The time on the First Event Start Date that the first Event starts.
First Event End Date: This date determines when the first Event should end.
First Event End Time: The time on the First Event End Date that the first Event ends.
Advanced Scheduling
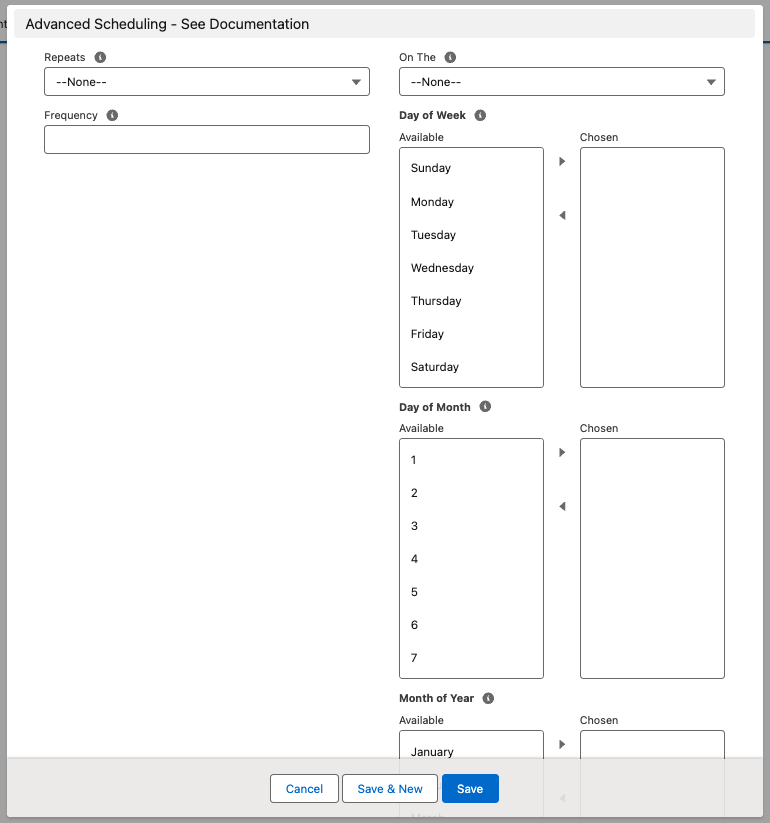
There are use cases where the Recurring Event's frequency is more complex than what is provided in the EZ Preset field. For those use cases, leave the EZ Preset field blank and use the Advanced Scheduling fields.
Repeats
Frequency
On The
Day of Week
Day of Month
Month of Year
Example
If your Recurring Event needs to create an Event once every three weeks, it would be set up like this:
Repeats = "Weekly"
Frequency = "3" (Each Event’s End Date will be three weeks apart.)
If you did not set Schedule Status to “Generate”, you must click Generate to create the Recurring Events.
Avoid Duplicate Events
To prevent custom Recurring Events that were cloned from an Event in the Event Wizard from generating duplicate Events, please complete the following fields under the Recurring field.
First Event Start Date
First Event Start Time
First Event End Date
First Event End Time
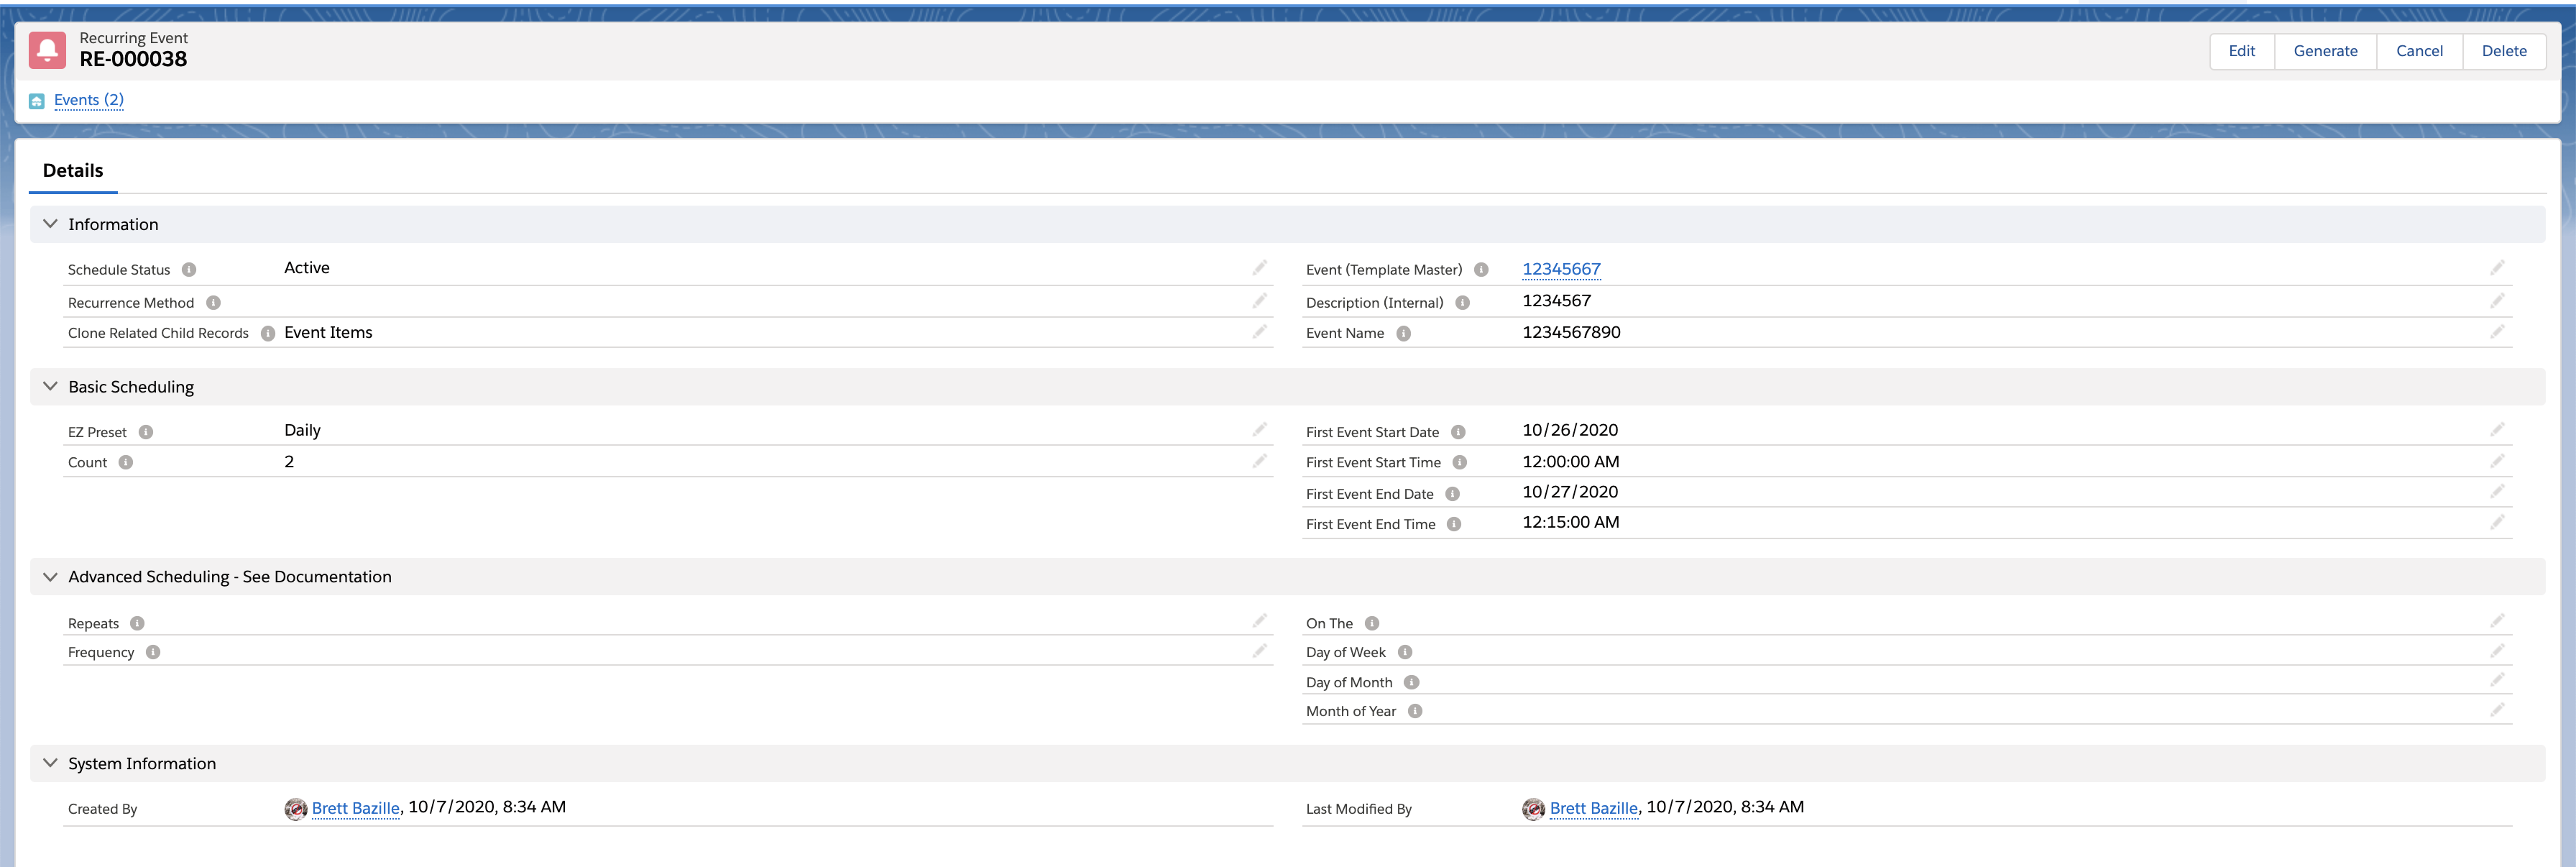
View the Recurring Event
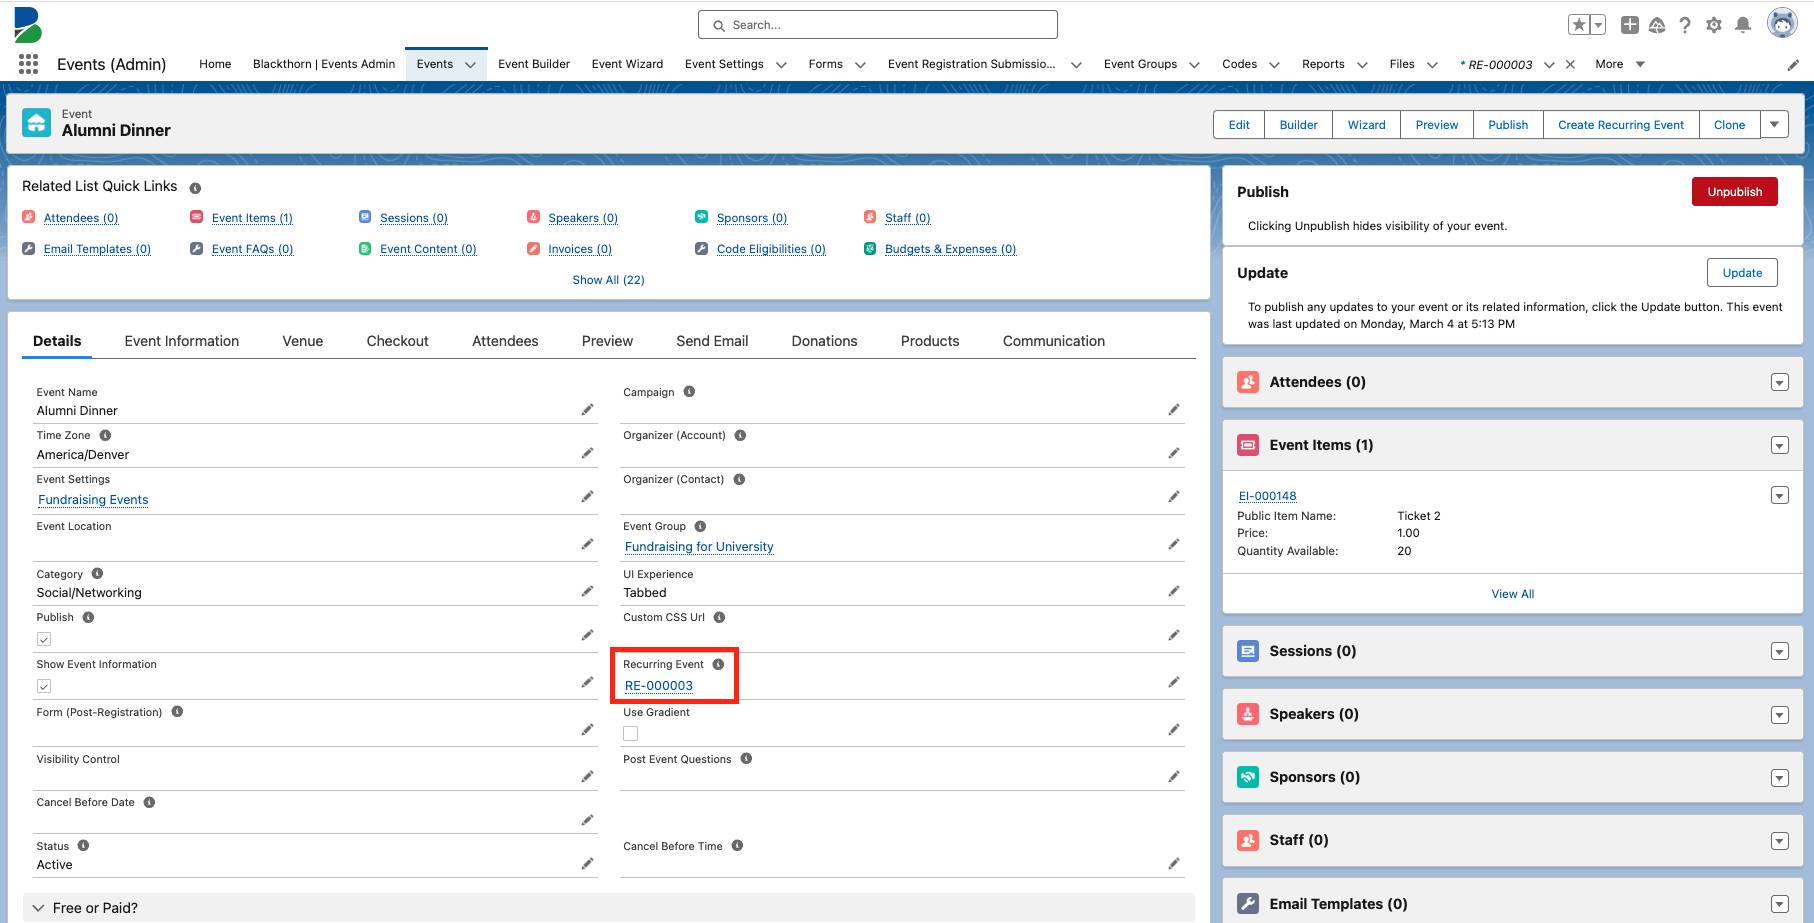
Click any of the child Event Page URL links on the Event where the Recurring Event field is populated.
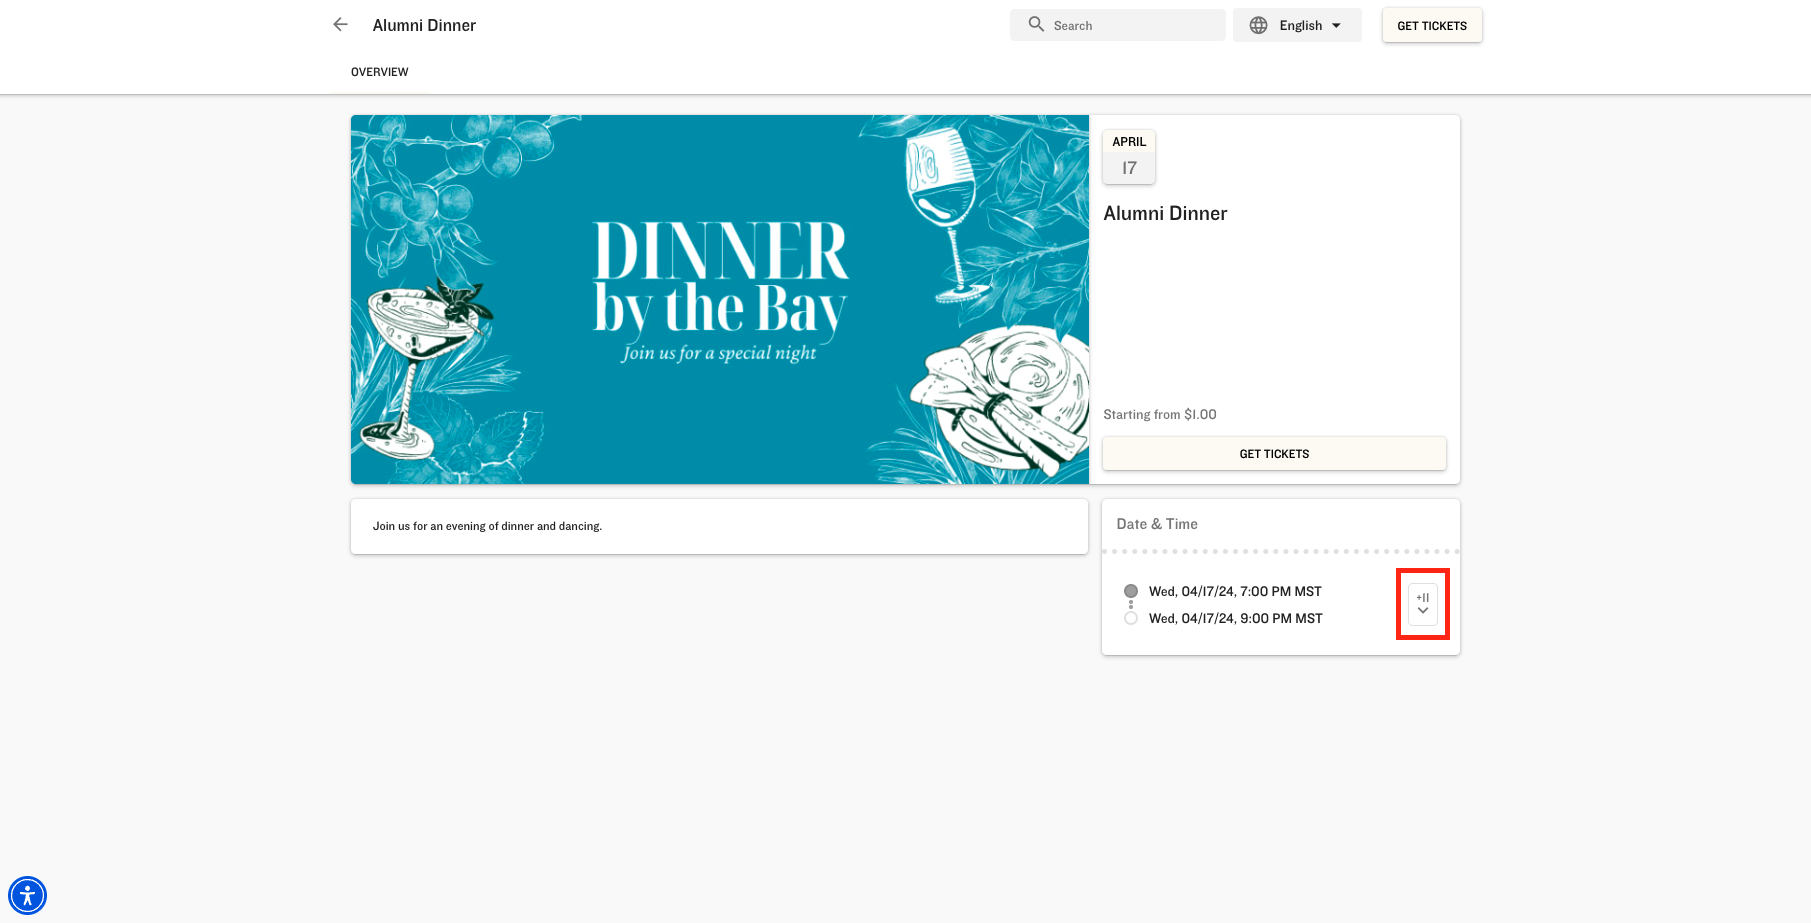
To see all Recurring Events when viewing a Recurring Event on a desktop, click the + icon.
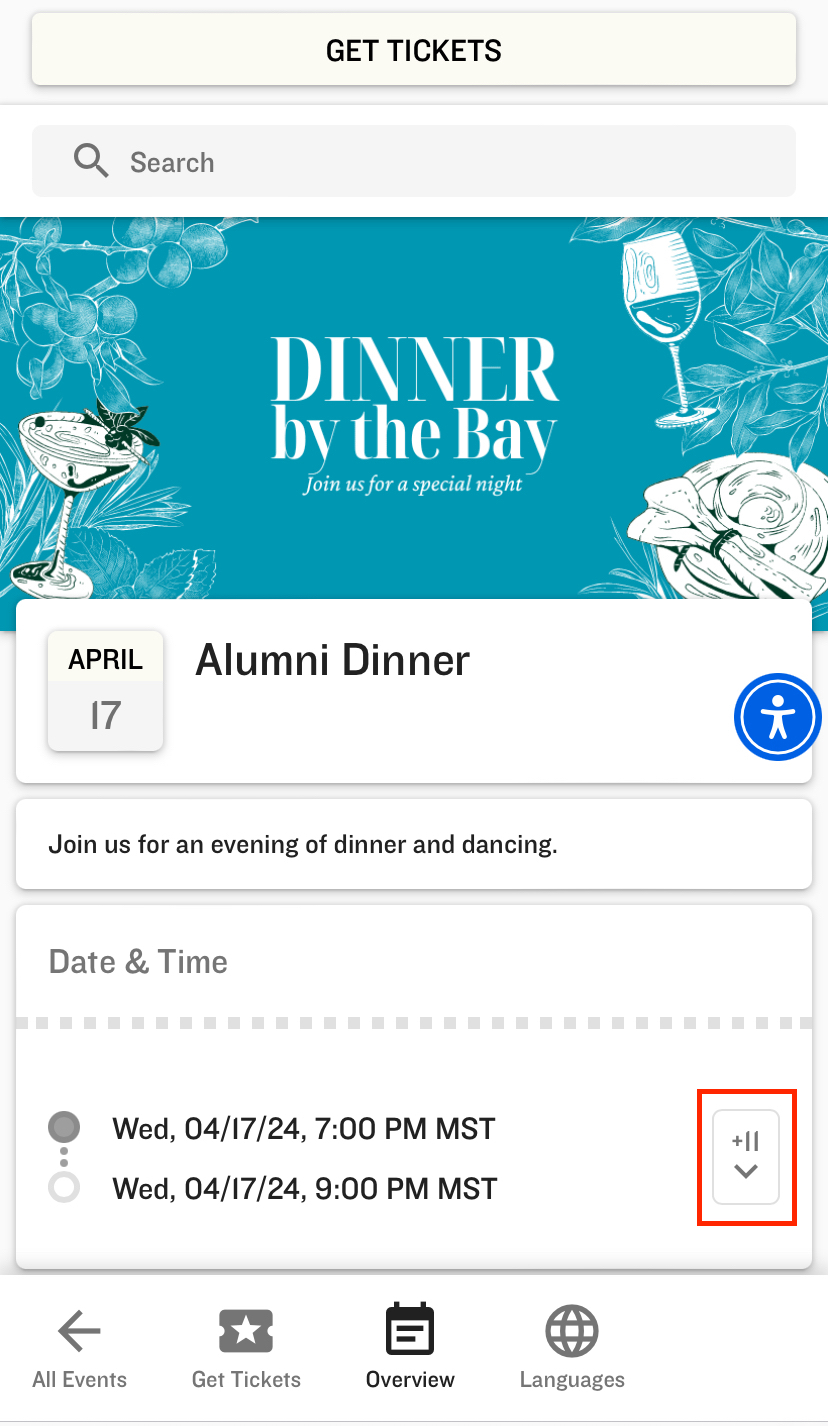
To see all the Recurring Events when viewing a Recurring Event on a mobile device or tablet, tap the + icon.
Default Number of Recurring Events Created
If you consistently use the same number of Events, this section is for you!
The Count field will default to “12” if custom settings are created. If the Count field is blank or custom settings are not created, the logic defaults to Count = “3.”
If you frequently schedule 4 Events per month, and want to skip filling out the Count field, follow the directions below.
Click Setup.
In the Quick Find box, search for and click "Custom Settings."
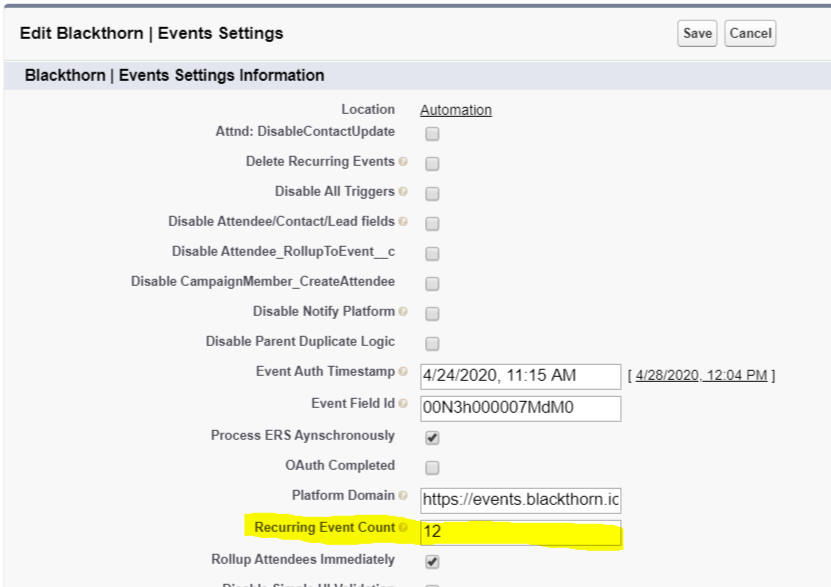
Click Manage next to Blackthorn | Event Settings.
Update the Recurring Event Count field to the desired default number.
Click Save.
Delete a Recurring Event Record
What if I need to delete 50 Events, and don't want to manually delete them? Glad you asked!
Navigate to your Recurring Event's record.
In the top right-hand corner, there are options for:
Cancel
Delete
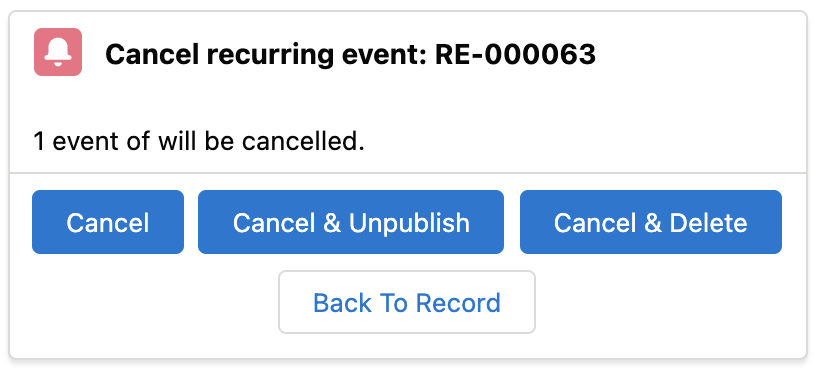
Clicking the Cancel button will prompt the selection of one of the three options below:
Cancel will keep all the Events and update the Recurring Event's Schedule Status to "Canceled".
Cancel & Unpublish will unpublish all Events, and update the Recurring Event's Schedule Status to "Canceled".
Cancel & Delete will delete all Events, and update the Recurring Event's Schedule Status to "Canceled".
Delete will permanently delete all the Events, as if they were never even there.