The next step is to test your Payment Gateway using either the test Stripe card or the test Stripe ACH bank account.
Test a Stripe Card
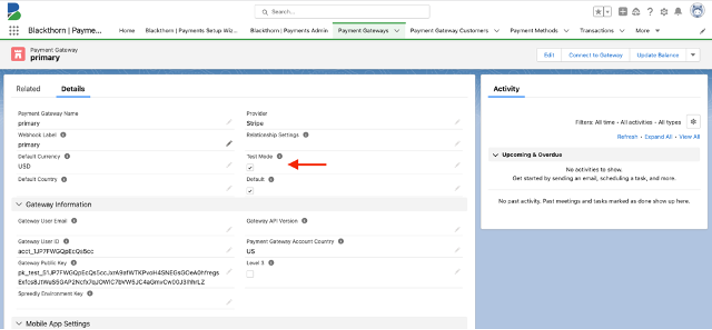
- Confirm that the Payment Gateway has Test Mode set to "TRUE".
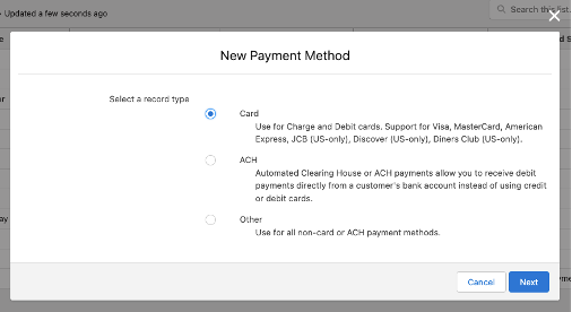
- Go to the Payment Method tab and click New.
- Select "Card" and click Next.
- Using the information provided below, complete the following fields.
- Holder's Name = use any name
- Number = “4242424242424242”
- Expiration Month = use any month
- Expiration Year = use any year
- CVV = use any 3-digit number
- Postal Code = use any 5-digit number
- Payment Gateway = the Payment Gateway you just set up
- Click Save.
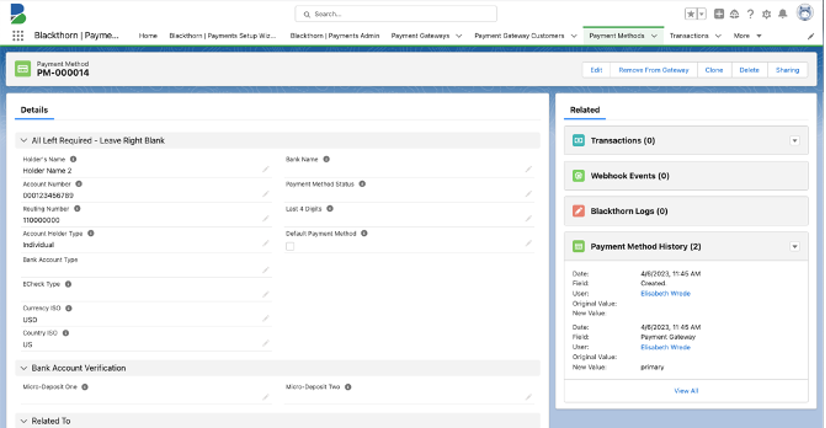
This Payment Method is now valid and can be used to capture and refund Transactions.
NOTE: Additional card numbers can be found in Stripe's testing documentation.
Test a Stripe ACH Bank Account
- Confirm that the Payment Gateway has Test Mode set to “TRUE”.
- Go to the Payment Method tab and click New.
- Select "ACH" and click Next.
.png)
- Use the data below to test either a successful or failed payment.
- Successful Payment Method
- Holder’s Name = Use any name
- Account Number = “000123456789”
- Routing Number = “110000000”
- Account Holder Type = Choose either option
- Currency ISO = “USD”
- Country ISO = “US”
- Failed Payment Method
- Holder’s Name = Use any name
- Account Number = 000111111116
- Routing Number = 110000000
- Account Holder Type = Choose either option
- Currency ISO = “USD”
- Country ISO = “US”
- Successful Payment Method
- Click Save.
This Payment Method is now valid and can be used to capture and refund Transactions.
Test for Specific Responses and Errors
Use the test cards below to create a Payment Method that produces a specific response.
Incorrect CVC Code Error
Use this number to create an error about an incorrect CVV. The error message will be in the Stripe data fields.
• Number = 4000000000000127
Fail to Capture
This number will create a valid Payment Method, but when you capture a Transaction with the Payment Method, the Transaction will fail. The error message will be in the Stripe data fields.
• Number = 4000000000000341
Additional testing for specific responses and errors can be found here.
Disputes
Use the card below in test mode to simulate a disputed Transaction. This number will create a valid Payment Method, but when you capture a Transaction with the Payment Method, a Dispute record will be created.
- Number = "4000000000000259"
Test Winning a Dispute
Enter the words "winning_evidence" in the Additional Information field on the Dispute Evidence record to simulate the dispute being won and the funds being returned to your account as an adjustment Transaction.
Test Losing a Dispute
Enter the words "losing_evidence" in the Additional Information field on the Dispute Evidence record to simulate the dispute being closed and marked as lost. (Your account will not be credited.)
Click here for more information about Disputes.
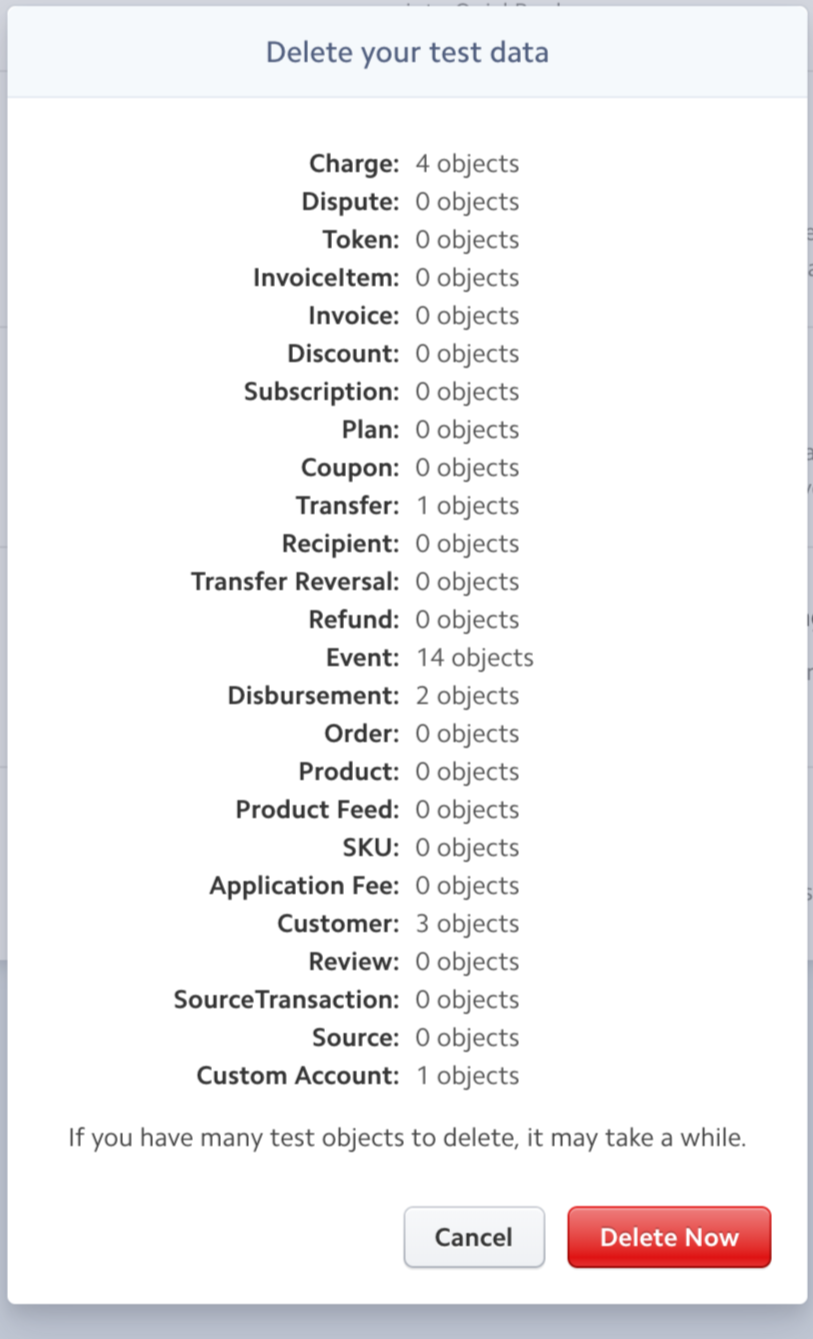
Delete Test Data
- Navigate to your Stripe Dashboard.
- Toggle "ON" the View test data switch. (left-hand column).
- Click Business settings. (left-hand column)
- Select "Data".
- Next to Test data, click Delete all test data.
- Click Delete Now.
Salesforce
Whether you are in a Production or Sandbox Org, you will need to temporarily deactivate all triggers so that you can delete Transaction, Payment Method, and Payment Gateway Customer records.
- Navigate to Custom Settings.
- Click Manage next to Blackthorn - Pay Trigger Settings.
- Click Edit.
- Check the Disable All Triggers checkbox.
- Click Save.
- Delete all of your test data.
- Navigate back to Custom Settings and UNCHECK Disable All Triggers.