Coming in 2026: Deprecation of Aura Virtual Terminal Component
New Virtual Terminal configurations should utilize our modern and feature-rich Lightning Web Component version. We plan to sunset the Aura Component and related Flow Screen Charge Component in 2026.
Don’t worry! Customers will receive advance notice of the sunset date to ensure a smooth transition.
The Flow Screen Charge component (PaymentChargeFlow) creates a Payment Method and charge Transaction with clicks, not code. This flow component can be configured for internal or customer-facing scenarios and used with standard or custom objects.
Create a Flow
Before you begin, please determine the Parent object for the Transaction (Charge) object. (The Parent object was configured in the Payments Setup Wizard.) For this example, we will use the Opportunity object as our Transaction Parent.
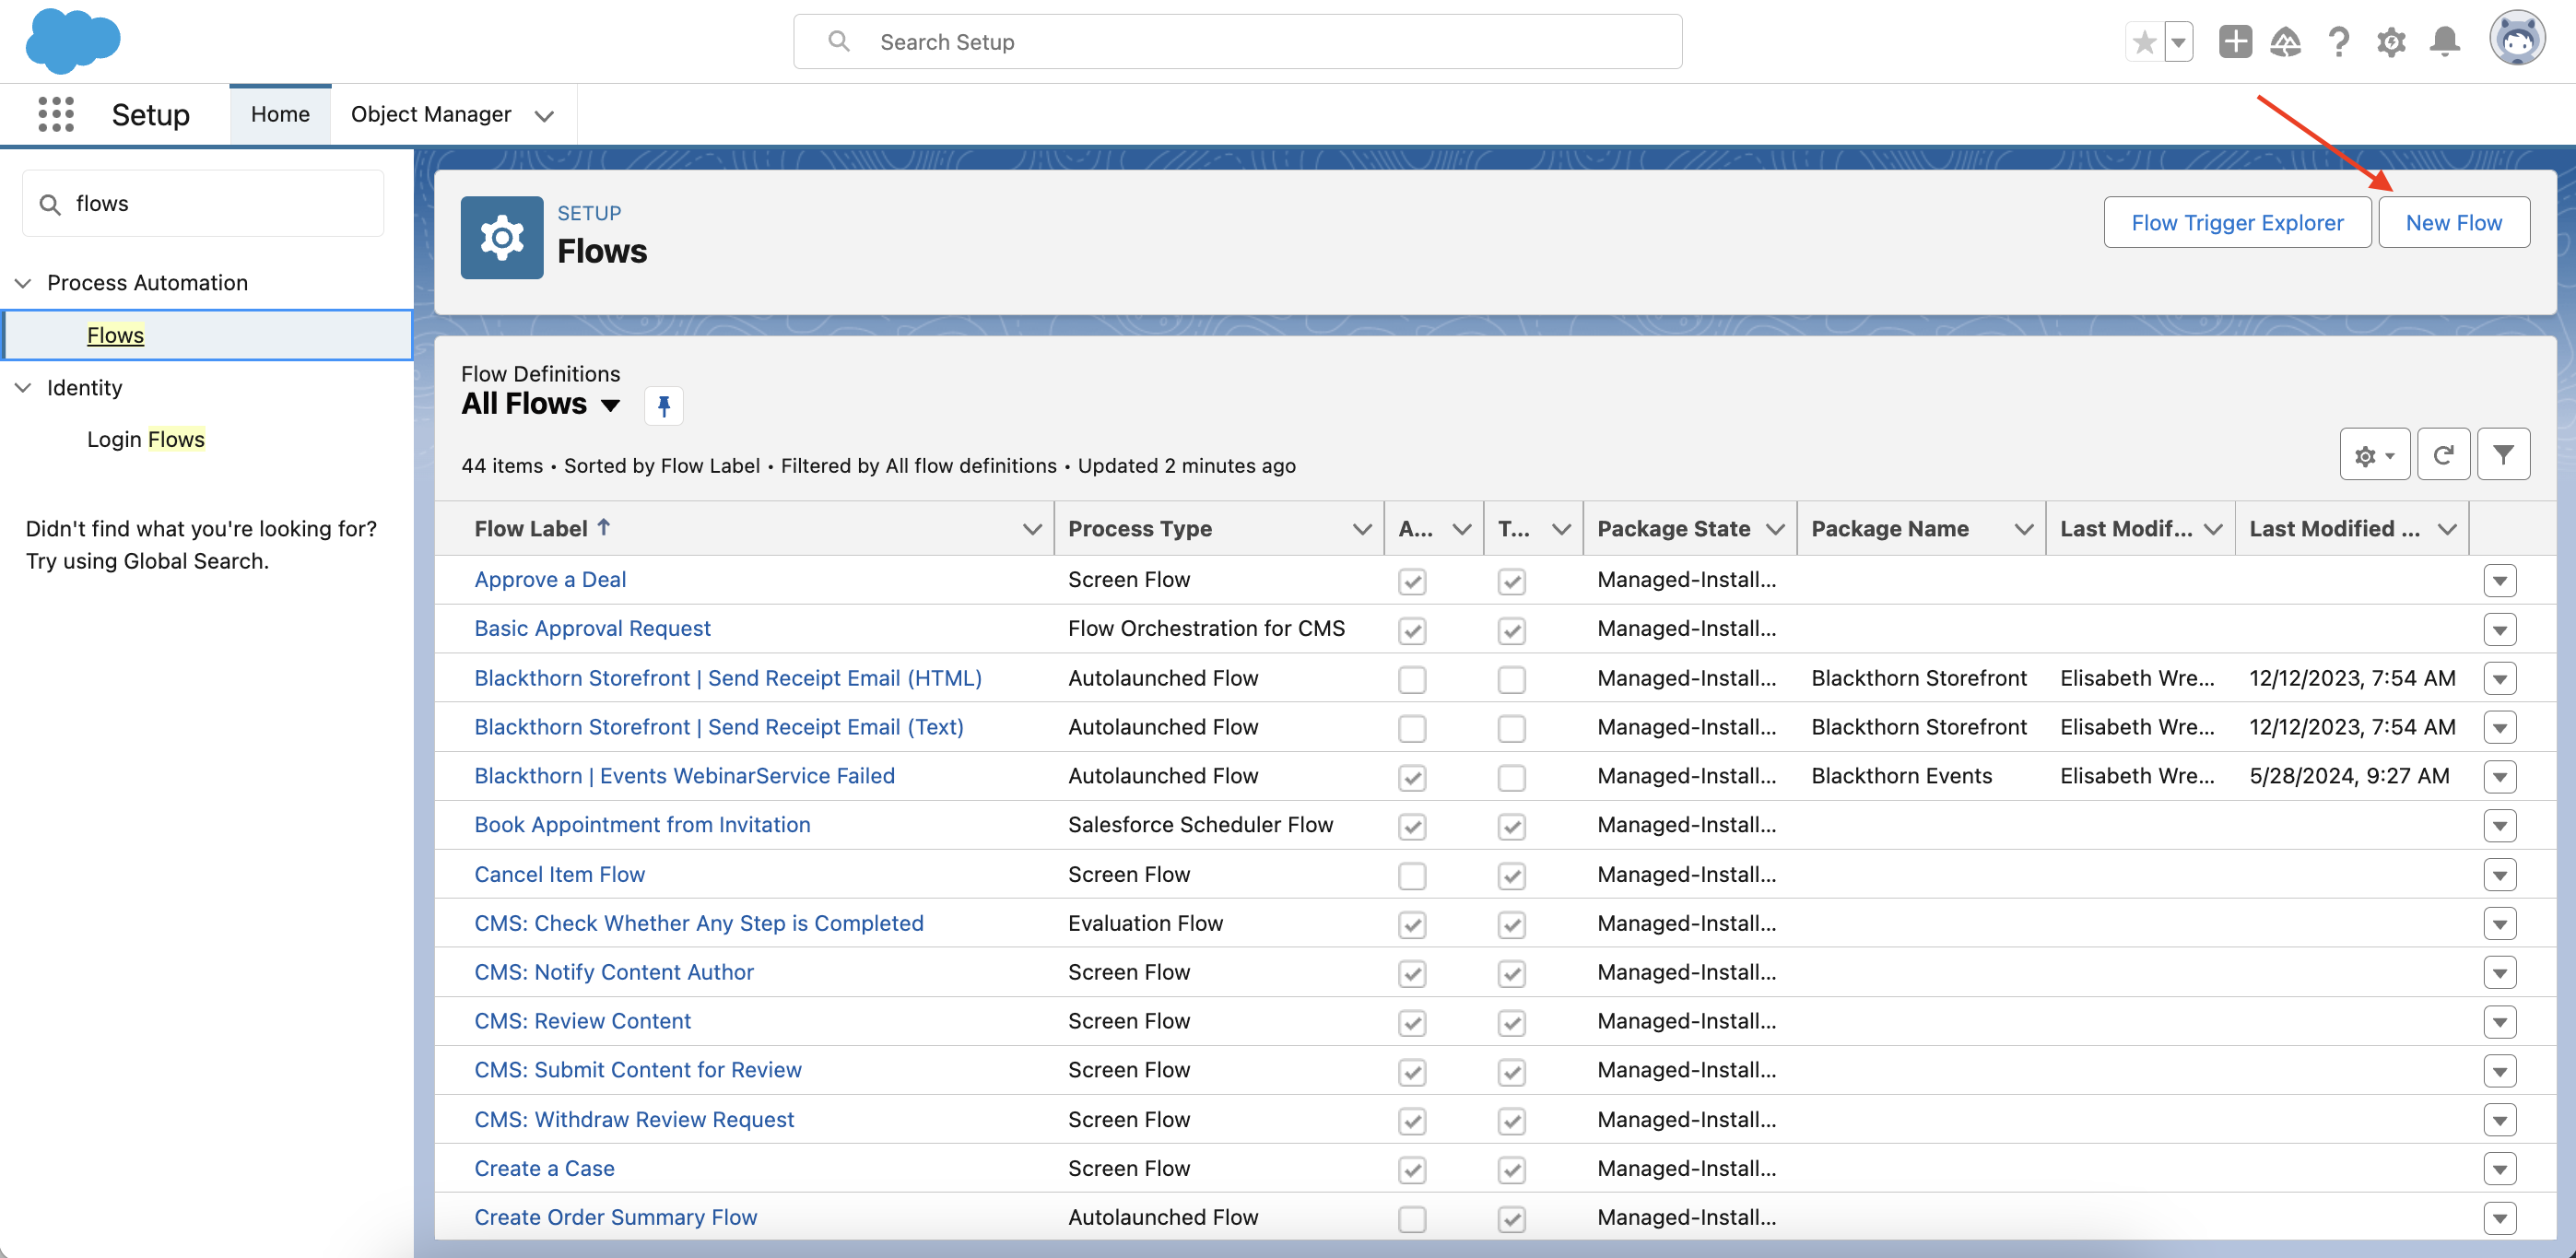
Click the Gear icon
Click Setup.
In the Quick Find box, search for and click "Flows."
Click New Flow.
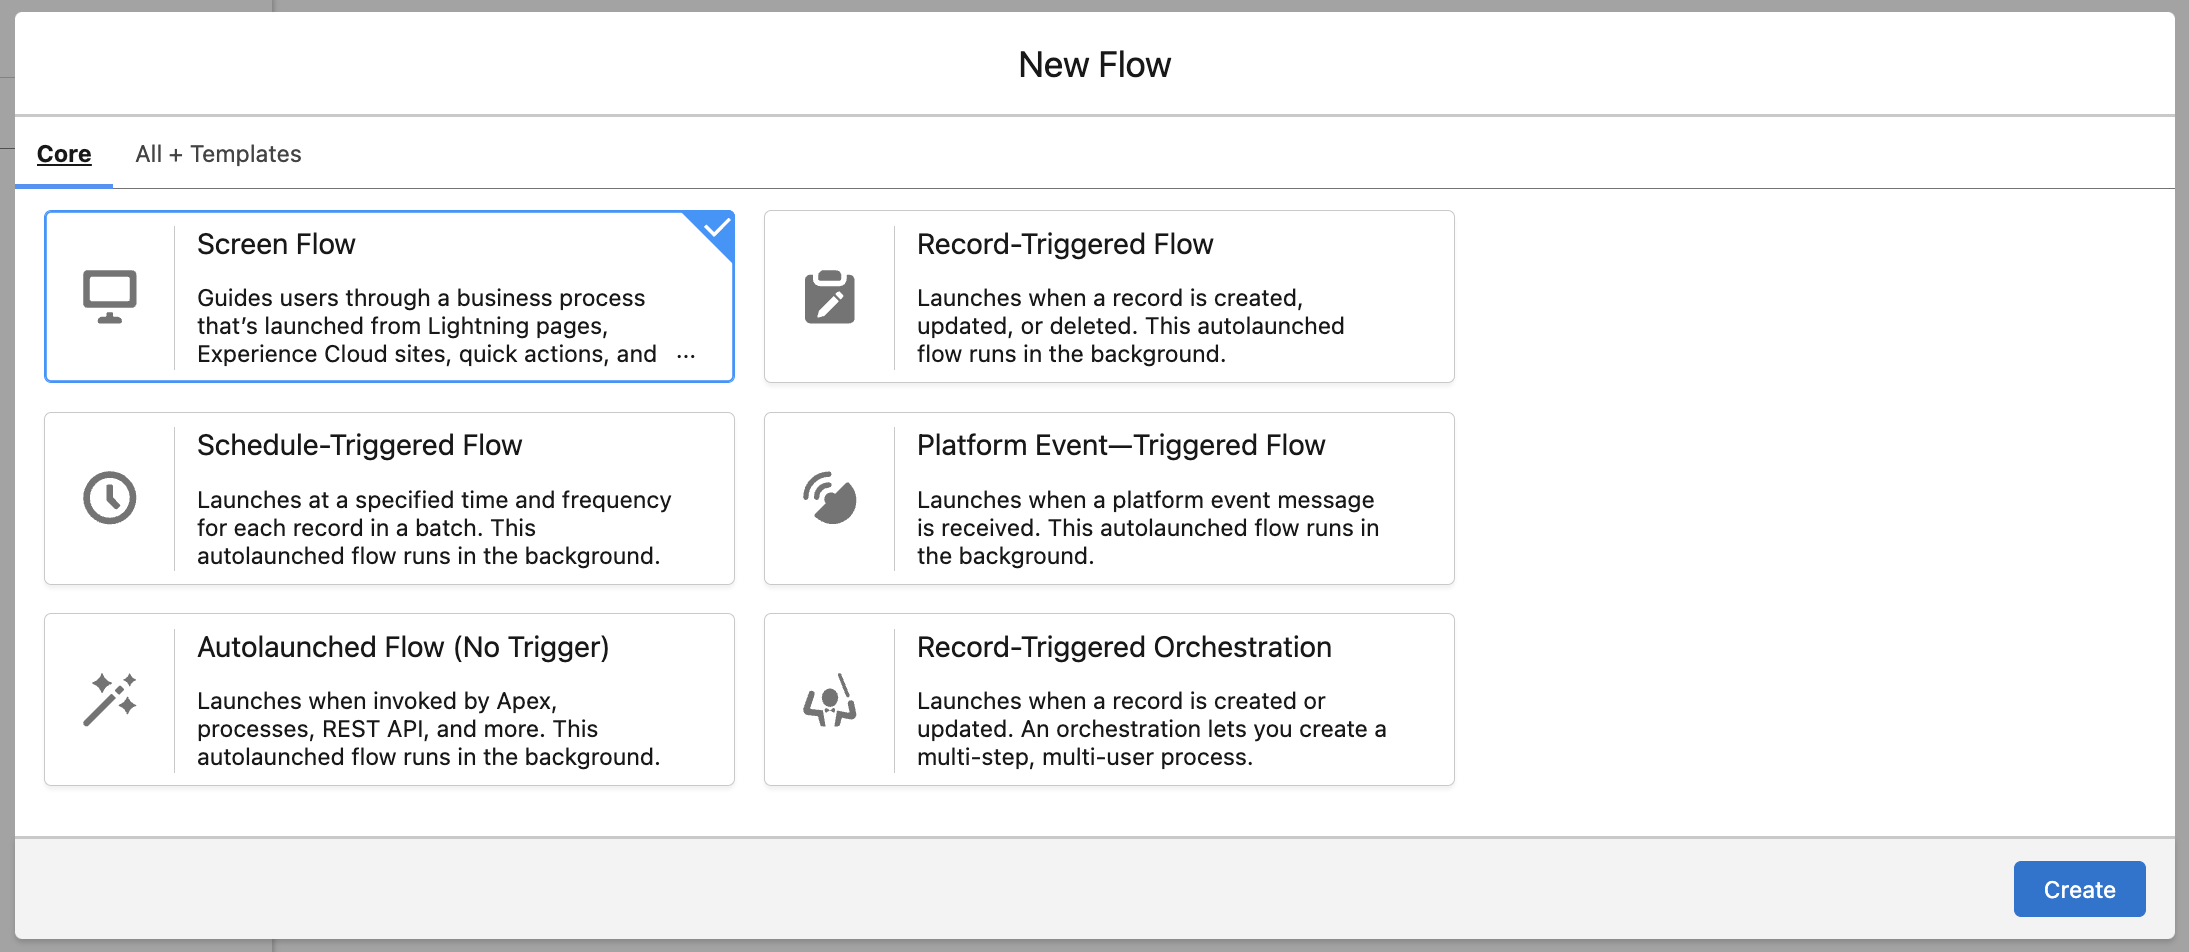
Select "Screen Flow" and click Create.
Create a Get Records Element
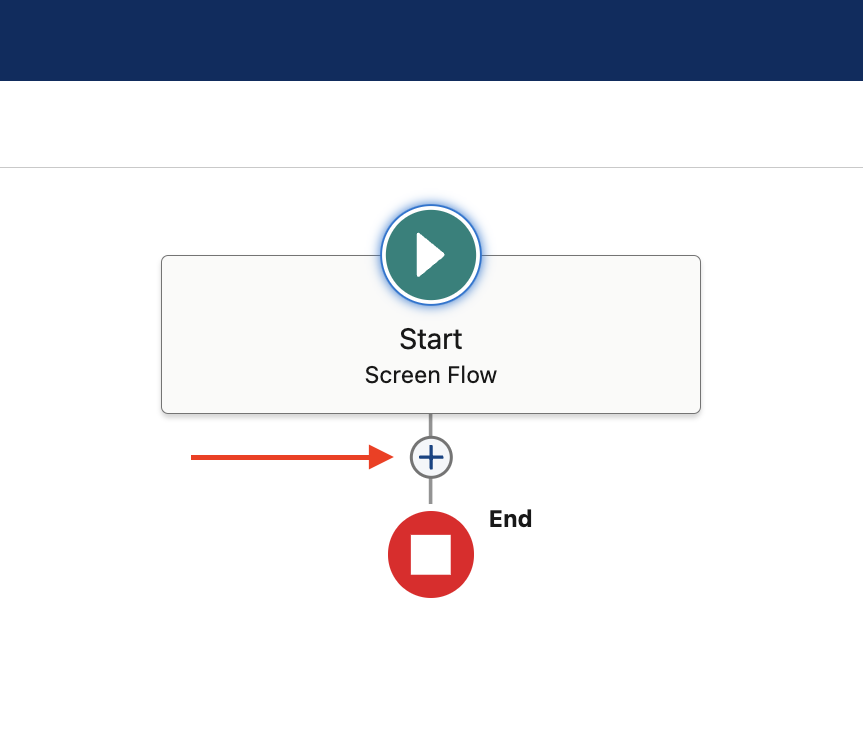
Click the + symbol (Add Element) between the Start and End elements.
Under Data, select Get Records.
Fill in the following fields. This step quieries the Opportunity for the fields you want to pass into the PaymentChargeFlow component. If you unfamiliar configuring the Get Records step, please review the Flow Trailhead modules.
Label (required)
Object (required)
Field (required)
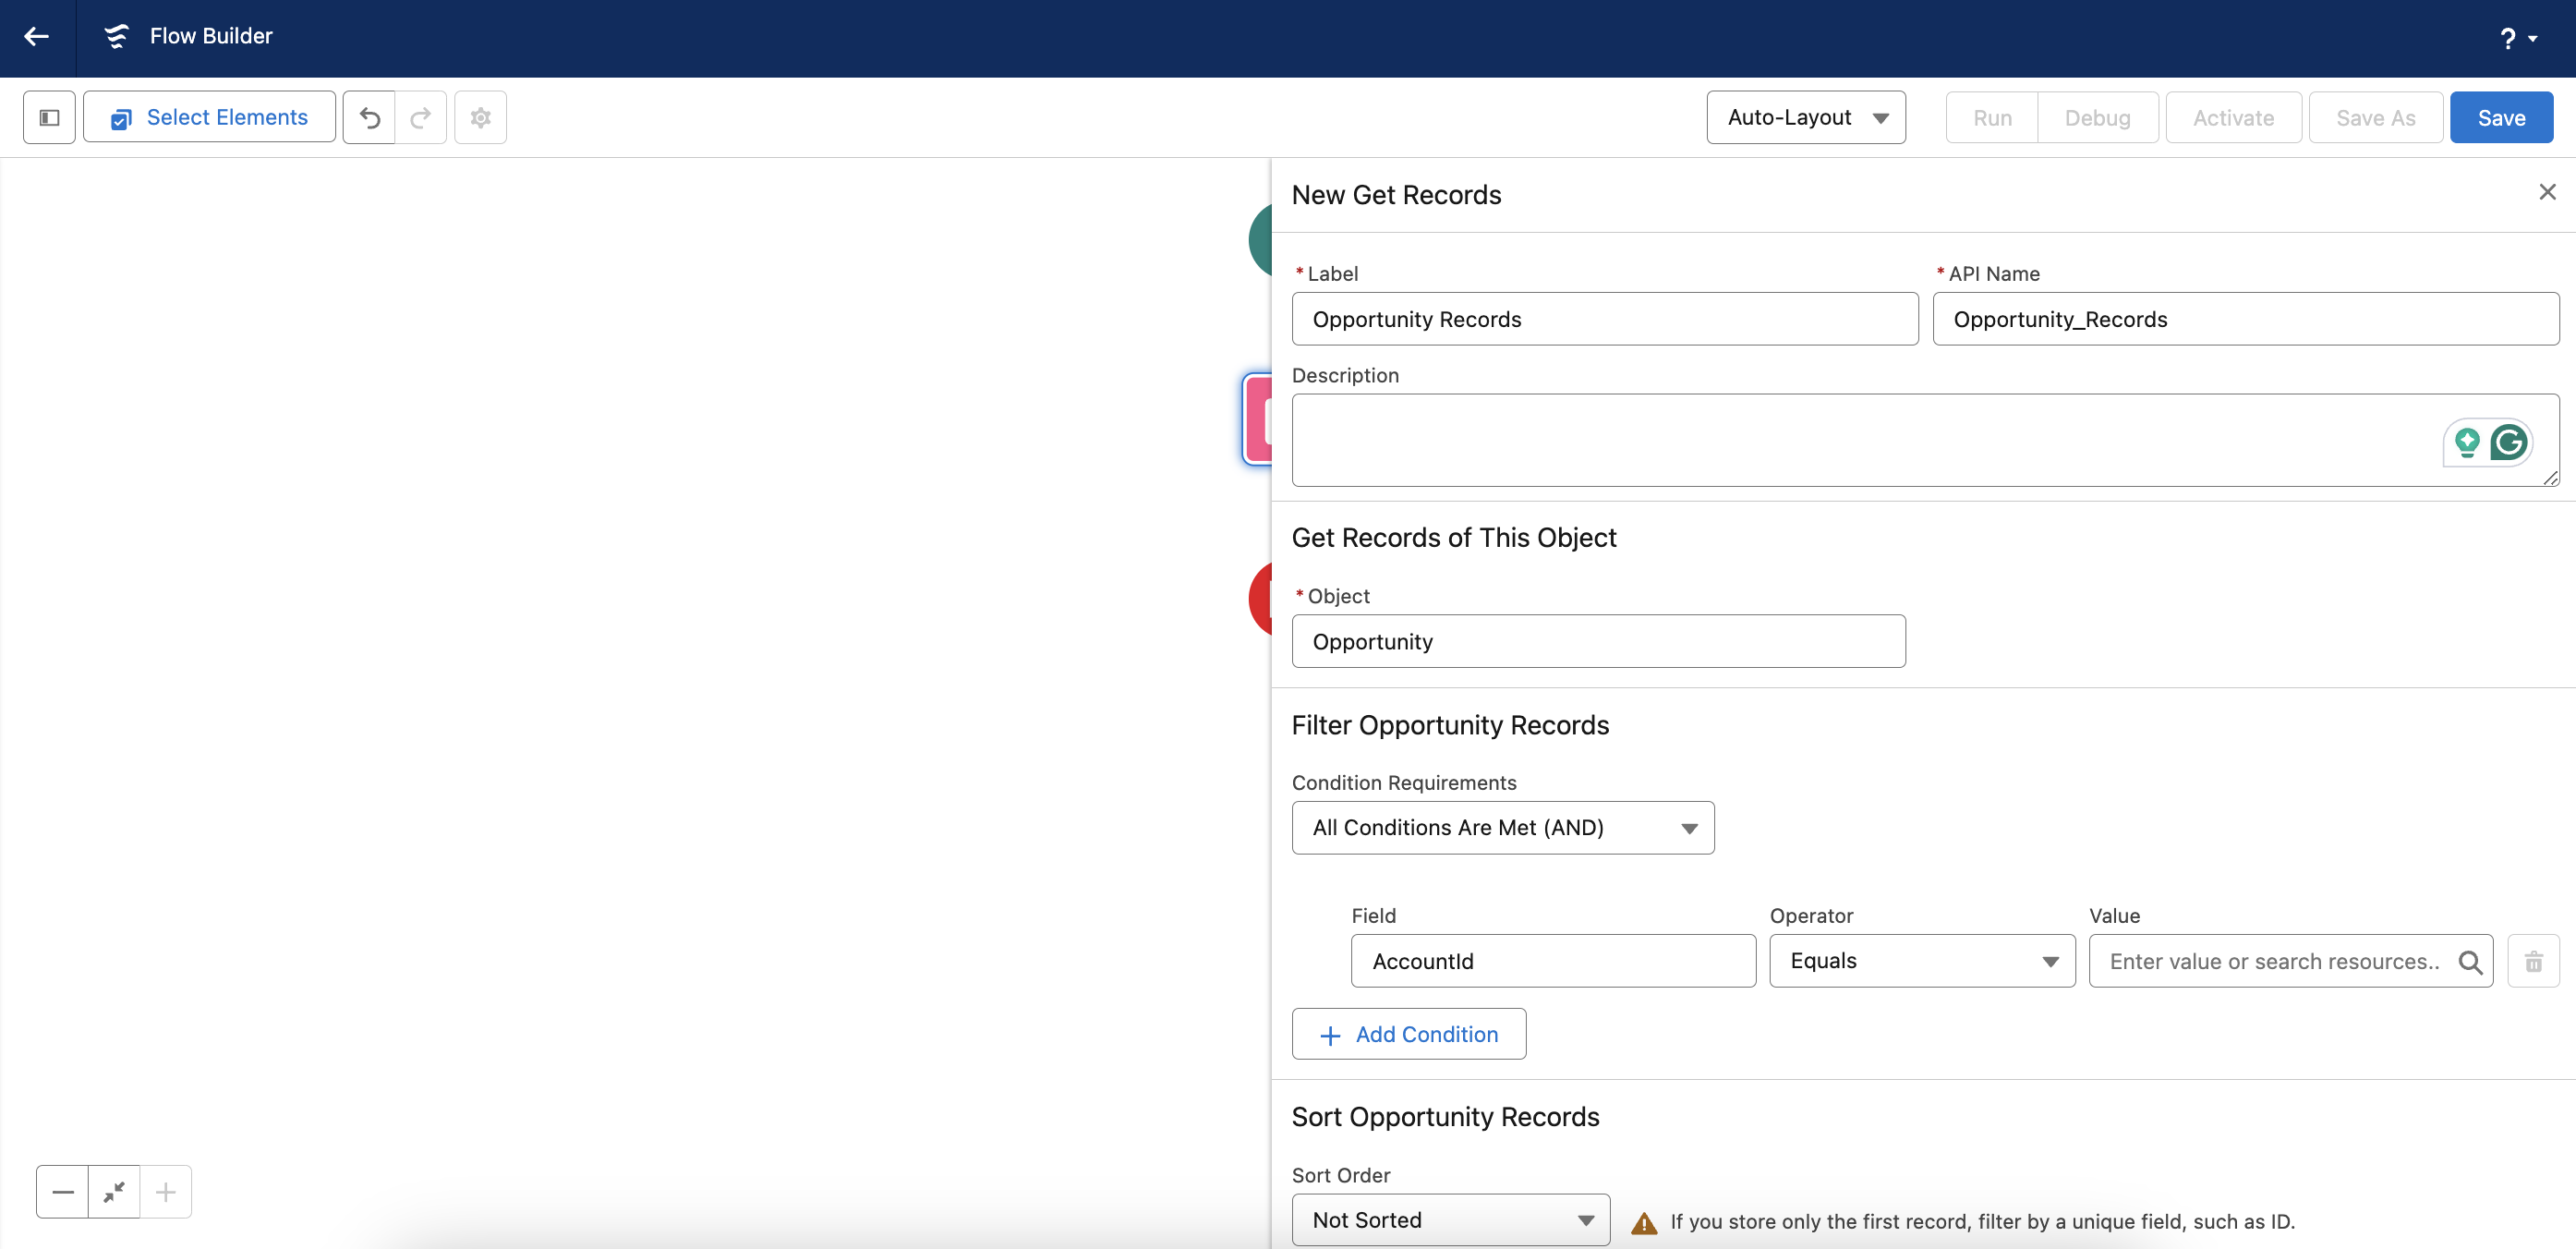
Review the additional options.
Close the Get Records window.
Create an "Enter Card" Screen Element
Click the + symbol (Add Element) between the Get Records and End elements.
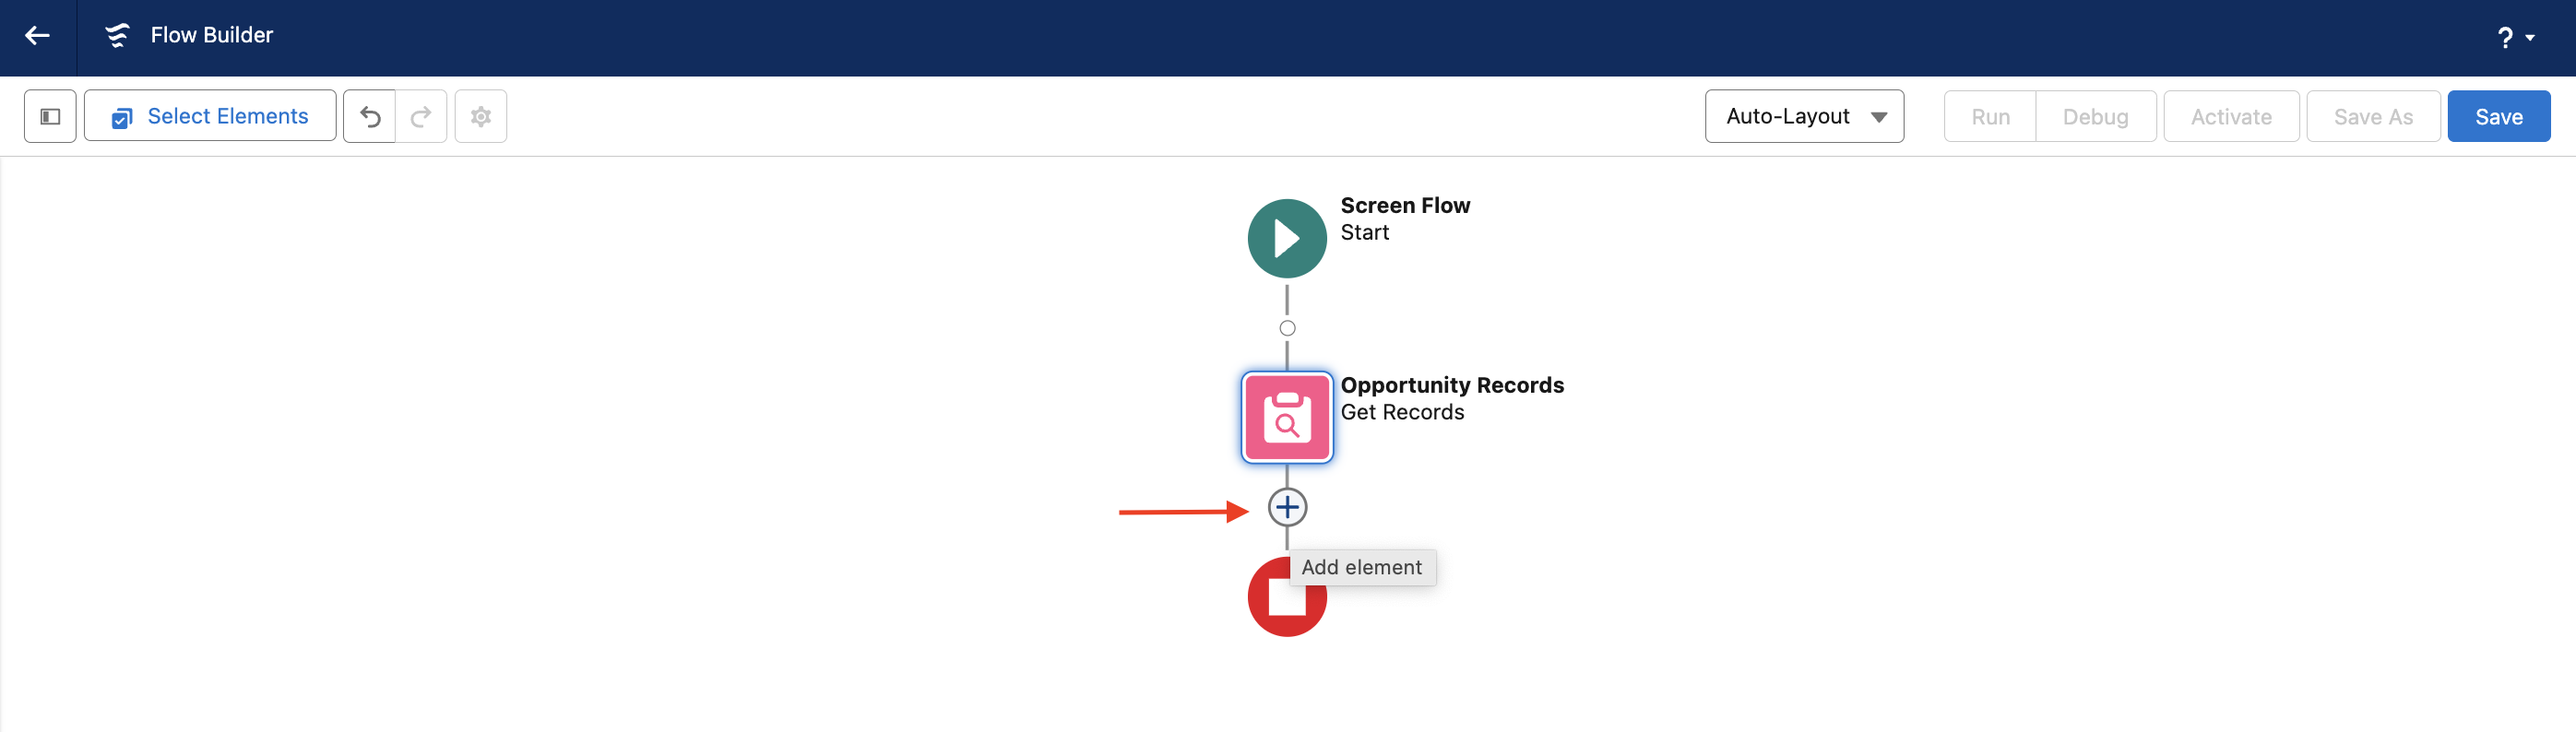
Under Interaction, select Screen.
Enter a Label. (required) (In this example, we used “Enter Card.”)
Un-check the Show Header field since the component already contains a header.
Review the footer configurations.
Under the Components tab, locate the PaymentChargeFlow component and drag and drop it on the new screen.
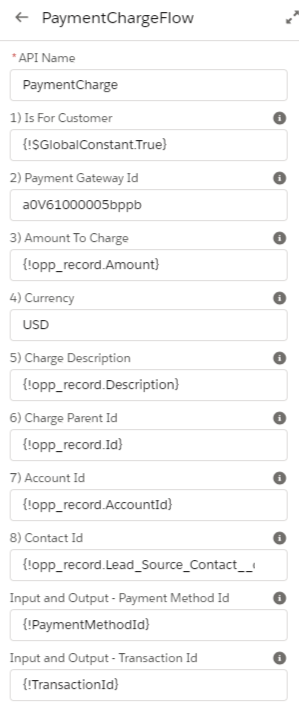
Fill in the required fields.
API Name
Is For Customer
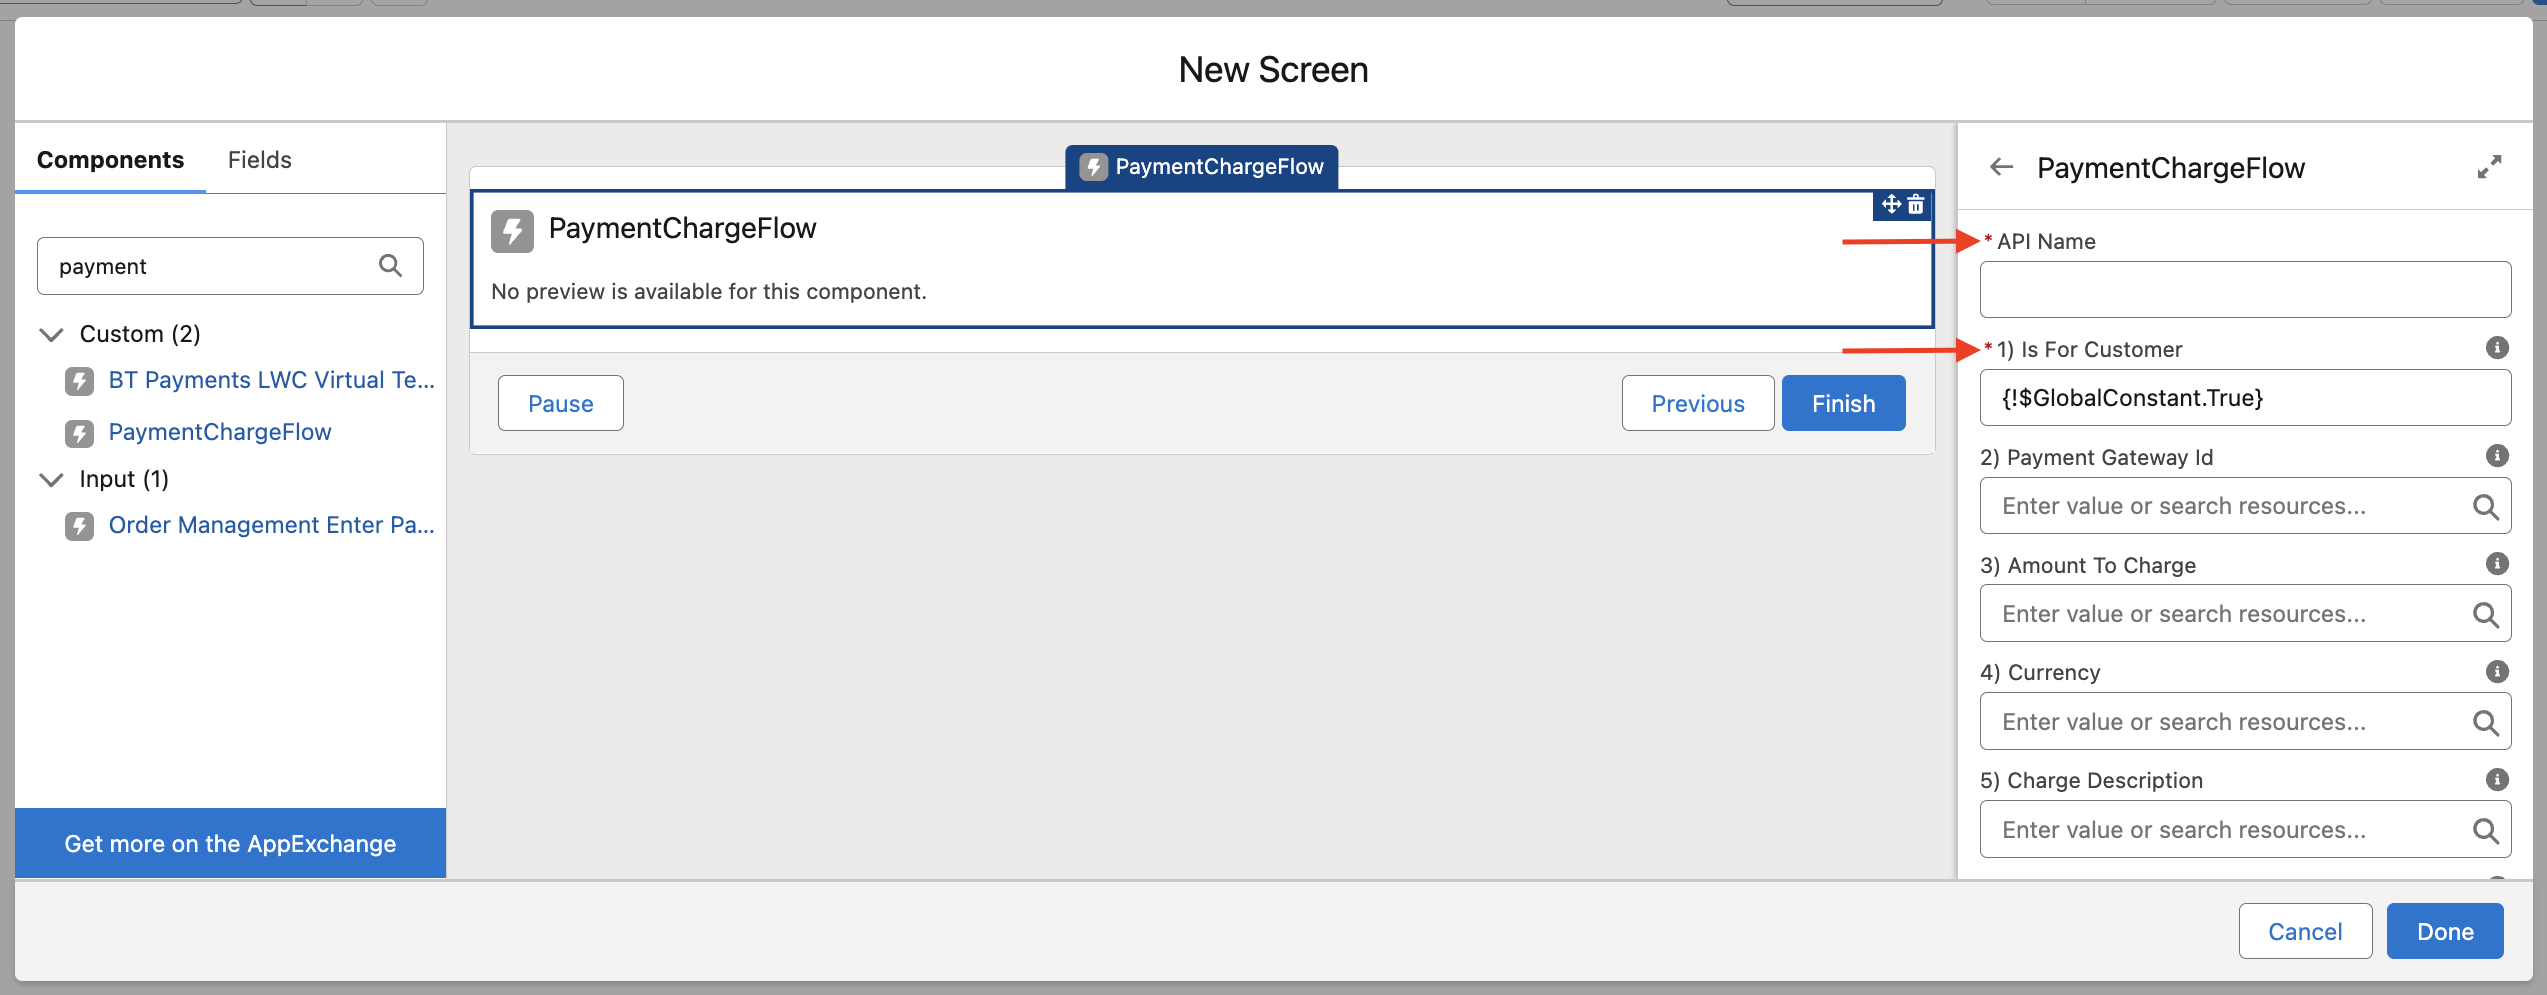
Complete the optional fields as needed. To learn more about each field, hover over each help icon. Values entered such as Currency= “USD” can be hard-coded. Or they can be mapped from fields such as {!opp_record.Amount} on the Transaction Parent (the Opportunity in this example). NOTE: Most fields may default to values if not set.
Payment Gateway Id
Amount To Charge
Currency
Charge Description
Charge Parent Id
Account Id
Contact Id
Input and Output - Payment Method Id
Input and Output - Transaction Id
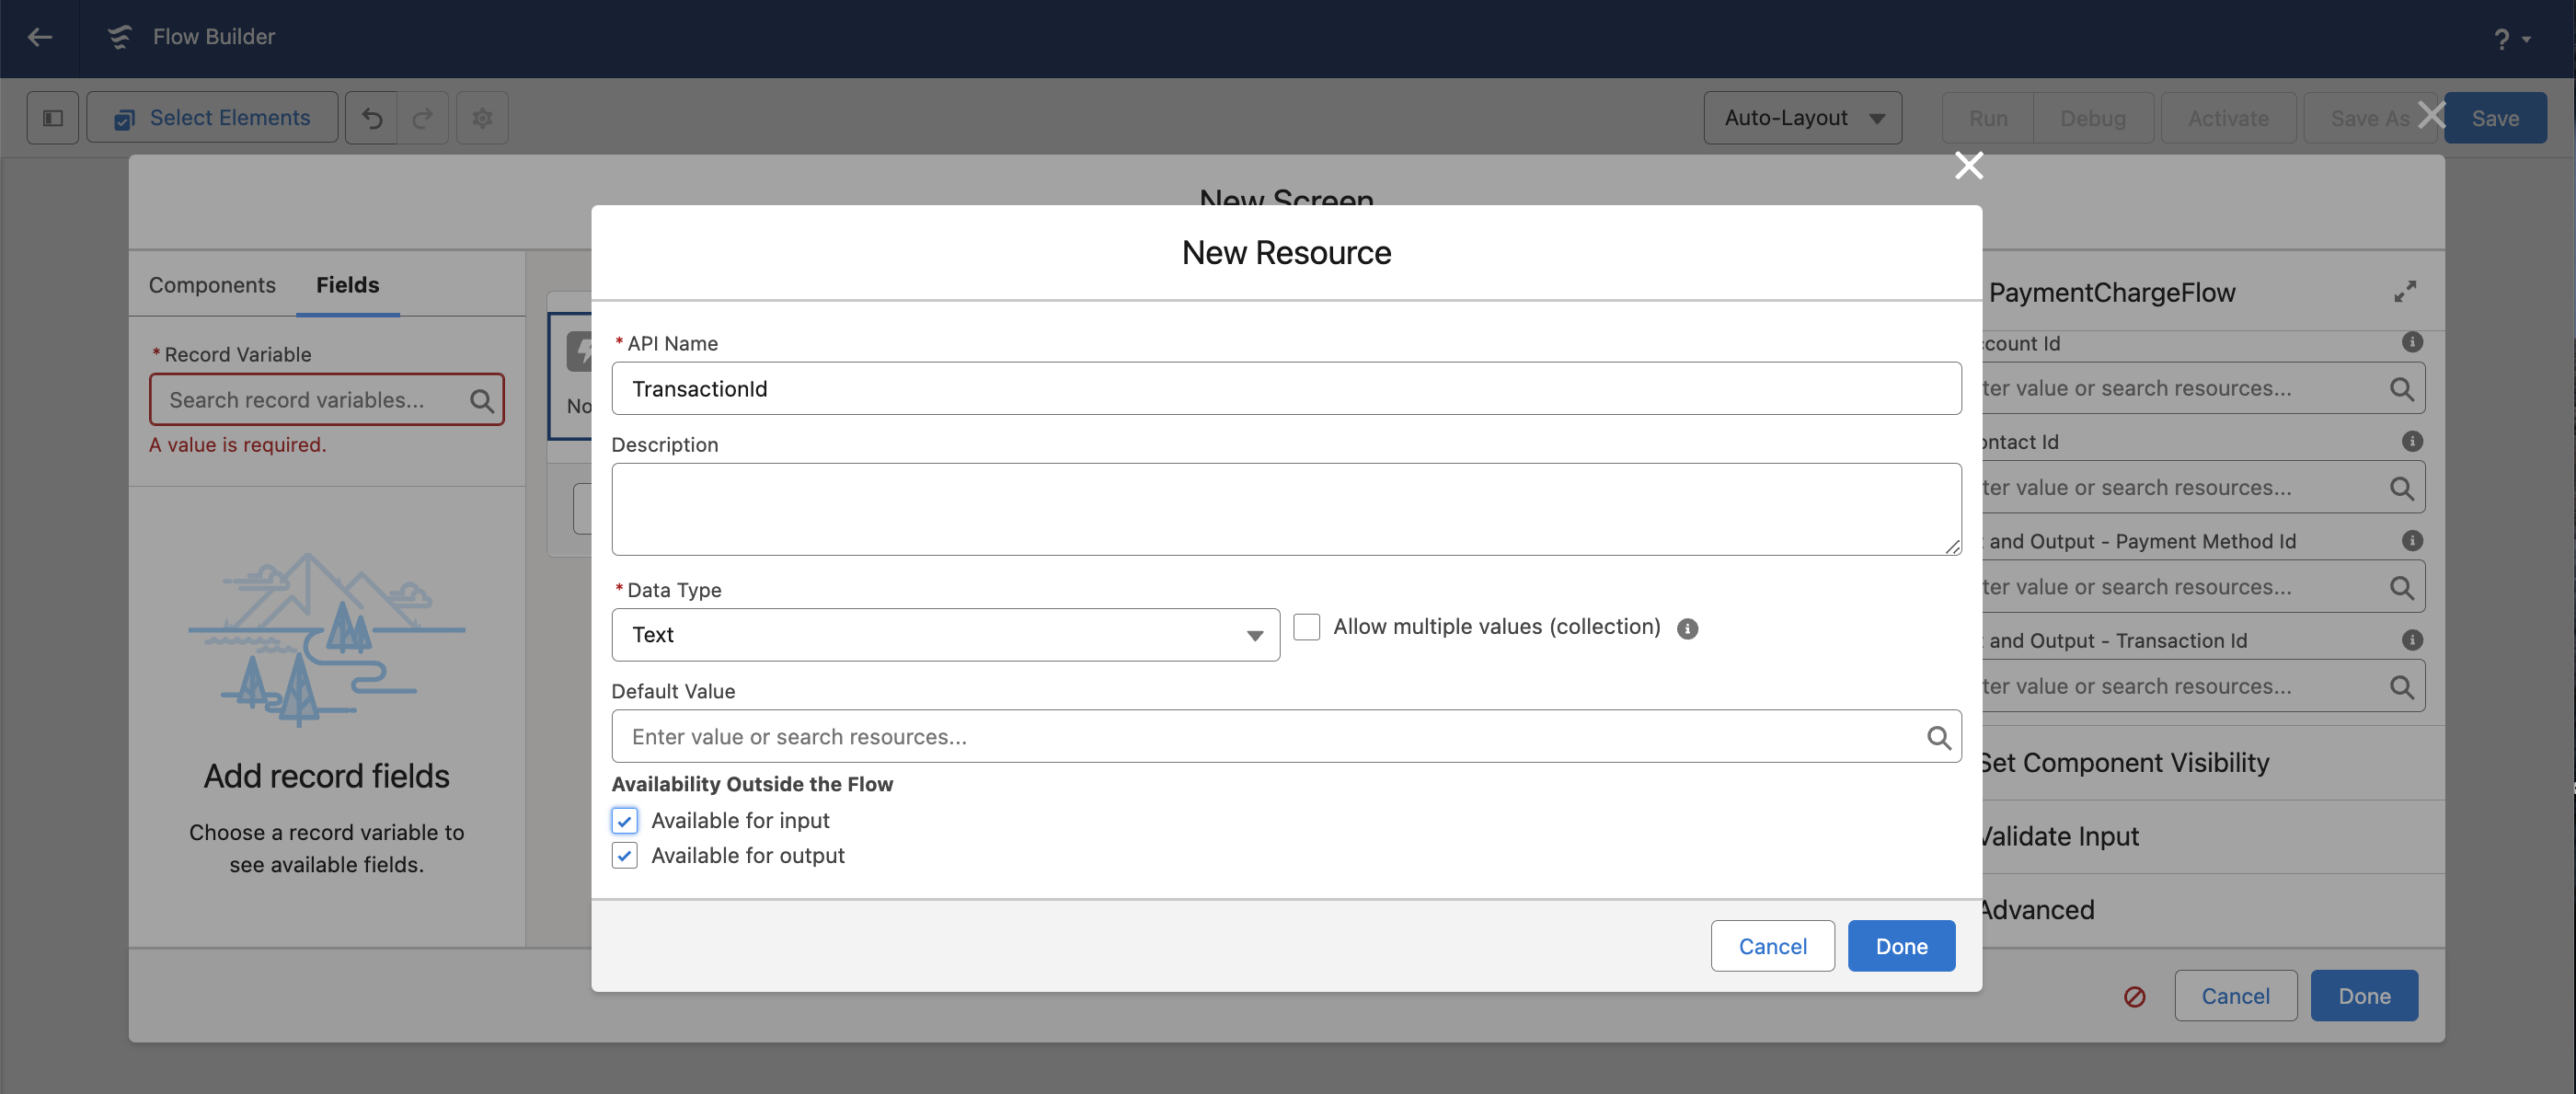
Create a PaymentMethodId Field
Click the Fields tab.
Click in the Record Variables field and click + New Resource.
Fill in the following fields.
API Name = “PaymentMethodId” (required)
Data Type = “Text” (required)
Available for input = “True” (checked)
Available for output = “True” (checked)
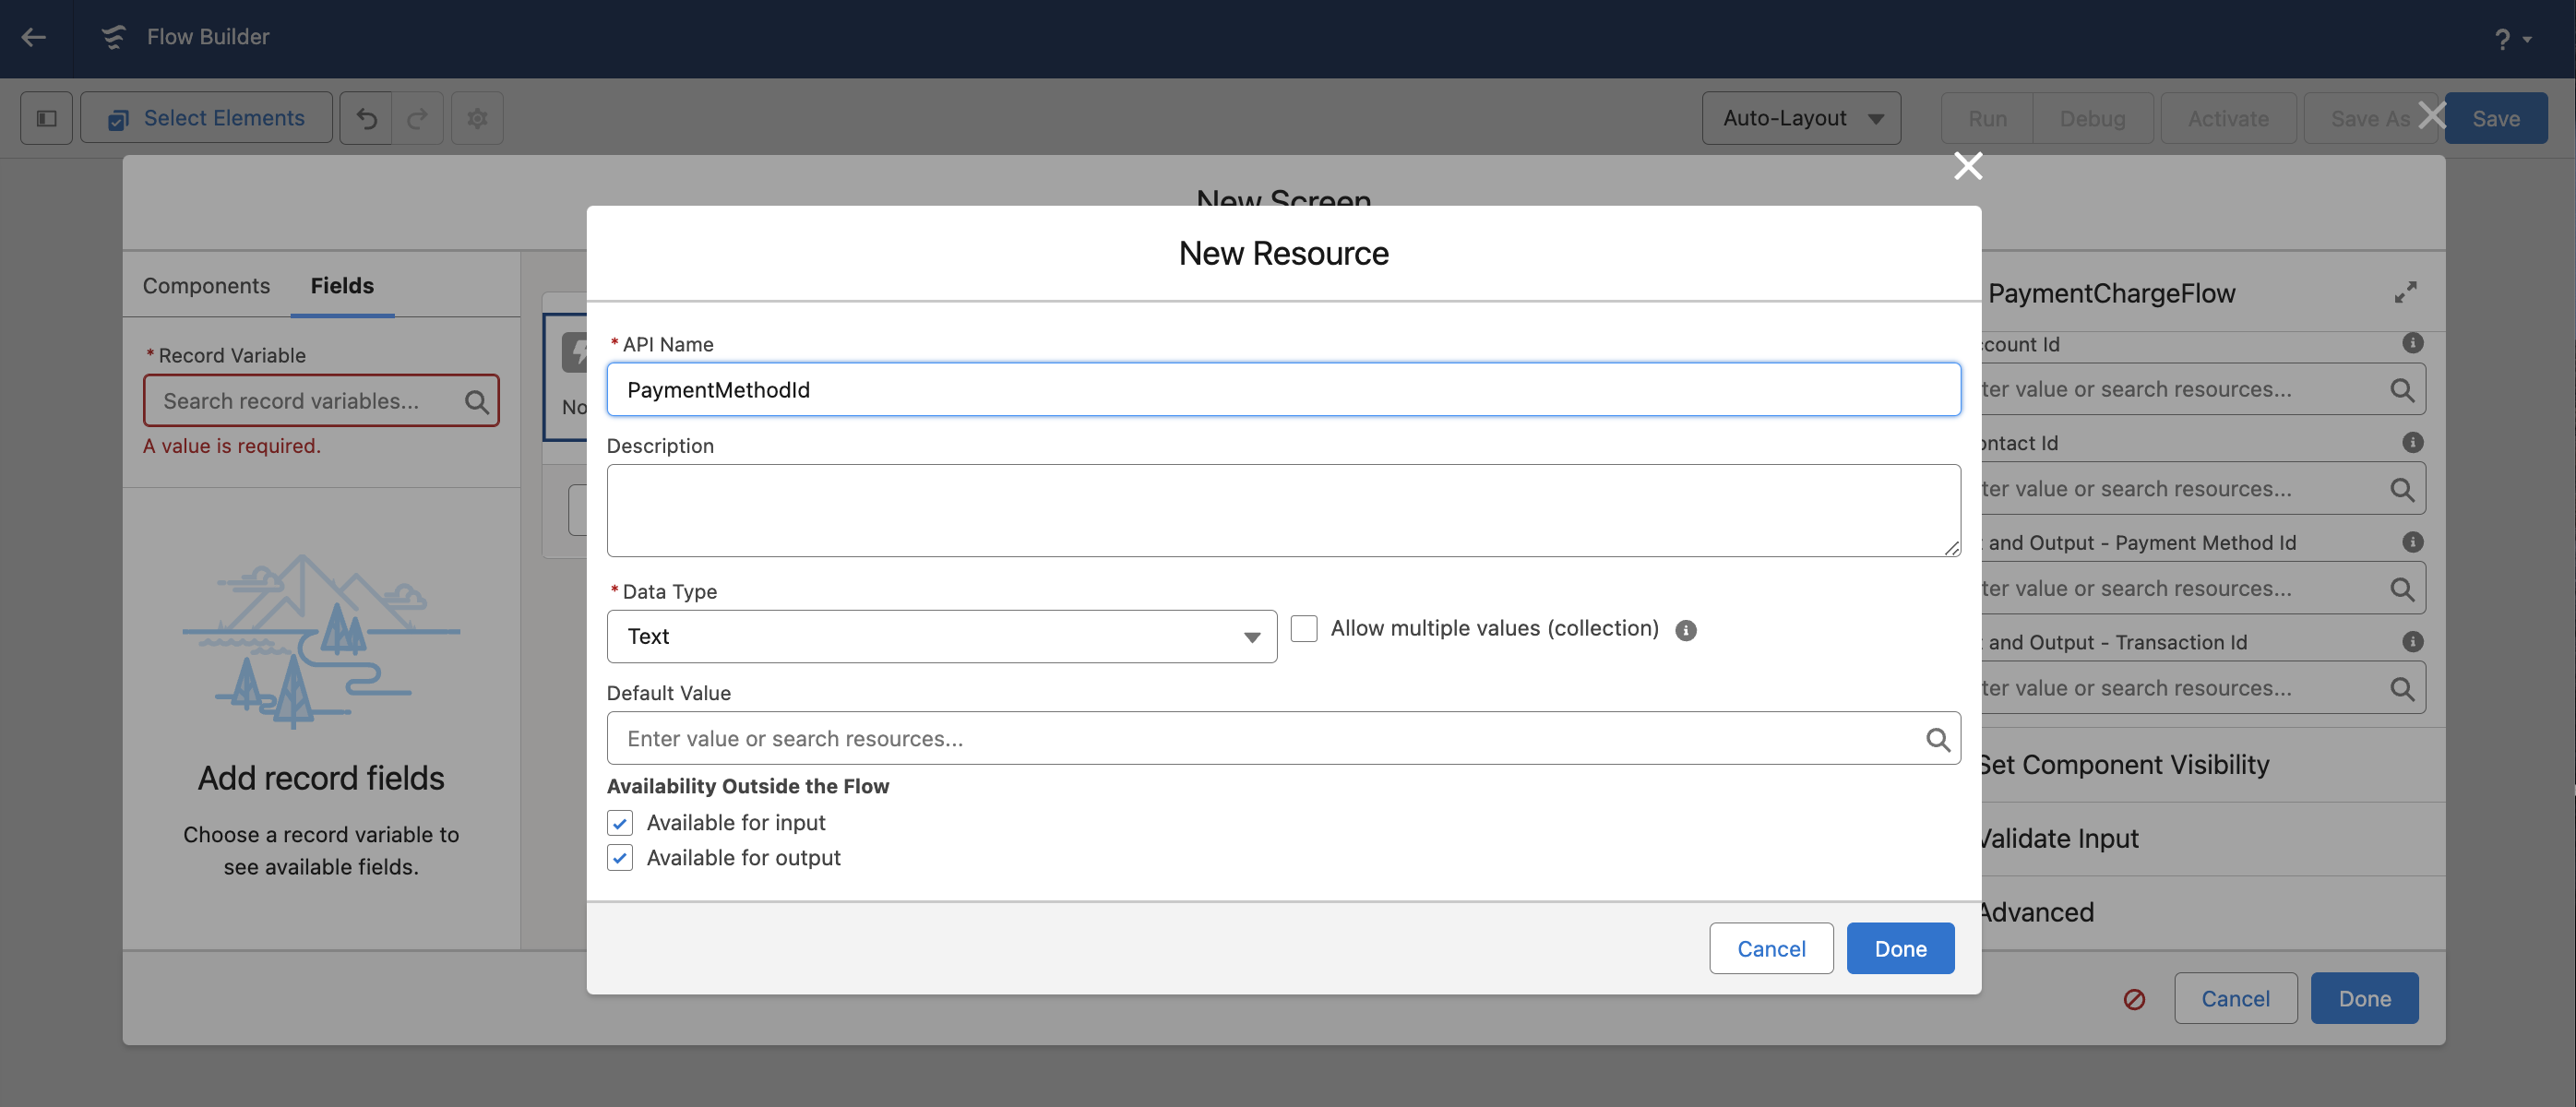
Click Done.
Create a TransactionId Field
Click the Fields tab.
Click in the Record Variables field and click + New Resource.
Fill in the following fields.
API Name = “TransactionId” (required
Data Type = “Text” (required
Available for input = “True” (checked
Available for output = “True” (checked)
Click Done.
Configure the Advanced Settings
Click the + symbol (Add Element) between the PaymentChargeFlow component and open the Advanced section.
Check the Manually Assign Variables checkbox.
Set Input and Output - Payment Method Id = “{!PaymentMethodId]" and Input and Output - Transaction Id = “{!TransactionId}." You must enter values in these fields so the multi-step flow will know if the Payment Charge step has been completed when a user clicks the Previous button. Entering values in these fields now also makes it easy to obtain the newly created Payment Method ID and Transaction ID if you need either later in the flow.
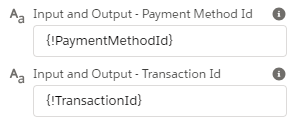
Click Done.
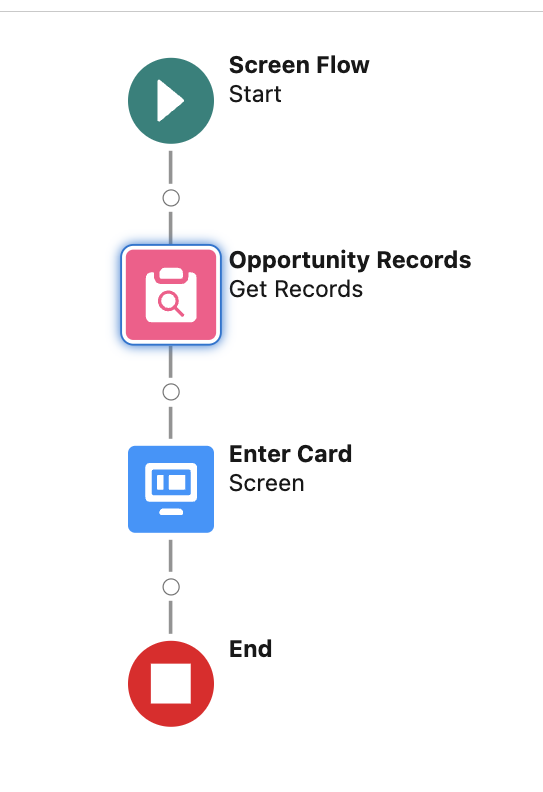
Create a "Results" Screen Element
Click the + symbol (Add Element) between the Payment Flow screen and the End.
Enter a Label. (required) (In this example, we used “Results.”)
Un-check the Show Header field since the component already contains a header.
Review the footer configurations.
Click Done.

Save Your Flow
Click Save.
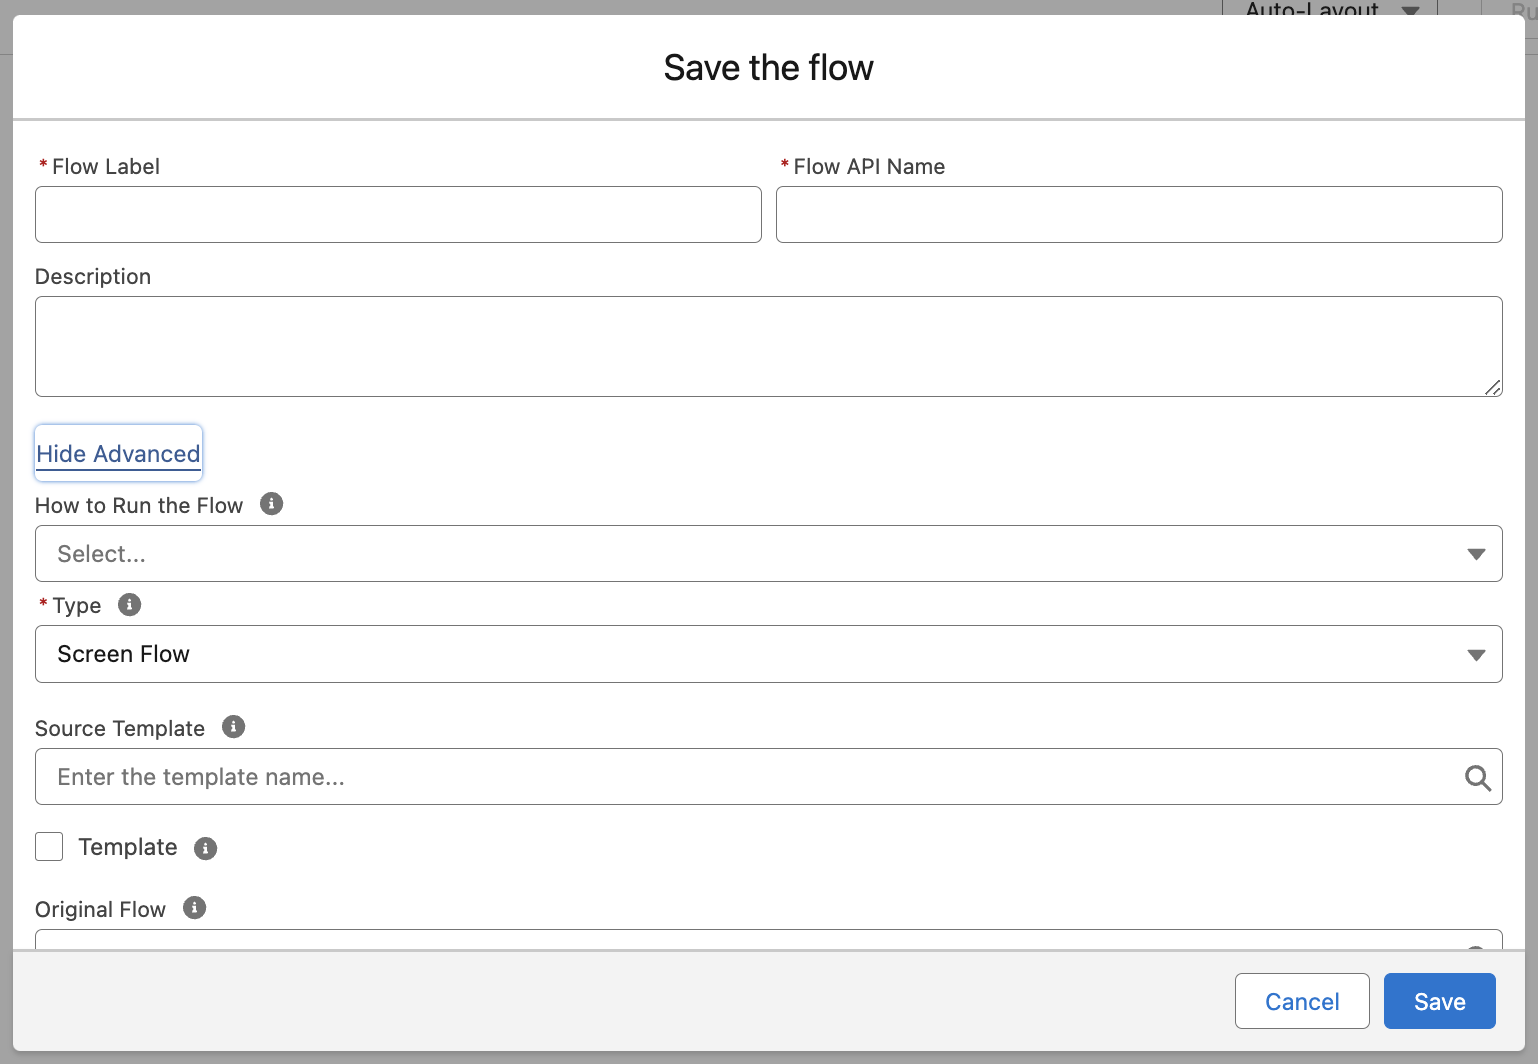
Enter a Flow Label.
Click the Advanced section and set Type = “Screen Flow.”
Click Save.
Run, test, and activate the flow before using it.
Edit the Parent Object Page Layout
Open the Parent Object record. In this case, it’s the Opportunity.
Click Setup.
Click Edit Page.
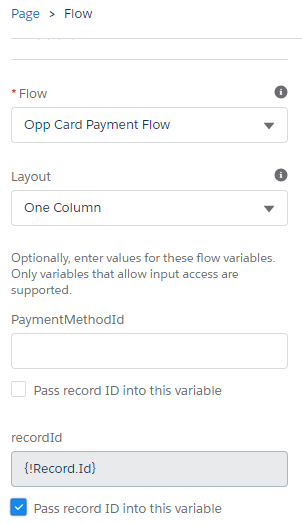
Select the Flow component and drag and drop it to a narrow column on the page layout. If you have multiple Flows defined in Salesforce, select the name of the Flow you just created in the Flow field.
Ensure the Pass record ID into this variable checkbox is checked.
Click Save.
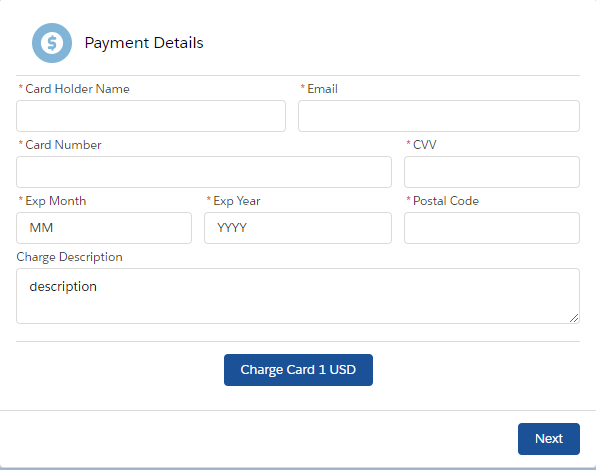
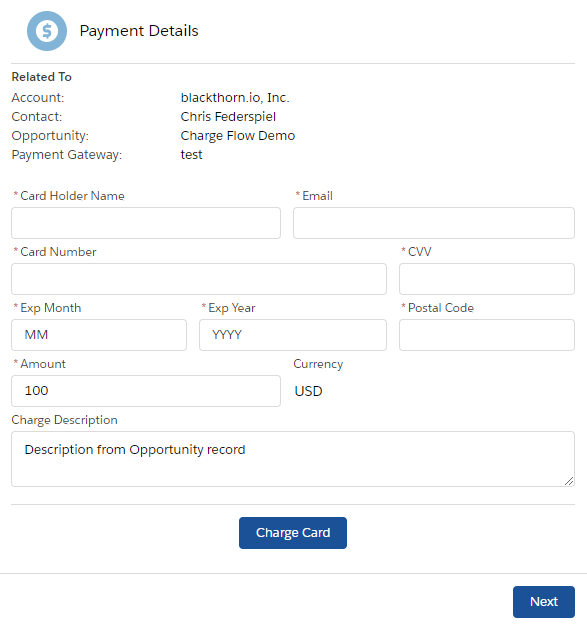
Navigate back to the Parent Object (Opportunity) record and try it out. Depending on how you've configured the PaymentChargeFlow component, it should look like one of the following images.
For customer-facing users
For internal Salesforce users
Authorize.net Payment Gateway Configuration
PREREQUISITE
You must be an Authorize.net user to use the following fields. Do not use these fields for any other scenarios. It will cause Transactions to fail.
This update is a work in progress, and support for CVV and address validation for other features will occur in future updates.
New Fields
Object: Payment Gateway
Field Label: Live Validation Mode (Authorize.net)
API Name: Live_Validation_Mode__c
Data Type: checkbox
Default Value: False (unchecked)
Description:
If checked, the Payment Method will use the "liveMode" to submit a zero-dollar or one-cent Transaction (depending on the card type and the processor support) to confirm the card number belongs to an active credit or debit account.
If unchecked, the Payment Method will use the "testMode" to perform a Luhn mod-10 check on the card number, without further validation.
Component: PaymentChargeFlow
Field: Show Address
Description: When enabled, additional address fields (Street, City, State, and Country) will be visible and required. Click here for more information about adding fields.
Instructions
To enable CVV validations when using an Authorize.net gateway and the PaymentChargeFlow component, check the new Live Validation Mode (Authorize.net) field on the Payment Gateway record and add the Show Address field to the PaymentChargeFlow component.
When both are enabled, additional address fields (Street, City, State, and Country) will be visible and required, and the validation process will occur.