Limitation
Do not use the Virtual Terminal to process a Transaction that includes Fees (Payment Processing or Tax). Fees are not supported by the Virtual Terminal.
IMPORTANT NOTE
The process for using Fees works the same whether you use Event Items or Event Item Sessions. For the examples below, we used Event Items.
Prerequisite
Before you can add Fees to your Event, you must add the following fields to the Event page layout.
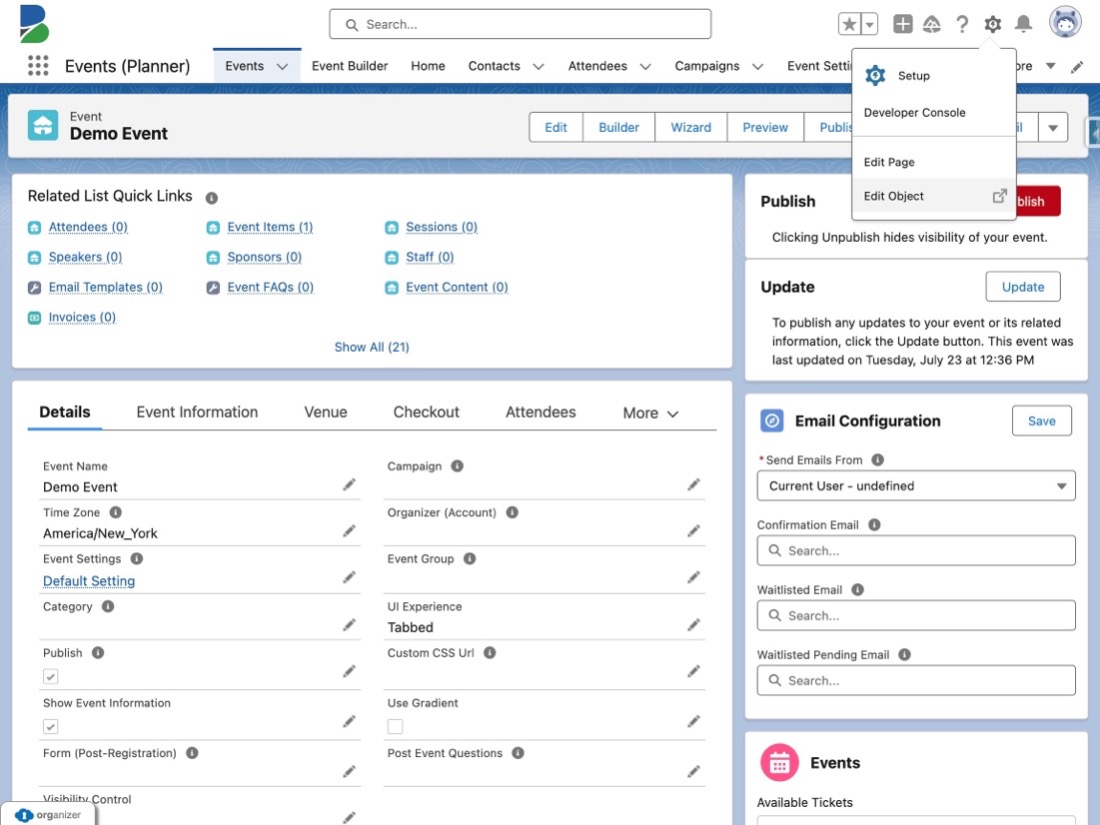
Go to the relevant Event record.
Click the Gear icon.
Click Edit Object.
Click the Page Layouts tab.
Click Event Layout.
Click the Fields tab.
In the Quick Fix box, enter and click “Fee."
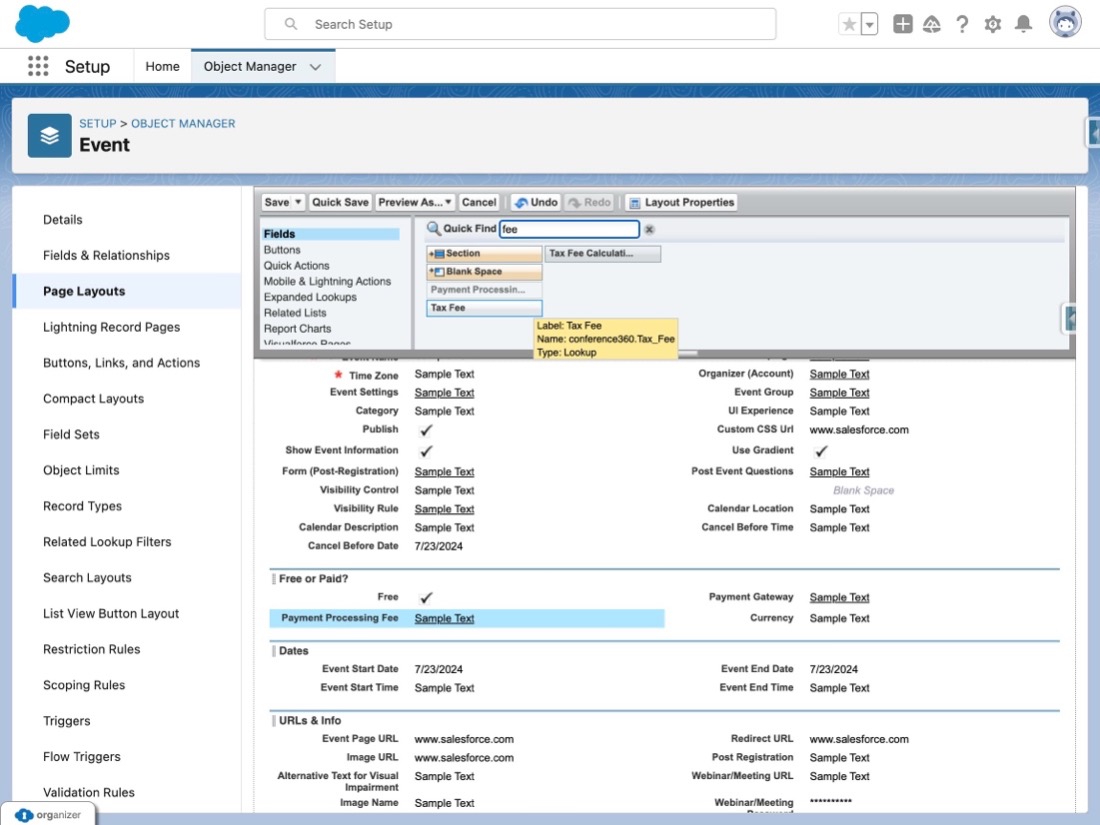
Drag and drop the following fields on the page layout.
Payment Processing Fee
Tax Fee
Tax Fee Calculation Type
Click Save.
Add a Payment Processing Fee to an Event
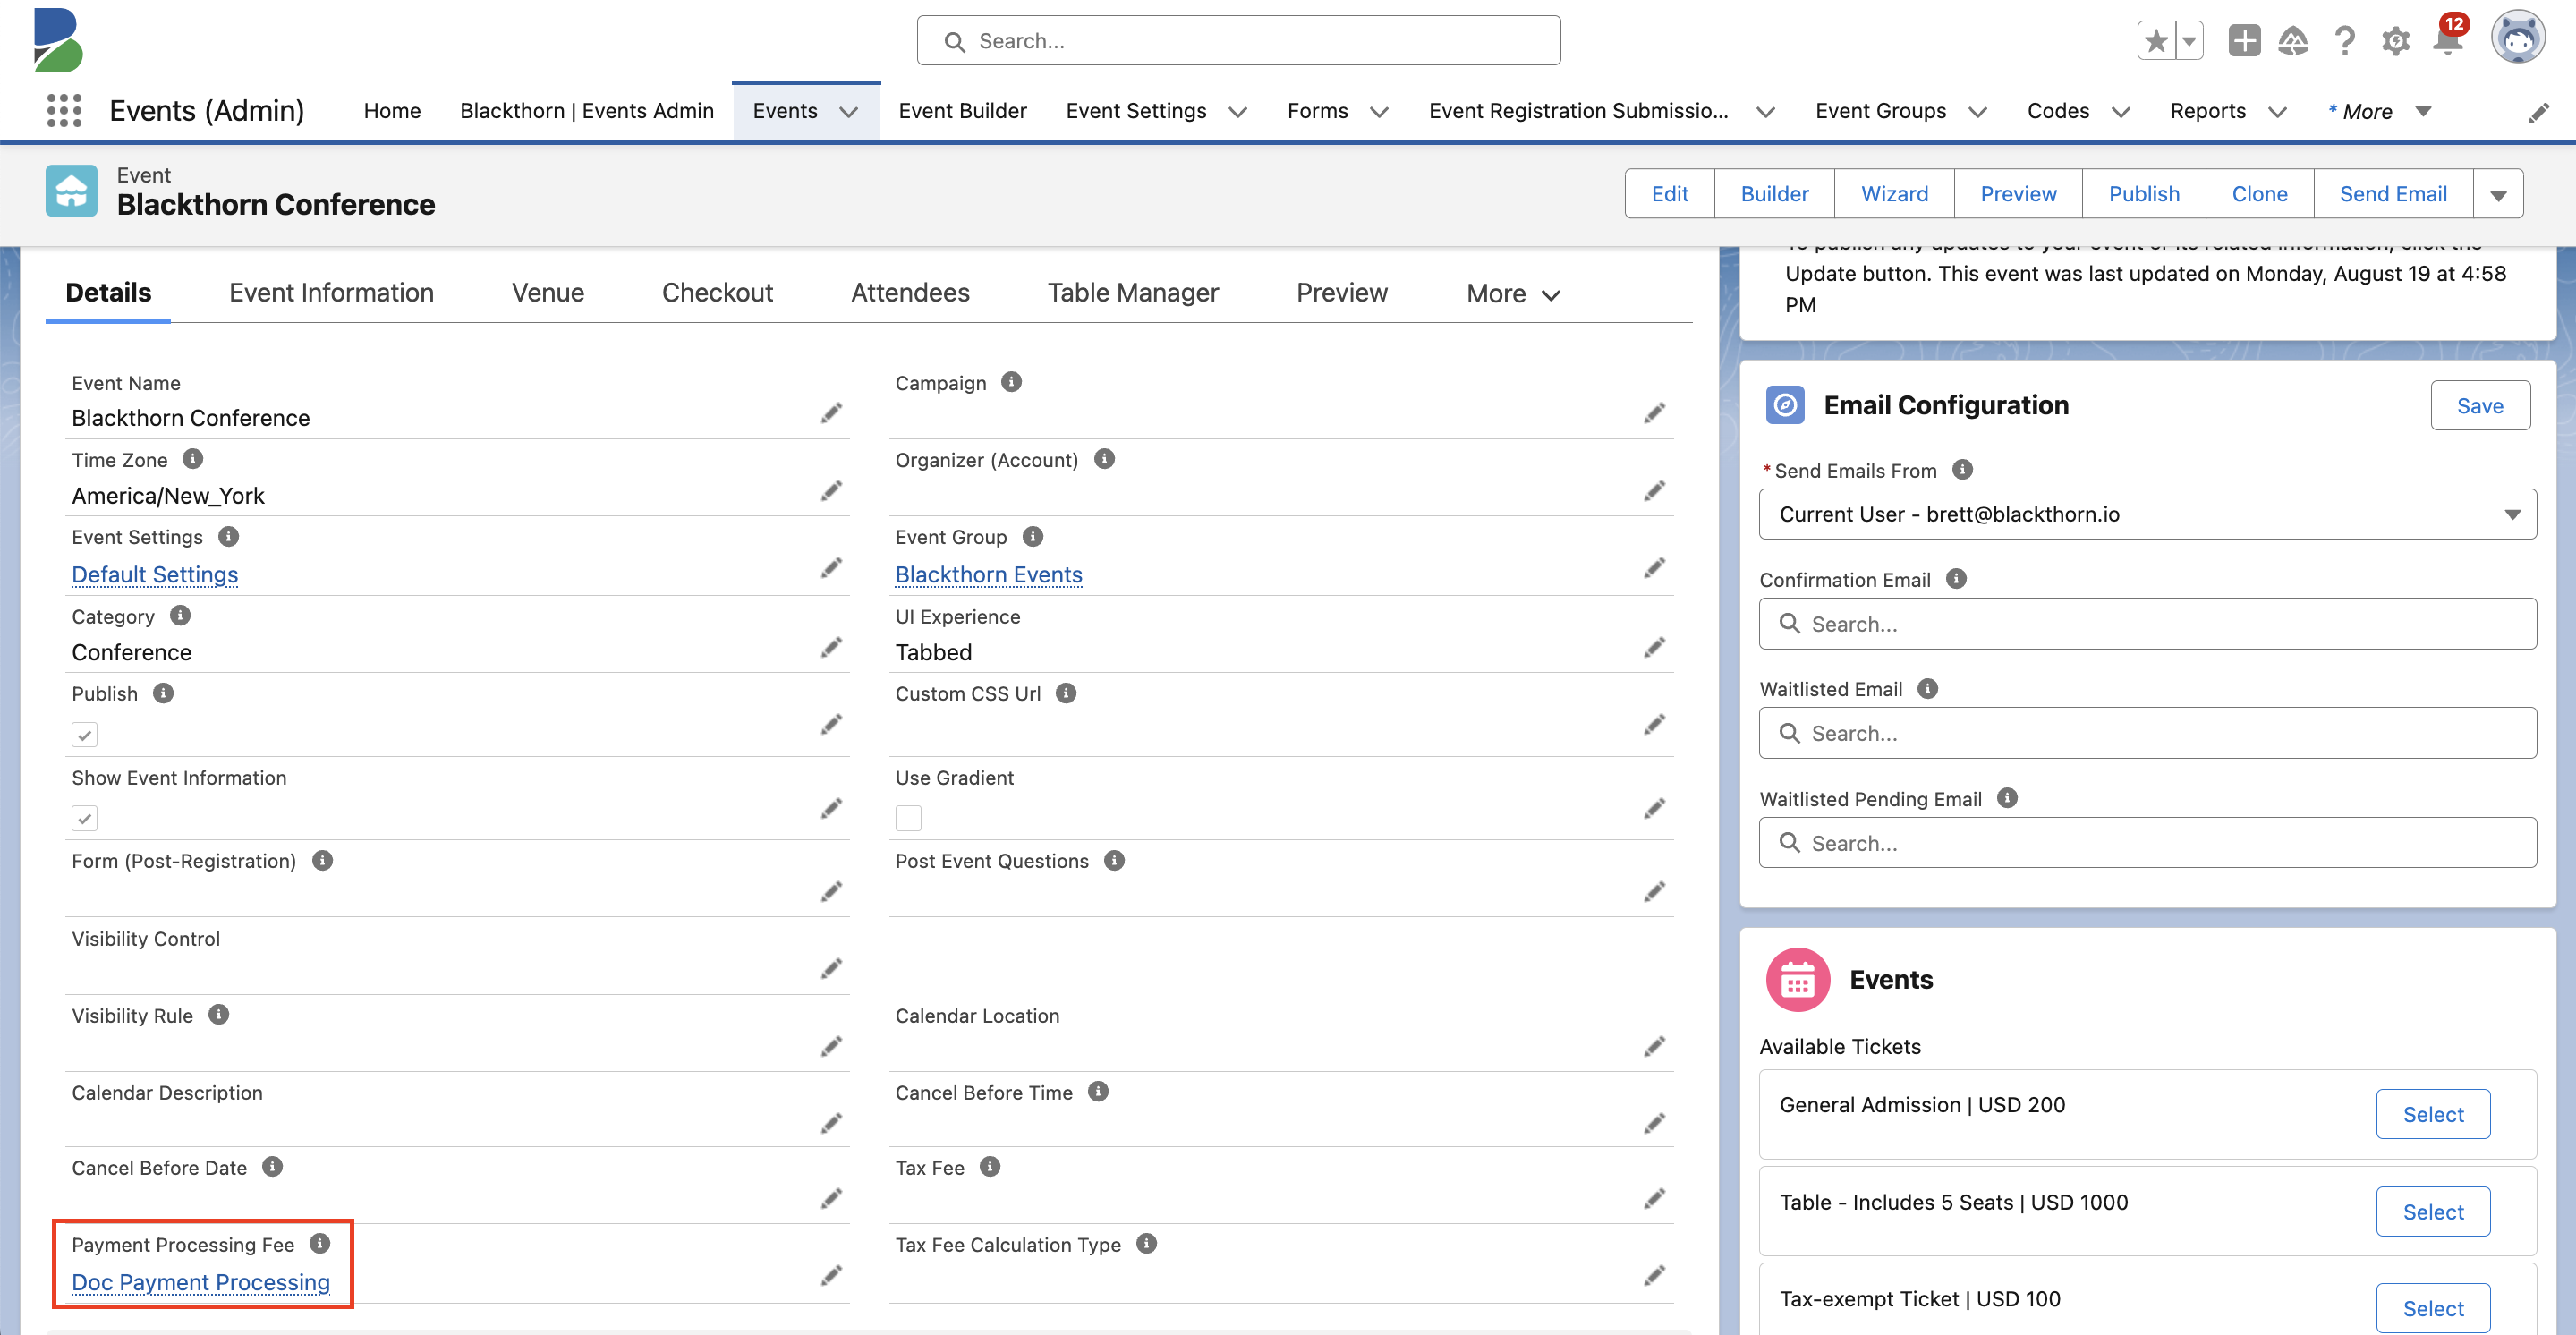
Go to the Event record.
Click the Pencil icon next to the Payment Processing Fee field.
Search for and select an existing Fee, OR click + New Fee.
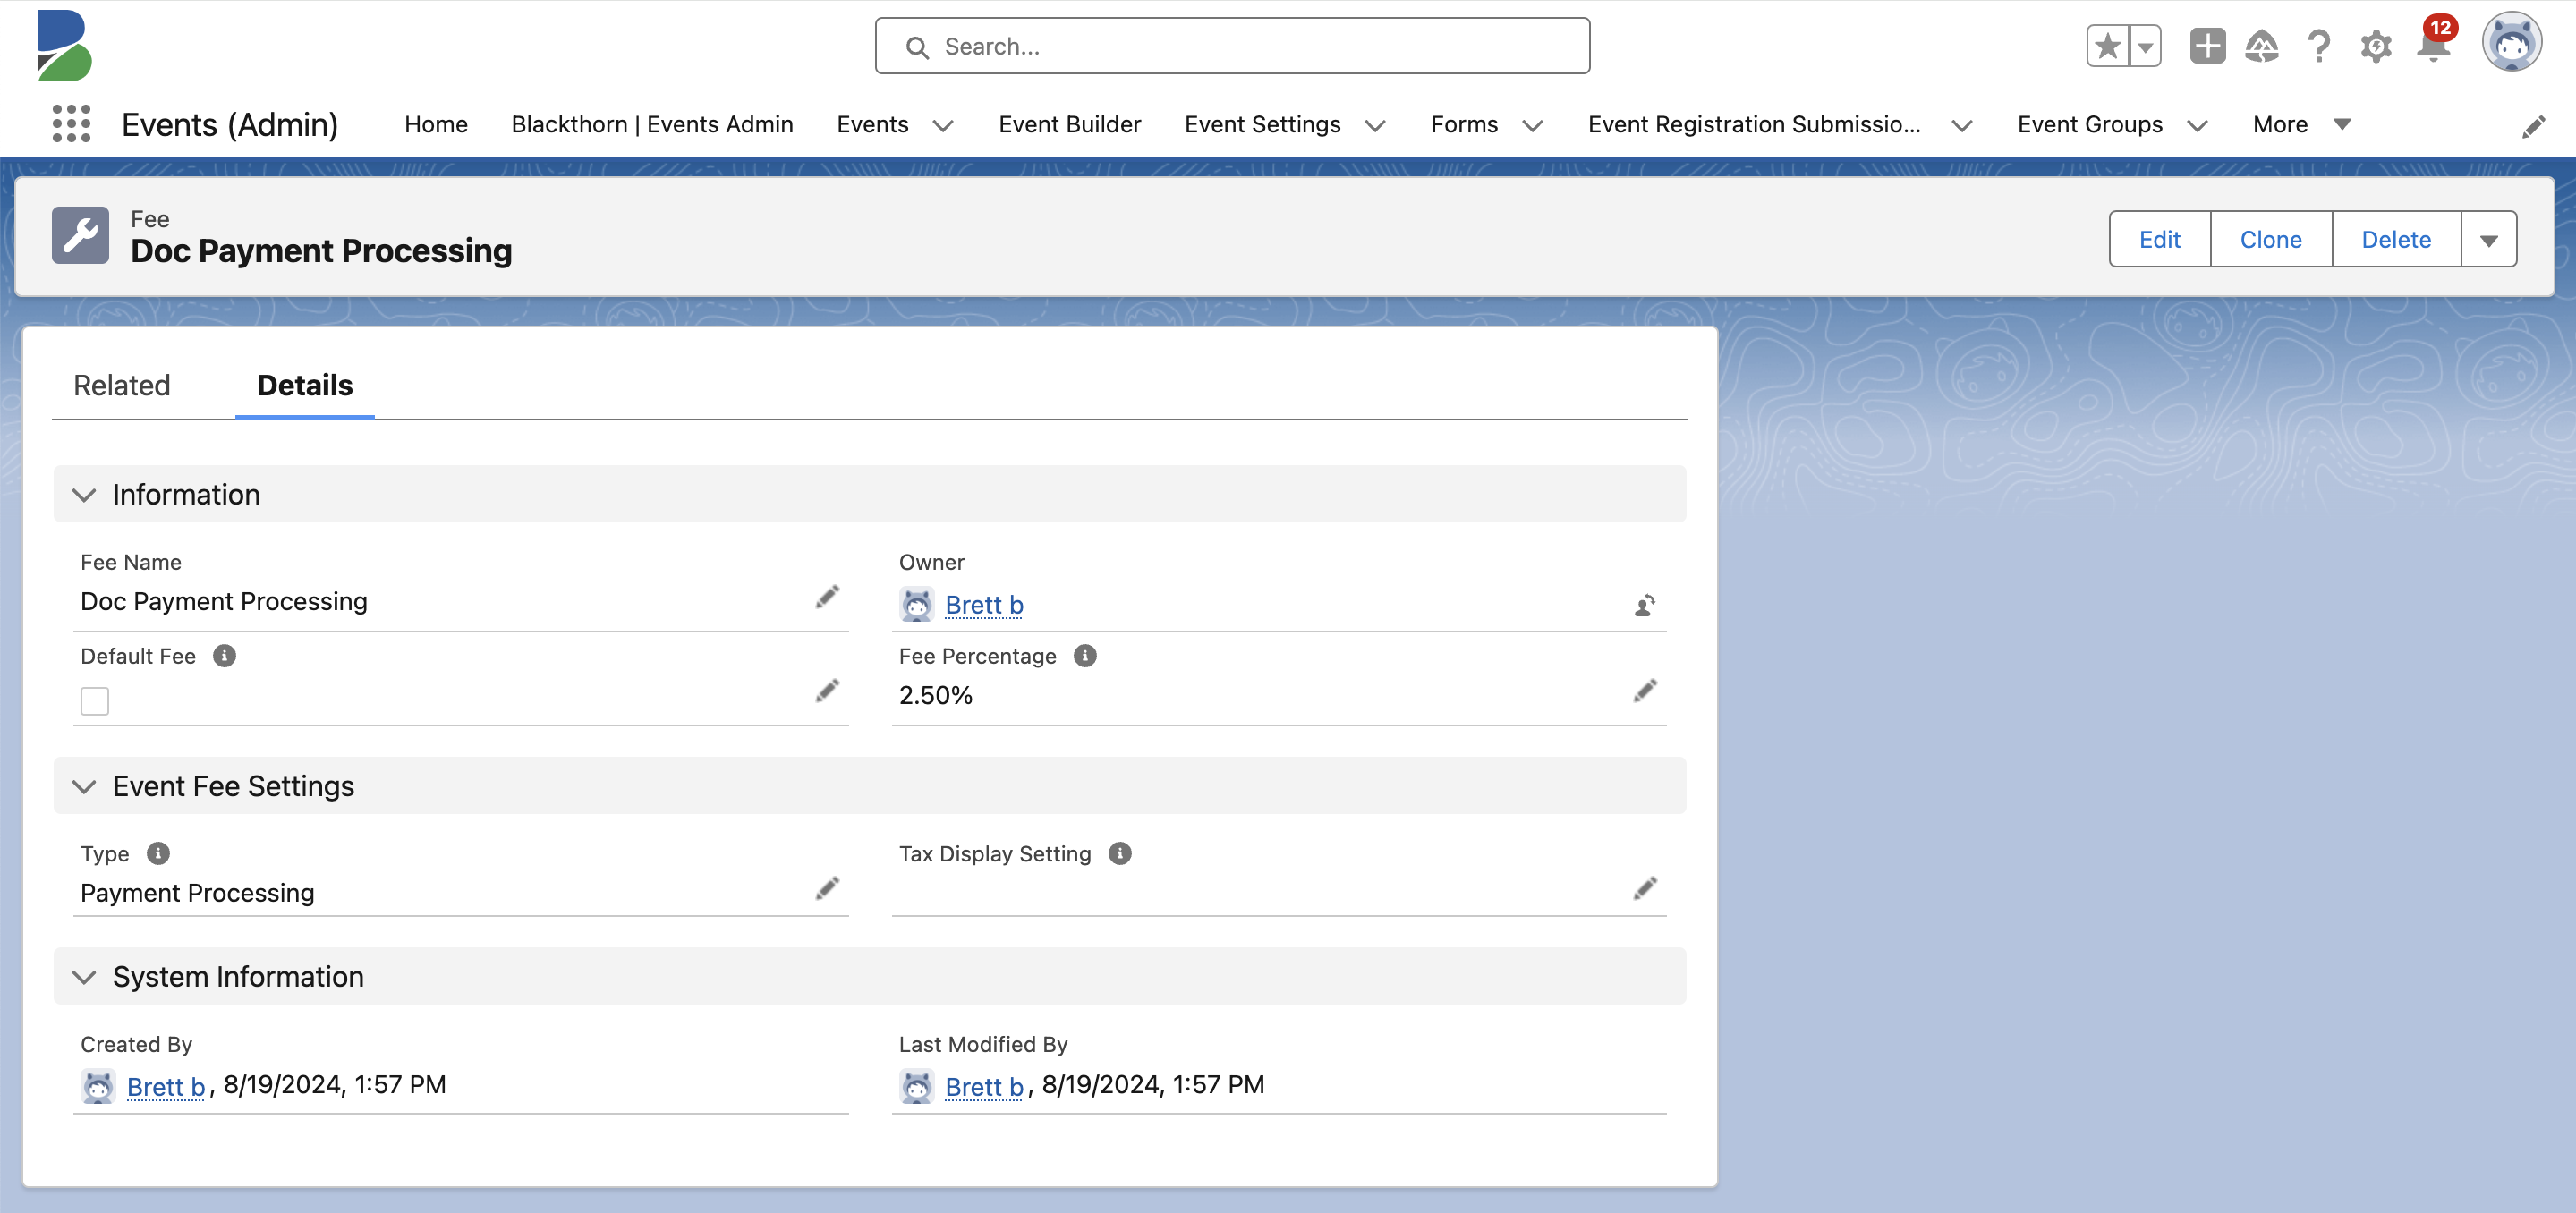
To create a new Fee, fill in the following fields.
Fee Name (required): IMPORTANT: This field will be displayed on checkout.
Fee Percentage (required): The value must be between 0 and 100.
Default Fee: If you check the Default Fee box, all newly created Events will use this Fee when processing credit card payments.
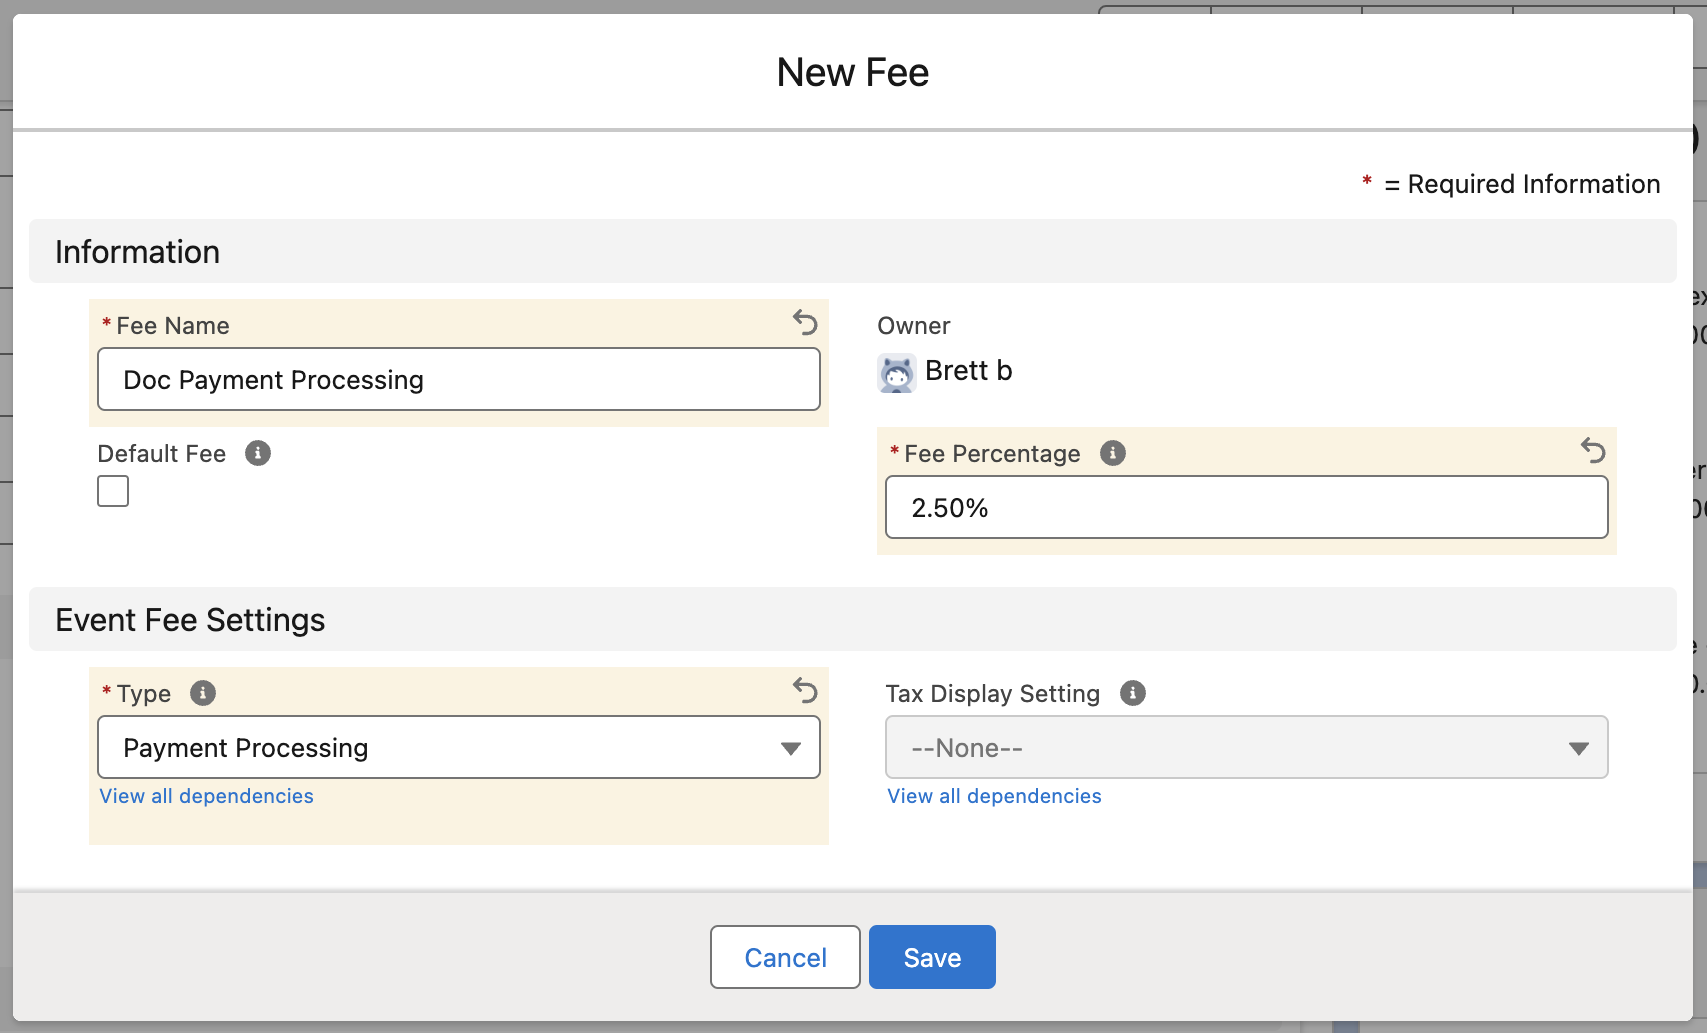
Click Save.
Click Save on the Event record.
Click Update to update the Event.
Short-Term Limitation
Displaying the Fee Name is only available with Tabbed, Full-width, Simple, and BYO CSS UI. It will be extended to Dynamic UI in a future release. Also, please note that the Fee will not be applied to any other Payment Methods at this time.
What Your Attendees Will See
In this example, the Event Item’s Ticket Price = “200.00,” and the Fee record contains the following information.
Fee Name = “Payment Processing Fee”
Type = “Payment Processing”
Fee Percentage = “2.50”
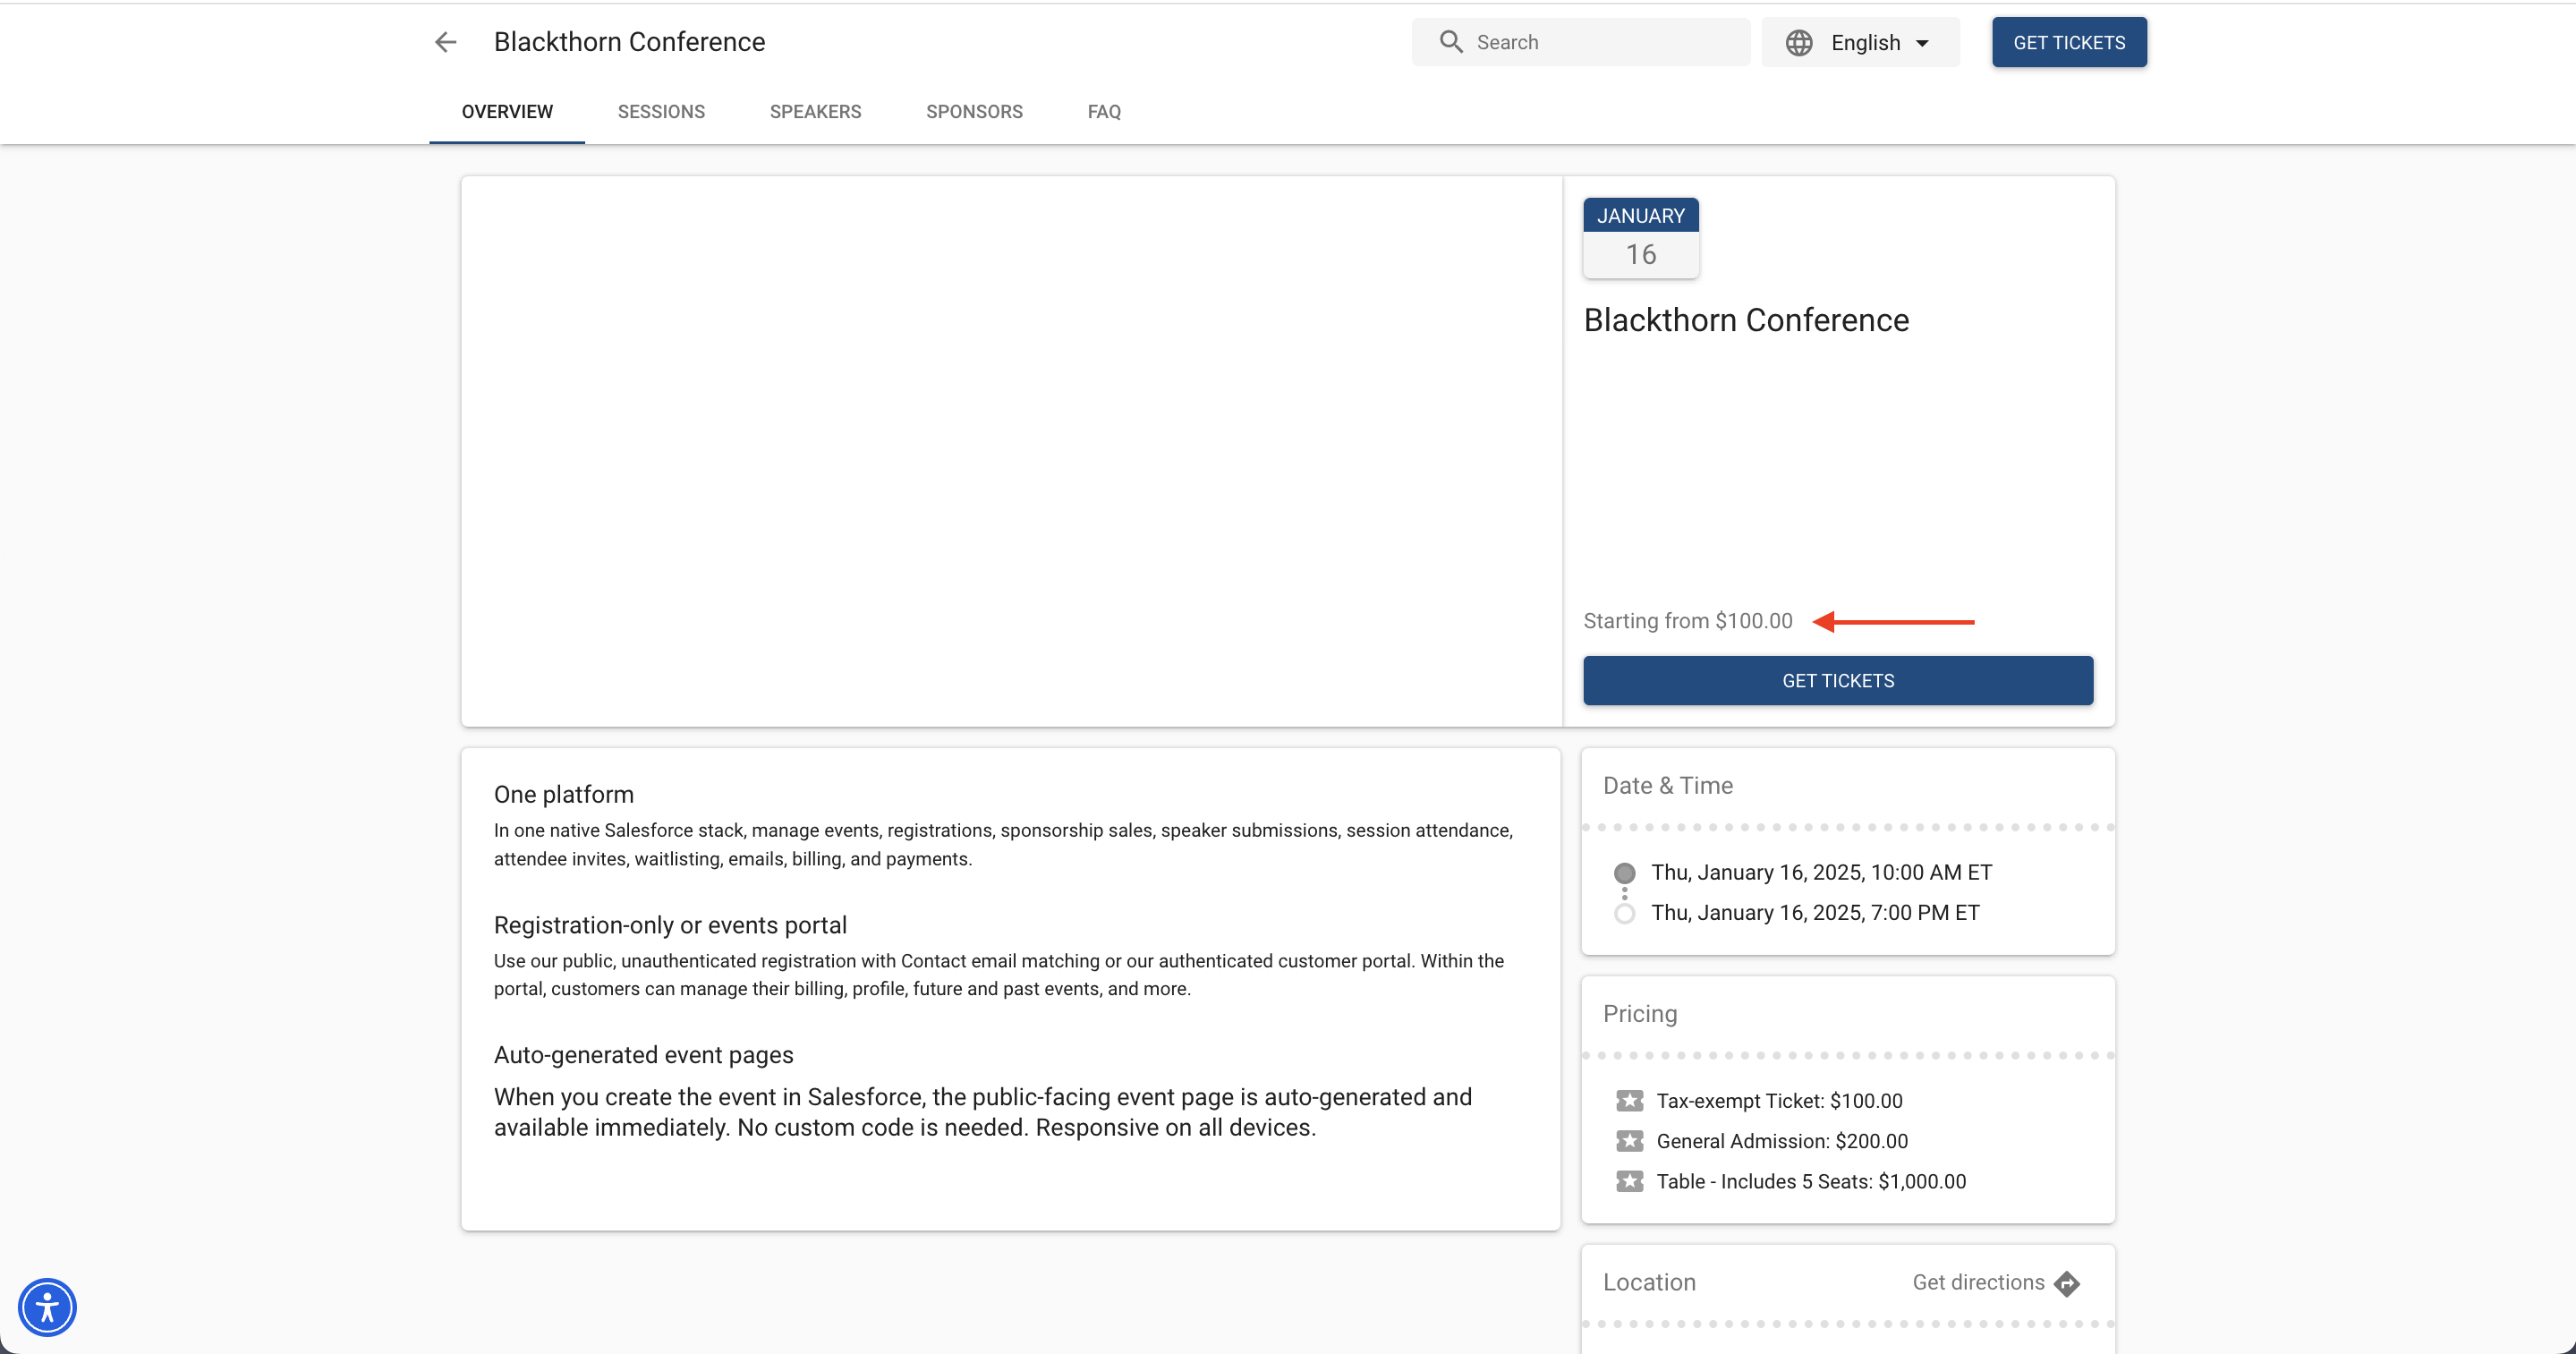
Click the Event Page URL.
The “Starting from” price is based on the Event Item with the lowest Price.
Click Get Tickets.
Add a Ticket to the cart and click Checkout.
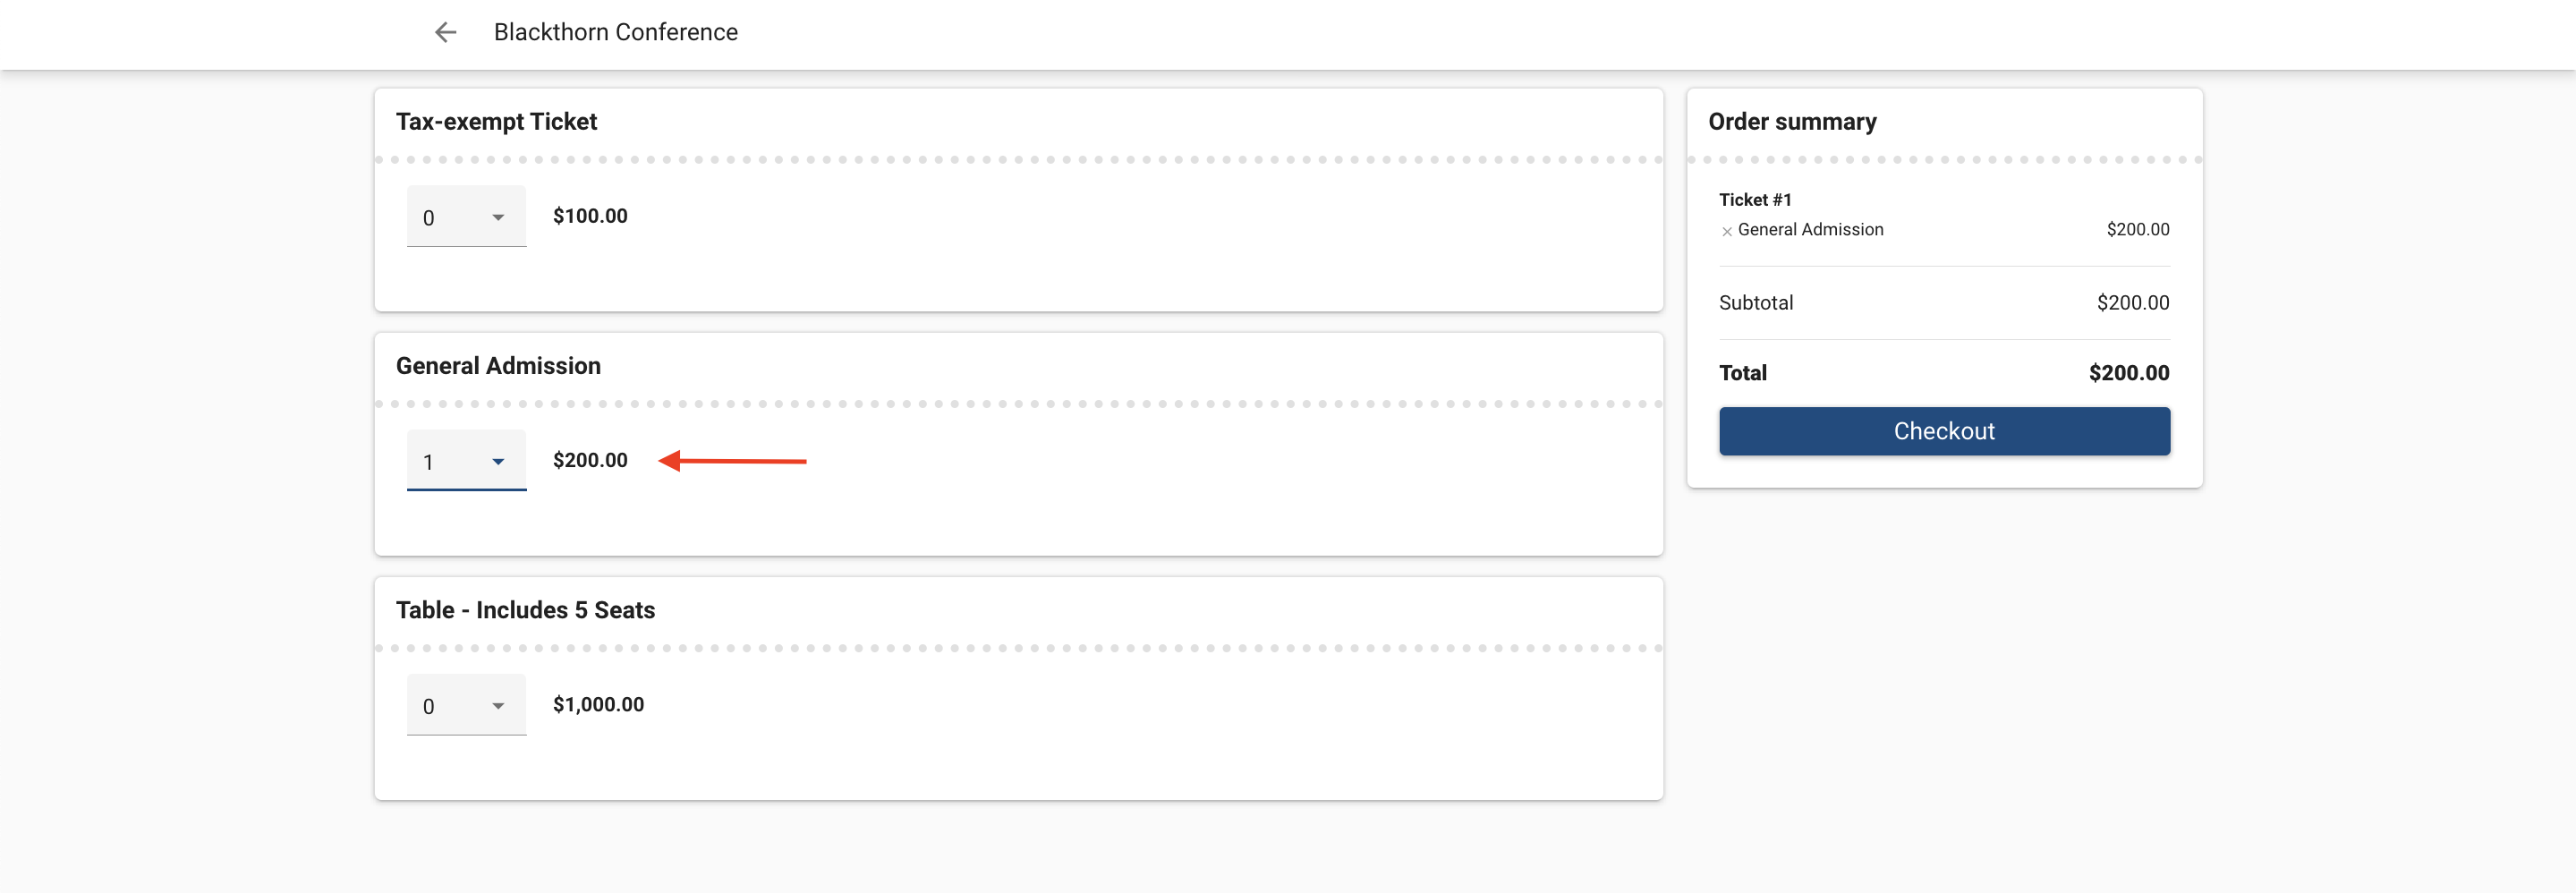
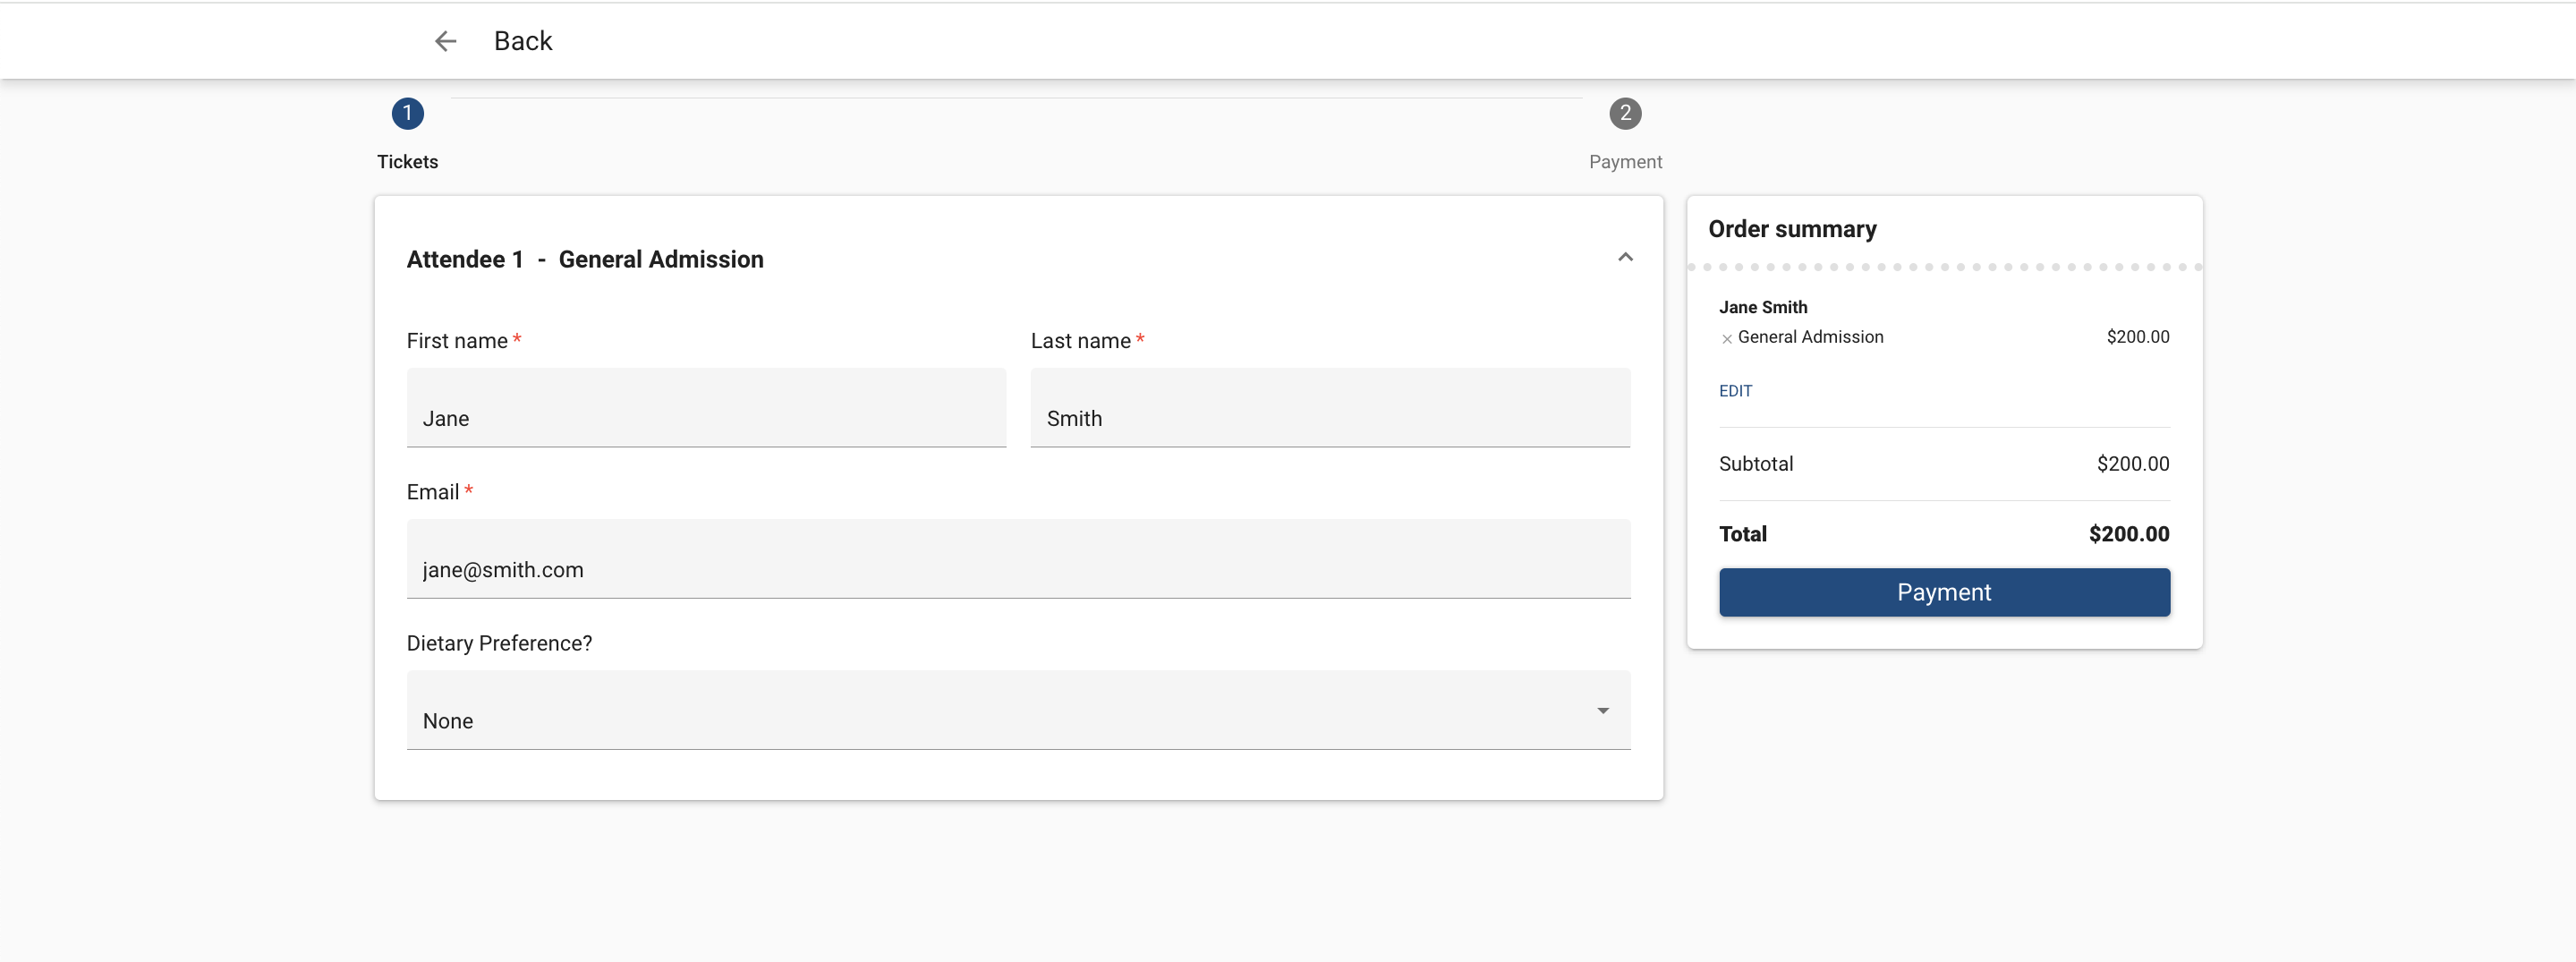
Fill in the Attendee details and click Payment.
Enter the payment details. In the Summary column, you’ll see the cost breakdown.
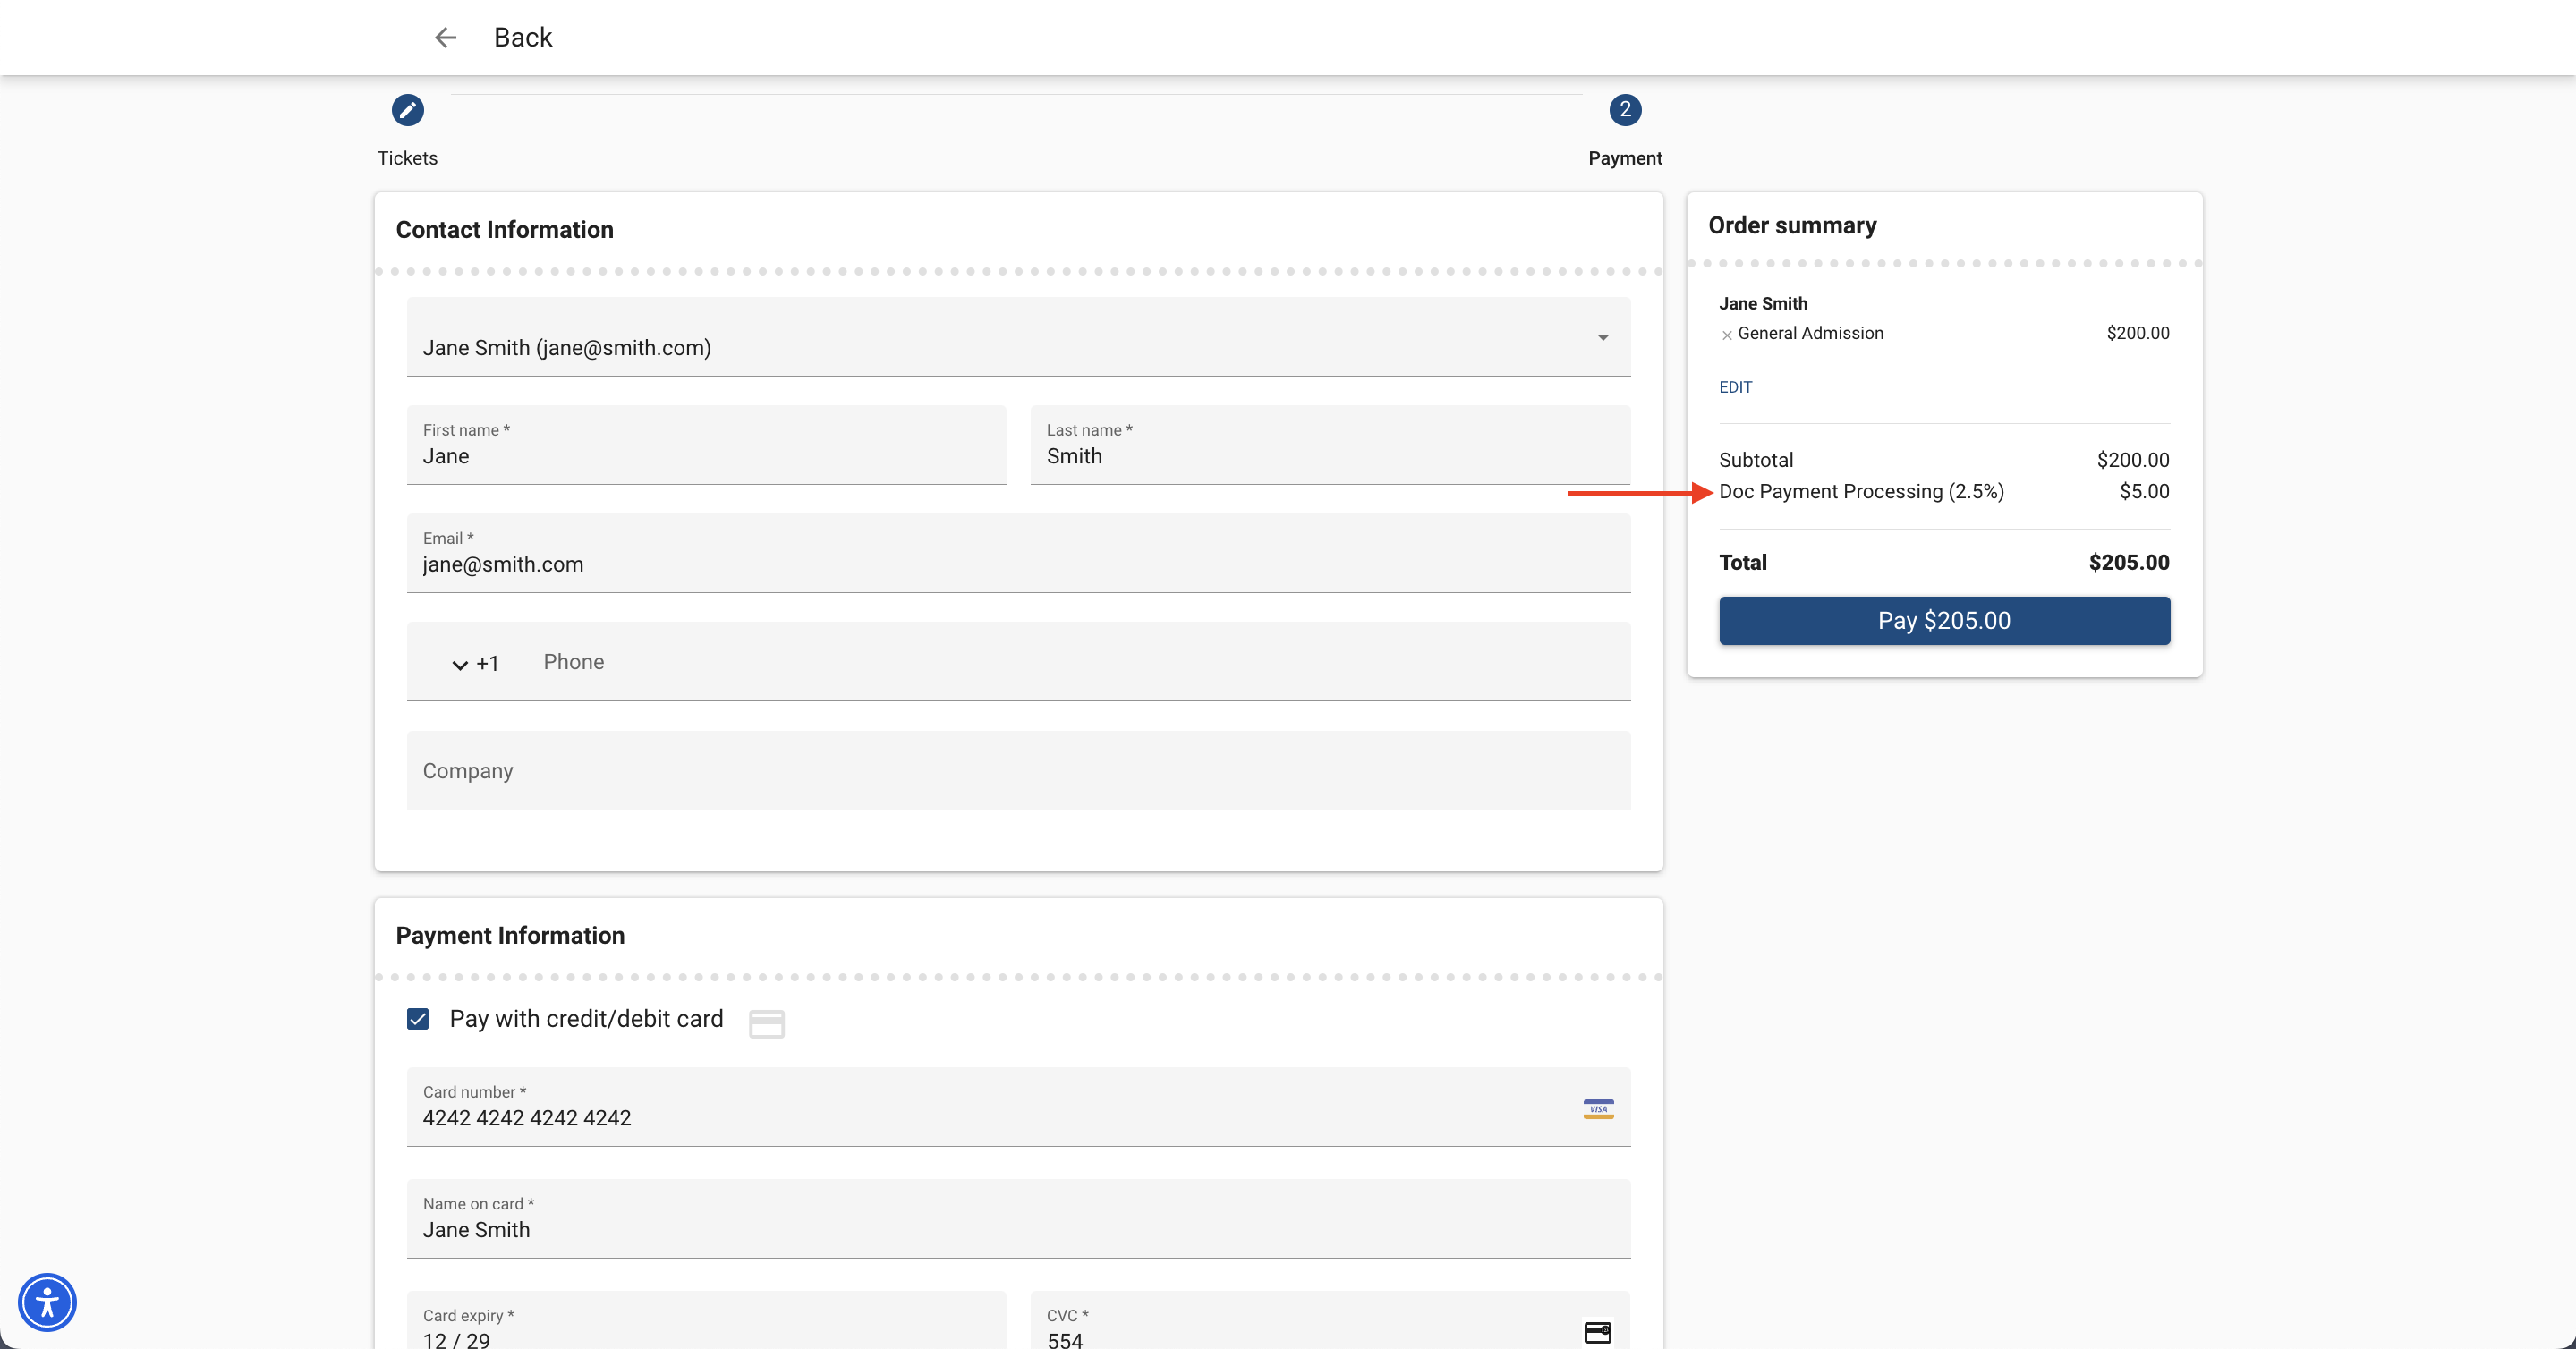
Click Pay.

Once the credit card processing fee and payment have been processed during checkout, a Line Item will be created for the Fee and related to the Invoice. The Line Item will also be visible on the DocumentLink.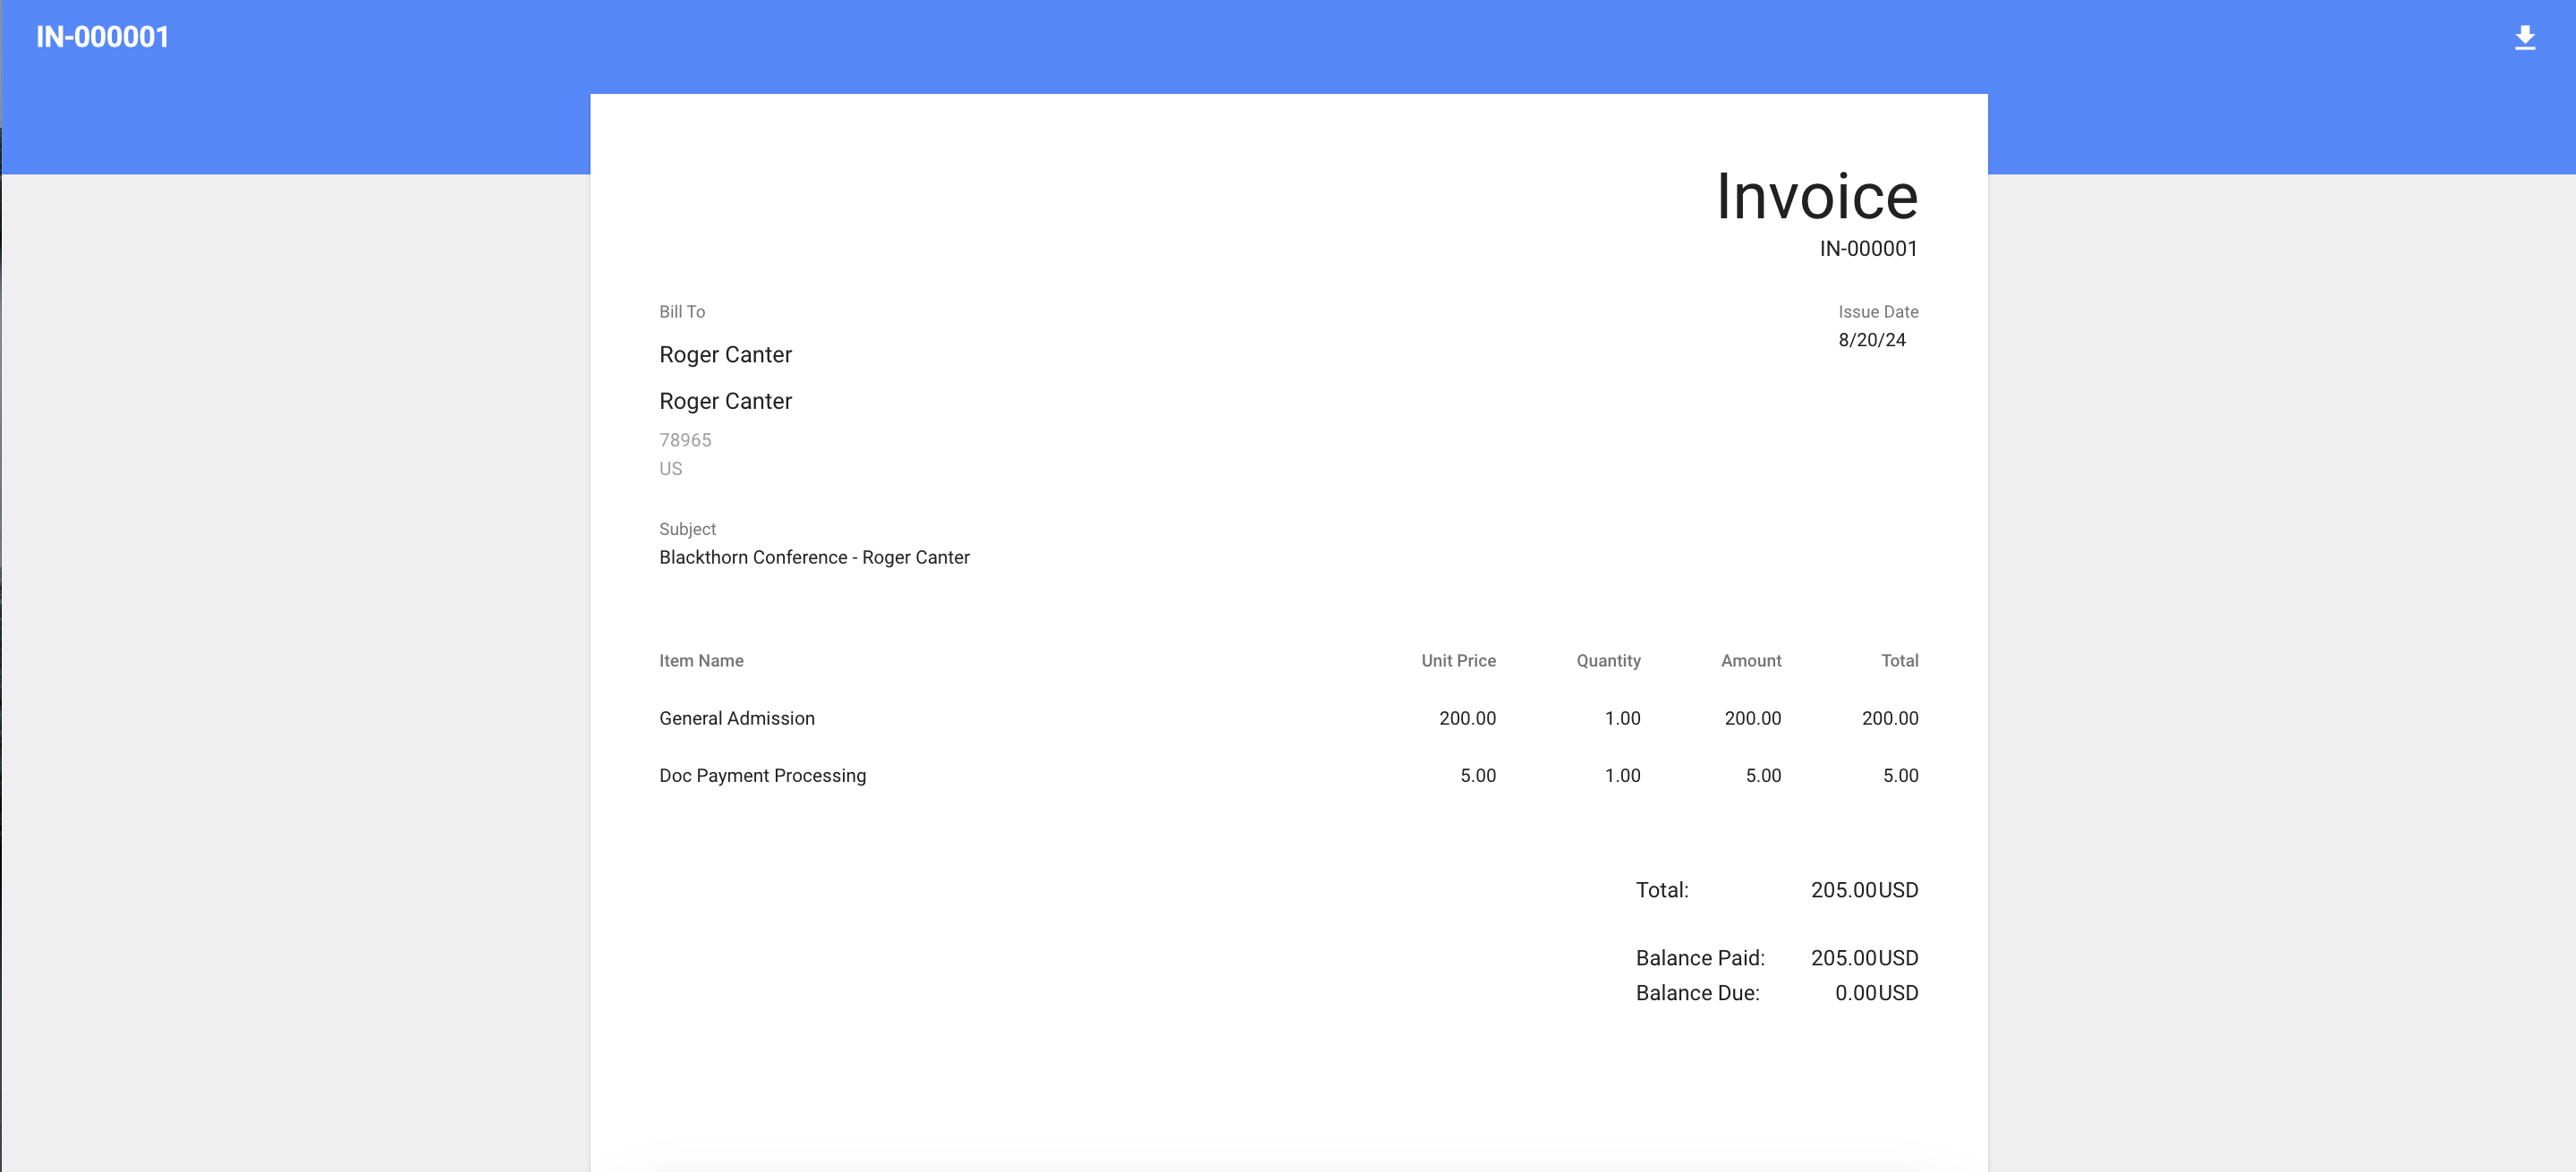
Add a Tax Fee to an Event
Calculated at Checkout
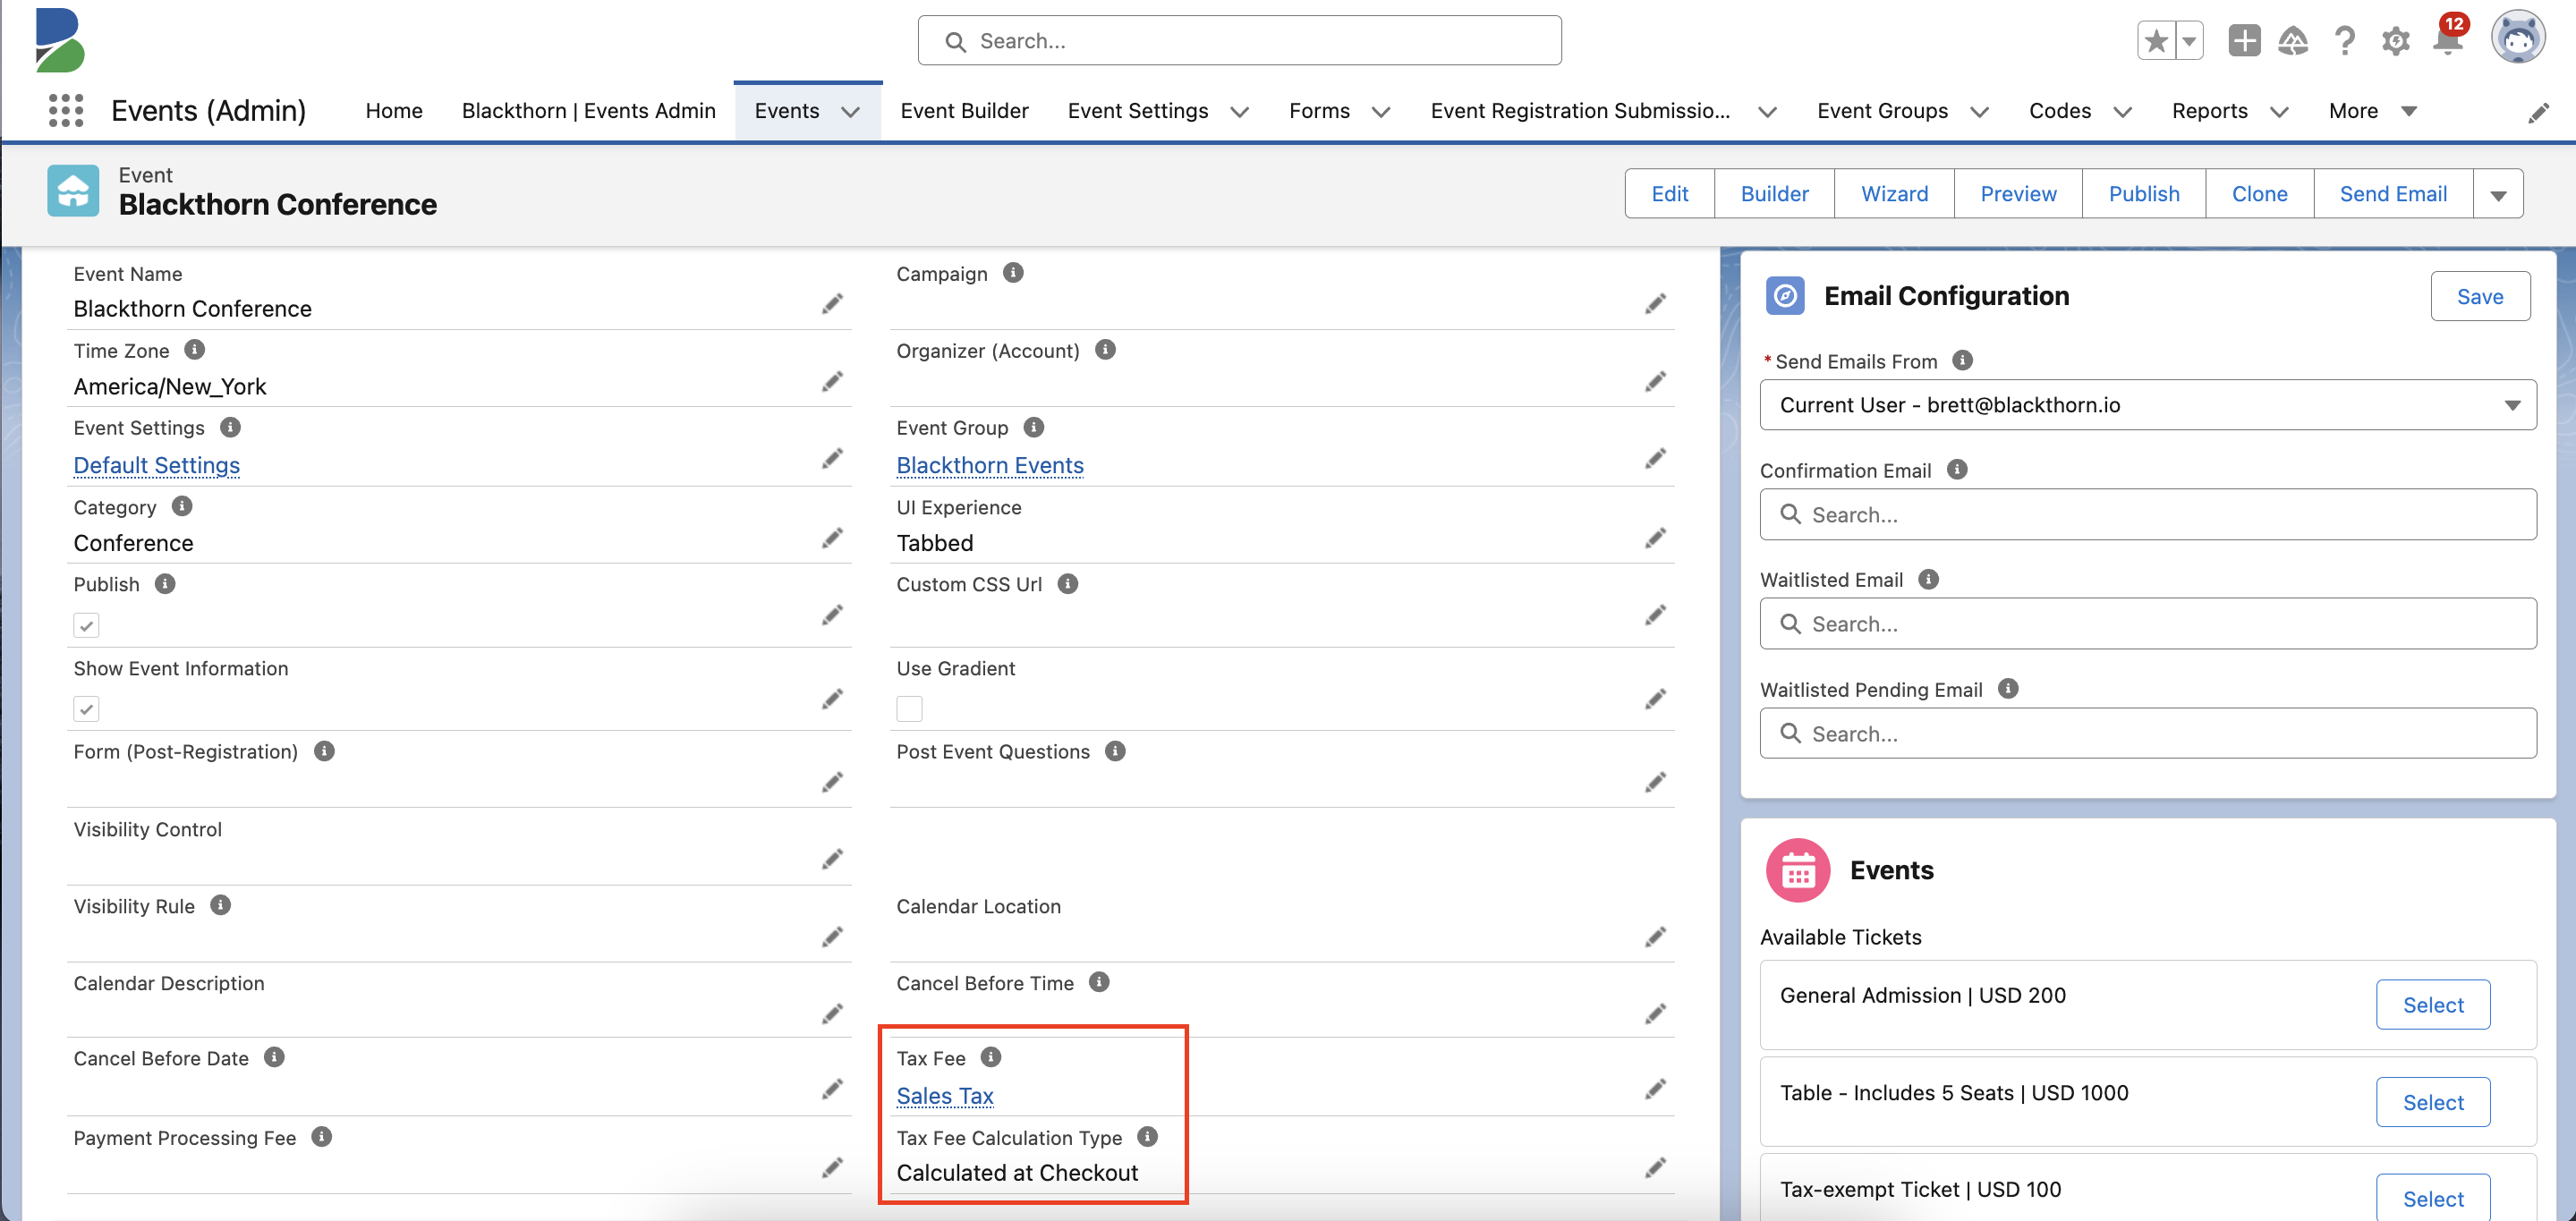
Go to the Event record.
Click the Pencil icon next to the Tax Fee field.
Search for an existing Fee or click + New Fee.
To create a new Fee record, complete the following fields.
Fee Name (required): IMPORTANT: This field will be displayed on checkout.
Default Fee - If you check the Default Fee box, all newly created Events will use this Fee for adding taxes.
Fee Percentage
Type = “Tax”
Tax Display Setting = "Calculated at Checkout" (The tax will not be shown until the final payment screen. Note: Taxes are always displayed separately on the final payment screen.)
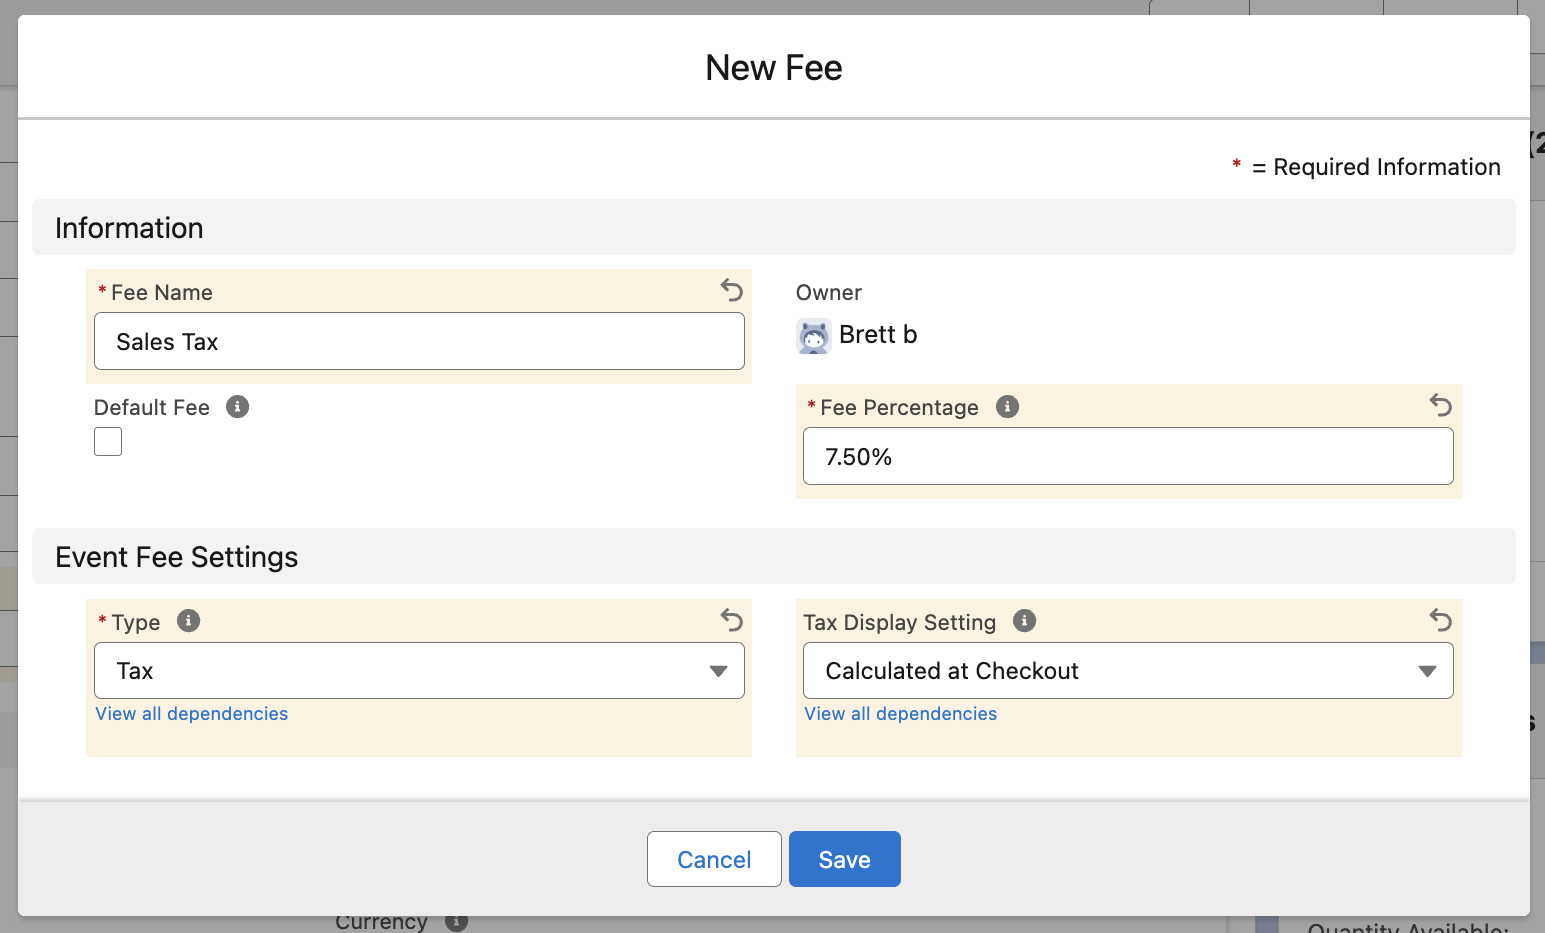
Click Save.

Click Save to save the changes to your Event.
Click Update to make sure the changes are published on the Event webpage.
What Your Attendee Will See
In this example, the Event Item’s Ticket Price = “200.00,” and the Fee record contains the following information.
Fee Name = “Sales Tax”
Type = “Tax”
Tax Display Setting = “Calculated at Checkout”
Fee Percentage = “7.5%”
Click the Event Page URL.
The “Starting from” price is based on the Ticket (Event Item) with the lowest Price, plus the tax due.
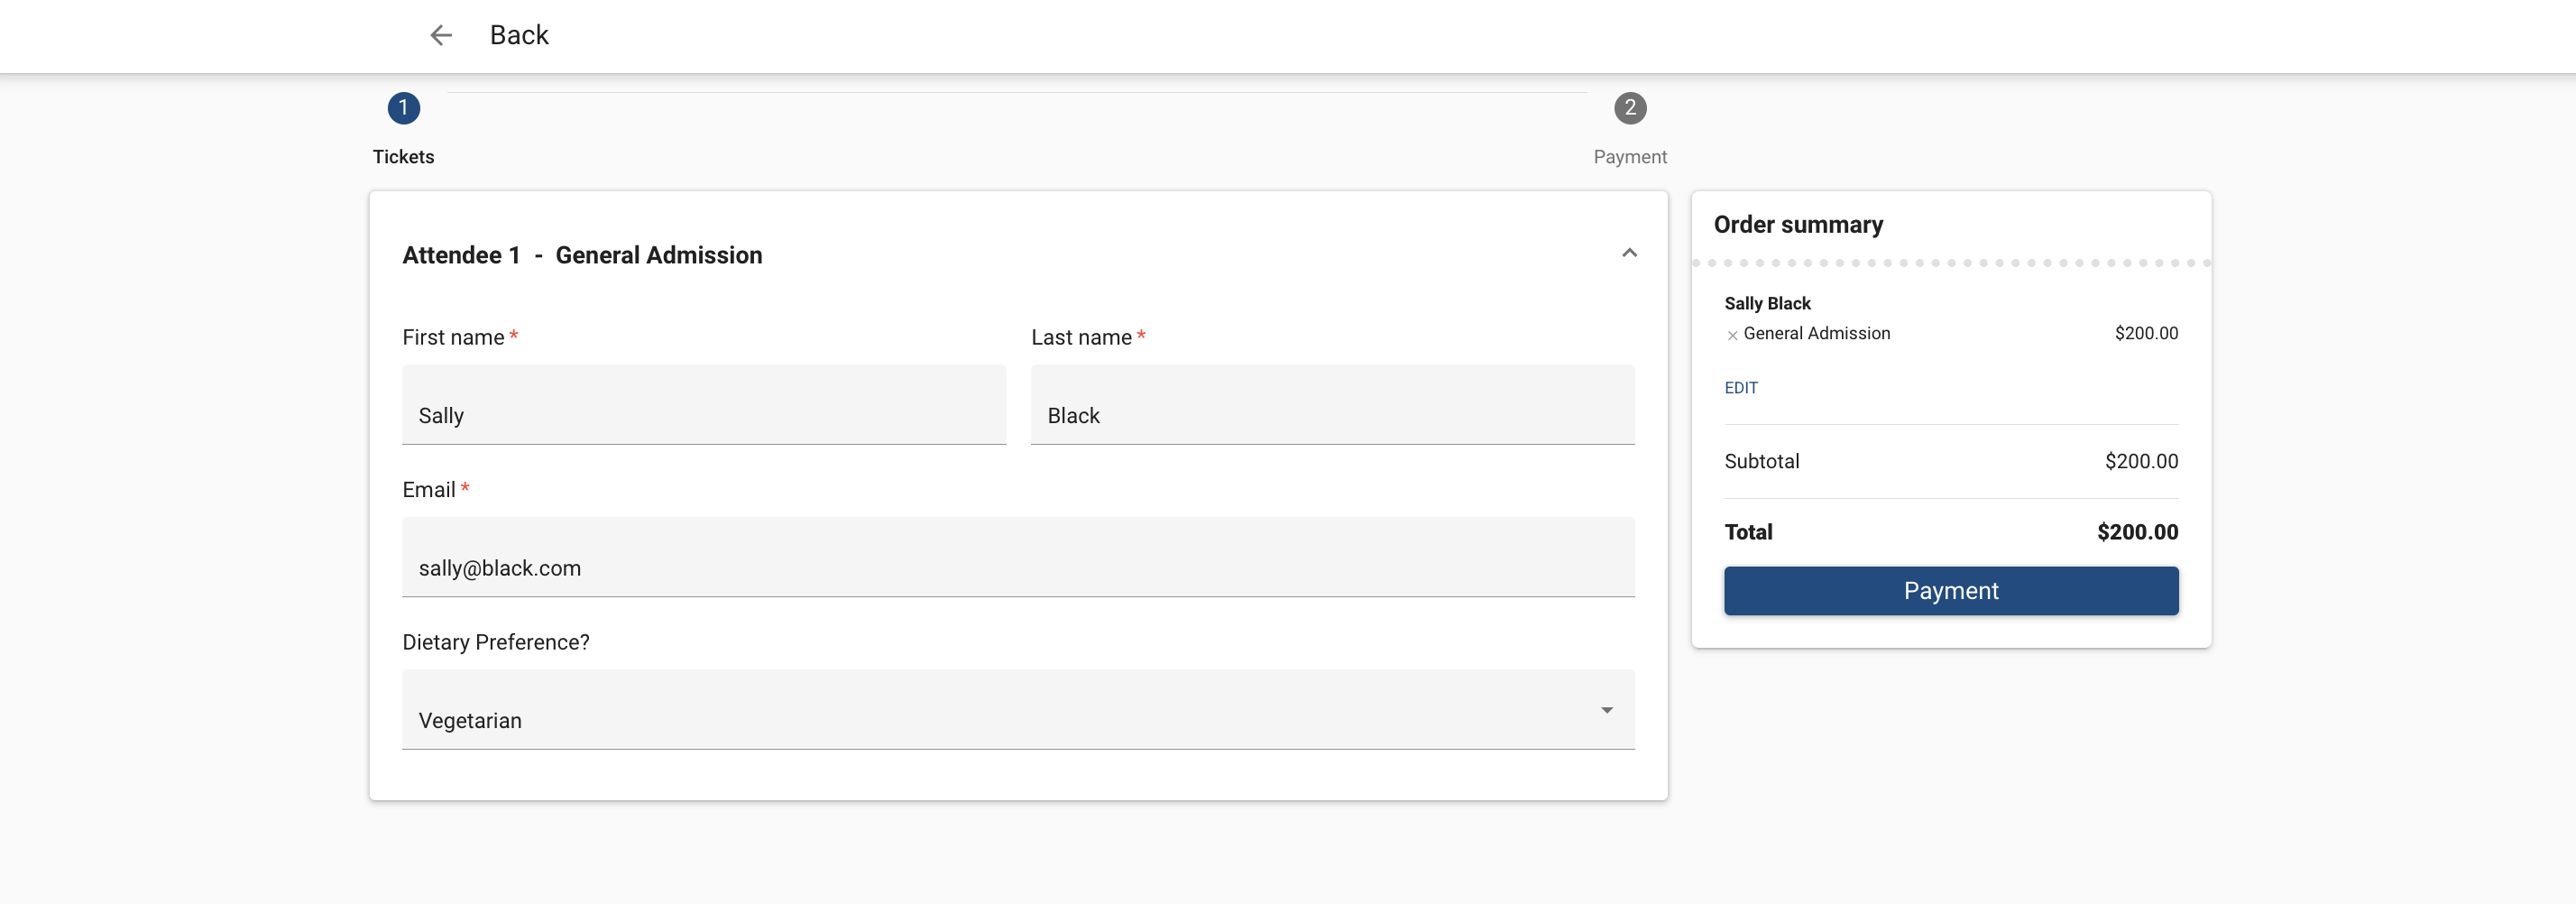
Click Get Tickets.

Add the General Admission Ticket to the cart and click Checkout.

Enter the Attendee details and click Payment.
Enter the payment details. In the Order Summary column, you'll see the cost breakdown.
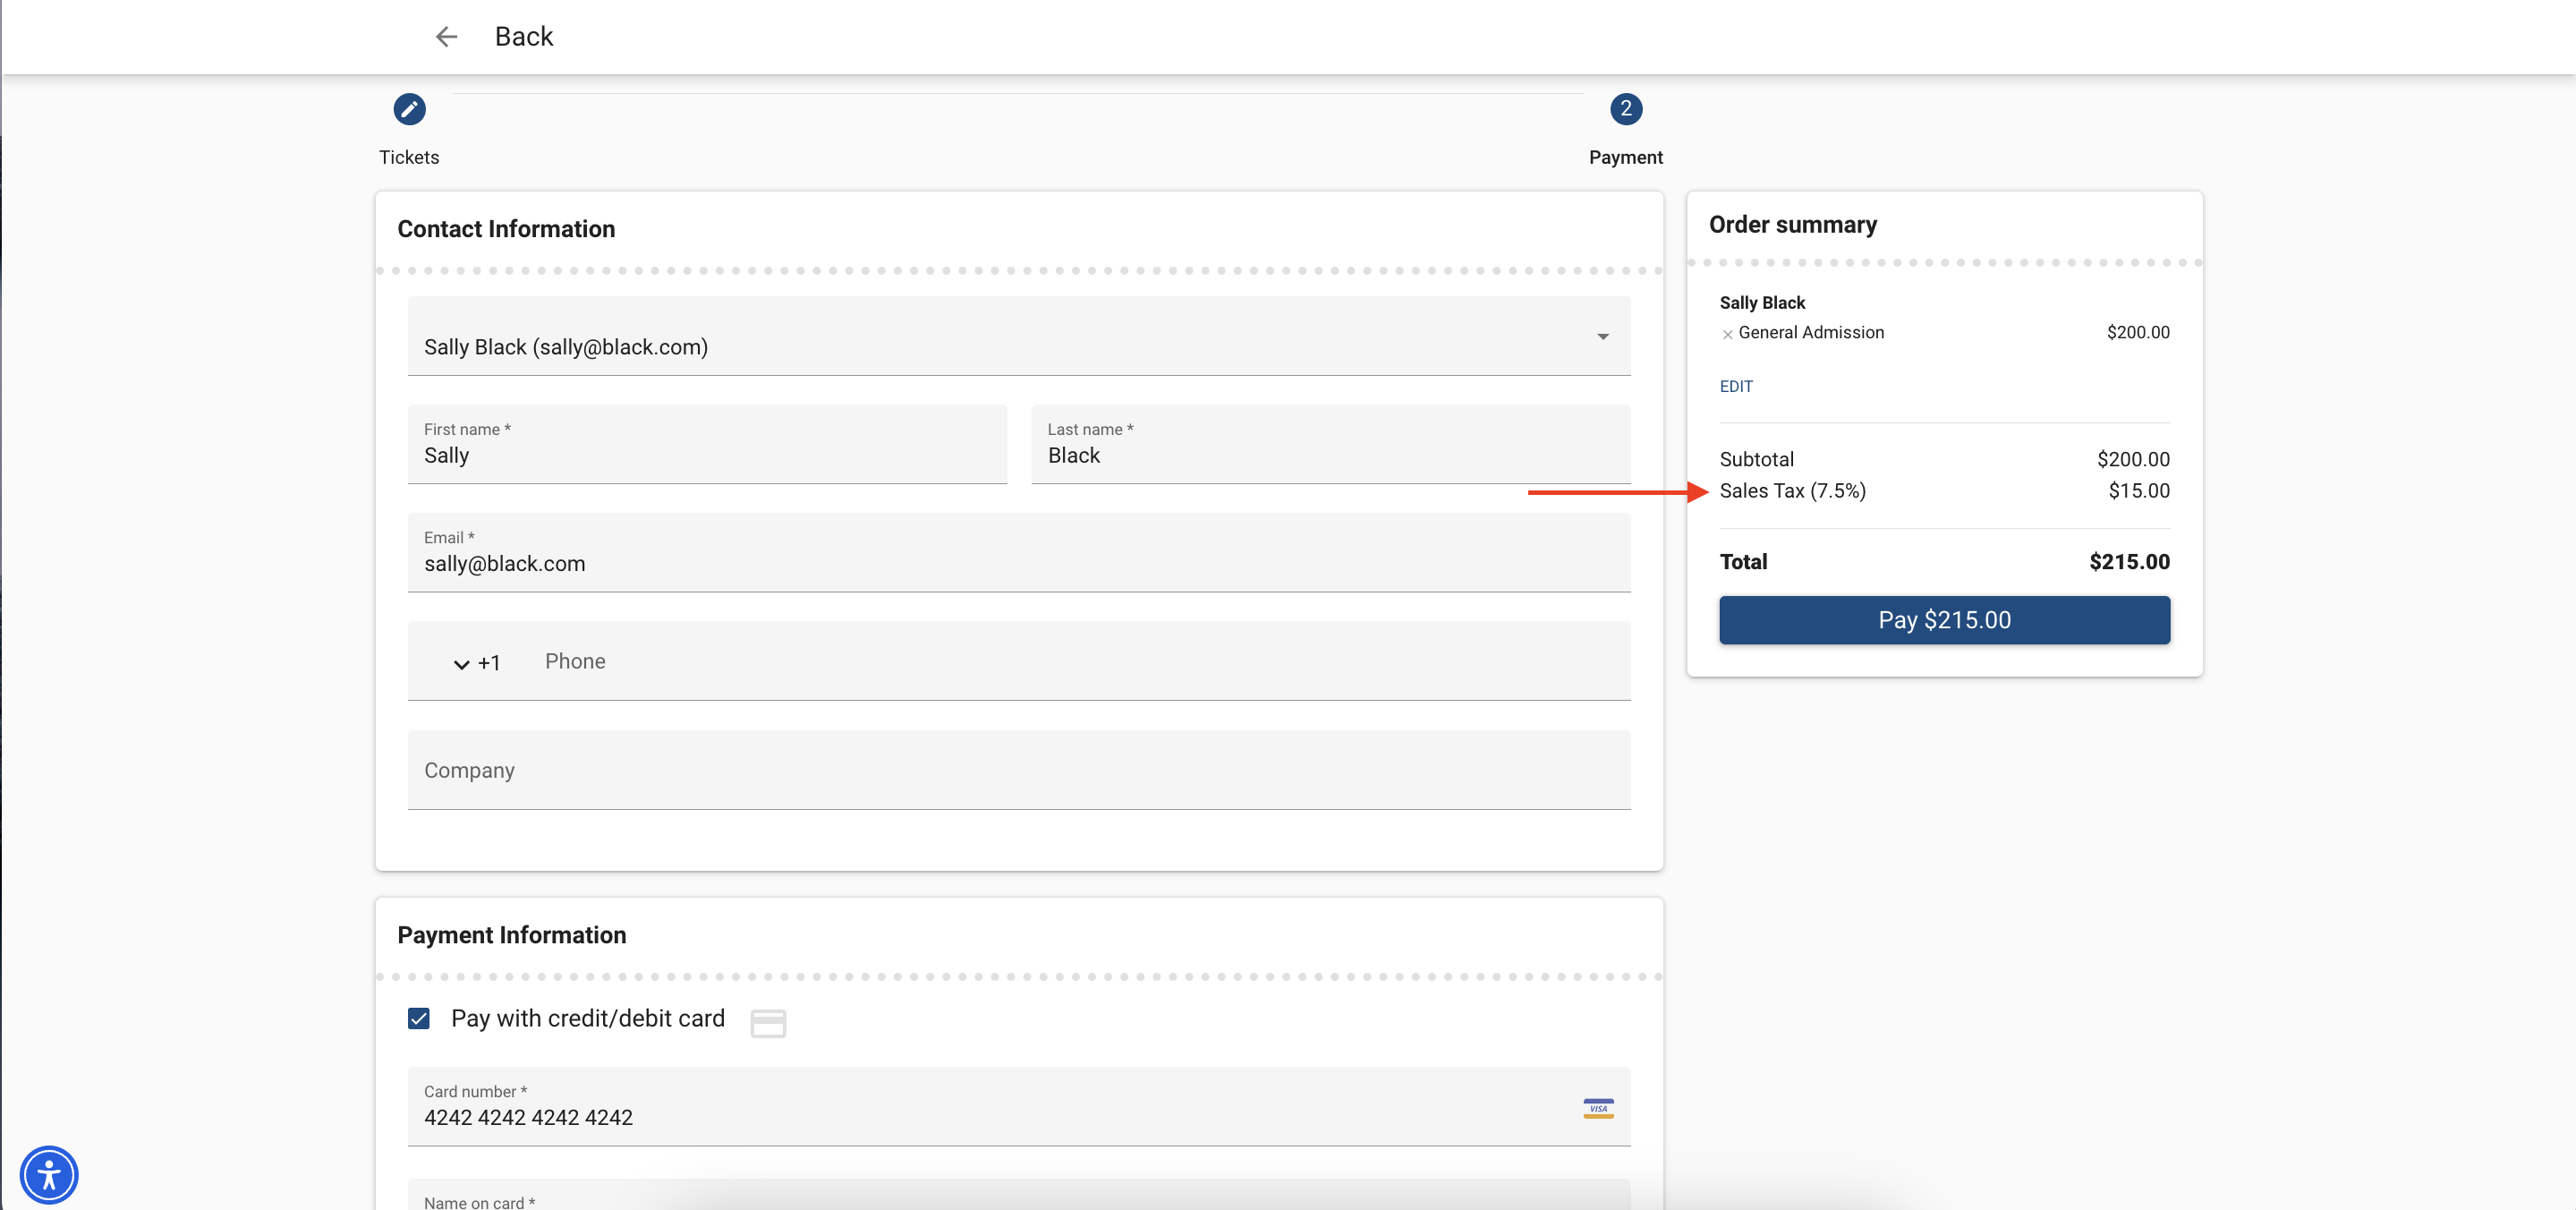
Click Pay.
Once the tax amount and payment have been processed, a Line Item will be created for the Fee and related to the Invoice. The Line Item will also be visible on the DocumentLink.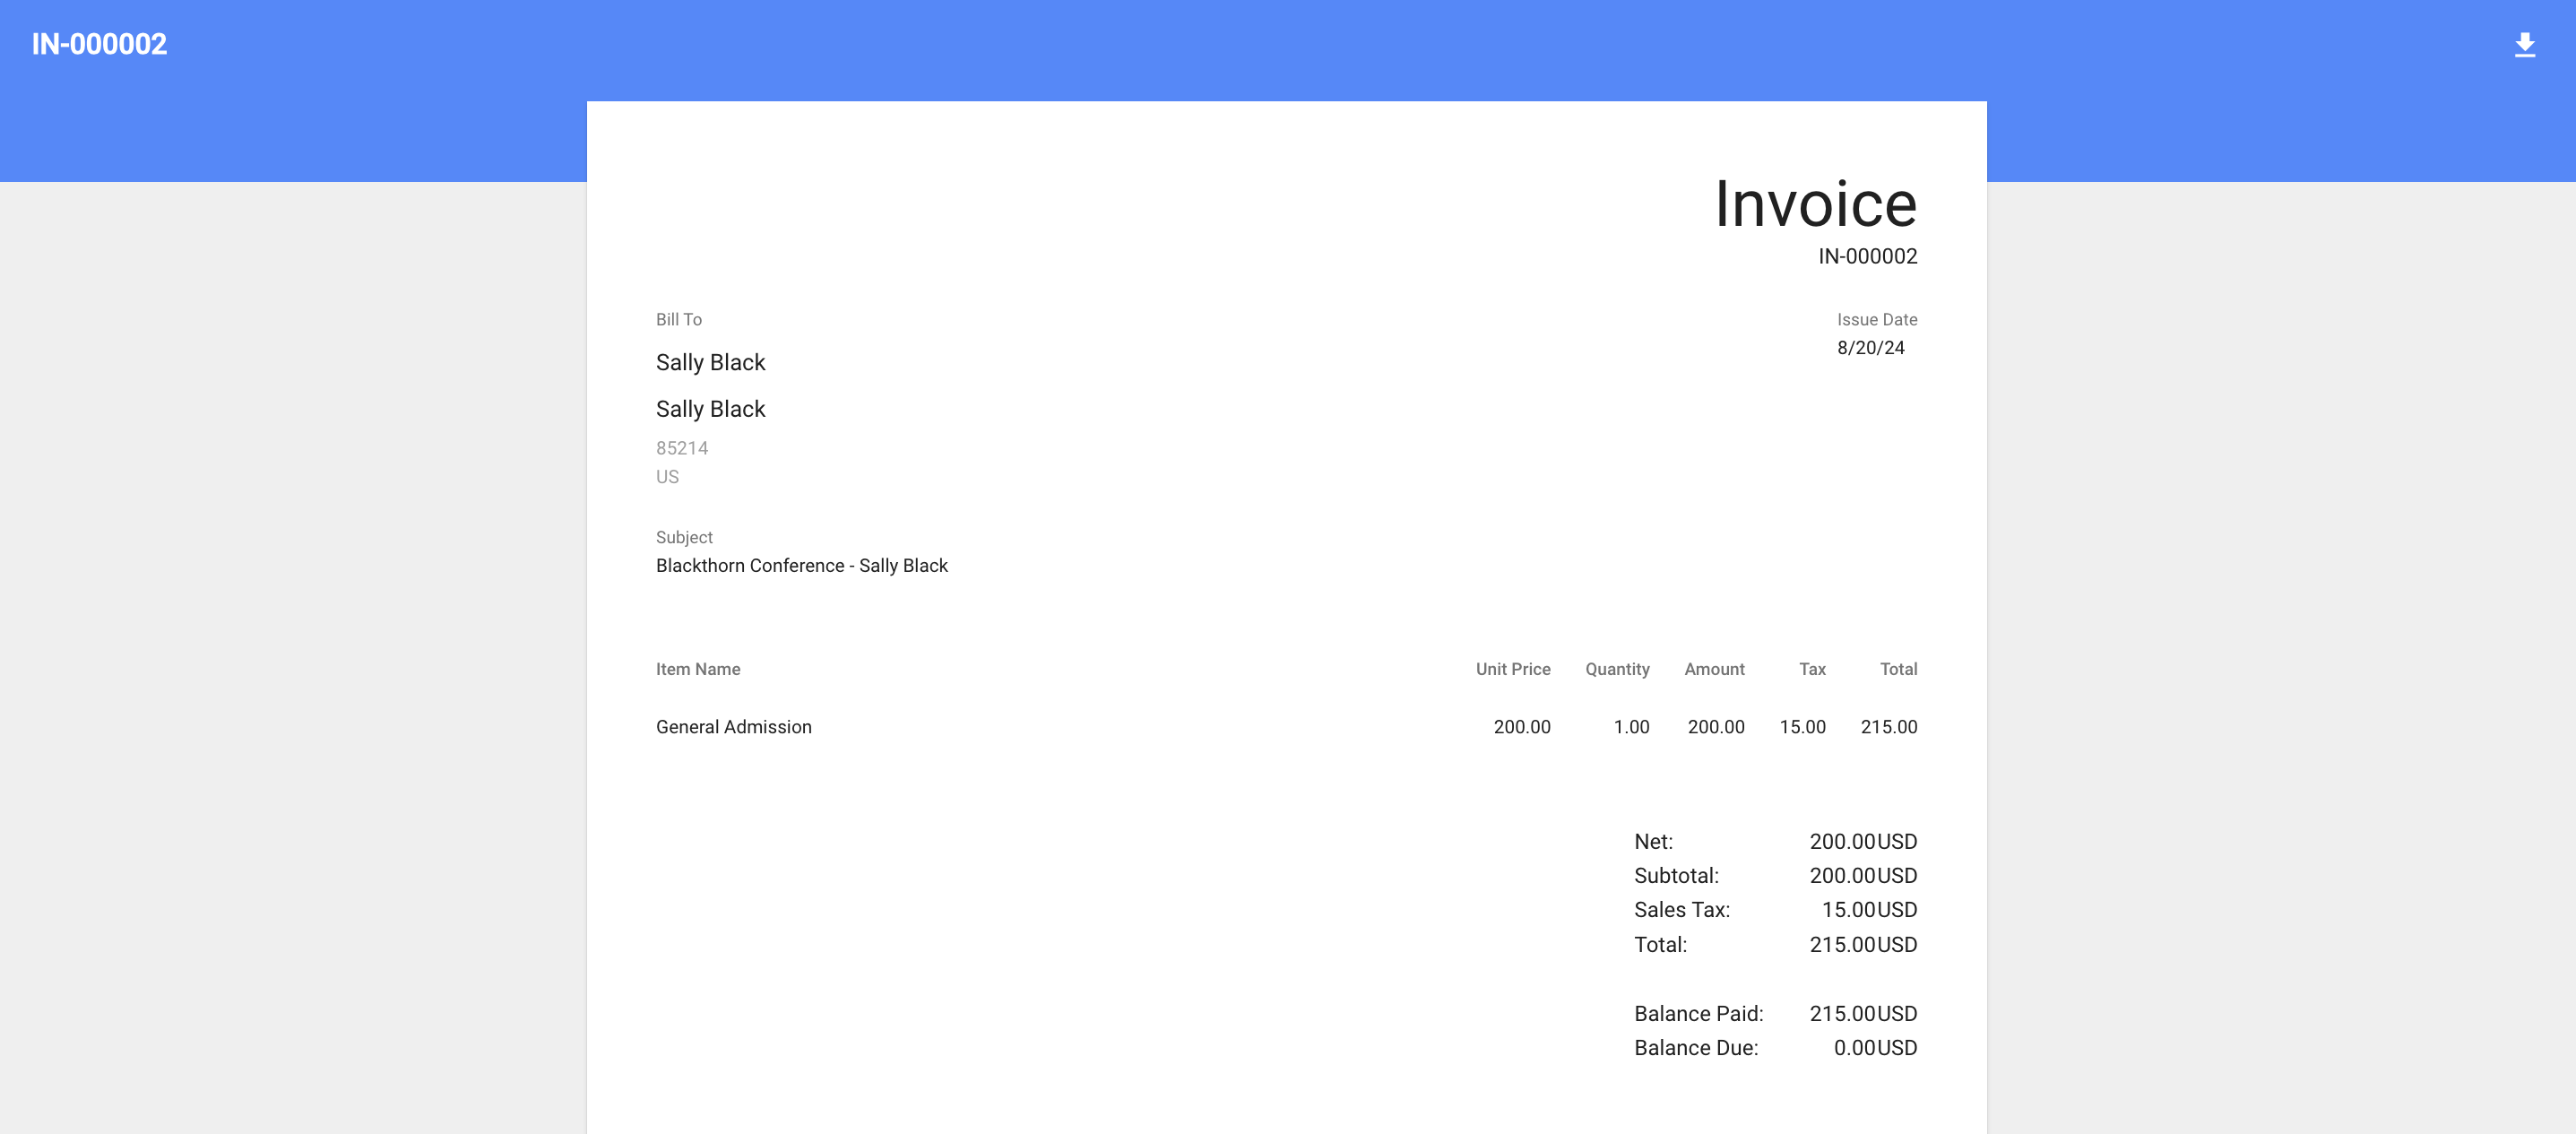
Tax-Inclusive Pricing
Go to the Event record.
Click the Pencil icon next to the Tax Fee field.
Search for an existing Fee or click + New Fee.
To create a new Fee record, complete the following fields.
Fee Name (required): IMPORTANT: This field will be displayed on checkout.
Default Fee - If you check the Default Fee box, all newly created Events will use this Fee for adding taxes.
Fee Percentage
Type = “Tax”
Tax Display Setting = "Tax-Inclusive Pricing" (The advertised price will include tax. Note: Taxes are always displayed separately on the final payment screen.)
Click Save.

Click Save to save the changes to your Event.
Click Update to make sure the changes are published on the Event webpage.

What Your Attendee Will See
In this example, the Event Item’s Ticket Price = “200.00,” and the Fee record contains the following information.
Fee Name = “State Sales Tax”
Type = “Tax”
Tax Display Setting = “Tax-Inclusive Pricing”
Fee Percentage = “3.5%”
Click the Event Page URL.
The “Starting from” price is based on the Ticket (Event Item) with the lowest Price, plus the tax due.
Click Get Tickets.
Add the General Admission Ticket to the cart and click Checkout.
Enter the Attendee details and click Payment.

Enter the payment details. In the Order Summary column, you'll see the cost breakdown.
Click Pay.
Once the tax amount and payment have been processed, a Line Item will be created for the Fee and related to the Invoice. The Line Item will also be visible on the DocumentLink.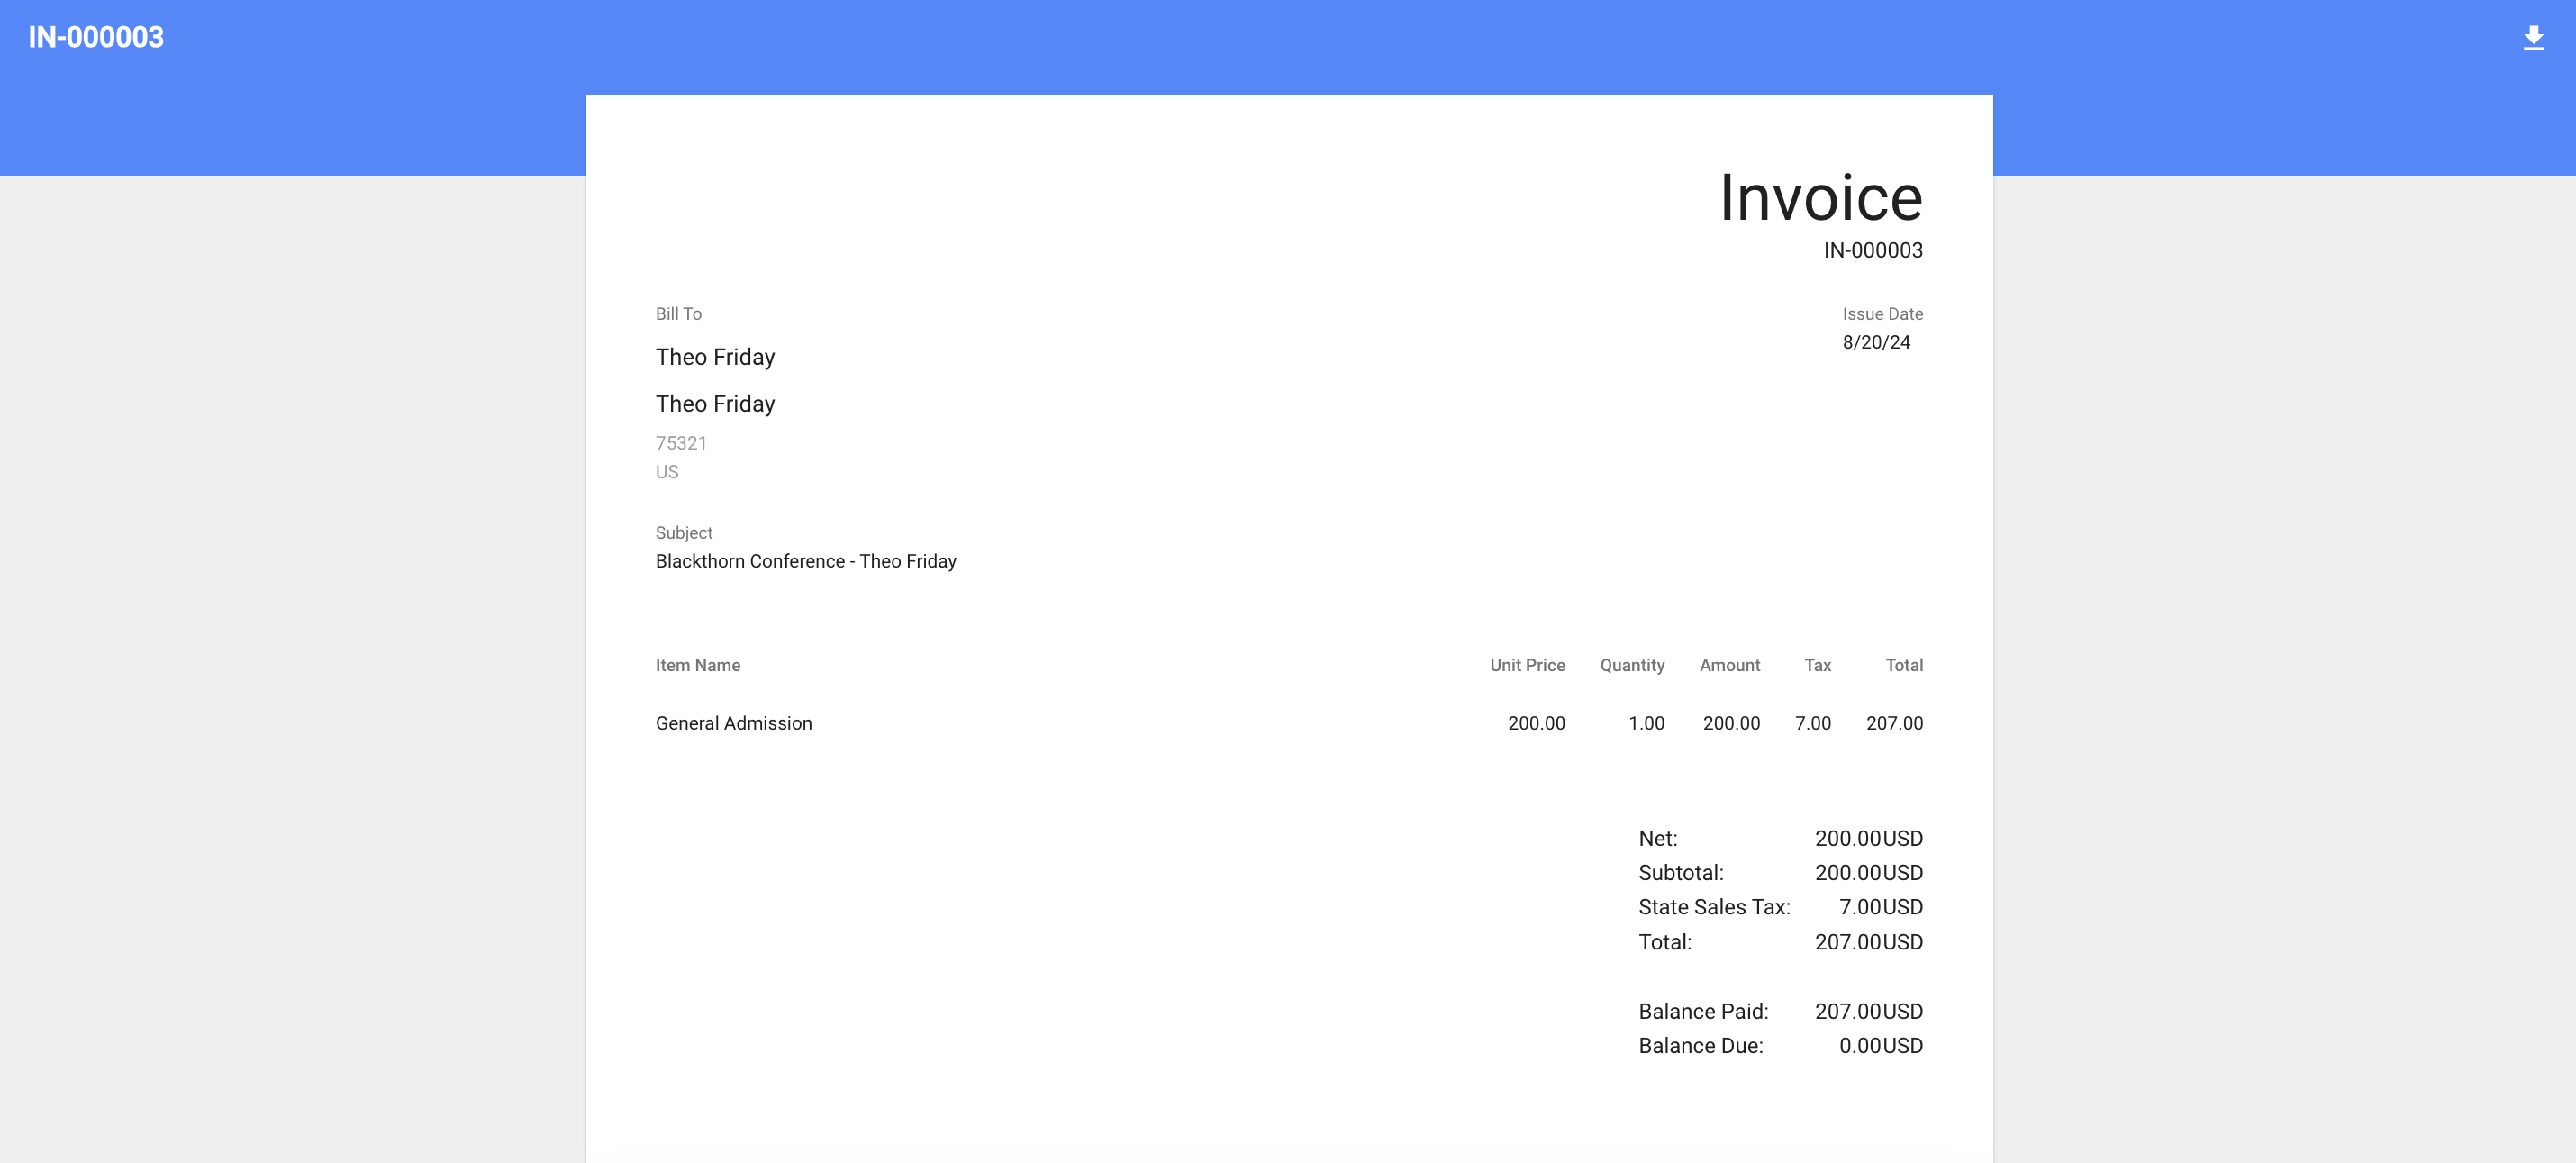
Tax-Exempt Event Items
In the following examples, you will see an Event with two Event Items, but one of the Event Items is tax-exempt.
Tax - Calculated at Checkout
Create an Event with two Event Items, but one of the Event Items is tax-exempt.
Go to the Event record.
Click the Pencil icon next to the Tax Fee field.
Search for an existing Fee or click + New Fee.
To create a new Fee record, complete the following fields.
Fee Name (required): IMPORTANT: This field will be displayed on checkout.
Fee Percentage
Default Fee - If you check the Default Fee box, all newly created Events will use this Fee for adding taxes.
Type = “Tax”
Tax Display Setting - "Calculated at Checkout" (The tax will not be shown until the final payment screen. Note: Taxes are always displayed separately on the final payment screen.)
Click Save.
Click Save to save the changes to your Event.
Click Update to make sure the changes are published on the Event webpage.
What Your Attendees Will See
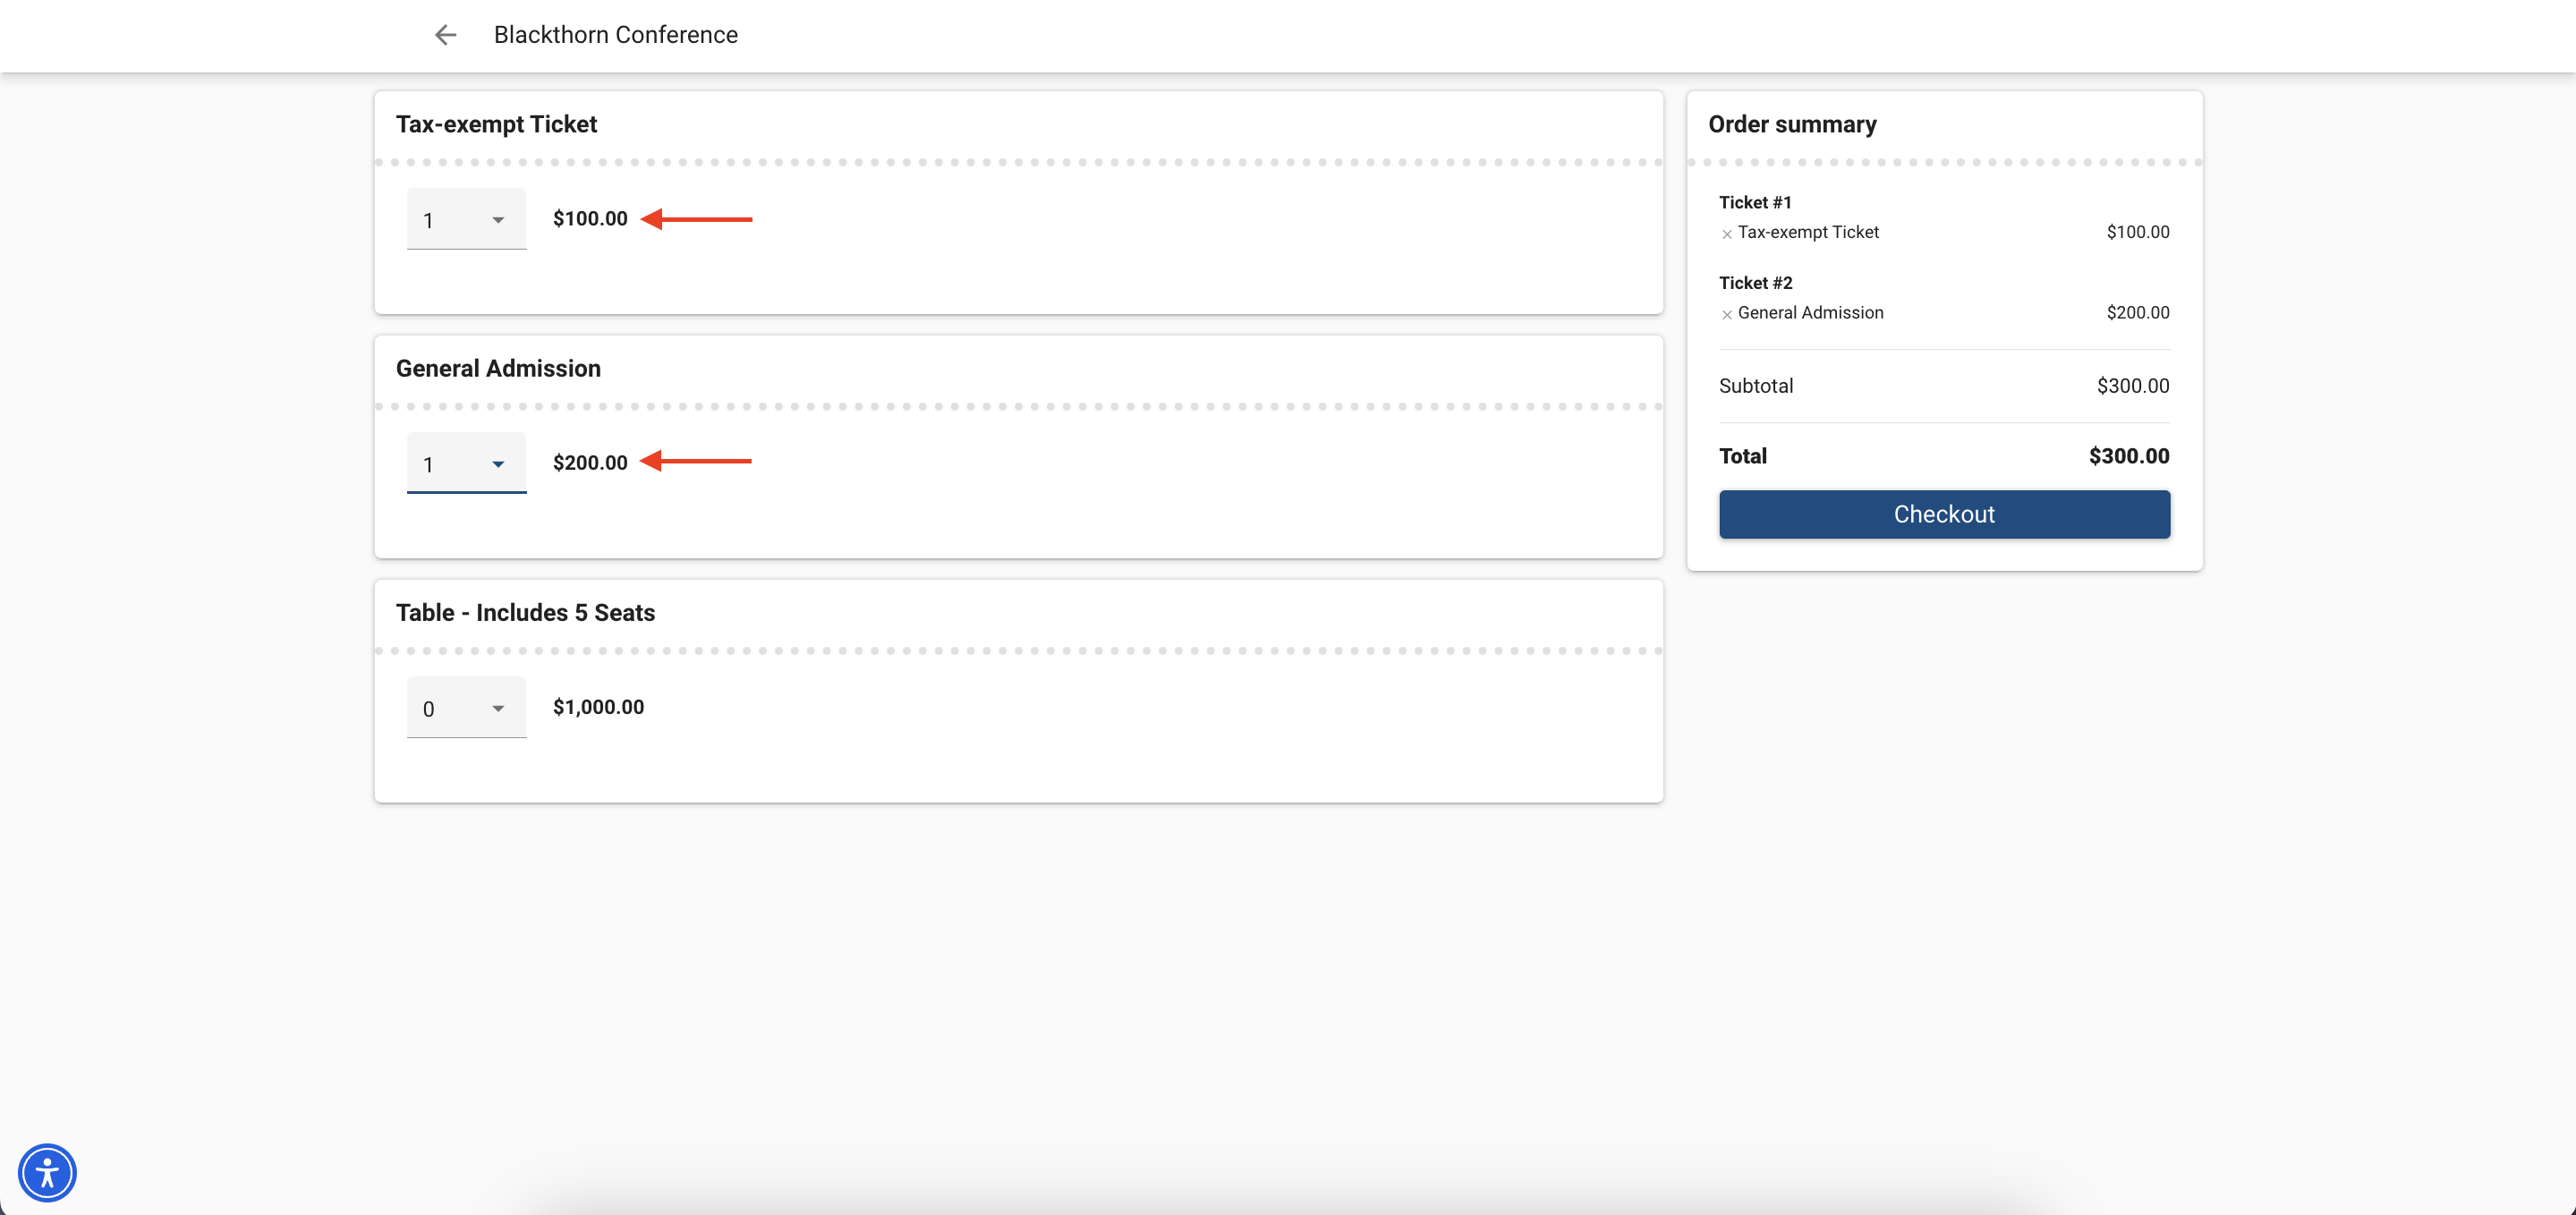
In this example, the first Event Item’s Ticket Price = “200.00,” the second tax-exempt Event Item’s Price = “100.00,” and the Fee record contains the following information.
Fee Name = “Sales Tax”
Type = “Tax”
Tax Display Setting = “Calculated at Checkout”
Fee Percentage = “7.50%”
Click the Event Page URL.
The “Starting from” price is based on the Event Item with the lowest Price.
Click Get Tickets.

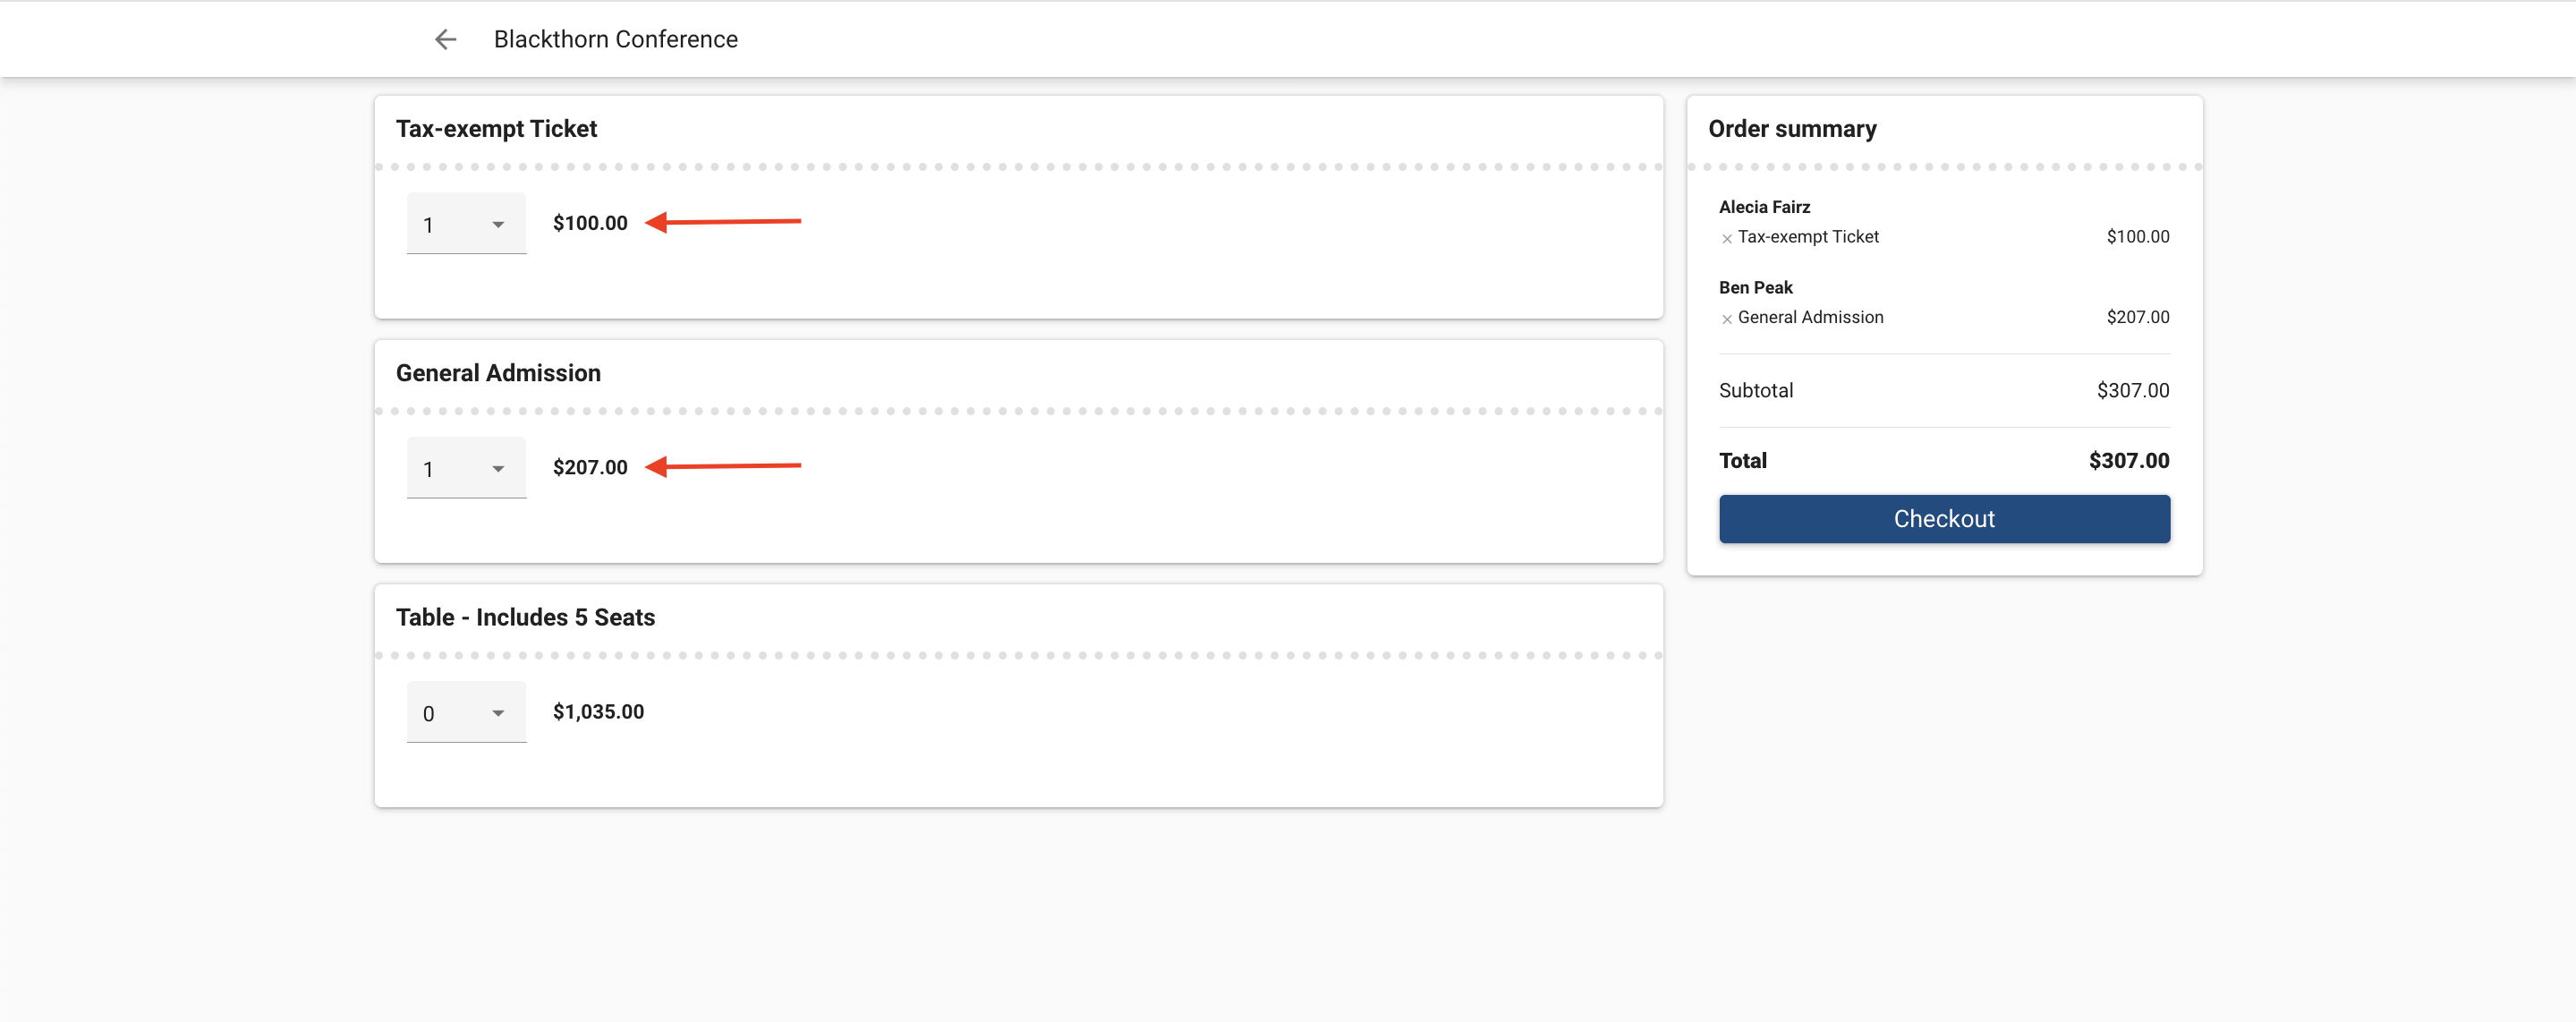
Add the General Admissions Ticket to the cart and click Checkout.
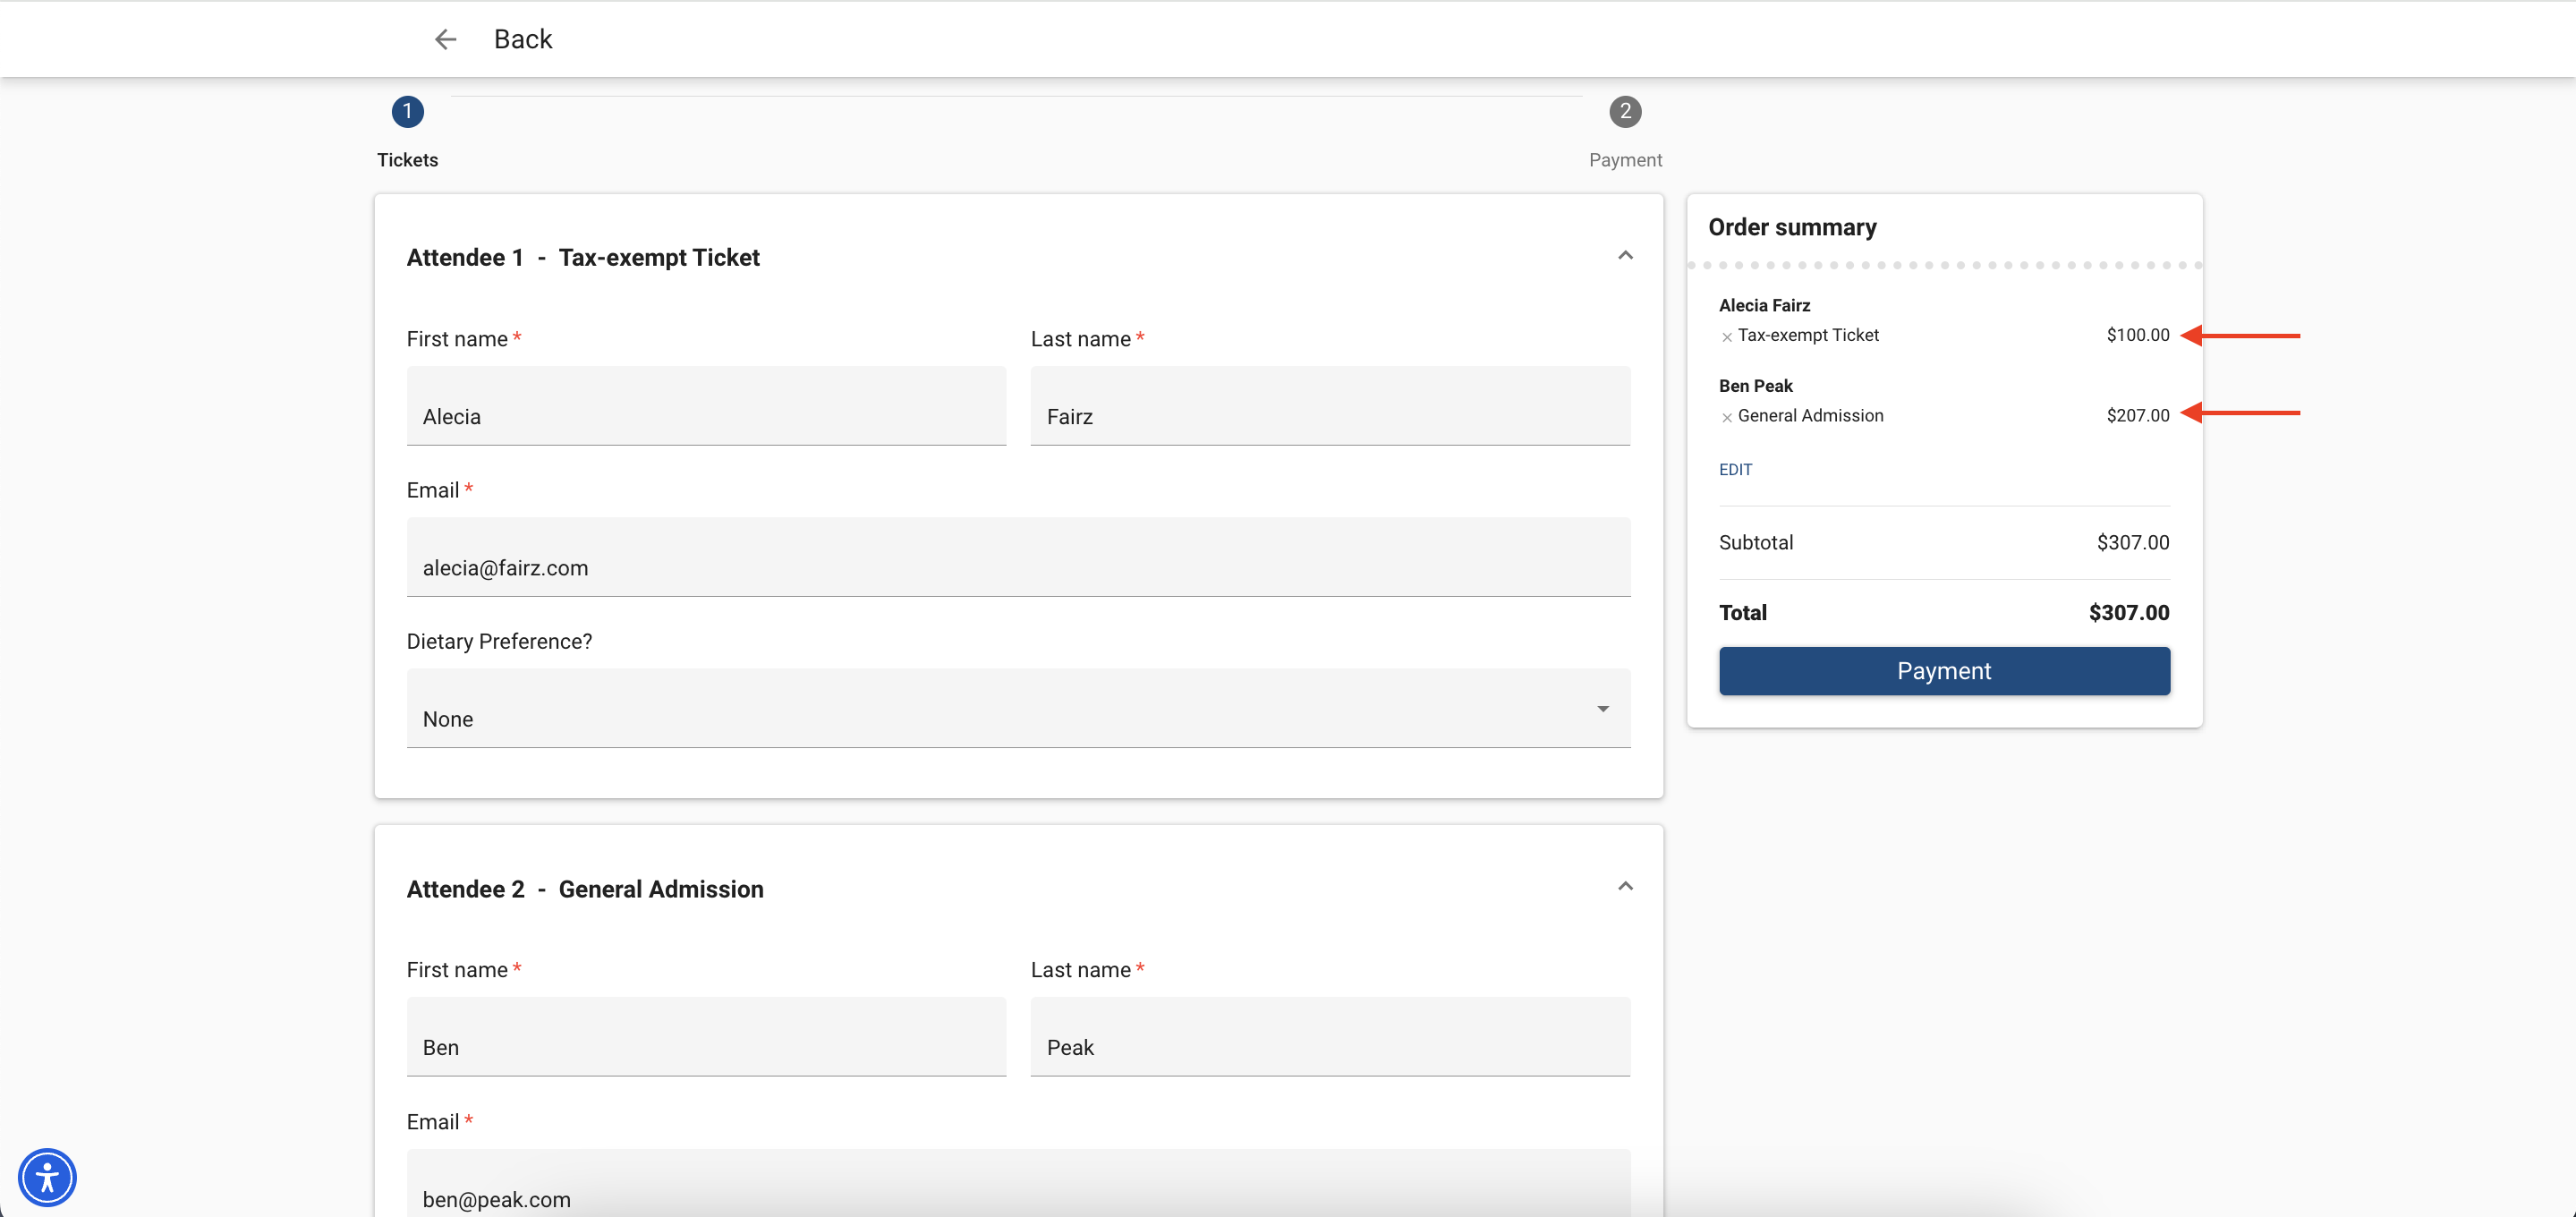
Fill in the Attendee details and click Payment.

Enter the payment details. In the Summary column, you’ll see the cost breakdown.

Click Pay.
Once the credit card processing fee and payment have been processed during checkout, a Line Item will be created for the Fee and related to the Invoice. The Line Item will also be visible on the DocumentLink.
Tax - Tax-inclusive Pricing
Create an Event with two Event Items, but one of the Event Items is tax-exempt.
Go to the Event record.
Click the Pencil icon next to the Tax Fee field.
Search for an existing Fee or click + New Fee.
To create a new Fee record, complete the following fields.
Fee Name (required): IMPORTANT: This field will be displayed on checkout.
Default Fee - If you check the Default Fee box, all newly created Events will use this Fee for adding taxes.
Fee Percentage
Type = “Tax”
Tax Display Setting = "Tax-Inclusive Pricing" (The advertised price will include tax. Note: Taxes are always displayed separately on the final payment screen.)
Click Save.
Click Save to save the changes to your Event.
Click Update to make sure the changes are published on the Event webpage.
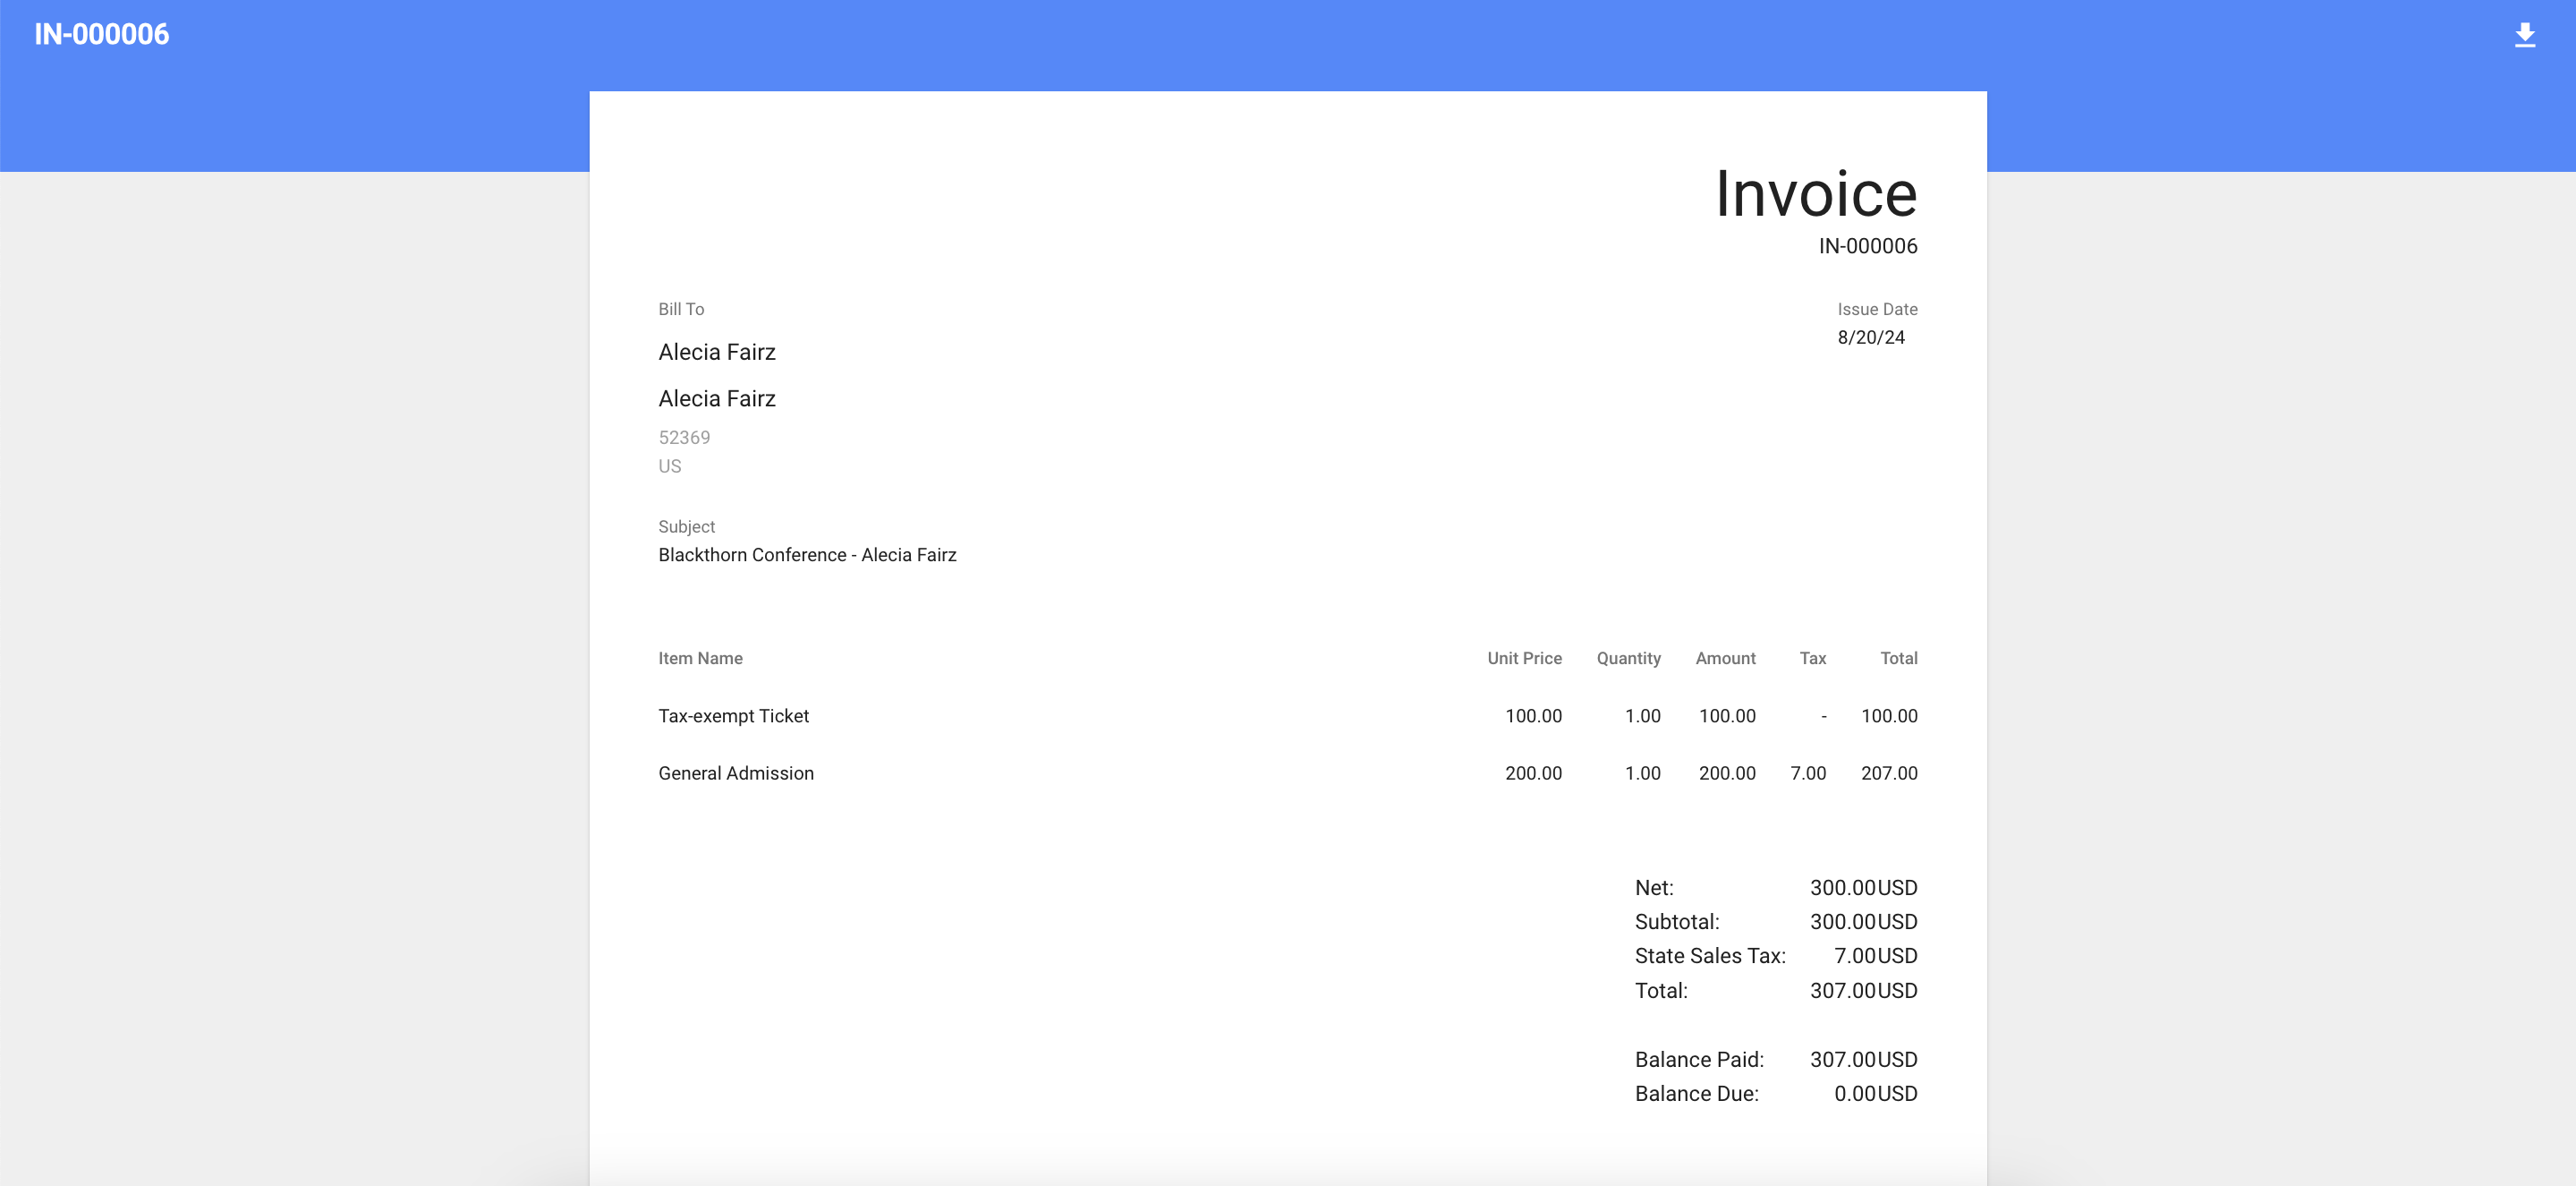
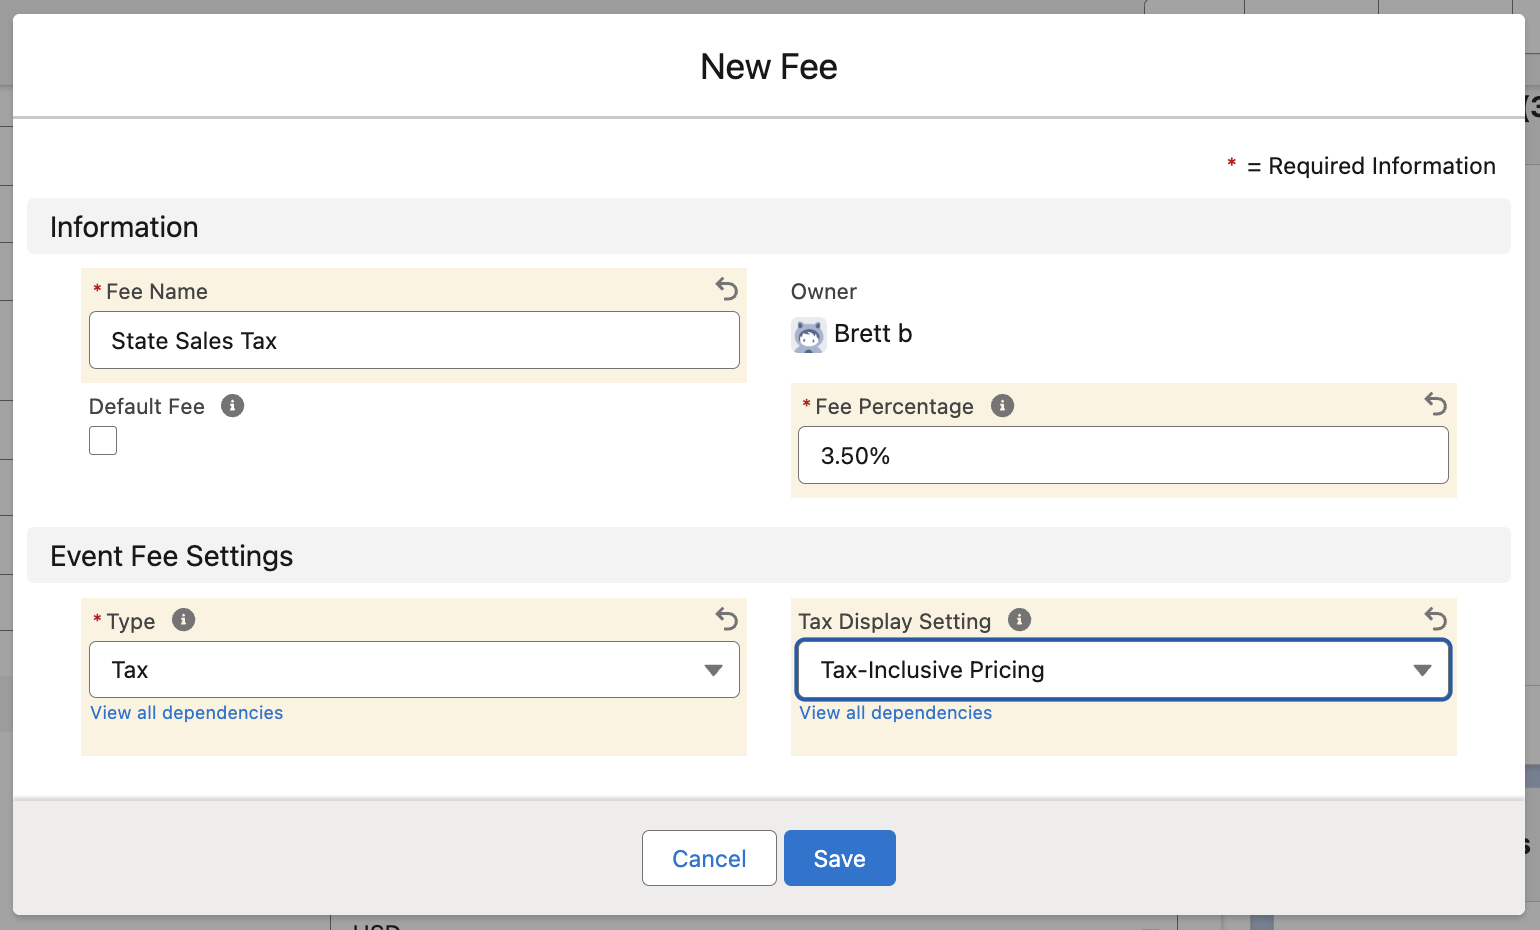
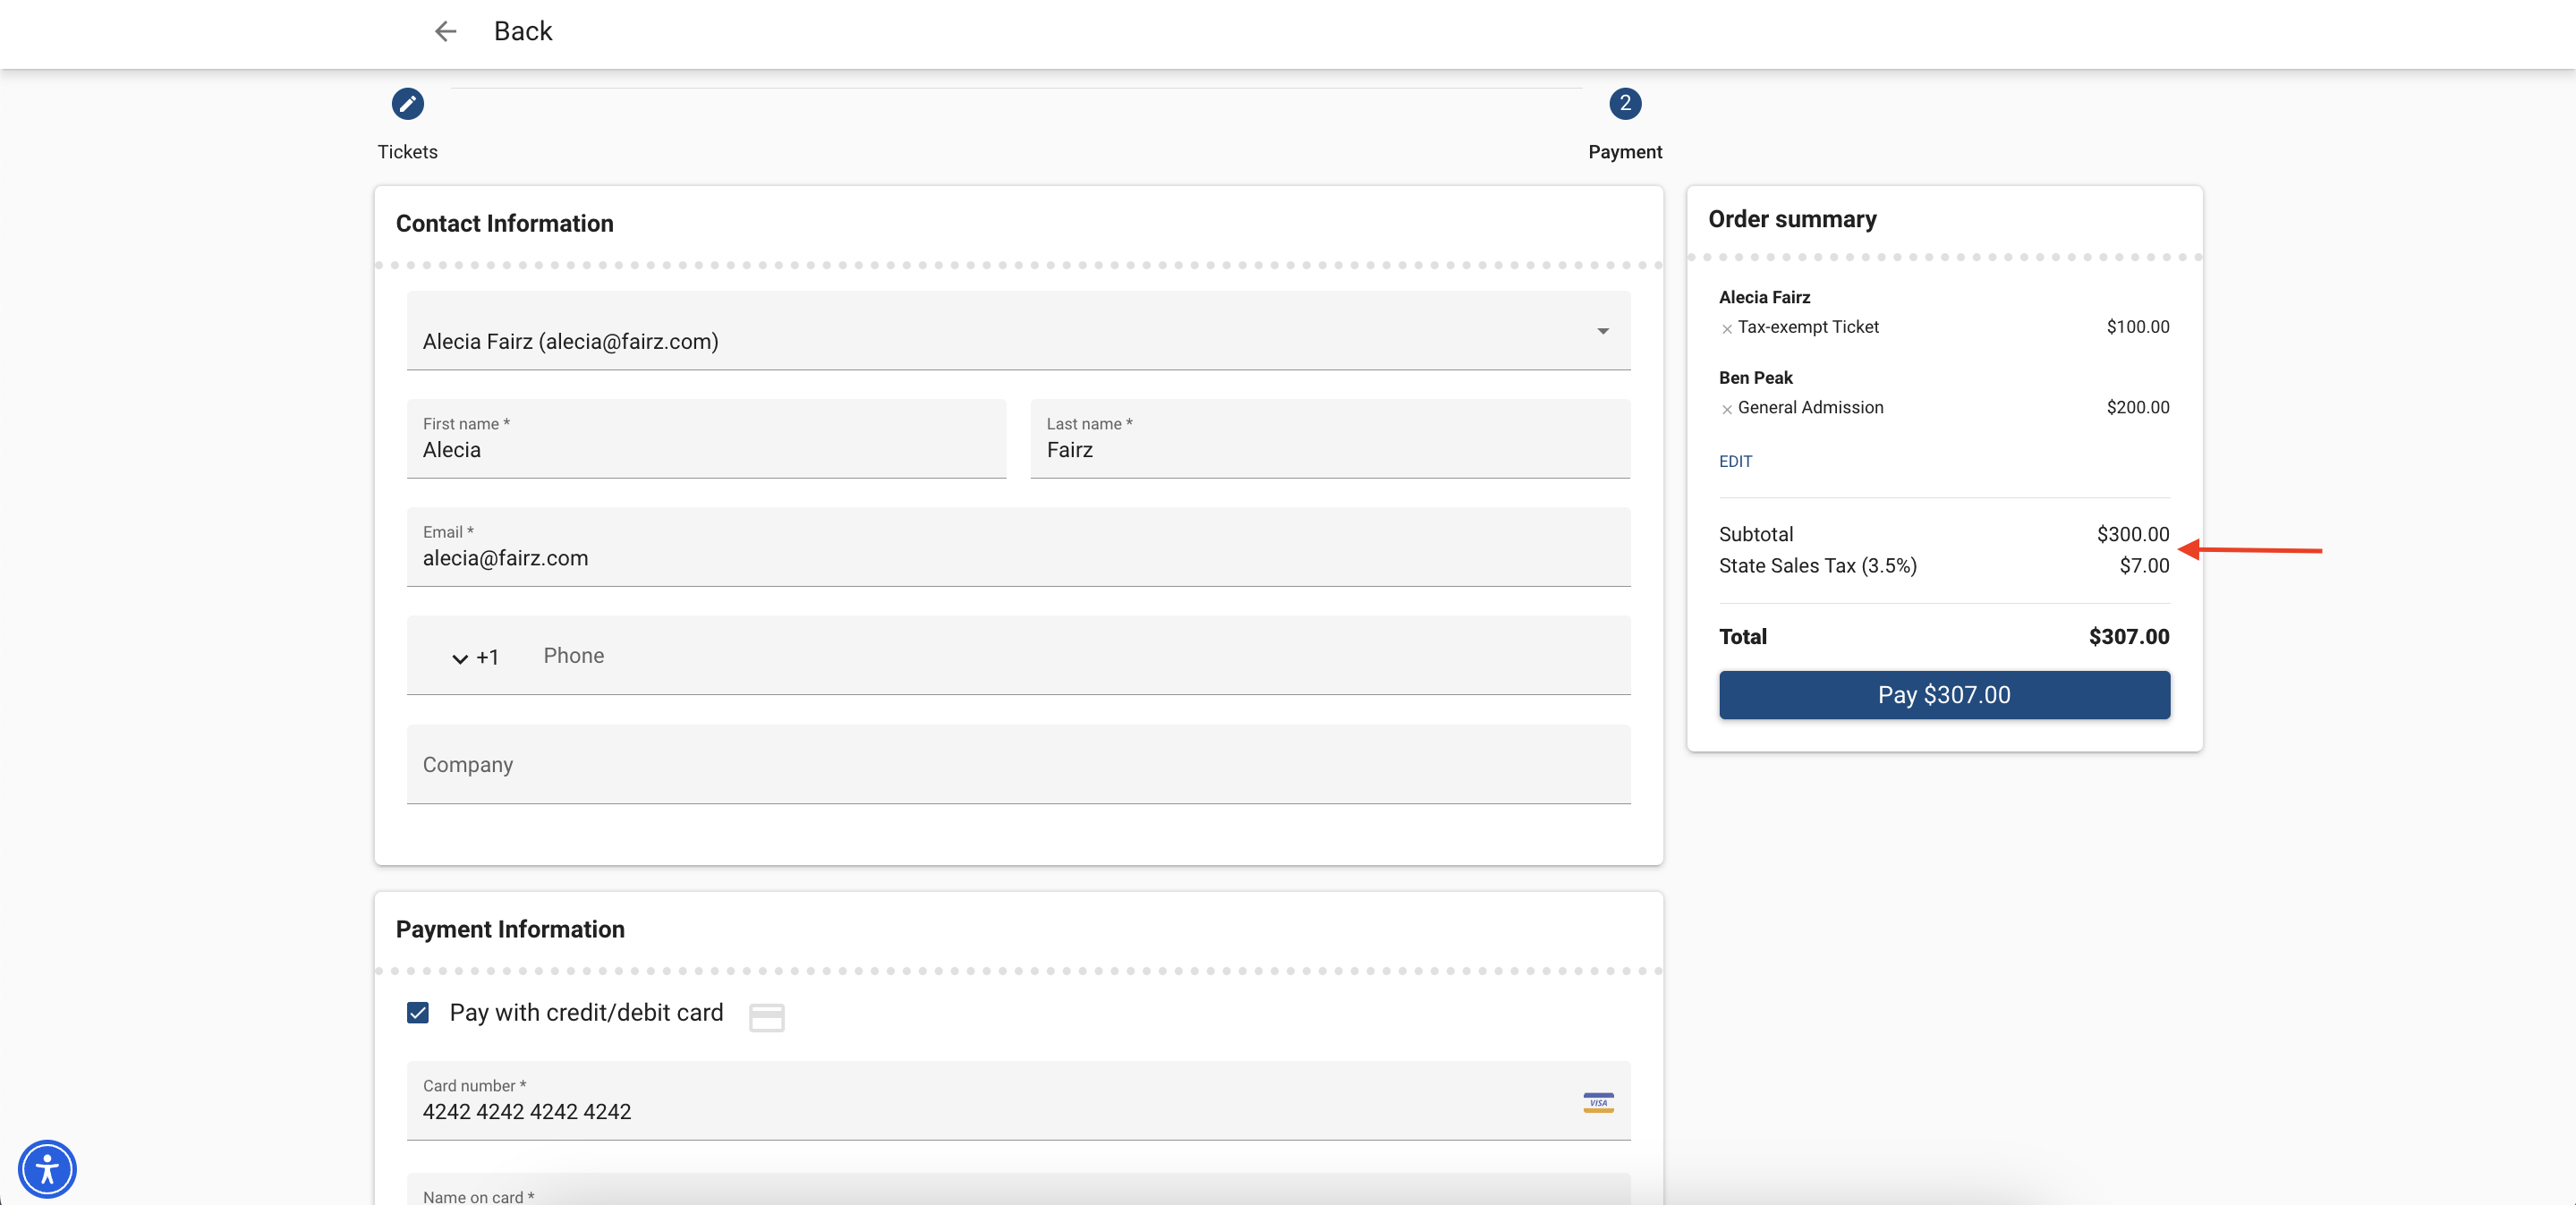
What Your Attendees Will See
In this example, the first Event Item’s Ticket Price = “200.00,” the second tax-exempt Event Item’s Price = “100.00,” and the Fee record contains the following information.
Fee Name = “State Sales Tax”
Type = “Tax”
Tax Display Setting = “Tax-Inclusive Pricing”
Fee Percentage = “3.50%”
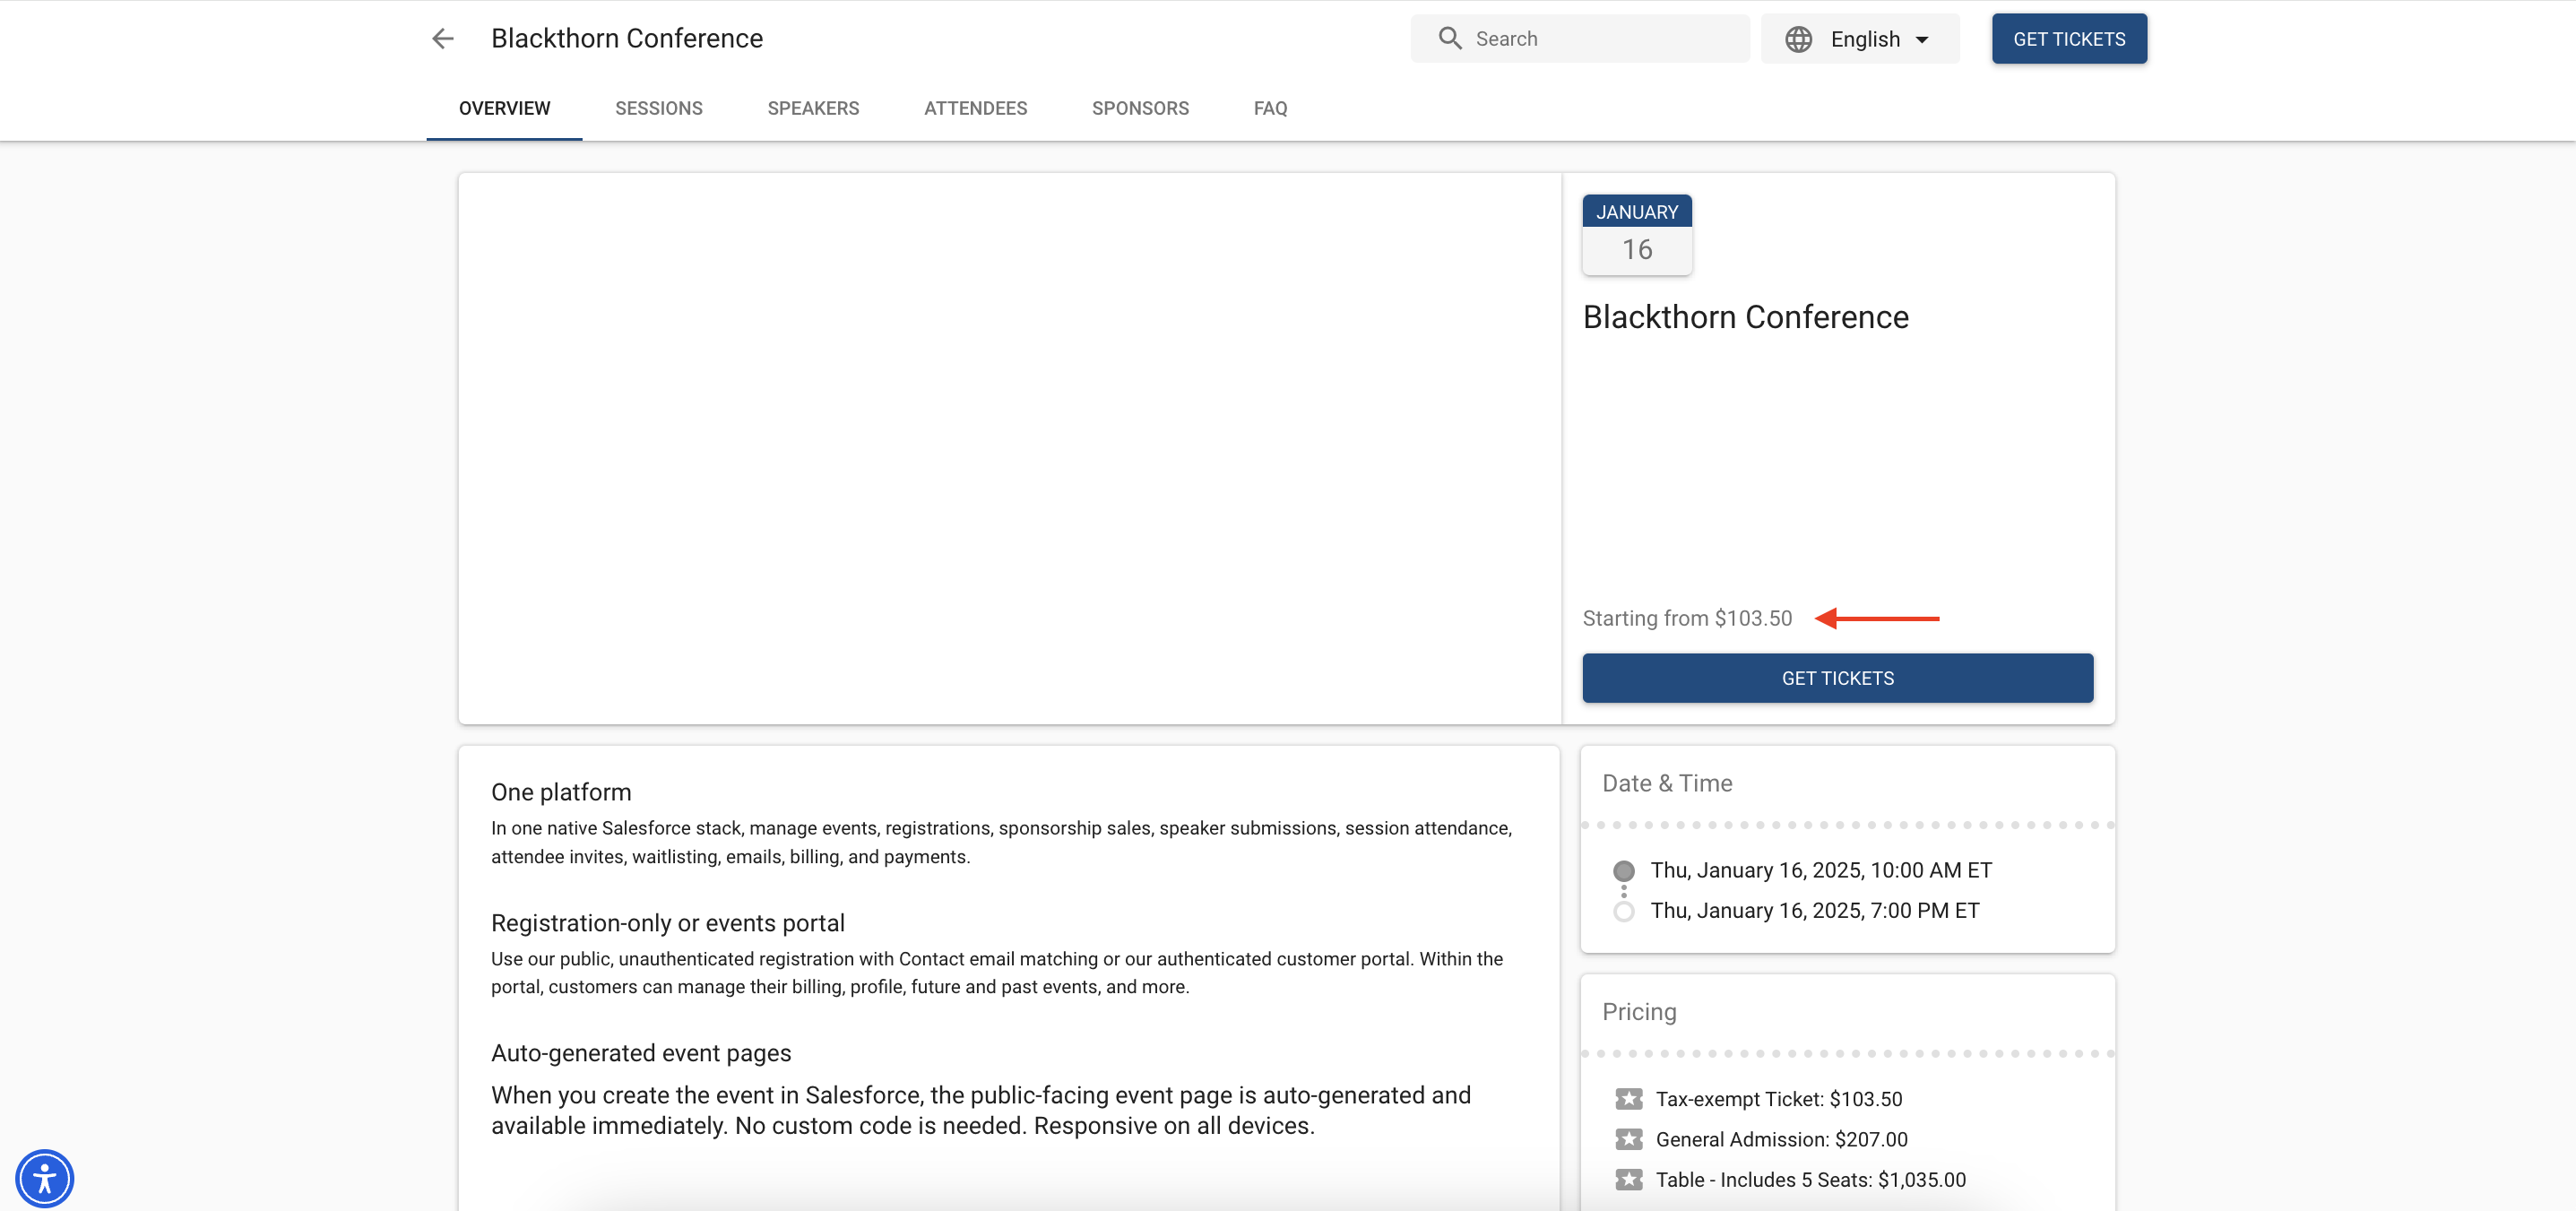
Click the Event Page URL.
The “Starting from” price is based on the Event Item with the lowest Price.
Click Get Tickets.

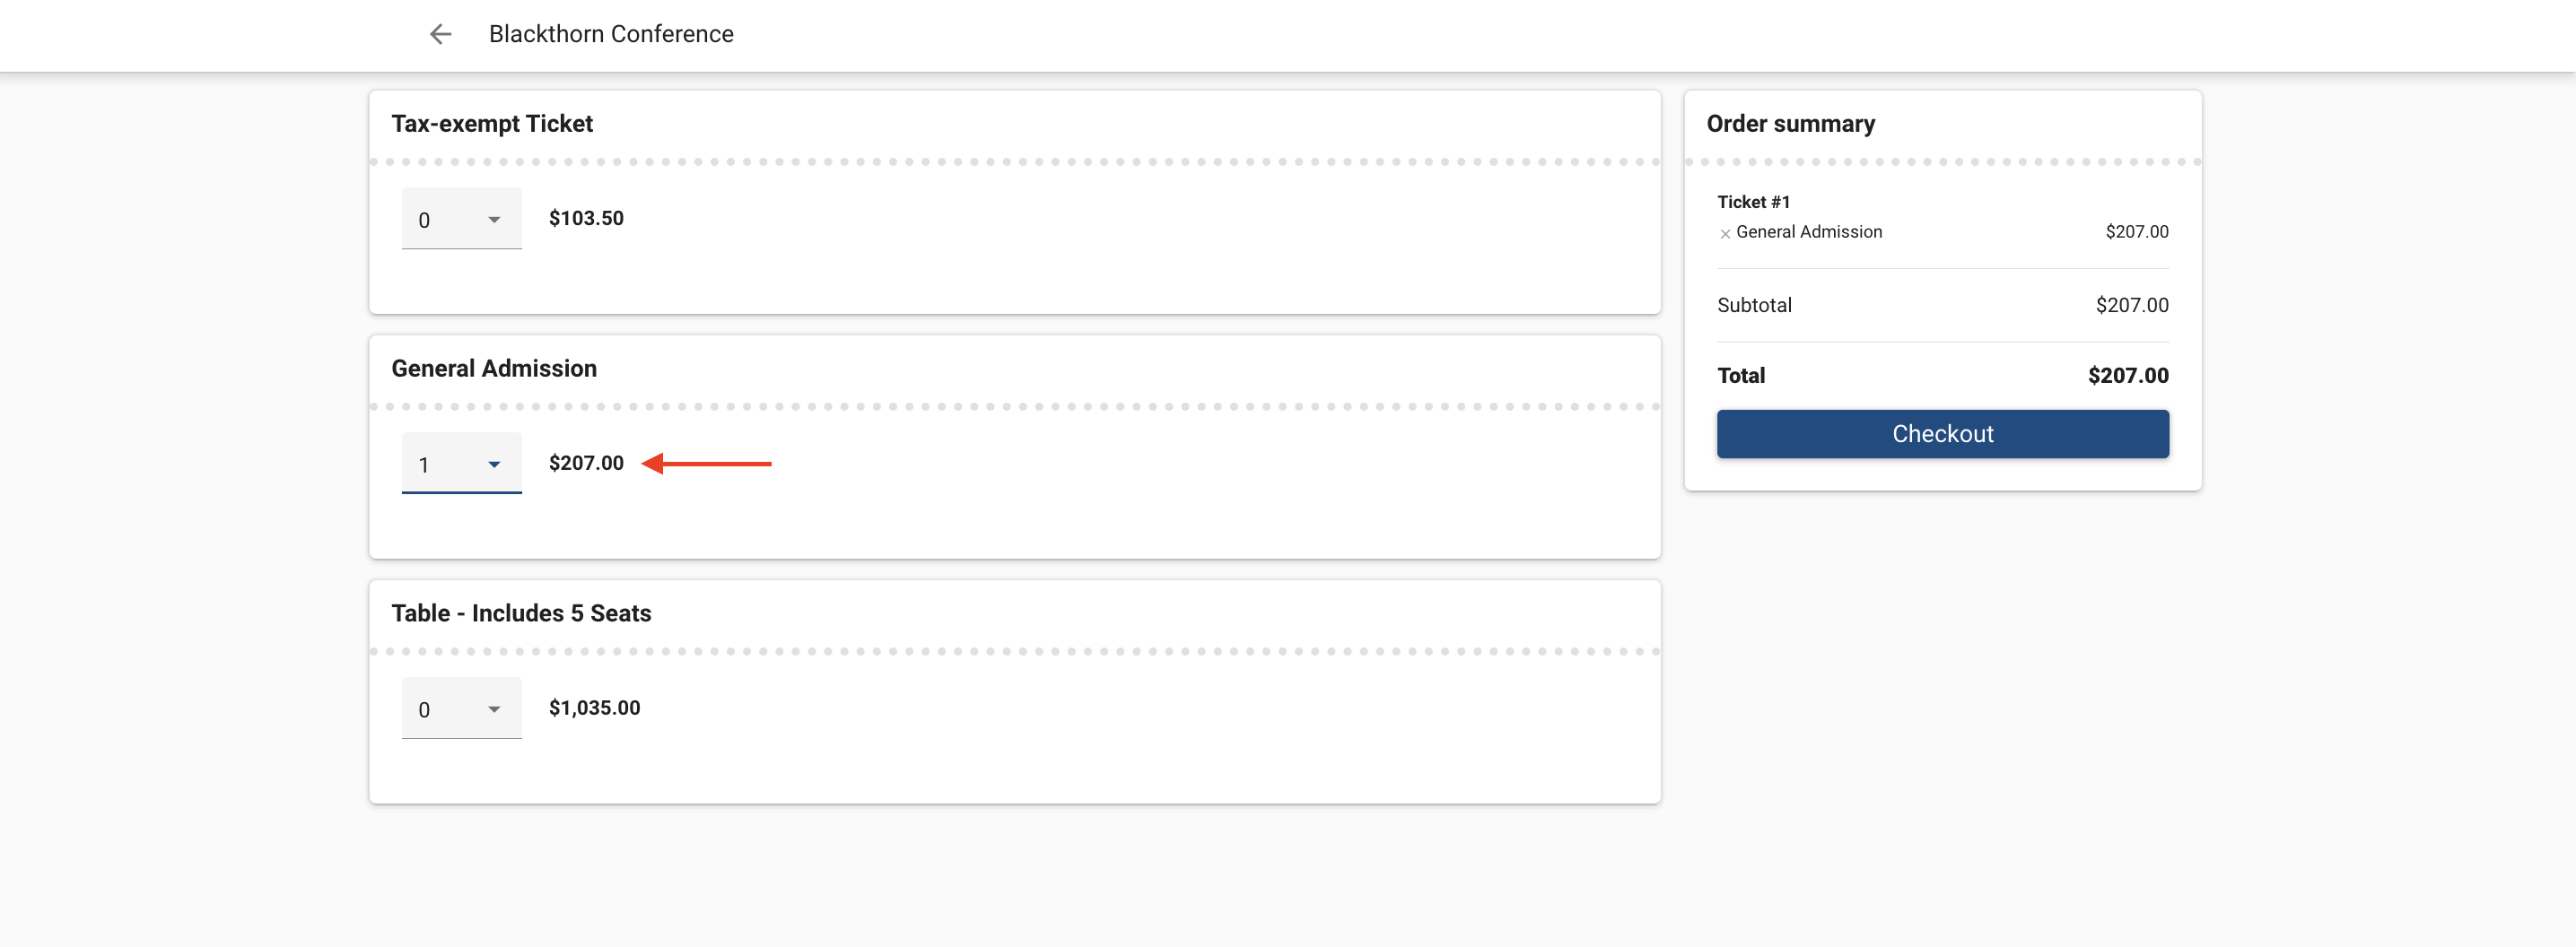
Add the General Admissions Ticket to the cart and click Checkout.
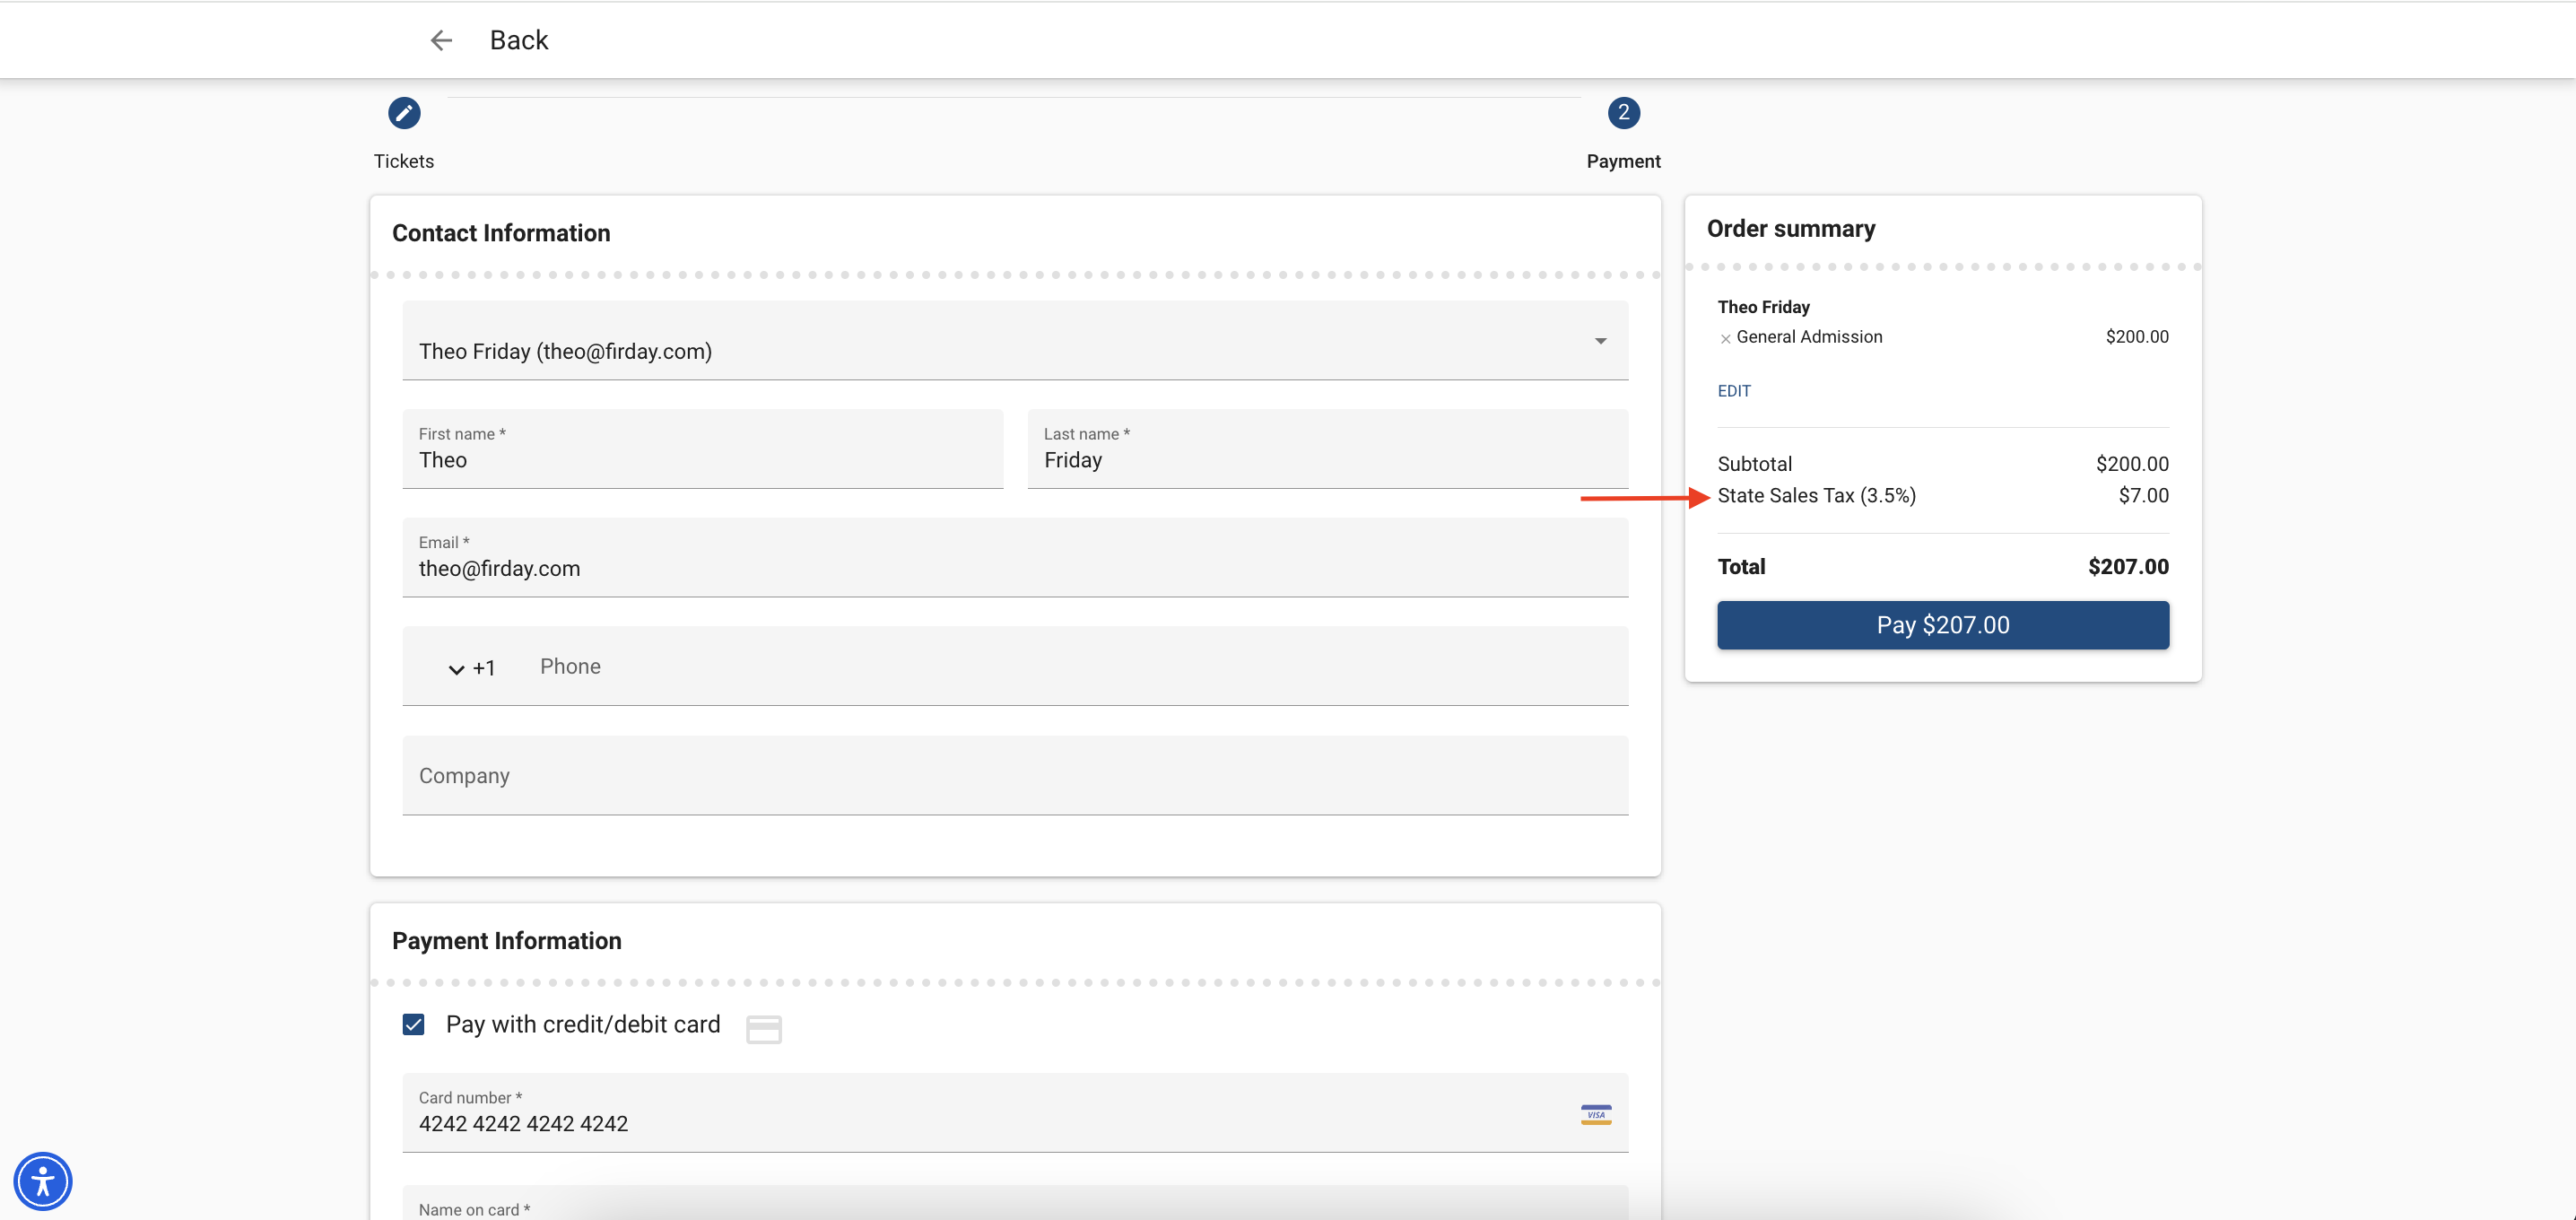
Fill in the Attendee details and click Payment.
Enter the payment details. In the Summary column, you’ll see the cost breakdown.
Click Pay.
Once the credit card processing fee and payment have been processed during checkout, a Line Item will be created for the Fee and related to the Invoice. The Line Item will also be visible on the DocumentLink.