Do not use the Virtual Terminal to process a Transaction that includes Fees (Payment Processing or Tax). Fees are not supported by the Virtual Terminal.
Prerequisites
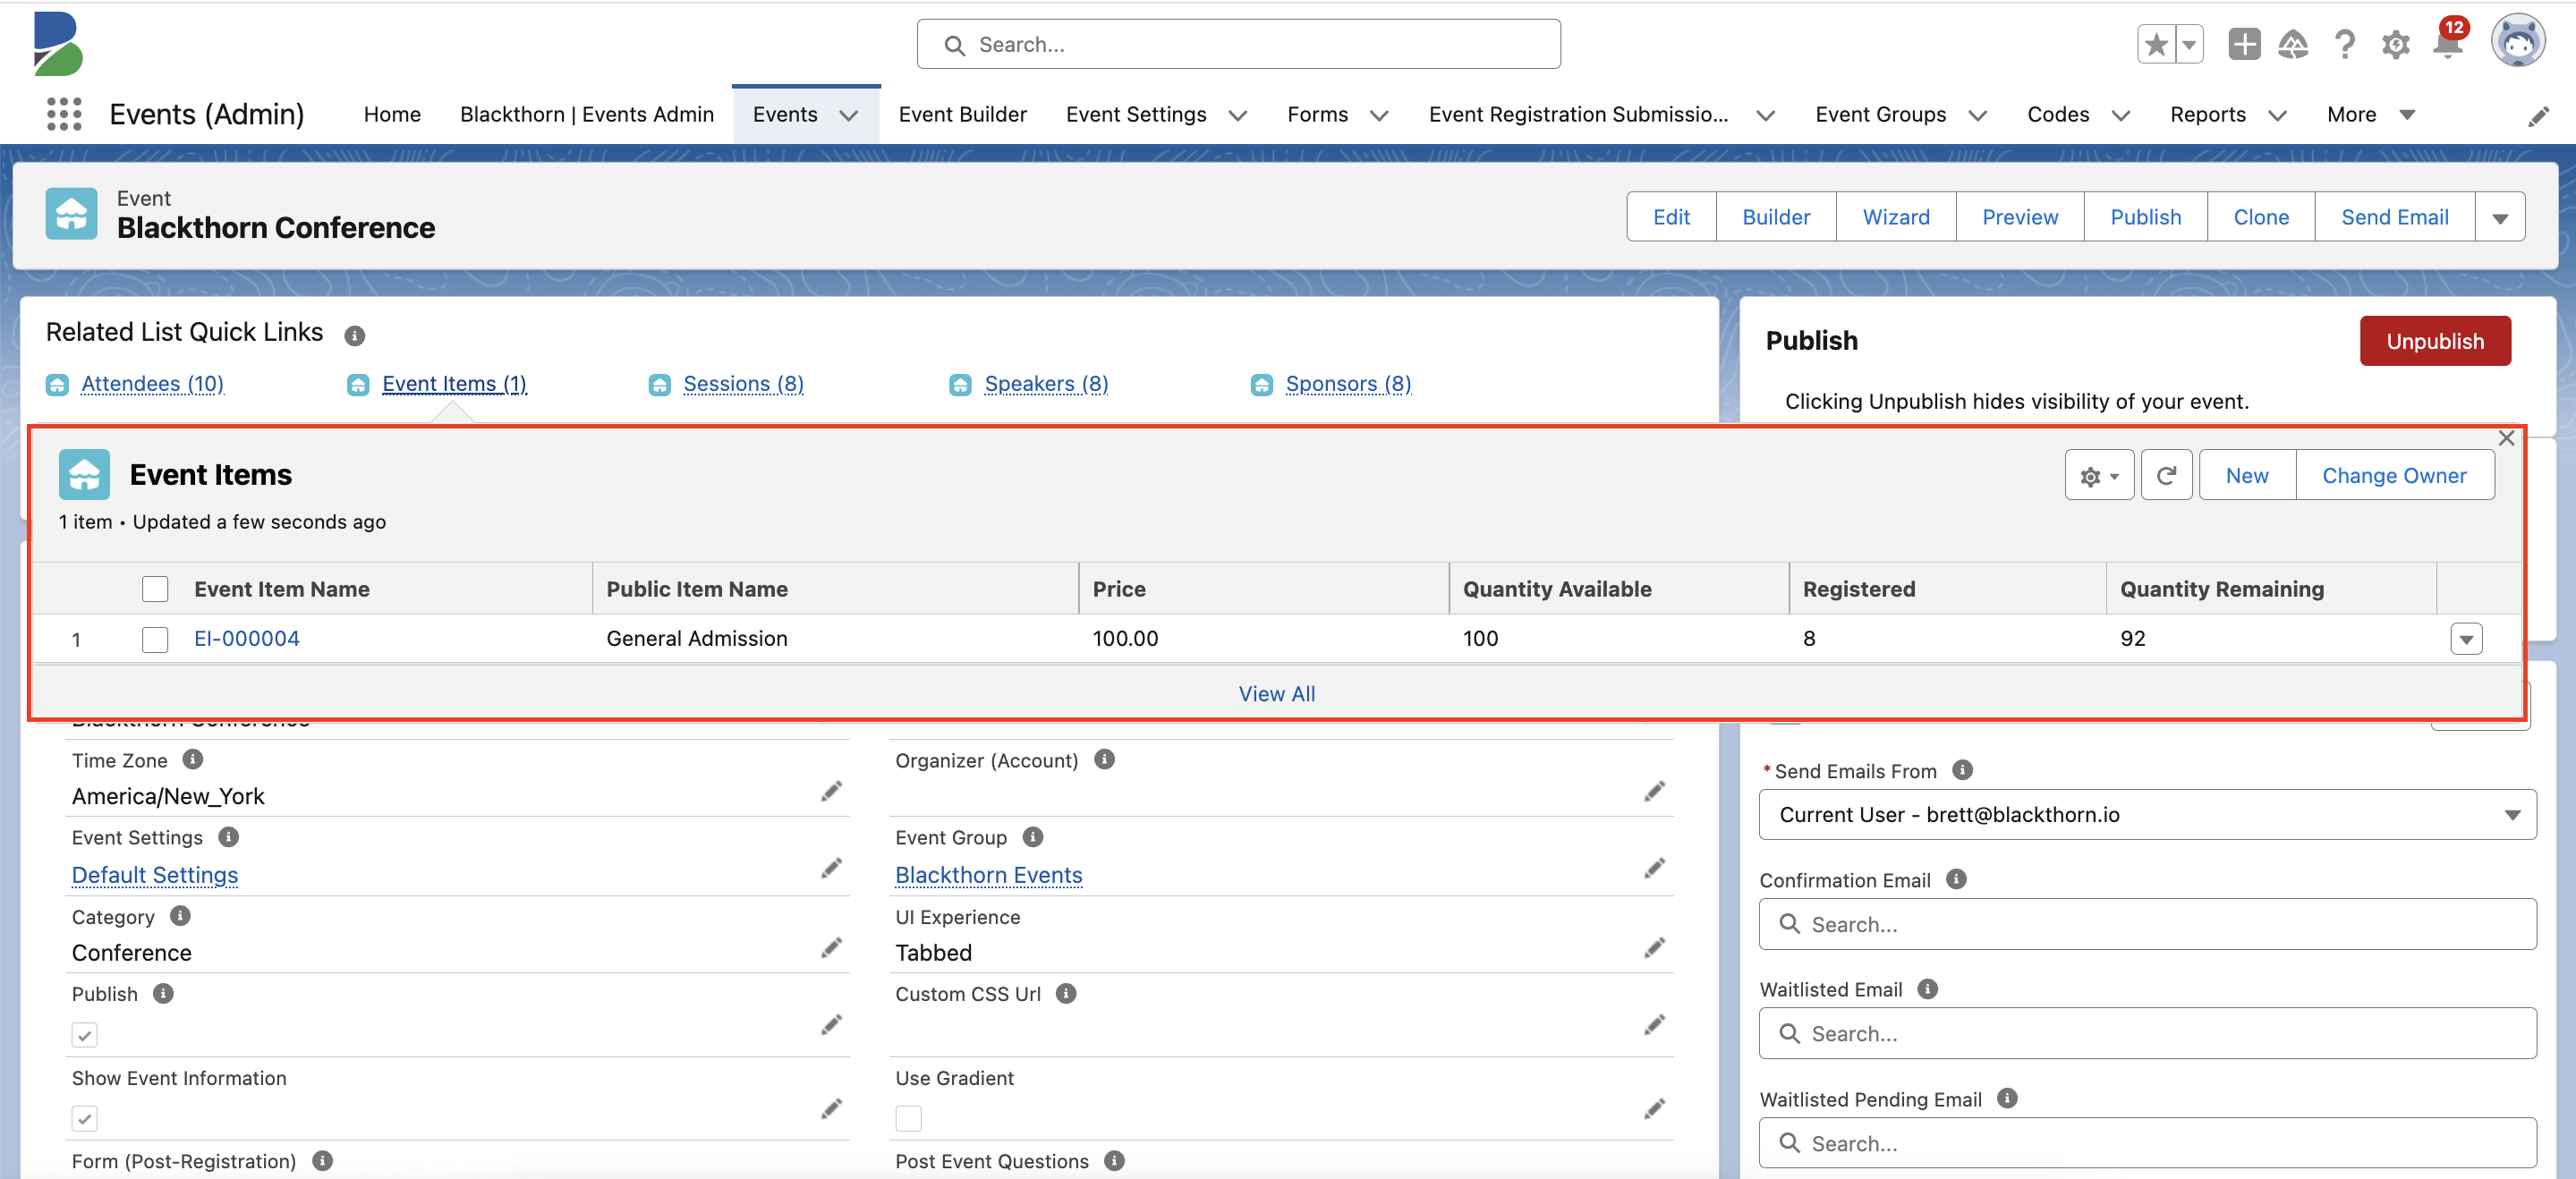
Before you can add taxes to an Event, create an Event with at least one paid Event Item and then complete the sections below. (In this example, Event Item’s Price = “100.00.”)
Add the Fee Fields to the Event Page Layout
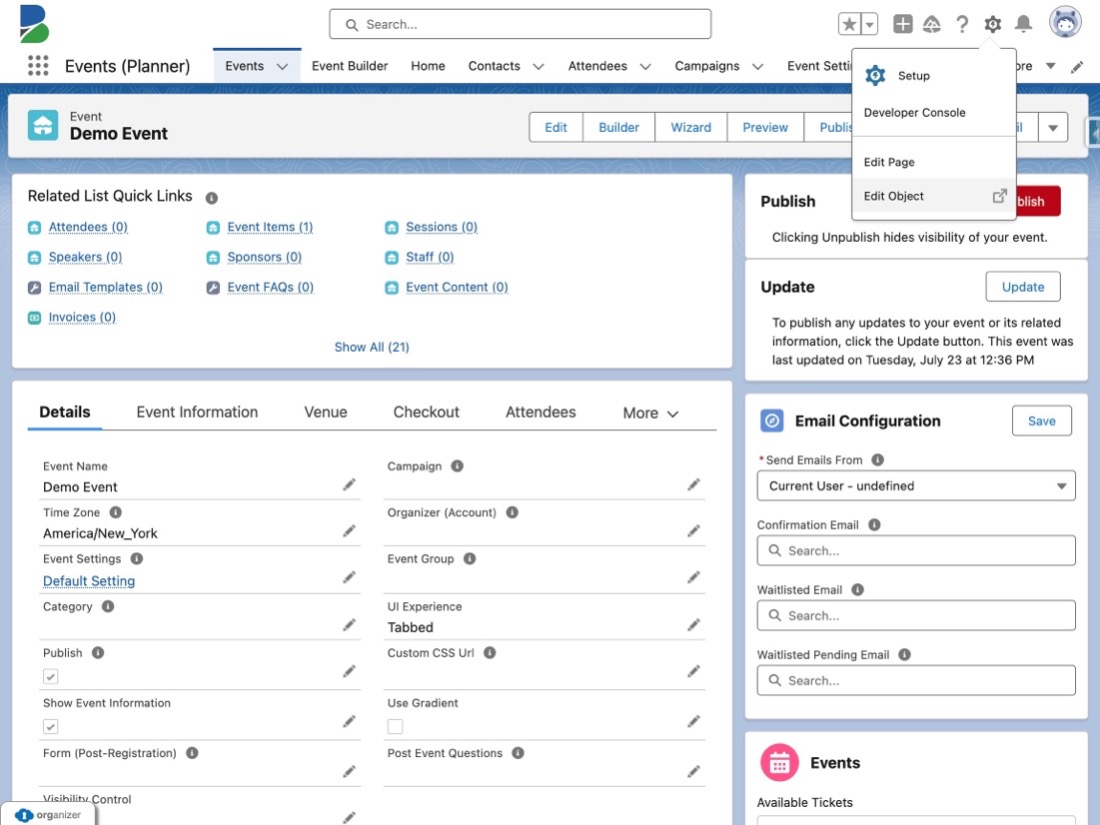
- Go to the relevant Event record.
- Click the Gear icon.
- Click Edit Object.
- Click the Page Layouts tab.
- Click Event Layout.
- Click the Fields tab.
- In the Quick Fix box, enter and click “Fee."
- Drag and drop the following fields on the page layout.
- Payment Processing Fee,
- Tax Fee
- Tax Fee Calculation Type
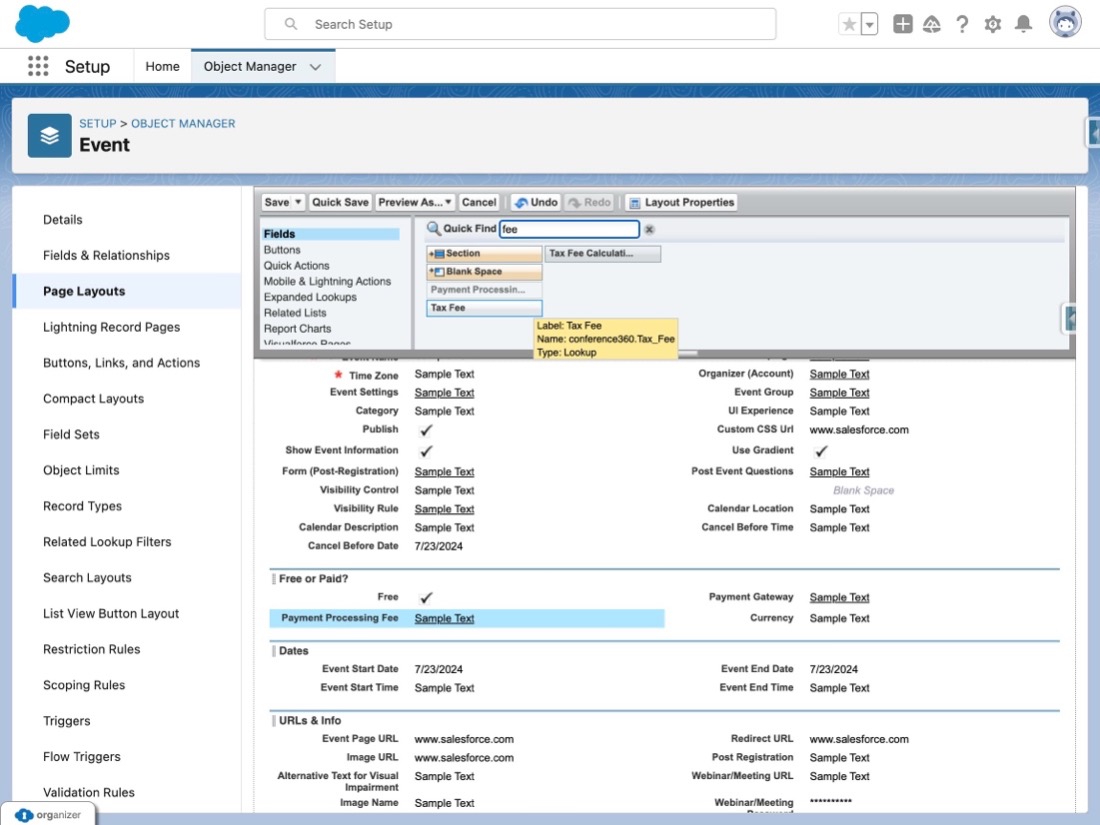
- Click Save.
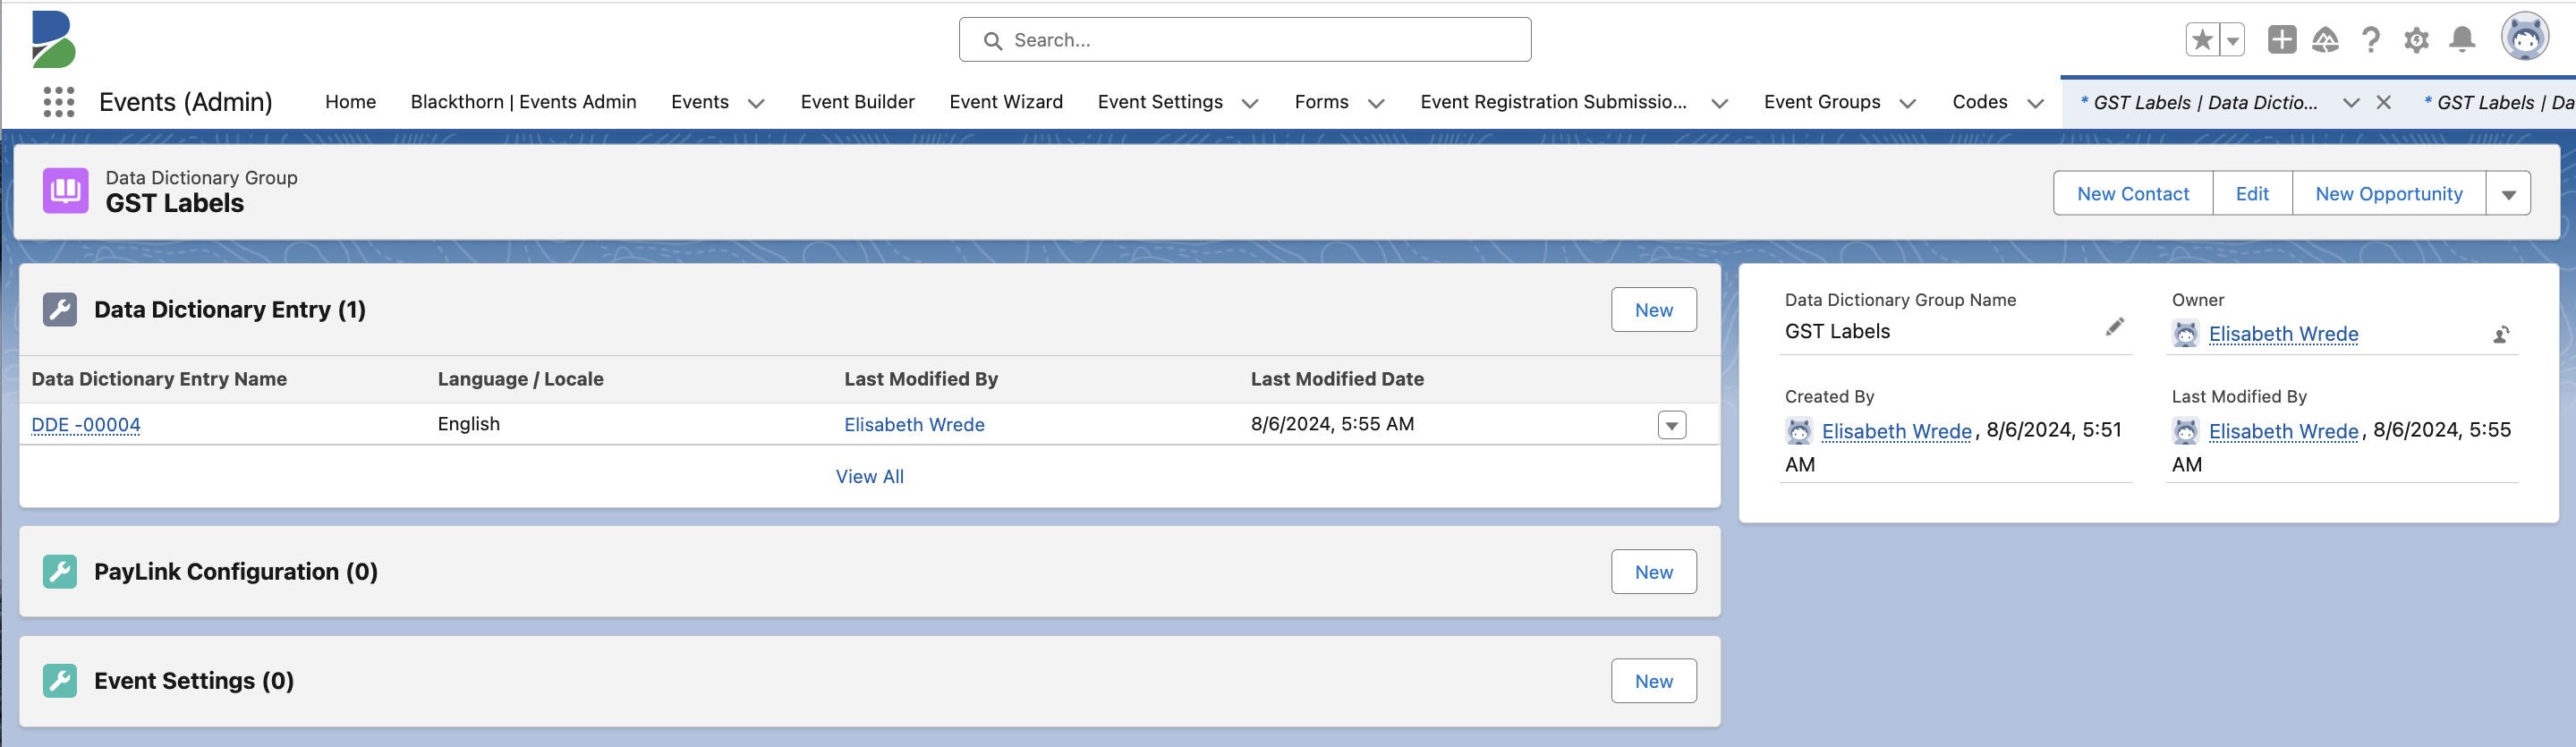
Create a Data Dictionary Group
Before you create a new DocumentLink Template, you must create a new Data Dictionary Group and populate it with Data Dictionary Entries.
There can only be one Value per Key for each Language / Locale. Creating a new entry for an existing Key will replace the current Value with the new one.
- From the App Launcher, enter and click “Data Dictionary Group”.
- Click New.
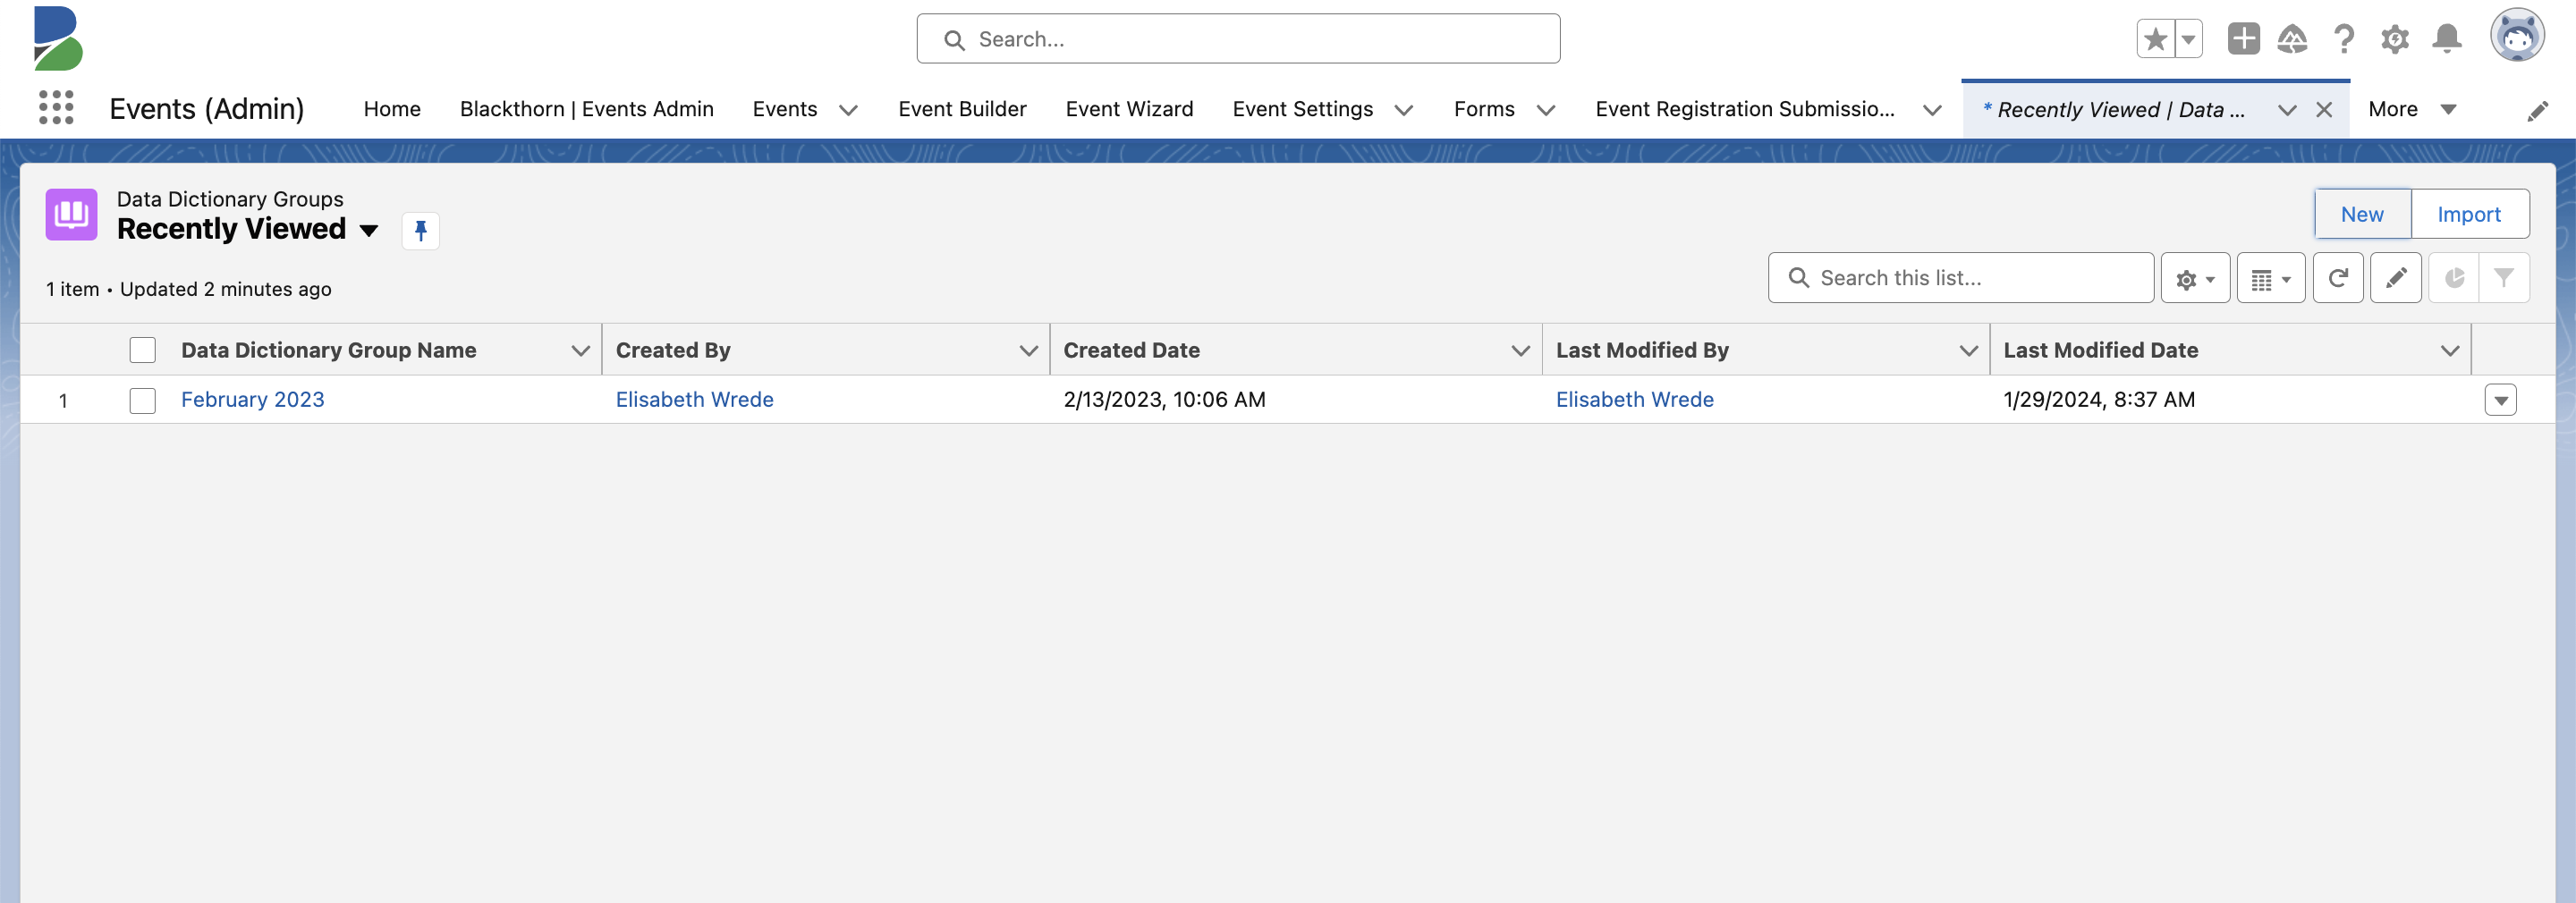
- Set Data Dictionary Group Name = “GST Labels.”
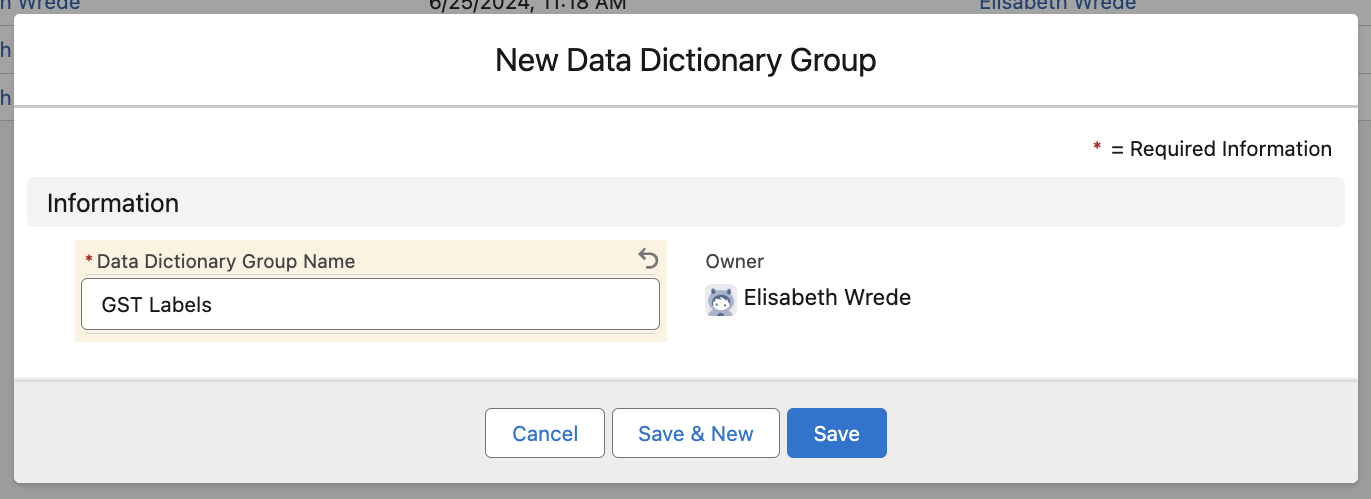
- Click Save.
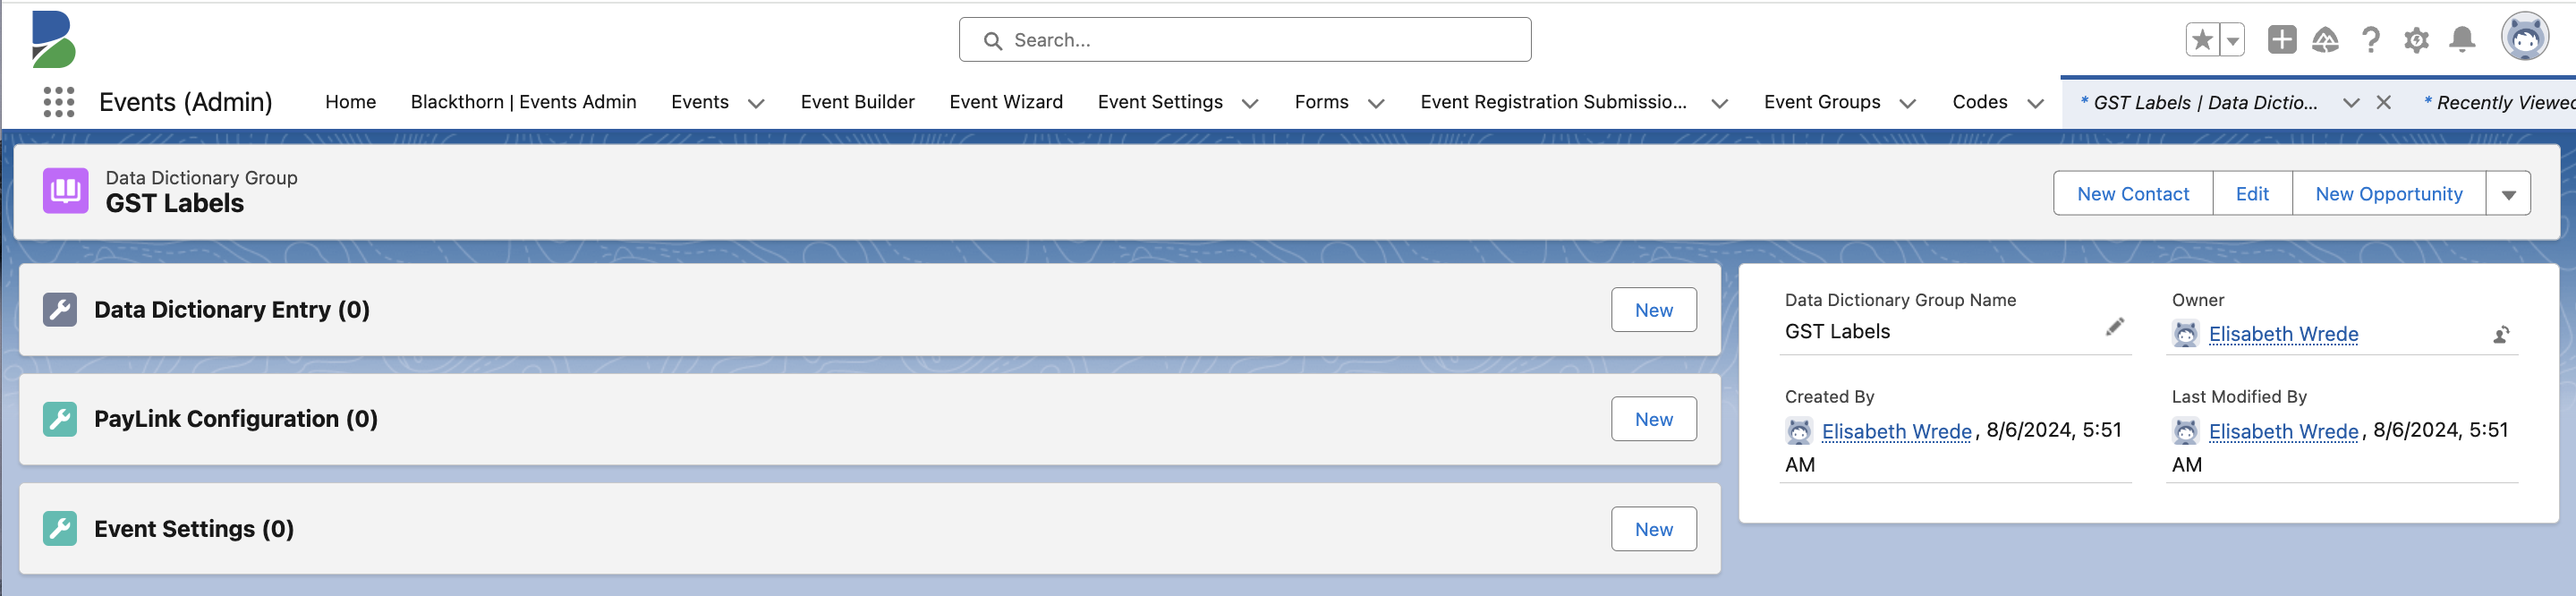
- Click New next to Data Dictionary Entry.
- Set the Language / Locale to “English.”
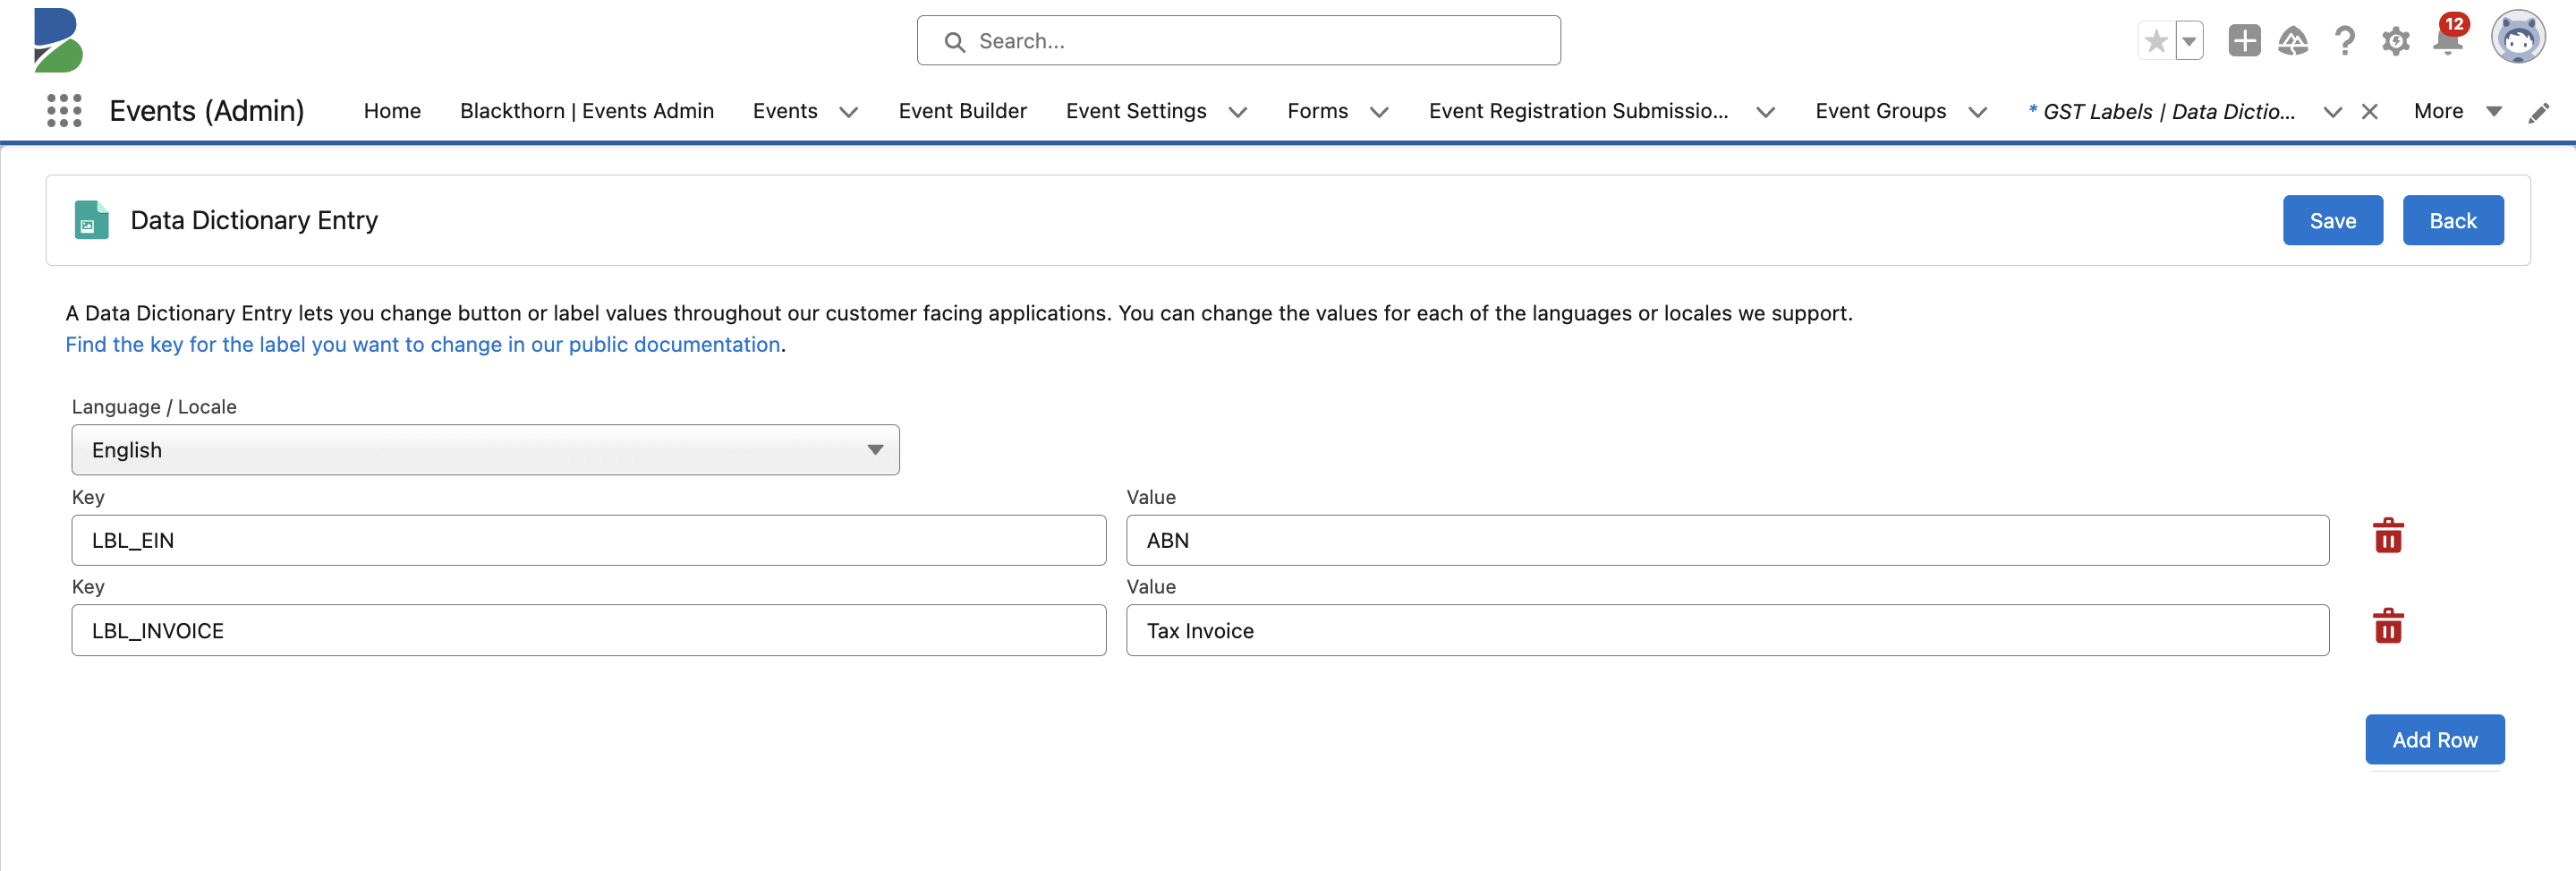
- Set the Key to “LBL_EIN” and the Value to “ABN.” Capital letters must be used in the Key field.
- Click Add Row.
- Set the Key to “LBL_INVOICE” and the Value to “Tax Invoice.”
- See the DocumentLink Data Dictionary (a Google document) for more Key and Value options.
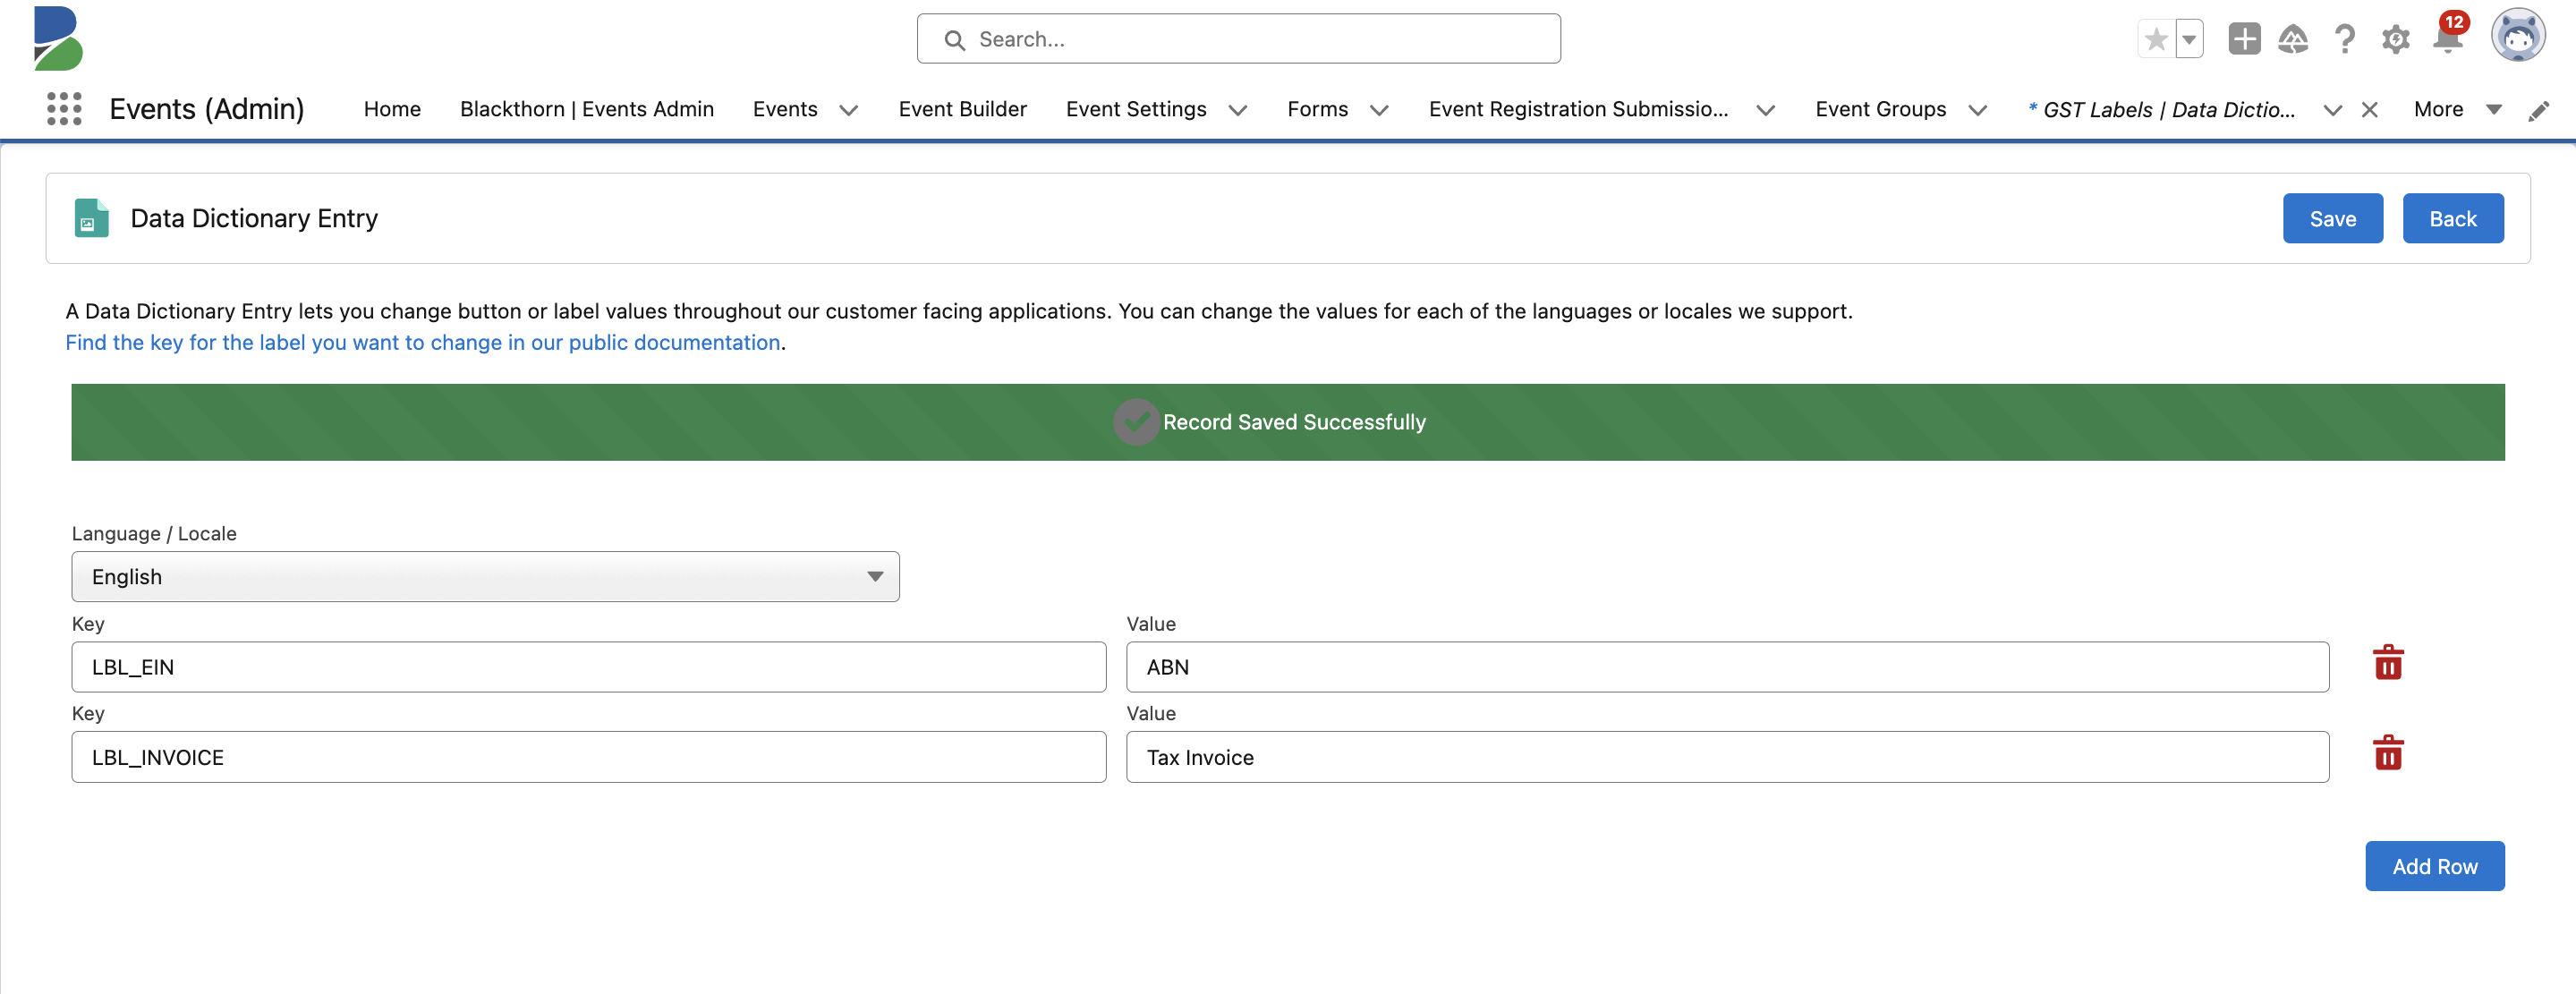
- Click Save.
- Click Back to return to the Data Dictionary Group record.
Add Taxes to the Event
To add taxes to an Event, you must start by creating a new Fee record with Type = “Tax.” In this example, we will use tax-inclusive pricing.
- Go to the Event record.
- Click the Pencil icon next to the Tax Fee field.
- Search for an existing Fee or click + New Fee to create a new Fee.
- In this example, we need to create a new Fee.
- Fee Name = "GST" (If you need the Invoice to say HST, set the Fee Name to “HST.”)
- Default Fee = “True” (checked)
- Fee Percentage = “10”
- Type = “Tax”
- Tax Display Setting = “Tax-Inclusive Pricing”
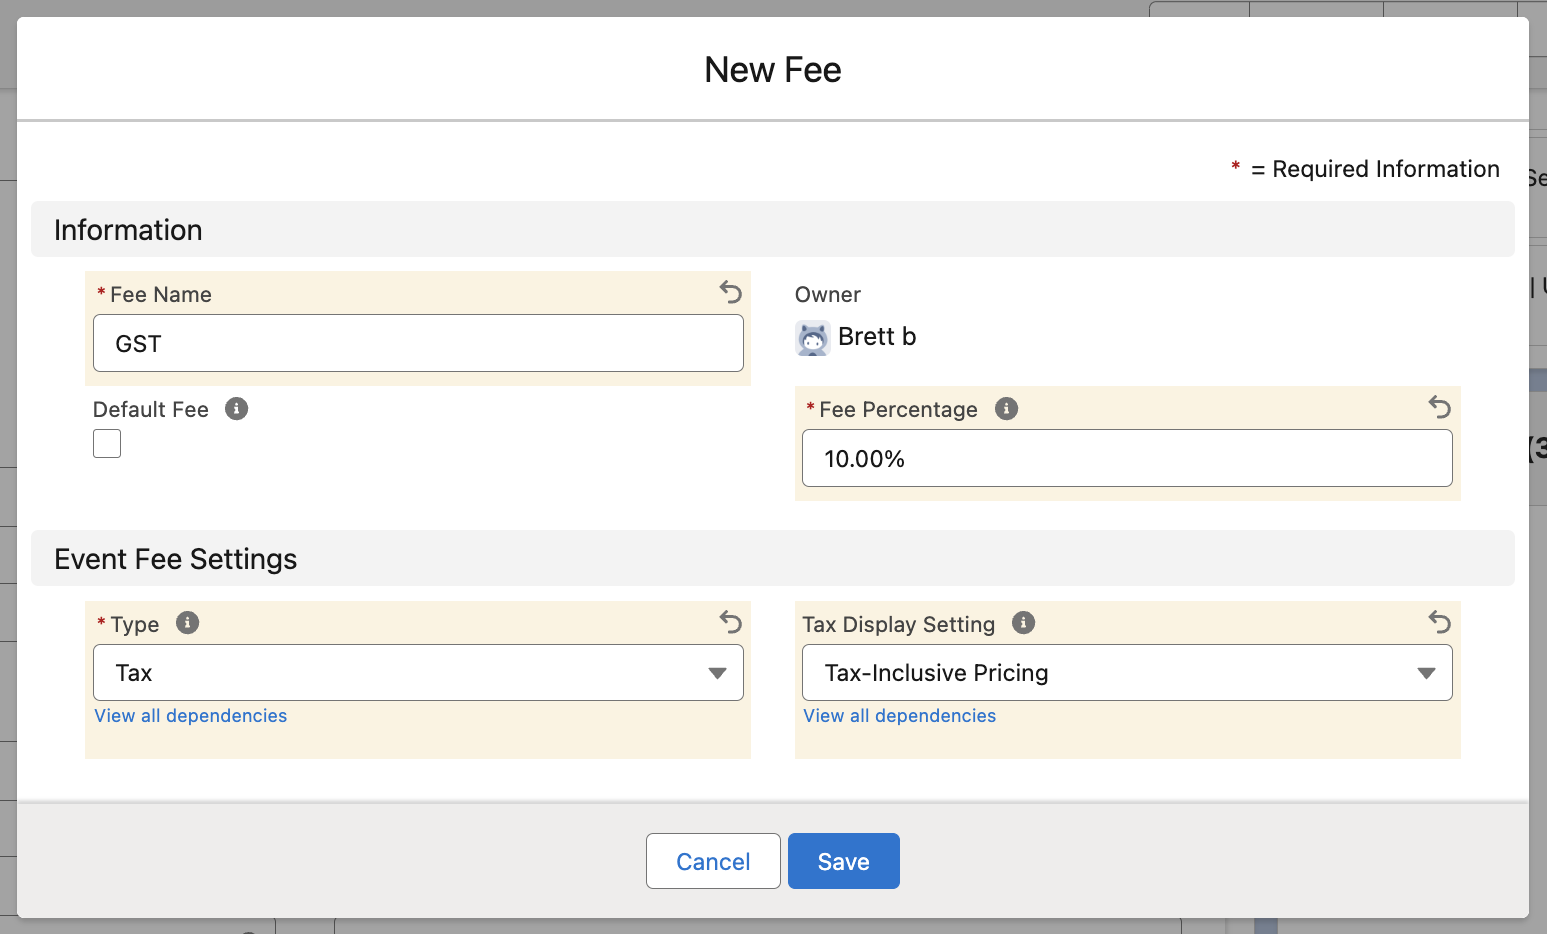
- Click Save.
- Click Save to save the changes to your Event.
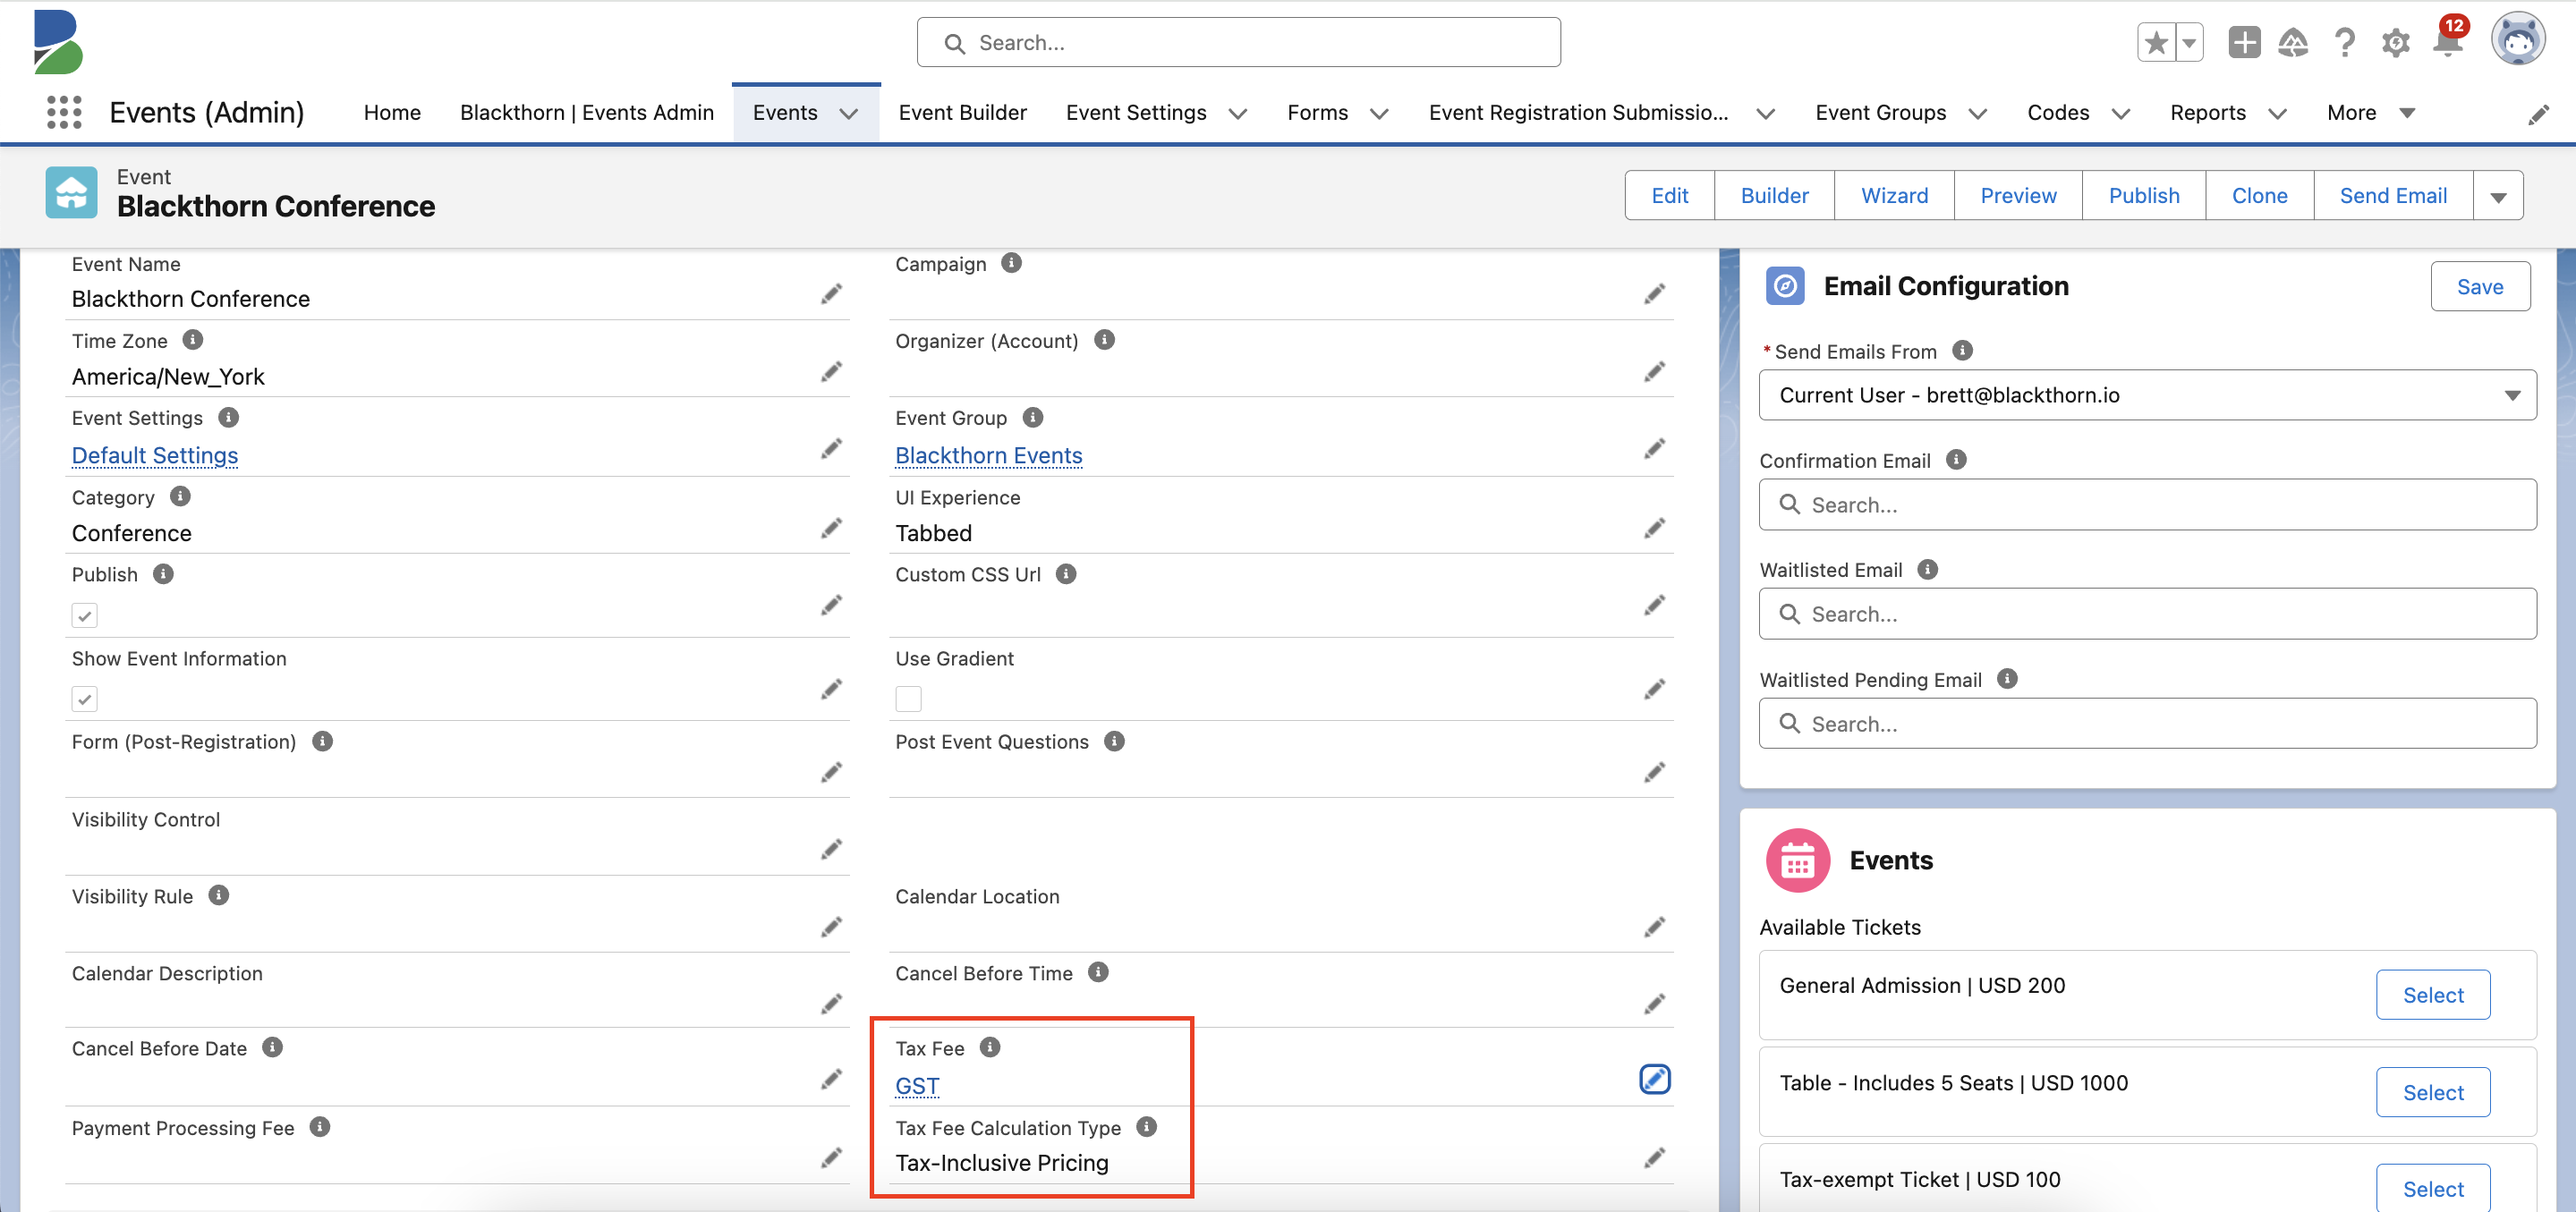
- Click Update to make sure the changes are published on the Event webpage.
Attendee Experience
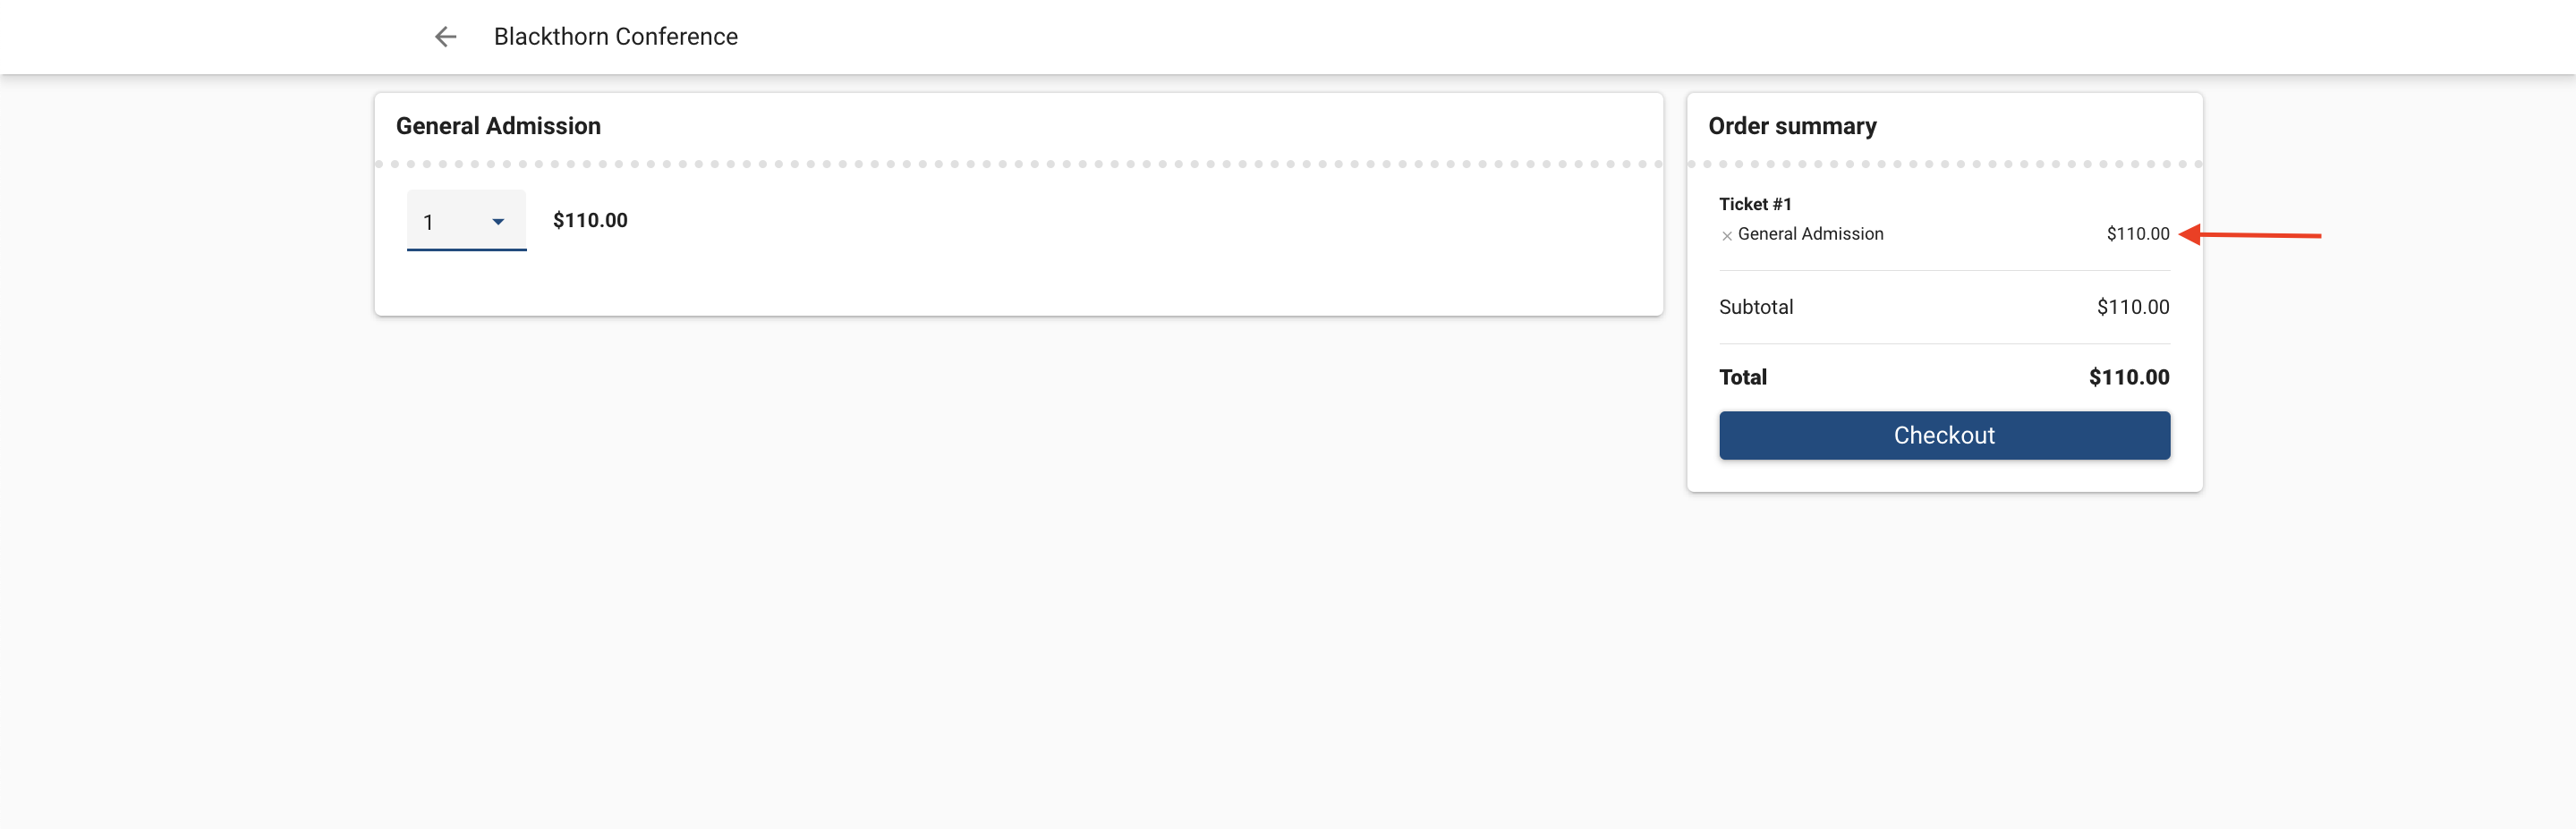
- For this example, we set the Event Item’s Price to “100.00.”
- Click the Event Page URL to open the Event webpage.
- The “Starting from” price includes the 10% markup for the configured Tax Fee.

- Click Get Tickets.
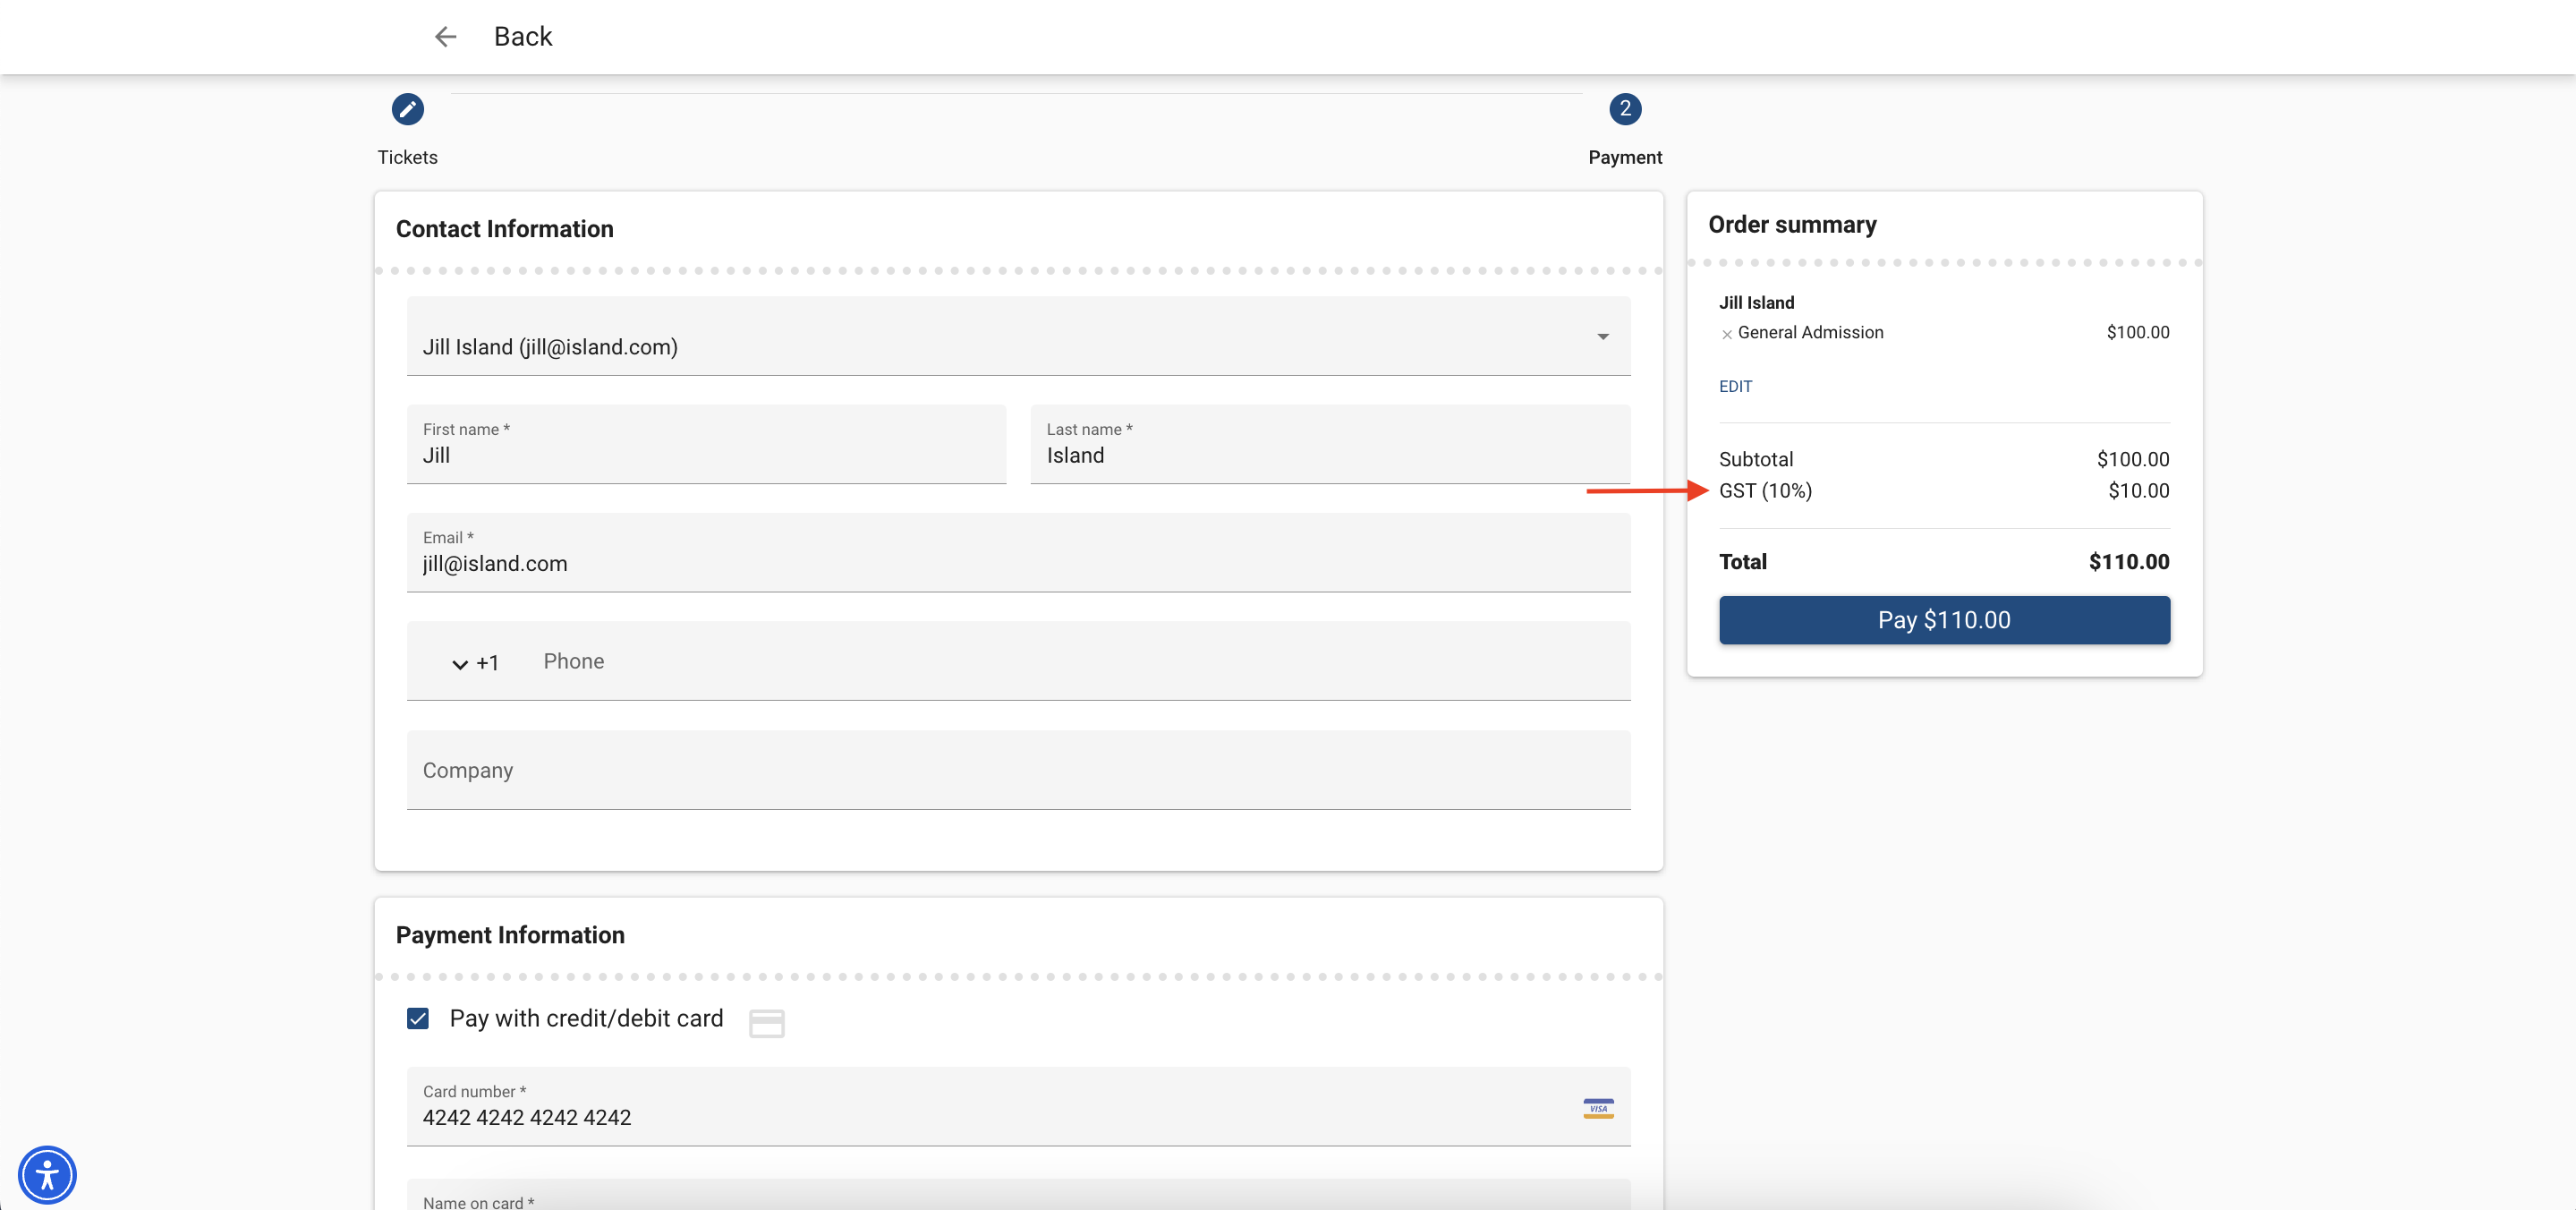
- Add a Ticket (Event Item) to the cart. The Ticket price shows the tax-inclusive price.
- Click Checkout.
- Enter the Attendee Information and click Payment.

- In the Order Summary column, you'll see the cost breakdown.
- Enter the payment details and click Pay.
The order is complete.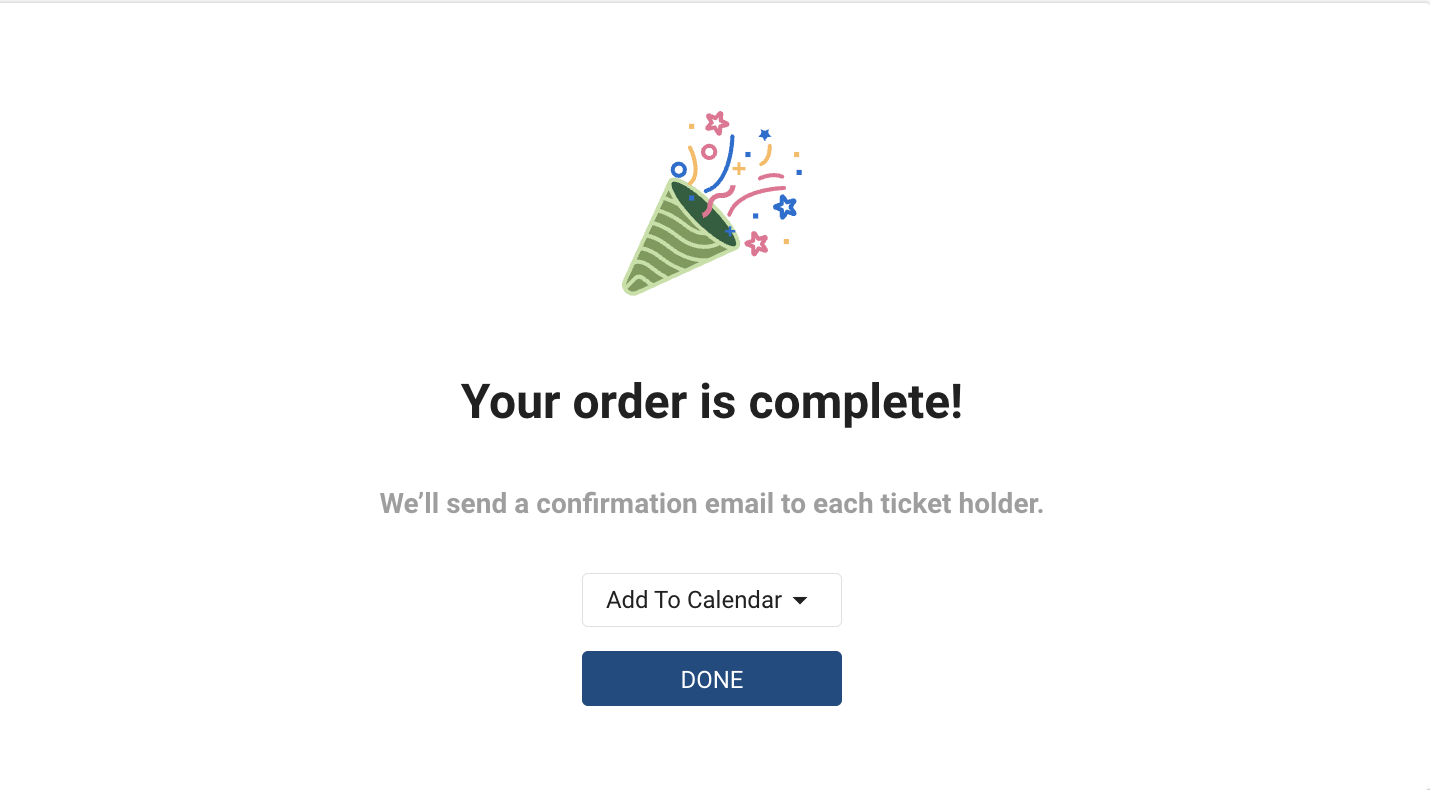
View the Tax Fees on Invoices
- Navigate back to the Event record in Salesforce.
- You will see a new Attendee record for the completed registration. Click the Attendee Full Name.
- The Attendee record now has a related Invoice. In the Line Items Related List, click the Invoice ID.
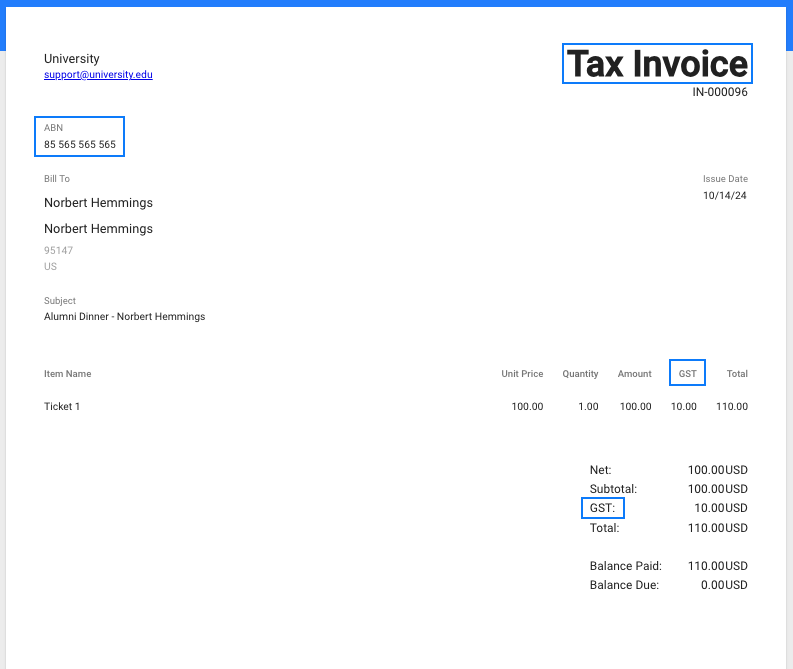
- The Invoice Totals section shows the amounts that are seen during the Event checkout process, including the tax amounts.
- You can also see the Invoice Line Item(s). Click the Item Name to view it.
- Line Item records show the breakdown of the amounts, including the Tax and Tax Rate seen during the checkout process.
Important Things to Know
- The Invoice’s Dynamic Fee Name won’t be displayed on the Invoice. The Fee’s Fee Name is automatically saved to the Invoice’s Dynamic Fee Name field.
- The text in the Fee’s Fee Name field will override the out-of-the-box "Tax" label under the Subtotal when viewing an Invoice in a DocumentLink.
Configure DocumentLink for GST
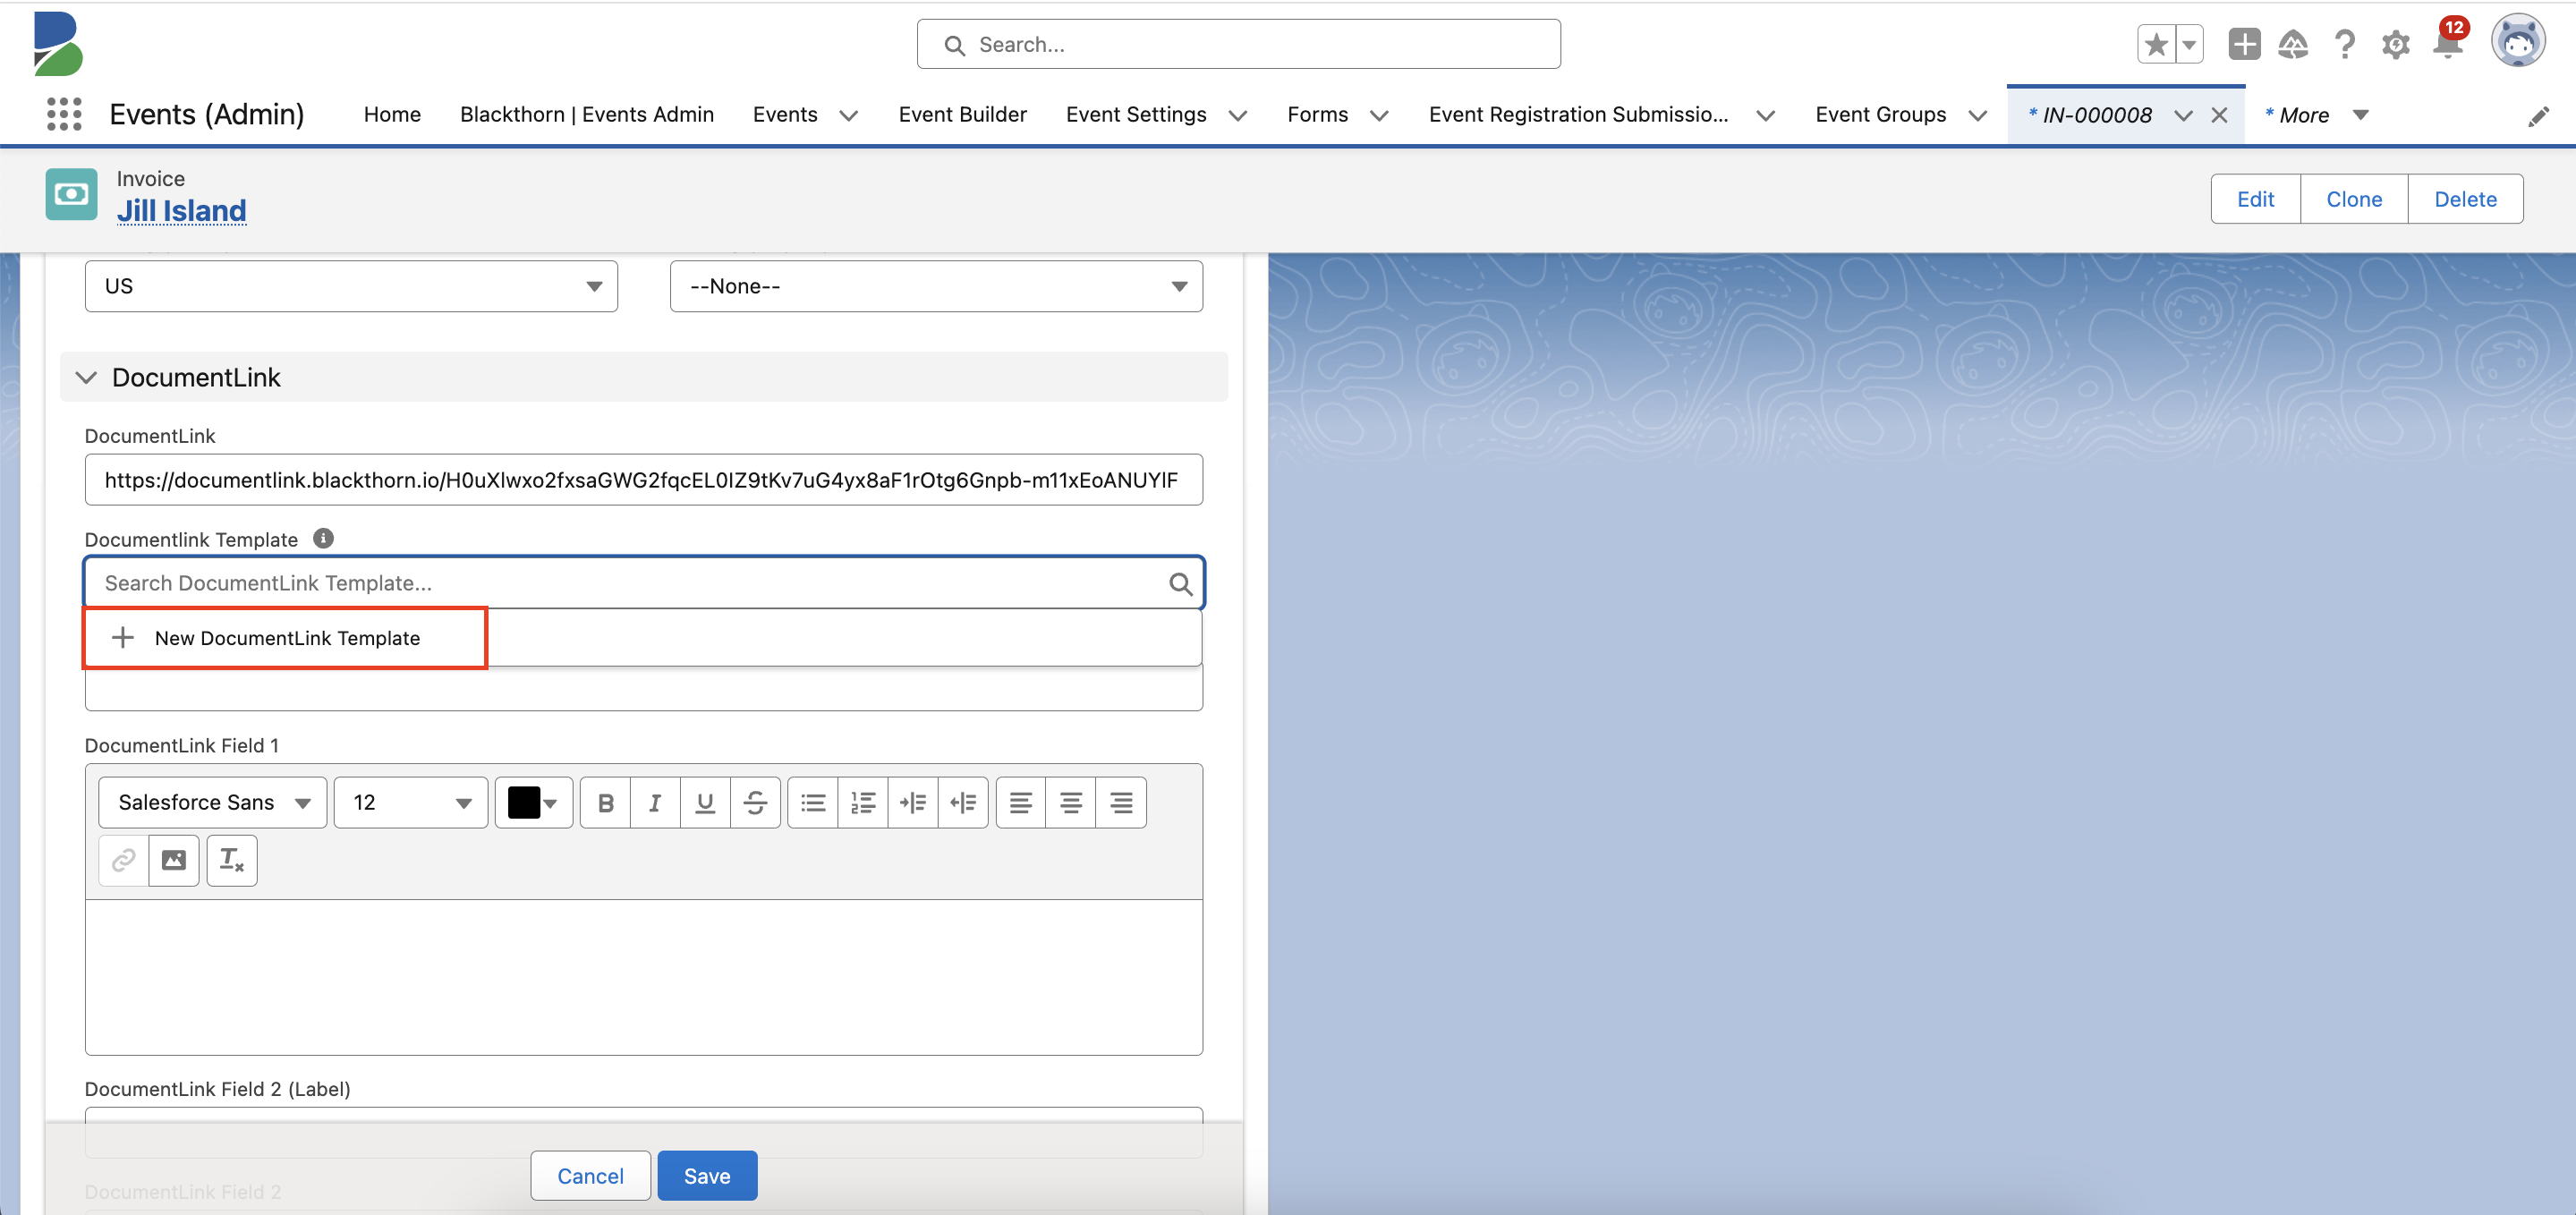
- Go back to the Invoice record.
- Click the Pencil icon next to the DocumentLink Template field.
- Click the DocumentLink Template field to select an existing DocumentLink Template or click + New DocumentLink Template to create a new template.
- Enter a DocumentLink Name (required).
- Fill in any other necessary fields.
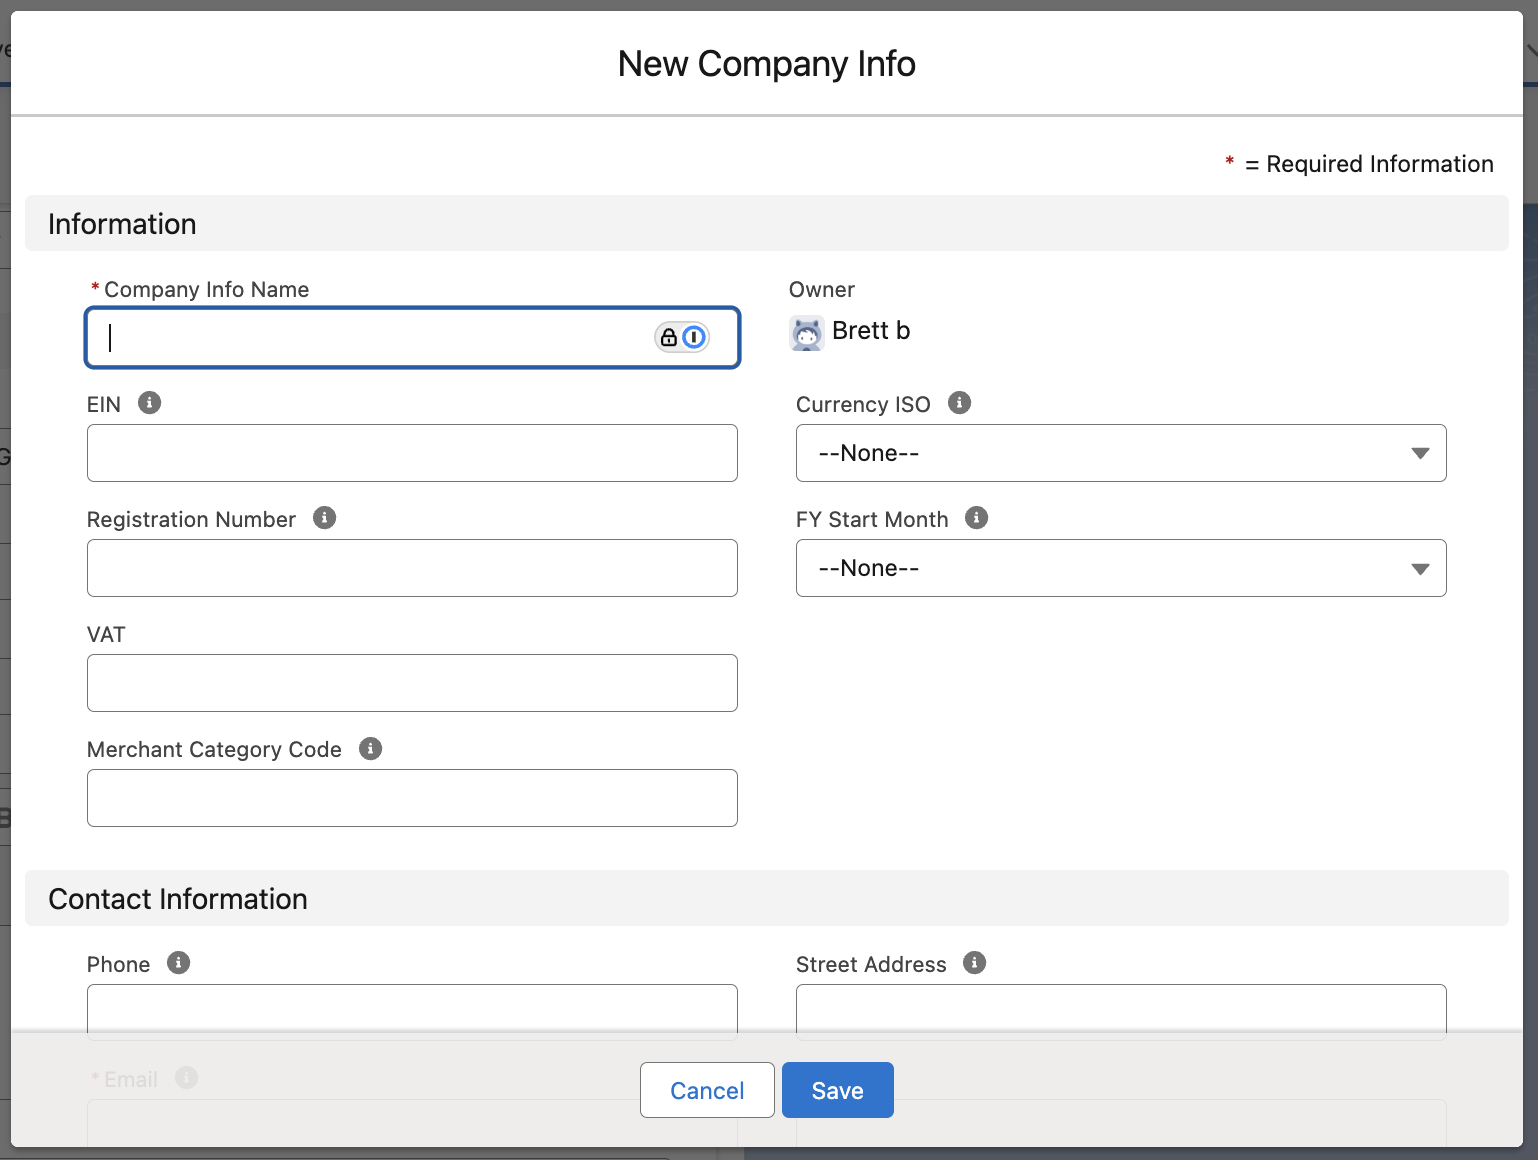
- Click in the Company Info field and click + New Company Info.
- Enter a Company Info Name, Currency ISO, and Email (required).
- Add the Australian Business Number (ABN) to the Registration Number field. The ABN must be included on all Invoices.
- Click Save.
- To override the "EIN" label and display "ABN," add the Data Dictionary Group you created at the beginning to the Data Dictionary Group field.

- Click Save.
- On the Invoice record, click Save.
- Click the DocumentLink field.