Important Change to Event Settings and Event Groups
Event Settings applied at the Event Group level will override all Event Settings applied at the individual Event level. Previously, Event Settings applied at the Event level overrode Event Settings applied to an Event Group.
About Event Settings
The Event Settings object stores all of the information about how your Event will look on the front end and how everything will be processed on the back end. An Event Settings record determines the look and feel for all related Events, removing the need to define the Event Settings's fields for each Event that you create.
When you install the Events app, we deploy a default Event Settings record. We recommend starting with the default record. After you create your first Event, customize the default Event Settings record to update the look and feel and determine which information you want to share.
Benefits
Create different Event Settings based on your Event types.
Define these settings once, and each related Event inherits the settings.
Important Features
There are three important features tied to the Event Settings object: Relationship Settings, Data Dictionary, and Event to Campaign Sync. Group your Events by their look and feel and how they need to interact with each of the following features.
Relationship Settings
If you have two Events each with its own Relationship Settings record, then you will need two different Event Settings records.
Event 1
Relationship Settings record 1: Generate new Leads/Contacts from Attendees that aren’t already in your system.
Event Settings record 1
Event 2
Relationship Settings record 2: Do not generate new Leads/Contacts from Attendees that aren’t already in your system.
Event Settings record 2
Event to Campaign Sync
If you have two Events that support members, each with its own Campaign Member Status selection, then you will need two different Event Settings records.
Event 1
Membership page registrants Campaign Member Status = “New Member”
Event Settings record 1
Event 2
Weekly meeting participants Campaign Member Status = "Responded"
Event Settings record 2
Find the Event Settings Tab
Click the App Launcher icon.
Type and select "Blackthorn | Events (Admin)."
Click the Event Settings tab.
For the Event Settings List View, we suggest changing the view from “Recently Viewed" to "View All" and then pinning "View All."
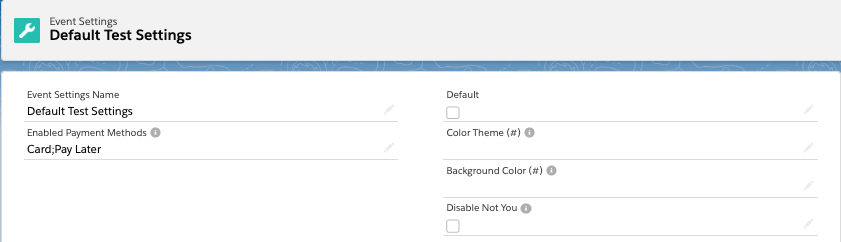
Enable Payment Methods
If the Event is paid, select how Attendees can pay during Checkout. "Pay Later" will create an Invoice that you can send to the Attendee later.
ACH Payment Methods
The Authorize.net Payment Gateway is the only gateway that accepts (electronic fund transfer) ACH Payment Methods during the Events checkout process.
For all other gateways, we recommend using the Pay Later option.
To activate an Authorize.net Payment Method, go to the Event Settings record for the Event, and add “ACH” to Enabled Payment Method. For some organizations, the “ACH” picklist value will need to be activated via Setup.
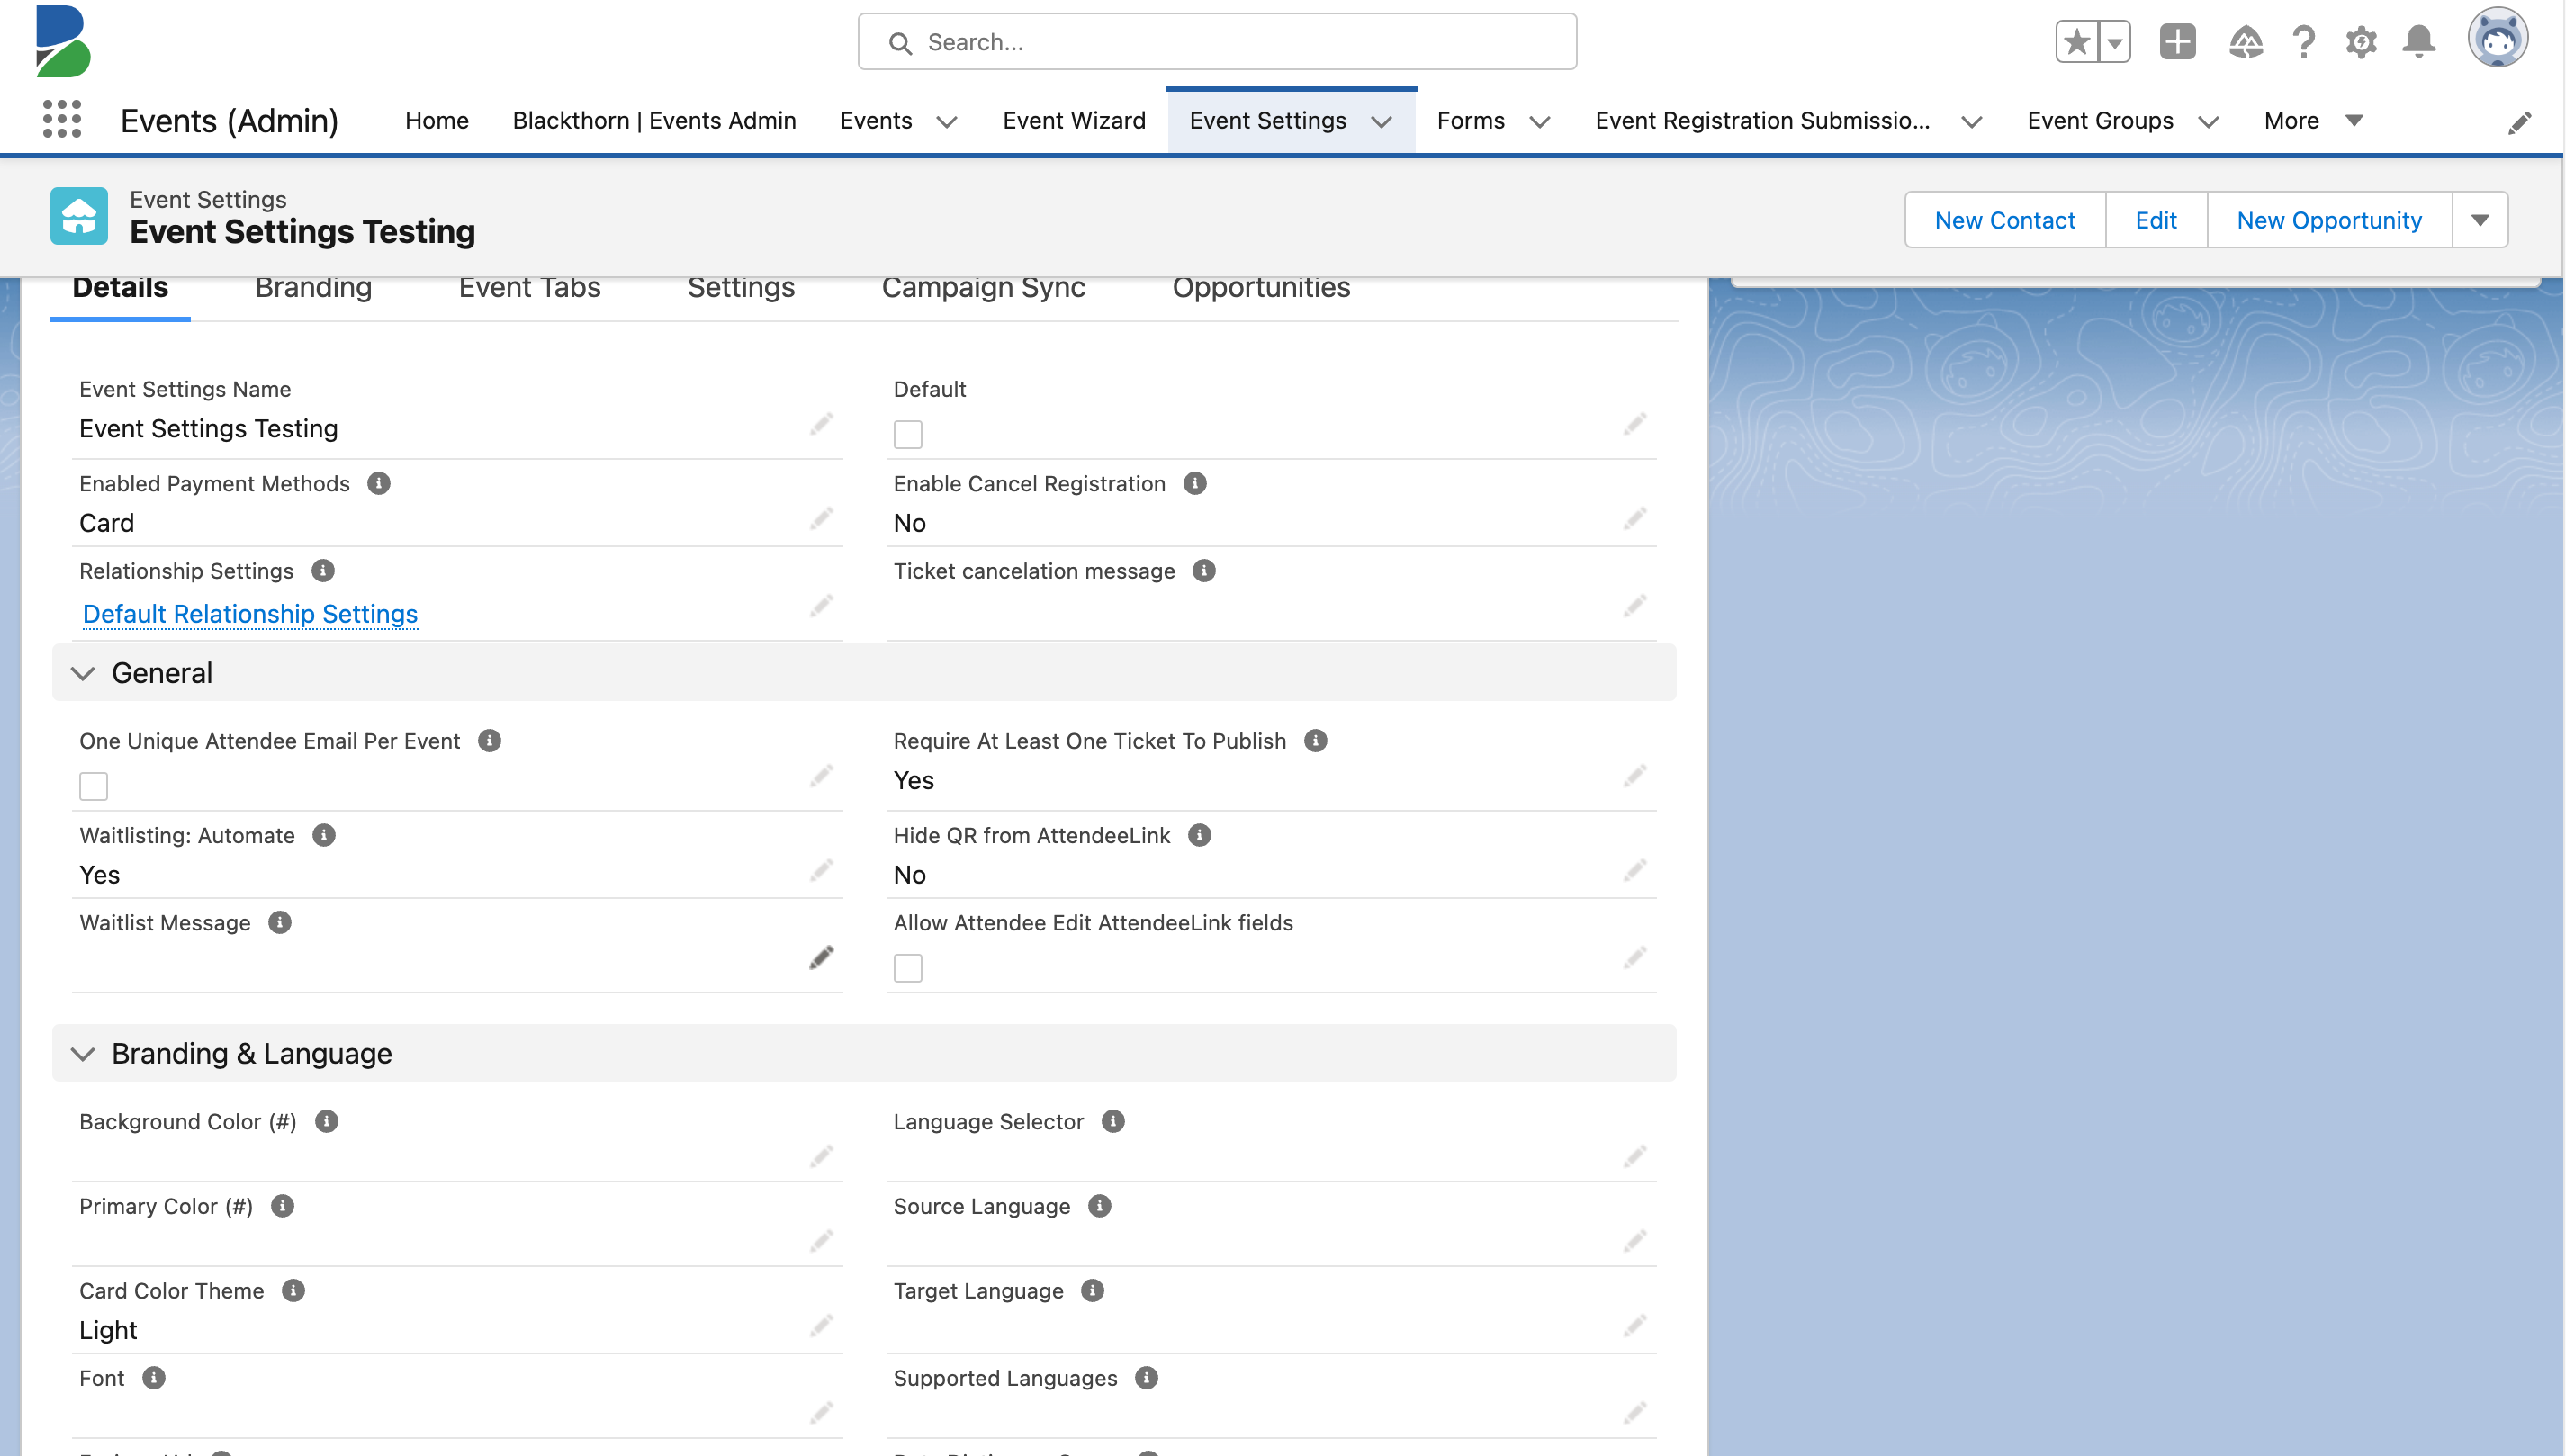
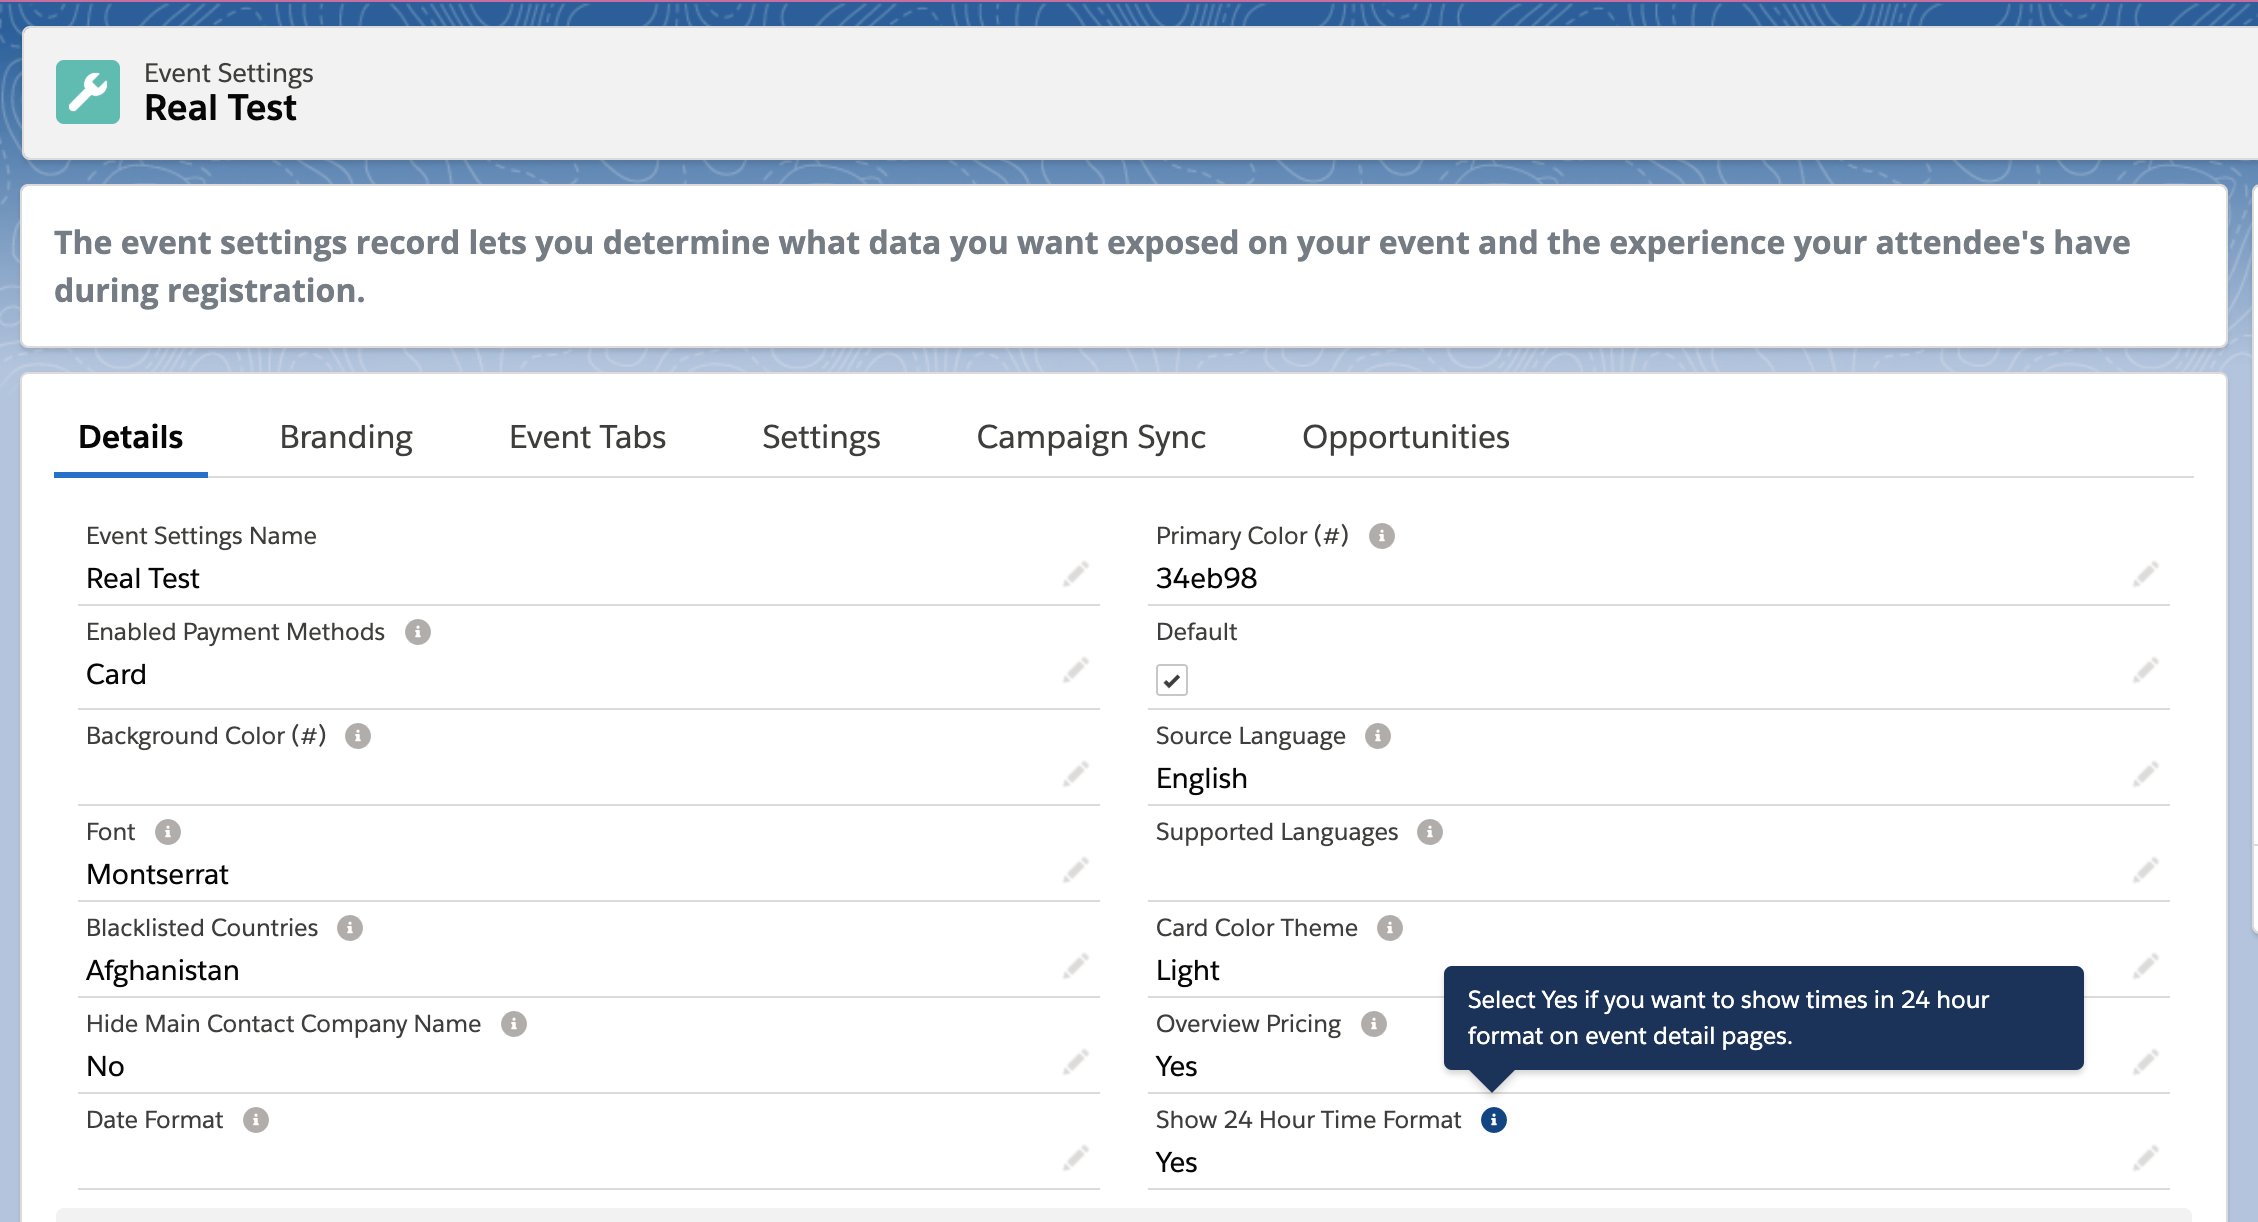
General Information
The General section and accompanying fields are located above the Branding & Language section on the out-of-the-box Event Settings object page layout for new installs.
One Unique Attendee Email Per Event
Require At Least One Ticket To Publish
Waitlisting: Automate
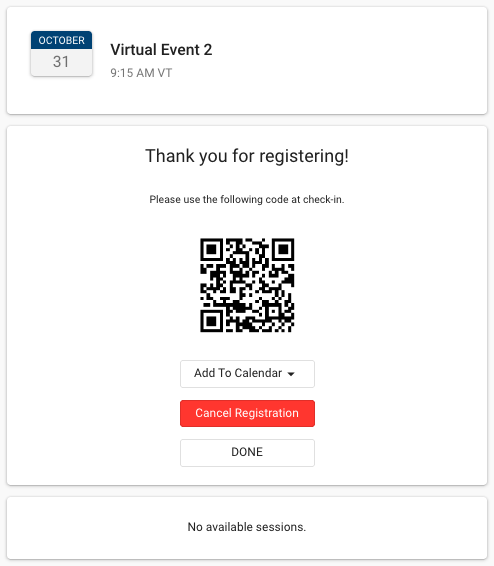
Hide QR from AttendeeLink
Waitlist Message
Allow Edits to Attendee Fields
If enabled (checked), an Attendee can update their AttendeeLink fields regardless of the UI Experience value. IMPORTANT: For an Attendee to make changes, their Registration Status must be set to "Invited".
If disabled, an Attendee can NOT change their information.
Ticket Information
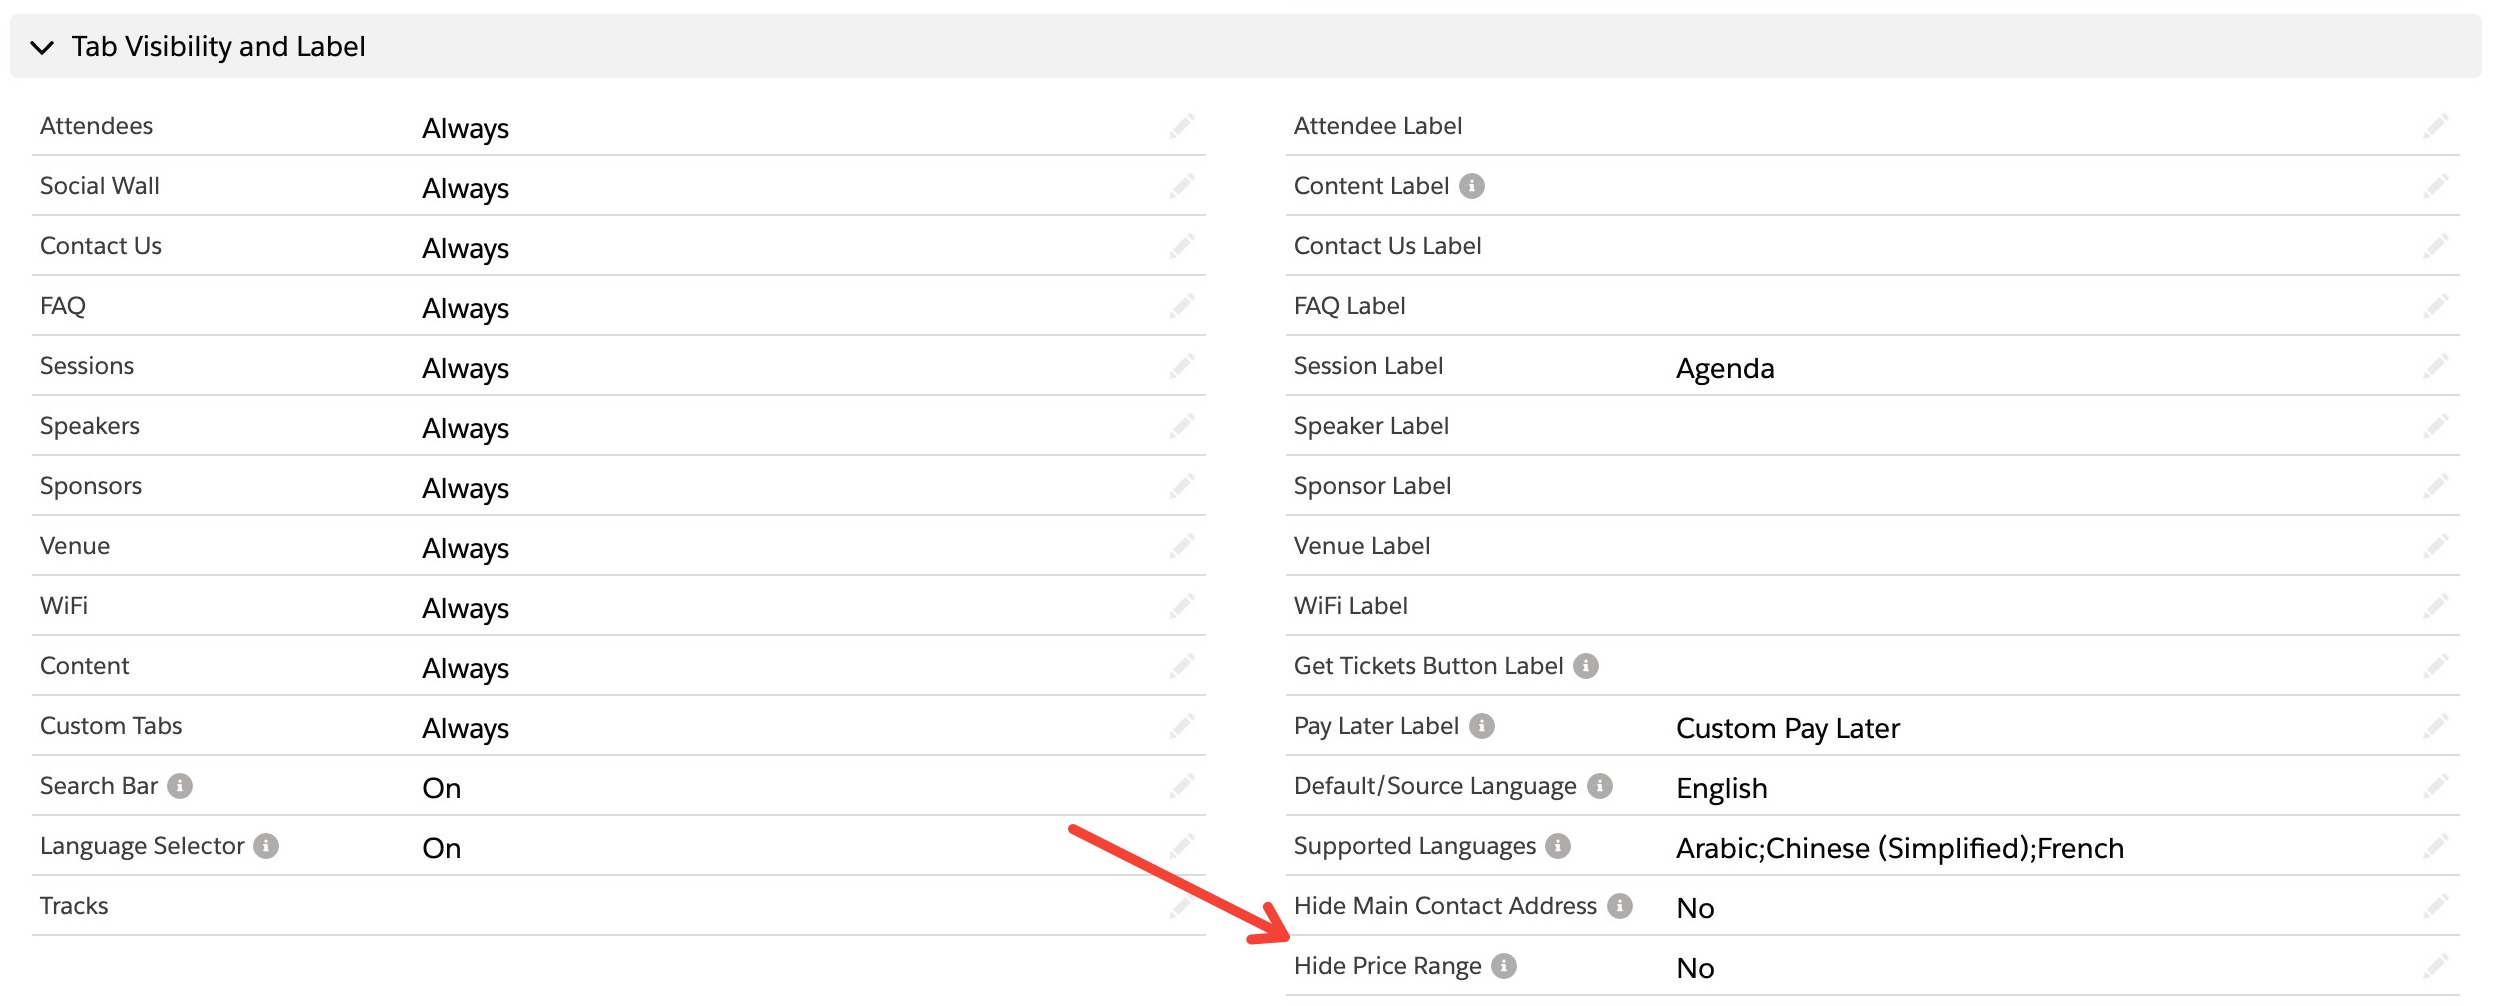
Hide Price Range
When Hide Price Range = “Yes,” the price range text will be hidden from the Event overview page, right above the register button.
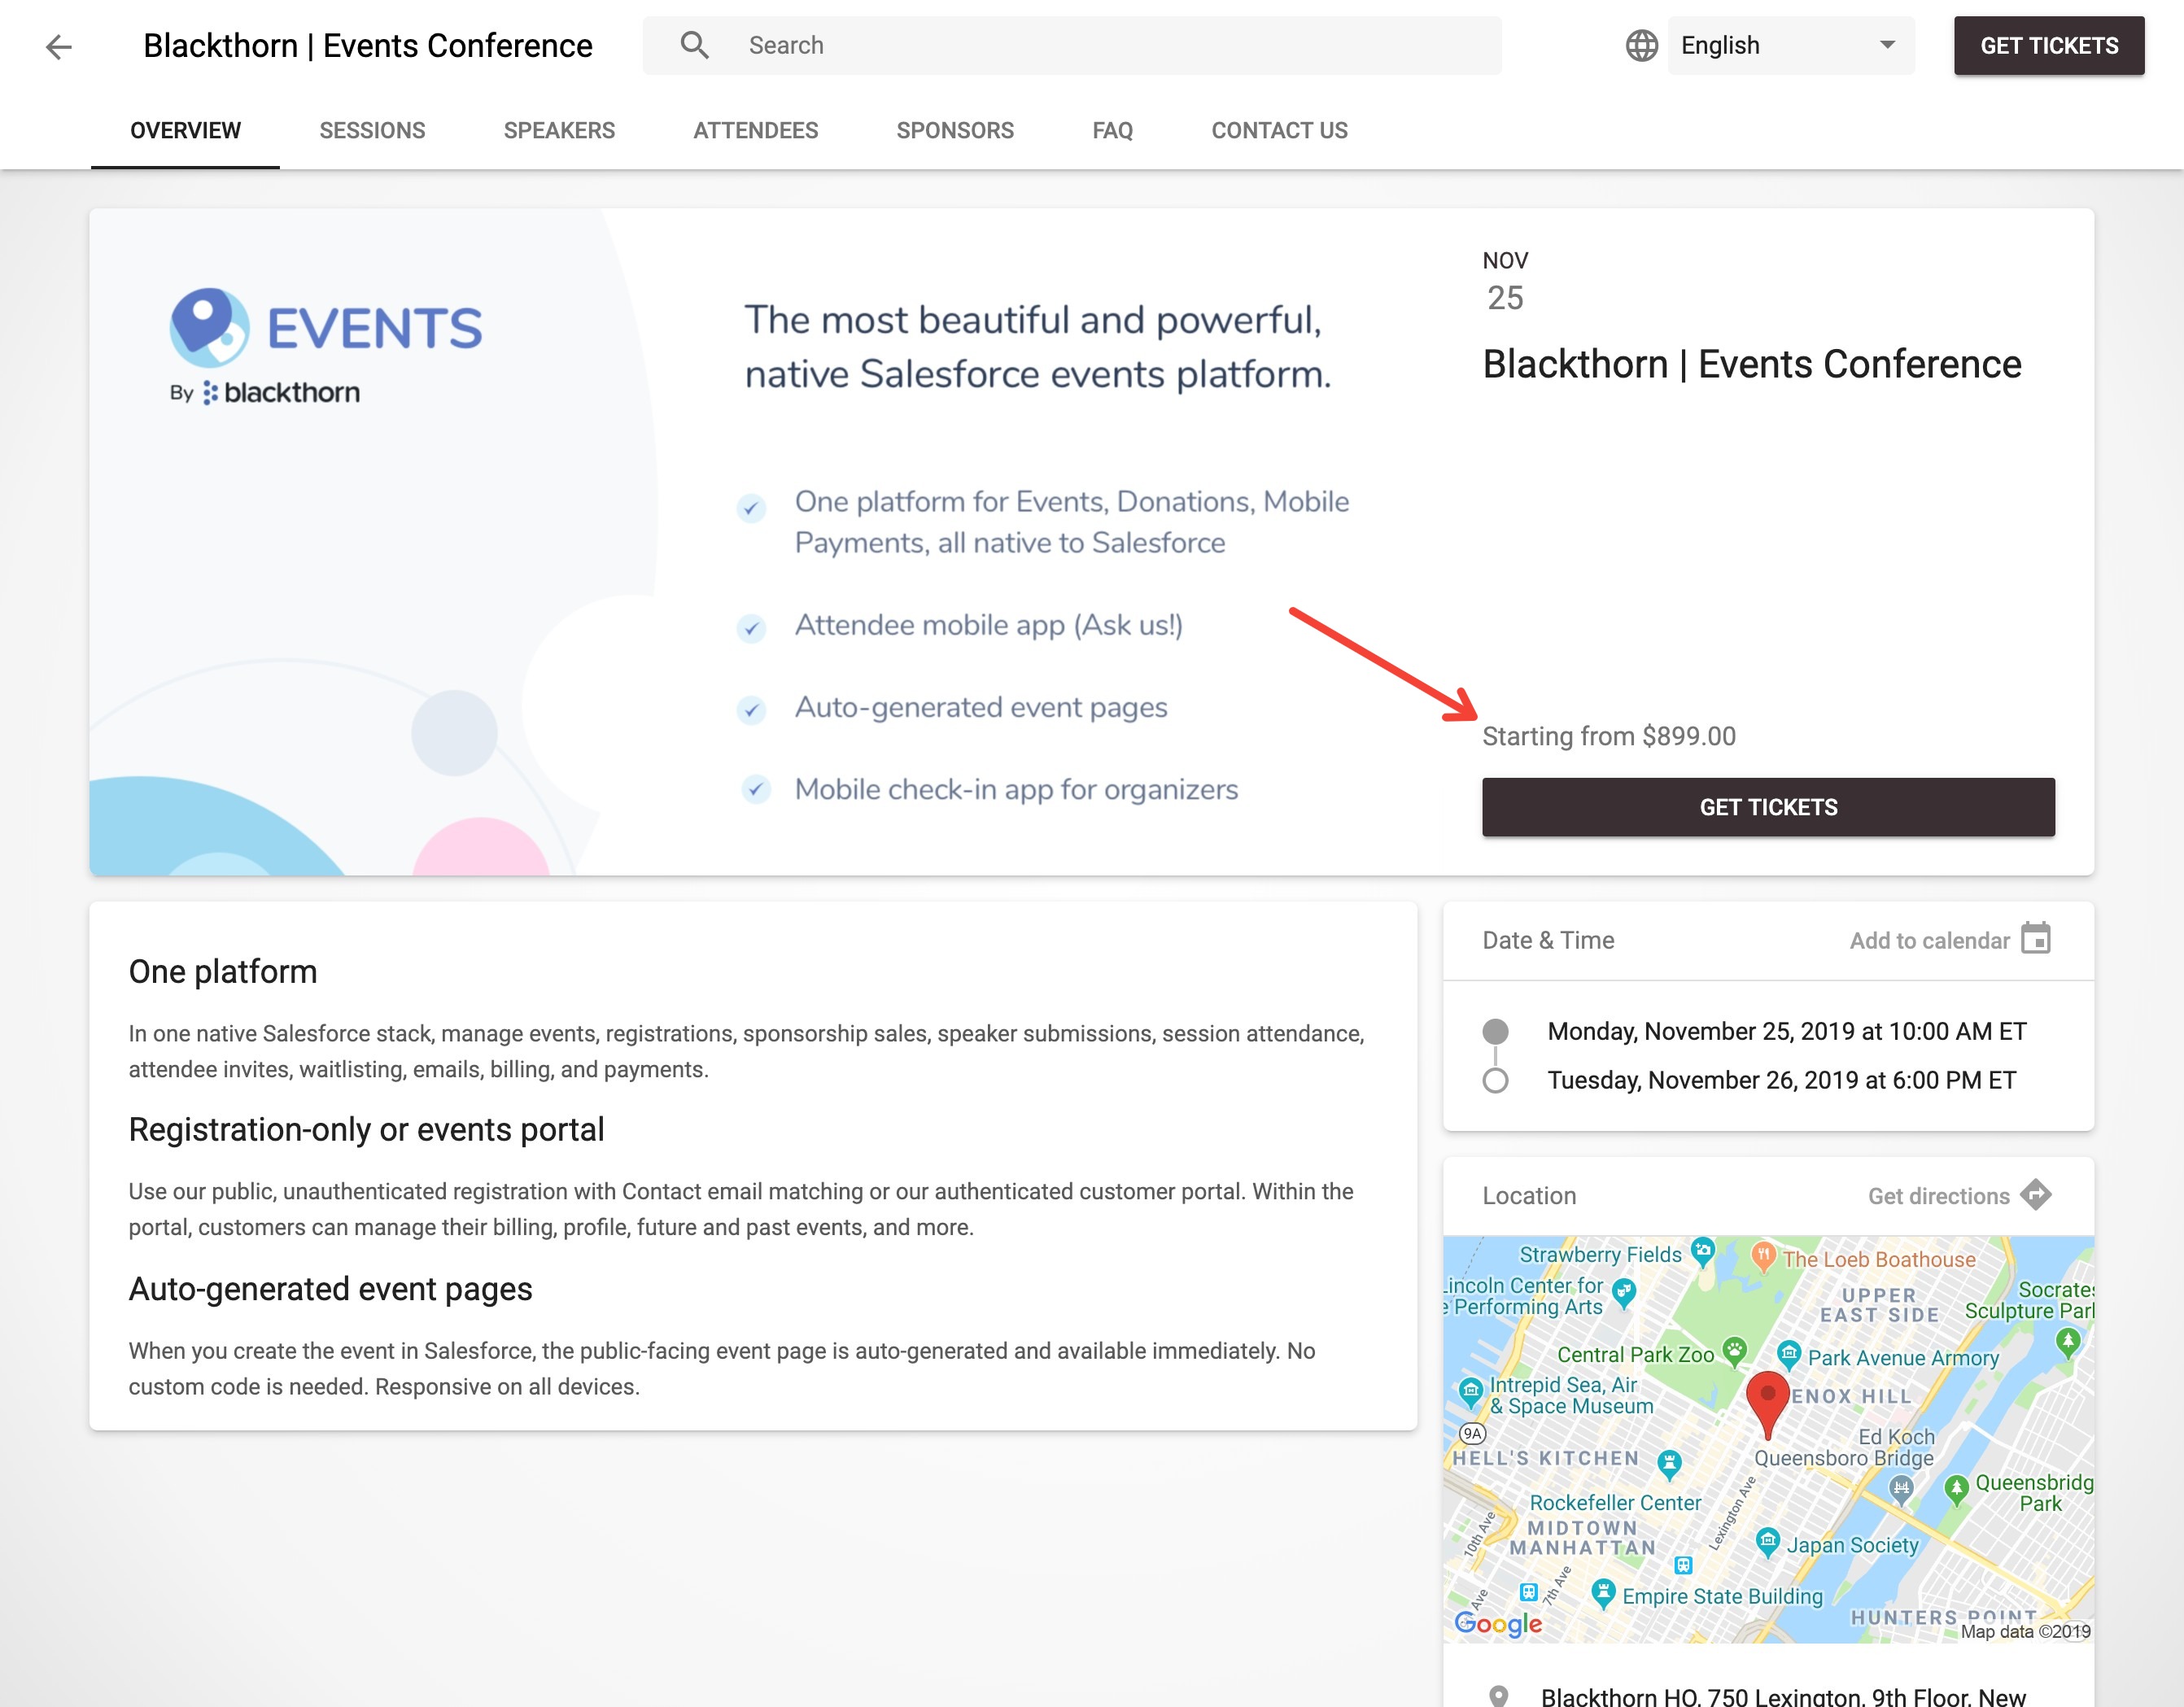
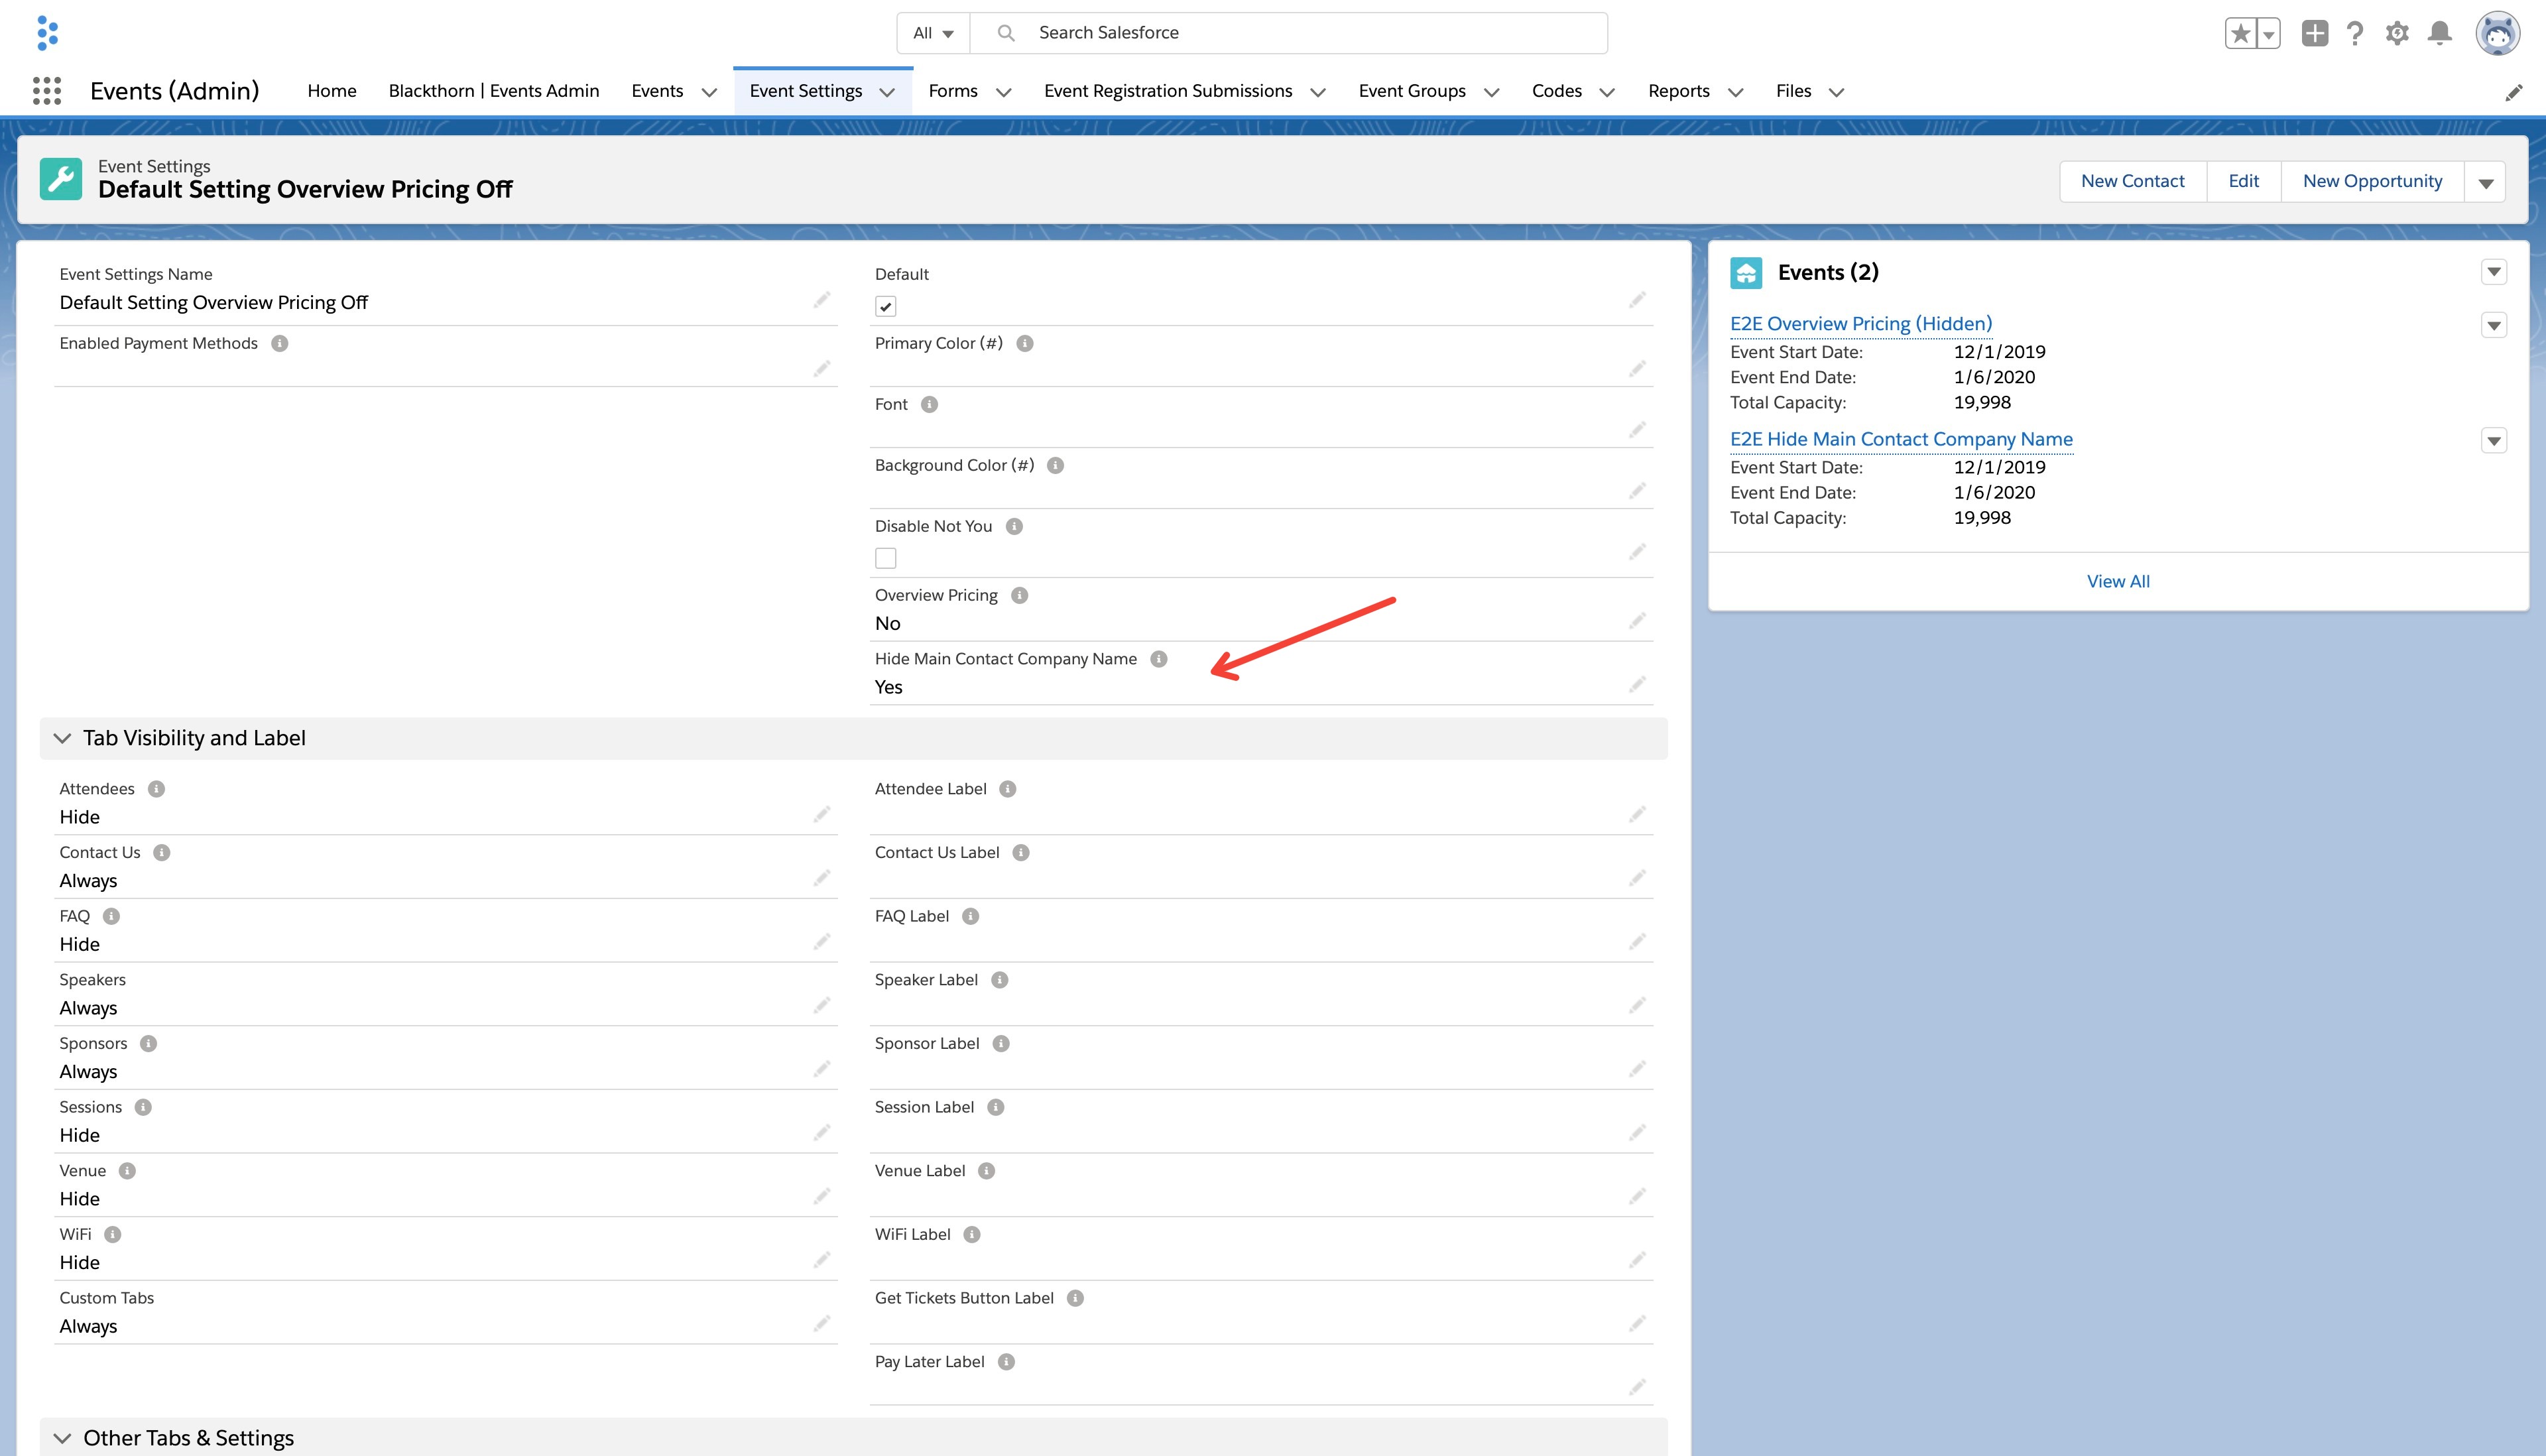
Overview Pricing
When Overview Pricing = “No,” the price range component will be hidden from the Event overview page.
Donations
The picklist field Create Opportunities for Donations (create_opportunities_for_donations_c) was added to the Event Settings. The default setting is “No.”
If Create Opportunities for Donations = “Yes” in the Event Settings, an Opportunity record will be created for each Event Item where Type = "Donation".
Each new Opportunity will include the following information:
Account Name = Attendee or Donor's full name
Close Date = date the Donation was made
Amount = amount of the Donation
Opportunity Owner
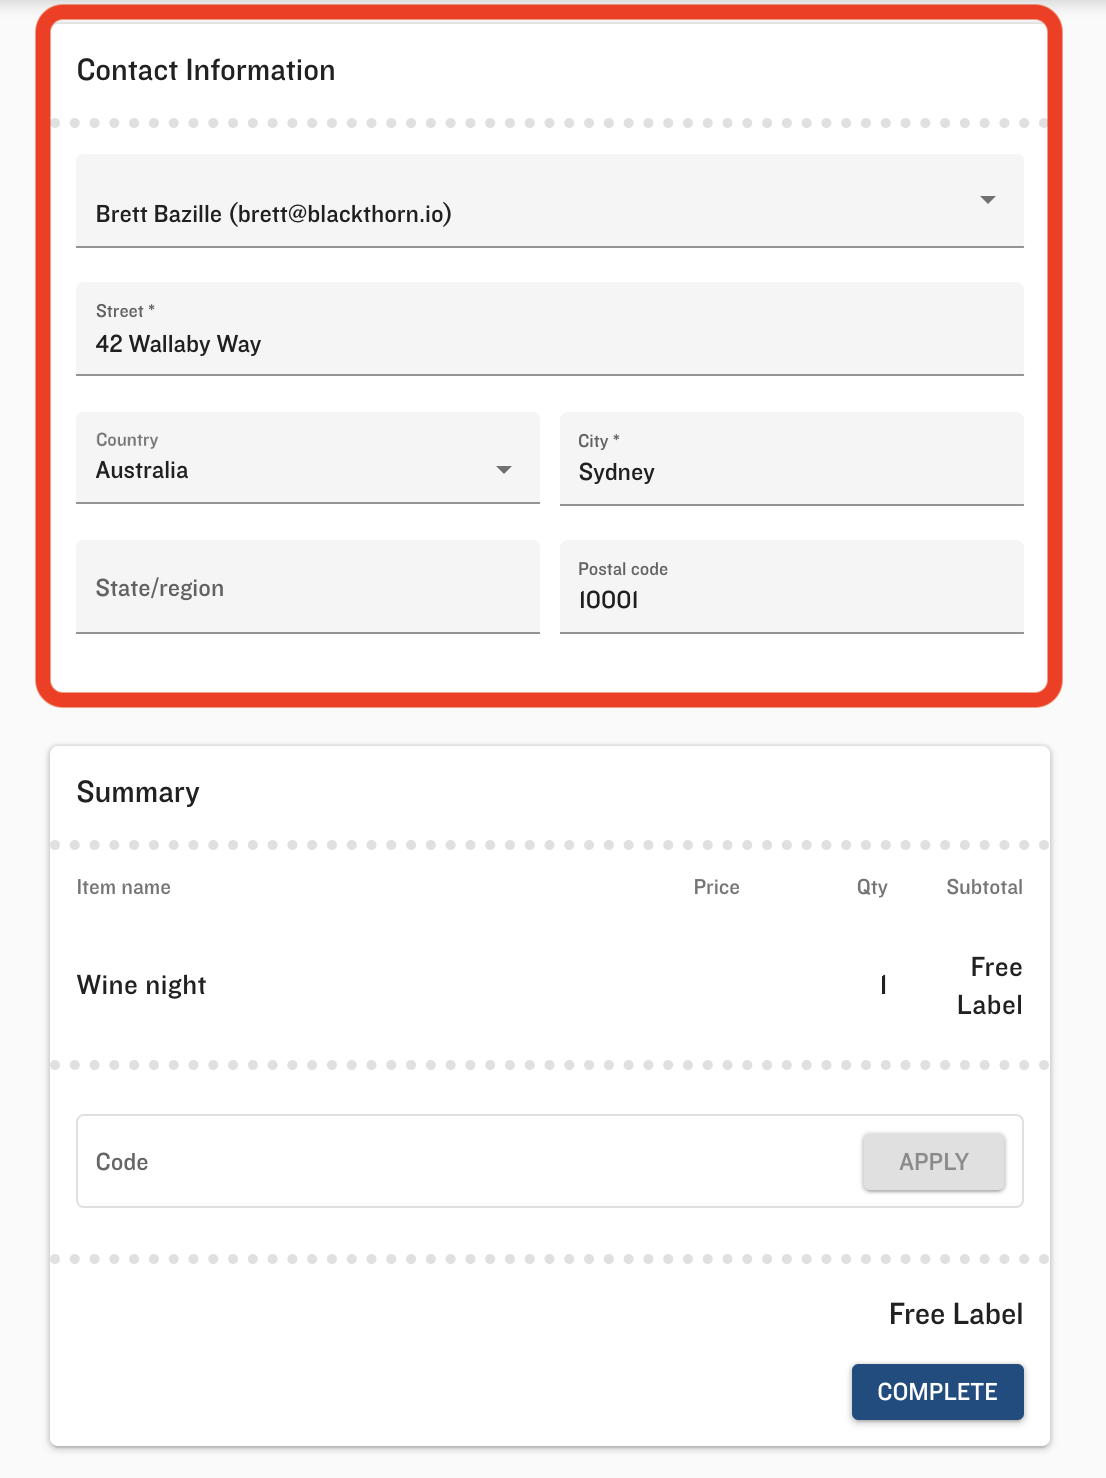
Main Contact (Primary Registrant) Form
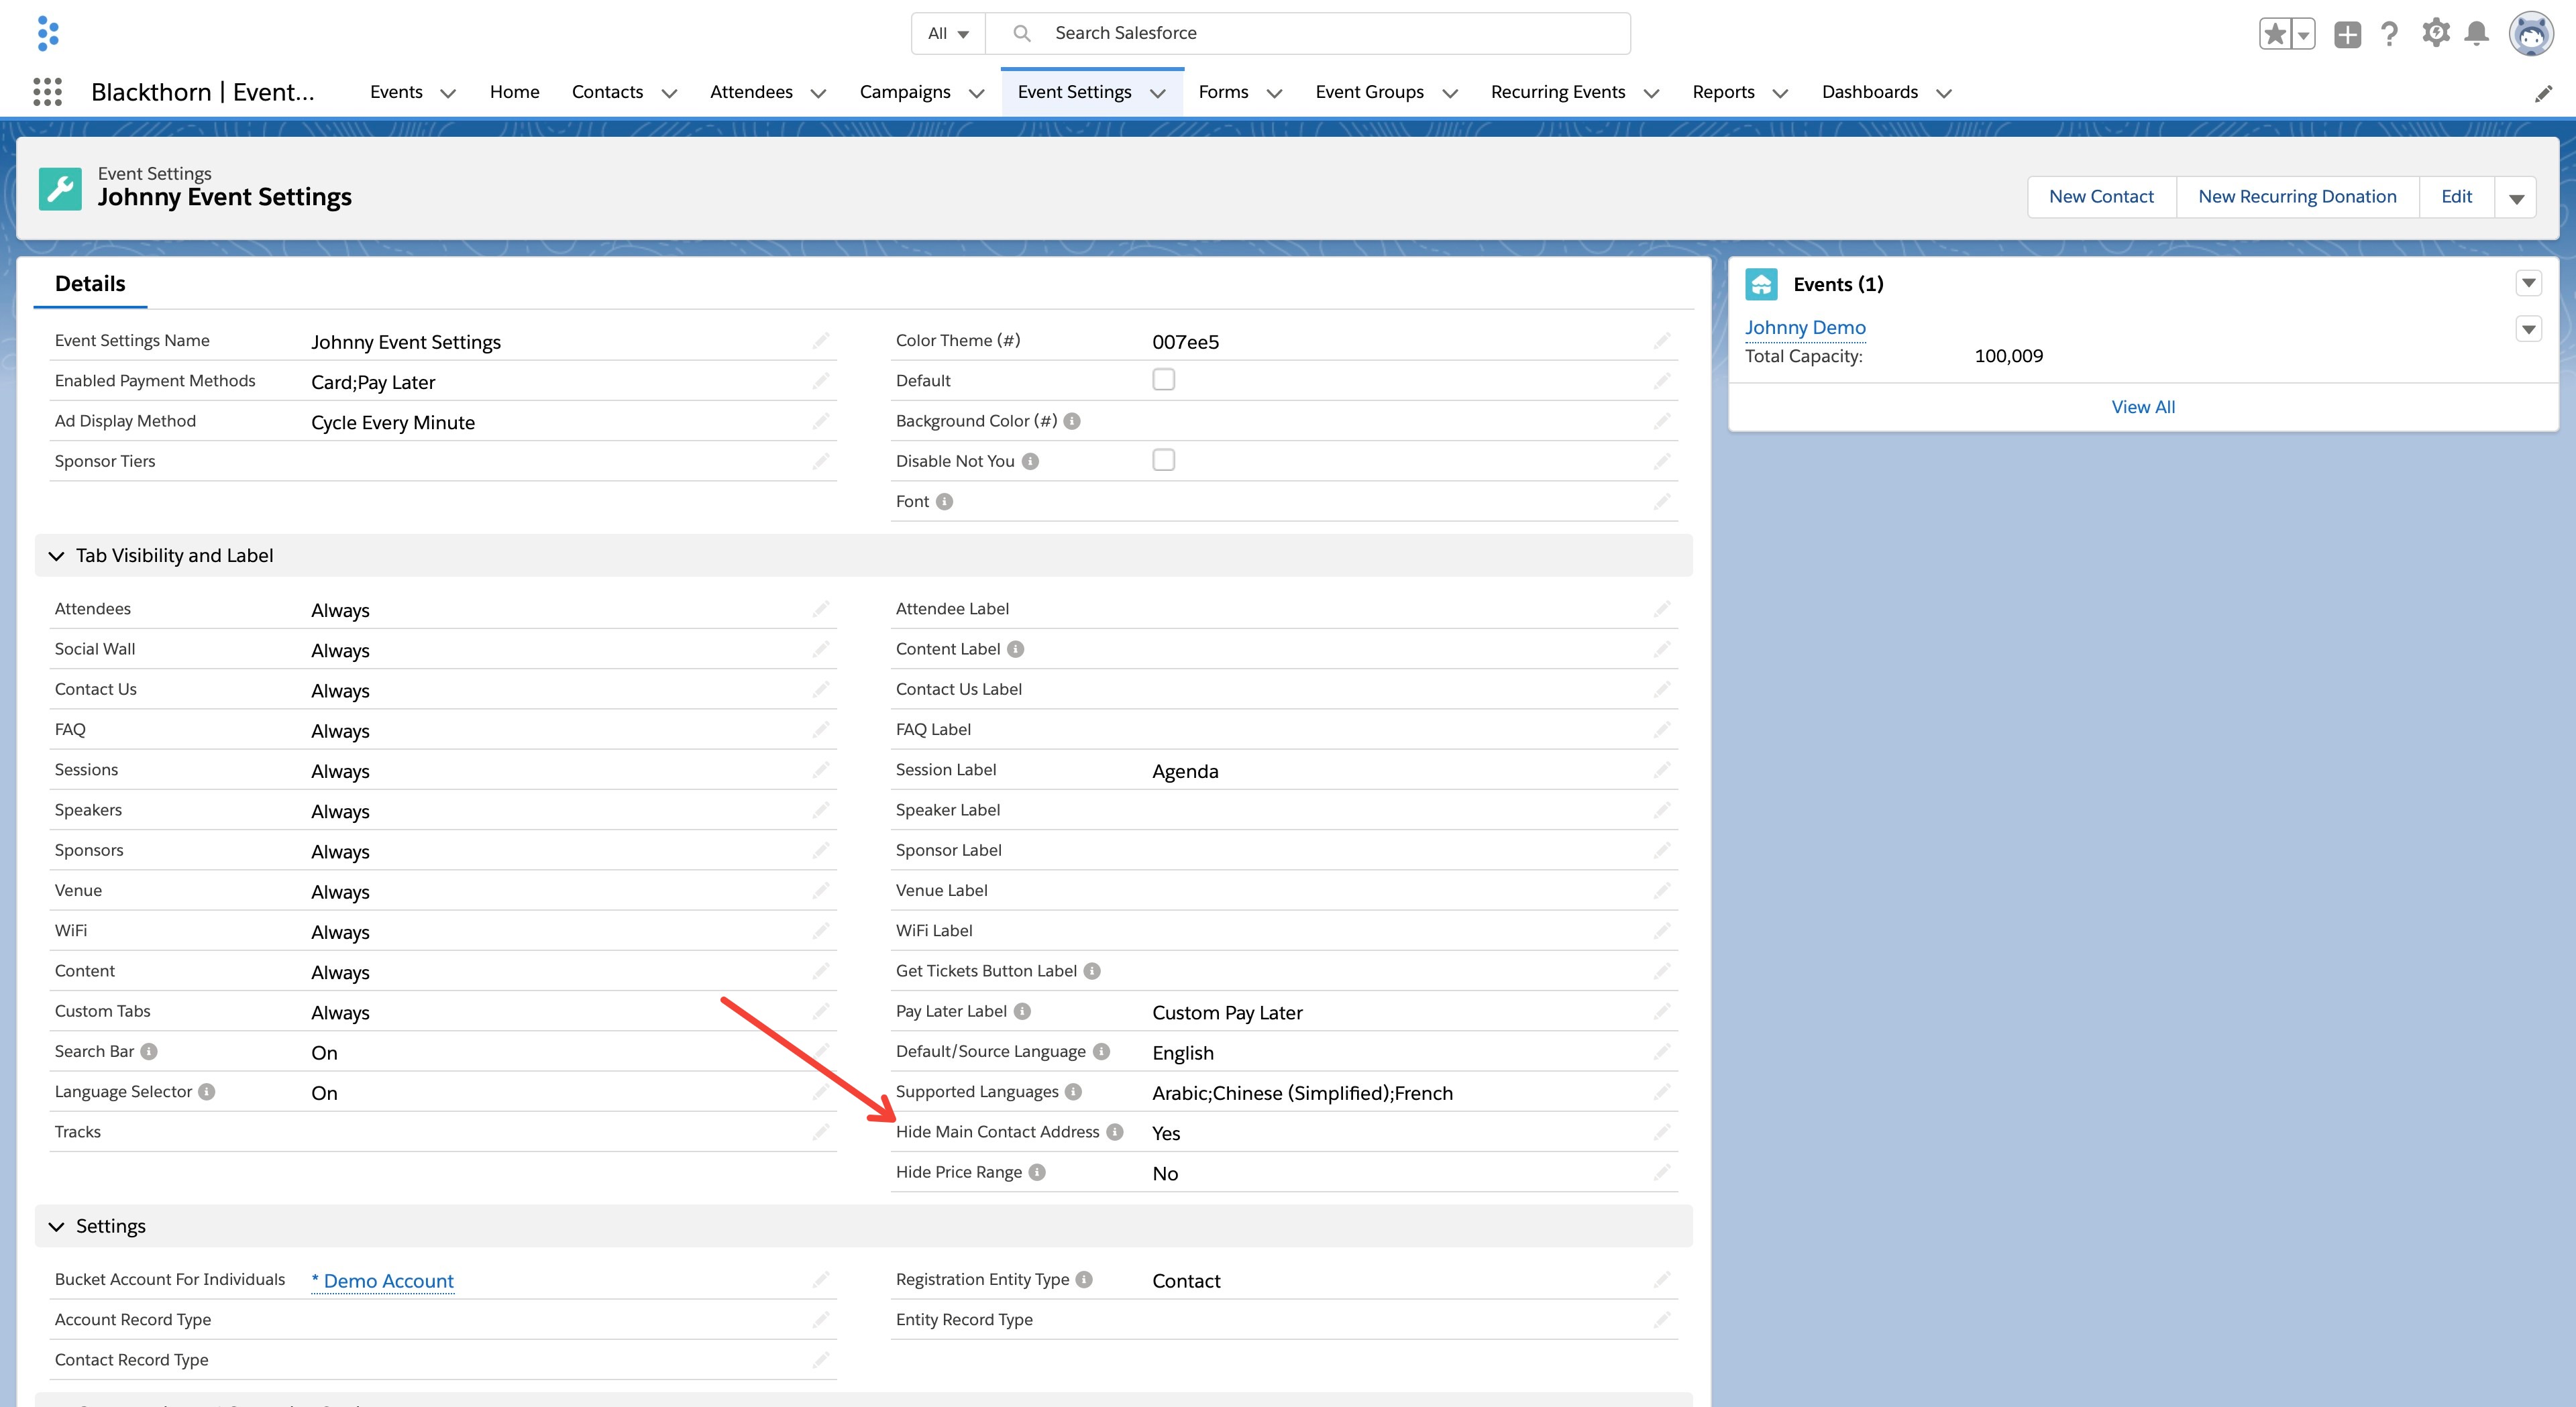
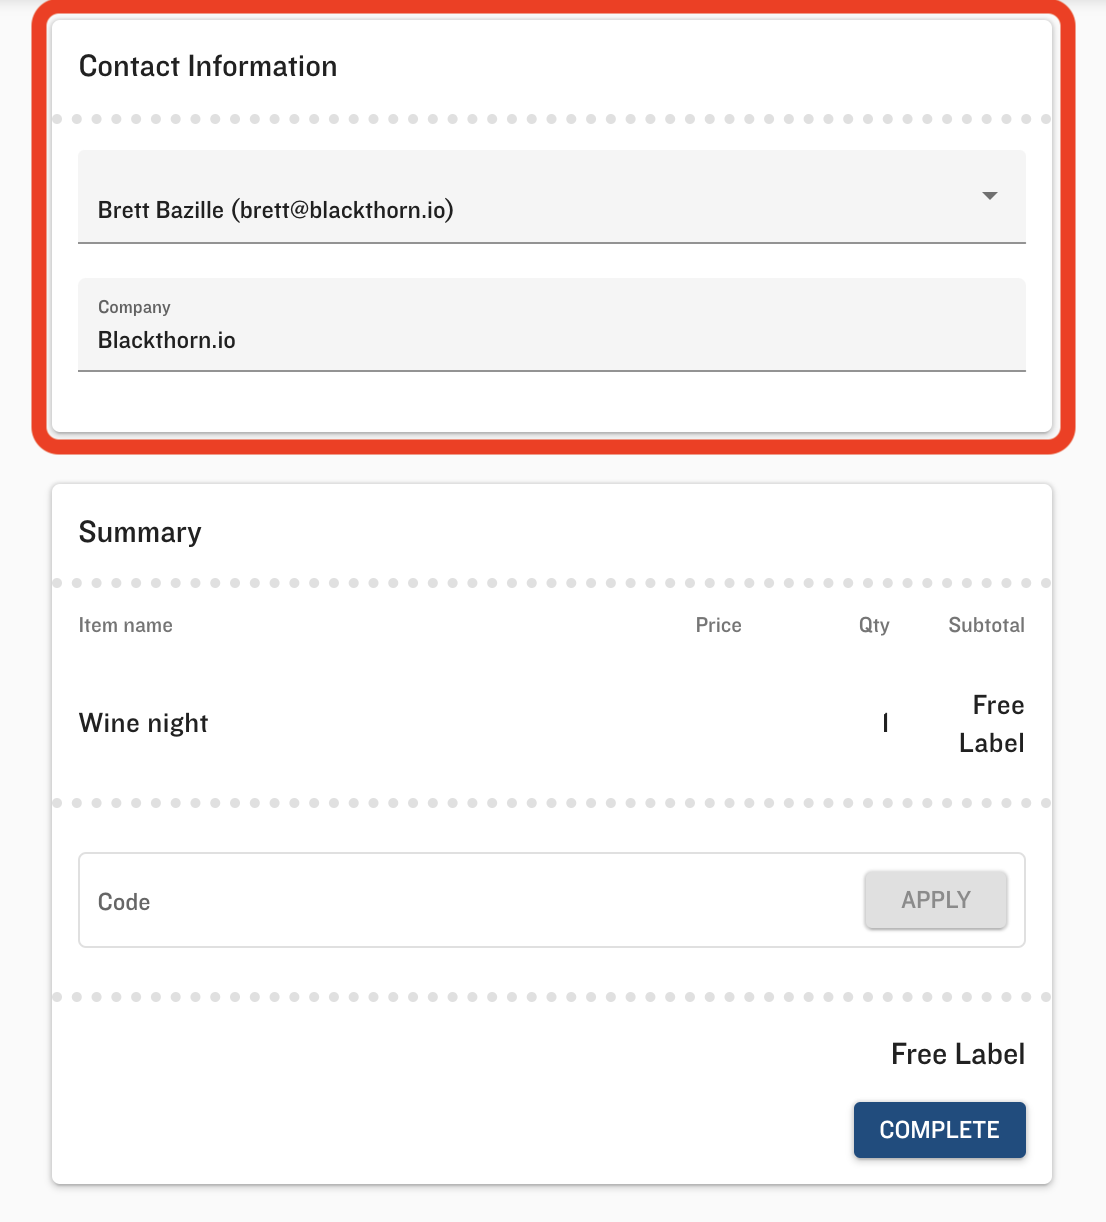
Hide the Main Contact Address during Checkout
When Hide Main Contact Address = “Yes,” the related address fields will be hidden from the UI during checkout.
Exception - Please Read
The Phone field will be visible on the Contact Information form even if the Hide Main Contact Address field is set to “Yes” on the Event Settings. The Contacts Phone is a required field for the BT Events Attendee Matching Rule.
Set to Yes
Set to No
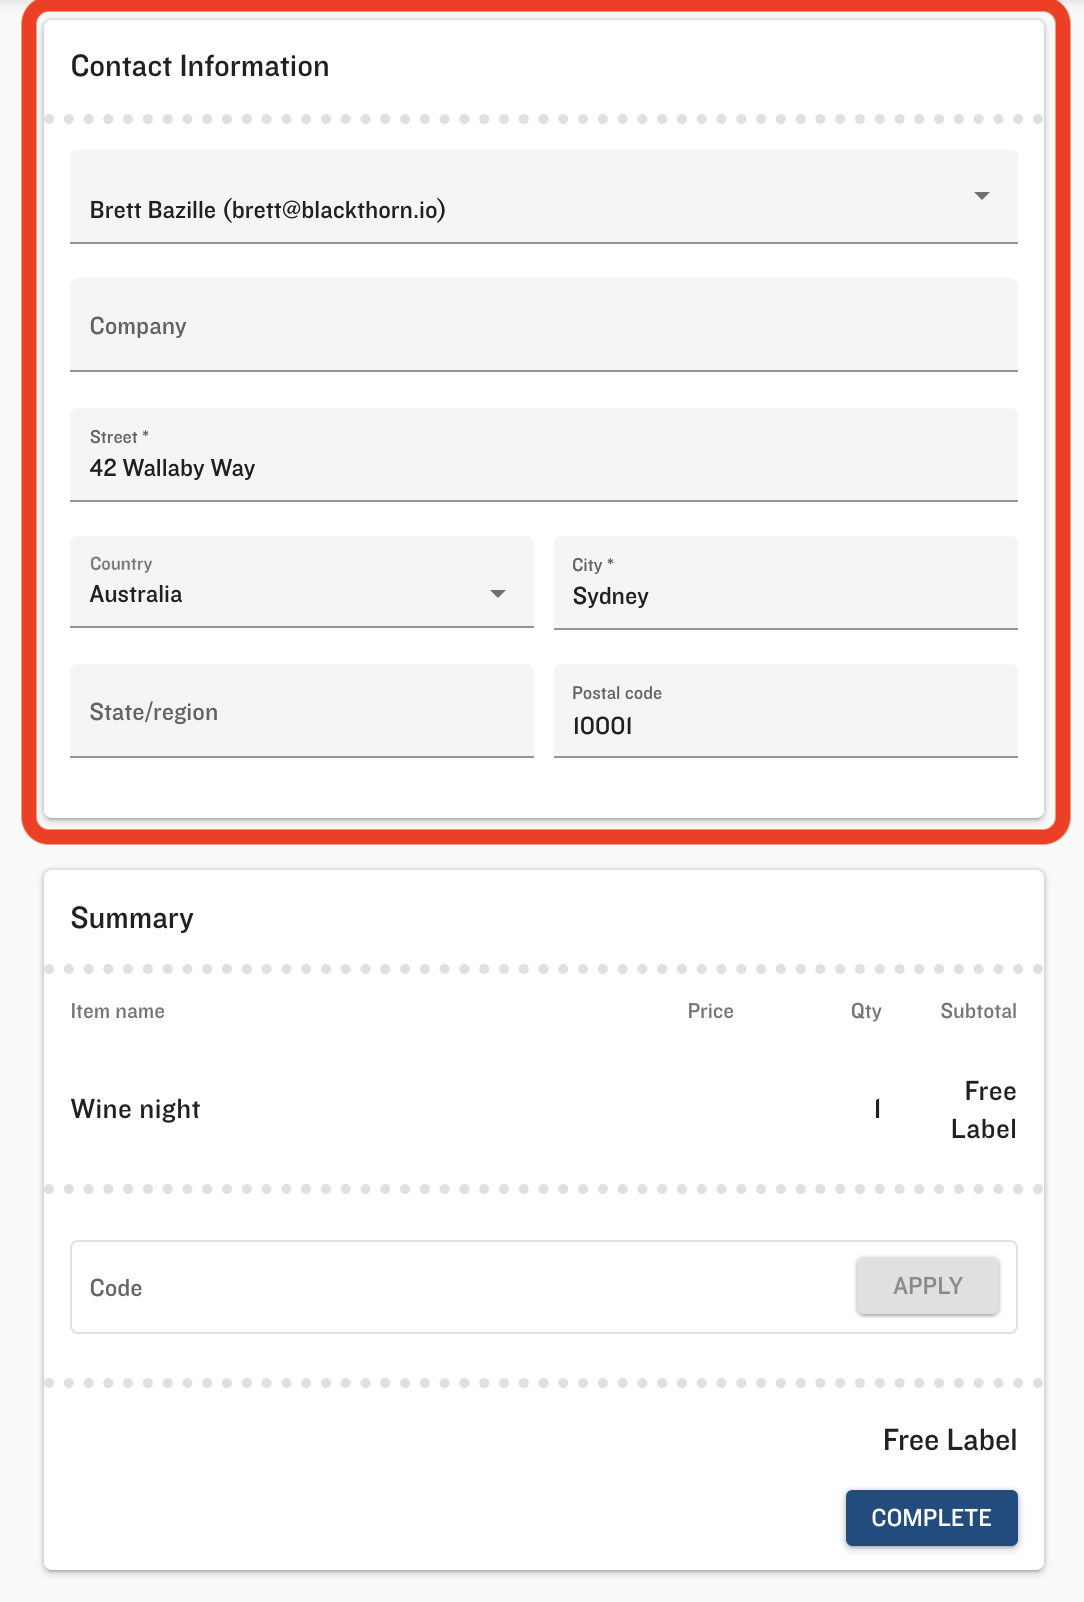
Hide Main Contact Company Name in Checkout
When Hide Main Contact Company Name is set to “Yes,” the company field will be hidden from the UI.
Design/UI
Background Color
Enter the hex number in the Background Color (#) for the Event's background color.
Primary Color
Enter the hex number in the Primary Color (#) for the Event's primary color.
Card Color Theme
Select “Dark” or “Light” for the Card Color Theme. The default is “Light.”
Font
Change the Font of your Event listing.
All Google Fonts that are listed as picklist values on the Event Settings’ Font field are currently supported.
To add your own custom font, use the following example: Custom CSS Injection - Example 3.
Injecting Custom CSS
Injecting custom CSS into an Event Settings will apply the CSS to all Events related to the Event Settings.
This can be done by adding the Custom CSS Url field to your Event Settings page layout.
This example will change the title to red, and the background of the title to green.
.page-event-details h1.title {
  background-color: red;
}

.page-event-a1q0I00000A58pwQAB h1.title {
  background-color: green;
}
This example will hide the Event Start Date and Event Start Time for your Event.
.welcome.ng-star-inserted {
    display: hidden;
}
  .start-dates {
    display:none !important;
  }
  #date-and-time {
    display:none !important;
  }
Note: Custom CSS must be correctly served as a file with a MIME type of 'text/CSS' in order for it to load correctly.
Favicon URL
Add a URL to the Favicon Url field on the related Event Settings record to link a branded Favicon. All Events linked to an Event Settings with this field populated will display the custom Favicon instead of the default Blackthorn Favicon.
Use one of the following ways to set a Favicon URL.
Set on a Single Event
Set the Favicon on an Event-by-Event basis by using the Favicon Url field on the Event Settings record that is related to an Event or series of Events.
Upload the image to your Salesforce Files.
Open the file.
Click Public Link.
Set the Expiration date = “Off”
Set the Password = “Off”
Click Copy Link.
Open the URL in a new browser and click Download.
Navigate to all downloads and find the image file.
Copy the URL (downloaded file). You may need to right-click the file and click Copy Link Address.
Open the Event Settings record related to the Event.
Click the Pencil icon.
Enter the URL in the Favicon Url field.
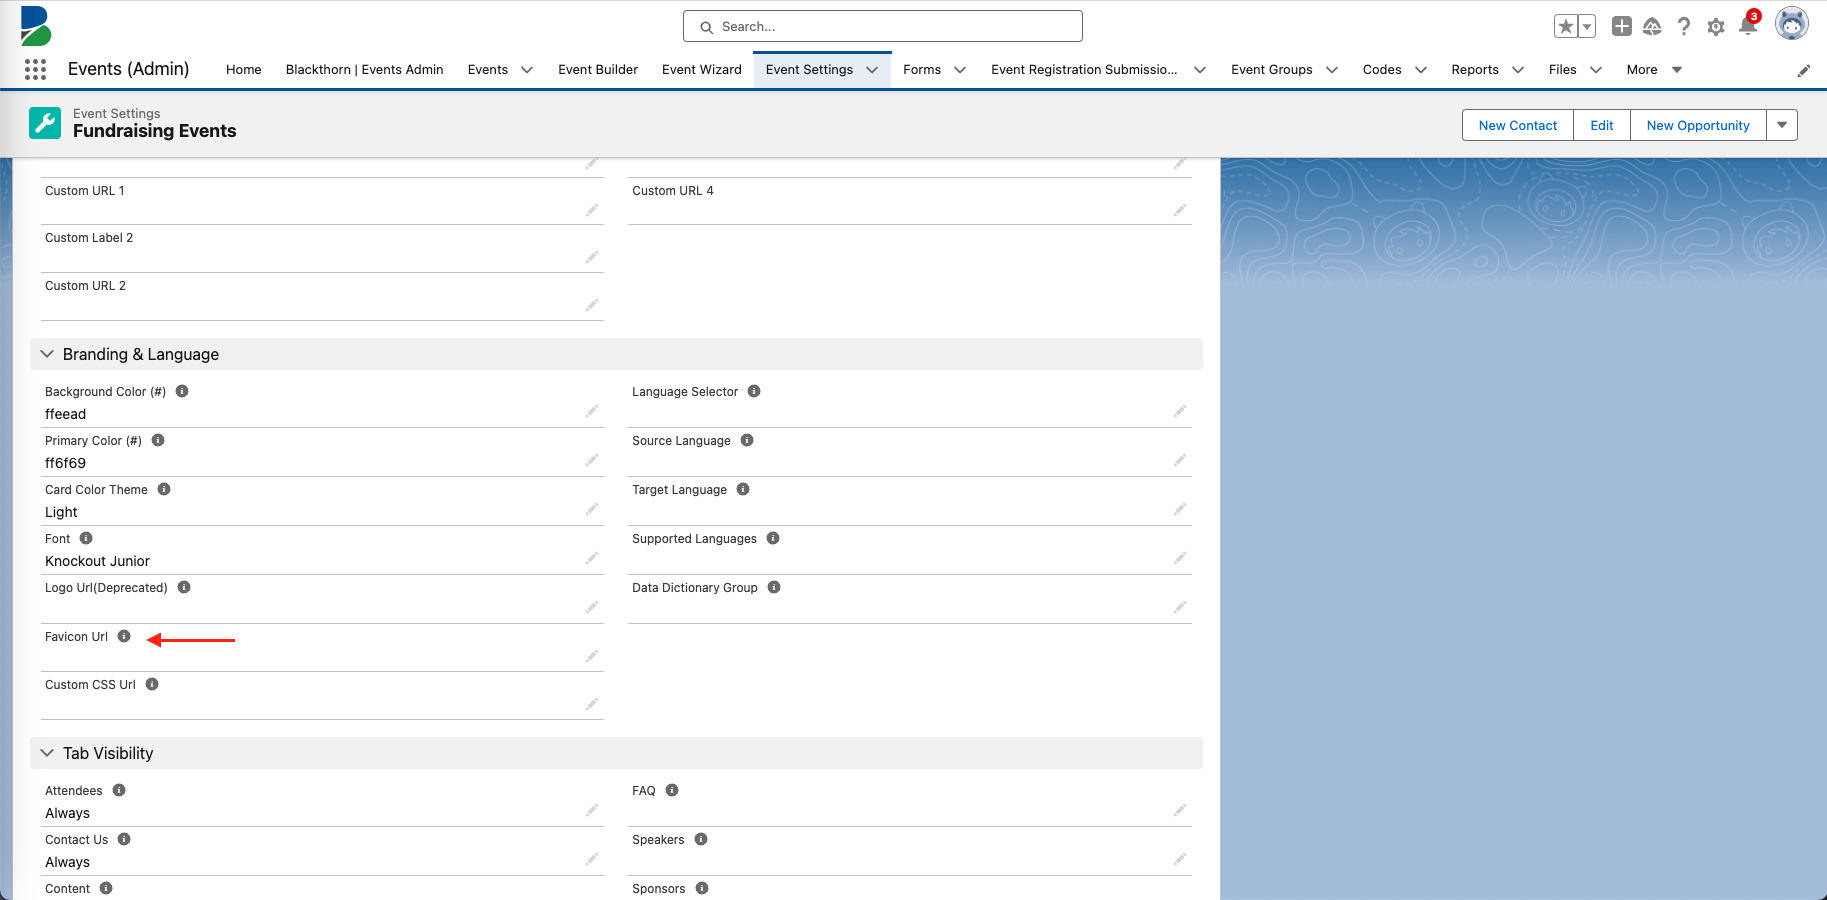
Click Save.
Set on All Events
Set the Favicon URL globally, which will apply the Favicon to all Events and Event Groups in the org.
Upload the image to your Salesforce Files.
Open the file.
Click Public Link.
Set the Expiration date = “Off”
Set the Password = “Off”
Click Copy Link.
Open the URL in a new browser and click Download.
Navigate to all downloads and find the image file.
Copy the URL (downloaded file). You may need to right-click the file and click Copy Link Address.
Go to the Blackthorn | Events Admin tab.
Click the Settings tab.
Enter the URL in the Favicon Url field.
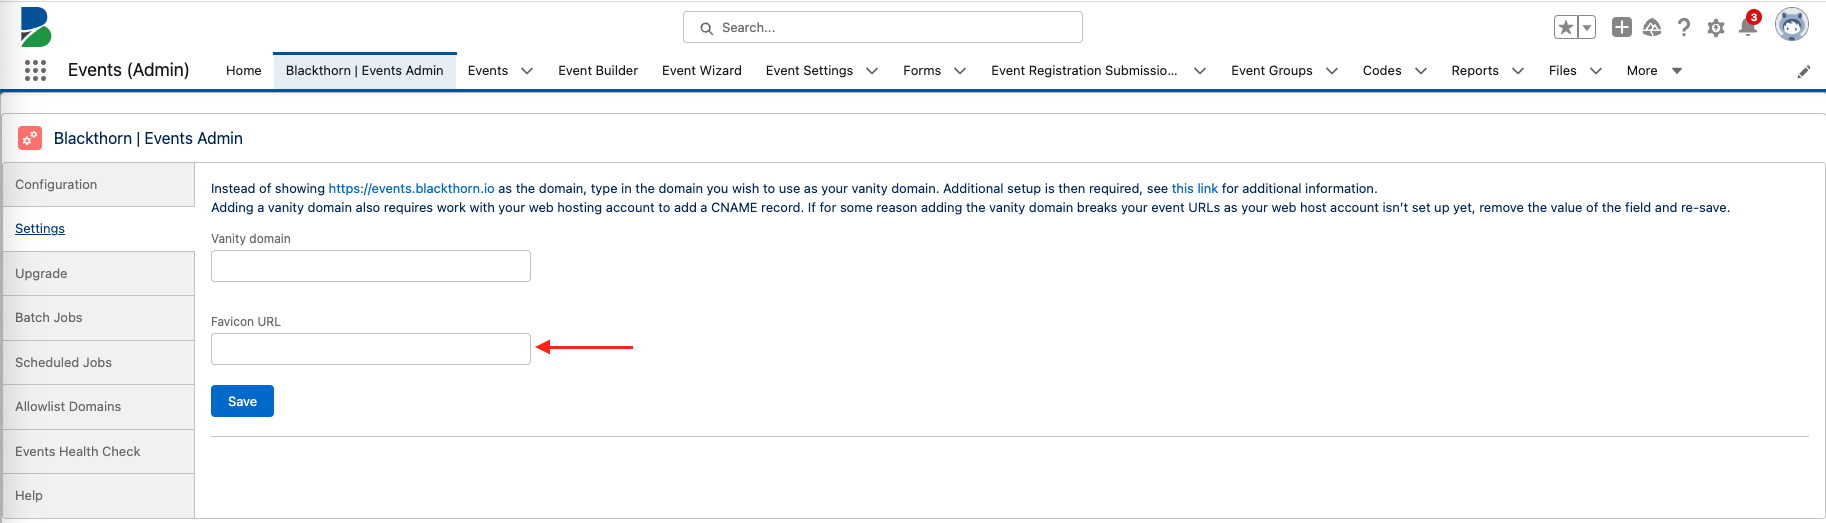
Click Save.
Example
The Blackthorn B is the default Favicon and in this Event example, it was replaced by populating the Favicon Url field

Note: The default sizing for a Favicon is 16x16 pixels.
Non-Salesforce File Storage
If you are using public Salesforce files or Google Drive links in the Favicon Url field, follow the instructions below.
Create the URL using this format: https://drive.google.com/u/1/uc?id=$FILE_ID&export=download
Change “$FILE_ID” to the desired FILE_ID.
Other Settings
24-hour Format
If you would like to change the date format on your Event overview page from am/pm to 24-hour, update the Show 24 Hour Time Format to "Yes".
Block Duplicate Registrations
The Block Duplicate Registrations field (conference360__Block_Duplicate_Registrations__c) allows users to block duplicate registrations.
When Block Duplicate Registrations is checked, duplicate Invoices will NOT be created when an Attendee registers twice in a row while the first registration is still being processed.
Note: Current users need to manually add the Block Duplicate Registrations field to the Event Settings page layout.
Duplicate Rules and ERS Records
Duplicate rules ensure completed and processed registrations are handled by duplication logic when configured to block duplicates on creation, including Event Registration Submission (ERS) records with Status set to “To Process” and a value in the new Primary Email (conference360__Primary_Email__c) field.
If the Event Settings Block Duplicate Registrations = “True” and an Attendee submits a registration that has an ERS record with Status set to “To Process” or “Completed” and the Primary Email field is populated, then the Attendee will get an error when they try to submit a duplicate registration.
If the Event Settings Block Duplicate Registrations = “False” and an Attendee submits a registration that has an ERS record with Status set to “To Process” or “Completed” and the Primary Email field is populated, the Attendee will be able to submit a duplicate registration successfully.
Contact and Payment Details for Free Events
The Event Settings' Remove Info Page for Free Events (conference360__Remove_Info_Page_for_Free_Events__c ) field allows users to add or remove the contact information/payment details page for free Events. The picklist values are “Yes” or “No,” and the default value is no.
When Remove Info Page for Free Events = “Yes” (enabled), the last page during checkout is hidden. This page usually asks for additional contact/payment information. This feature can only be enabled for free Events.
If a free Event has the Event Settings Remove Info Page for Free Events and Enable Captcha fields enabled, Attendees will see the reCAPTCHA on the last page of the registration process.
Note: Current users may need to manually add the Remove Info Page for Free Events field to the Event Settings page layout.
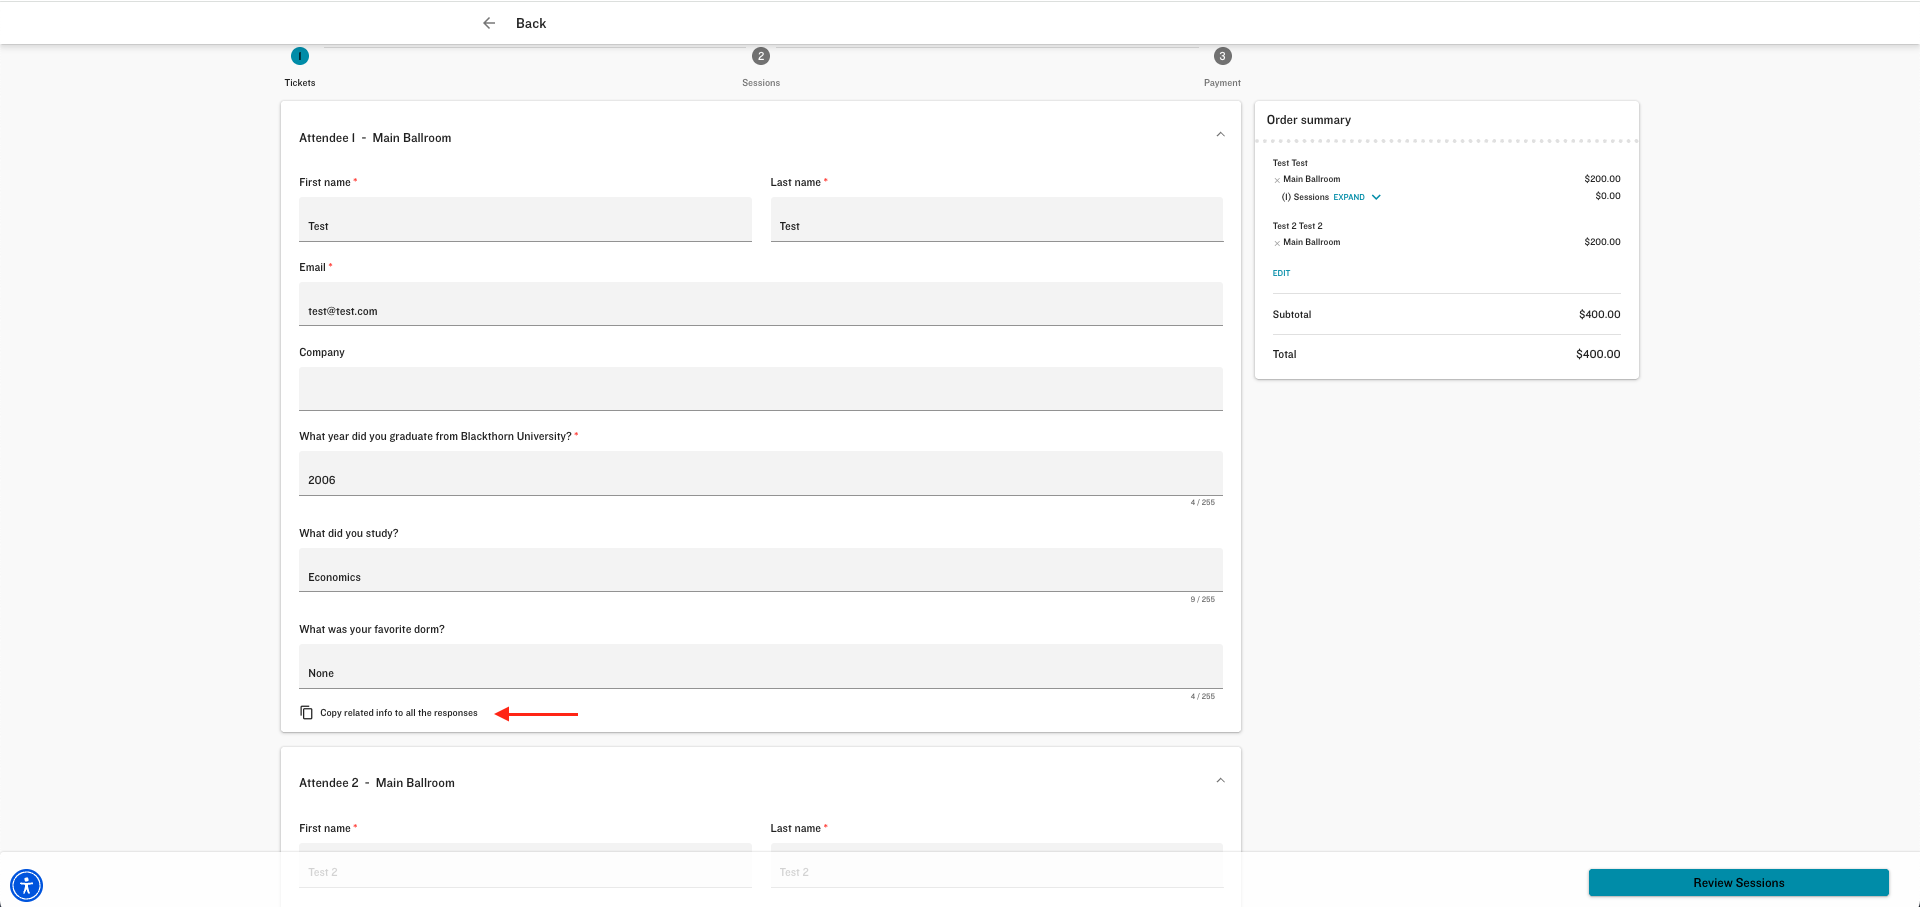
Copy Related Info to All Responses
When an Attendee registers a group, they can now click the Copy related info to all the responses button to copy their Form responses to all Attendees in the group if the new Event Settings’ Allow Form Responses for Attendee Group field is set to "Yes." The new field removes the repeated copy-paste step and decreases the time it takes to register everyone.
Important Notes
The Forms must be identical and have the same Form record ID.
The Copy related info to all the responses button will only be displayed if the first Event Item shown has custom questions.
Countries to Exclude or Include
The Countries To Exclude field defines which countries should be removed as available options for Attendees during checkout. If a country is excluded, payment cards from that country cannot be used for checkout.
Since the Countries To Exclude picklist allows up to 100 options, which may be overwhelming for Attendees, you can instead use the Countries To Include field.
The Countries To Include field gives you the option to overwrite the values in the Countries To Exclude field.
To use the Countries To Include field, choose values from the Countries To Exclude picklist and place them in the Countries To Include field, separated by commas.
Attendees will now see only the countries in the Countries To Include field as available options in the Attendee Info Form’s Country picklist.
NOTE: If the Event Settings’ Countries To Exclude and Countries To Include fields both contain values, Attendees will only see the values in the Countries To Include field in the Attendee Info Form’s Country picklist.
Custom Cancelation Message
If your Attendee cancels their registration via their AttendeeLink, you can replace the default cancelation message with one of your own. Add the message to the Ticket cancelation message field on the Event Settings record.
Date Format
Use the Date Format field to change the date format on the Event’s webpage. The included picklist values are as follows.
MM/DD/YY
MM/DD/YYYY
DD/MM/YY
DD/MM/YYYY
YY/MM/DD
YYYY/MM/DD
Disable Auto-Add to Default Event Group
The Event Settings Disable Auto-Add to Default Event Group (conference360__Disable_Auto_Add_to_Default_Event_Group__c ) field allows Event Organizers to determine whether an Event should automatically be added to the Event Group that is marked as the default Event Group.
If Disable Auto-Add to Default Event Group is unchecked (default setting), the new Event will be added automatically to the default Event Group.
If Disable Auto-Add to Default Event Group is checked (enabled), the new Event will not automatically be added to the default Event Group.
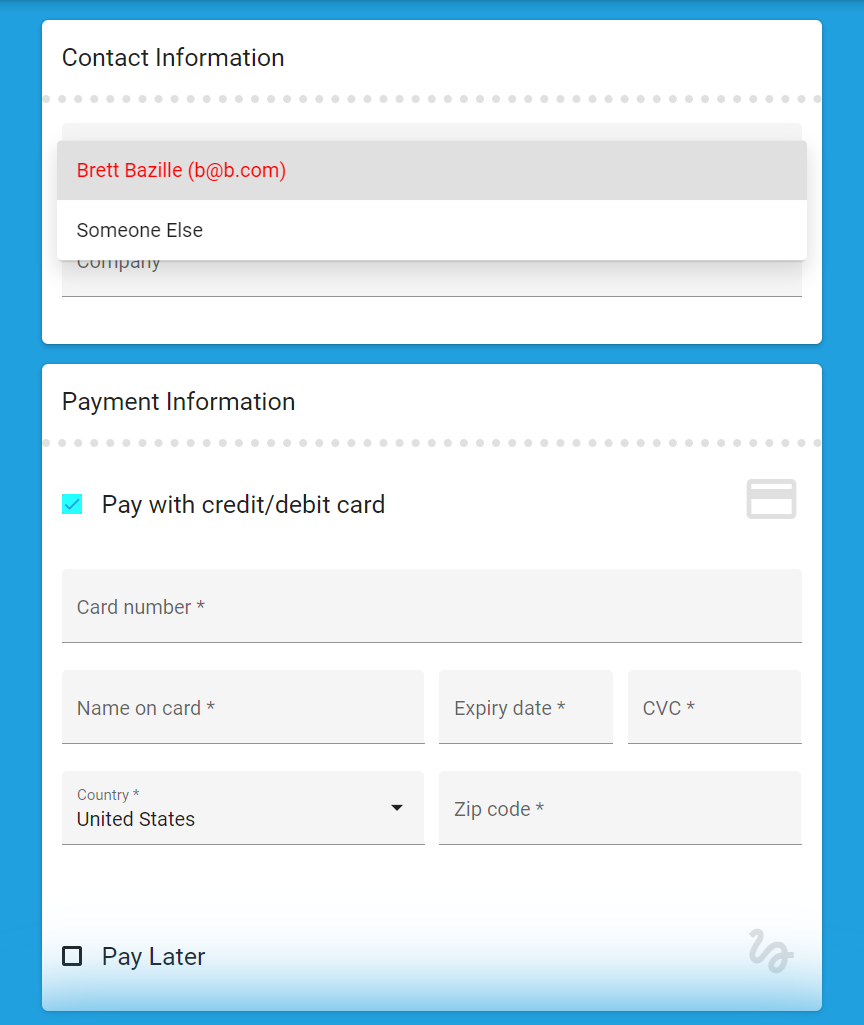
Disable Checkout as Someone Else
When Disable Checkout as Someone Else is checked, the Attendee will not see the "Someone Else" option on checkout. This field will need to be added to your Event Settings page layout.
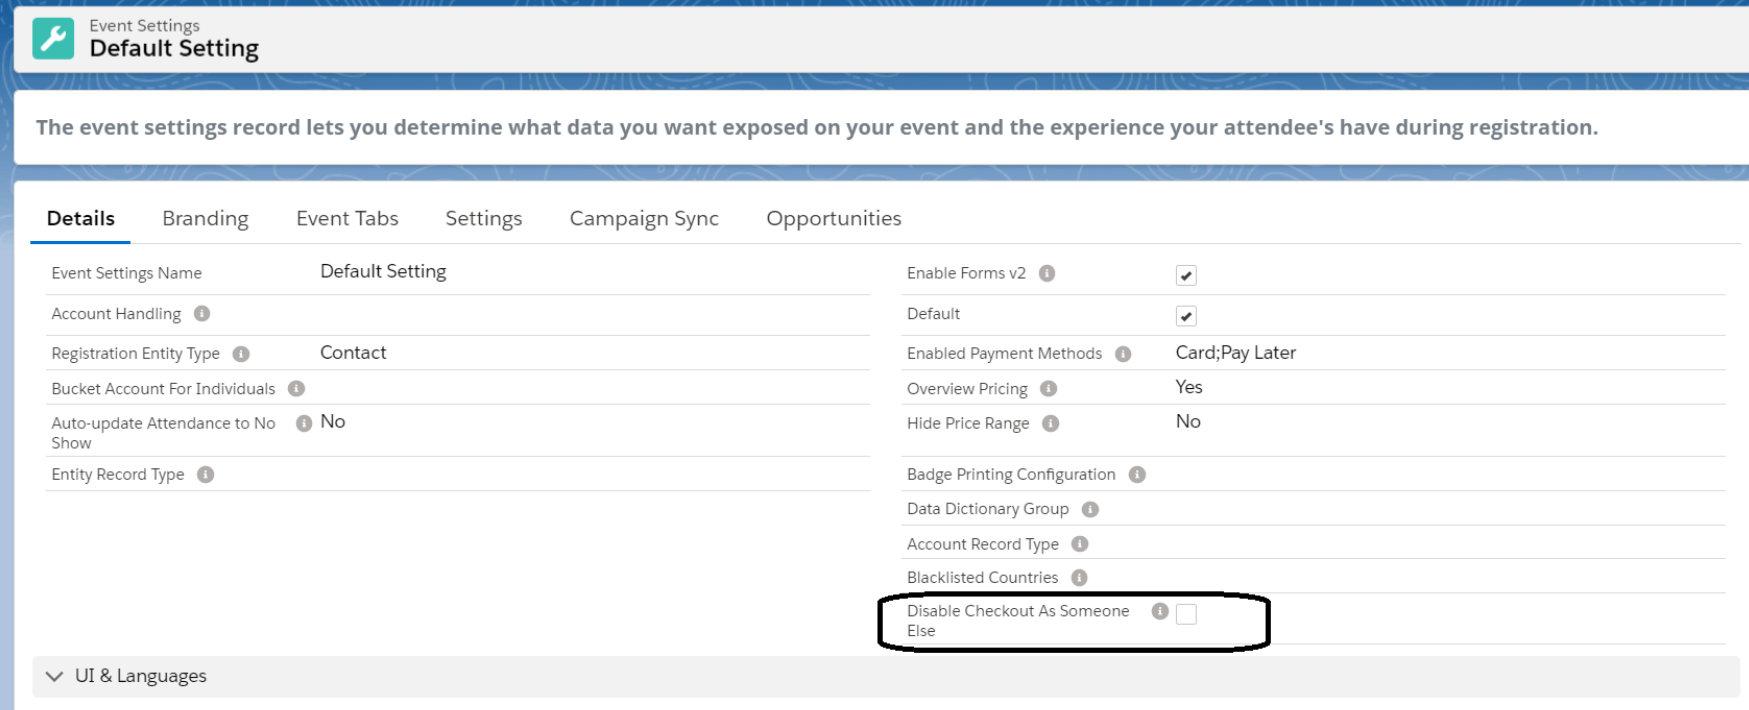
Once the box is checked, the Attendee will no longer see the "Someone Else" option.
Disable Not You
When Disable Not You is checked and an Attendee receives an invite from an AttendeeLink, they will not see the Not You button.
A common use case for this is with invite-only Events and with Attendees forwarding invite emails to block other people from registering.
Enable Event Search Options
If the Event Settings Search Bar field is set to “On,” Attendees can search the Event for related information using the following search criteria.
Sponsors: Sponsor Name
Speakers: First Name and Last Name
Attendees: First Name, Last Name, and Title
Sessions: Session Name
Event FAQ:
existing questions: A Question in simple or richTextQuestion form and an Answer in simple or richTextAnswer form
new questions: A Question in simpleTextQuestion form and an Answer in simpleTextAnswer form
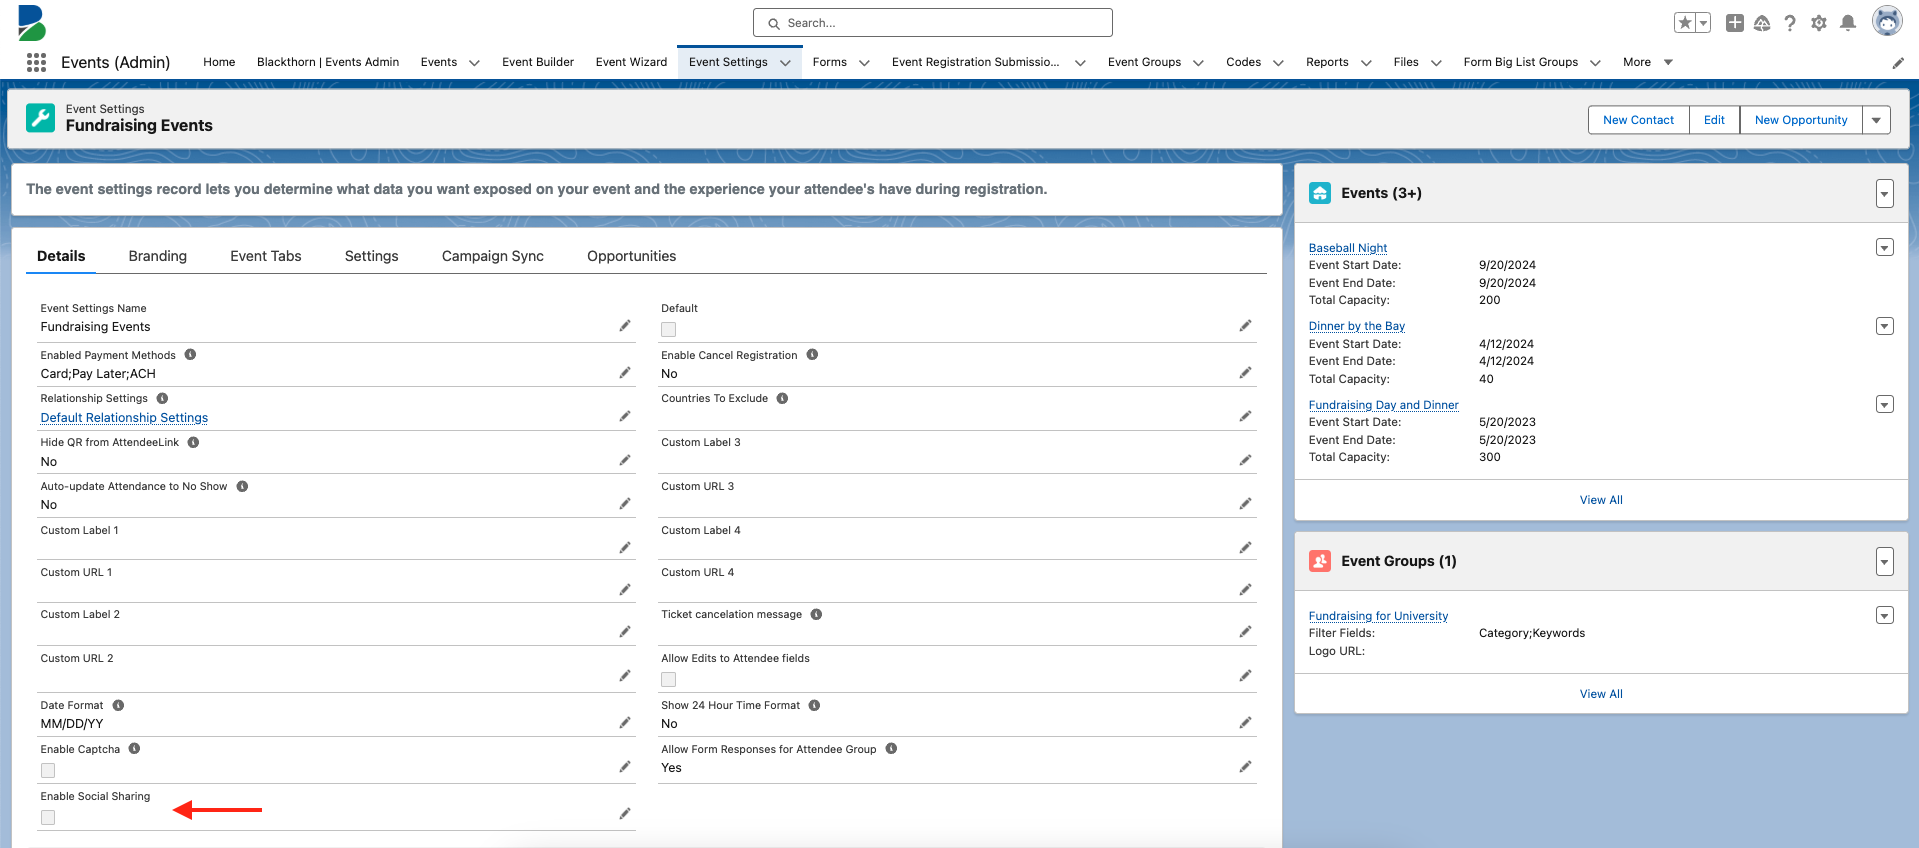
Enable Social Sharing
The Event Settings Enable Social Sharing checkbox allows Event Organizers to show or hide the Share button on an Event webpage.
- Object: Event Settings
- Field Label: Enable Social Sharing
- API Name: conference360__Enable_Social_Sharing__c
- Data Type: Checkbox
- Default: Unchecked (hide button by default)
- When enabled (checked), potential Attendees will see the Share button across all user interfaces.
- When disabled (unchecked), potential Attendees will not see the Share button.
If you don’t want Attendees to see the Share button, no additional action is needed.
To use the Enable Social Sharing checkbox, start by adding it to the Event Settings page layout.
- Click the Gear icon in the upper right-hand corner.
- Click Setup.
- Click the Object Manager tab.
- In the Quick Find box, enter and click “Event Settings.”
- Click the Page Layouts tab.
- Click the Page Layout Name.
- In the Quick Find box, enter “Enable Social Sharing.”
- Drag and drop the field on the page layout.
- Click Save.
- Go to the Event Settings record.
- Click the Pencil icon next to the “Enable Social Sharing field.
- Check the box.
- Click Save.
- Go to the related Event record and click Update.
Redirect Registered Users to their AttendeeLink
The Event Settings Auto Redirect Users to Confirmation Page (conference360__ Auto_Redirect_Users_to_Confirmation_Page__c) field ensures authenticated users (EC users, authenticated iframe, AttendeeLink users) who register for an Event via an Experience Cloud/Community or iframed webpage are redirected to their AttendeeLink if they revisit the (non-AttendeeLink) Event URL.
Register Walk-up Attendees
The Event Settings Allow Walk Up Registrations field lets Event Organizers determine whether Event Staff can accept walk-up registrations by showing or hiding the Add Attendee button, providing greater control over the registration experience on the day of the Event.
If Allow Walk Up Registrations is checked, Event Staff will see the Add Attendee button and can accept walk-up registrations on the Mobile Check-in app. This update changes the default behavior.
If Allow Walk Up Registrations is unchecked (new default setting), Event Staff can only check in pre-registered Attendees.
Salesforce Versions Before 5.32
If the related Salesforce org uses an older version (prior to version 5.32) and doesn’t have the Allow Walk Up Registrations field, the Add Attendee button used for walk-up registrations will remain available on the Mobile Check-in app. Previously, the Add Attendee button disappeared in the Mobile Check-in app when using older Salesforce versions.
Separate Donations and Products from Tickets
Create a customized checkout experience by separating the Donations and Products sections from the Tickets and placing them on their own pages. Separating everything helps Attendees find what they need. The Donations page offers an intuitive and focused interface, while the Products page highlights products to ensure they are visible to Attendees.
To place the Donations and Products sections on their own pages during checkout, set the Event Settings field Display Donations & Products separately to “Yes” (checked).
To continue using the current functionality, leave Display Donations & Products separately set to “No” (unchecked).
Note: If a Form is related to a Donation or Product record, the Form will be displayed on the page with the Donation or Product.
Show/Hide the Join Video Stream Button
The Remove URL from Attendee Links field allows users to hide the Join Video Stream button to Attendees on the AttendeeLink page when the value in the Event’s Webinar/Meeting ID or Webinar/Meeting Account field is removed.
If the value is set to "No" or left blank, the existing behavior will continue.
If the value is set to "Yes" and the value in the Webinar/Meeting ID or Webinar/Meeting Account field is deleted, the information in the Attendee’s Webinar/Meeting Join URL field (Join Video Stream button) will be removed.
Create Opportunity From Checkout
Check Create Opportunity From Checkout if you want an Opportunity automatically created from an Event checkout.
Opportunity Open Stage Name
Defines the stage for an open opportunity created from the Event checkout and used with "Pay Later" Event checkouts.
For example, if Create Opportunity From Checkout is enabled and “Pay Later” was selected during checkout, the opportunity will be created with the name in the Opportunity Open Stage Name field.
Opportunity Successful Stage Name
Defines the stage for a successful opportunity created from the Event checkout and used with completed Event checkouts.
For example, if Create Opportunity From Checkout is enabled and the checkout was paid successfully, the opportunity will be created with the name in the Opportunity Successful Stage Name field.
Create Zero Dollar Opportunities
If the Create Zero Dollar Opportunities field is set to “None” or “Yes” and Create Opportunity From Checkout is checked, Opportunity records will be created for free and $0.00 Event orders.
If the value is “No” and Create Opportunity From Checkout is checked, Opportunity records will NOT be created for free and $0.00 Event orders.

Opportunity Record Type
The Opportunity Record Type field defines the Label of the record type you want when an Opportunity is created.