Out of the box, you can create a Donation, provide a description, define the sales start and end dates, and track the quantity sold.
When an Attendee purchases a Donation, the following occurs.
- The Donation becomes a Line Item on the related Invoice.
- The new Attendee record’s Donated checkbox is checked.
Separate Contact and Attendee records for the Donation are not created. In addition to the items just described, we also provide the features covered below.
Pre-requisites
If an Event includes a free Event Item (Main event ticket) and a Donation Event Item, a Payment Gateway is required in order to publish the Event.
Sandbox
If you create an Event Item with Address set to “Optional” or “Required” in a Sandbox, you must set the Country field to “Required.” You will get an error if the Country field is set to “Hide” (default setting).
Event Page Layout
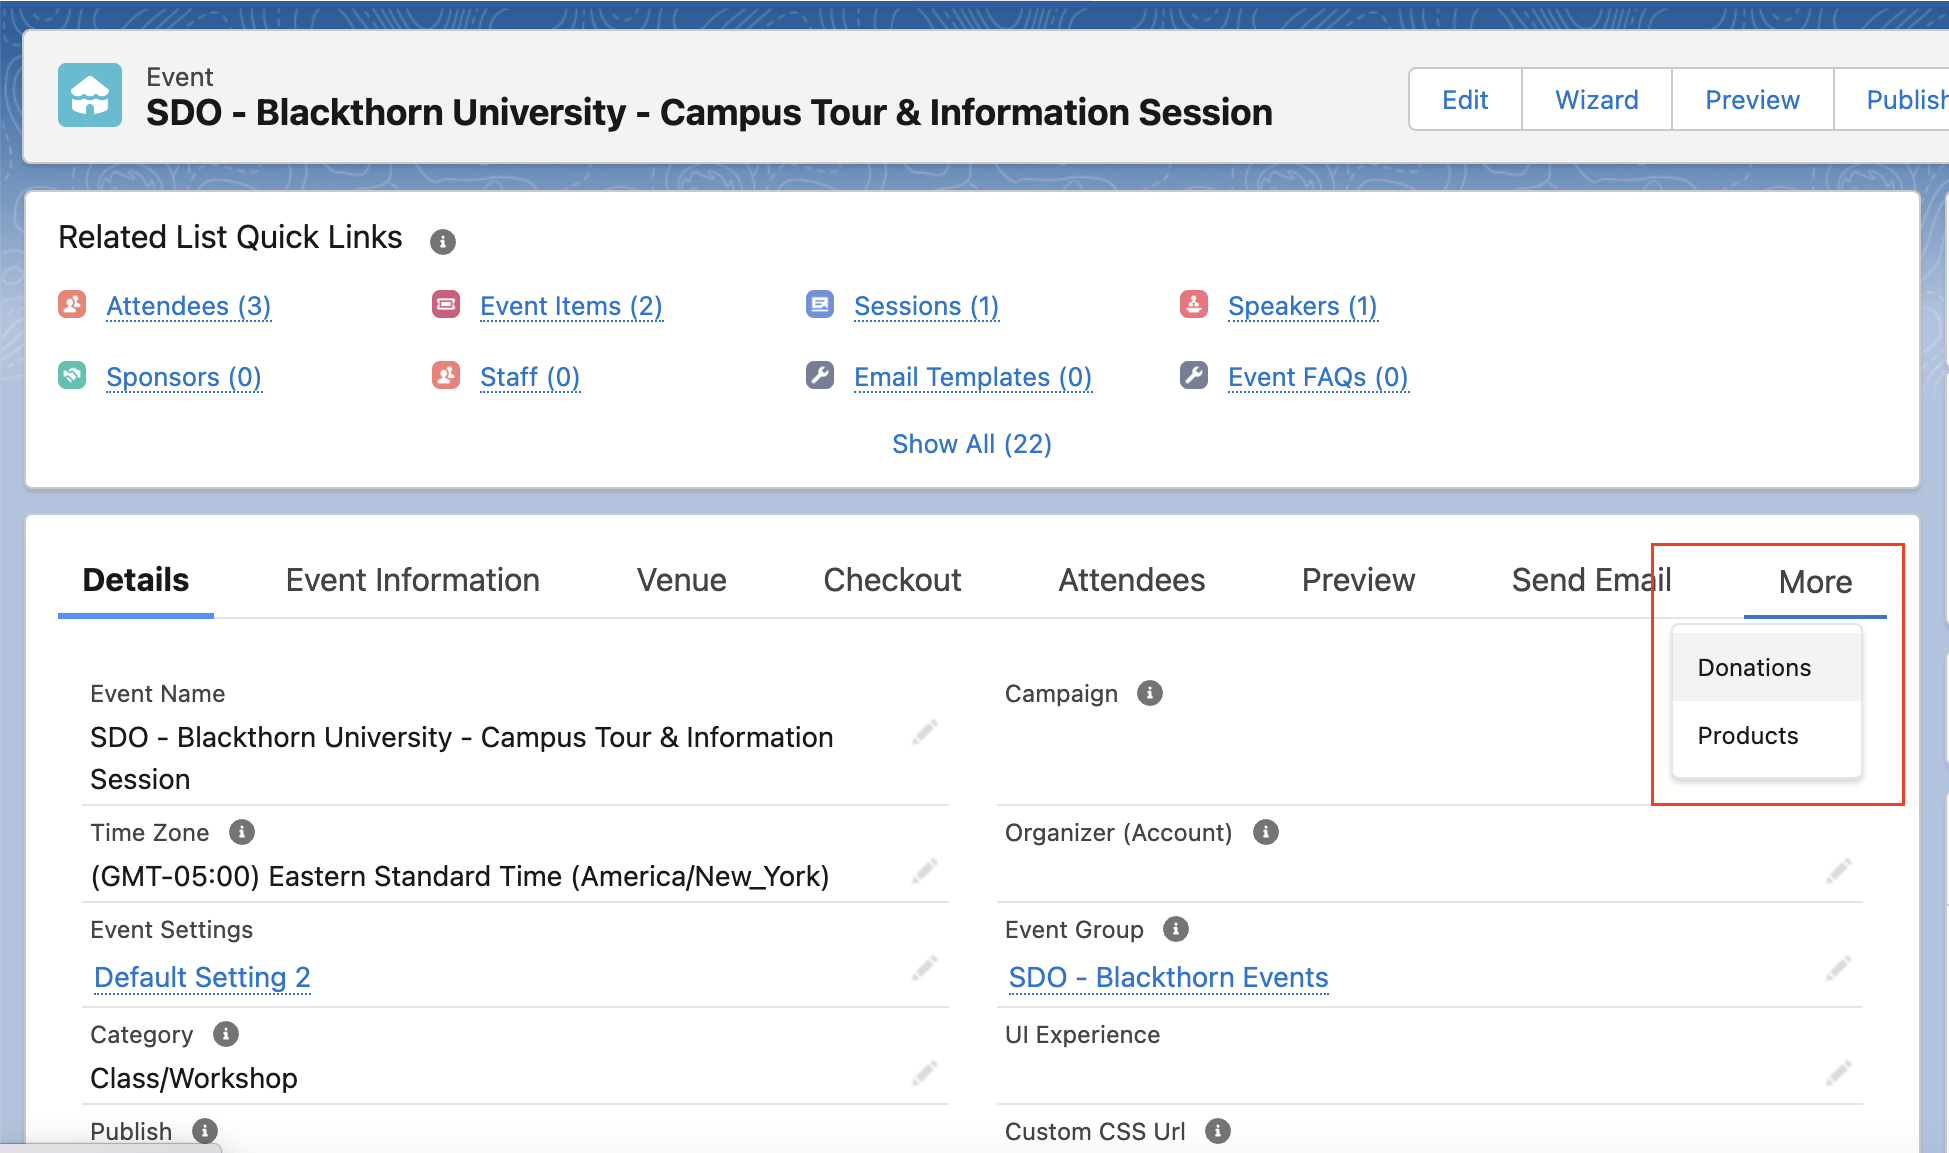
The section “Donations” was added to the Event page layout. The Products section will include the following fields: Item Name, Attendee, Attendee Full Name, Event, and Unit Price.

New Fields
You may need to manually add new fields to the Attendee page layout as they may not be added by default.
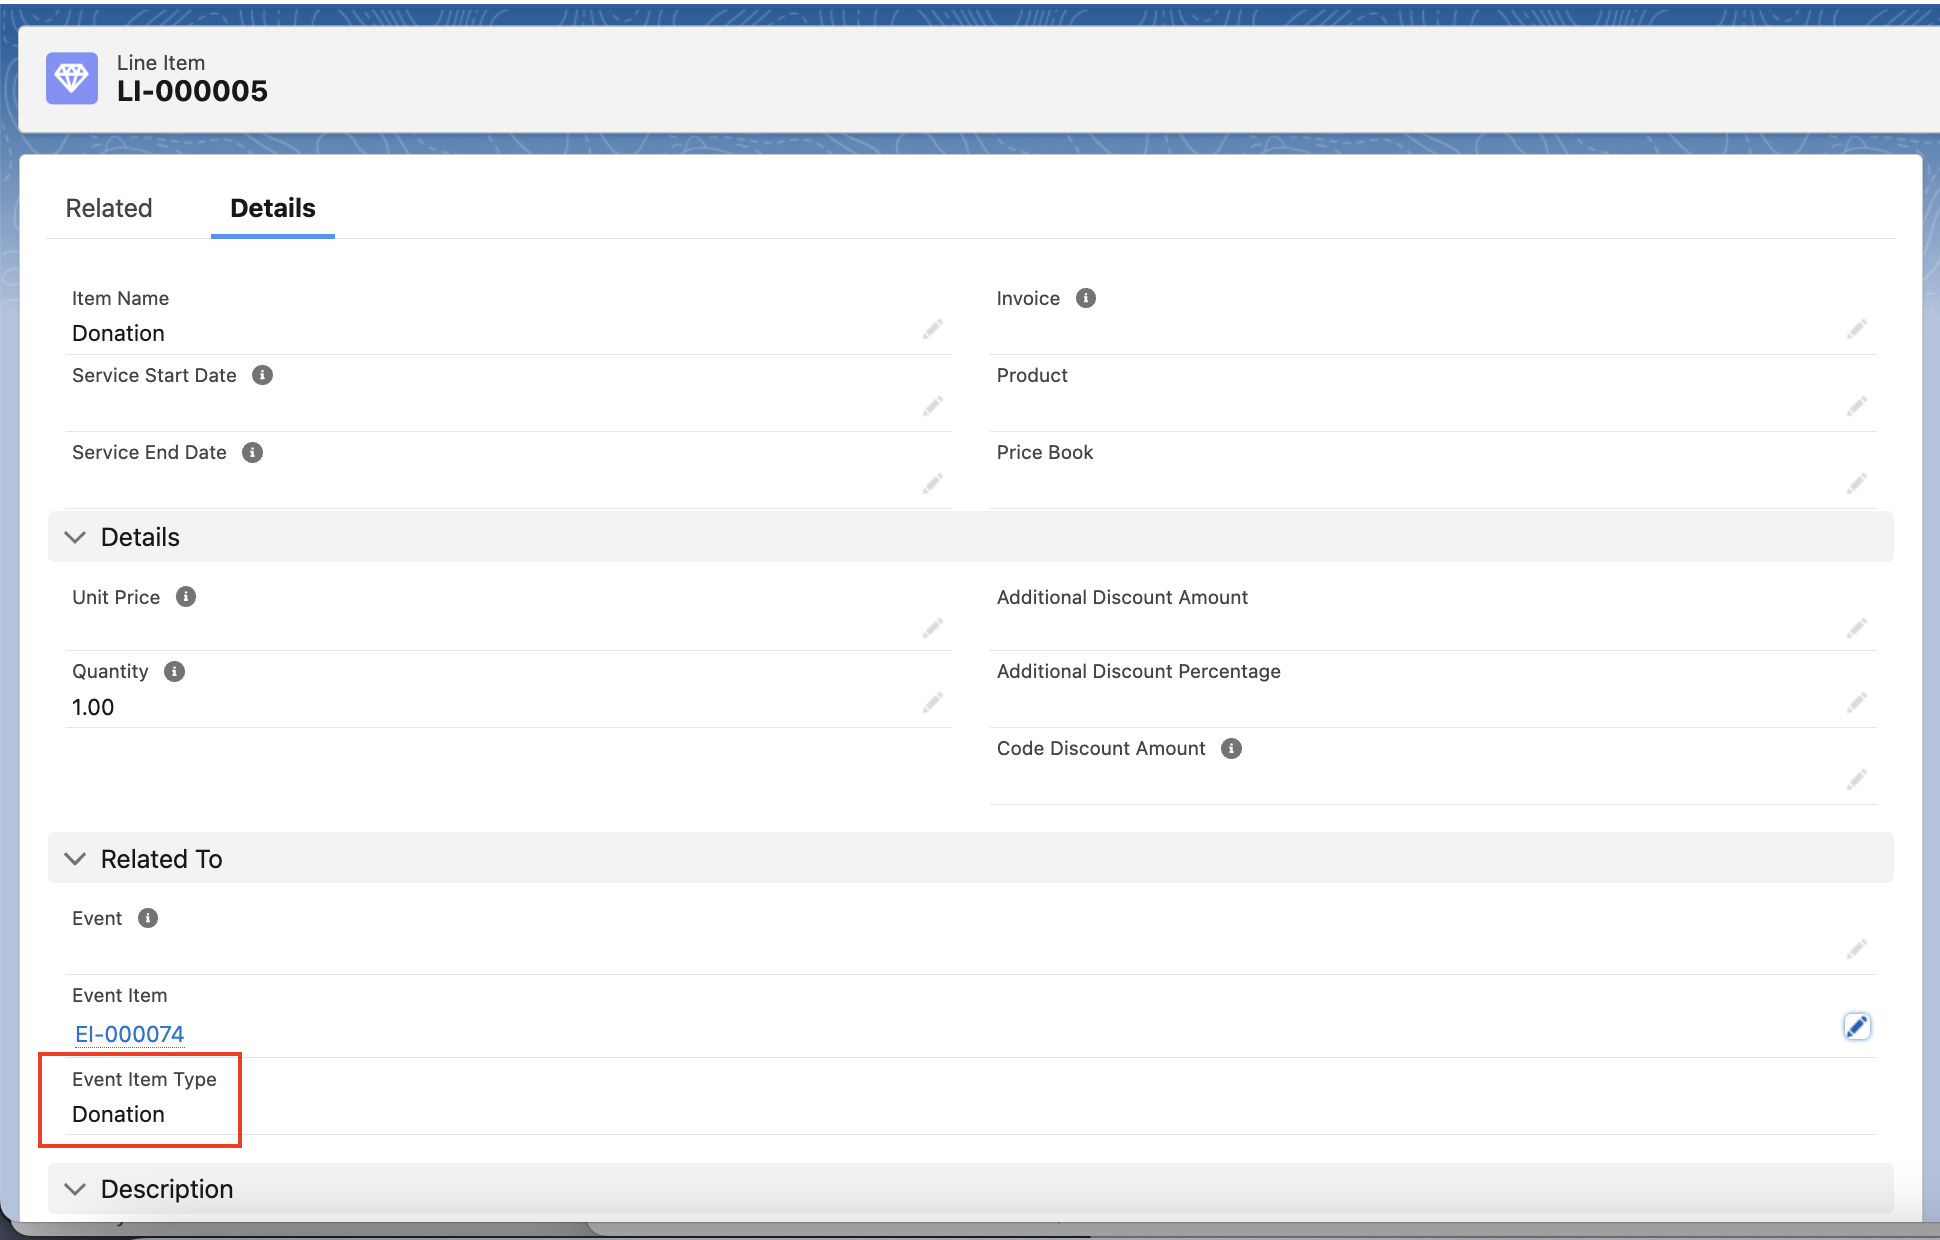
Event Item Type
- Field Label: Event Item Type
- Field Name: conference360__Event_Item_Type__c
- Data Type: Formula(Text)
- Location: Line Item object
- Purpose: a text formula field that shows the type of Event Item
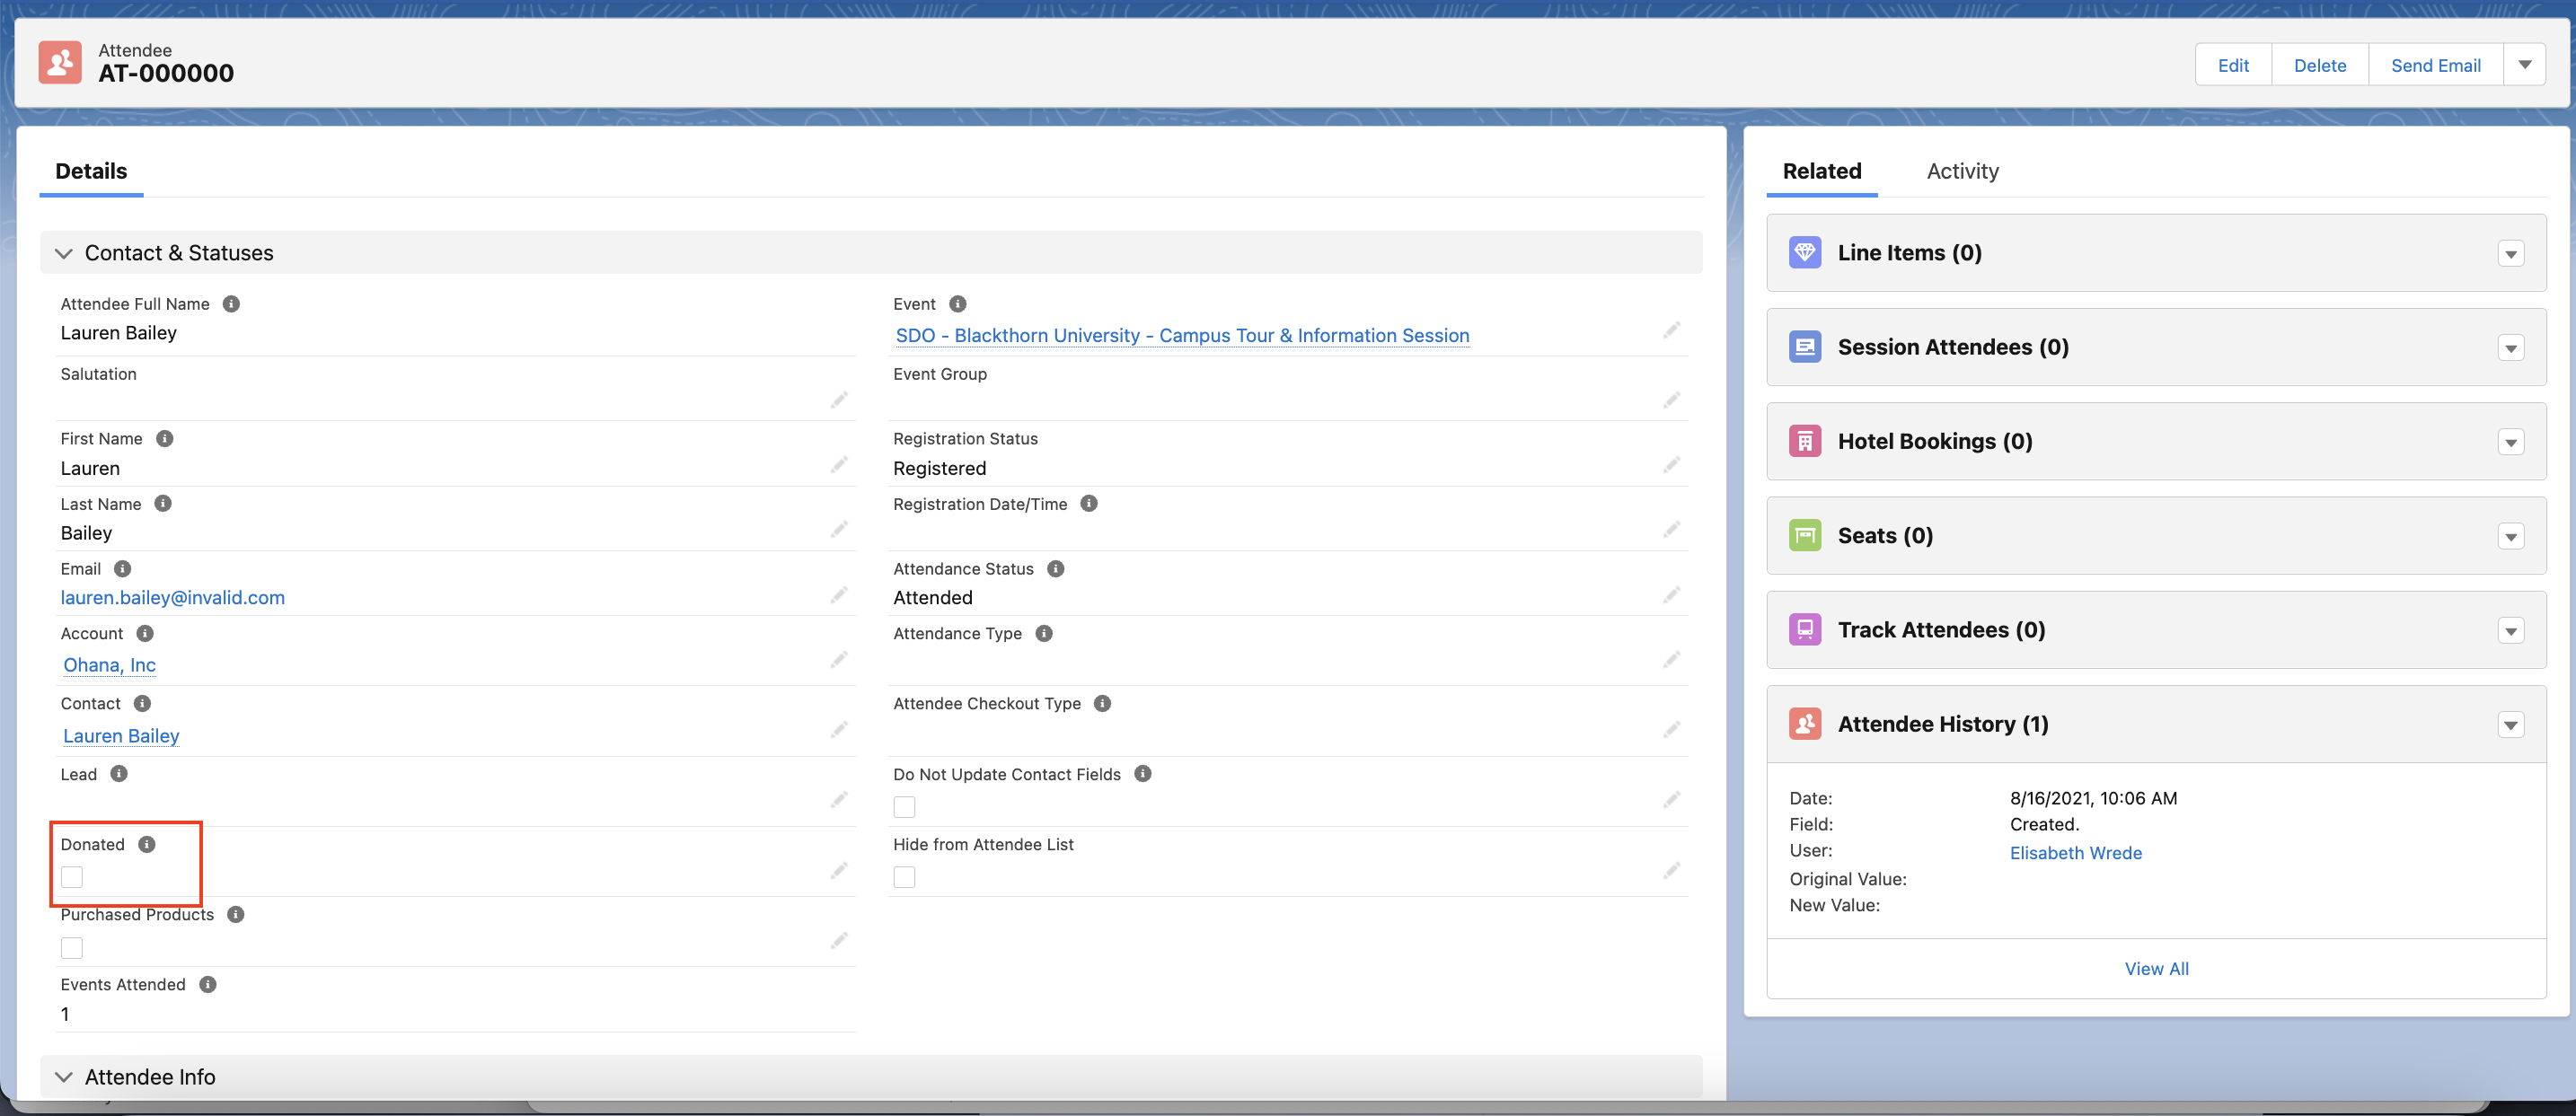
Donated
- Field Label: Donated
- Field Name: conference360__Donated__c
- Data Type: Checkbox
- Location: Attendee object
- Purpose: a checkbox field that shows whether an Attendee gave a Donation
Functionality
Event Item Record
- If a Donation is added to the Event Item, it will be carried to the Line Item on the Invoice.
- The Event Item Type for a Donation is “Donation”.
Line Item Record
- The Event lookup field has been added to the Line Item record to show which Event the Donation is related to.
Checkout Process
- Registrants can either choose from a list of pre-selected amounts or enter a unique amount for a Donation.
- Images are now supported during checkout.
- A Donation’s information is added to a selected Attendee when the Donation is added to the cart.
- If a Donation’s information has not been added to an Attendee, the Donation’s Information will be added to the first Attendee.
- Donation data will be added to the checkout payload.
- Custom Forms are supported for Donations.
Split Payments
Split Payments allows users to define how to reconcile funds from different purchases (e.g., Tickets, Donations, Products) to specific gateway accounts connected to separate bank accounts.
The benefits of using Split Payments include the following.
- Allow Attendees to pay using both a primary Payment Gateway and a Donation Payment Gateway during a single checkout experience.
- Improve the user experience by eliminating the need to enter payment details multiple times.
Click here for more information about and how to use Split Payments.
Create a Donation
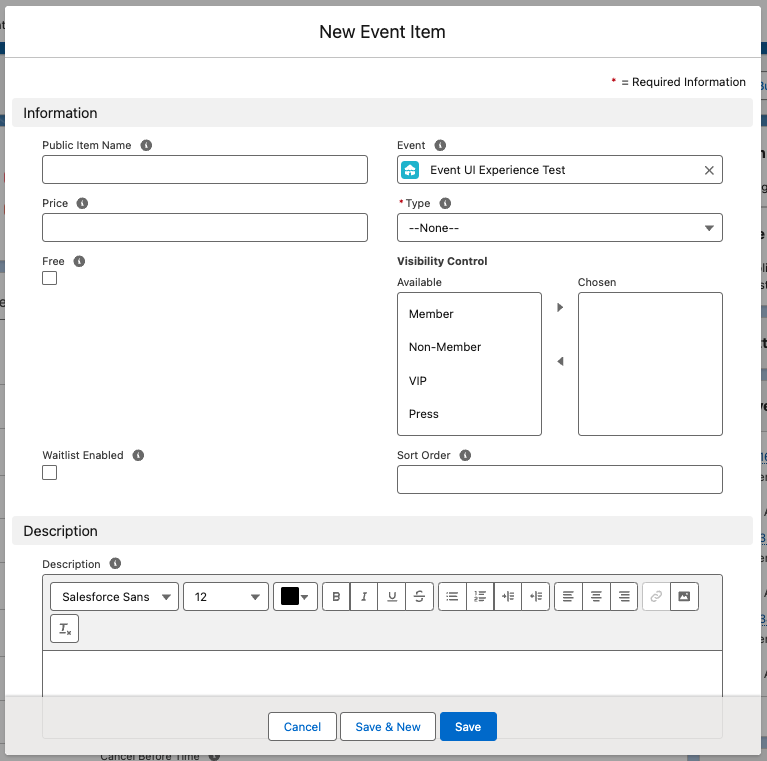
- Once a Main event ticket has been created, open a New Event Item window and add the following information to create a Donation.
Information & Description
- Enter a Public Item Name (required).
- Select an Event.
- Enter an amount in the Price field. (Donation amounts can include two decimal points. Ex. $22.50)
- Set Type = "Donation".
- Select a Visibility Control, if using.
- Check Waitlist Enabled to enable waitlisting.
- Enter a Description.
- Enter a value in the Sort Order field to change the order of the Event Items on the registration page.
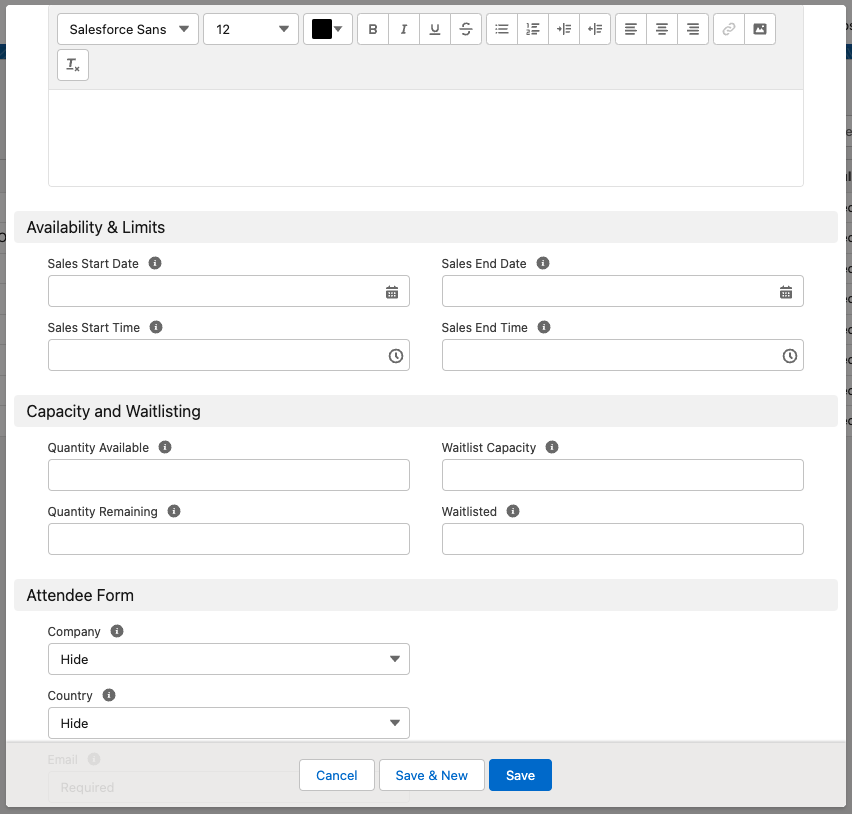
Availability & Limits
Enter information about the sales start/end dates.
- Sales Start Date
- Sales End Date
- Sales Start Time
- Sales End Time
Capacity & Waitlisting
- Enter the Quantity Available. If the field is left blank, the Quantity Available will say “999,999”.
- The Quantity Remaining field updates automatically based on the equation, Quantity Available - Registered Quantity = Quantity Remaining.
- If waitlisting is enabled, enter an amount in the Waitlist Capacity field, if using. For more information about waitlisting, click here.
- Enter a value in the Default Quantity Selection field to define the default quantity of Tickets, Guest Tickets, or Products that will be automatically added to the cart when an Attendee reaches the ticket selection step. If the number of remaining tickets is greater than 0 but less than the Default Quantity Selection, all remaining tickets will be added to the cart.
- NOTE: When an Attendee purchases Tickets, Guest Tickets, or Products from their AttendeeLink, the default quantity will not be added to the cart. (The original behavior is unchanged.)
- The Waitlisted field will provide a summary of the Attendees who are waitlisted for the Event Item.
Attendee Form
There are multiple fields on the Attendee Form that you can hide, make required, or show as optional for each Donation.
For example, if you have a "Child Under 3 Yrs" ticket for sale, it is very unlikely that the child does not have an email address. You can hide the Email field from this Event Item's Attendee Form.
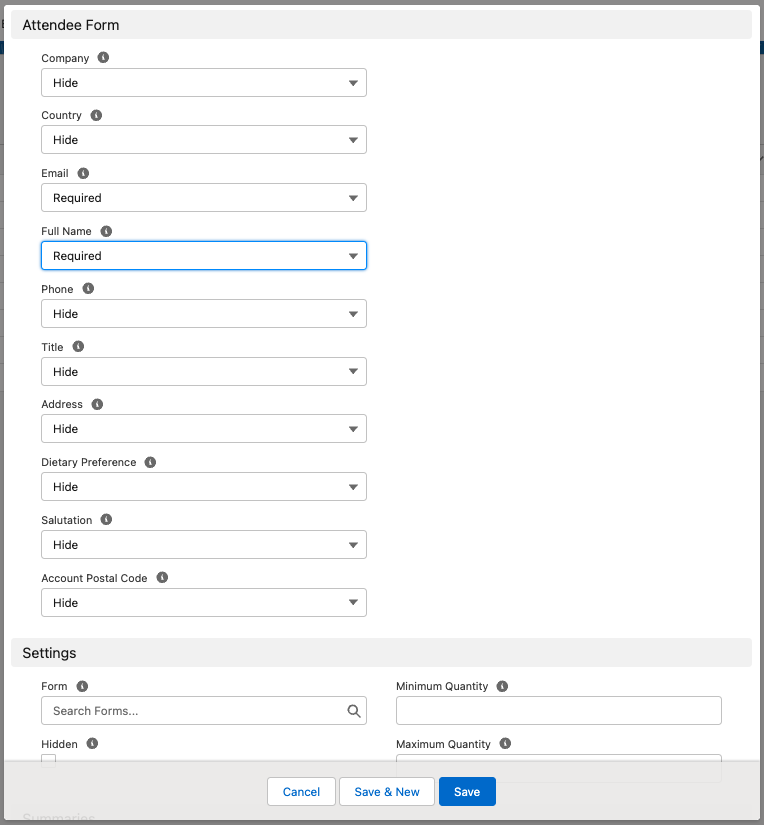
Select “Hide”, “Optional”, or “Required” for each of the fields below.
- Company
- Country
- Full Name
- Phone
- Title
- Address
- Dietary Preference
- Salutation
- Account Postal Code
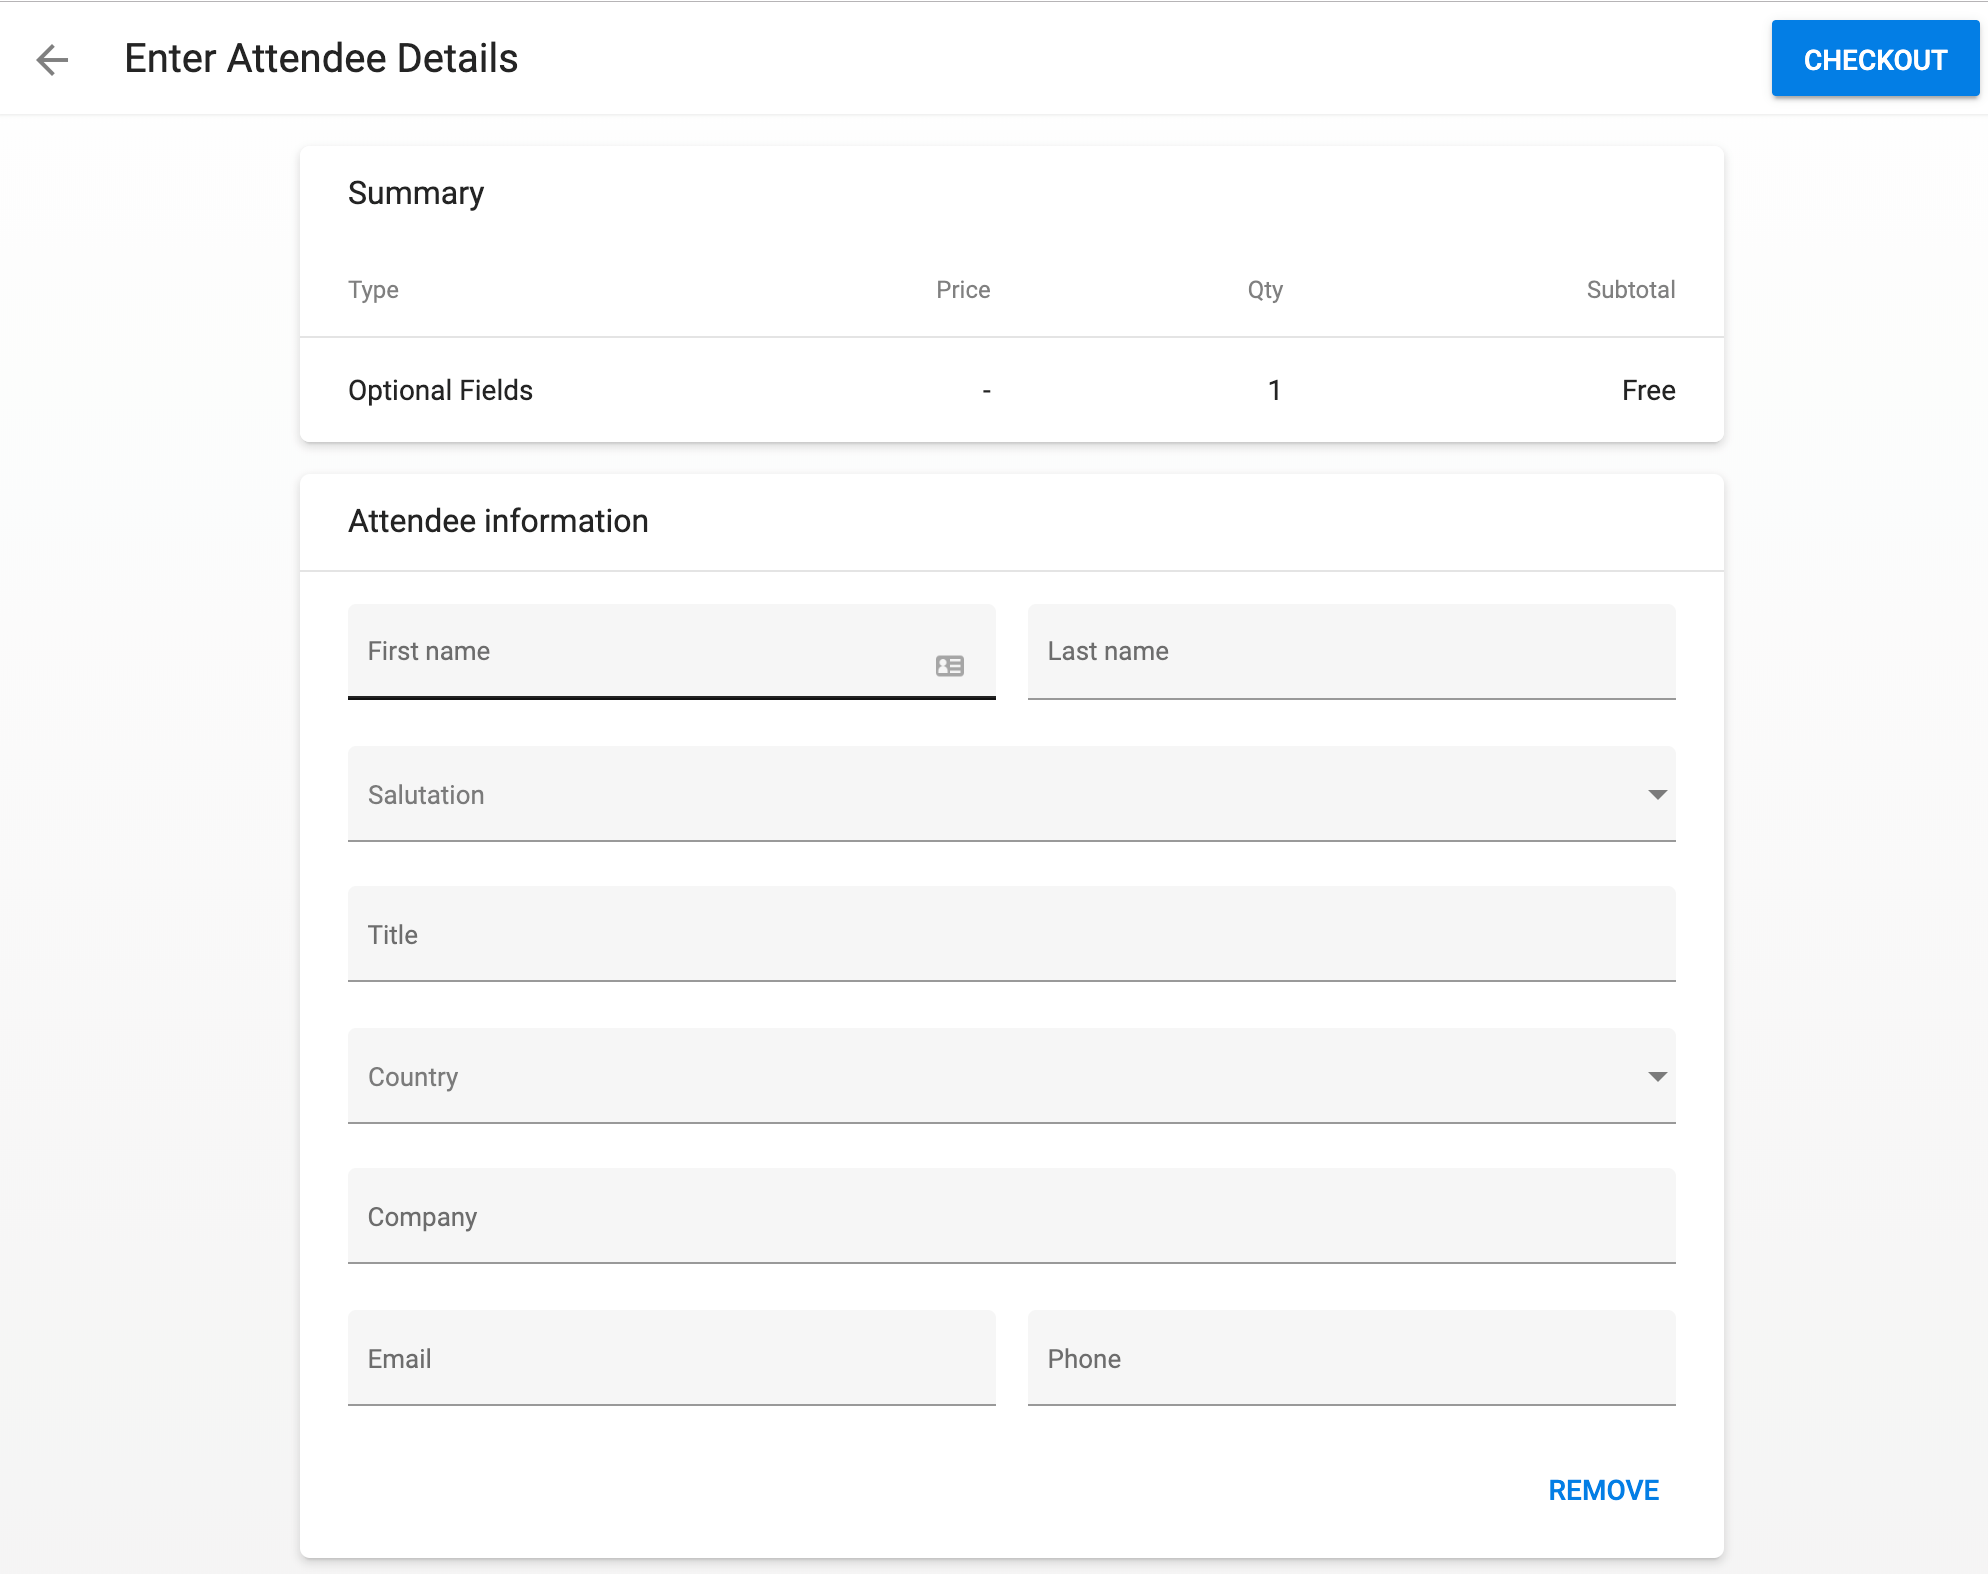
Live Attendee Form Example
- Click Save & New to create a new Event Item or click Save.
Other Settings
- Select a previously created Form or create a new one. Click here for more information about creating Forms and Form Elements.
- Check Hidden if you want to hide the Event Item from the Event checkout process.
- To set a minimum or a maximum number of Event Items allowed per order, enter the amounts in the Maximum Quantity and/or Minimum Quantity fields.
- An Event Item’s Quantity Remaining will show on the registration page only when there are 10 or fewer Event Items available.
- The Maximum Quantity or number of Event Items that can be purchased at one time cannot be larger than 10. Please contact Blackthorn Support if you would like to increase the number to 25.
- If you want the Donations and Products sections to be on their own pages, set Event Settings Display Donations & Products separately separately to “Yes” (checked). To continue using the current functionality, leave Display Donations & Products separately separately set to “No” (unchecked).
- Note: If a Form is related to a Donation or Product record, the Form will be displayed on the page with the Donation or Product.