Codes can be used for specific Events, or Event Items. Three types of Codes can be added to Events and Event Items:
Discount: decreases the dollar amount an individual will pay
Access-Promo: access to proceed or purchase an item or a promotional code for an item benefit
Source: While the “Source” option can track a code to follow a user through a flow, like an embedded URL, we recommend using a UTM parameter for tracking instead.
Prerequisites
Licenses
Codes are a part of the Blackthorn Payments package. The user configuring discount Codes will need a license for the Payments app.
Page Layout Updates
Code Eligibility Object
If you do not see the Event or Event Item fields on the Code Eligibility record, update the page layout to include them.
Event Item Object
Add the Code Eligibility’s Related List to the Event Item object.
Important Functionality
Discount Codes are only supported for the Full-Width, Tabbed, and Dynamic UI experiences. Using a discount Code with the Simple UI will cause the checkout process to fail.
Discount Codes are not supported for Sessions.
Create a Discount Code
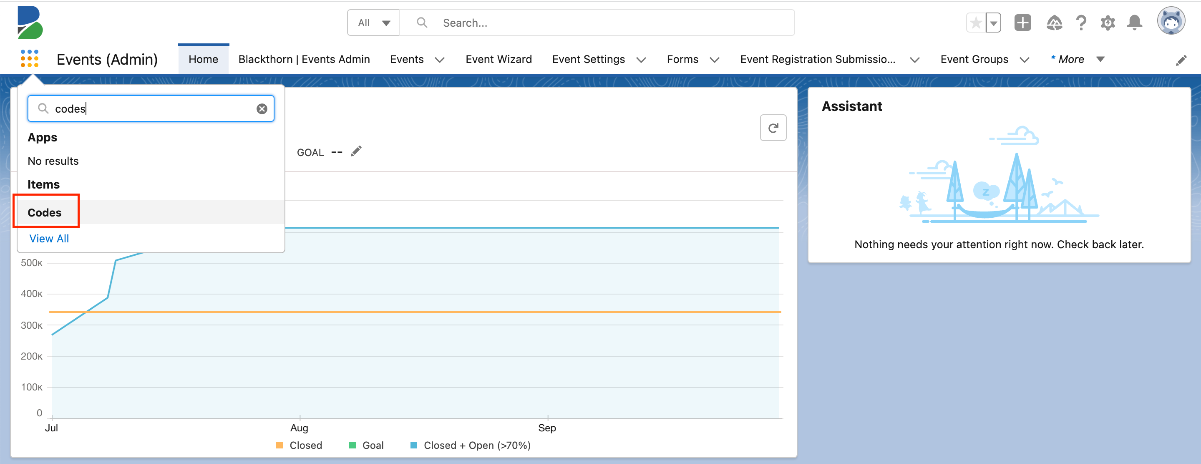
Click on the App Launcher.
Enter and select “Codes.”
Click New.
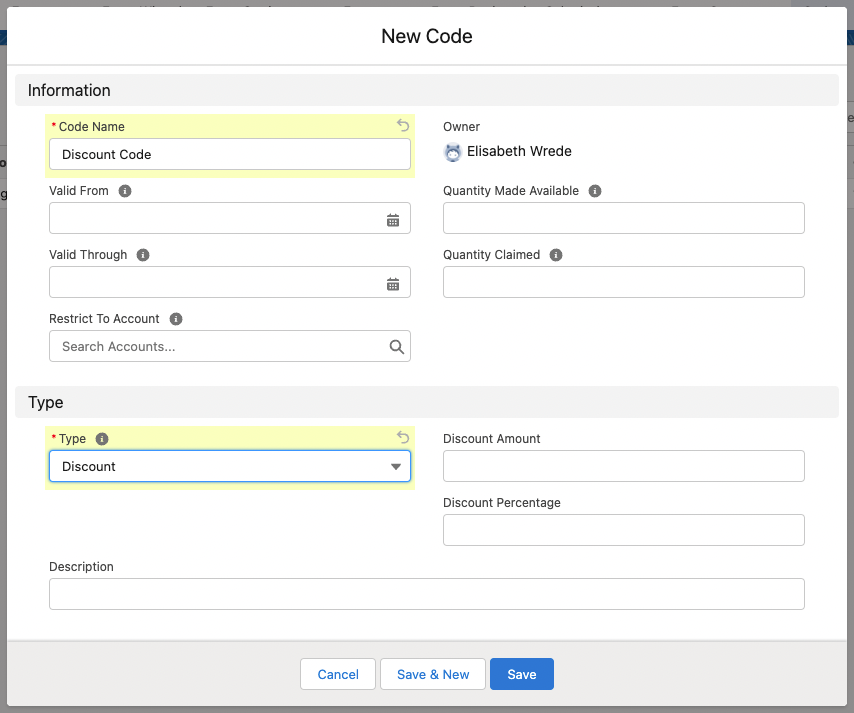
Define the following fields:
Enter the Code Name. (required)
Choose a Valid From date.
Choose the Valid Through date.
NOTE: Valid From and Valid Through dates are enforced depending on which field is set.Restrict To Account (If set, only Contact associated to the Account can use the Code.)
Enter the Quantity Made Available.
NOTE: Quantity Made Available is enforced only when populated (leave blank for unlimited uses). The related Quantity Claimed field is updated every time a Code is used on an Invoice for an Event or Event Item. If an Invoice Status = "Void", the Code is released, and the Quantity Claimed is updated.Select “Discount” in the Type field.
Enter the Discount Amount or the Discount Percentage.
Enter a Description.
Click Save.
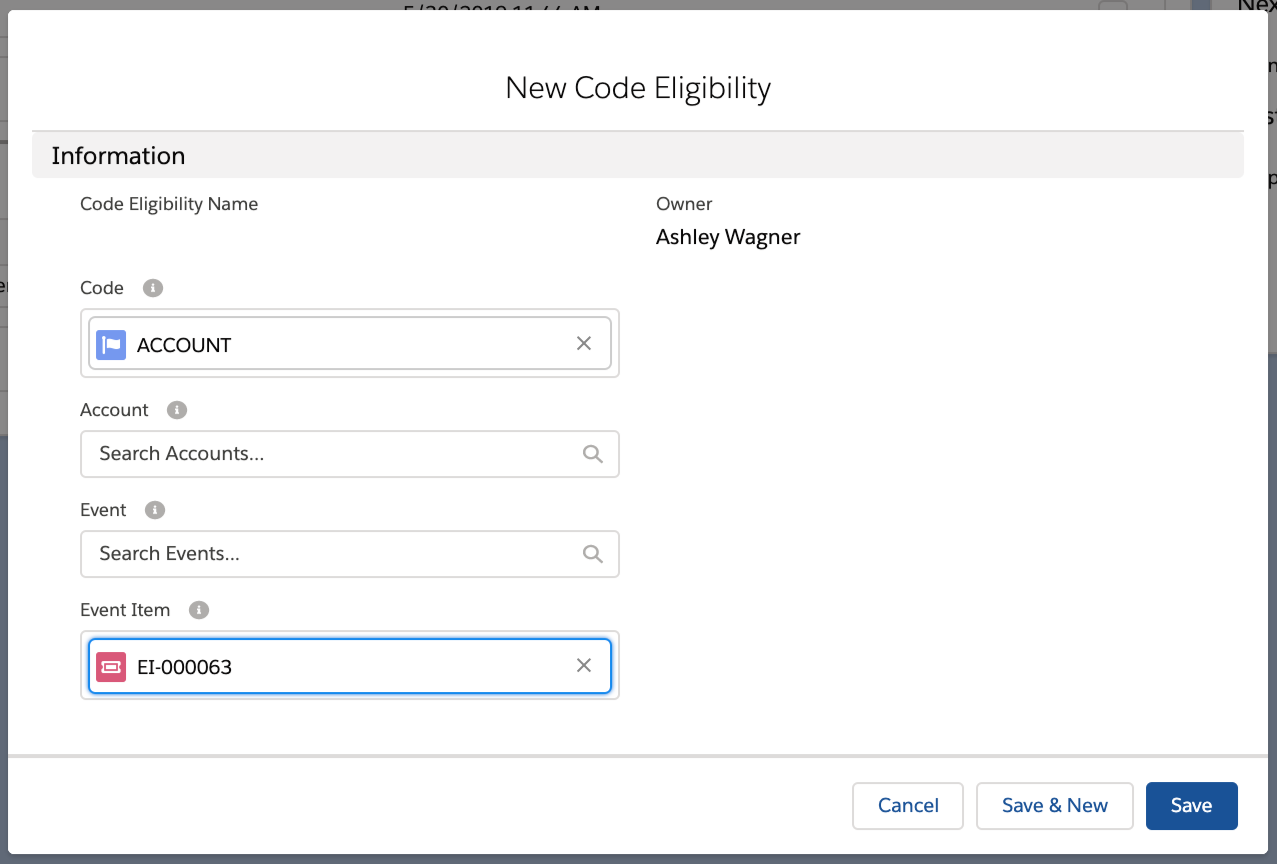
Create a Code Eligibility Record to Relate an Event or Event Item
Select a Code.
Choose either an Event or an Event Item.
NOTE: Code Eligibility can only be added to one of them.
Click Save.
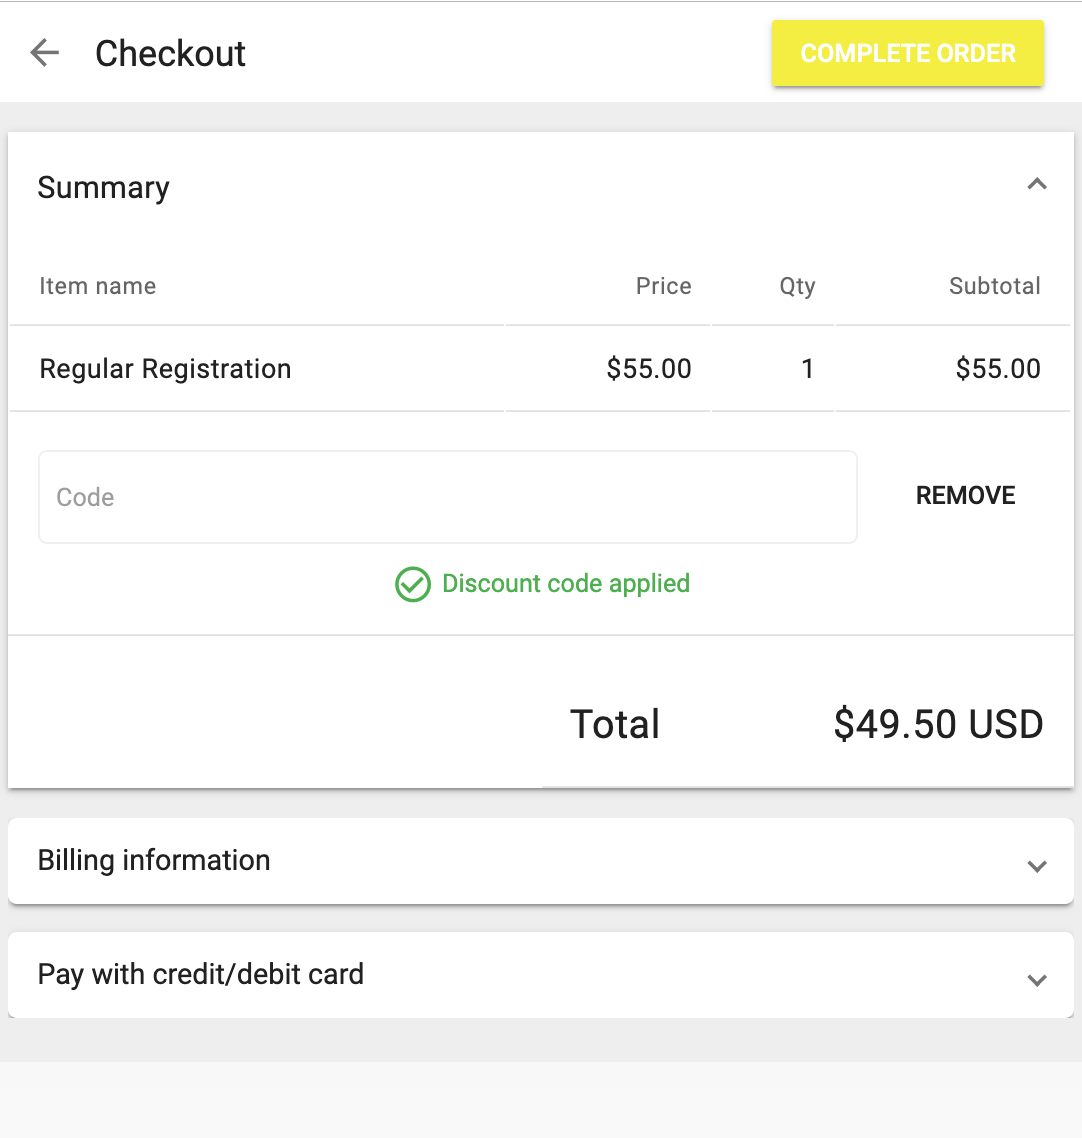
Enable the Discount Code on your Event Page
Go to the Event record.
Set the Code Settings field to “Optional,” “Hide,” or “Required.”
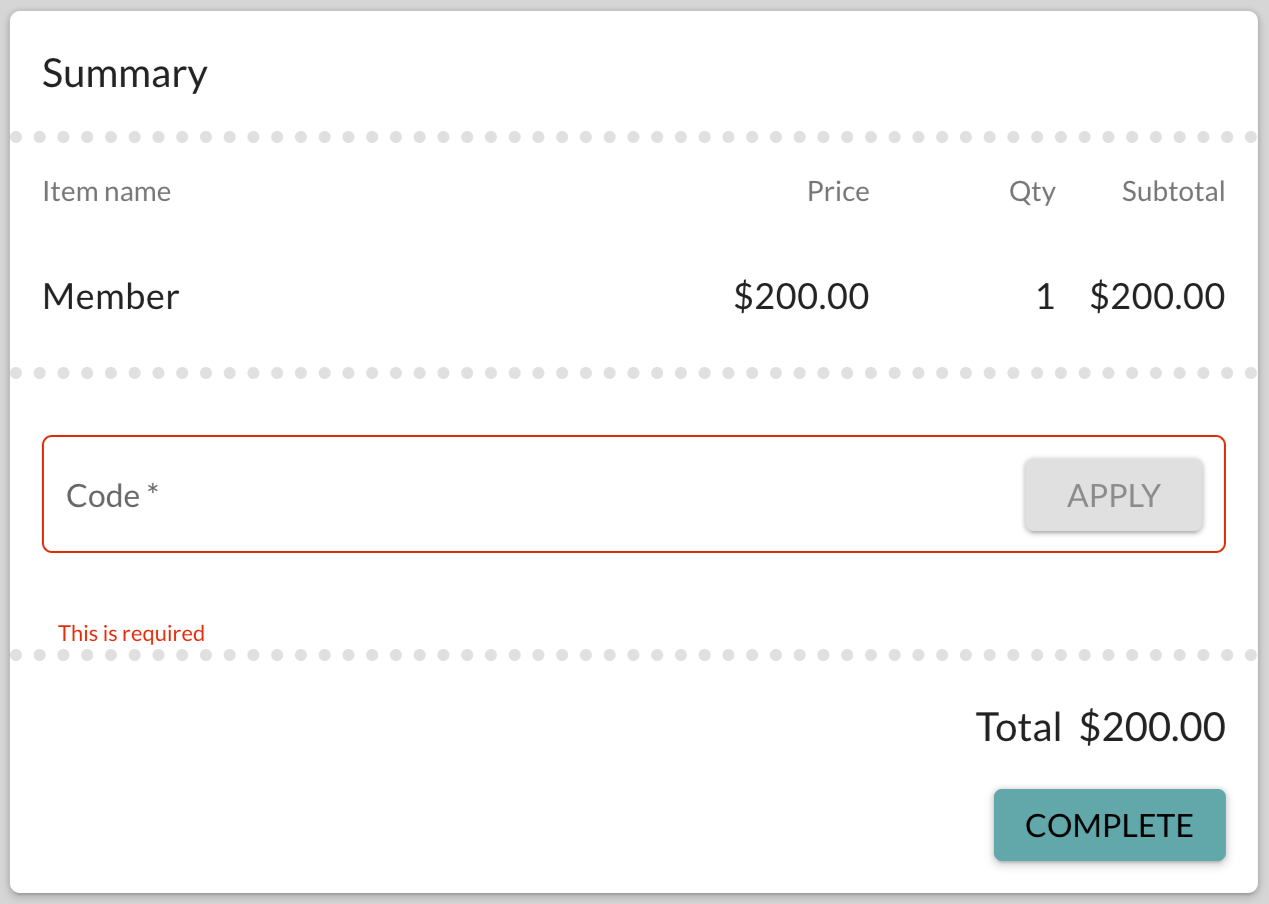
If Code Settings = “Required” on the Event, all Event Items must have an associated Code. Registrants won't be able to proceed with checkout unless they have the valid Code.
If Code Settings = “Optional,” then a registrant isn’t required to enter a Code even if the Code was set on the Event Item level.
If Code Settings = “Hide,” the Code will be hidden throughout the checkout process.
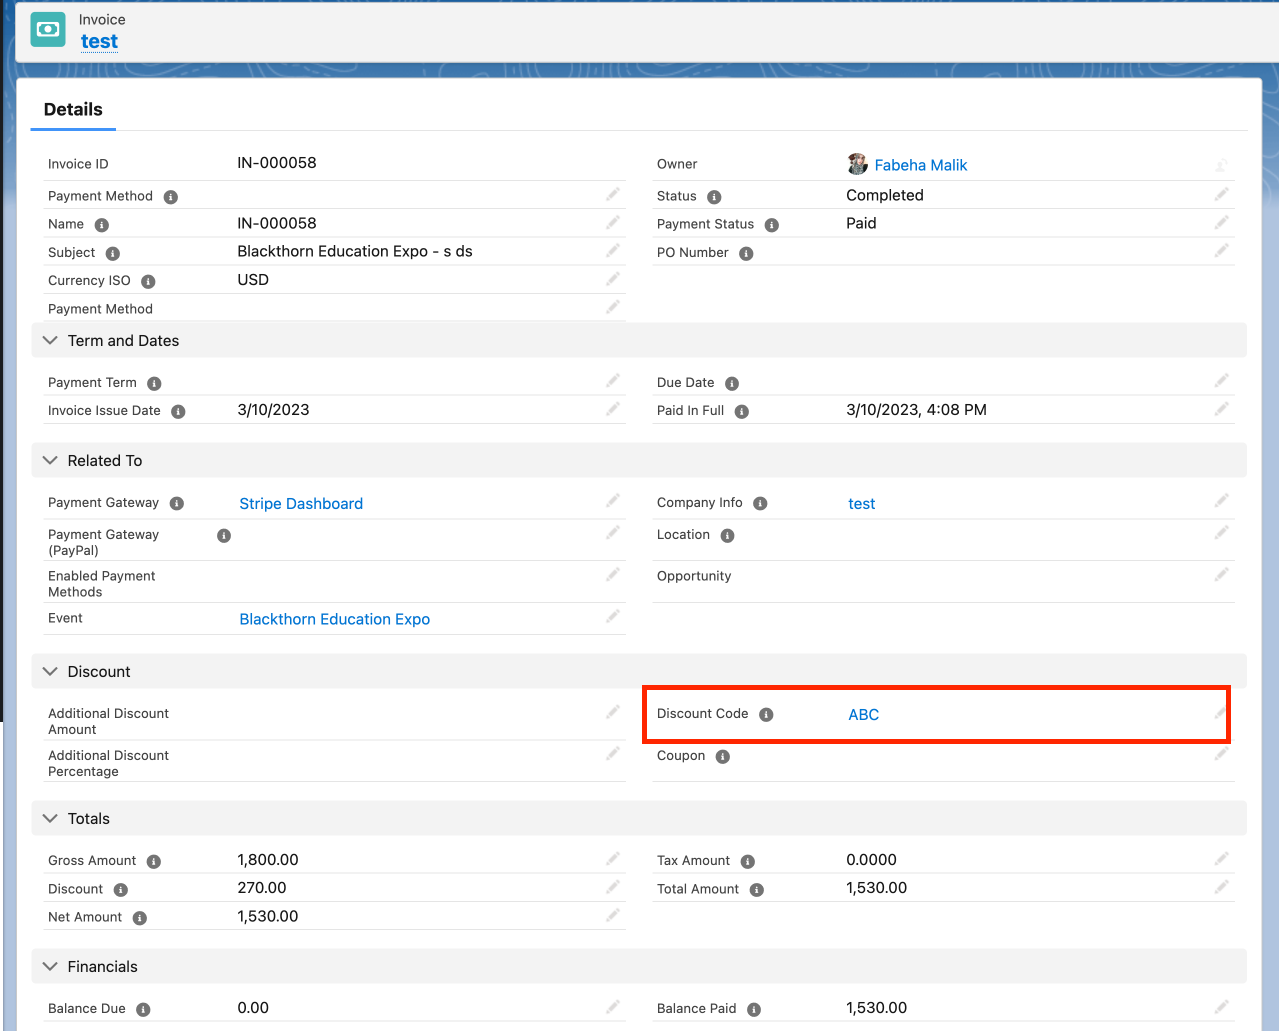
Code Discount Amount Field
The amount an Event Item's Line Item was discounted by using a Code is calculated and stored in the Code Discount Amount field on the Event Item's Line Item on theInvoice.
Multiple Registrants and a Discount Code
When a group of Attendees registers for an Event as a group and uses a discount Code during checkout, the discount Code will be applied to the group’s total cost and found on the Invoice record.
The discount Code will not be applied to each Attendee individually during the checkout process.
Create an Access-Promo Code
If no discount is offered, Codes can also give users special permission to purchase an Event Item (i.e., Ticket or Product) or to access an Event Item benefit.
Enter the Code Name. (required)
Choose a Valid From date.
Choose the Valid Through date.
NOTE: Valid From and Valid Through dates are enforced depending on which field is set.Restrict To Account (If set, only Contact associated to the Account can use the Code.)
Enter the Quantity Made Available.
NOTE: Quantity Made Available is enforced only when populated (leave blank for unlimited uses). The related Quantity Claimed field is updated every time a Code is used on an Invoice for an Event or Event Item. If an Invoice Status = "Void", the Code is released, and the Quantity Claimed is updated.Select “Access-Promo” in the Type field.
Enter the Discount Amount or the Discount Percentage.
Enter a Description.
Click Save.

Create a Code Eligibility Record to Relate an Event or Event Item
Select a Code.
Choose either an Event or an Event Item.
NOTE: Code Eligibility can only be added to one of them.
Click Save.

Enable Discount Codes on your Event Record
Go to the Event record.
Set the Code Settings = “Required.”
NOTE: This will make the Access-Promo Code required at the Event level.
Code Discount Amount
The amount an Event Item's Line Item was discounted by using a Code is calculated and stored in the Code Discount Amount field on the Event Item's Line Item on the Invoice.
Reserve Seats for Attendees
You can also use an access-promo Code to reserve seats for Attendees by updating the following.
Code Eligibility Record
On the Code Eligibility record, select an Event in the Event field. Do not use the Event Item field.
Event Record
On the Event record, set the Code Settings field to “Required.” This will prevent Attendees from registering for the Event without using the access-promo Code.
FAQ
Q: How many Code Eligibility records can be enabled on an Event or an Event Item?
A: There is no known limit for the number of related Code Eligibility records that can be enabled on an Event or an Event Item.
Q: Can only one promo Code be used at a time? Or can users stack promo Codes?
A: Only ONE promo Code can be used during checkout. If an Attendee has a few codes available for a given Event they can be swapped but not stacked.
Q: Can I use a discount Code in the Experience Cloud?
A: Yes, you can use discount Codes in the Experience Cloud if the following criteria are met.
A user logged into an Experience Cloud site as a Contact related to an Account can apply a discount Code if...
The Account is related to a discount Code.
The Code’s Restrict To Account field is set to “True.”
A user logged into an Experience Cloud site as a Contact related to an Account cannot apply the discount Code if...
The Account is NOT connected to a discount Code.
The Code’s Restrict To Account field is set to “True.”