Our Event creation process is designed to be lightweight but robust if needed— you can get an Event live in just three steps.
- Event Settings
- Event Details
- Event Items
If this is your first time creating an Event, please follow the instructions below to become familiar with the objects and fields. Additional features, like creating checkout questions or relabeling tabs are listed at the bottom of this page.
Pre-requisites
If an Event includes a free Event Item (Main event ticket) and a Donation Event Item, a Payment Gateway is required in order to publish the Event.
Sandbox
If you create an Event Item with Address set to “Optional” or “Required” in a Sandbox, you must set the Country field to “Required.” You will get an error if the Country field is set to “Hide” (default setting).
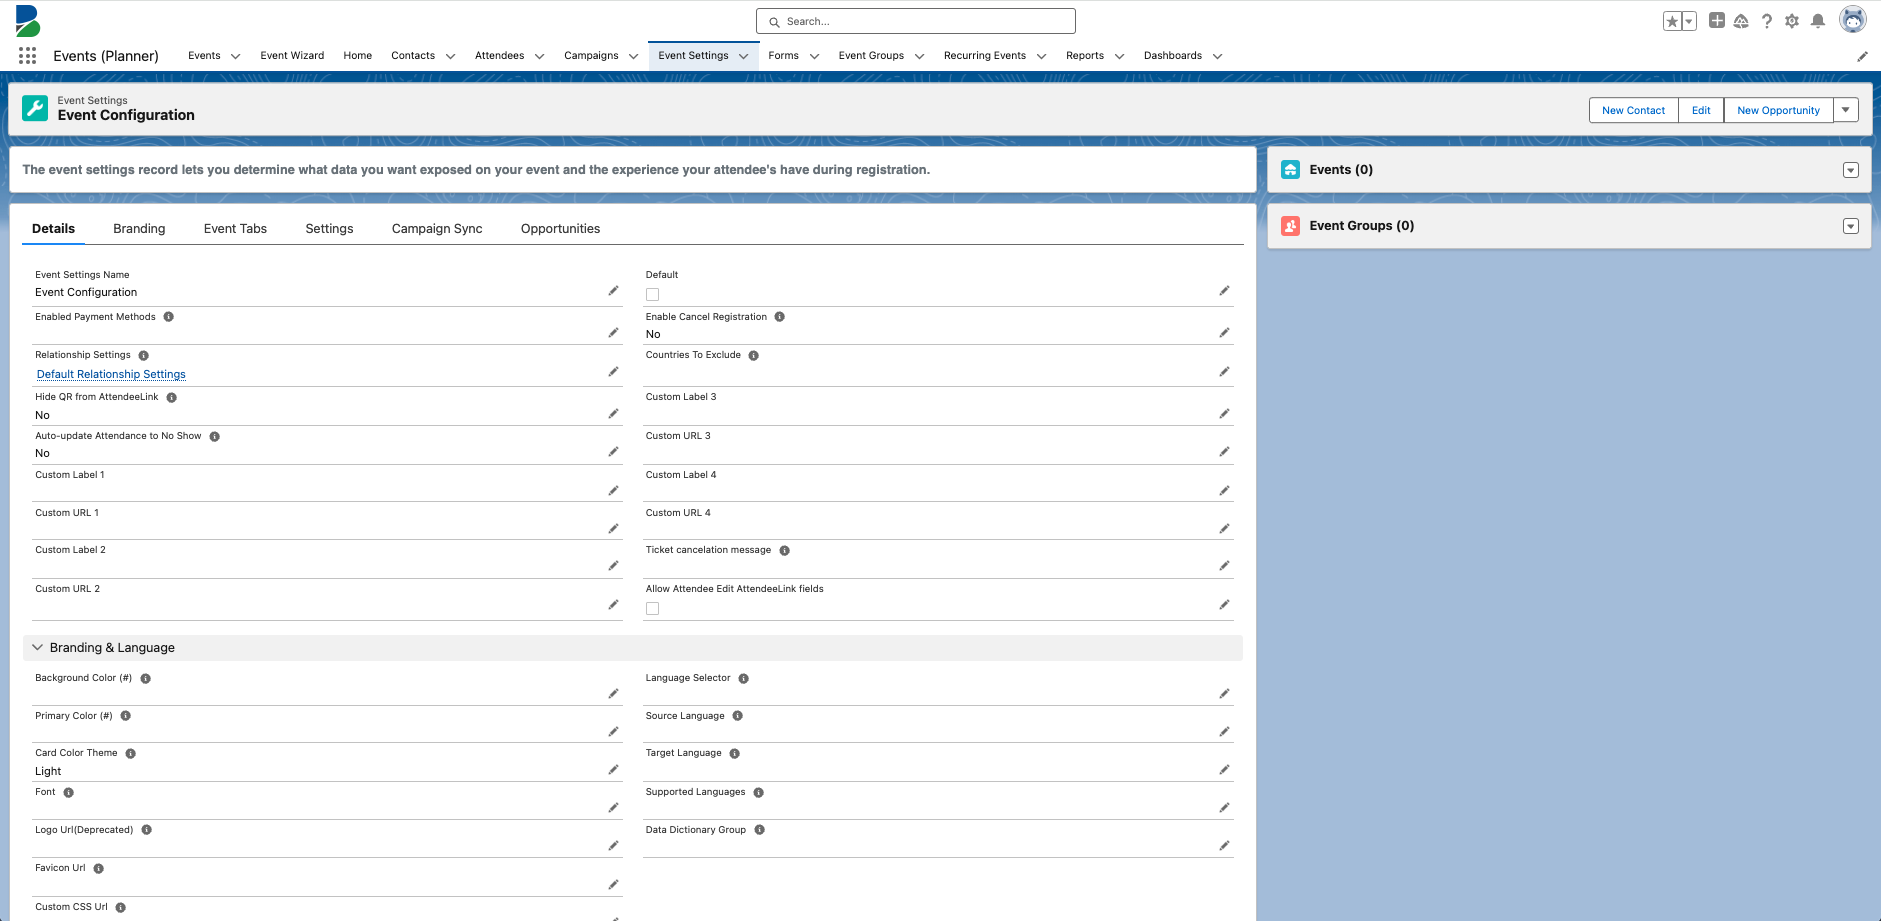
Create an Event Settings Record
The Event Settings are the back end to your Event. They control things like the Payment Method, Font, colors, Venue, and language options.
- Click the App Launcher.
- Enter and click Blackthorn | Events (Planner).
- Click the Event Settings tab.
- Click New.
- Complete the following fields. You can add additional information after the Event Settings record is created.
- Event Settings Name (required)
- Check Default if this record will be the default Event Settings record.
- Select the payment method types that you will accept.
- Background Color (#)
- Card Color Theme
- Click Save.
For additional features, click here.
Create Your First Event
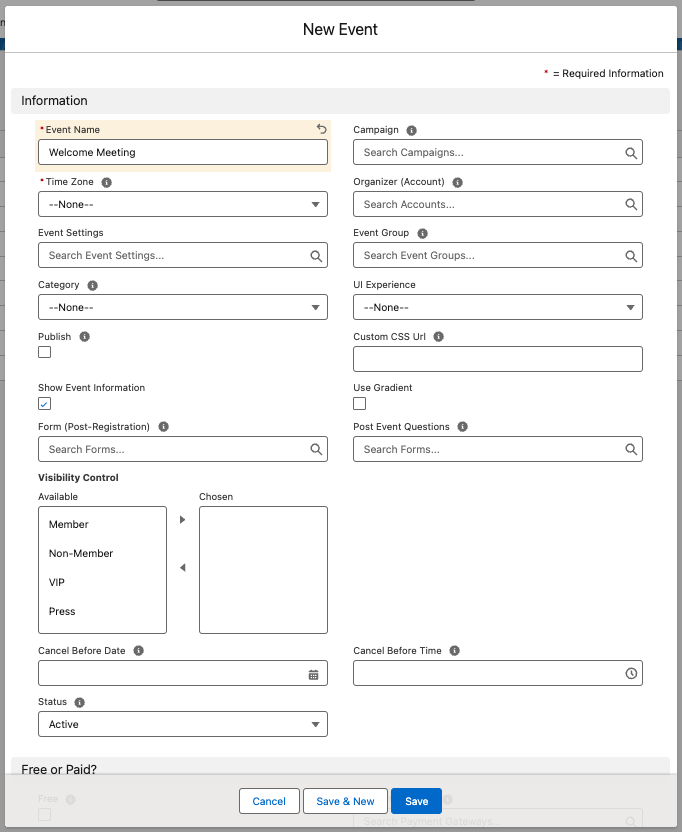
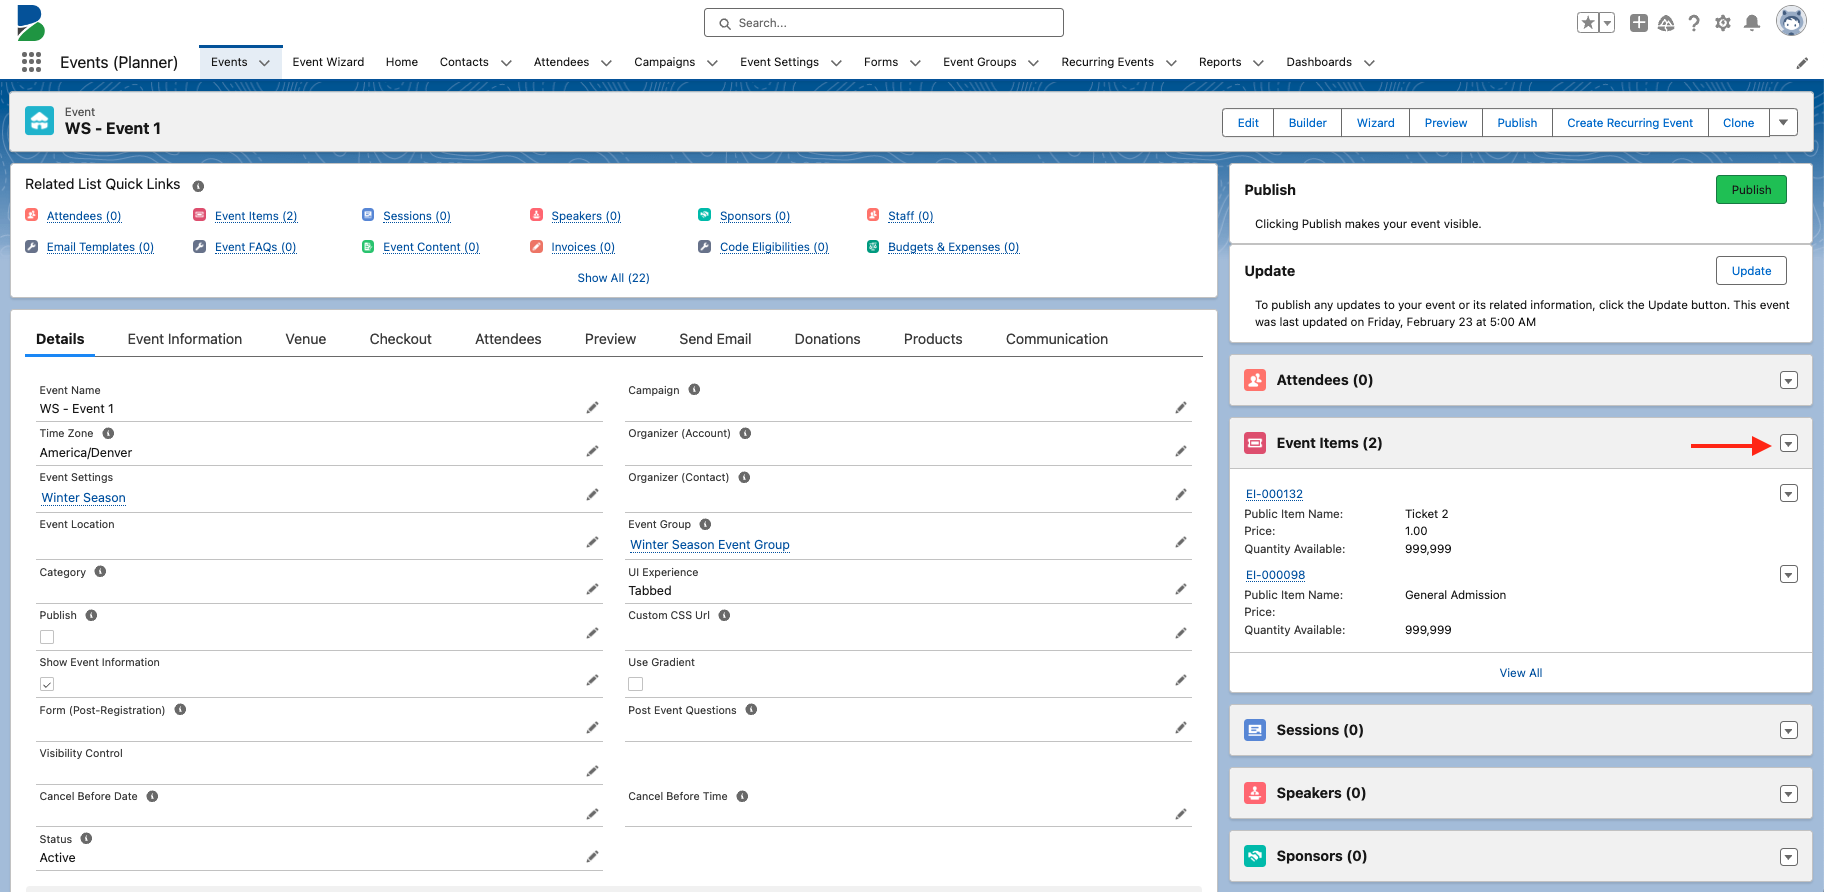
The Event object stores information about your Event, including what, where, and when. It’s also the place where you can find links to everything else that pertains to the Event.
- Click New next to the Event Related List.
- Fill in the fields in the sections below.
- Click Save.
Information
- Event Name (required)
- Time Zone (required)
- Event Group - Leave the field blank if the Event will not be associated with an Event Group.
- UI Experience - Click here for more information about the different user interfaces.
- Form (Post-Registration) - Click here for more information about Forms.
- Post Event Questions
About the Status and Publish Fields
Publish
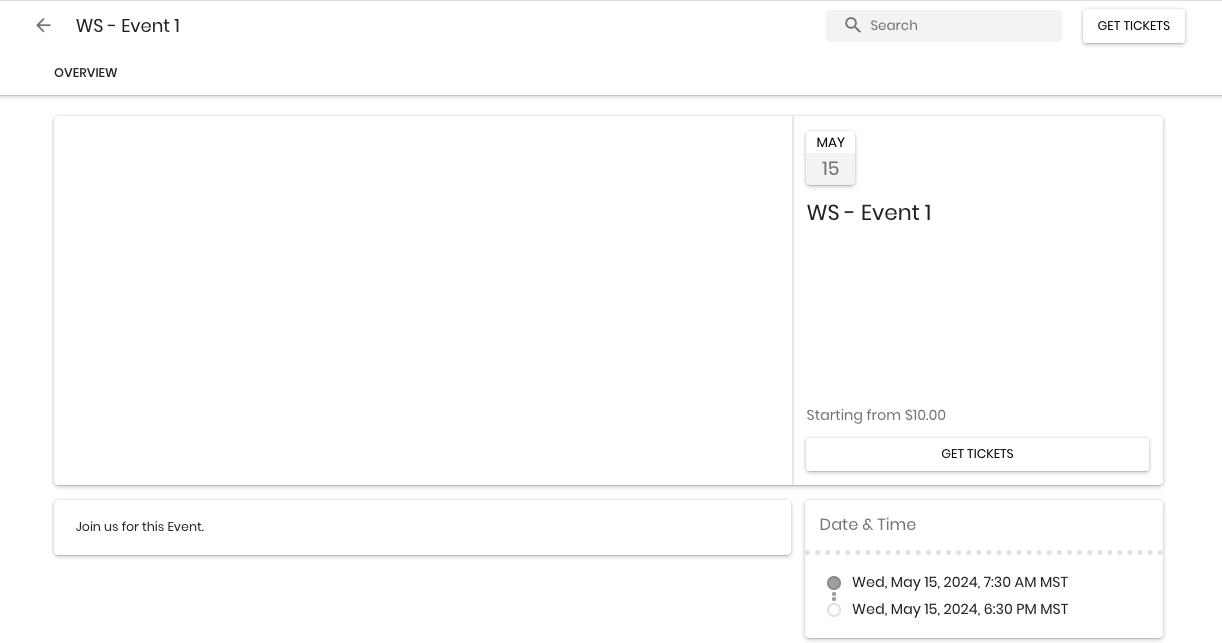
If an Event’s Publish (conference360__Visible__c) field is set to “True” or checked, then the Event will be viewable via the Event URL and on all public Event Groups and Event lists. If the field is unchecked, the Event can only be viewed by clicking the Preview button.
Status
The Event’s Status field shows the internal status of the Event and is used by Admins. For example, an Admin might change the Status to “Draft” to let other Admins know that they are updating the Event record. The values “Draft,” “Active,” “Canceled”, and “Completed” do not reflect if the Event has been published.
The Event Status is set to “Active” by default when the Event is created. Once the Event record exists, an Admin must manually change the field to "Completed" or "Canceled" or use the Blackthorn | Events Status Update scheduled job to update the field’s value.
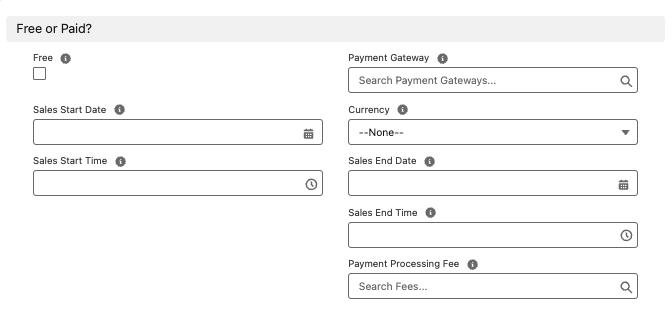
Free or Paid?
• Free – check if the Event will be free.
• Payment Gateway – Select a Payment Gateway if the Event is paid.
• Currency
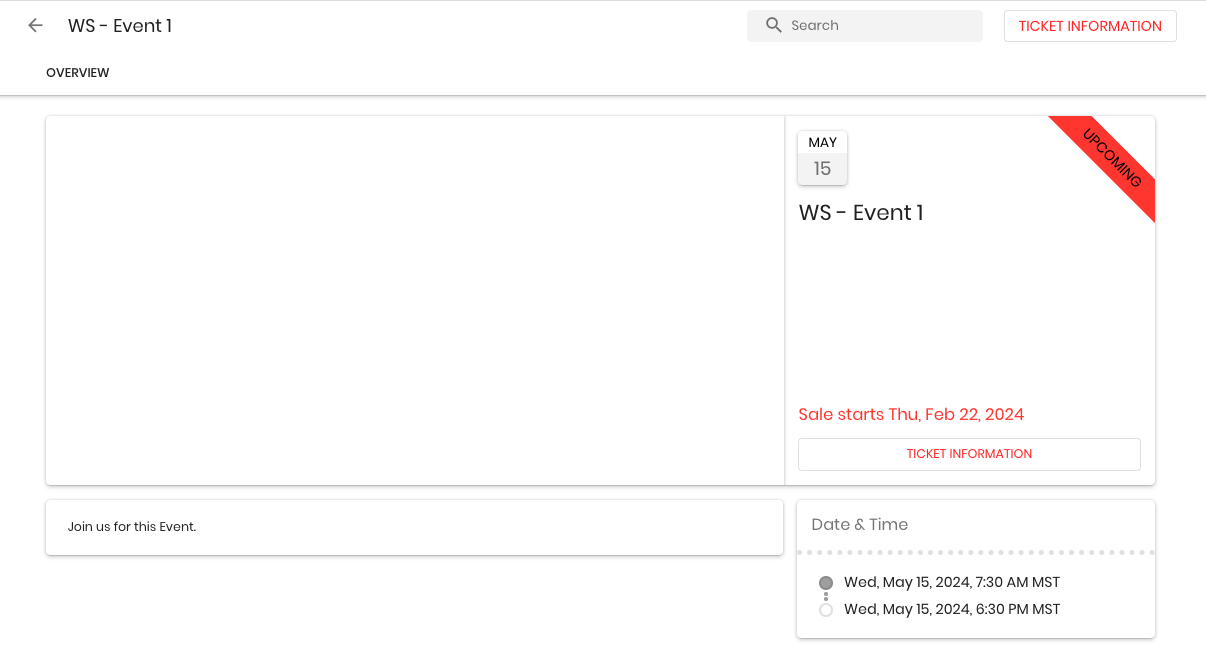
• Sales Start Date
• Sales Start Time
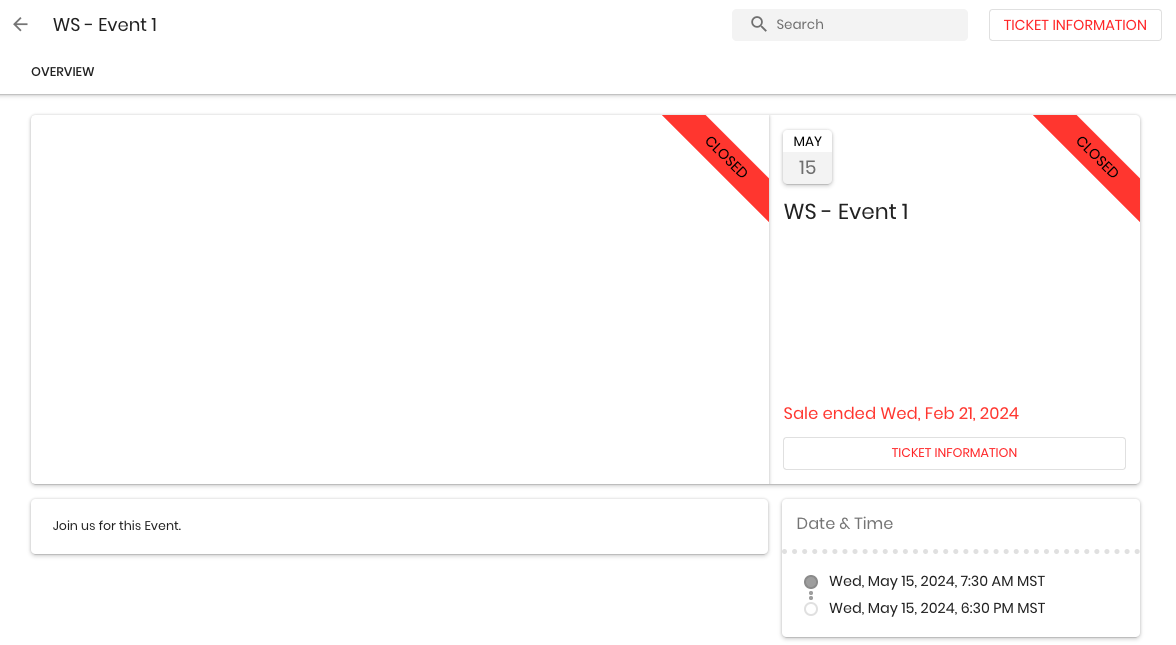
• Sales End Date
• Sales End Time
About the Sales Start/End Fields
Use the Sales Start Date, Sales Start Time, Sales End Date, and Sales End Time fields to control when an Attendee can register for an Event. These fields are different than the date when the Event occurs. (You must add them to the Event record page layout since they are not automatically added to it.)
If the Sales Start Date is set to a date before the day the Attendee tries to register or is left blank, the Attendee will be able to register for the Event.
If the Sales Start Date is set to a date if the future, the Attendee will not be able to register for the Event until the date listed.
If the Sales Start Date is in the past, the registration window has closed. The Attendee will no longer be able to register, and a Closed banner will appear.
IMPORTANT: If an Event Item’s Sales Start Date is before the Event’s Sales Start Date, the registration page will show the Event’s Sales Start Date.
Dates
- Event Start Date
- Event End Date
- Event Start Time
- Event End Time
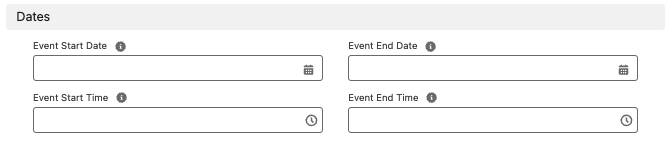
NOTE: The Event Start Date/Time and Event End Date/Time fields should be used for formula fields, email templates, etc. They will pull the correct date and time regardless of time zone for the Attendee.
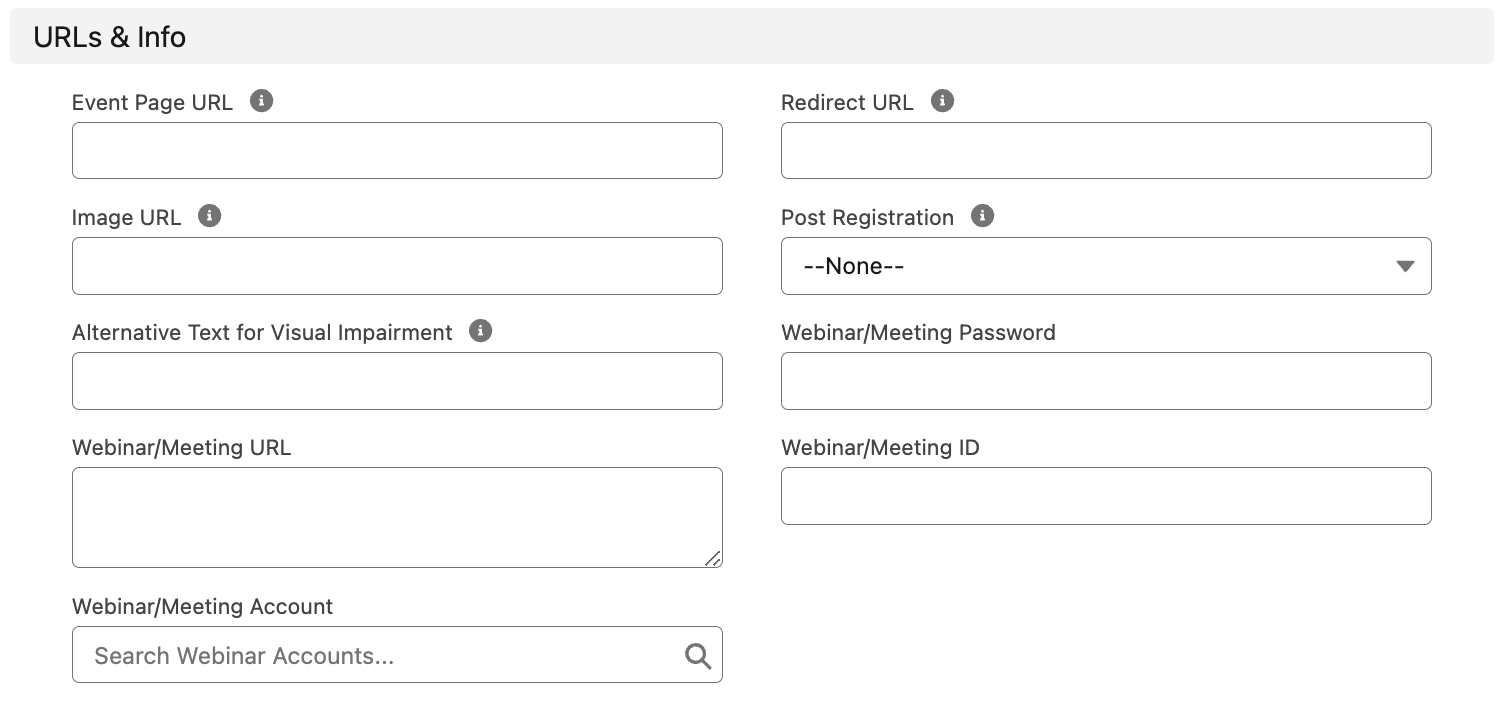
URLs & Info
- Image URL
- Post Registration – Define what will happen after the Attendee submits their registration. If you select "Show Success Message", enter your message in the Registration Success Message field. If you select "Redirect to URL", enter the URL in the Redirect URL field.
- Webinar/Meeting URL – Click here for more information about webinar integrations.
- Webinar/Meeting Password
- Webinar/Meeting Account
- Webinar/Meeting ID
- Include Zoom URL In Calendar Description - When checked, Attendees will see Zoom links in the invite’s Calendar Description with text similar to “To join the meeting directly, click here: [link].”
More About Images
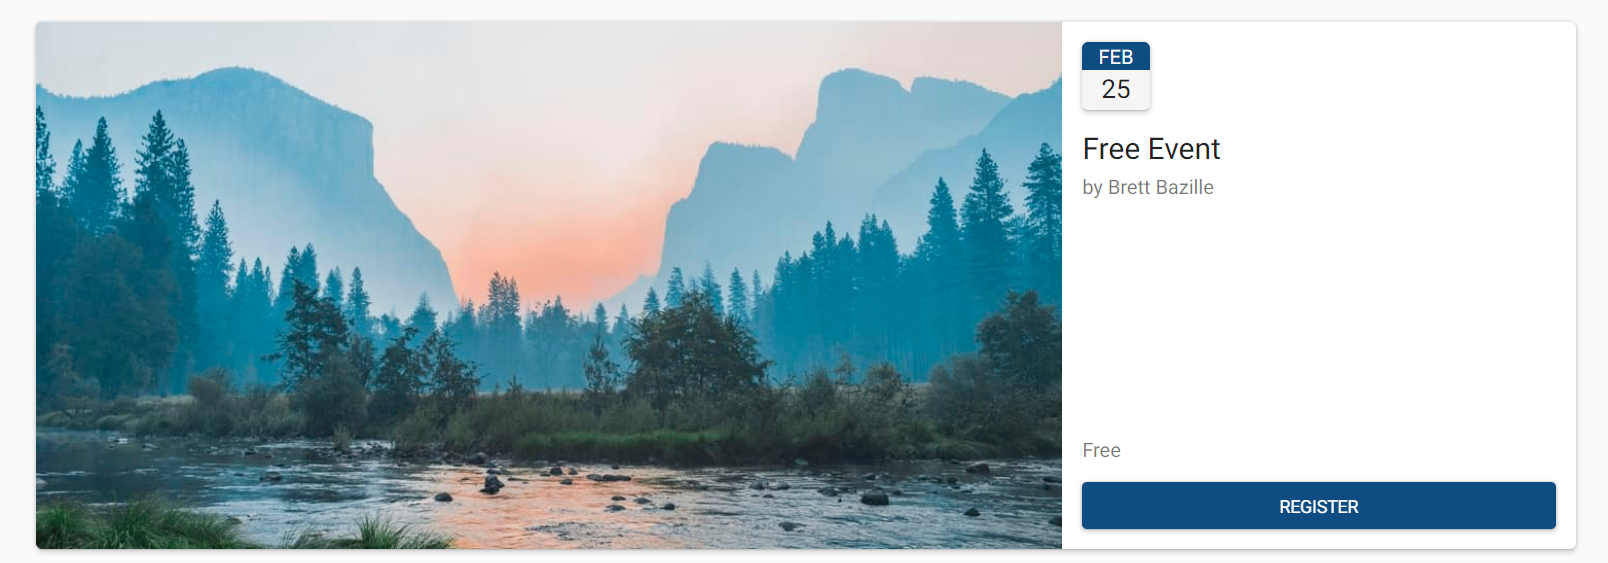
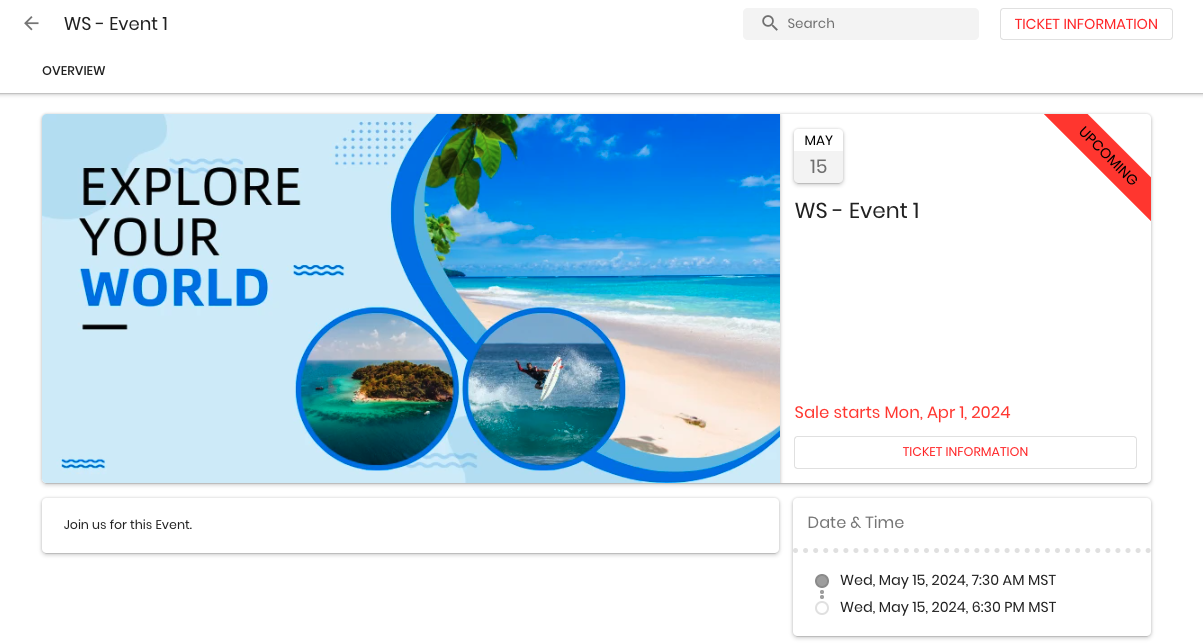
The image in the Image URL field will appear on the cover of the Event.
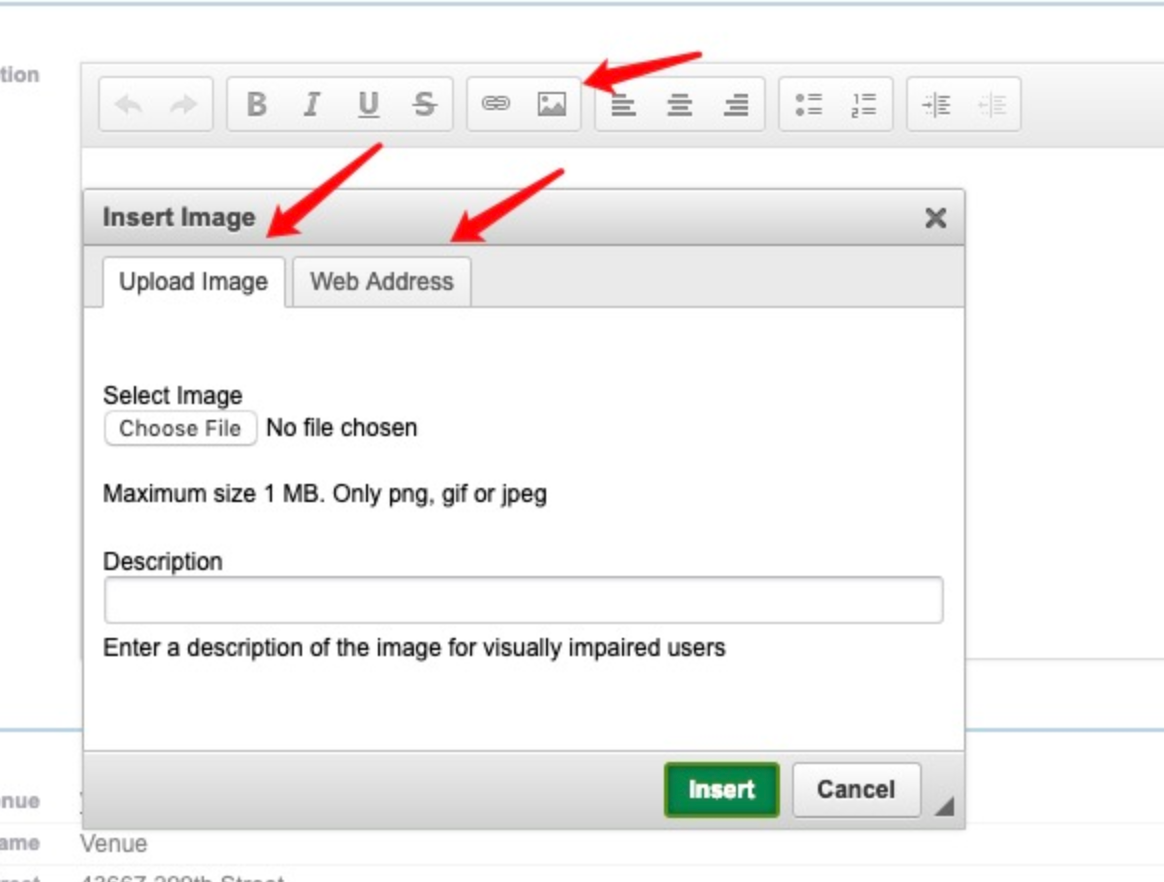
- The Image URL link needs to be HTTPS, not HTTP.
- For a Salesforce File, copy the public link.
- Classic Salesforce Document, mark "Externally Available", right click on the image, copy the image address.
- Classic In the editor, both Upload Image/Web Address image upload options work. See below.
Check here to see more details about images.
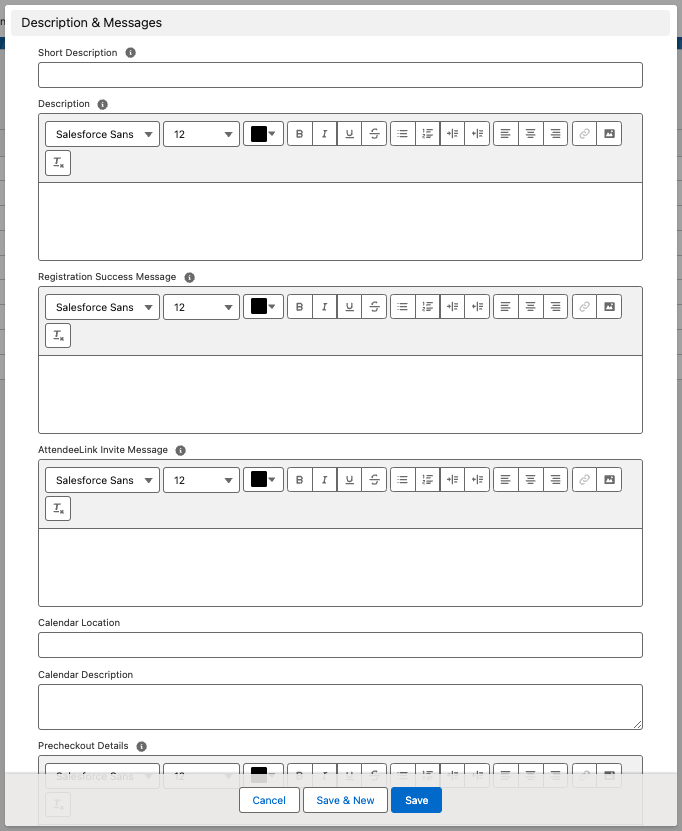
Description & Messages
- Description
- Registration Success Message
- AttendeeLink Invite Message
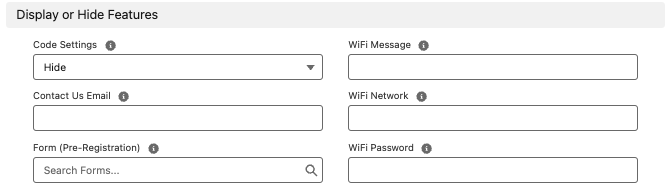
Display or Hide Features
- Code Settings
- Contact Us Email
- Form (Pre-Registration)
- WiFi Message
- WiFi Network
- WiFi Password
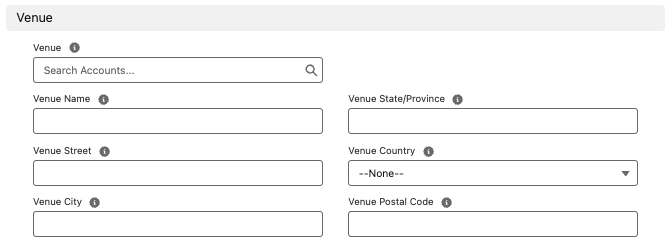
Venue
- Venue
- Venue Name
- Venue Street
- Venue City
- Venue State/Province
- Venue Country
- Venue Postal Code
Capacity
- Total Capacity

Waitlisting
- Waitlist Enabled - Click here for more information about waitlisting.
- Waitlist Capacity

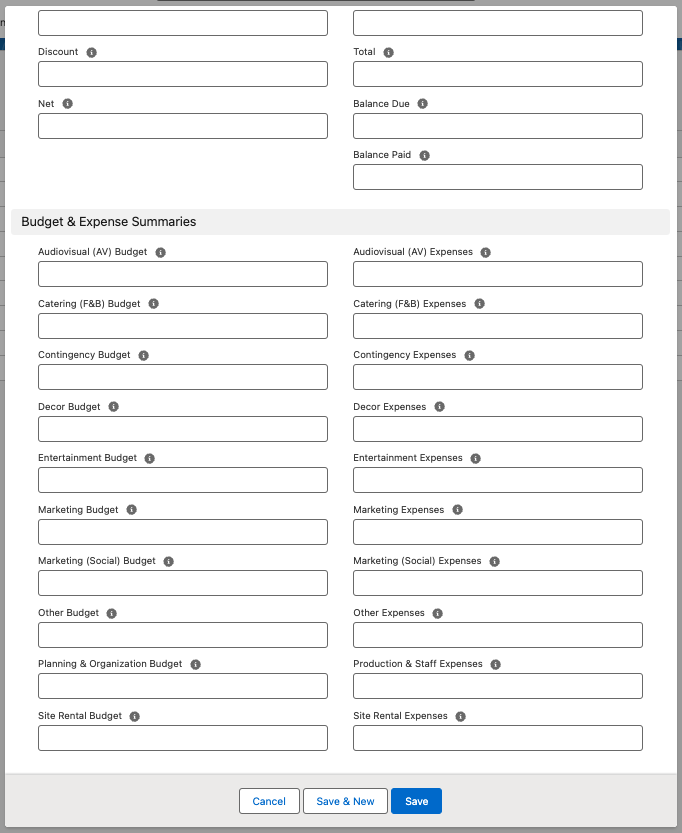
Budget & Expense Summaries
If you want to enter a budget for each category, you can do so here or on the Event record page. If you want to relate the Event to Budget & Expense records, these fields will automatically update.
Click here for information about the Budget & Expense object.
- Audiovisual (AV) Budget
- Audiovisual (AV) Expenses
- Catering (F&B) Budget
- Catering (F&B) Expenses
- Contingency Budget
- Contingency Expenses
- Decor Budget
- Decor Expenses
- Entertainment Budget
- Entertainment Expenses
- Marketing Budget
- Marketing Expenses
- Marketing (Social) Budget
- Marketing (Social) Expenses
- Other Budget
- Other Expenses
- Planning & Organization Budget
- Production & Staff Expenses
- Site Rental Budget
- Site Rental Expenses
Click here to learn more about all the Event record’s fields.
Your New Event Record
Create Event Items
There are three primary types of Event Items that can be added to an Event: Tickets, Donations, and Products. For this example, we will focus on Tickets. To learn more about the other types, click Donations or Products.
About Event Item Tickets
Main Event Ticket
A Main event ticket is a required Event Item, meaning that every Event must offer at least one Main event ticket. This ticket type also has the following characteristics.
- Primary ticket type for an Event.
- Use it for the target audience of the Event.
- It can be a free or paid ticket.
Guest Ticket
The Guest ticket is a secondary or alternate ticket that is used when there is a difference in price compared to the Main event ticket or to differentiate attendee populations (Ex. student vs parent). This ticket type also has the following characteristics.
- Not required for an Event.
- Can be a free or paid ticket.
- Used to identify Attendees that belong to separate populations, opportunities, or campaigns.
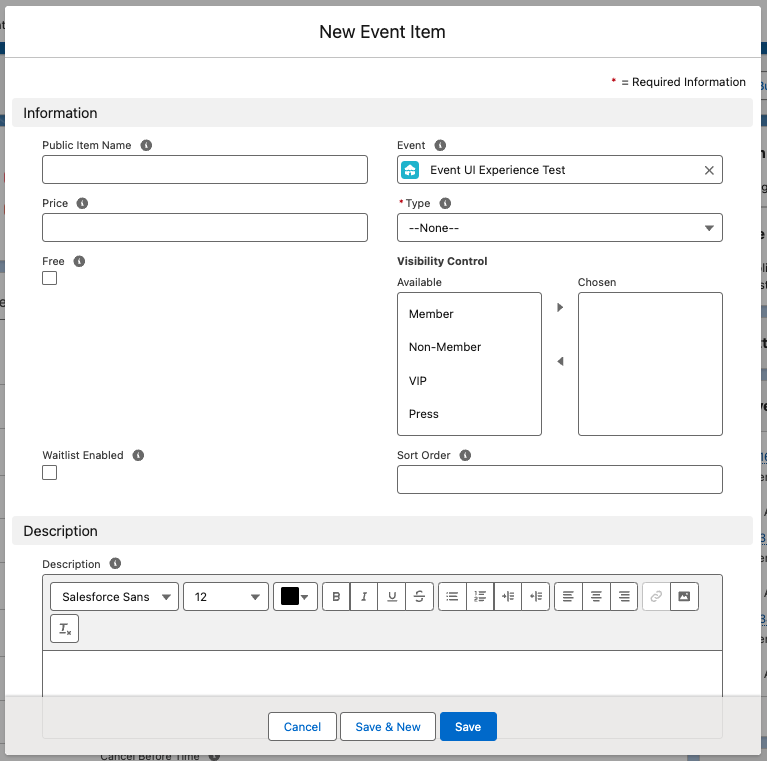
Create a Ticket
- From the Event record, click New next to the Event Items Related List.
- Fill in the fields in the sections below.
- Click Save.
Information & Description
Enter a Public Item Name (required).
Select an Event.
Is the Main event ticket free or paid? If it is paid, enter the amount in the Price field. If the Main event ticket is free, check Free.
Set Type = "Main event ticket". (If creating a Guest Ticket, set Type = "Guest".)
Select a Visibility Control, if using.
Check Waitlist Enabled to enable waitlisting.
Enter a Description.
Enter a value in the Sort Order field to change the order of the Event Items on the registration page.
Deprecated Field
The Event Item’s Relationship Settings field has been deprecated. Use the Event Settings Relationship Settings field to attach Relationship Settings to your Event.
Availability & Limits
The Sales Start Date and Sales End Date specify which days the tickets are available for purchase. For example, If the Event is on 12/31 for New Year's Eve, you may want to stop ticket sales by 12/20 to ensure you can organize food and drinks for the Attendees.
- Sales Start Date
- Sales End Date
- Sales Start Time
- Sales End Time
IMPORTANT: If an Event Item’s Sales Start Date is before the Event’s Sales Start Date, the registration page will show the Event’s Sales Start Date.
Capacity & Waitlisting
- Enter the Quantity Available. If the field is blank, the Quantity Available will say “999,999”.
- The Quantity Remaining field updates automatically based on the equation Quantity Remaining = Quantity Available - Registered Quantity.
- If waitlisting is enabled, enter an amount in the Waitlist Capacity field if using. For more information about waitlisting, click here.
- Enter a value in the Default Quantity Selection field to define the default quantity of Tickets, Guest Tickets, or Products that will be automatically added to the cart when an Attendee reaches the ticket selection step. If the number of remaining tickets is greater than 0 but less than the Default Quantity Selection, all remaining tickets will be added to the cart.
- NOTE: When an Attendee purchases Tickets, Guest Tickets, or Products from their AttendeeLink, the default quantity will not be added to the cart. (The original behavior is unchanged.)
- The Waitlisted field will summarize the Attendees who are waitlisted for the Event Item.
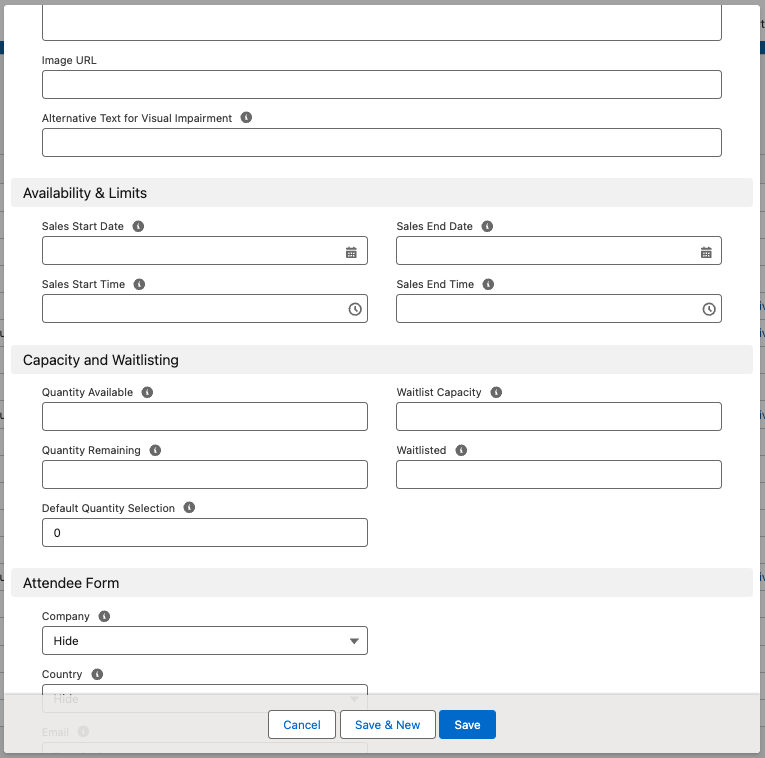
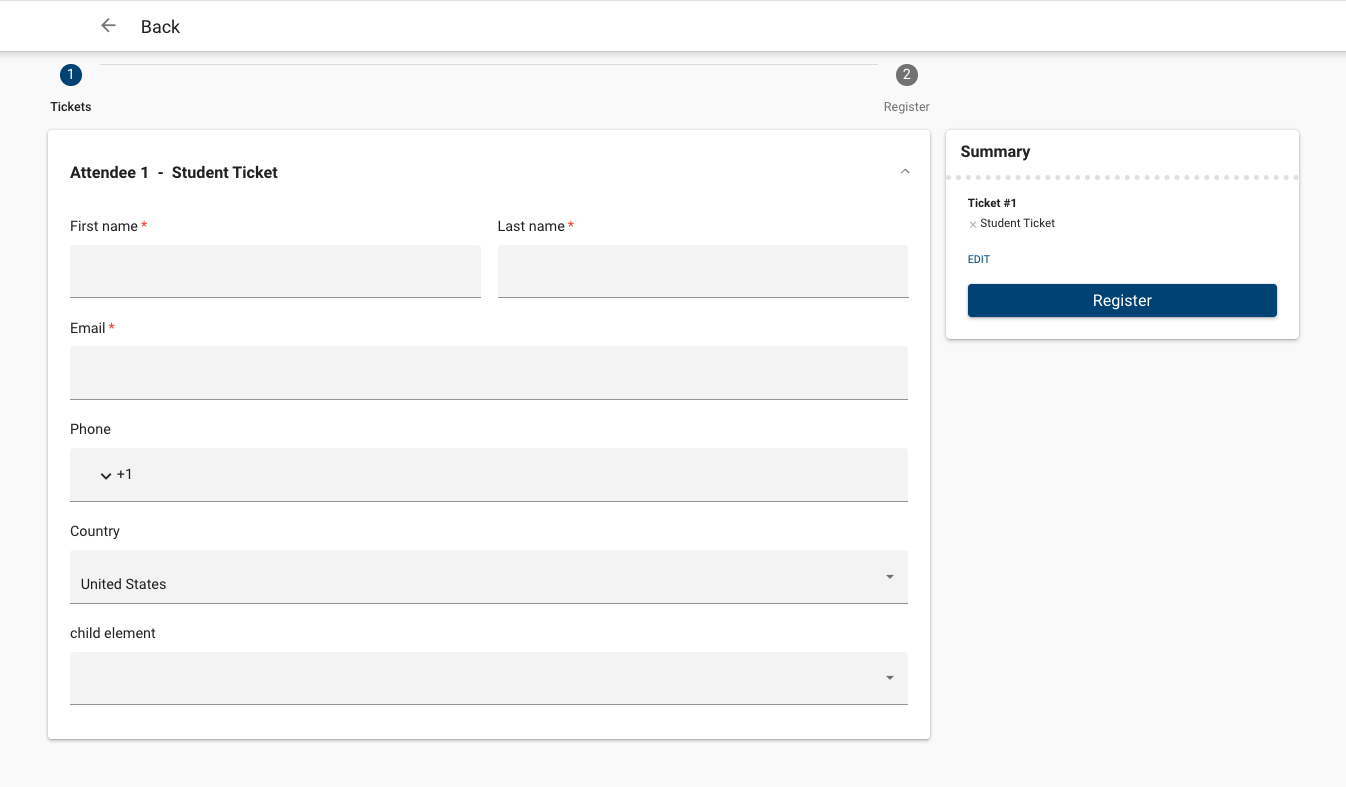
Attendee Form
There are multiple fields on the Attendee Form that you can hide, make required, or show as optional for each Main event ticket.
For example, if you have a "Child Under 3 Yrs" ticket for sale, it is unlikely that the child has an email address. Therefore, you can hide the Email field from this Event Item's Attendee Form.
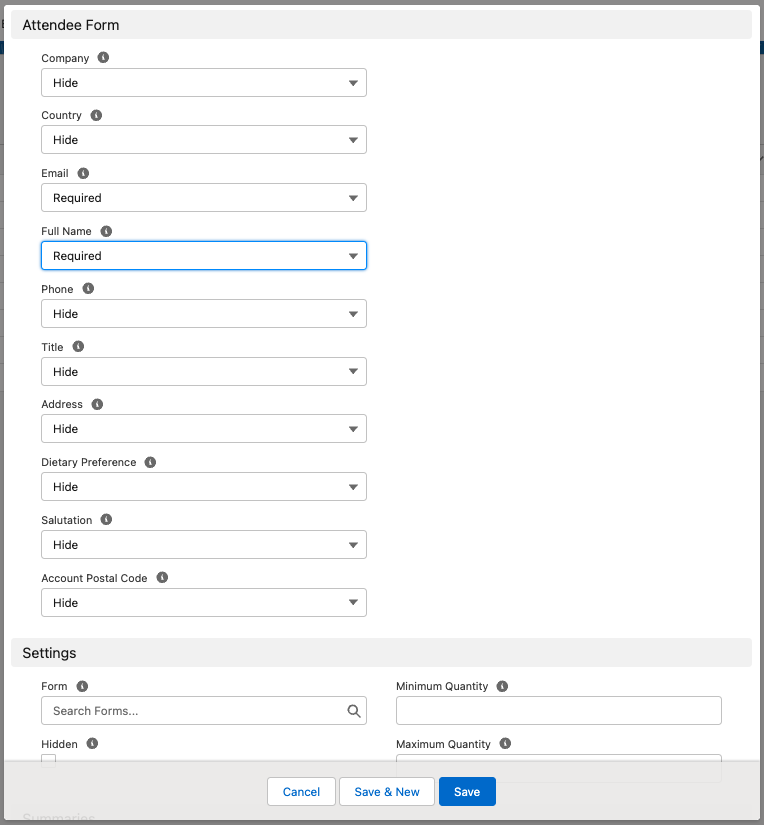
Select “Hide”, “Optional”, or “Required” for each of the fields below.
Company
Country
Email
Full Name
Phone
Title
Address
Dietary Preference
Salutation
Account Postal Code
Important Functionality: If an Event Item’s Account Postal Code is set to “Required,” but the Address field is set to “Hide” or “Optional,” then a registrant will not be able to complete the registration process.
Attendee Form Example
Settings
- An Event Item’s Quantity Remaining will show on the registration page only when there are 10 or fewer Event Items available.
- Select a previously created Form or create a new one. Click here for more information about creating Forms and Form Elements.
- Check Hidden if you want to hide the Event Item from the Event checkout process.
- To set a minimum or a maximum number of Event Items allowed per order, enter the amounts in the Maximum Quantity and/or Minimum Quantity fields.
Publish Your First Event
Authorize Events
If you do not see the Publish and Update buttons, but instead see the Authorize button, your Events app has not been authorized in your org.
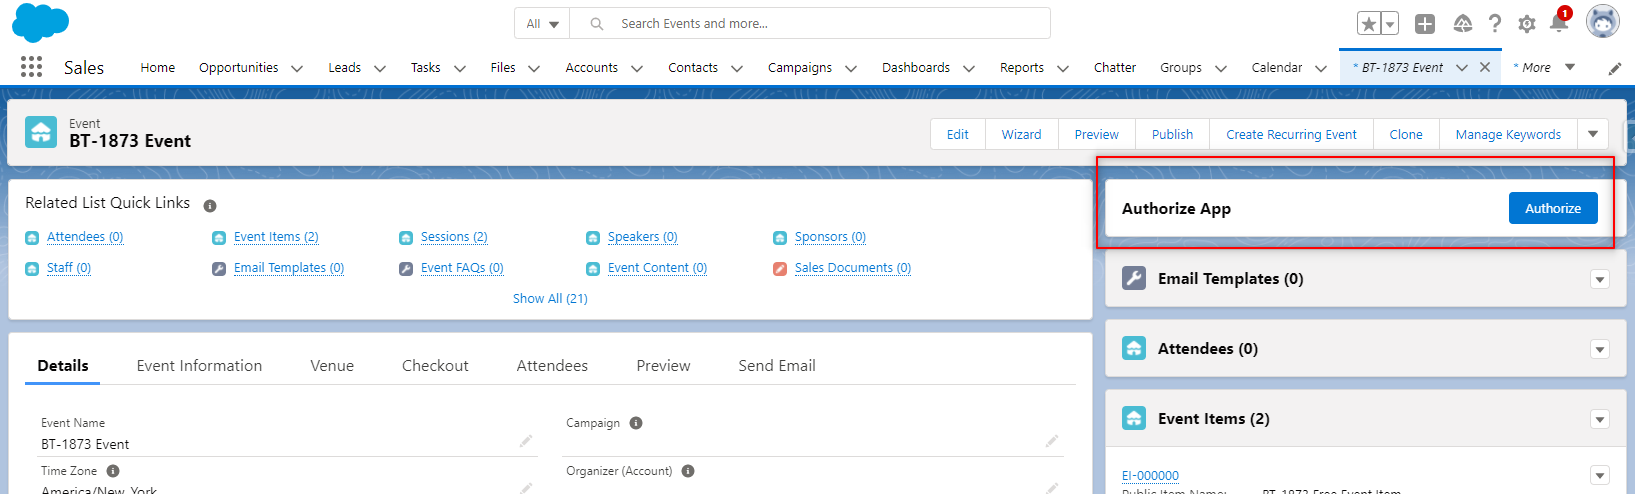
To complete authentication, click the Authorize button and follow the steps. You will be returned to the Event record page, and the Publish and Update buttons will now be visible.
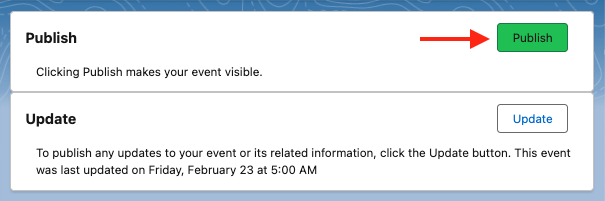
Publish an Event
Click Publish to publish the Event. Once the Event is published, your Event can be viewed by anyone.
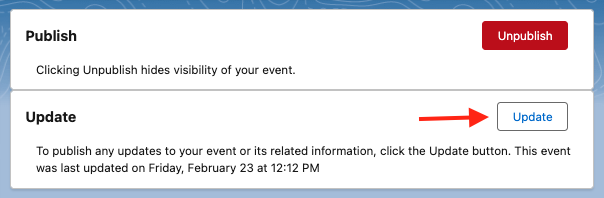
Update an Event
Most changes made to your Event will automatically update your Event. To ensure that all udpates are made to a published Event, click the Update button.
Most changes made to your Event will automatically update your Event. To ensure that all updates are made to a published Event, click the Update button.
View Your Event
Click the Event URL and view your live Event.
If the Event or Event Item(s) are not rendering after publishing, please watch this quick video about how to troubleshoot visibility controls.
Next Steps
- Create Session, Event FAQs, Event Speakers, Event Sponsors, and Event Staff records related to your Event.
- Learn how the Event Checkout process works.