Users must manually update a cloned Event’s Total Capacity after cloning an Event because cloning an Event resets the new Event's Total Capacity to the cloned Event Item’s Quantity Available.
Need to duplicate your Event quickly with all of the related information like Attendees, Event Items, Sessions, Sponsors, Form Elements, etc? Now you can, in three simple steps with our Clone feature!
Before You Clone
Permissions
A standard user must have one of the following permission sets to be able to clone Event records.
- Blackthorn | Events (Admin)
- Blackthorn | Events (Organizer)
- Blackthorn | Events (Community/Platform User)
Page Layout
When cloning an Event, standard users will use the default page layout, which includes any Related Lists that may have been removed on the original Event record.
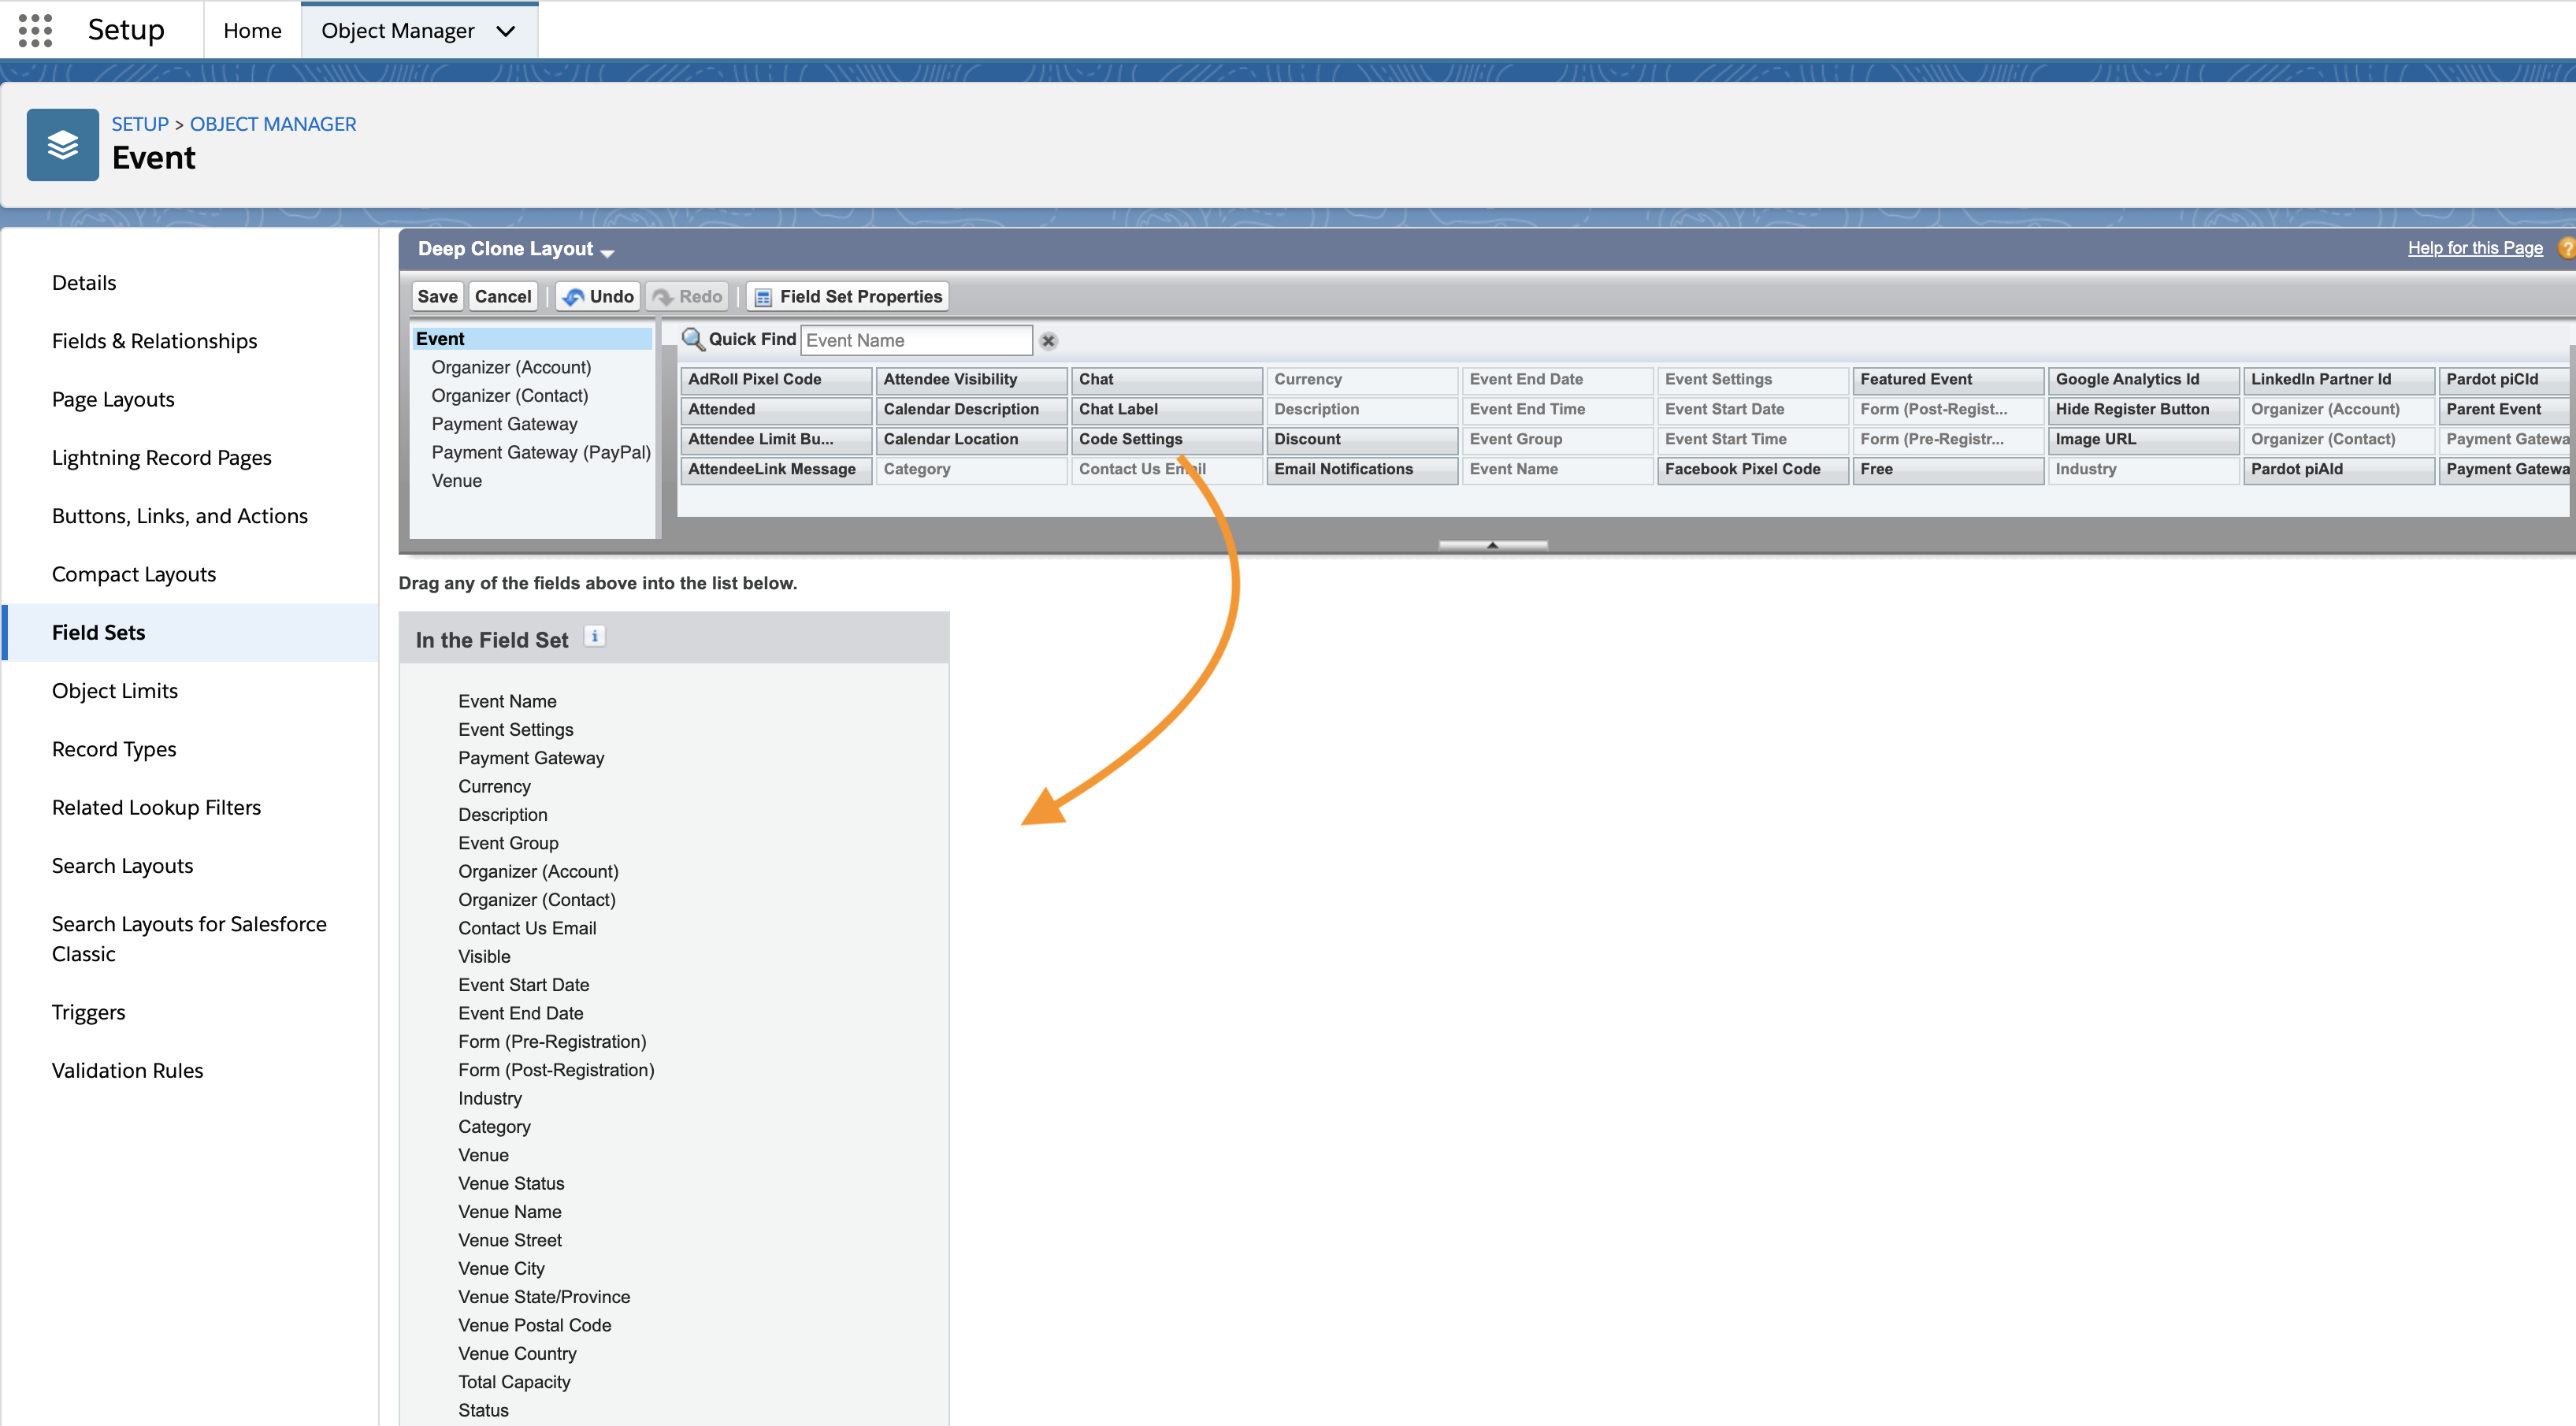
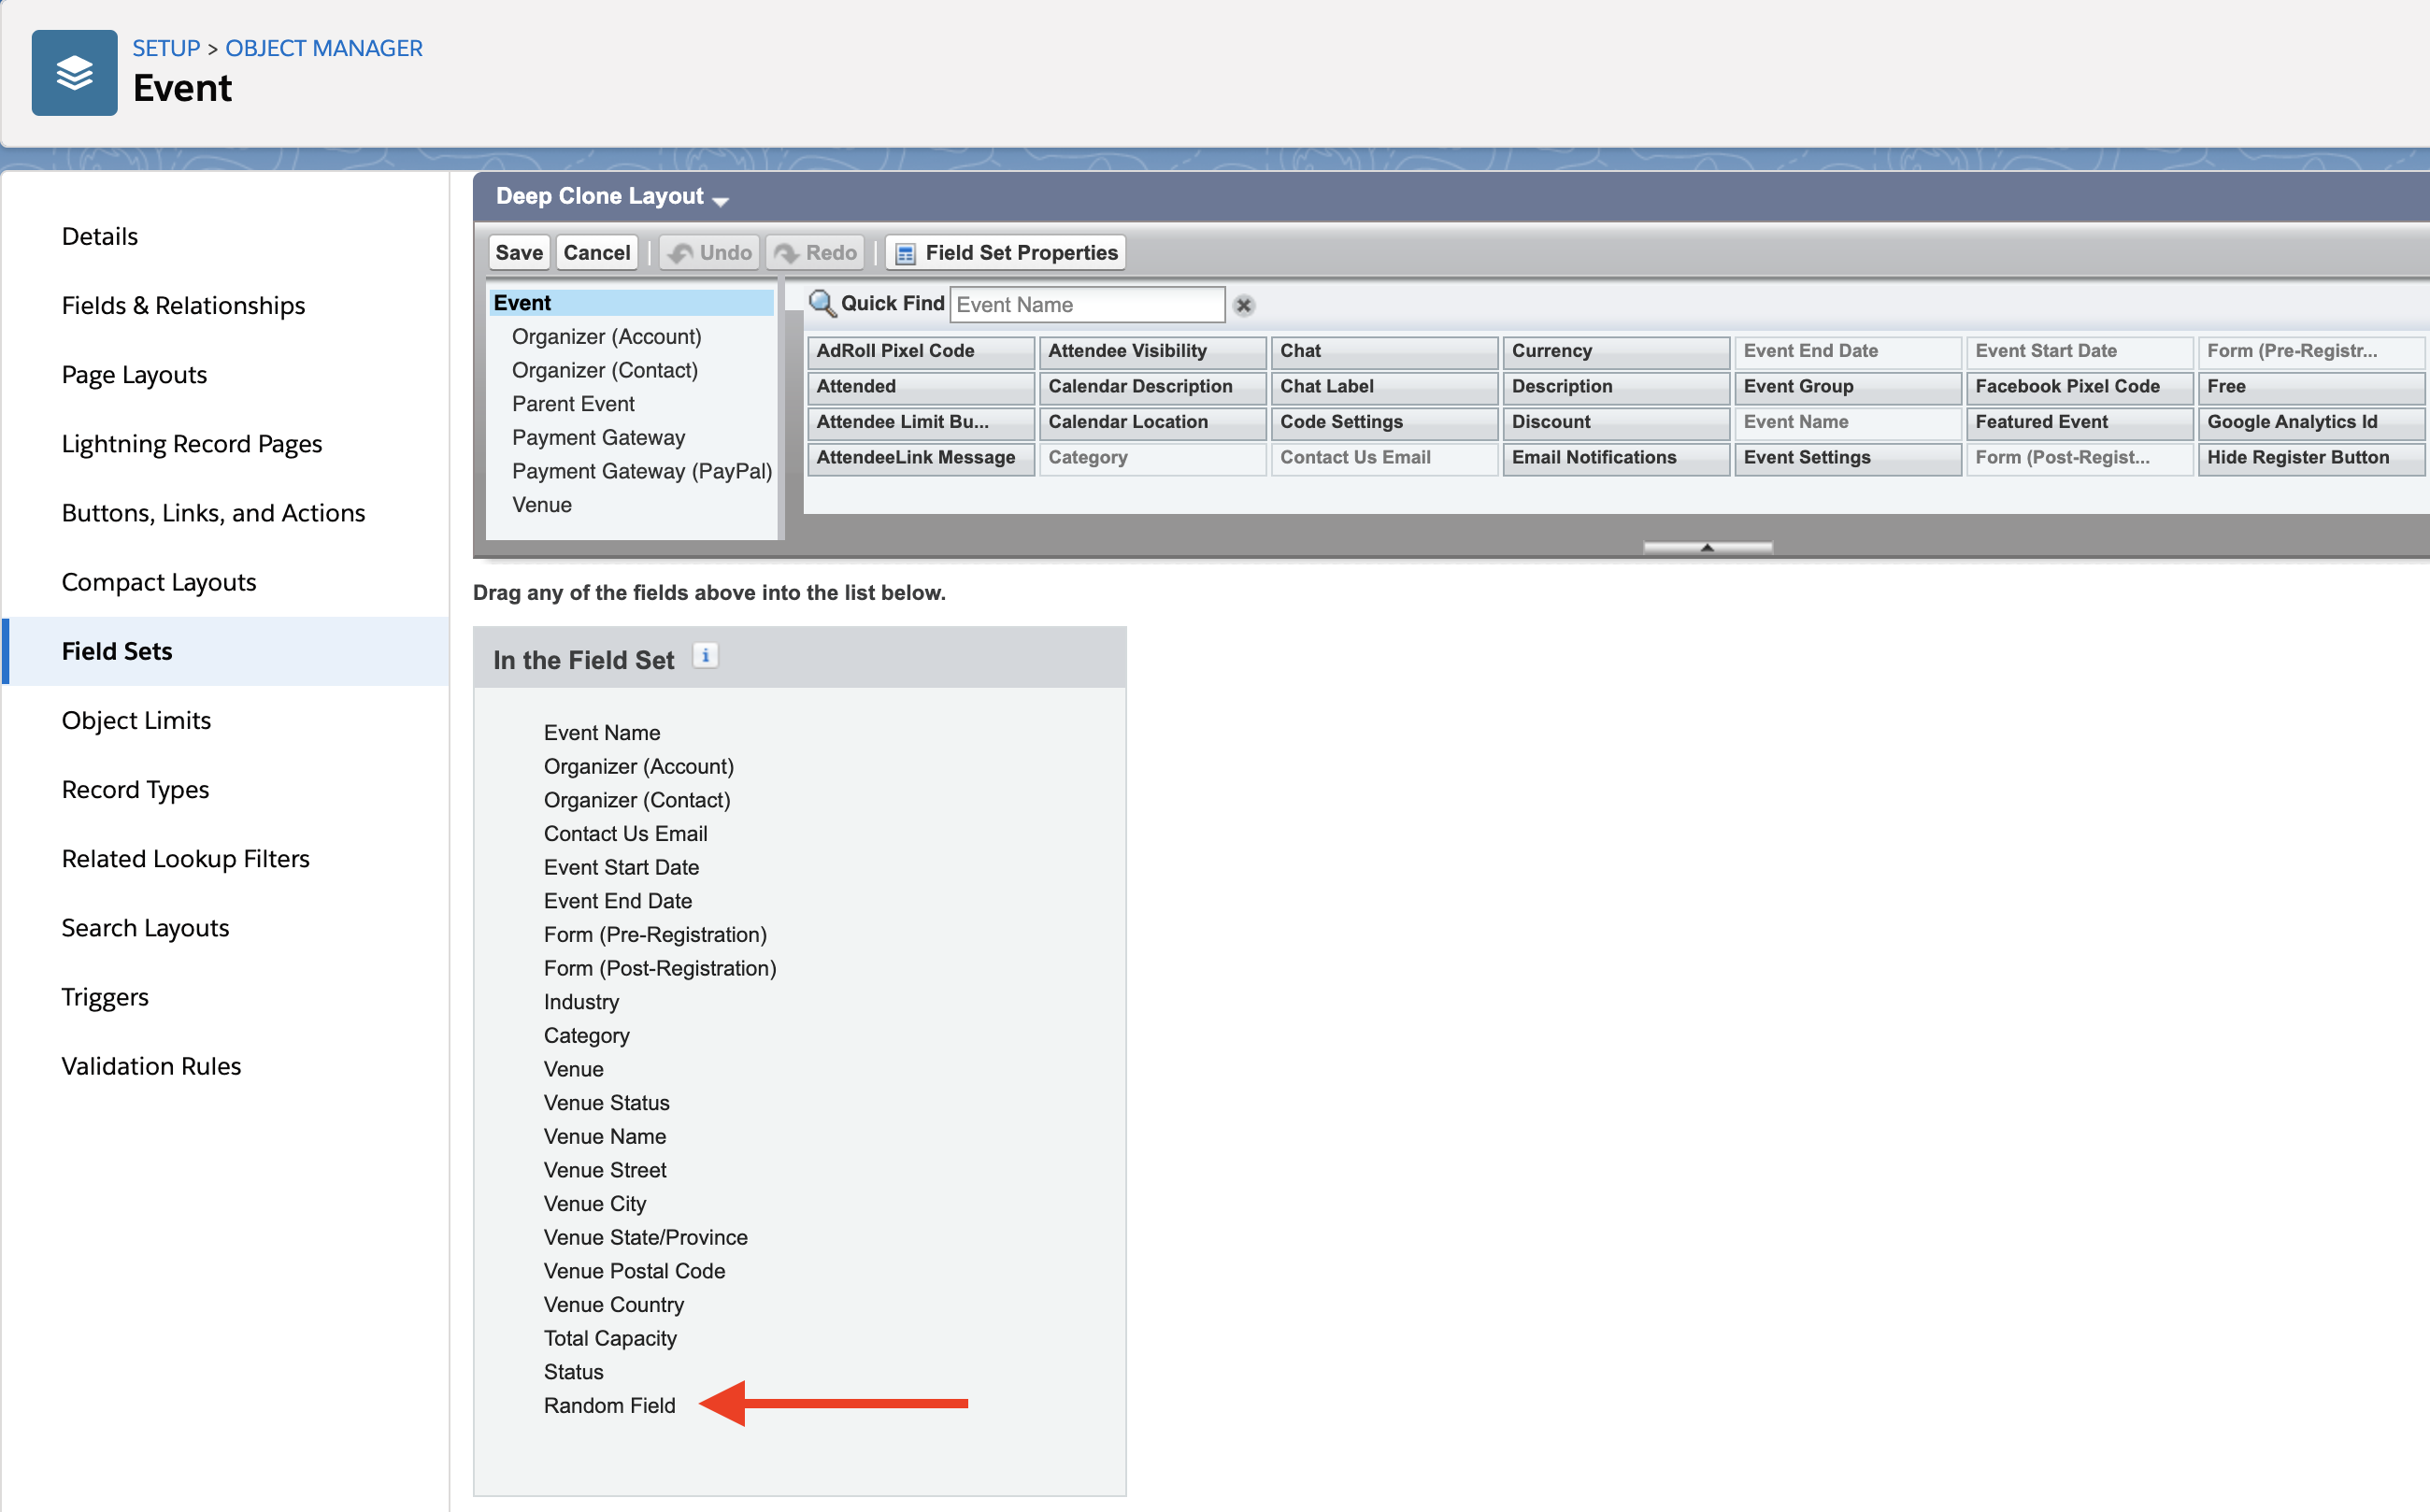
The Deep Clone Layout can be customized by adding/removing fields to/from the Deep Clone field set.
Follow the steps below to add the custom fields to the Event Deep Clone Layout.
- Go to Setup.
- Click the Object Manager tab.
- In the Quick Find box, enter and click "Event" (conference360__Event__c).
- Click the Field Sets tab.
- Click “Deep Clone Layout."
- Drag and drop the fields you need into the "In the Field Set" list.
- To make a field required, hover over the field in the "In the Field Set" box, click the Wrench icon, and check the Required checkbox. Note: The red asterisk that appears next to a field when cloning an Event only indicates that the field must be cloned. There is no validation that prevents cloning when the required field is left blank. If the required field is blank on the original Event, the cloned field will also be blank.
- Click OK.
- Click Save.
Record Types
Admins can use the Blackthorn | Events Settings Enforce RecordType Permission Deep Clone custom setting to control who can access specific custom Record Type, allowing or preventing users from cloning certain Events.
If Enforce RecordType Permission Deep Clone is enabled (checked), the deep clone process will enforce Record Type assignments.
If an Event Organizer doesn’t have access to an Event’s custom Record Type, clicking the Clone button on the Event record will not clone (i.e., deep clone) the Event. They can, however, change the value in the Record Type field to a value they have access to.
Classic/Lightning
-
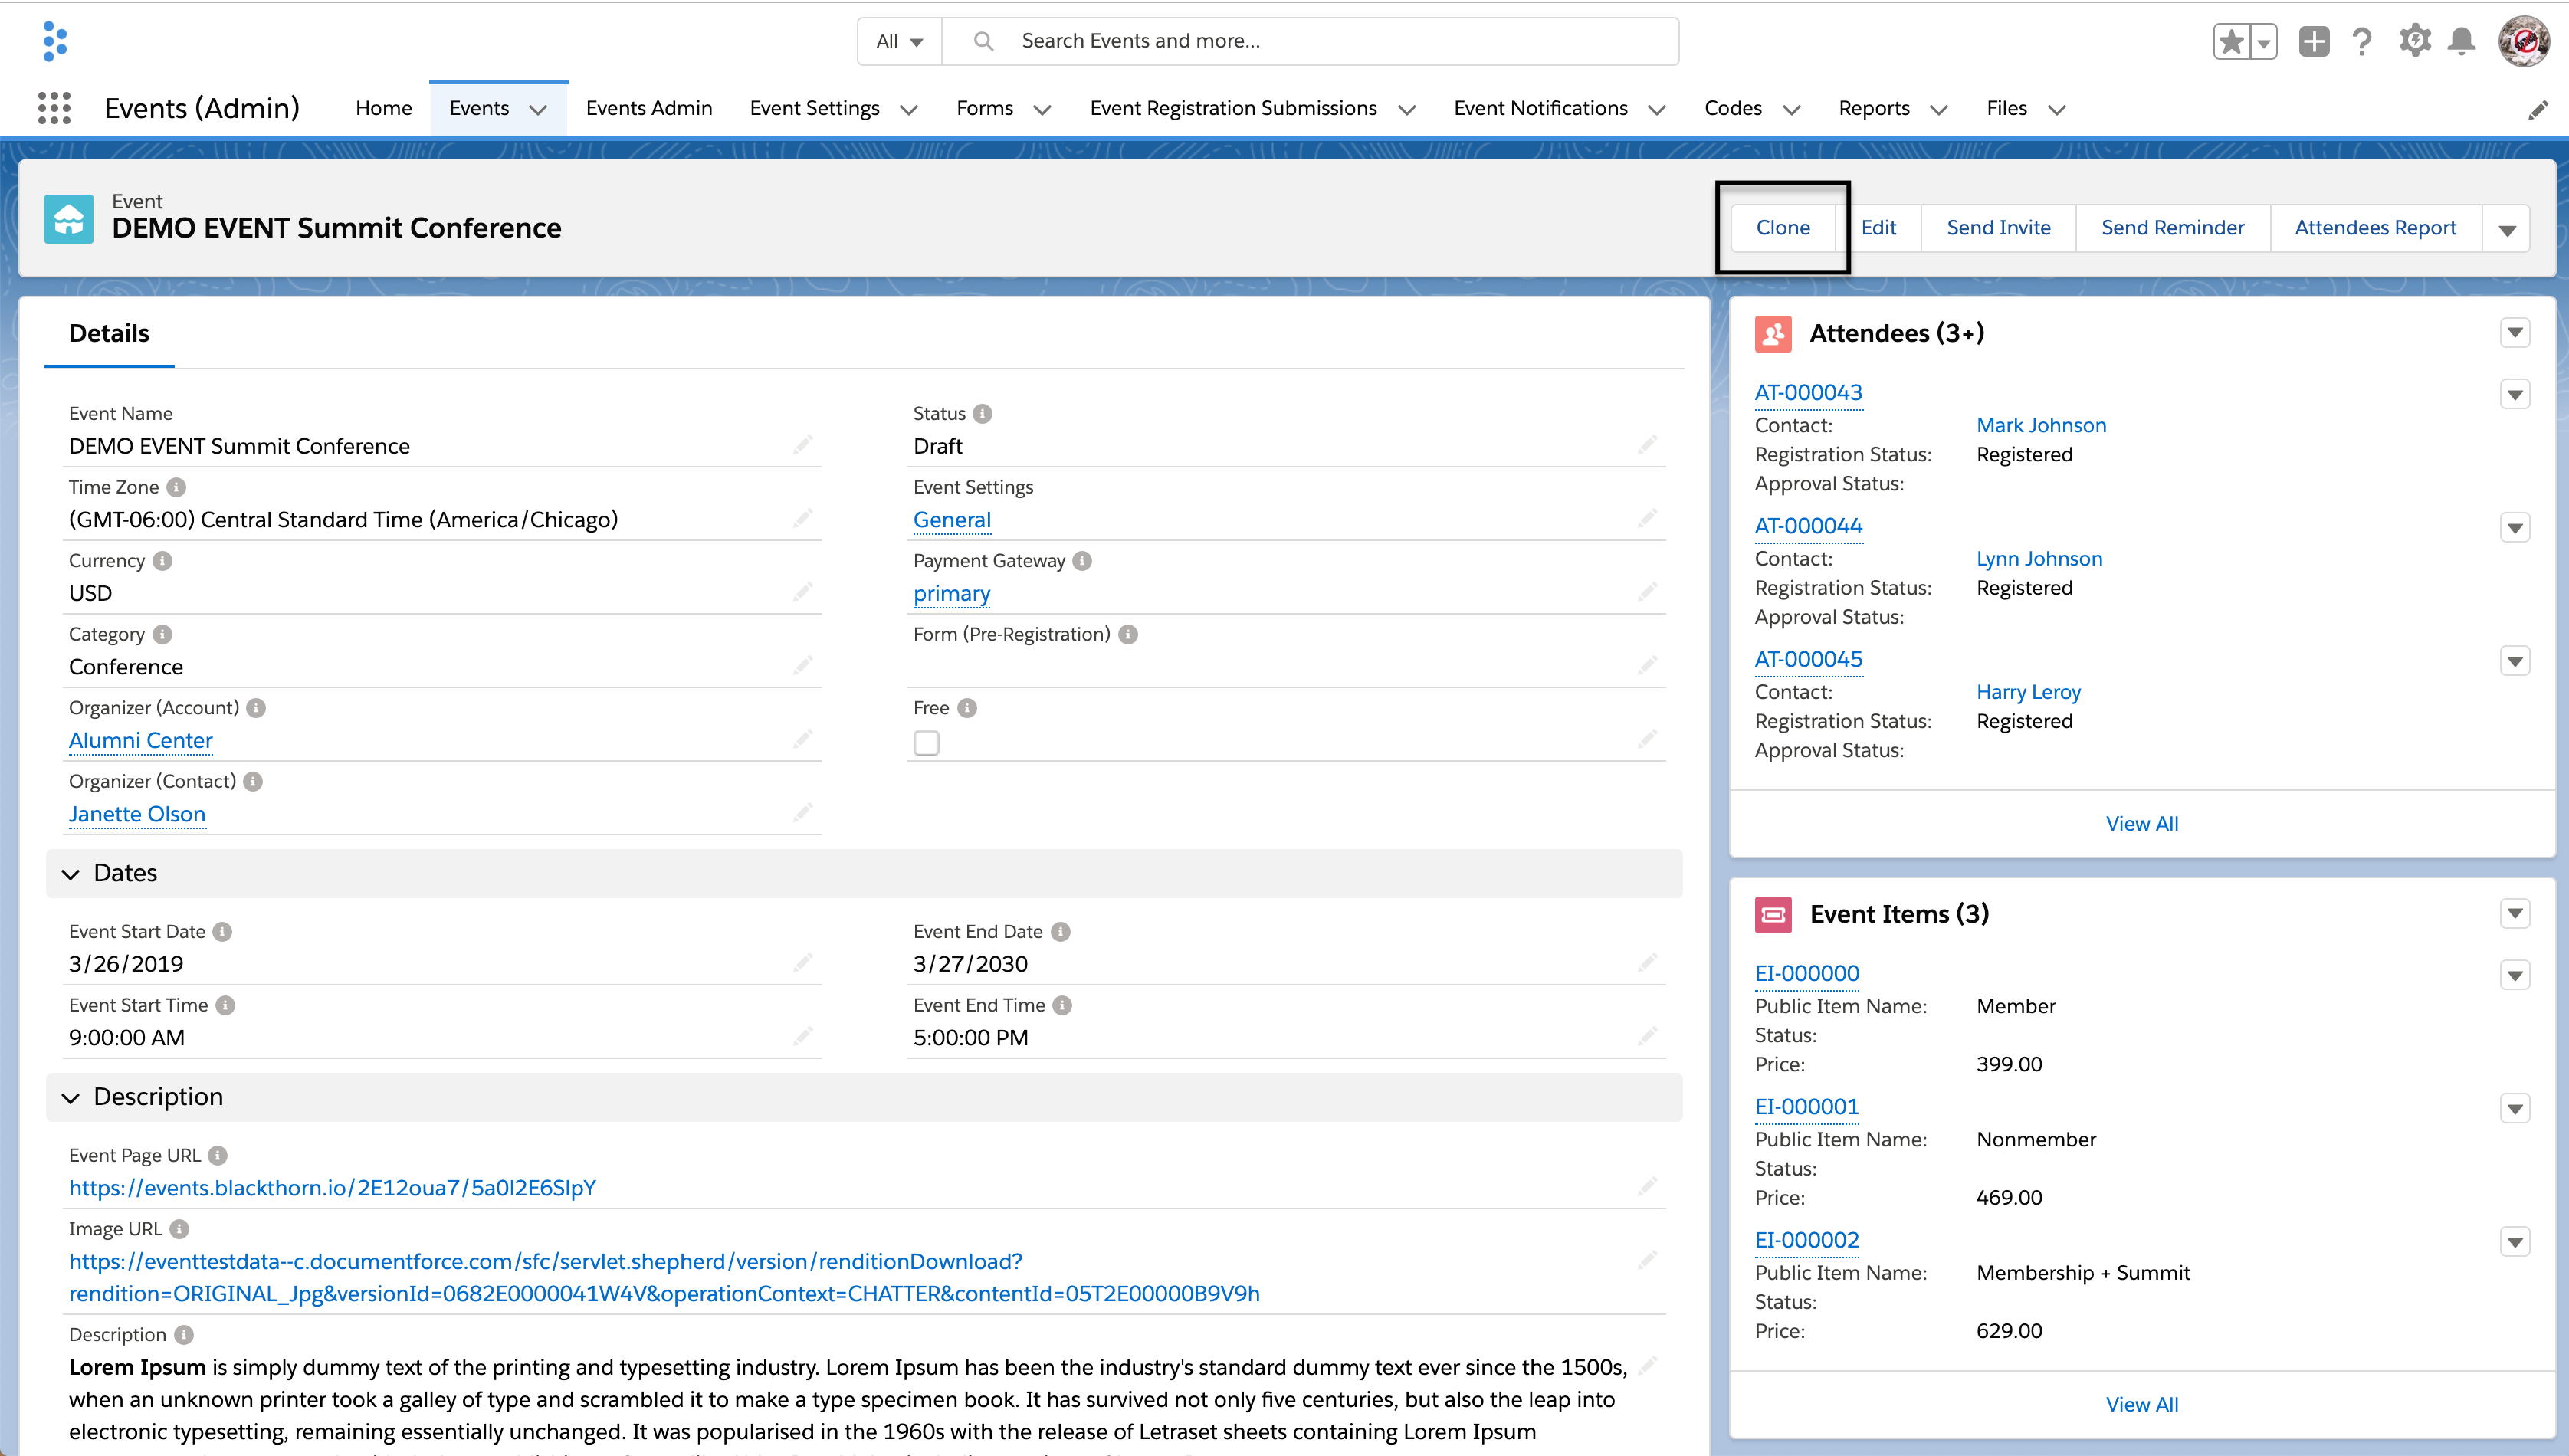
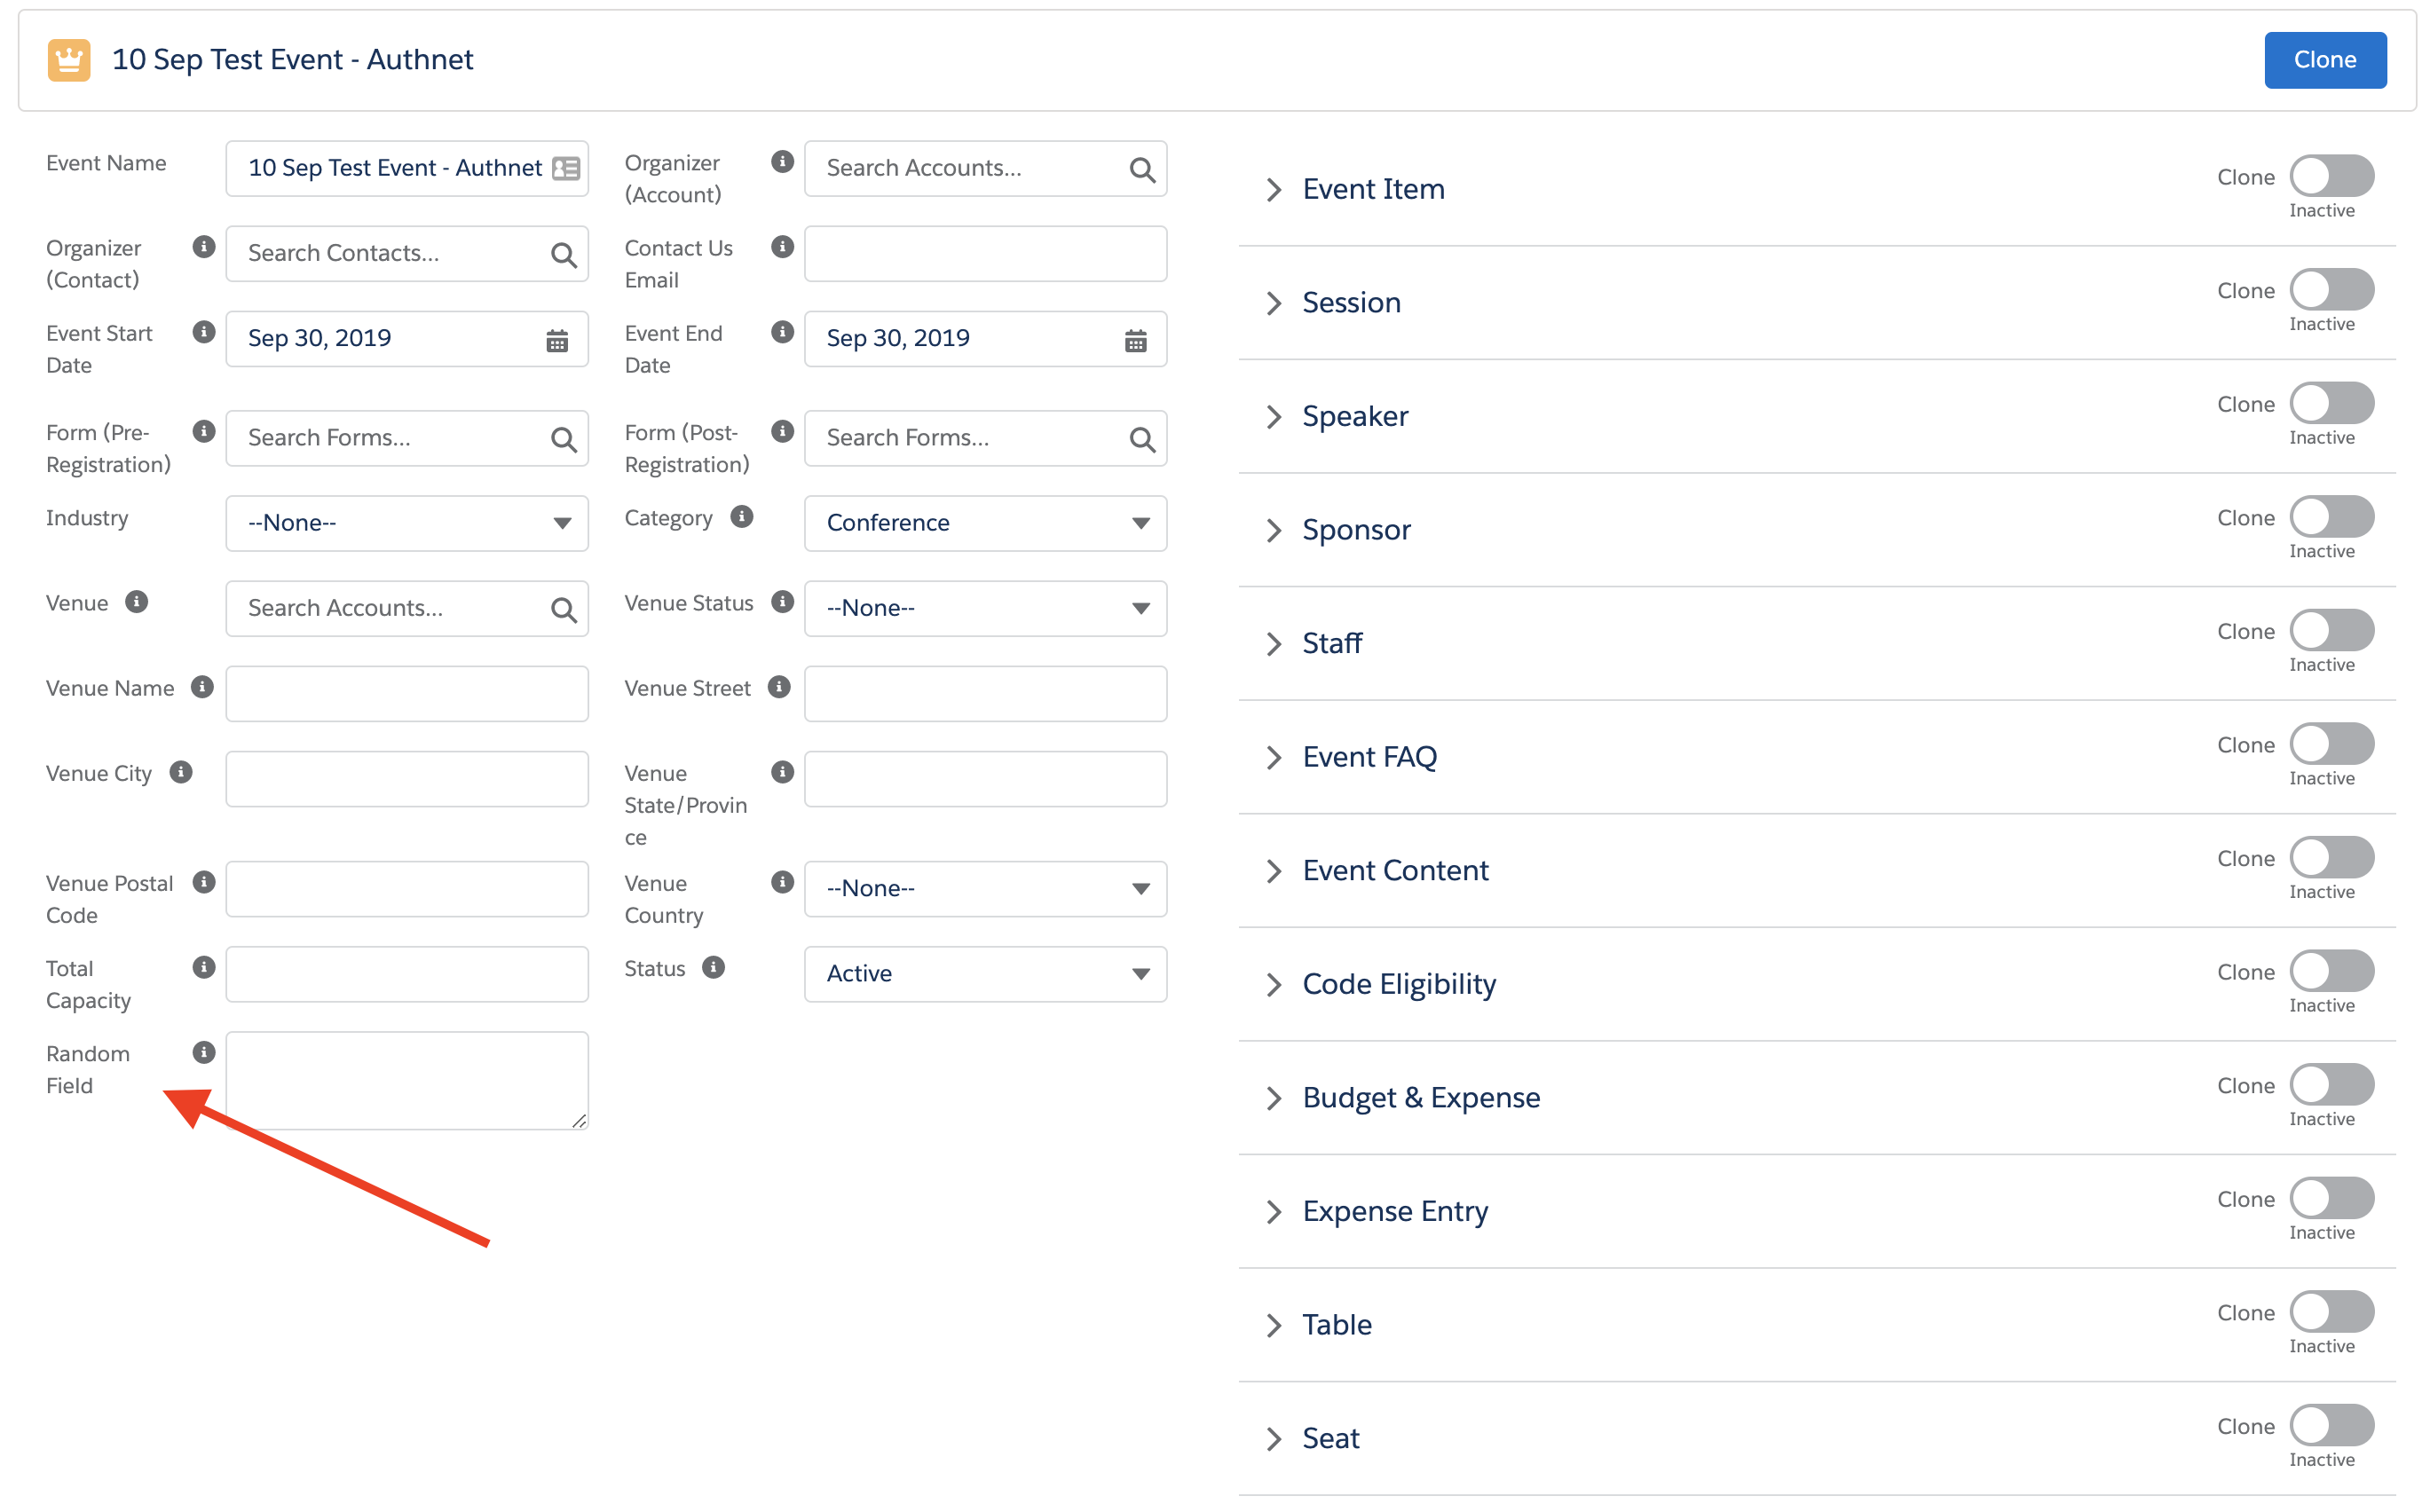
Go to the Event record and click the Clone button. To select all objects at one time, click the Clone All button.
-
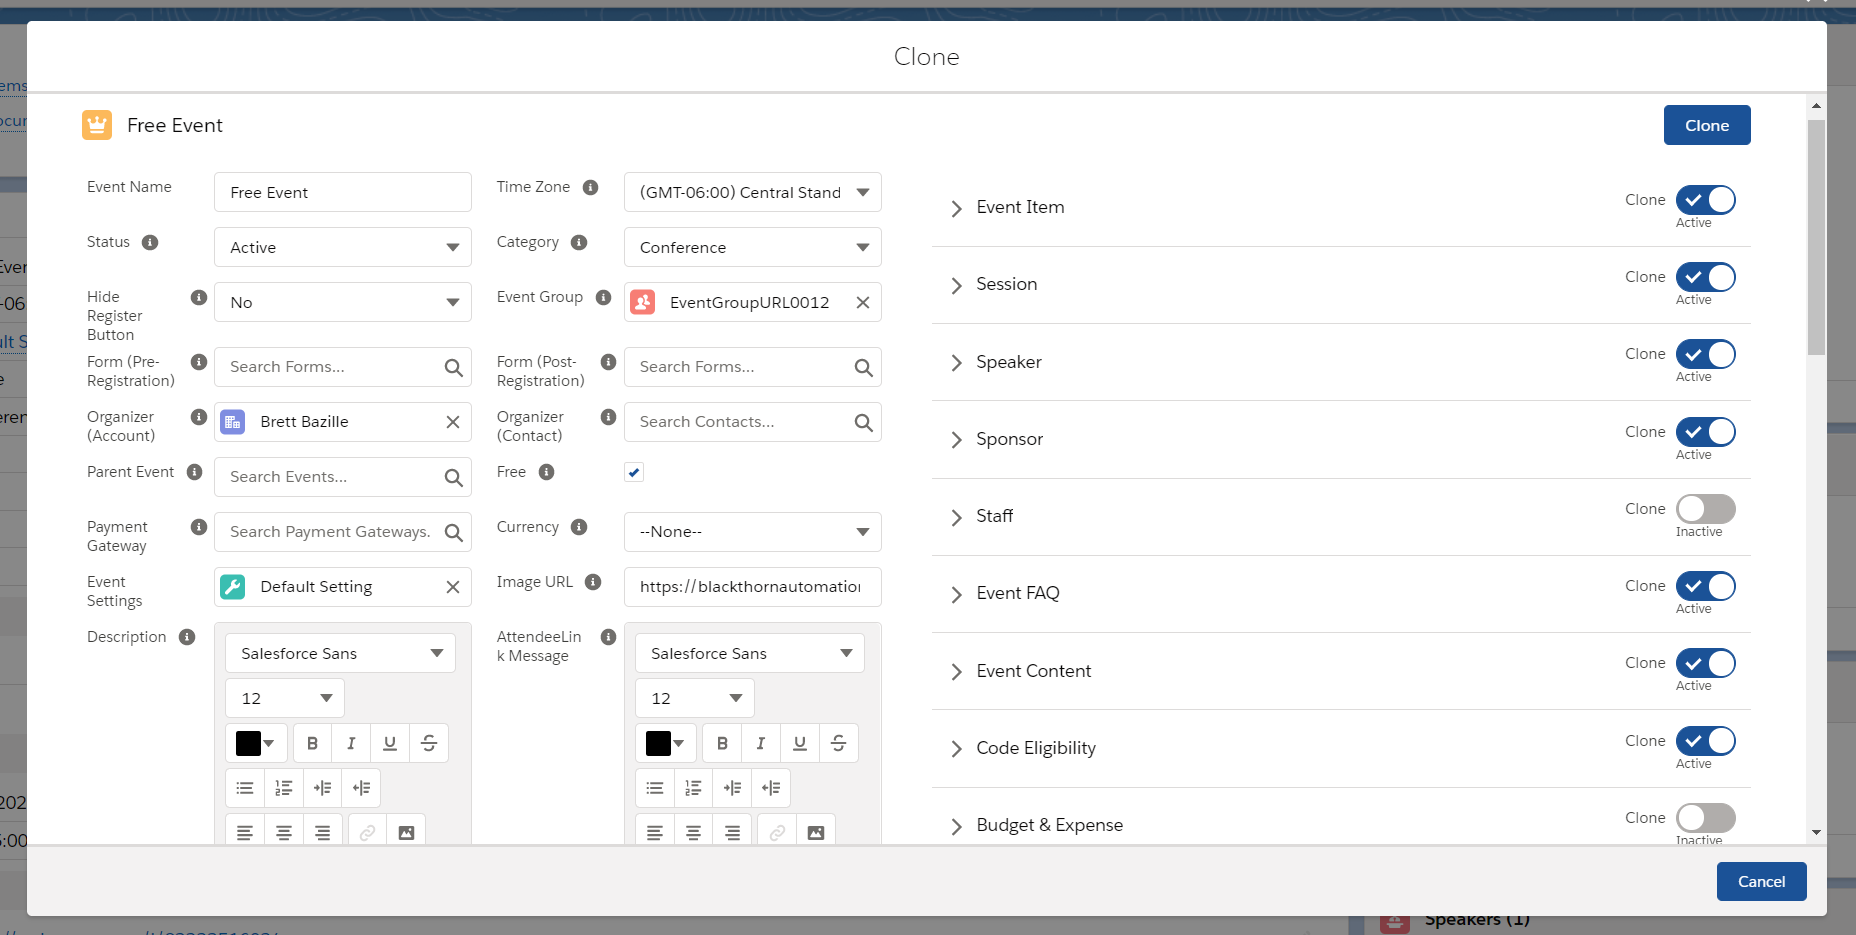
Select the Related Items.
The right side of your screen will display a list of all related items. Toggle the Clone button to select which Related List should also be cloned. Leaving them gray will not clone the Related List.- Example: If I wanted to clone the "Speakers" Related List to my new Event, I would toggle it to "Active."
- Example: If I didn't want to clone the "Staff" Related List, I would leave it as "Inactive."
-
Click the Clone button.
Once you click the Clone button, a new Event will be created.
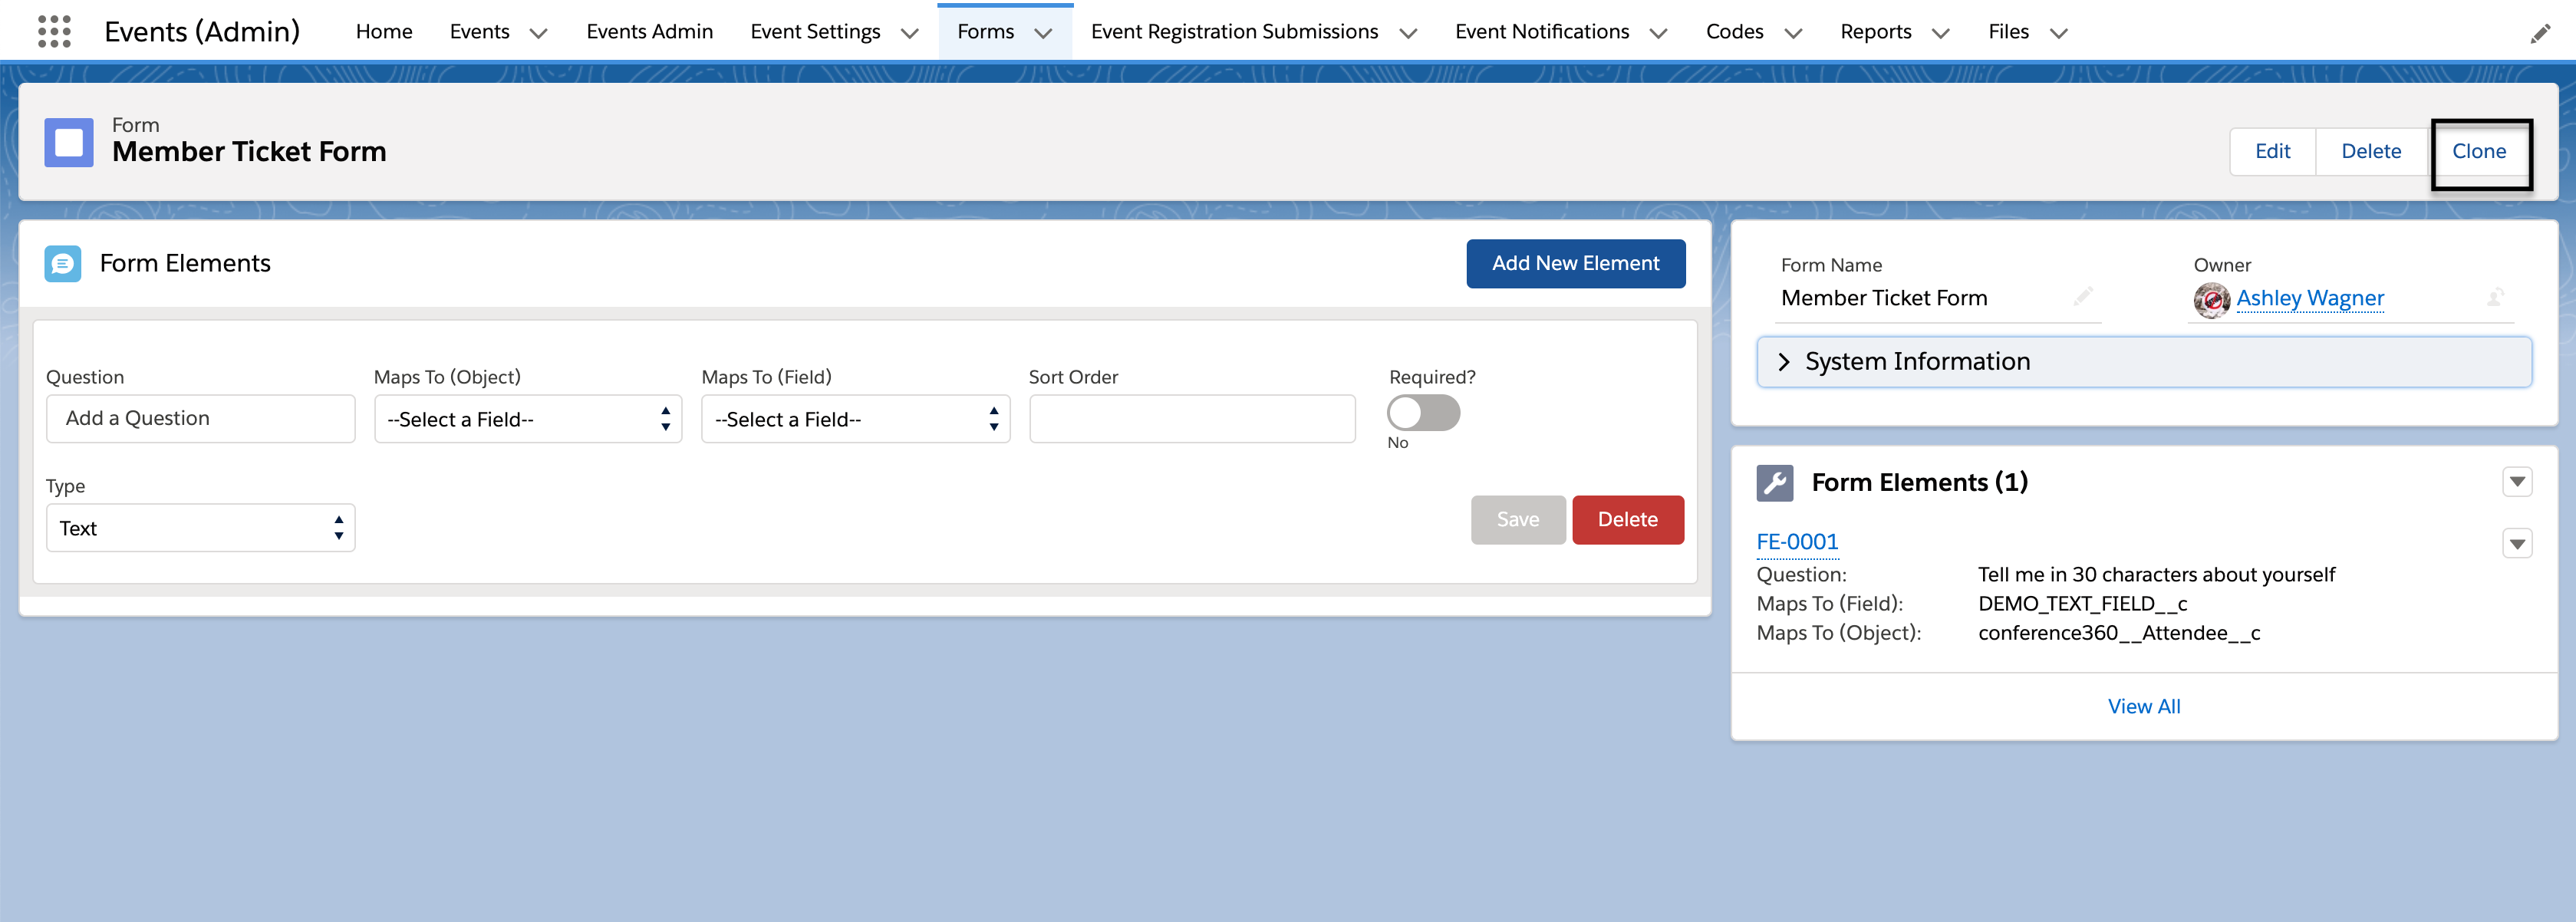
Custom Questions (Form) Clone
To deep clone forms in lightning experience:
- Edit the Form page layout.
- Add the custom Clone button from the previous Mobile/Lightning actions.
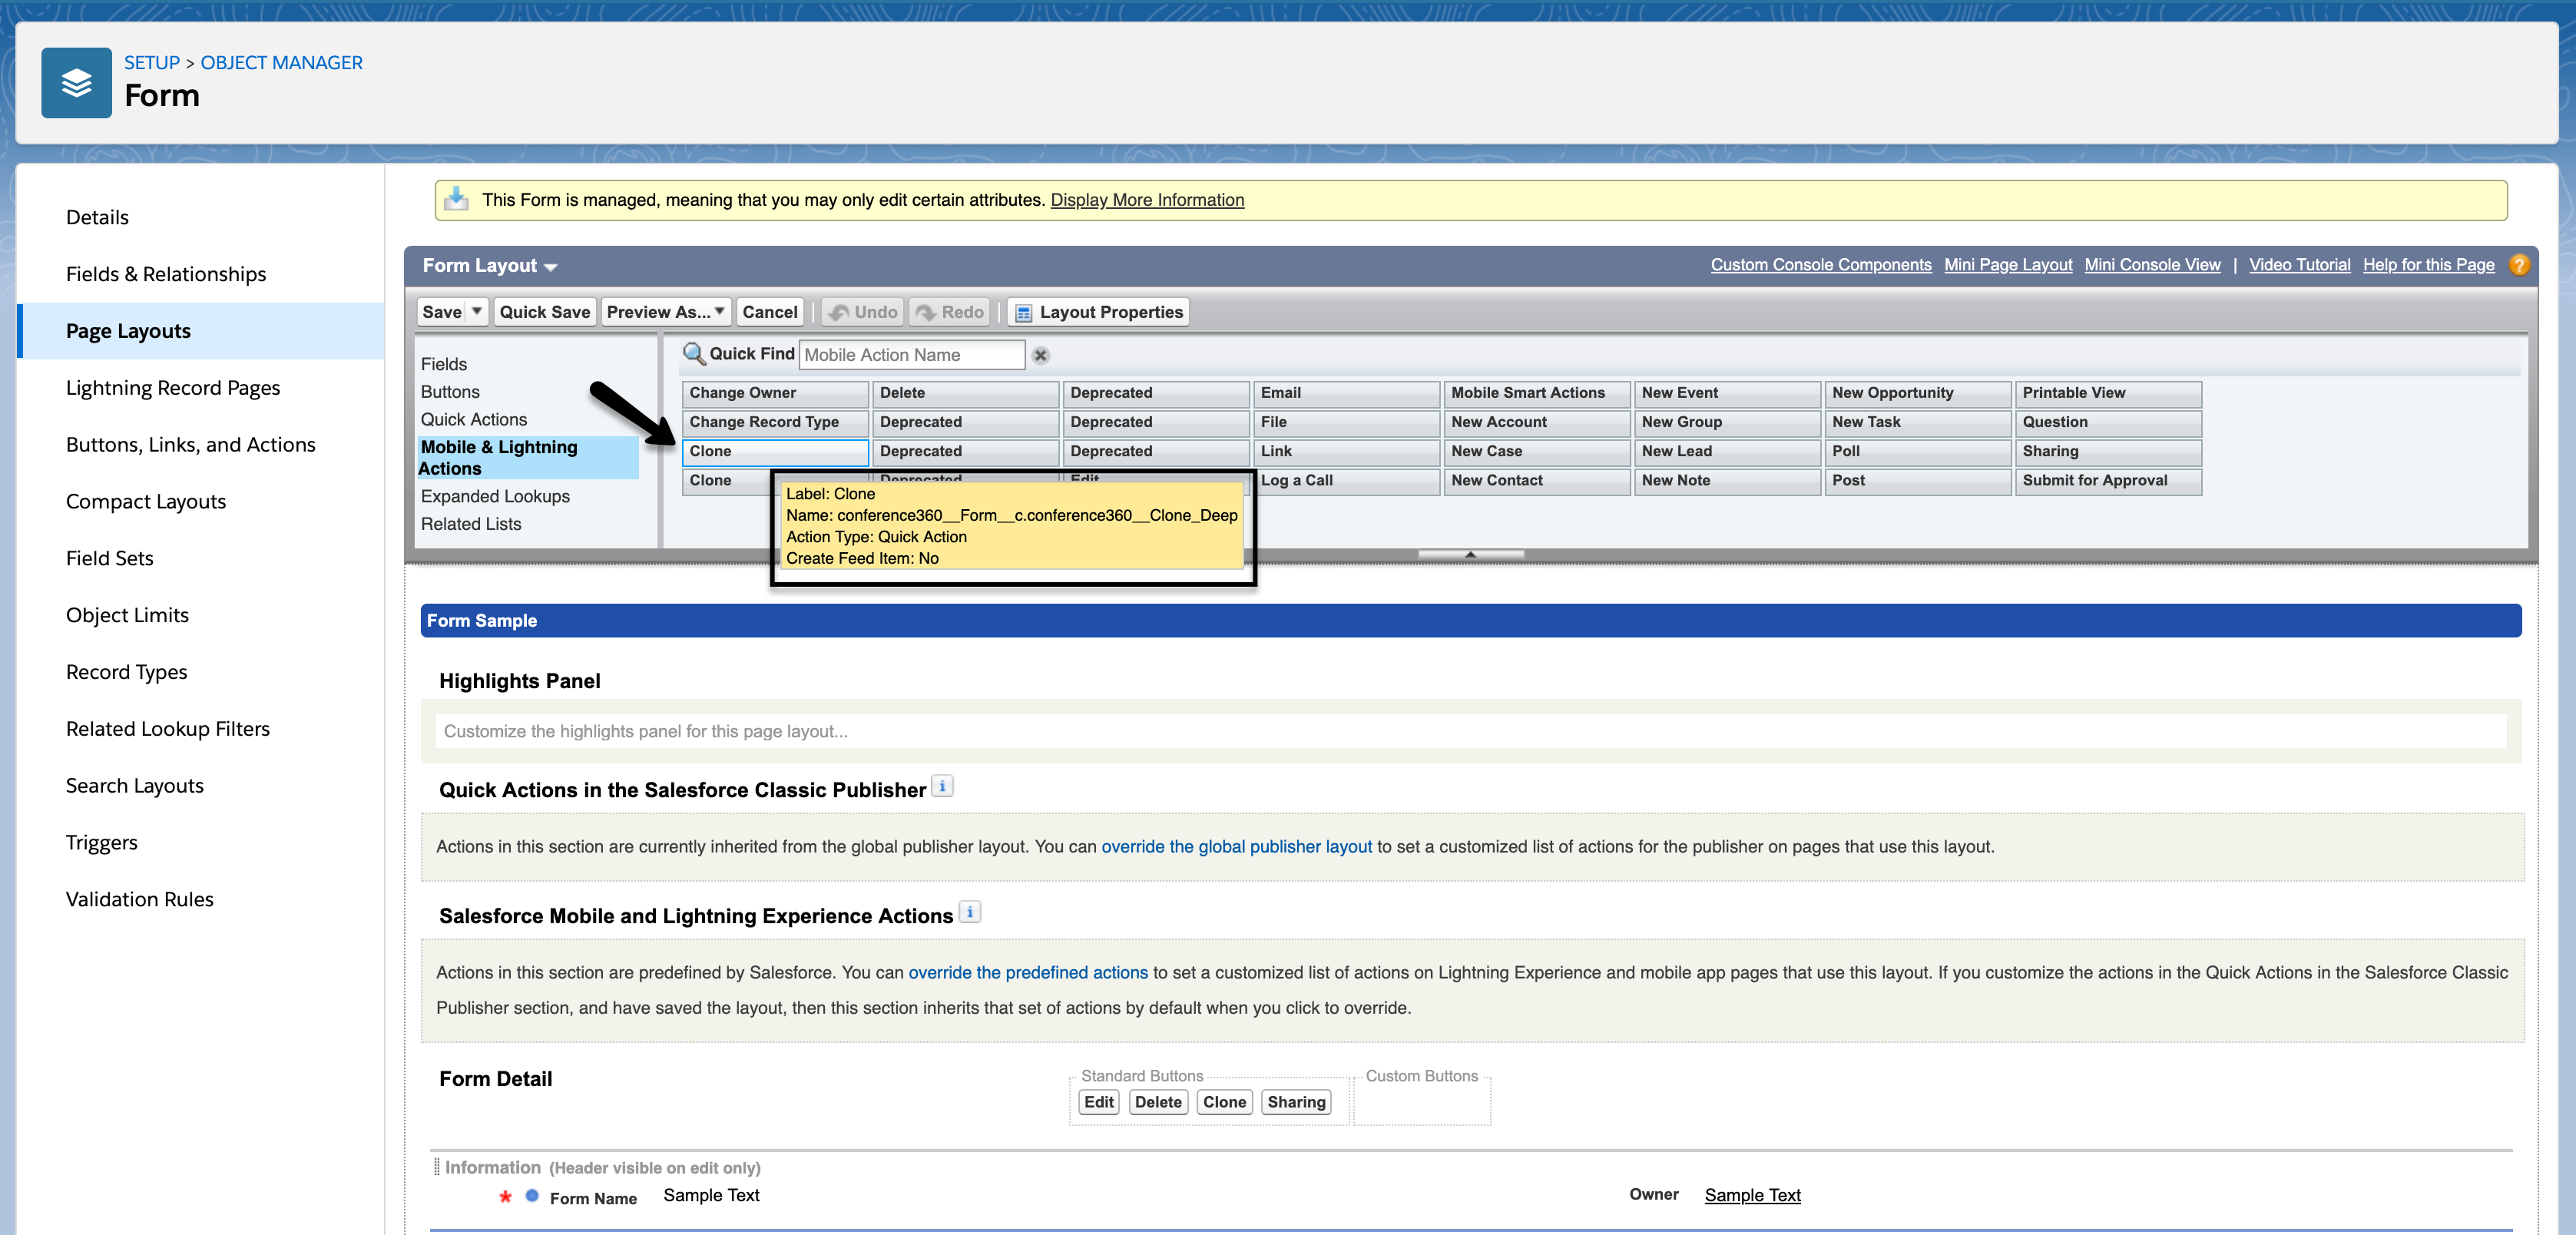
- Select the Form to be cloned. Click the Clone button. The Form and accompanying questions are cloned.
Add a Custom Field to the Clone Feature
Lightning
-
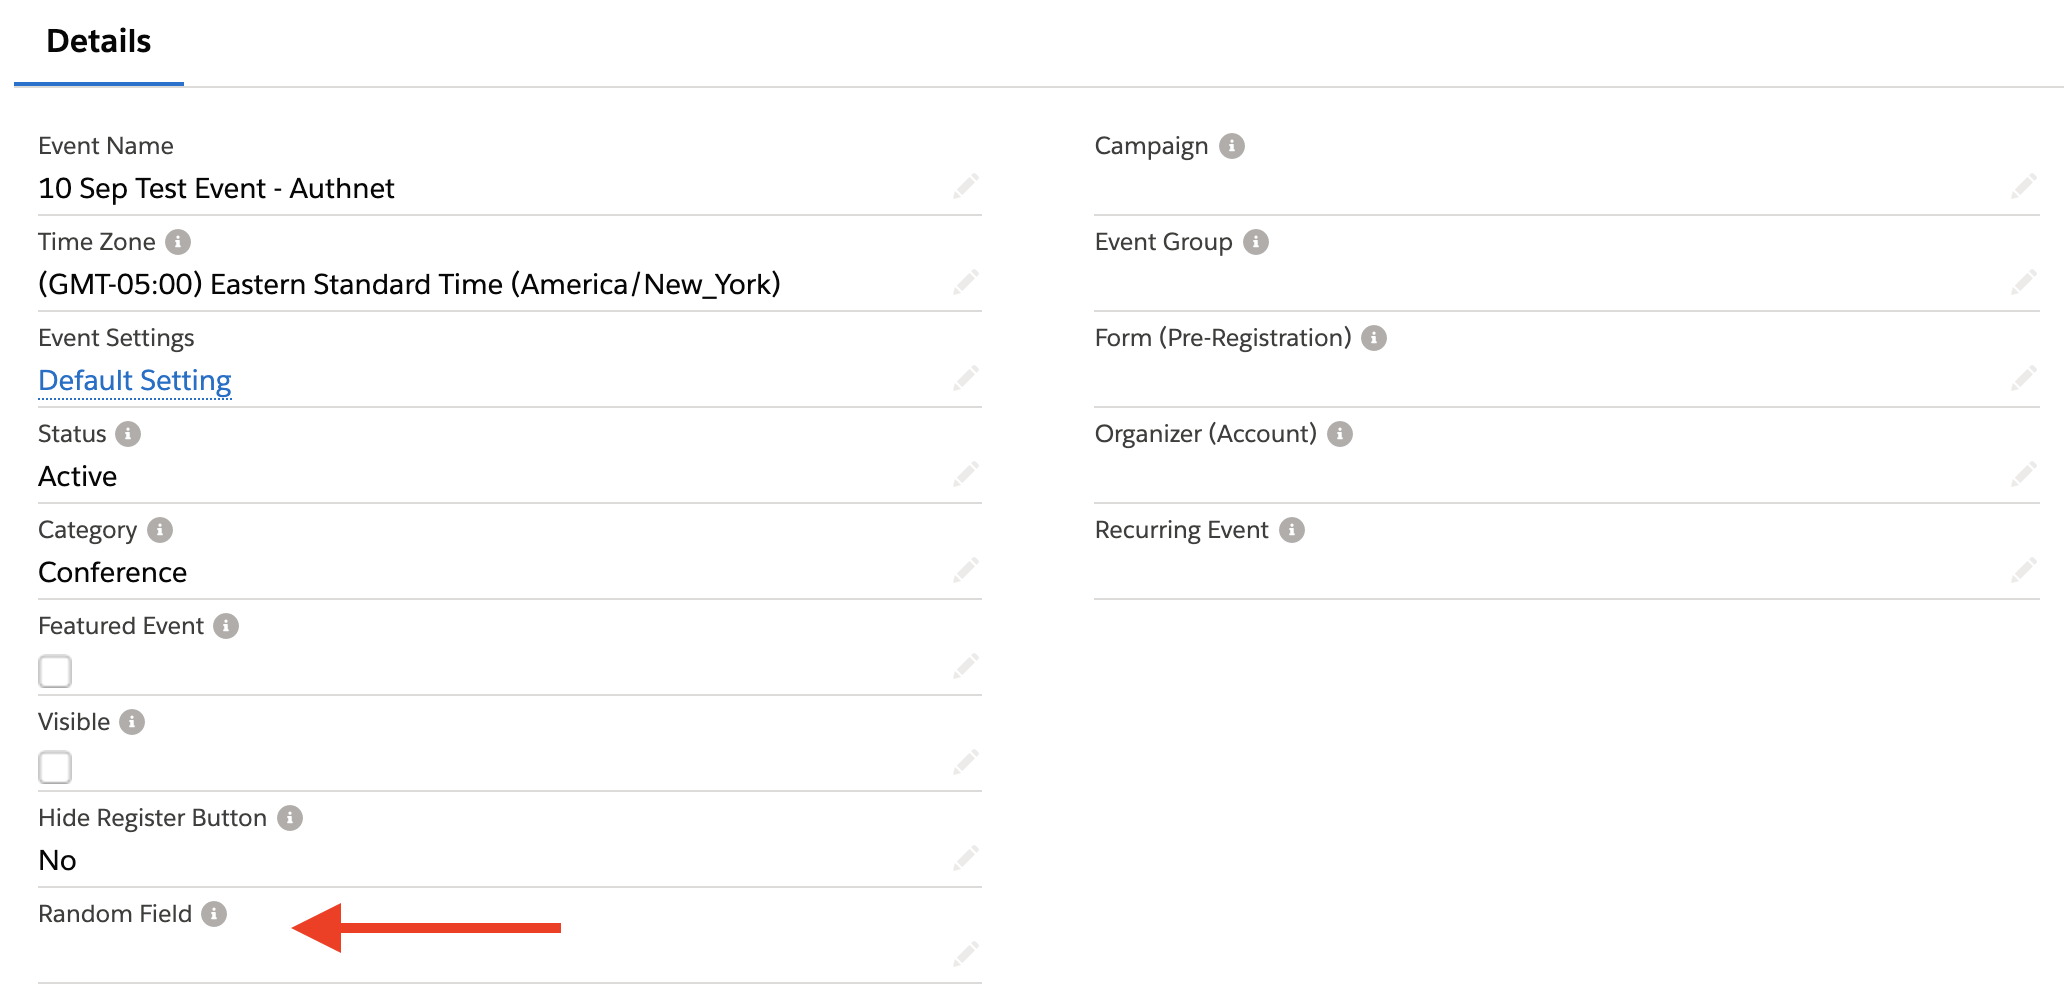
Create a custom field (Random Field) on the Event object.
-
Edit the field set within the Event object and add the custom field (Random Field).
-
Save the Event object and clone the Event. You can now see the custom field (Random Field) is ready to be cloned.
Cloning with Sessions
When cloning an Event with Sessions, the Start Date, Start Time, End Date, and End Time of the cloned Sessions will reflect the values in the original Event.
If the values will be different for the cloned Event, please update them while cloning the Event.
Important Note: The cloning process supports cloning Tracks and Sessions, but it does not automatically clone Track Sessions. Please manually clone Track Sessions if they are part of your Event.
Cloning with Fees
Cloning an existing Event with a Payment Processing Fee will result in a cloned Event that includes the same Payment Processing Fee value.
- If the original Event's Payment Processing Fee field is blank, the cloned Event's Payment Processing Fee will also be blank.
- If a Default Fee value exists on the original Event, the cloned Event will have the Default Fee related to it.
The Payment Processing Fee related to the Event that is being cloned takes priority over the Default Fee, including empty fields.