Cloning an Event in the Event Builder allows you to edit all Event fields before saving the cloned record.
Click Clone an Event.
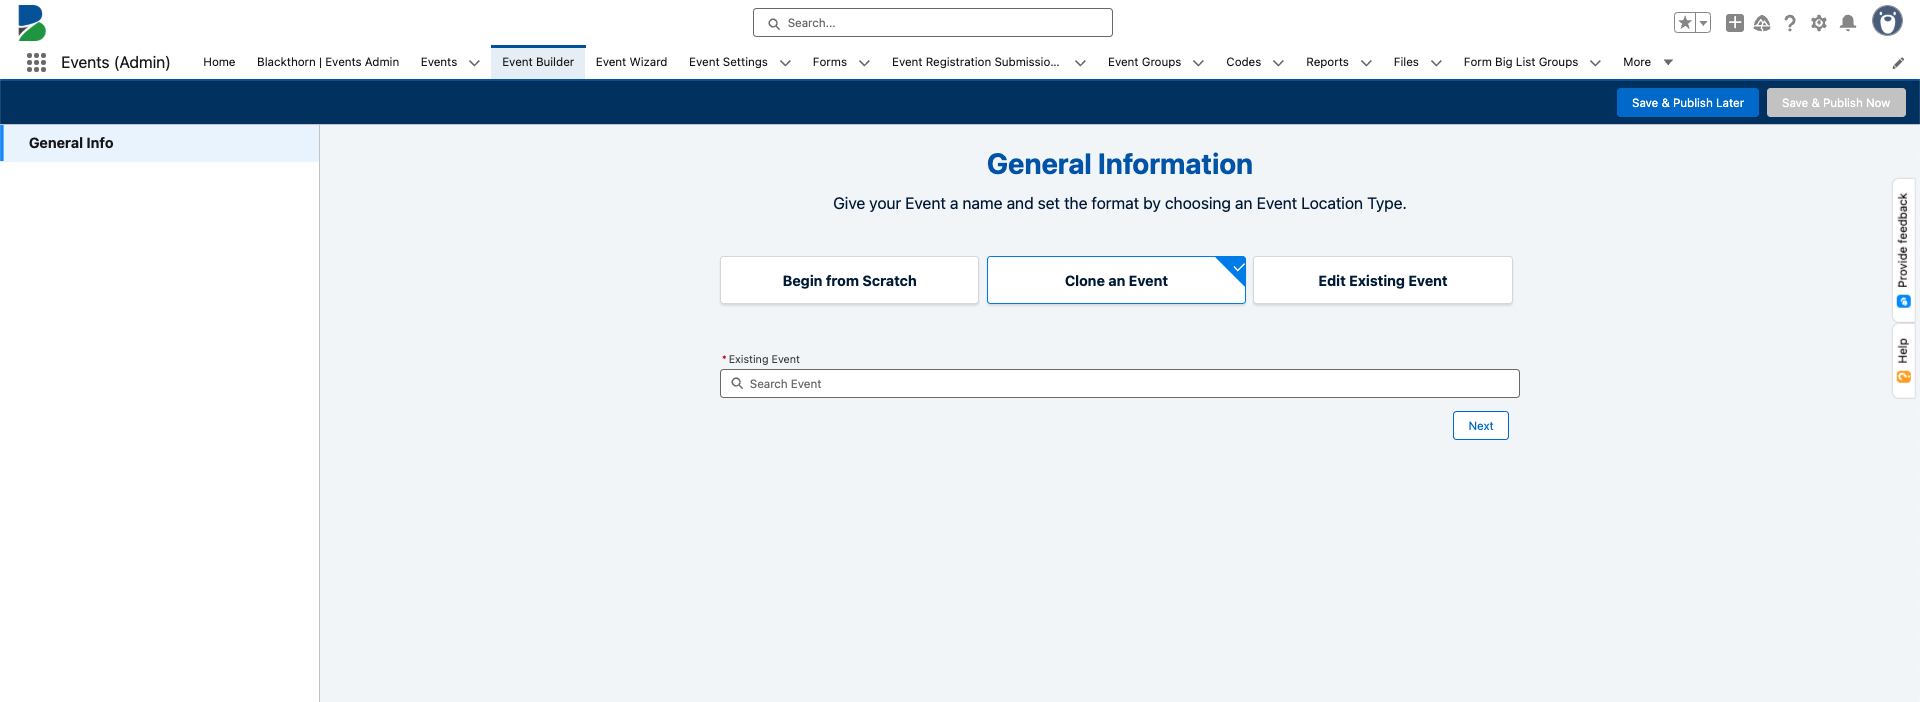
Select an existing Event Name. (required)

Click Next.
STOP: Please Read
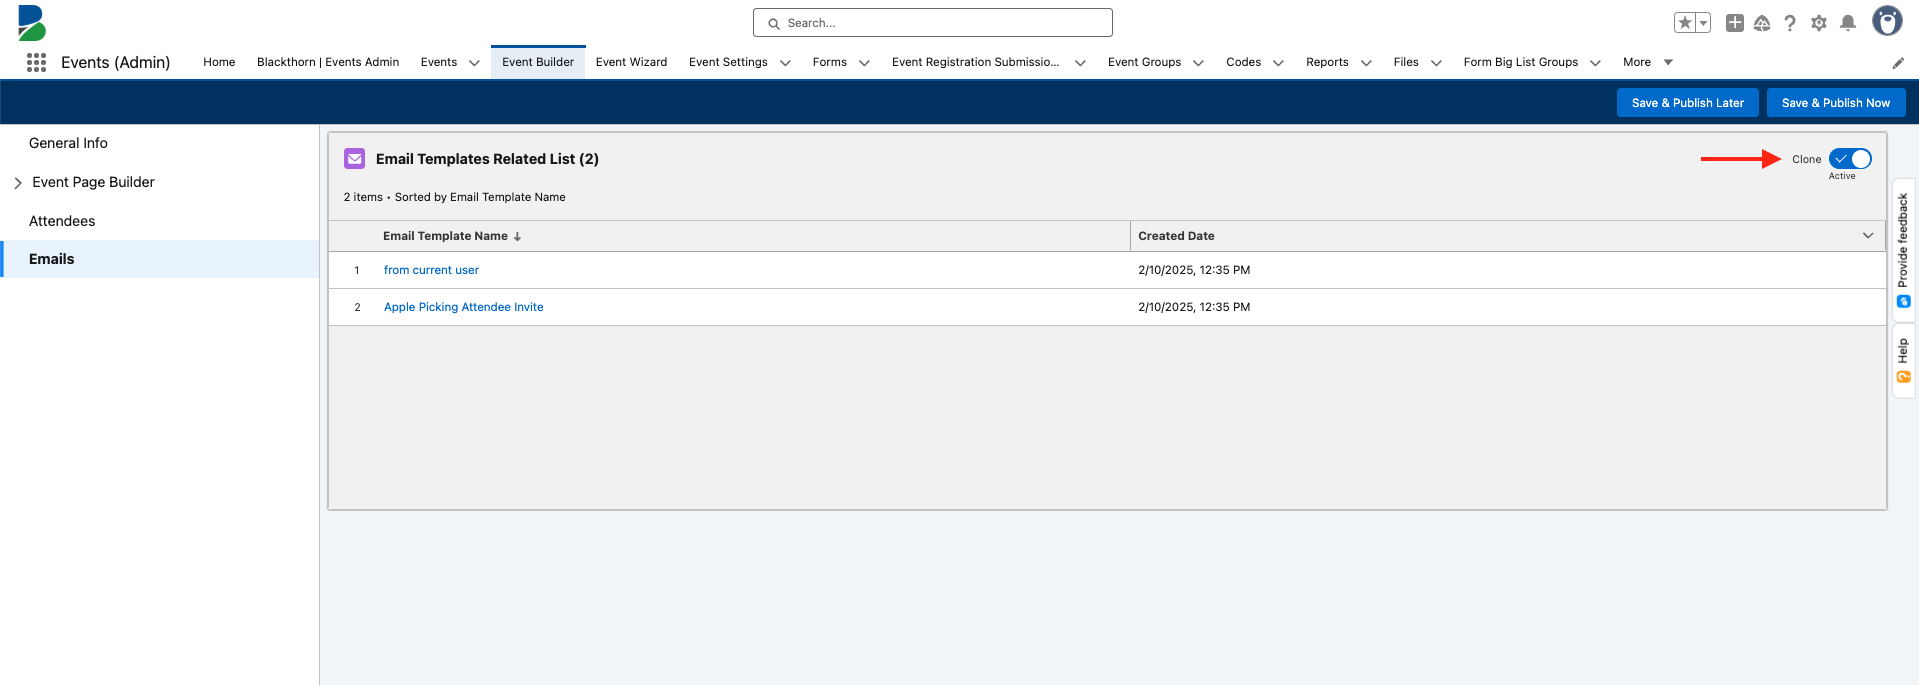
If the Event you are cloning contains Email Templates and you DON’T want the templates cloned, please follow the steps below. If you scroll down to edit the Event, the Email Templates will automatically be cloned. Otherwise, click the General Info tab.
Click Emails in the left-hand navigation.
If you don’t want to clone the Email Templates that were related to the original Event, set the Clone toggle to “Inactive.” If you do, leave the toggle set to “Active.”
Click General Info.
Since you are now working on the cloned or new Event, you will see that Begin From Scratch is selected.
In addition to the original Event’s information, the newly cloned Event will also include the following:
Cloned Event’s Event Name = “Copy of [Original Event Name]”
Cloned Event’s start/end dates = the original Event’s Event Start Date and Event End Date
Cloned Session’s start/end dates = the original Session’s Start Date and End Date
Cloning an Event with an empty Event Location field will result in a newly cloned Event with Event Location = “Hybrid” by default.
Review the remaining fields and click Next to go to the Hero Section.
Important Note: Not all junction objects and fields, such as the Session Speaker and Session Keyword objects and Event Settings’ fields such as Form and Font, can be cloned.