Known Issue: Email Template Builder
Event Organizers can edit existing Email Templates in the Email Template Builder without the Email Template displaying a blank screen.
However, for those who can’t update the Salesforce package, we recommend using one of the following workarounds.
Use a classic Email Template or a Firefox browser.
For Chrome users, clear the cache and hard refresh the page if the Email Template Builder loads with a blank screen.
Create beautiful reminders and post-Event emails in Salesforce with a no-code editor (no need to create an email using HMTL/CSS).
Before You Start
Configure the UID
The Email Settings’ Custom Setting Custom Email Builder UID Handler field gives you more control when setting UID for special use cases.
The Custom Email Builder UID Handler field defines a custom handler. Use the following format to configure the new field as "TestUIDHandler."
1 public class TestUIDHandler implements EmailEditorUIDInterface{
2           public String getUID(){
3                   return '1234567890';
4           }
5}
Update the Event Object’s Page Layout
Add the "Email Templates" Related List to the Event object’s page layout.
Go to Setup.
Click the Object Manager tab.
In the Quick Find box, enter and click “Event” (conference360__Event__c).
Click the Page Layouts tab and click the layout you want to update.
Click the Related Lists tab.
Locate “Email Templates” and drag and drop it on the page layout.
Click Save.
Check Permission Sets
Confirm that you have the correct permissions. The Email Template Builder creates the Classic Email Template located within Setup. Users who want to create or view Email Templates need the following permissions:
Permission Sets
Blackthorn | Events (Admin) or Blackthorn | Events (Organizer)
Blackthorn | Payments (Admin)
System Permissions
Author Apex
Create Content Deliveries
Customize Application
Edit Read-Only Fields
Manage Custom Permissions
Modify Metadata Through Metadata API Functions
View Setup and Configuration
View Roles and Role Hierarchy
If you are running into insufficient privileges, please watch this troubleshooting video.
Create Out-of-the-Box Email Templates
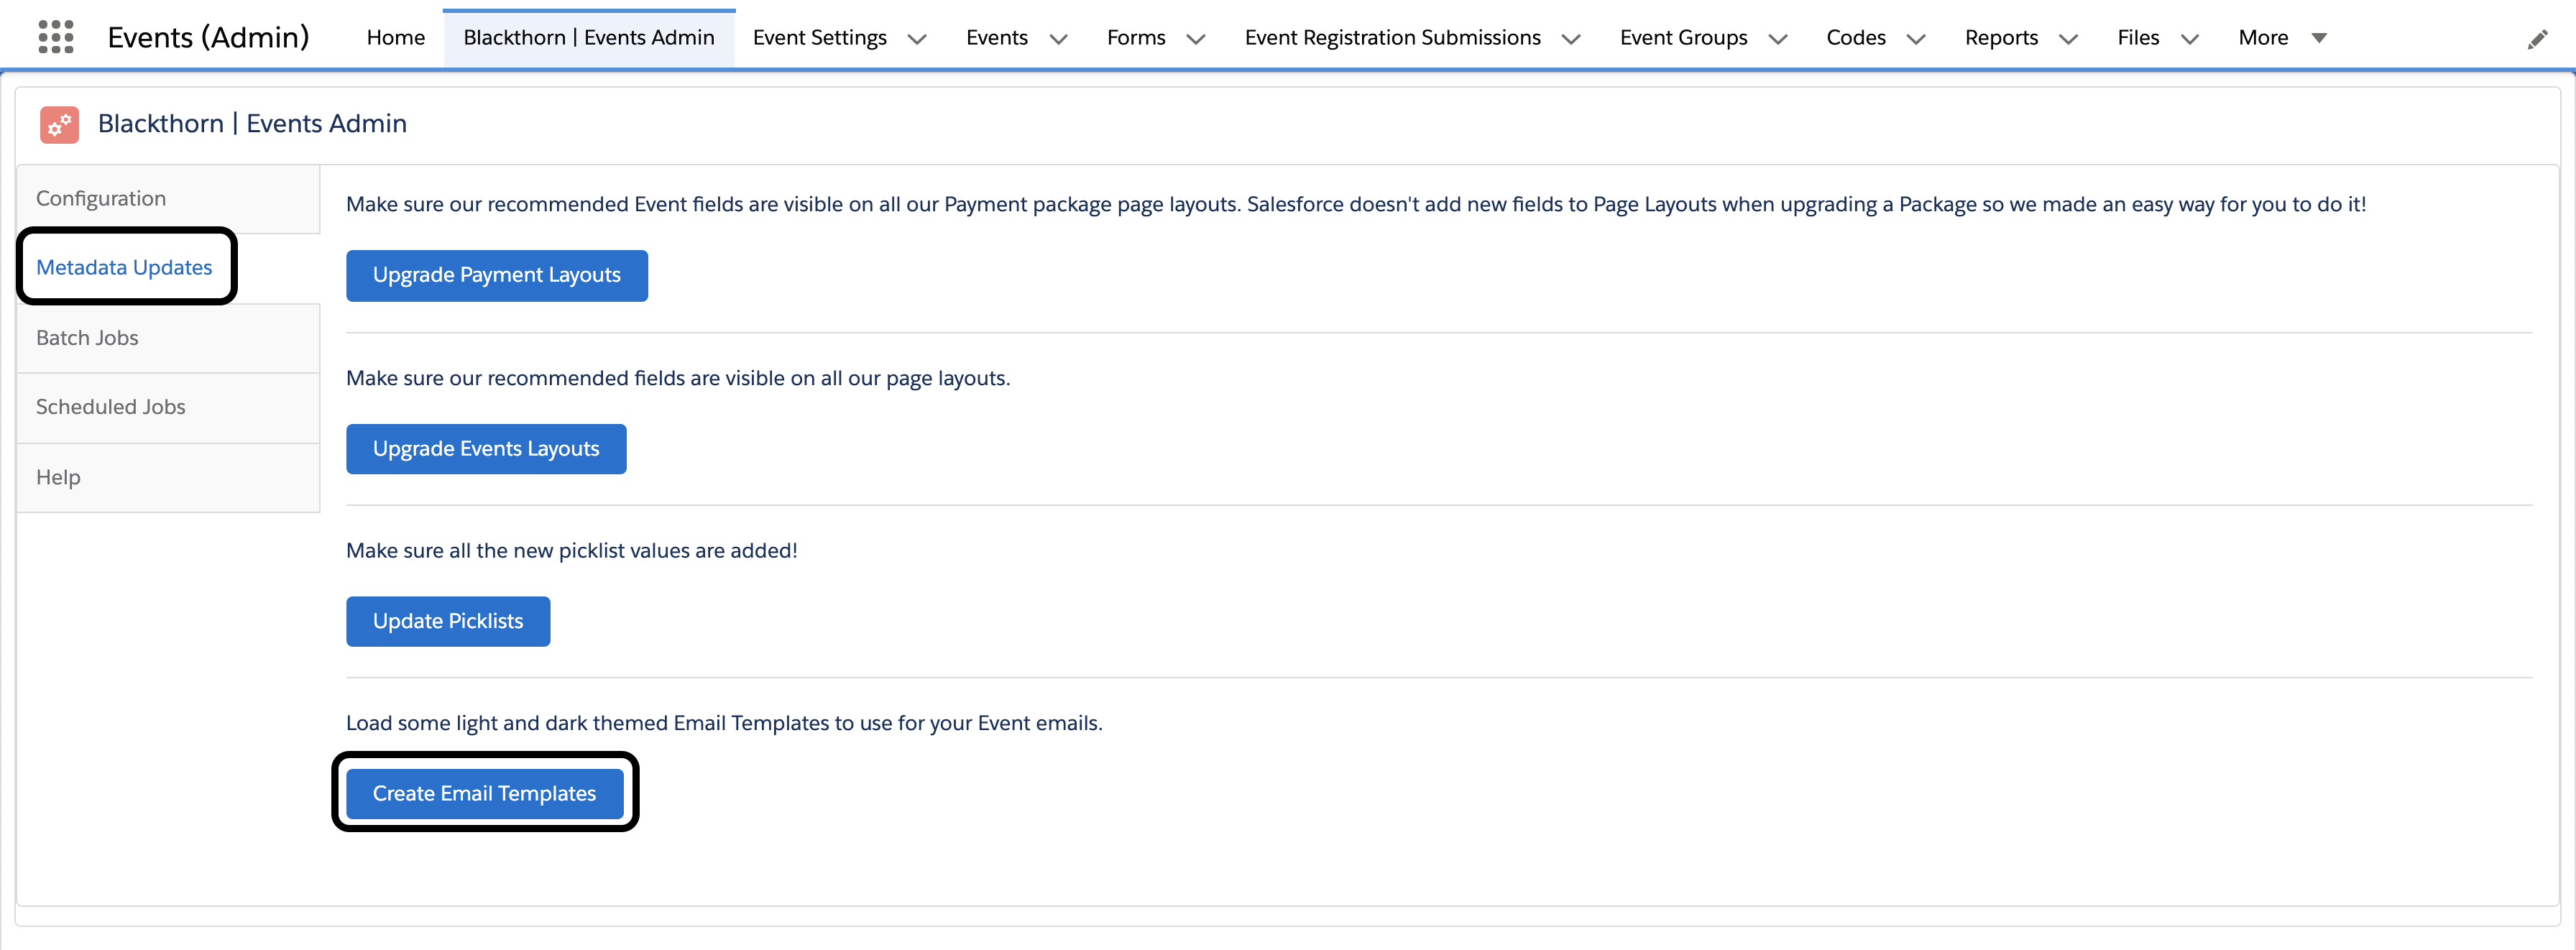
Navigate to the Blackthorn | Events Admin tab.
Click the Configuration tab.
Click Create Email Templates. Here is a quick video on how to create templates!
Flows and Email Templates
Using Email Templates and flows (previously workflows) together can create problems.
For example, if an Attendee’s Registration Status is set to “To Invite” and an Email Template email is sent, the Registration Status field automatically updates to “Invited.”
If you intend to use this feature, we recommend disabling the “Send Blackthorn | Event invite email” flow.
Instructions
Functionality Update
The Email Template builder functionality no longer avoids MSO code. You can now import Classic Email Templates into Blackthorn Events.
Start Here
Setting up your first template is simple!
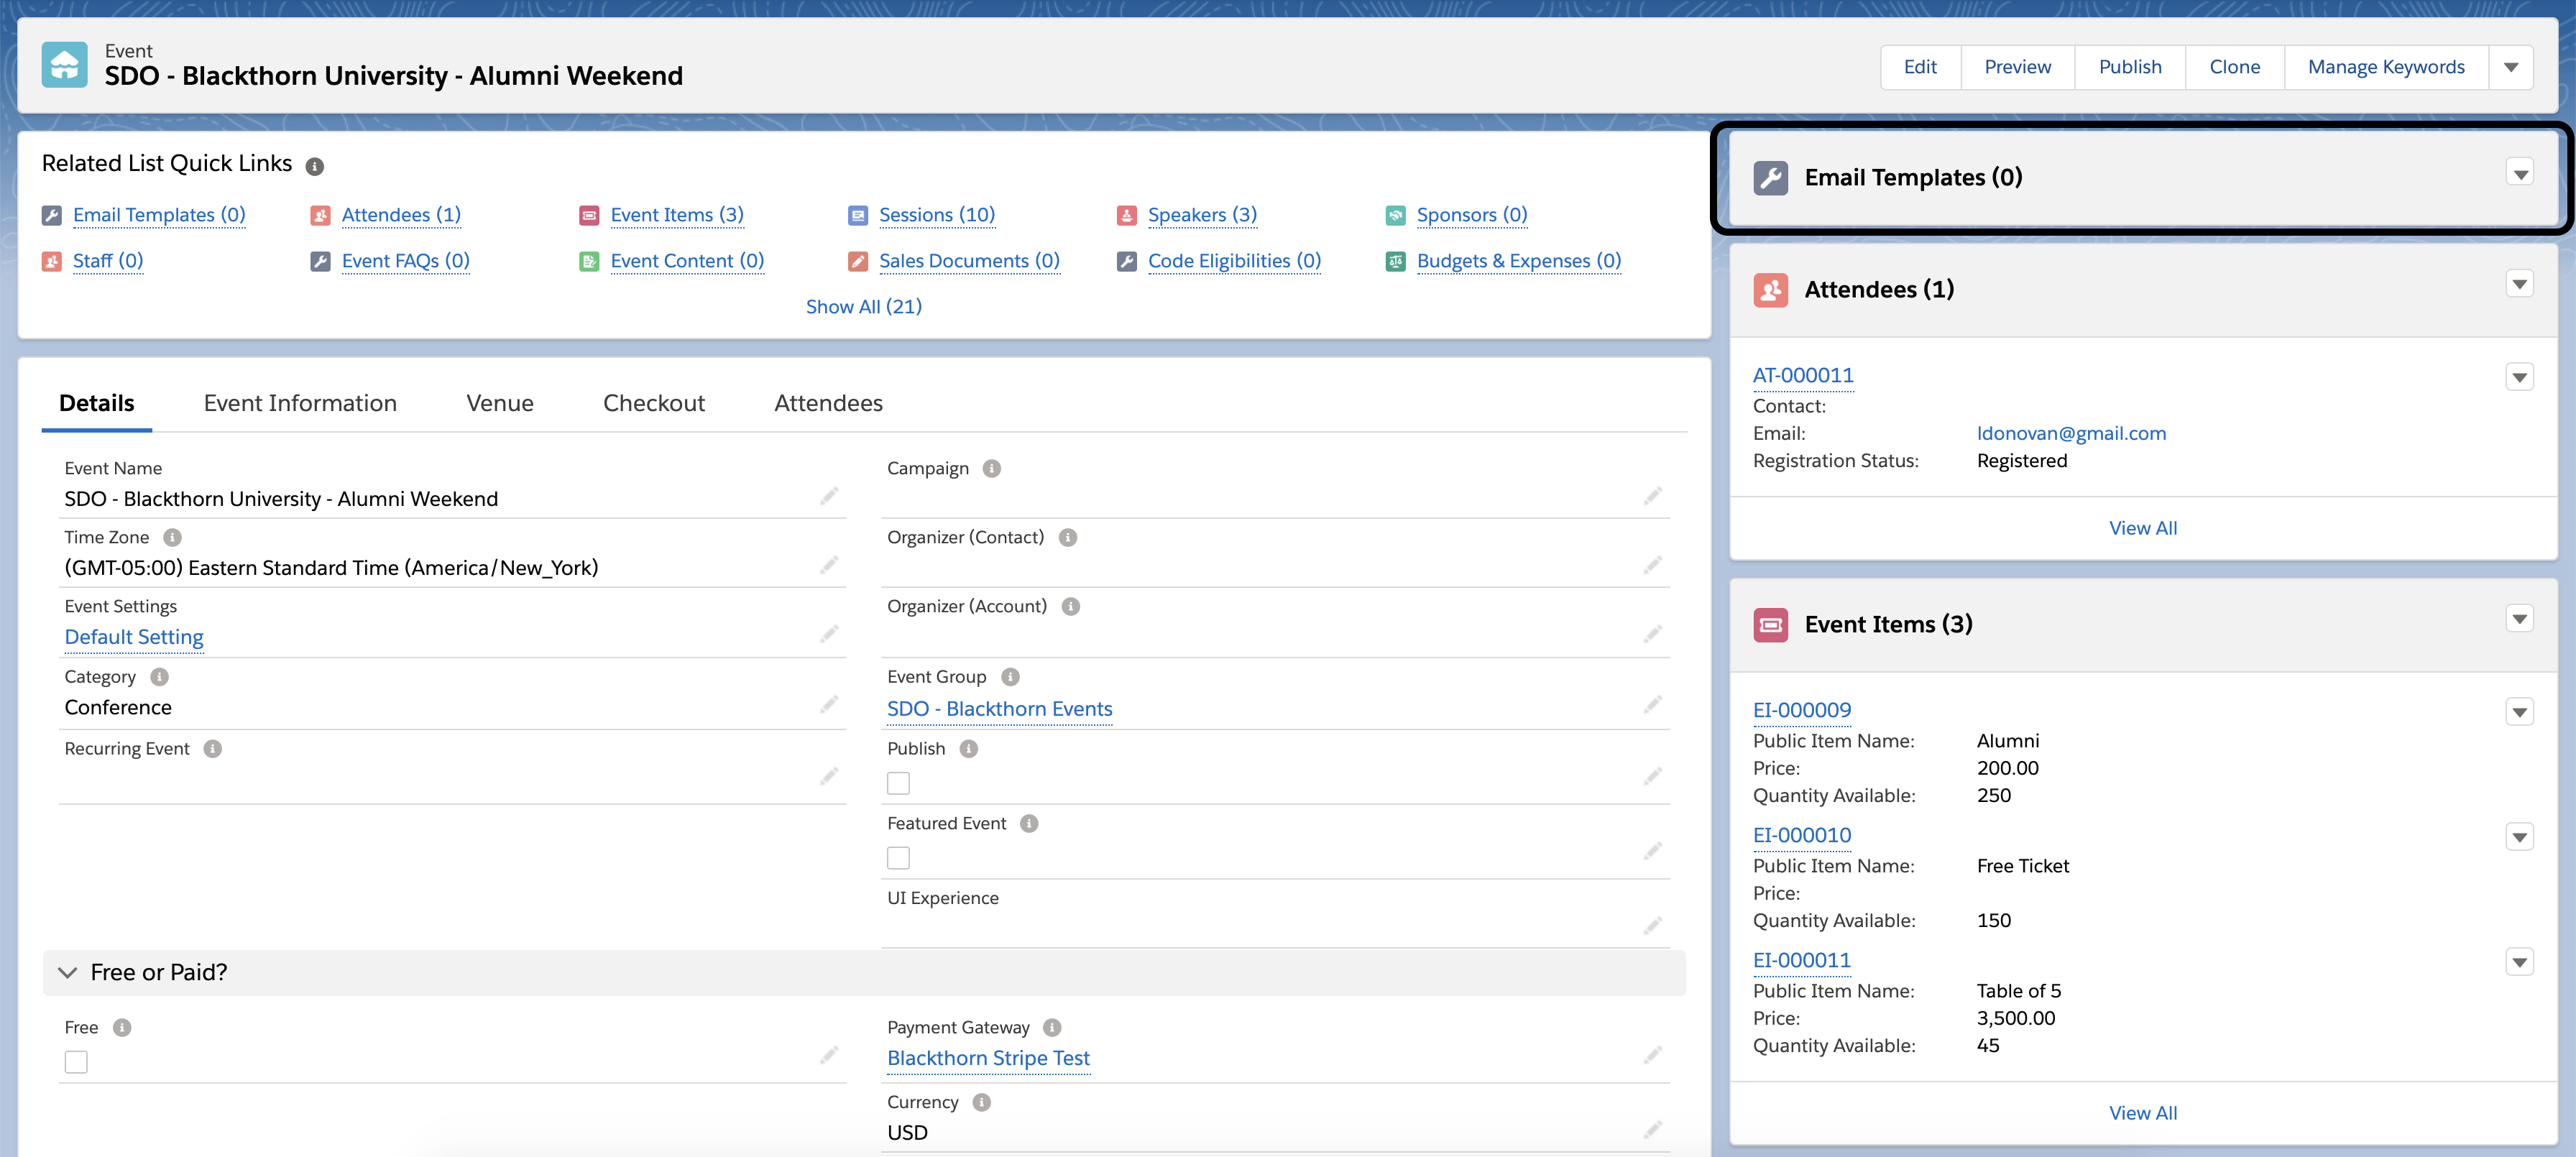
Navigate to an Event record. New Email Templates can only be created from the Email Template Builder component in an Event record.
On the "Email Templates" related list, click the dropdown arrow and click "New".
On the "New Template" modal, select "New" and click Continue.
Note: The "New From Template" option will create a new template from an existing template.(Optional): If you want to check out a template, we have included 12 by default.
Standard Template | Invite Light
Standard Template | Confirmation Light
Standard Template | Reminder Light
Standard Template | Missed You Light
Standard Template | Cancelled Light
Standard Template | Thank You Light
Standard Template | Invite Dark
Standard Template | Confirmation Dark
Standard Template | Reminder Dark
Standard Template | Missed You Dark
Standard Template | Cancelled Dark
Standard Template | Thank You Dark
If you create a new Email Template from an existing record, you'll notice the Event Name displayed under the Email Template Name. This will help when deciding which Email Template to use when cloning your new record.
If you do not see an Event Name under the Email Template Name name that means an Event has not been associated with the Email Template yet.
NOTE: When saving the Email Template, the Email Template Name length must be 80 characters or less, including the developer’s name (the unique date/time that is added to the end of the email template API name).
.png)
Next, you'll see a page similar to the one below. The "Blackthorn University" image is pulled directly from the Image URL field on your Event.
.png)
To add an image, drag and drop the Image tile from the Content section into the template.
Click "Browse" and you'll be presented with the File Manager.
.png)
Use the Upload, Import, or Search free photos options to add images.
Use the Upload button to add an image locally from your computer.
Use the Import button to add an image via Facebook, Dropbox, One Drive, etc.
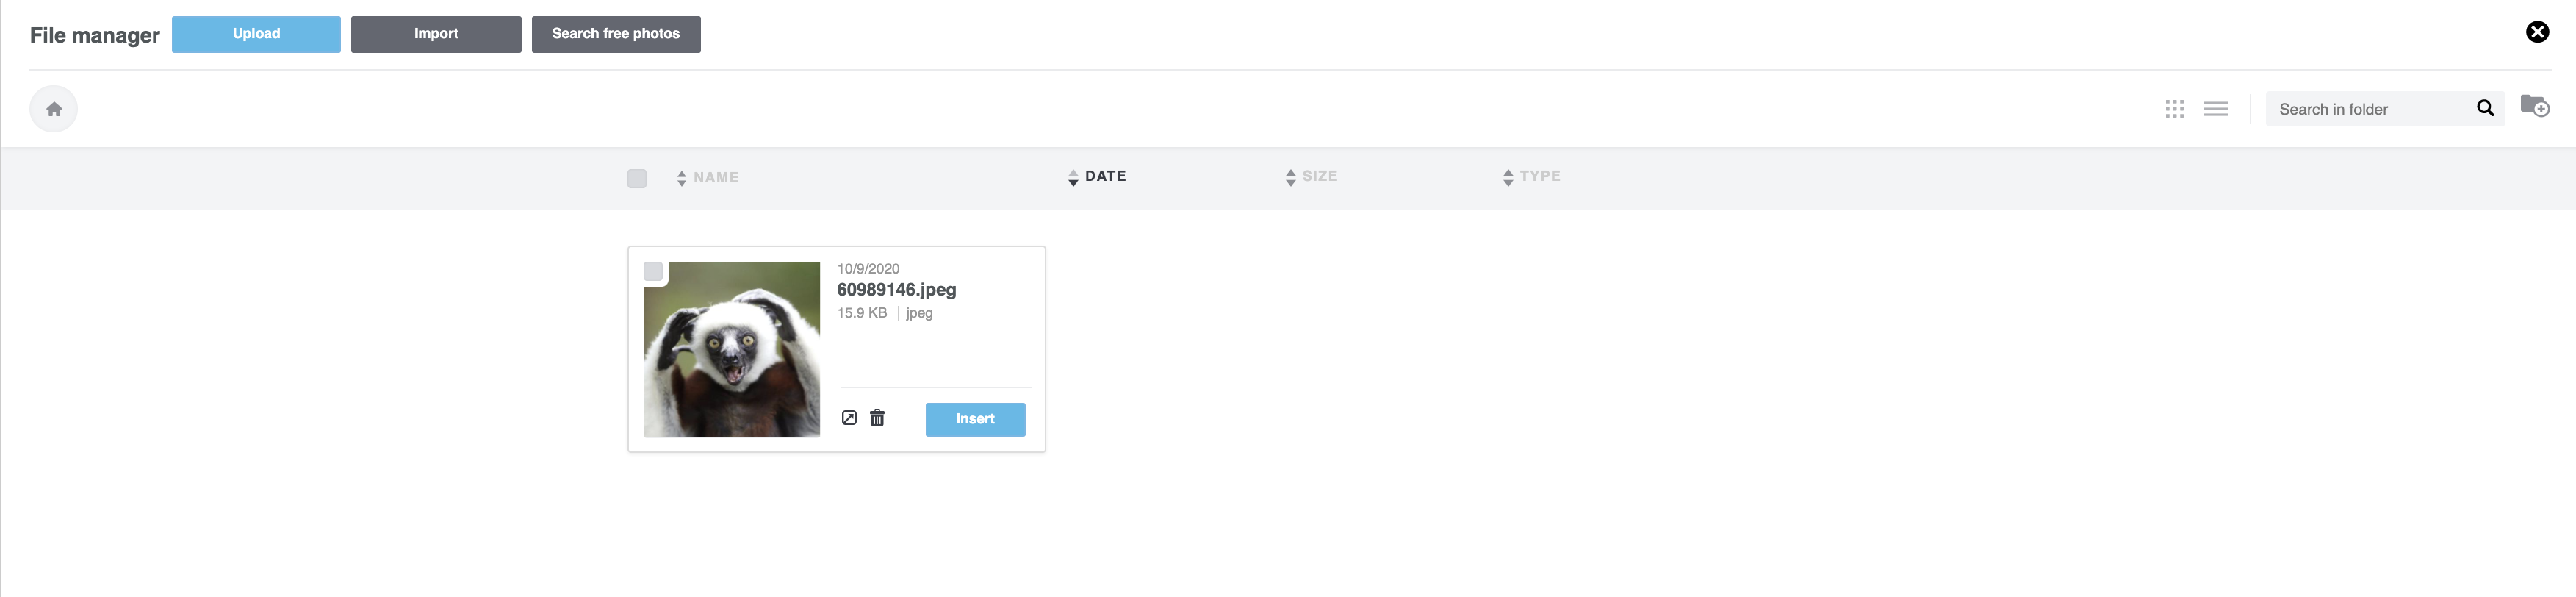
To upload an image via Salesforce Files, copy the public link from your image into the "Just provide the link" box.
.png)
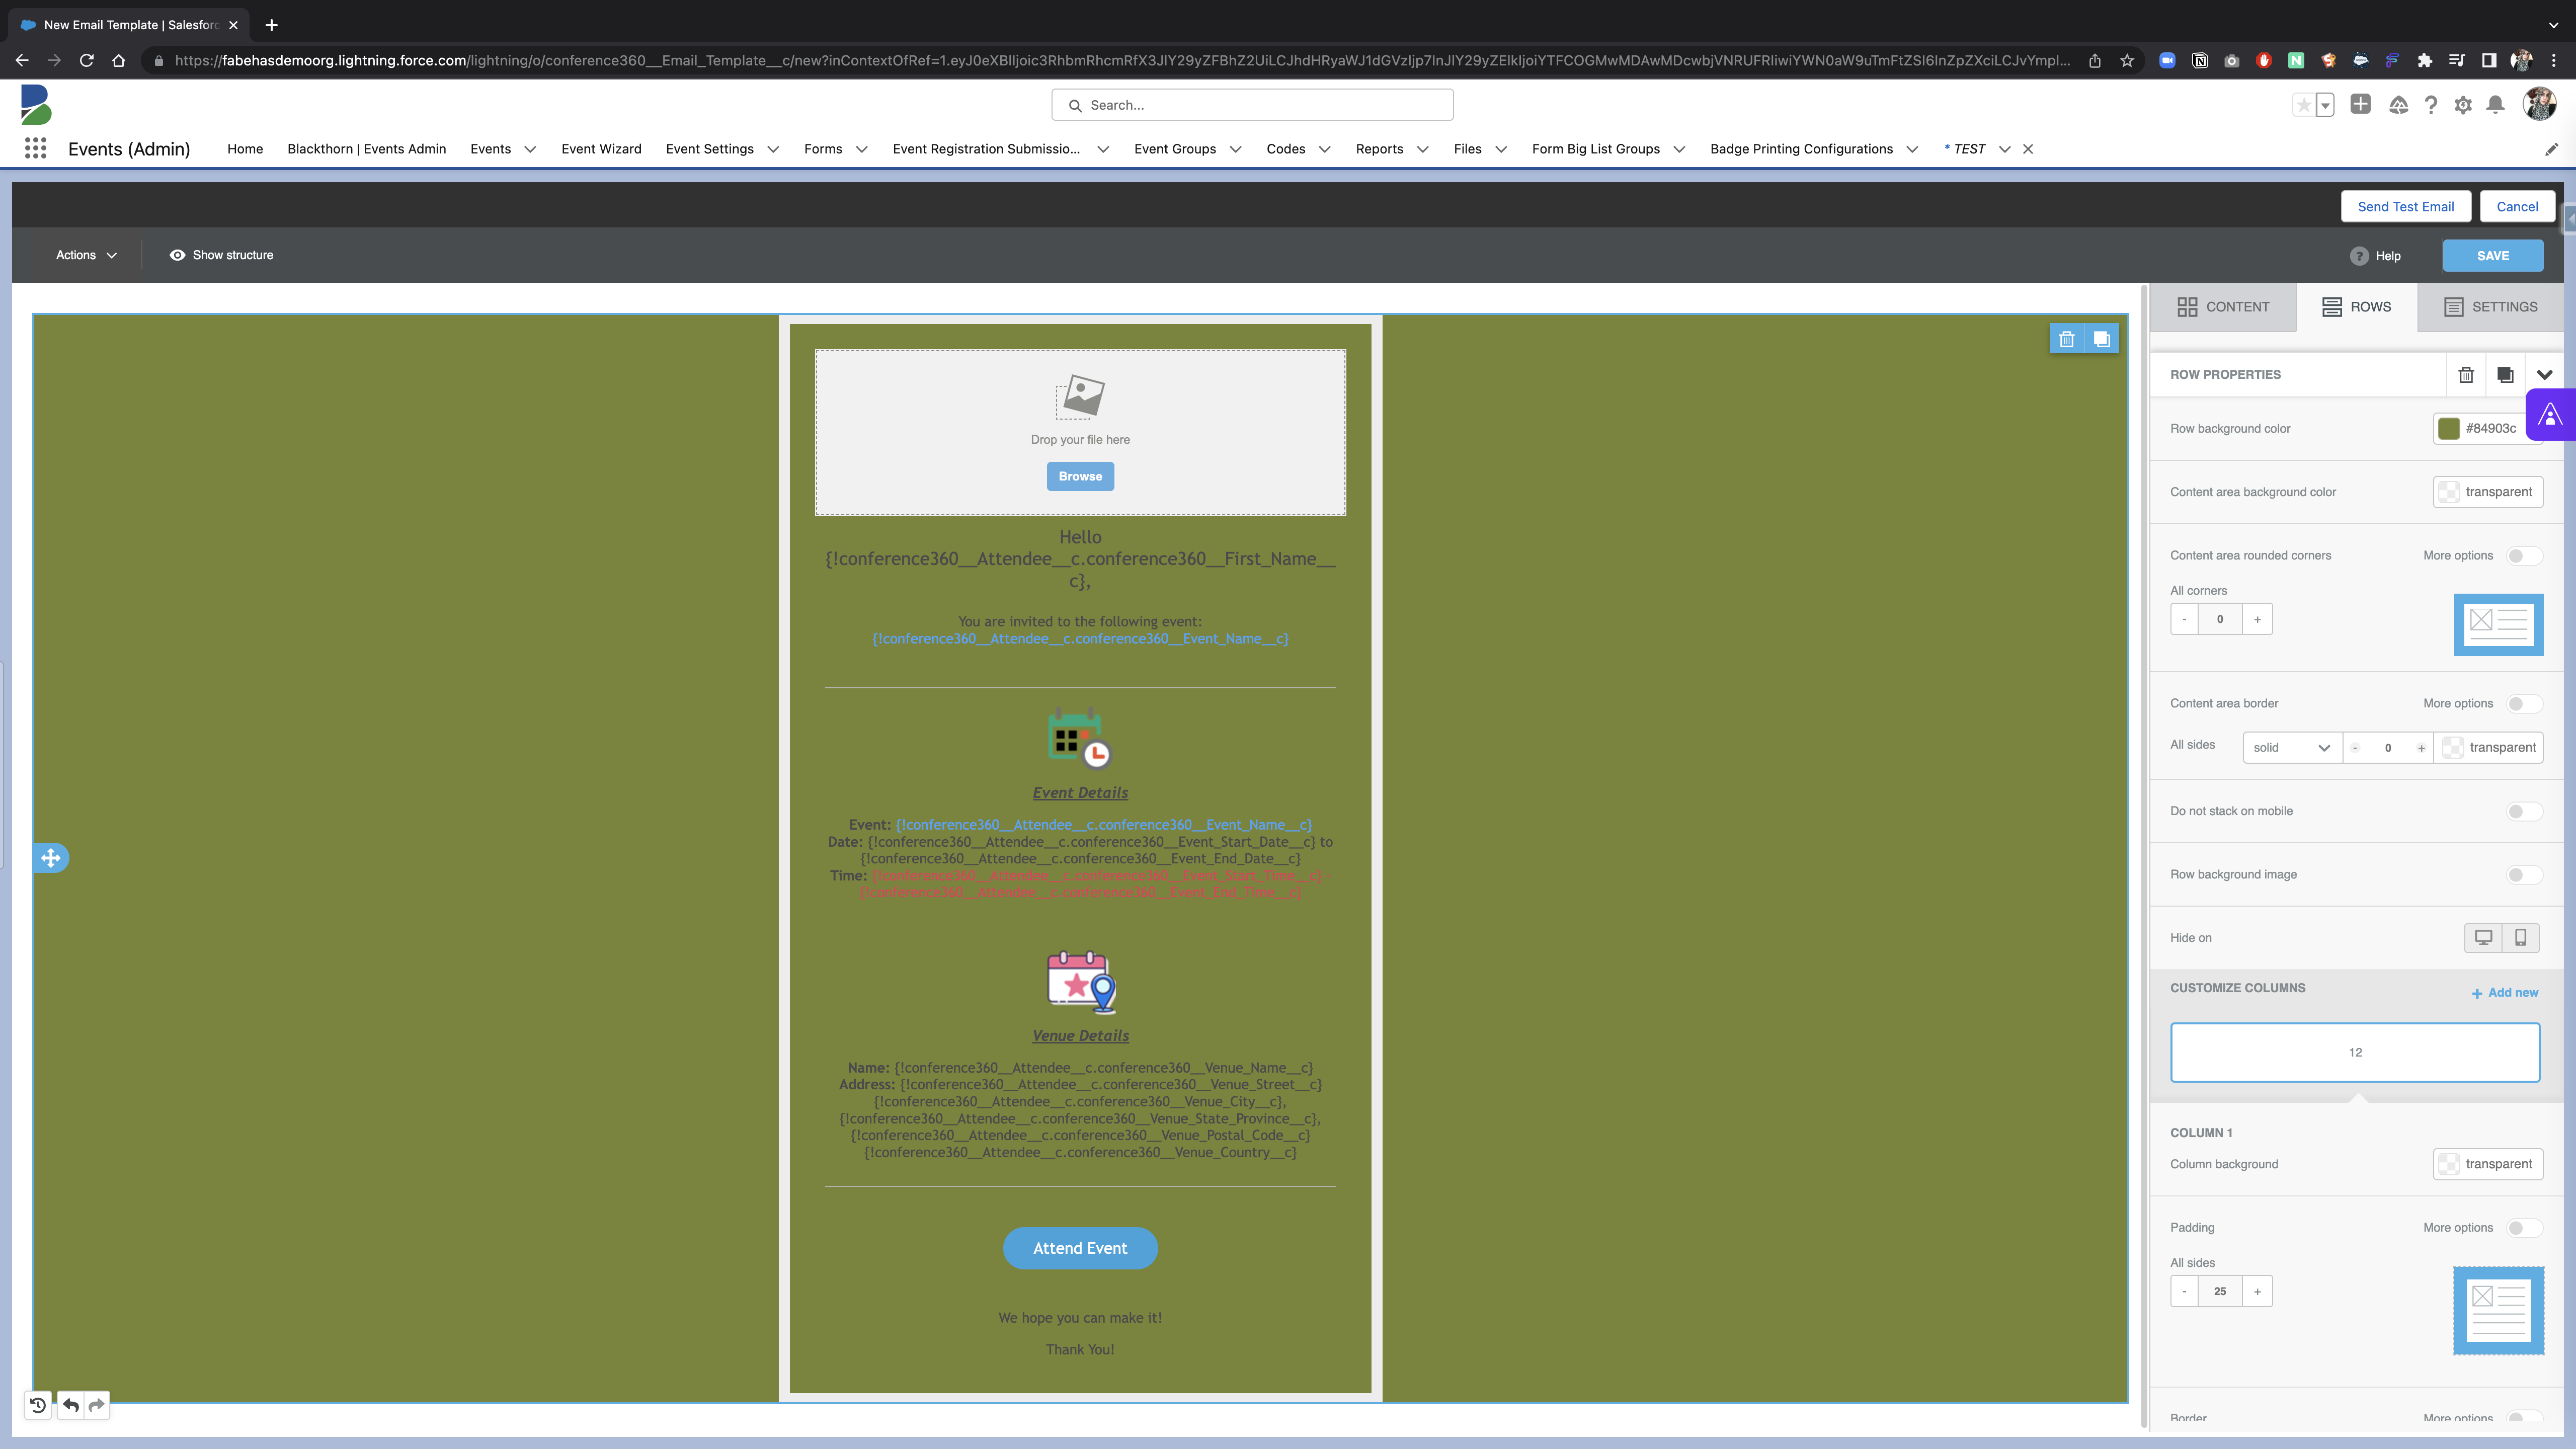
To add merge fields, click on a text box, click "Merge Tags", and select the tag you want! Below is an example of some tags that could be used to display the event name, date, and time!
Note: When adding in dates and times, please use the Event Start Date/Event Start Time and Event End Date/Event End Time to avoid issues with daylight savings time..png)
When saving the Email Template, you can insert merge tags into the subject line as well. An example would be: "You're invited to {{{!conference360__Attendee__c.conference360__Event_Name__c}}}!"
It's free rein from here. Play around and see what you can build.
Edit Your Images
You can also edit your image in the Email Template, with one exception. Adding rounded corners to images does not work with JPG files; it only works with PNG files.
Complete the following steps to round the corners of a PNG image file.
Open an existing Event record.
Scroll down to the Email Templates Related List.
Click an existing Email Template. If you need to create a new Email Template, click New and follow the instructions listed above.
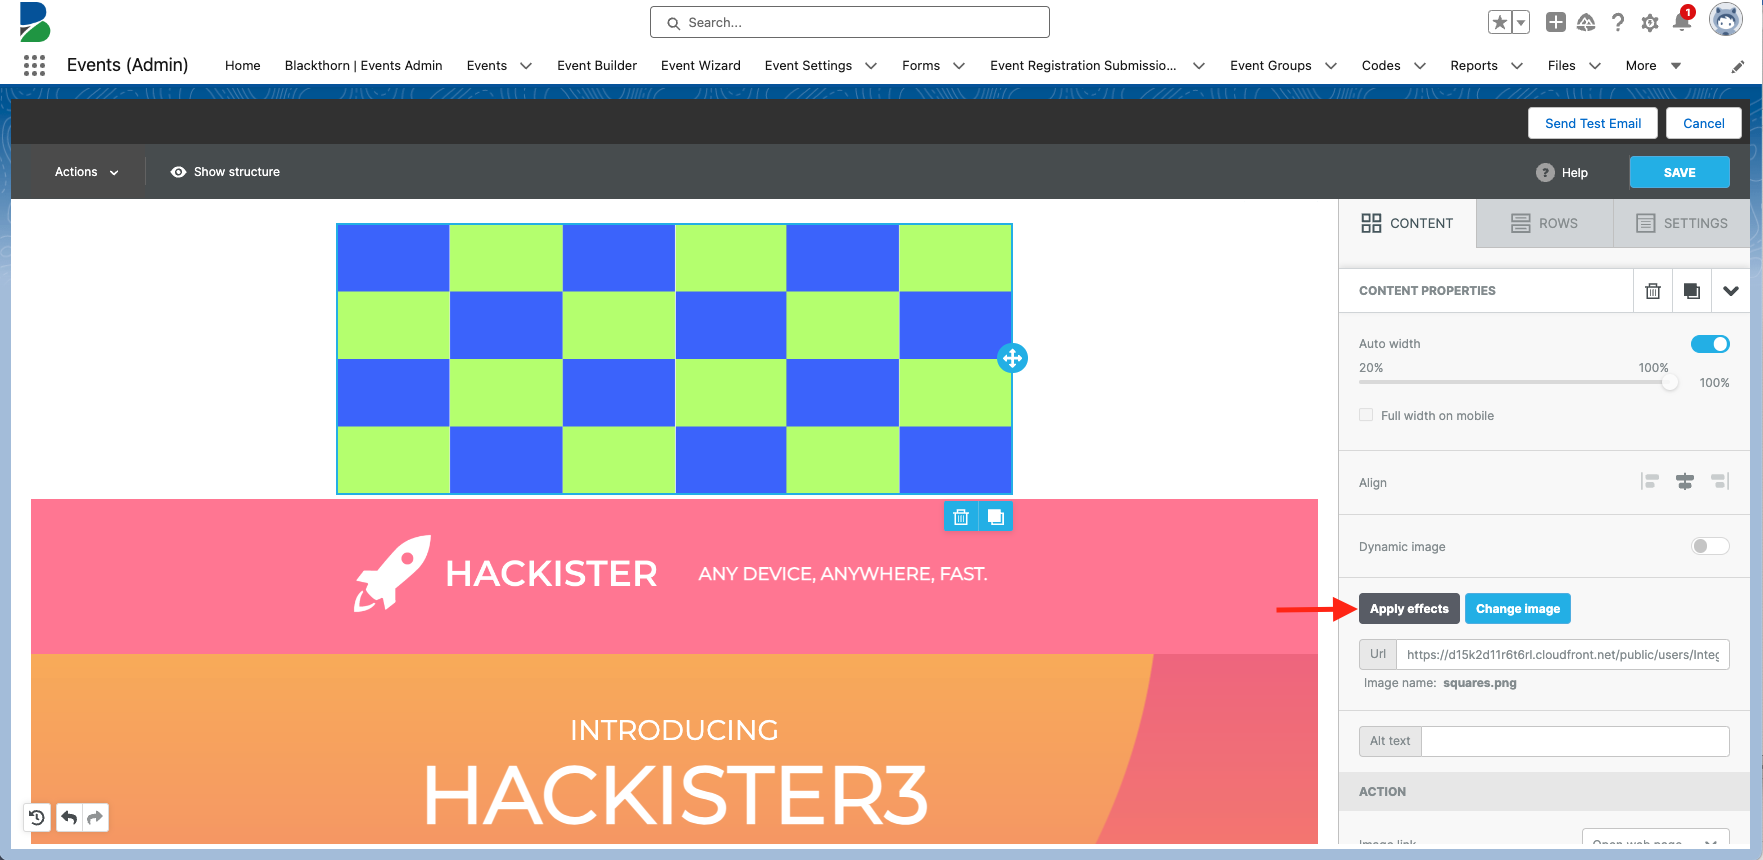
Click an existing image or add a new content row and upload a PNG image file.
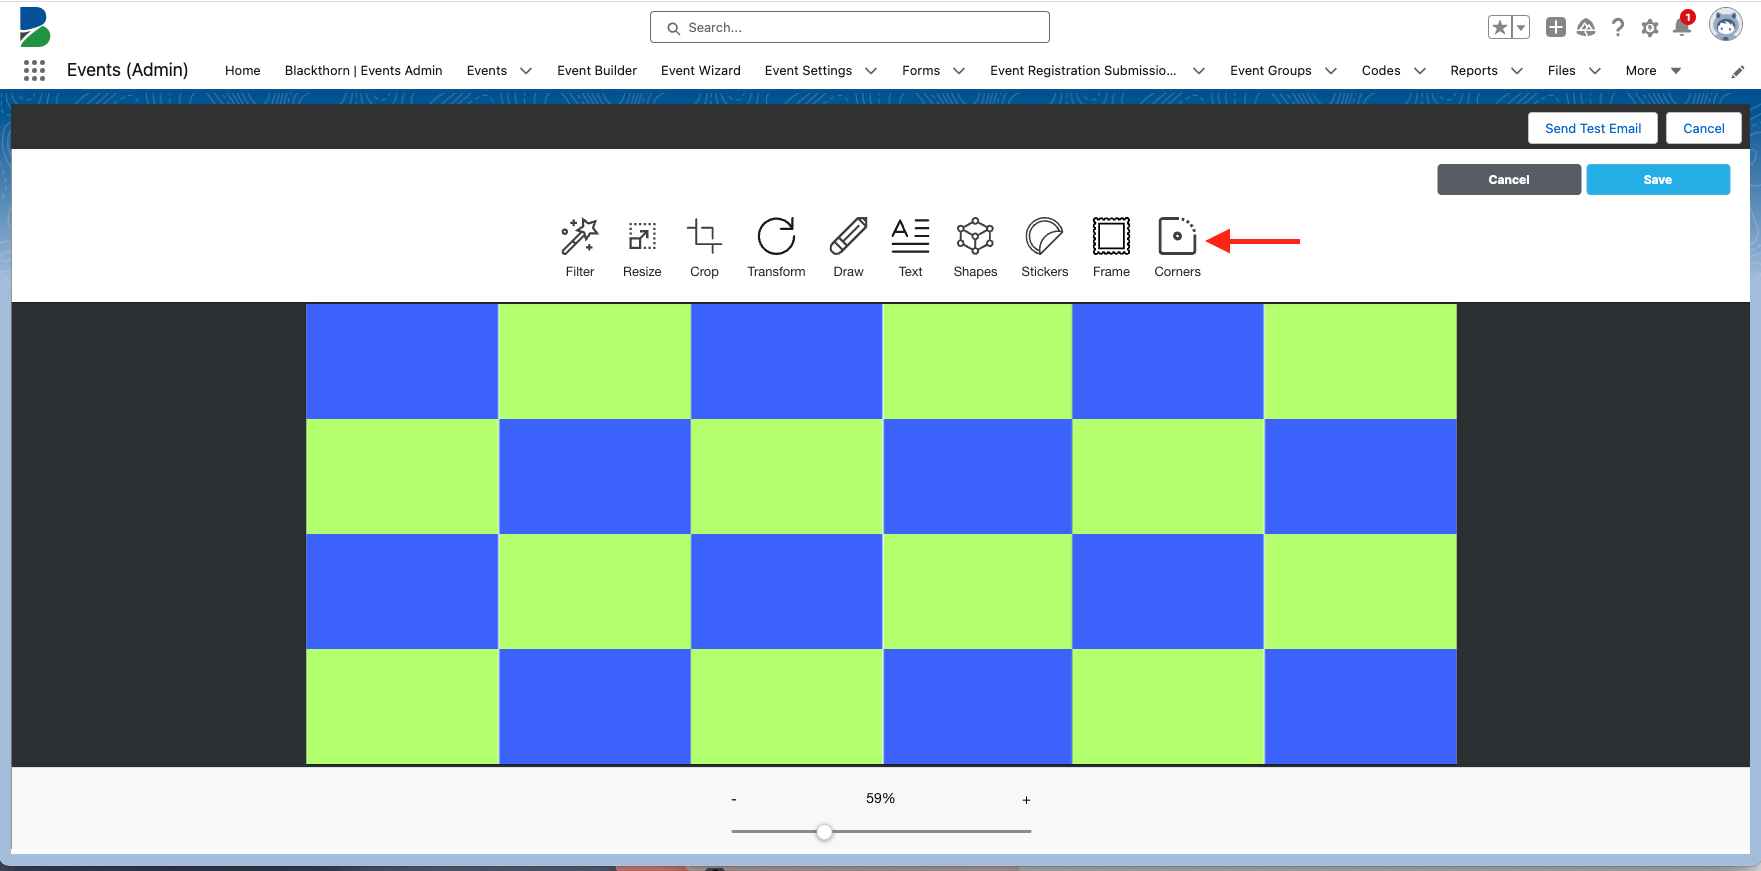
Click Apply effects.
Click the Corners icon.
Drag the Radius slider to the right until the corners are the correct shape.
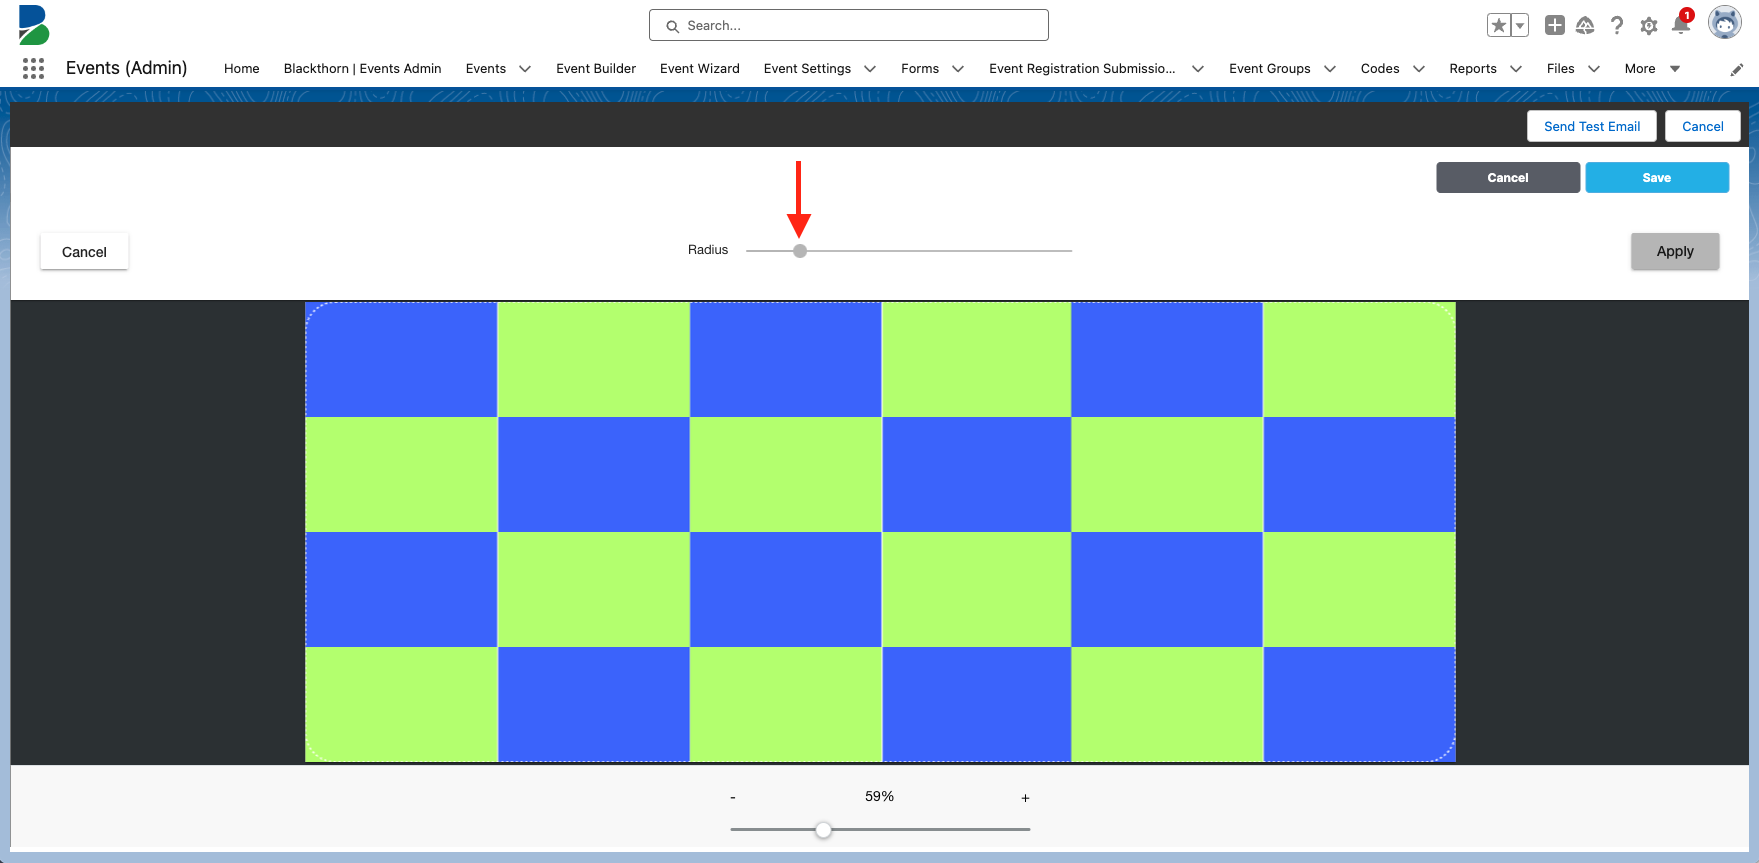
Click Apply. (If the image is a JPG file, the empty corner spaces will be filled with a black background.)
Click Save. The image's corners are now rounded.
Once you are done editing the Email Template, click Save.
Confirm the Subject and click Save.
Send Emails
You can send emails from several places. If you don't see the following buttons on your Event page layout, please add them.
Event Record
Click the Send Email button on an Event record to send an email to all Attendees specified in the criteria for the Event.
Attendee Record
Click the Send Email button on an Attendee record to send an email directly to that Attendee, and only that Attendee.
Note: It may take several minutes for the Email Template to appear in the Related List.
Experience Cloud Prerequisites
When logged in to the Experience Cloud as a Community user, you can preview and send emails from an Attendee or Event object after performing the following steps:
Add a Sharing Setting to the Attendee object: Set the Default External Access field to “Public Read/Write” (Location: Setup > Settings > Security > Share Settings).
Create a CSP Trusted Site: Set the Trusted Site URL field set to “https://*.cloudfront.net" (Location: Setup > Settings > Security > CSP Trusted Sites > New Trusted Site).
From the Event Record
Select one of the following methods to send an email from an Event.
The Send Emails From address will determine which email address the Email Template is being sent from. By default, this is the Current User (the Salesforce user currently logged in.) Emails will be automatically added to this picklist by adding them to the Organization-Wide Email Addresses in Salesforce Setup.
The Email Template field is where you can select which Email Template to send.
The Attendee Filter field controls which Attendees receive the email. This can be filtered by any selection within the Registration Status field (Invited, Registered, etc.) or the Attendance Status field (Attended, No Show, etc.).
.png)
From the Attendee Record
Select one of the following methods to send an email from an individual Attendee.
The Send Emails From address is who the email comes from. By default, this is the Current User (the Salesforce user currently logged in). Emails will be automatically added to this picklist by adding the email to the Organization-Wide Email Addresses in Salesforce Setup.
The Email Template field is where you can select which Email Template to send.
.png)
Edit Your Email Template
Open the Event record with the related Email Template.
Go to the related Email Template list and click New.
Select “New From Template.”
Choose an Email Template.
Click Continue.
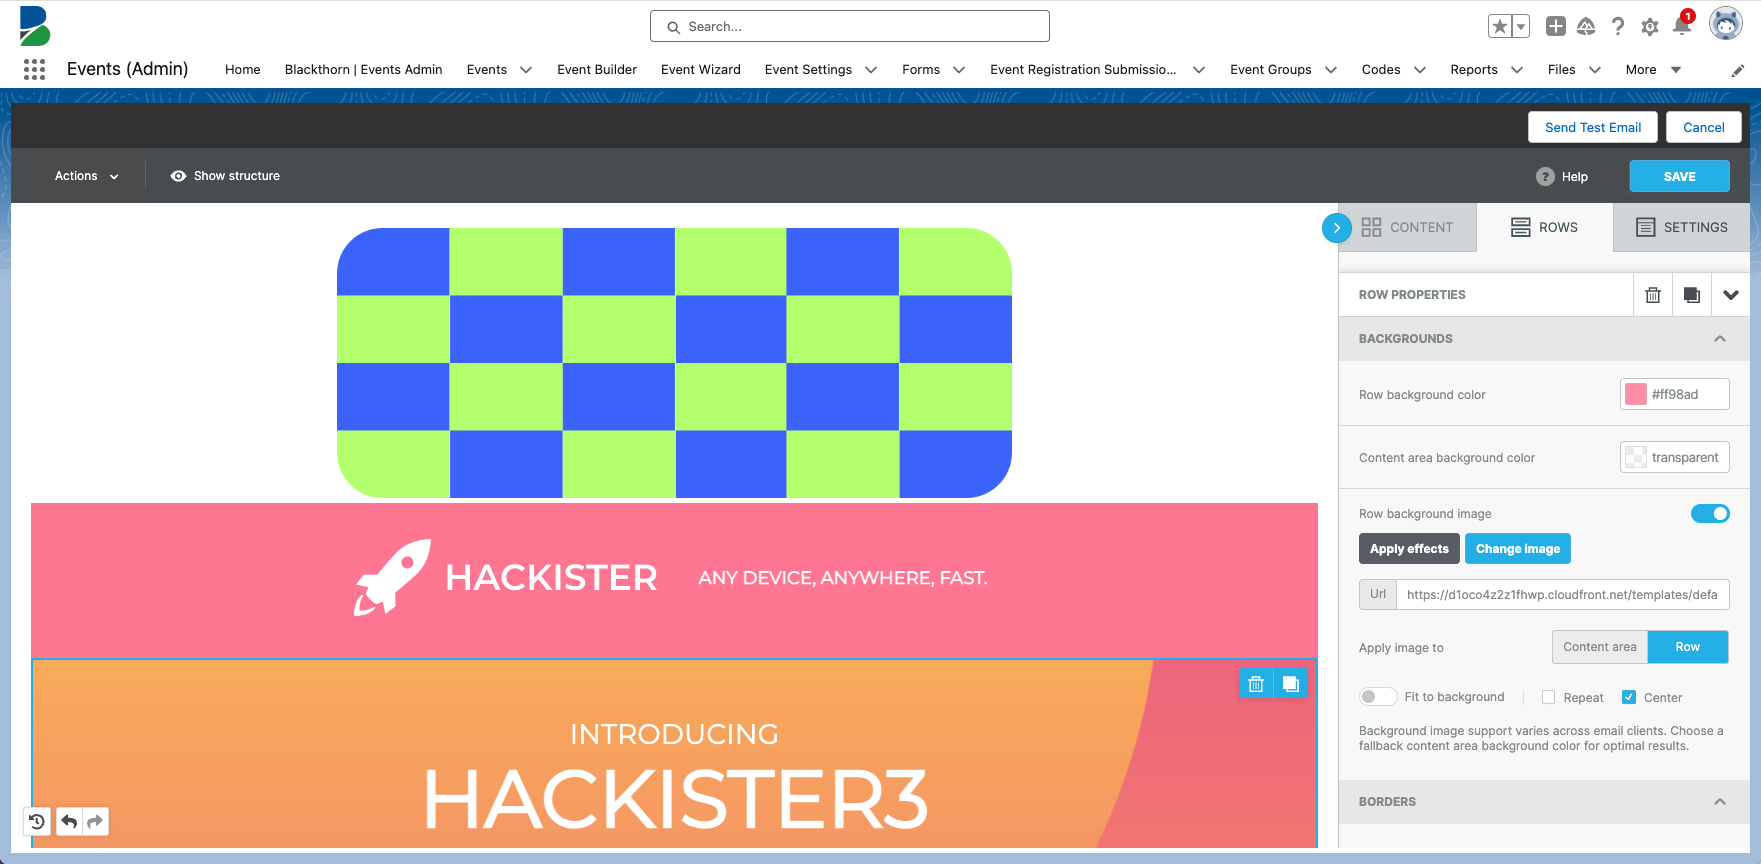
Click the Row tab.
In the template, select the row that you want to change the background color.
Enter a hex # in the Row background color field.
Click Save.
Enter an Email Template Name and Subject if you want to rename the template.
Click Save.
View Previously Created Email Templates
To see the templates created with the Blackthorn Email Template Builder, you need to add the Blackthorn Custom Email Template object as a tab in your org. Complete the steps below to add a new tab to your app picker.
Click the Gear icon.
Click Setup.
In the Quick Find box, search for and click “Tabs”.
Click New.
Set Object to “Email Template”.
Select a Tab Style.
Click Next.
Choose the visibility requirements for the tab.
Click Next.
Choose the custom apps where the new tab will be visible.
Click Save.
The steps above will then add the Blackthorn Custom Email Template tab to your available app navigation items.
Recommendation: We suggest renaming this tab as it has the same name as the Salesforce Standard Email Template folder.
FAQ
“Refused to Connect” Error
Q: I received a “refused to connect” error (i.e., 'domain.csxyz.visual.force.com refused to connect') when creating an Email Template through the Builder. What do I do?
A: If you receive a refused to connect error (i.e., 'domain.csxyz.visual.force.com refused to connect') when creating an Email Template through the Builder, you must allowlist several domains in Salesforce.
To allowlist the following three domains for Visualforce Pages, go to Setup > Session Settings.
Your "My Domain" (for example, https://blackthorn--full.lightning.force.com)
Links Not Working
Q: My Attendees have reported that links in Yahoo are not showing up as hyperlinks, how do I fix this?
A: Yahoo Mail does not automatically convert hyperlinks, unlike Google Mail, for example. To hyperlink merge fields, text, etc., please use the Link feature built into the Email Template Builder.
Add a Merge Field to a Button
Q: Can I insert a merge field behind a button?
A: Yes, you can. In the following example, we will add the Merge Tag for the AttendeeLink to the Attend Event button.
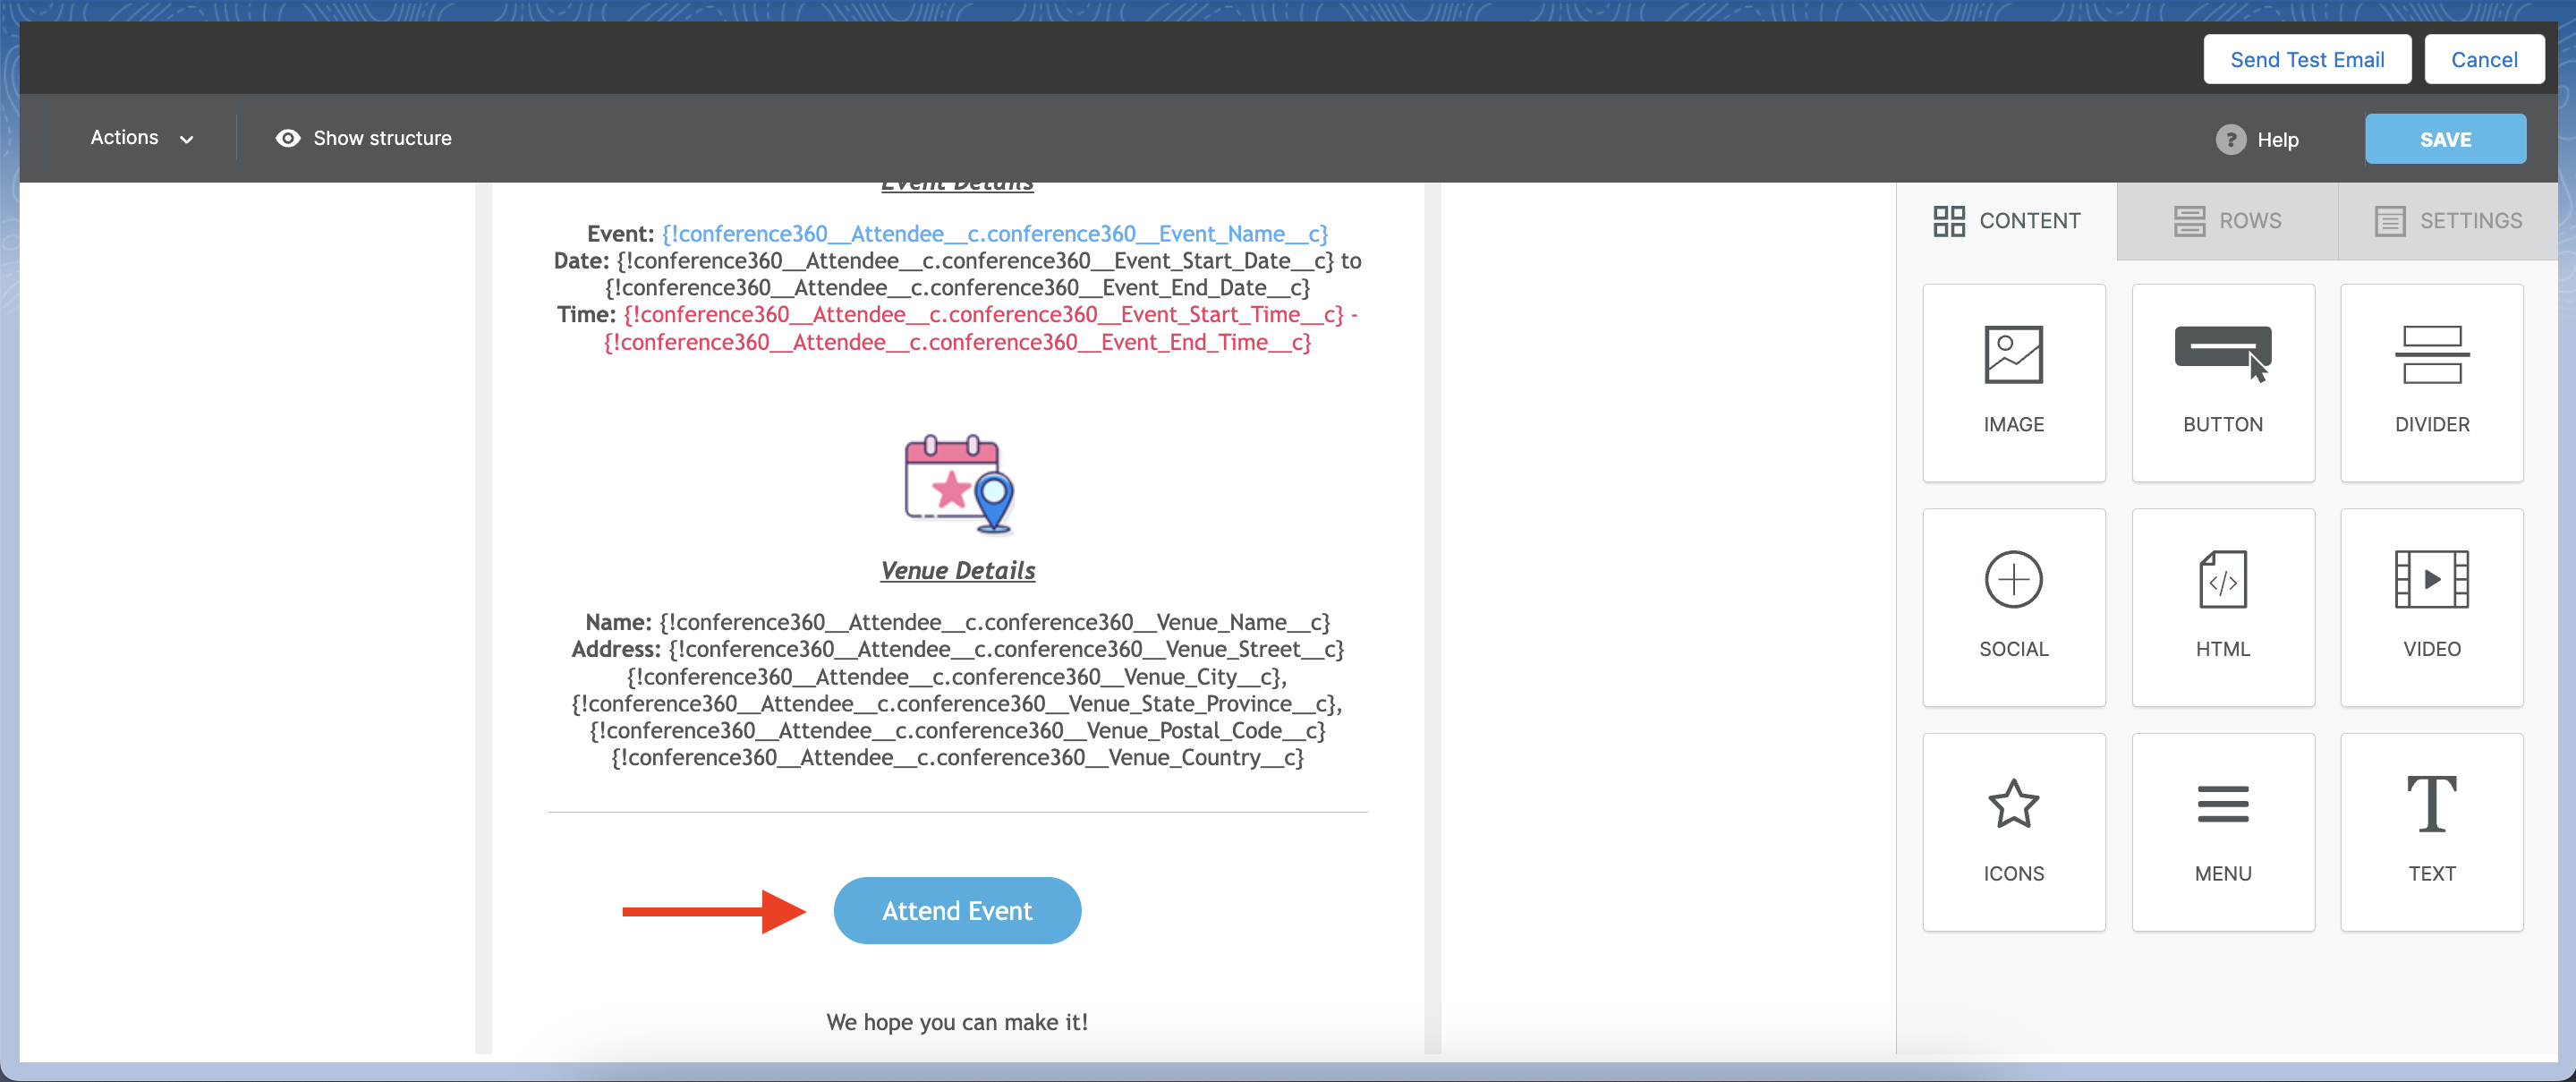
Open an Email Template.
Click in any area with text.
Click Merge tags.
Locate and click “Attendee -> AttendeeLink.”
Cut the merge tag and click the area with the Attend Event button.
Paste the merge tag into the button’s Action URL field.
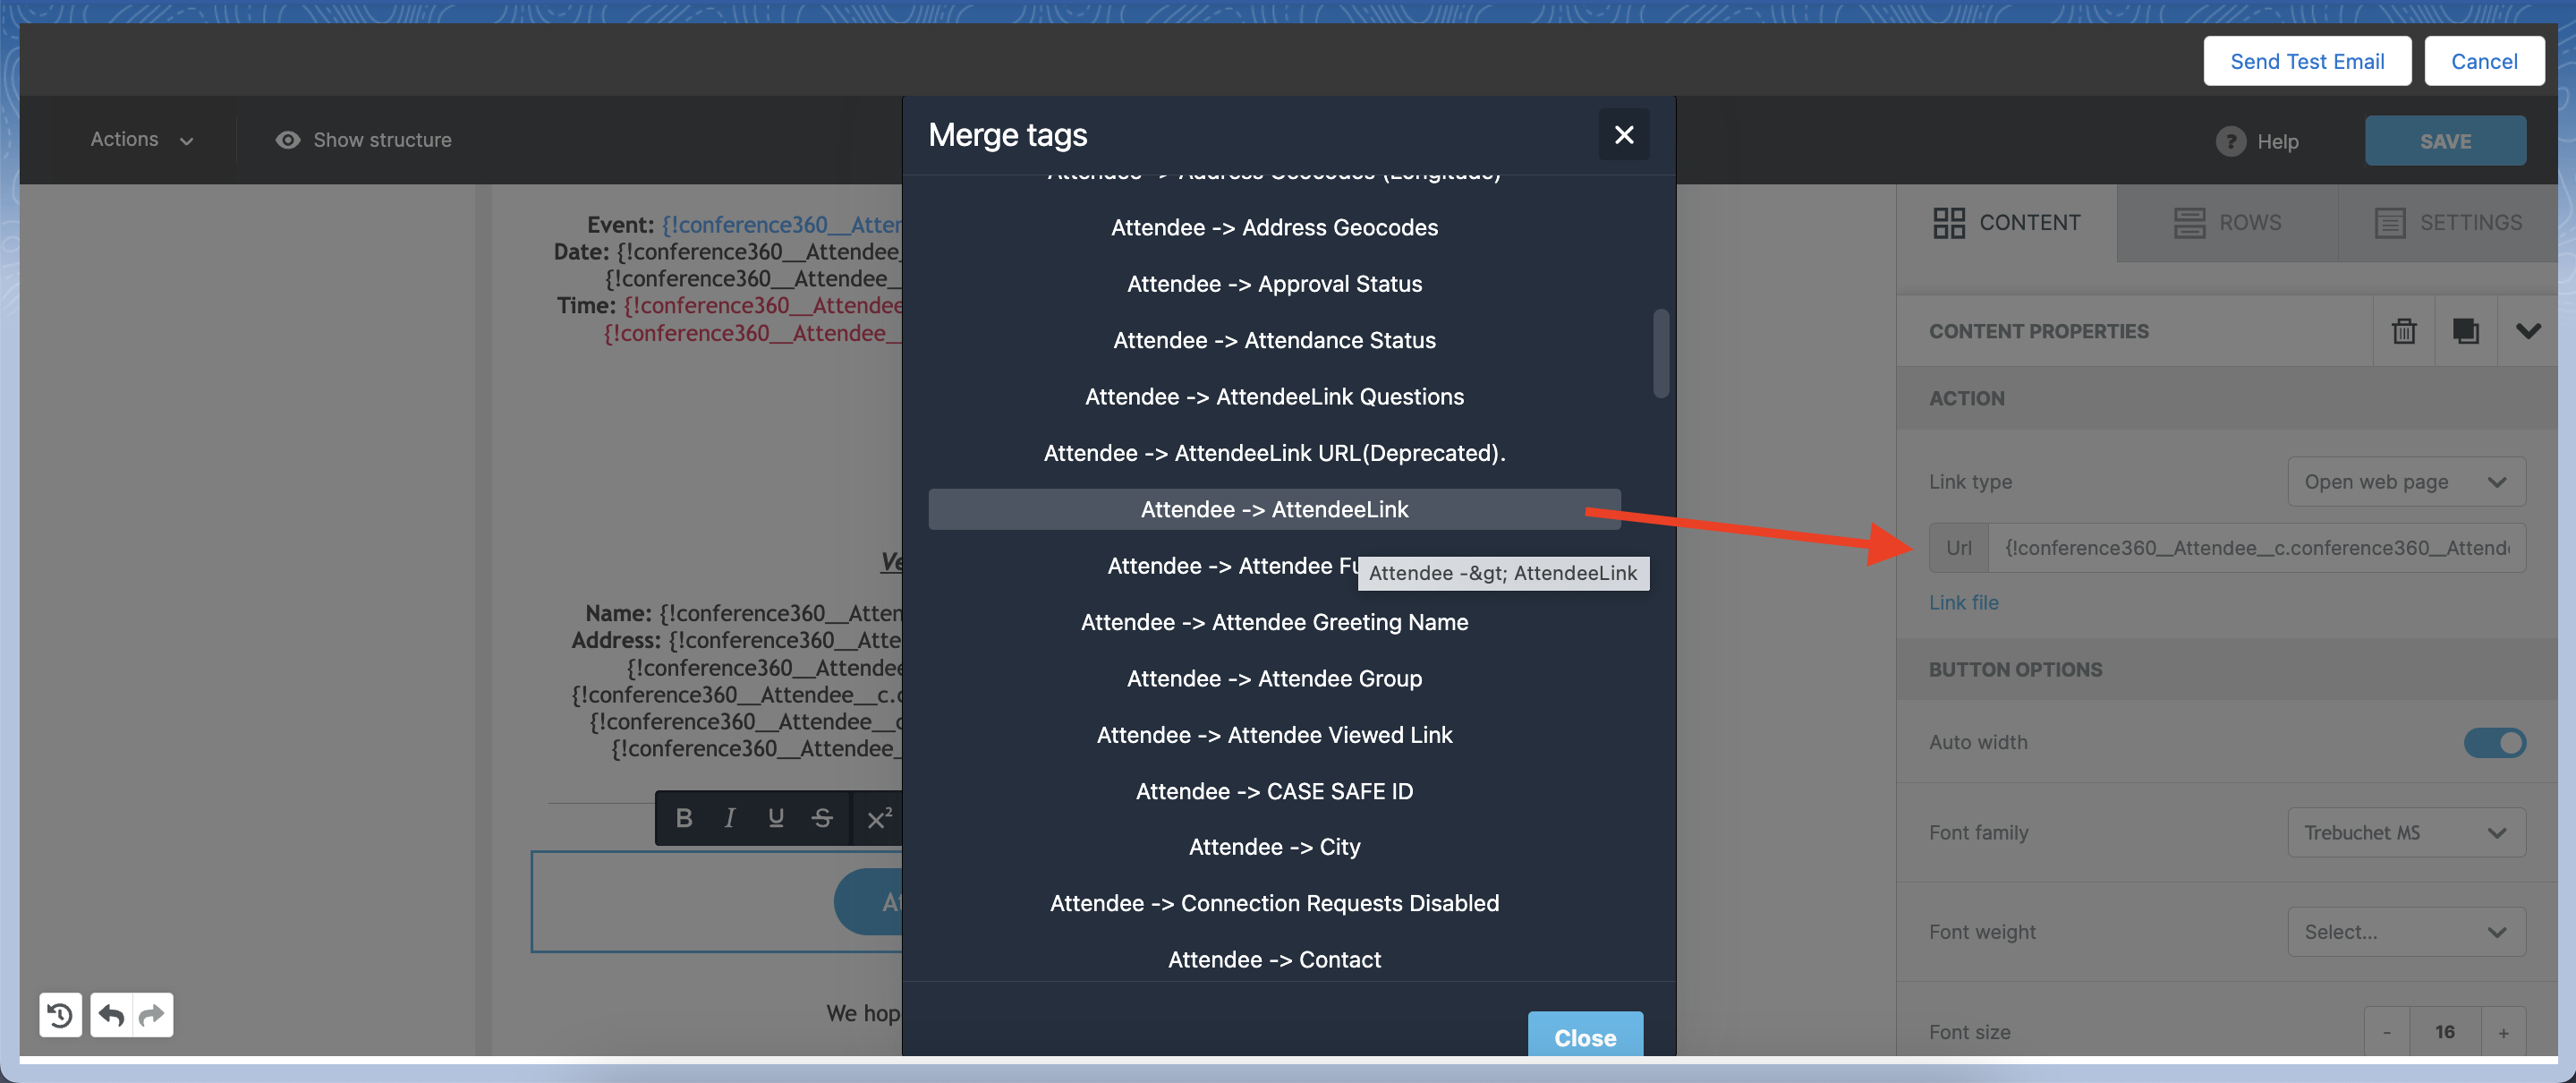
Click Save.
Enter a Subject and click Save.
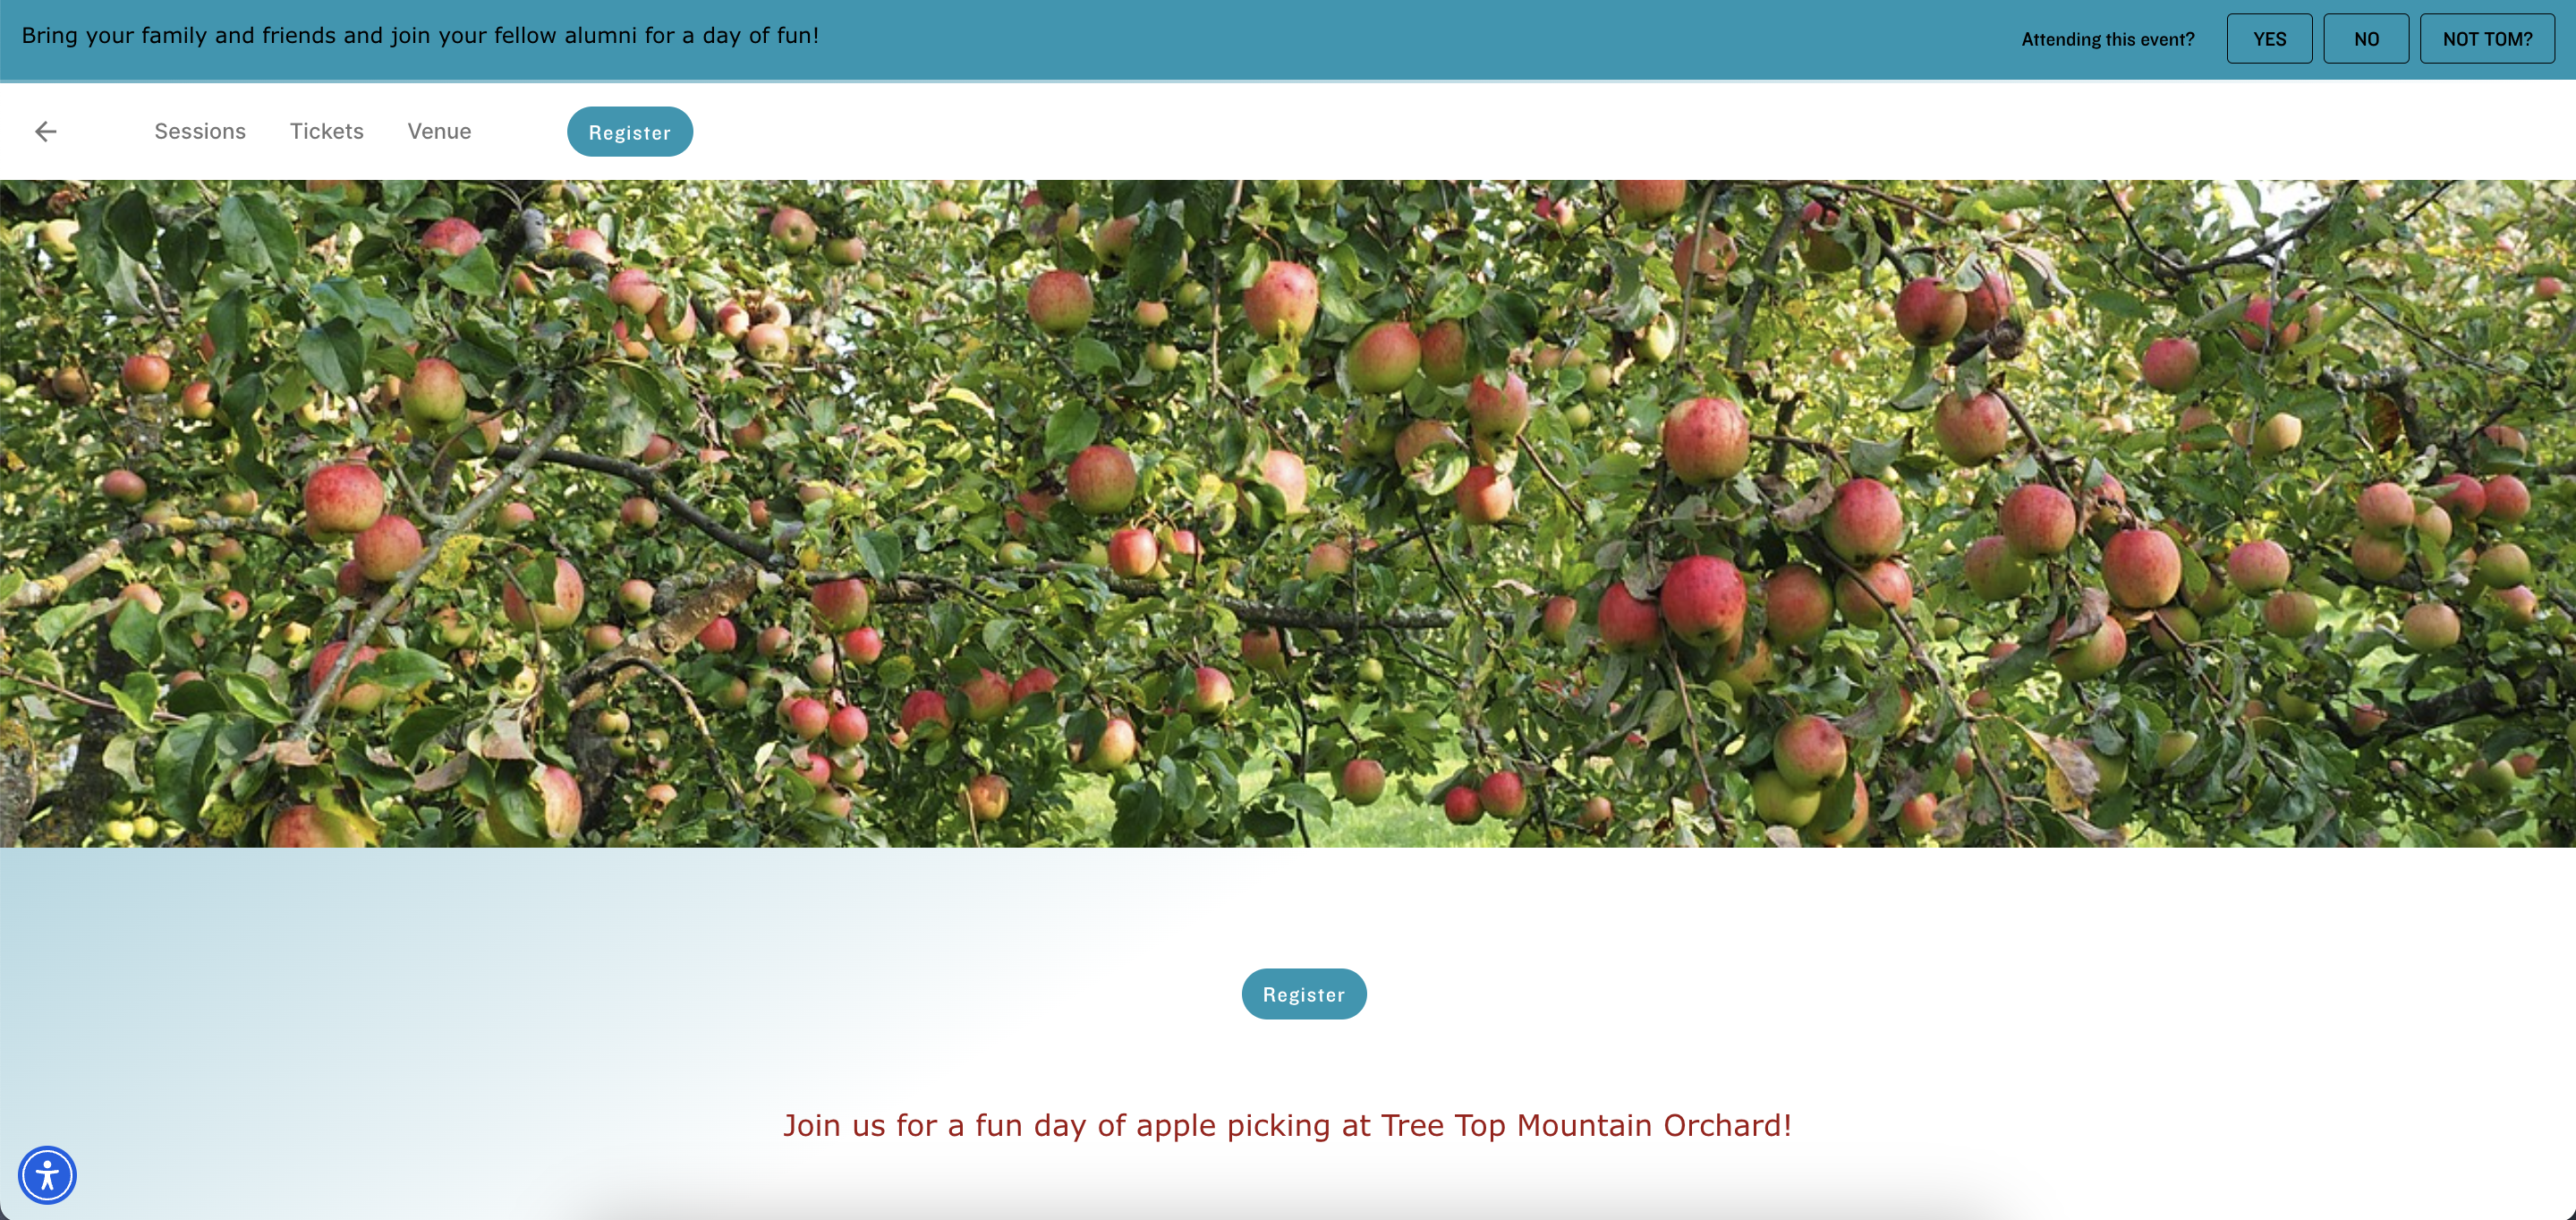
Send the email invitation to your Attendees.
When your Attendees receive the email and click the Attend Event button, they will be taken to their AttendeeLink.
Preview Email Does Not Show Images and Icons
Q: Why can’t I see the email images and social icons in the Preview Email in the Email Template Builder?
A: The issue occurs because some external domains used by the Bee/BeeFree email editor are not included in your Salesforce org’s Content Security Policy (CSP) allowlist.
Blackthorn’s Events package does not set CSP headers due to an org-level CSP requirement. Instead, Events relies on the org-level Lightning/VF CSP configuration.
To resolve the issue, add the required Bee/BeeFree domains to the CSP Trusted Sites list.
Go to Setup.
In the Quick Find box, enter and click “Trusted URLs.”
Click New Trusted URL.
Enter an API Name.
Enter “https://d1oco4z2z1fhwp.cloudfront.net” in the URL field.
Update the other settings as needed.
Click Save.
Repeat the process for the remaining three URLs.
Once you have added all four URLs, perform a hard refresh or re-login to Salesforce.
The Preview Email modal will now display the images and social icons correctly.