What is a Dispute?
Introduction
A Dispute is a situation in which a customer questions the validity of a Transaction that was registered to their account.
If you are unfamiliar with how Disputes are received, the associated fees, or what to submit, please review Stripe's documentation.
Setup
Create a webhook between Stripe and Salesforce.
Testing Disputes
In order to test Disputes you will need to use a specific test credit card created for a dispute simulation.
Receiving a Dispute
Navigate to the Dispute object.
* ***Lightning:** Navigate to app launcher > Under "All Items" select Dispute.*
* ***Classic:** Click "All Tabs" (The "+" icon in the top right corner) > select Dispute.*
- A Dispute record is created through Webhook Events with the Status = "Needs Response."
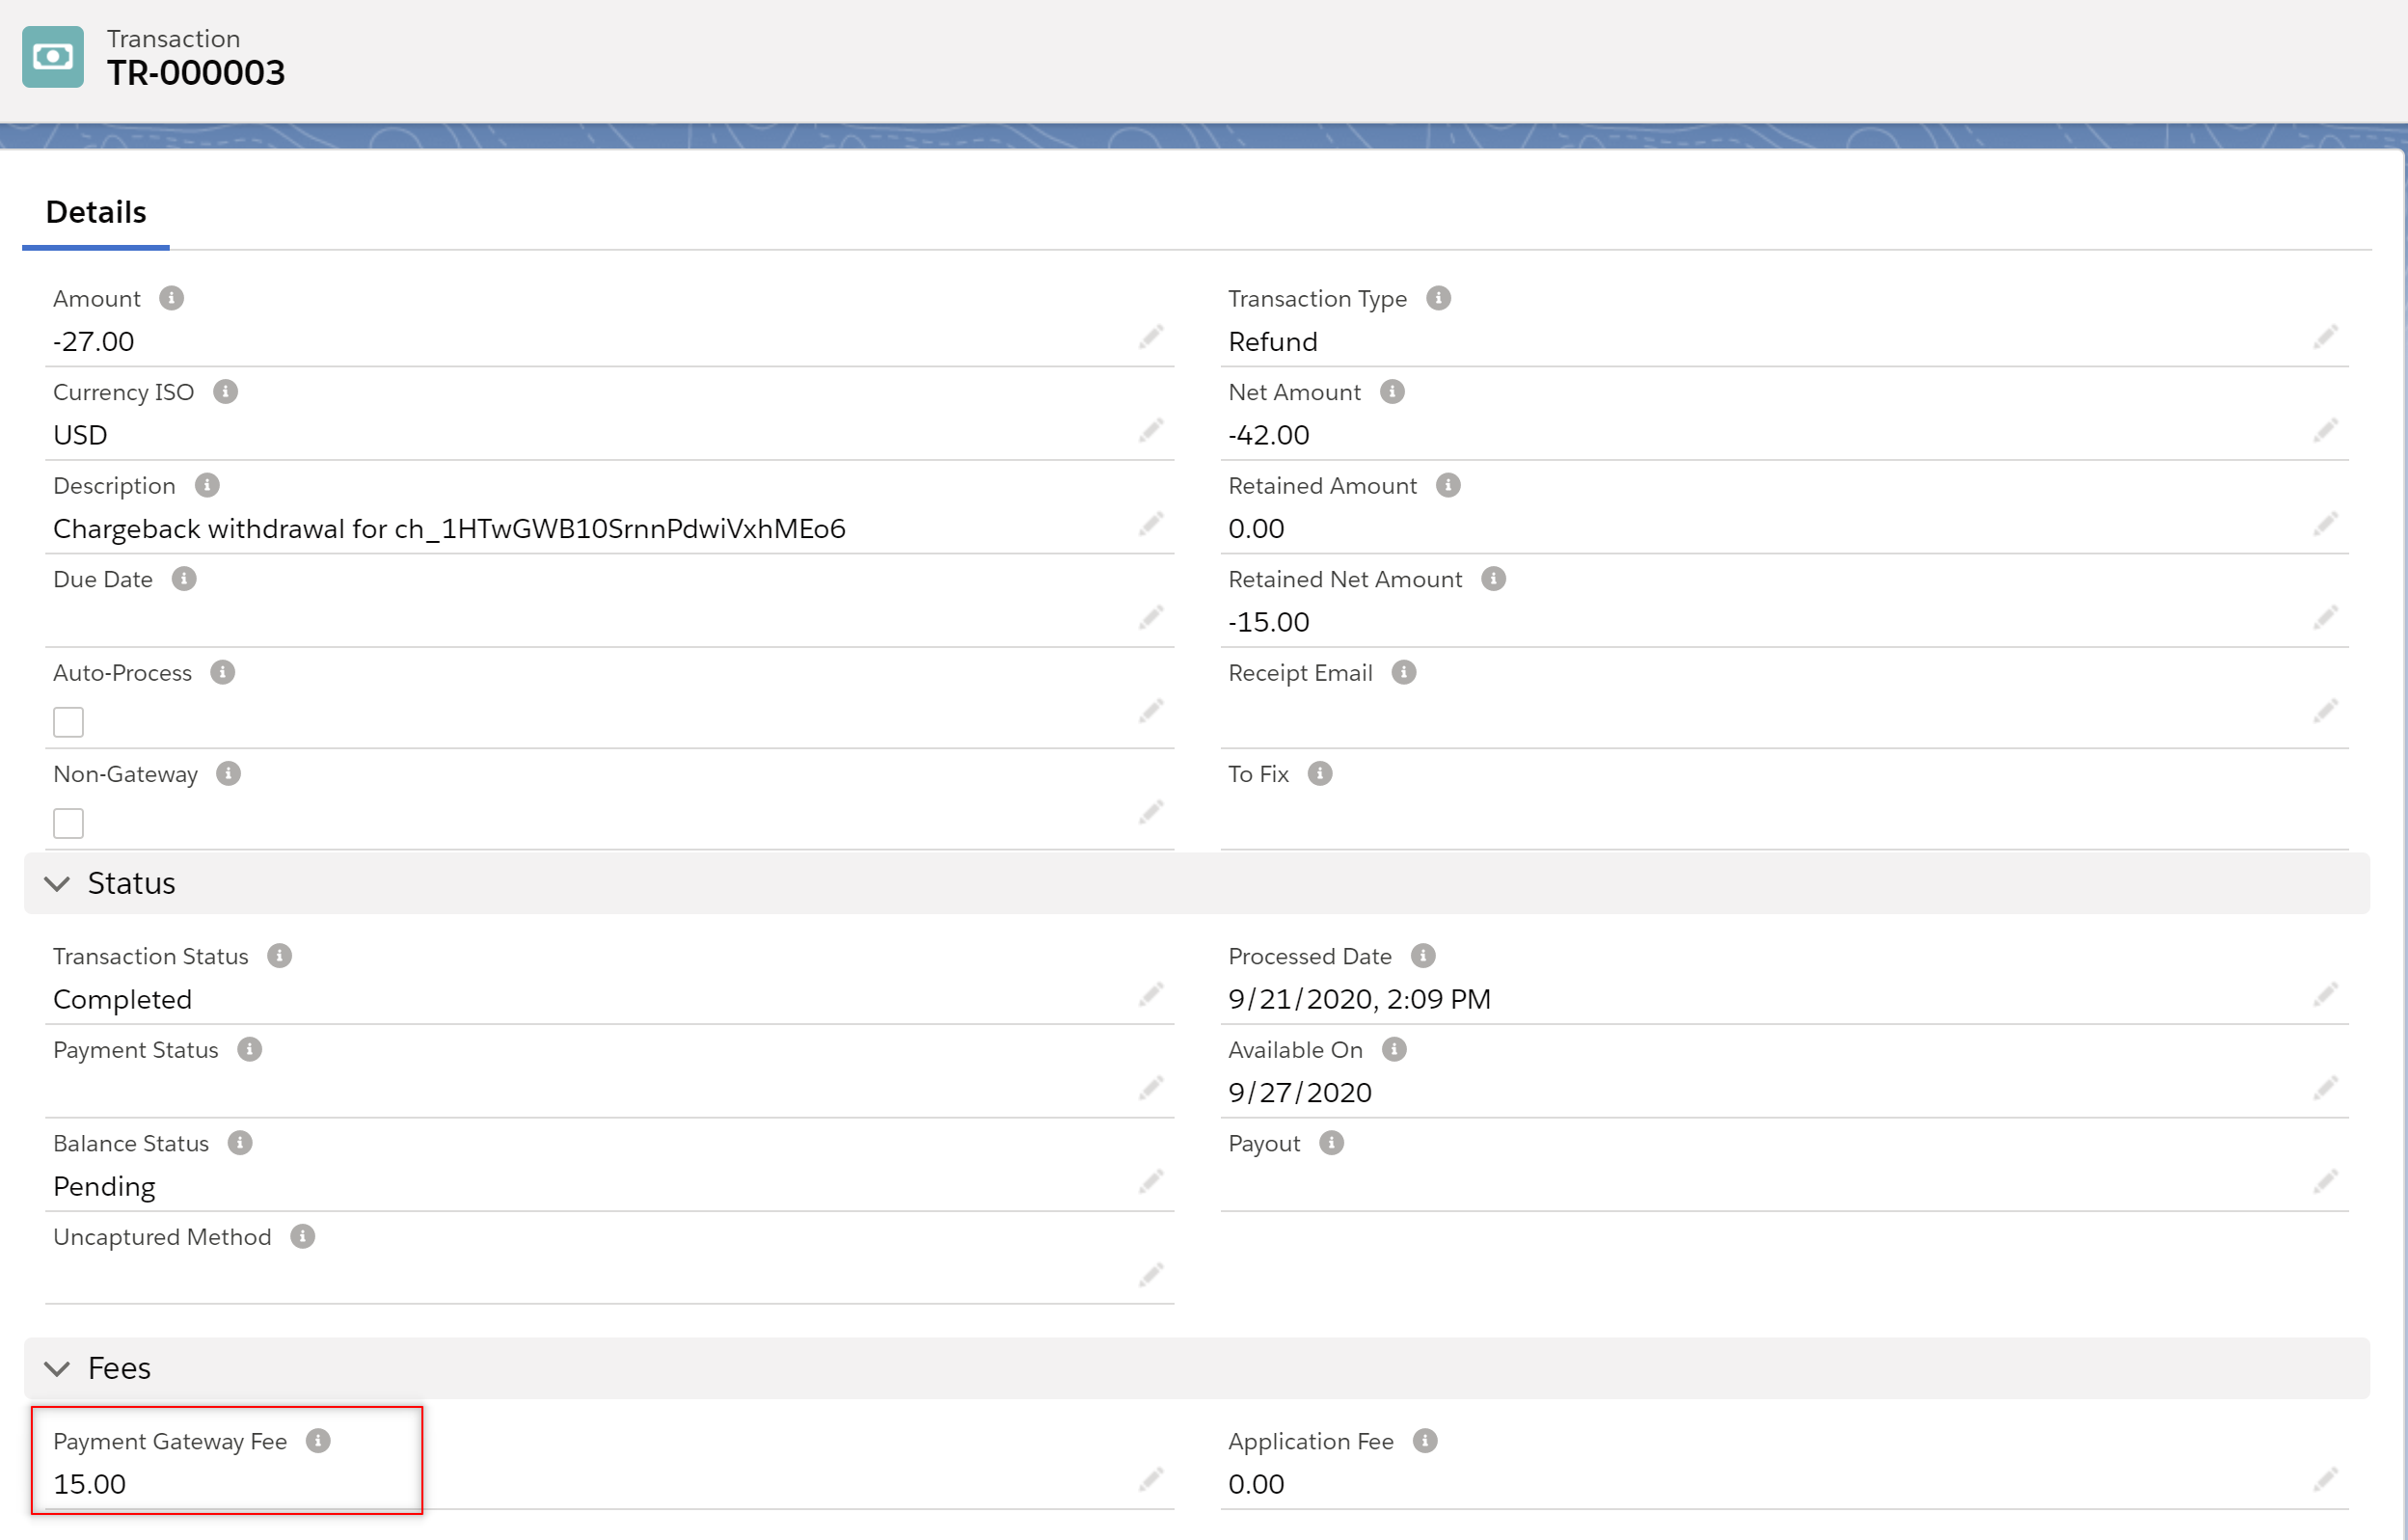
- The disputed Transaction's Payment Status changes from "Captured" to "Disputed" and a refund Transaction is created for the captured amount. The Stripe fee for the dispute will also be populated on the Payment Gateway Fee field on the refund Transaction.
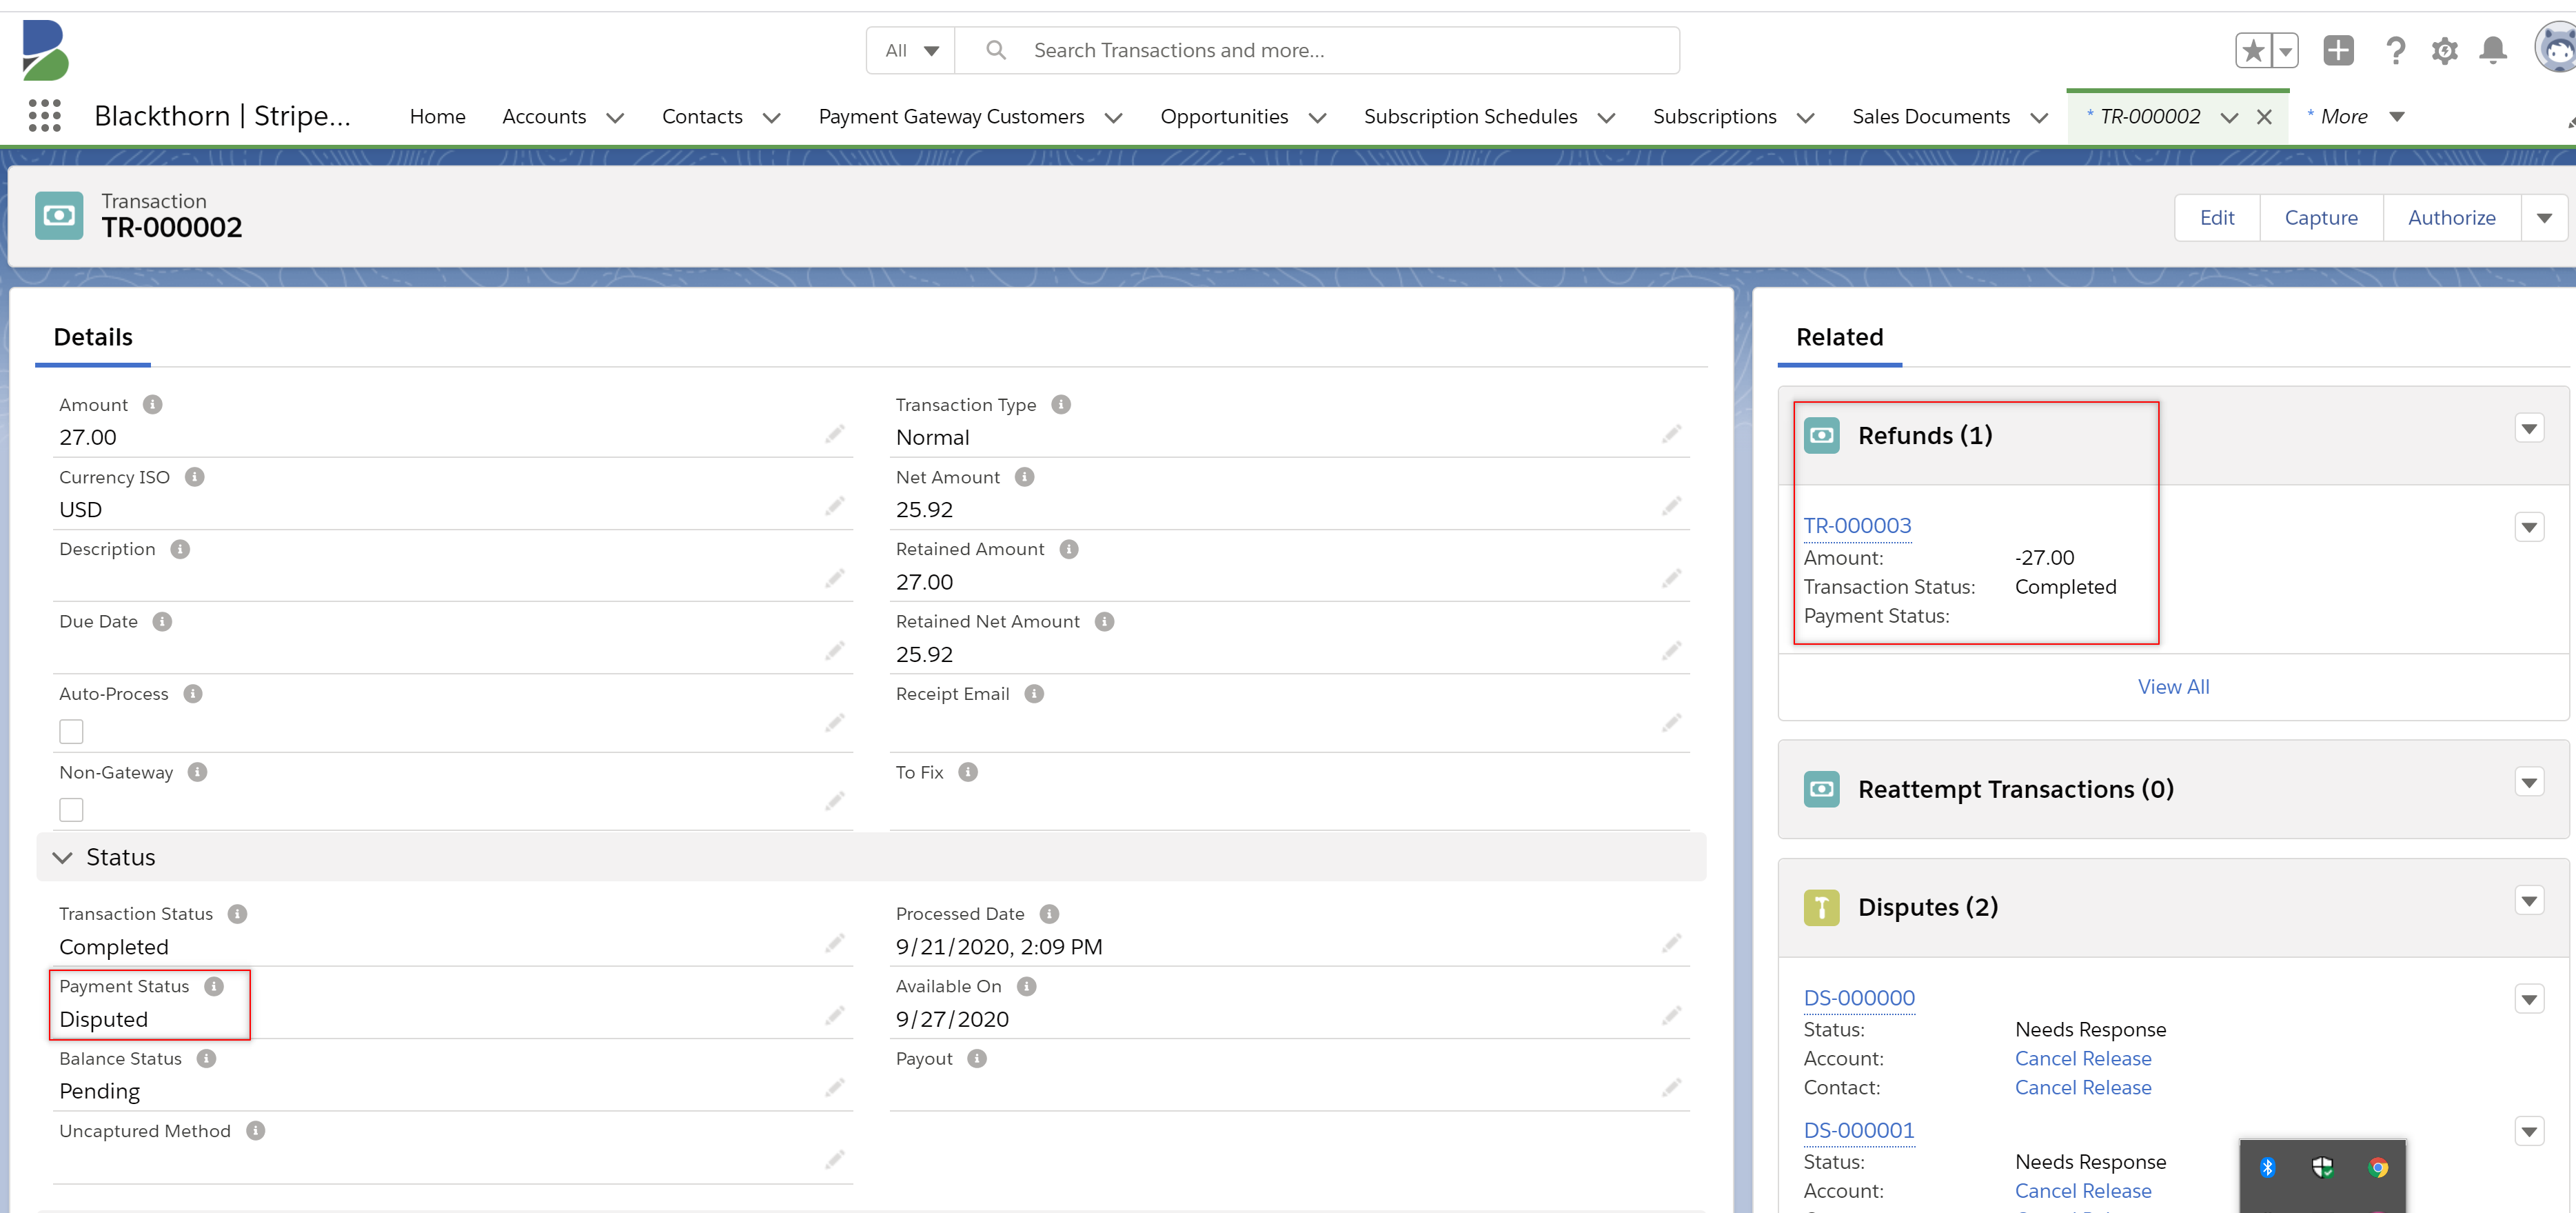
Disputed Transaction
If you notice that two refund Transactions are created when you receive a Dispute, this is because the old dispute logic operated in this manner. Please upgrade to the latest Payments package to see the most recent dispute logic.
- When receiving a Dispute, you have until the Due By date to formally respond and submit all supporting evidence.
- The Dispute Reason is what the cardholder defined the disputed payment as. Dispute reasons
- The Refundable, Has Evidence, and Past Due fields track where the disputed record is in the process.These fields can be used as notification filters in a Workflow, Process Builder, or Reports to make sure Disputes are submitted before being past due.
- After adding your Dispute Evidence and clicking Submit, the Submission Count = "1" and the Status = "Under Review". It has now been submitted to Stripe's financial partner for review and no changes can be made.
- If you won the Dispute, Status will update to "Won". If the card issuer won the Dispute, Status will update to "Lost". Once a Dispute has been "Won" or "Lost", Stripe will send out an email with the Dispute information.
Notes
- Important note from Stripe: If you receive a Dispute, try contacting your customer and discuss it before you respond. It’s possible that they simply did not recognize or remember the Transaction when they viewed their statement.
- Stripe will charge you a [
15.00 adjustment Transaction will be created for you to cover the original Stripe fee. - ACH disputes cannot be contested. If you receive an ACH dispute the Dispute Status = "Lost" and the original Transaction's Payment Status will update to "Refunded".
Dispute Evidence
The purpose of the Dispute Evidence object is to submit evidence in defense of your Dispute that will push to Stripe. Review all evidence before clicking Submit, as you cannot update evidence once submitted.
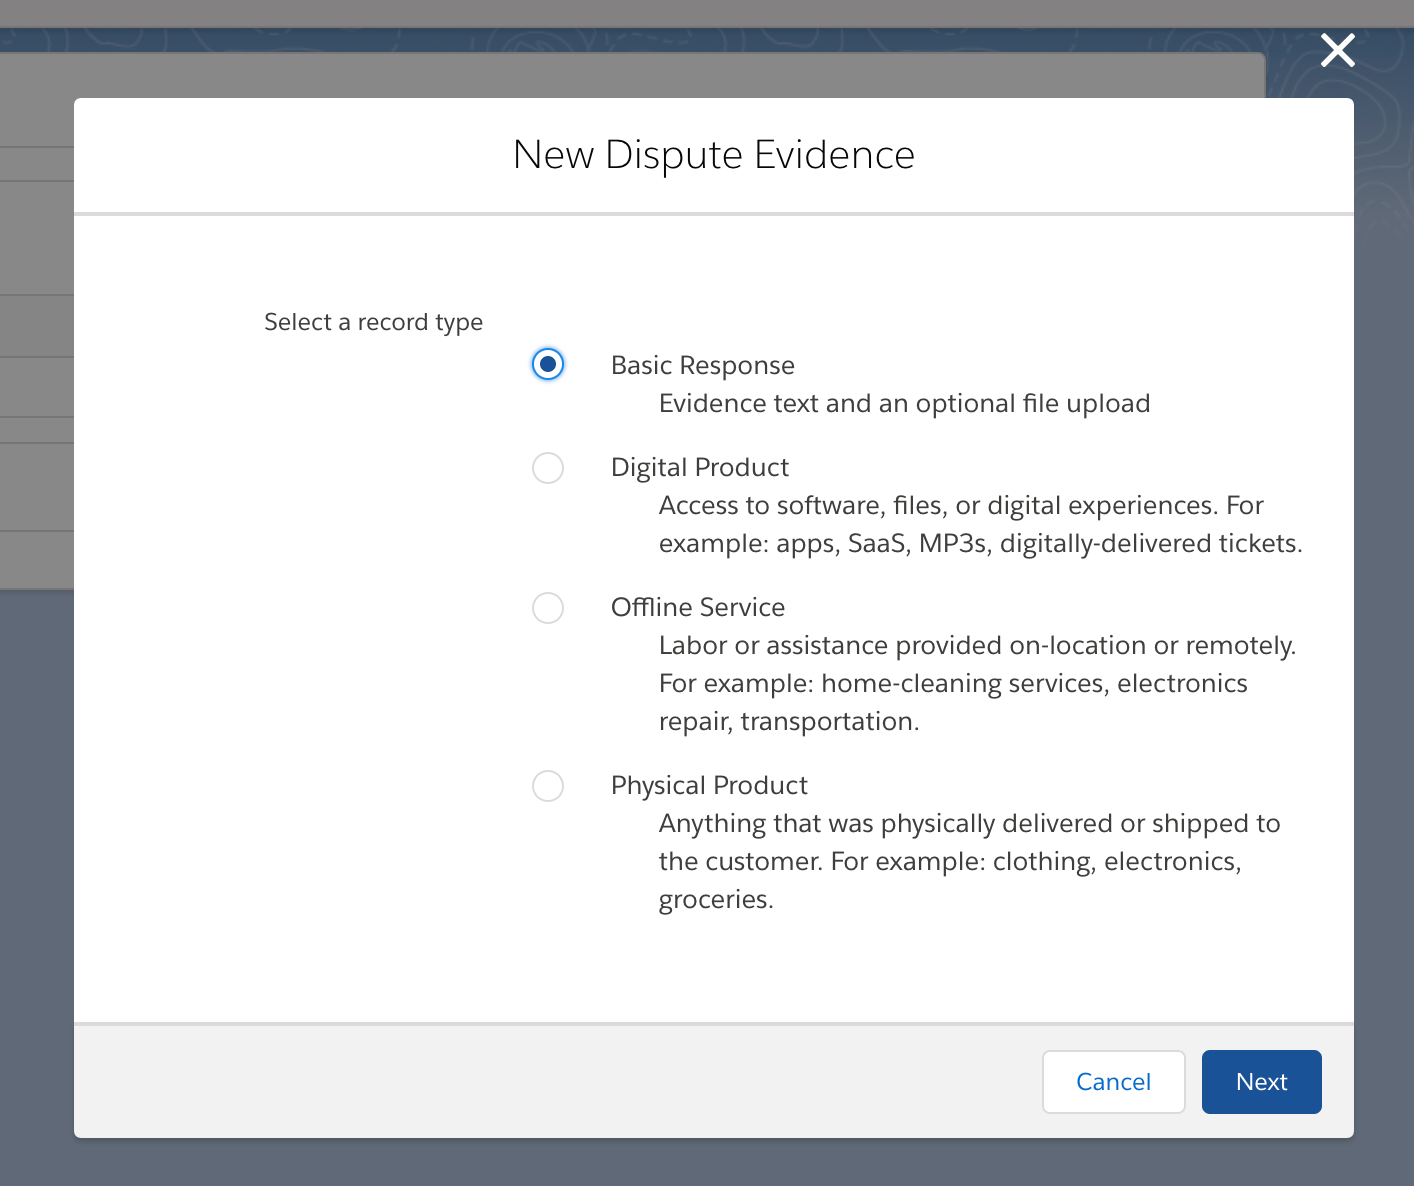
There are four different Record Types for Dispute Evidence. Record Types are used because not all fields are relevant for all Dispute types (as is designed in the Stripe dashboard), however, if you do need access to other fields as part of the Dispute, you can add them to the Page Layout or update the same data set in the Stripe dashboard:
- Basic Response
- Physical Product
- Digital Product or Service
- Offline Service
Creating a New Dispute Evidence Record
- Navigate to the Dispute Evidence object.
Lightning/Classic: Navigate to the Dispute record > under Related Lists, click New for Dispute Evidence.
- Select a Record Type and click Next.
- Product Description, Customer Name, Customer Email, Billing Address, and Customer IP Address are general fields for all Product Categories and should be filled out unless they are not applicable.
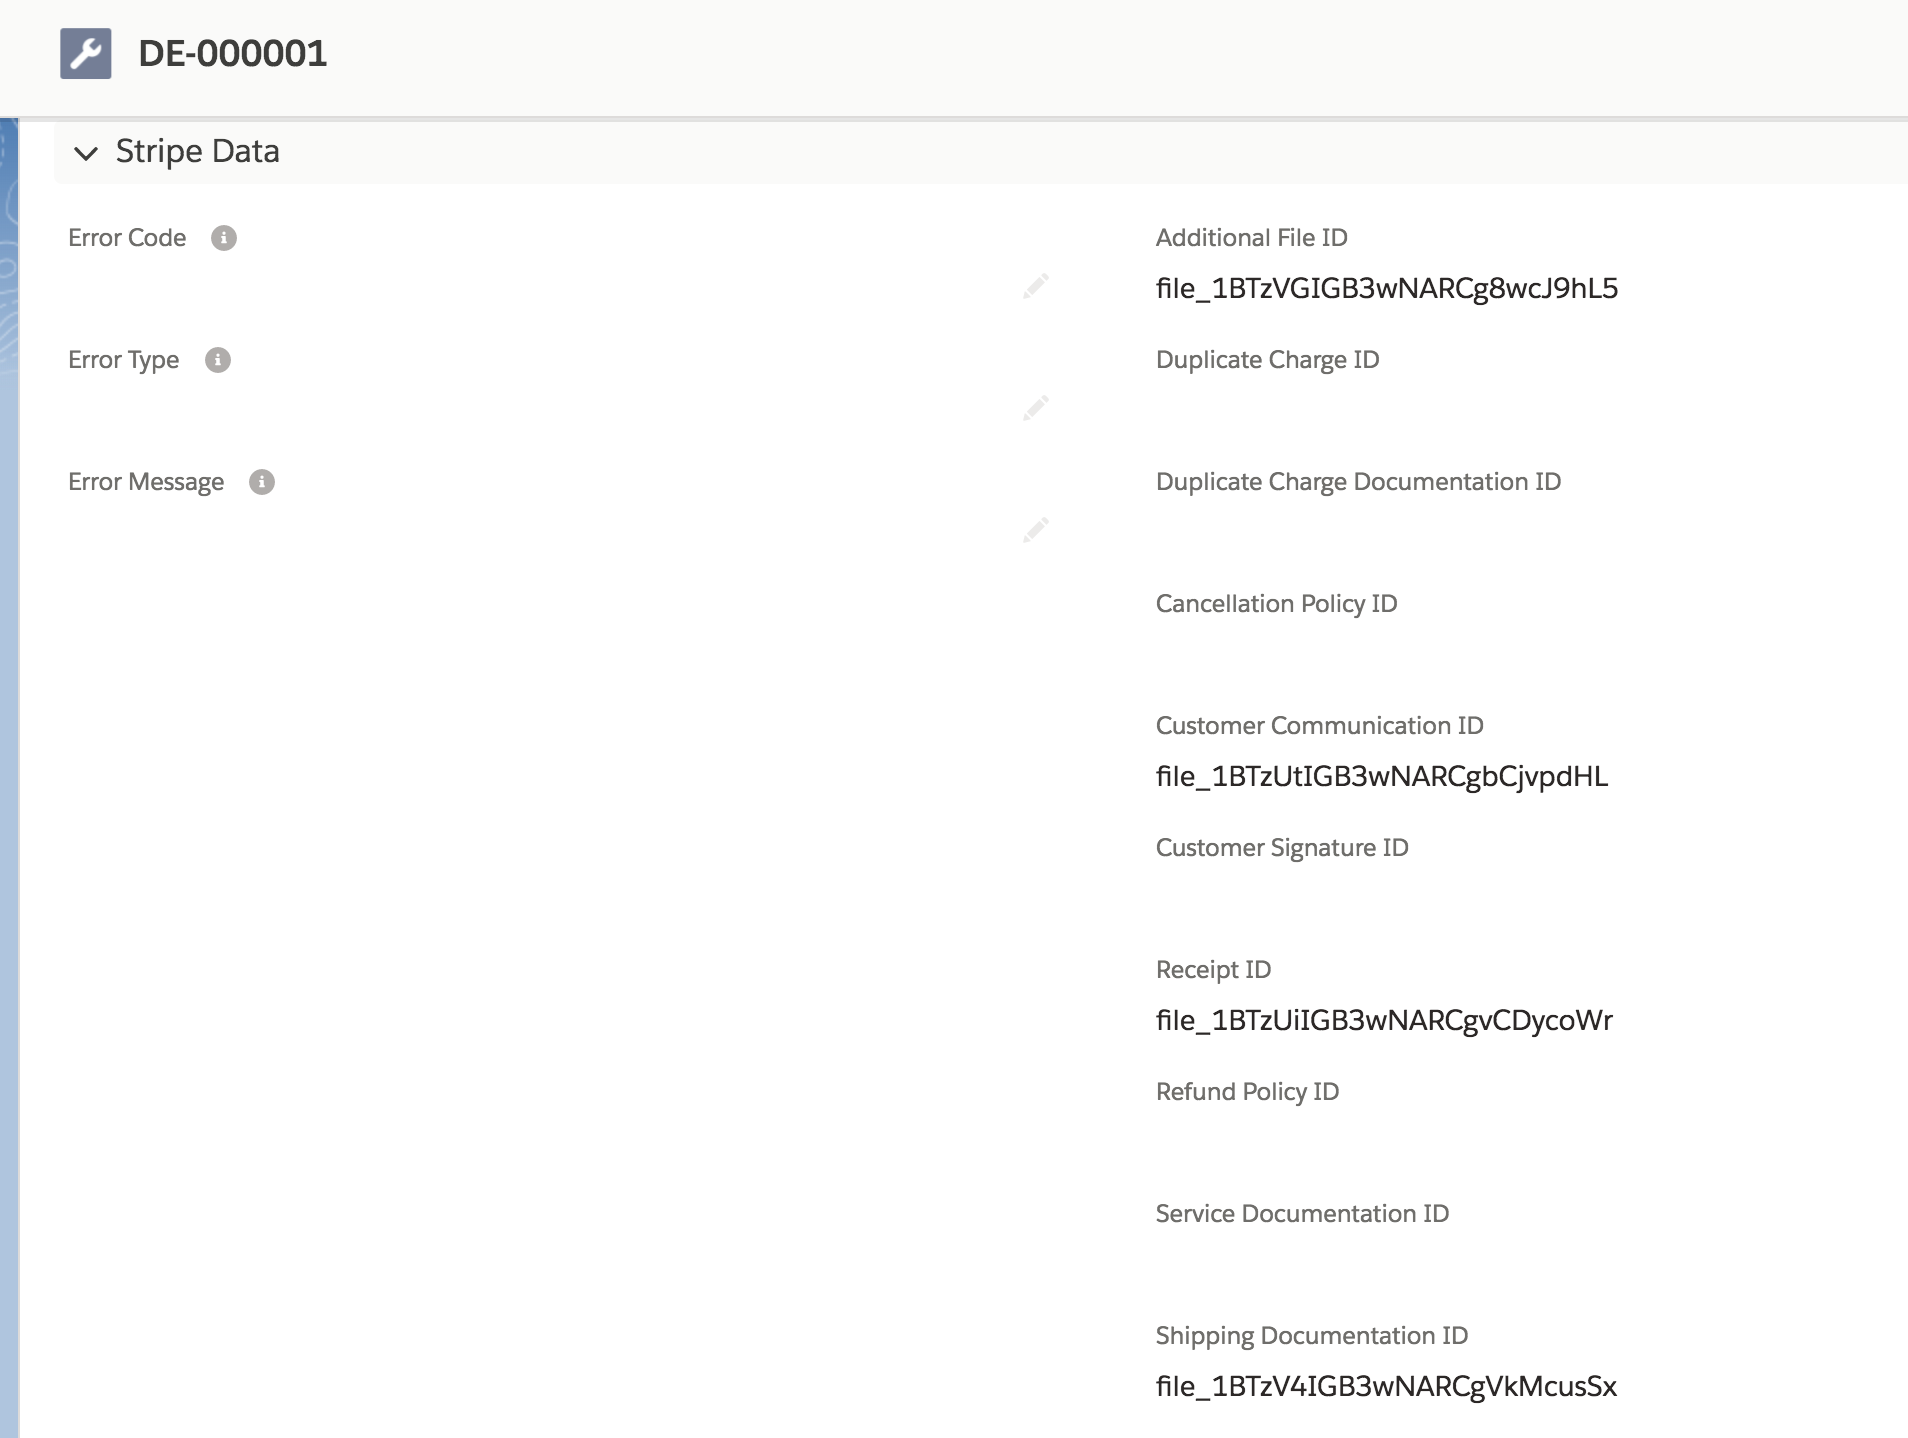
- Stripe Data fields will populate automatically once the Dispute Evidence has been submitted.
Note
Enter as much information as you can into all sections of the Dispute Evidence record. Stripe provides best practice recommendations for preparing suitable responses. Click here.
Upload Documentation
Documentation can be uploaded through the Upload Files button under the Dispute Evidence Related List.
- Click Upload Files.
- Upload all relevant documentation.
- Click the "Title" link of all uploaded file(s).
- Click Go To Content Page (Classic UI - located in the top right of the page) or click Edit File Details (Lightning UI - pencil icon in the top right of the page).
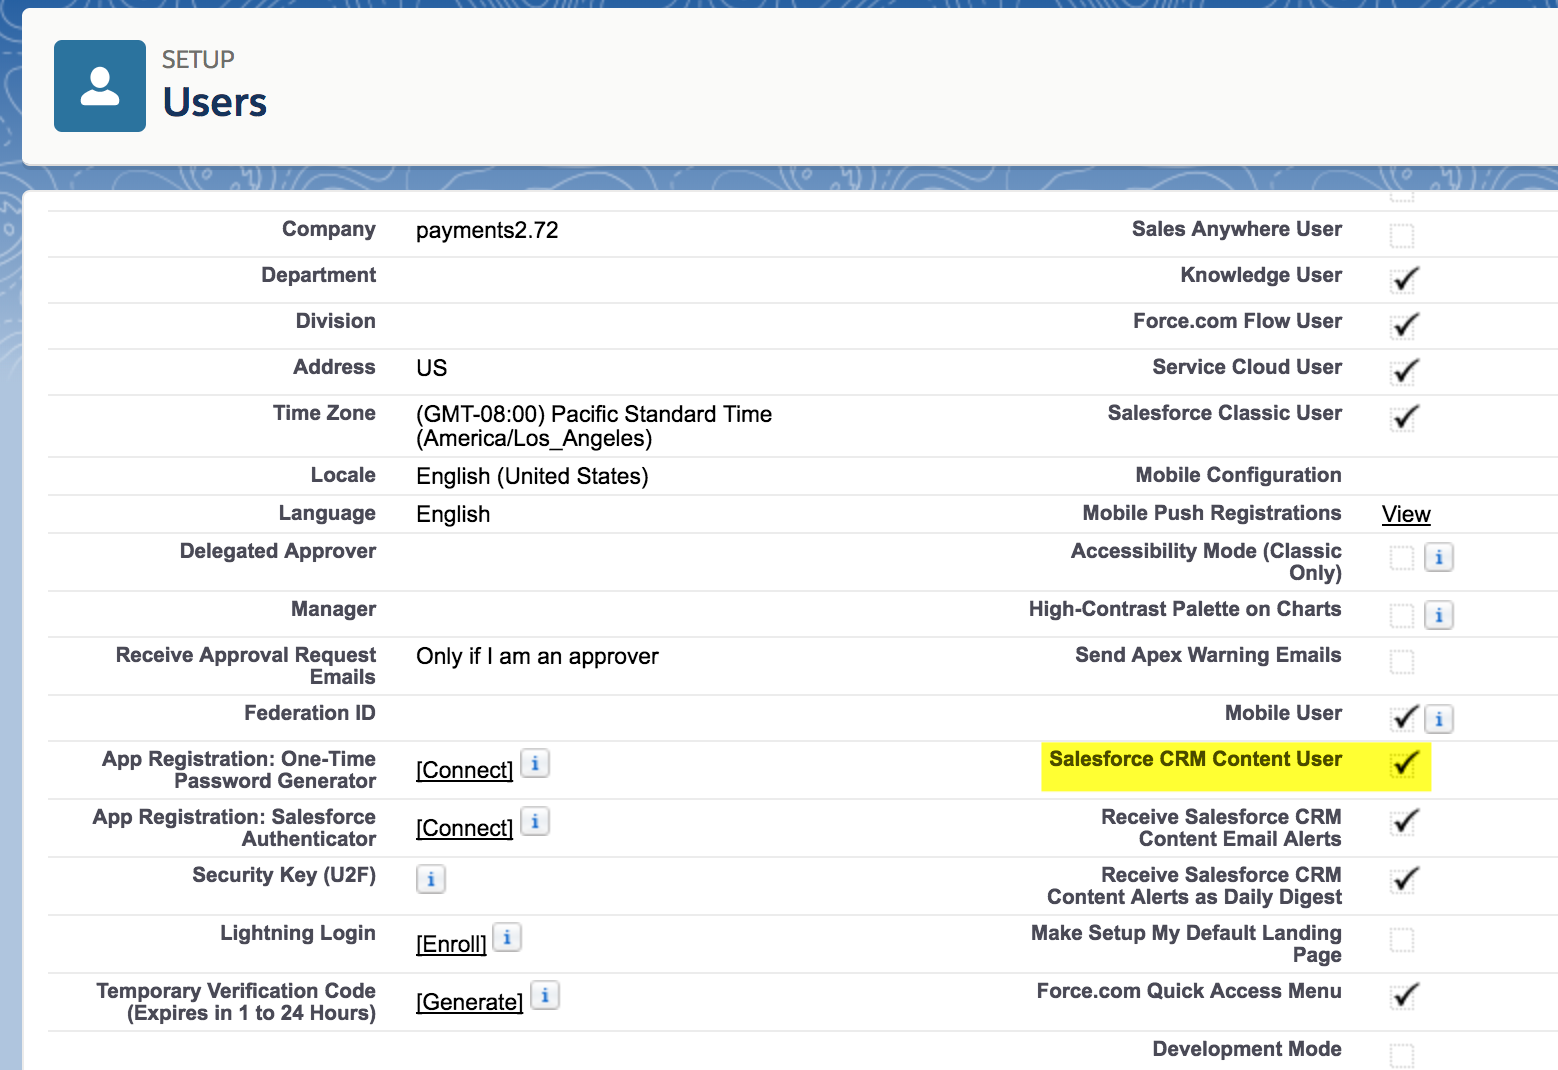
Can't find the Go To Content Page link? You might not have "Salesforce CRM Content User" enabled on your user record.
- Under Content Details, click edit, and select Edit Content Details (Classic UI).
- Click Type and select the available type for your uploaded documentation.Can't see the Type field in Lightning? Edit the Content Version Page Layout to include the Type field.
- Click Save. Perform this process for each uploaded file.
Notes
* There is no limit to the number of files you can upload.
* Upload documents per Type, do not combine all documents into one file upload.
* Evidence cannot be added to Lost Disputes.
- When you have uploaded and defined the Type of your documentation you are ready to submit your evidence.
Submit Dispute Evidence
- Navigate to your Dispute Evidence record.
- Click the Submit button.
Once you click the Submit button, you can no longer edit, delete, or add anything to the record.
What happens when you submit evidence?
- Evidence is submitted to Stripe's financial partner.
- No one can edit, delete, or add anything to the Dispute record.
- Dispute Status = "Under Review".
- Dispute Submission Count = "1".
- Dispute Has Evidence = "TRUE".
Then you wait...50-75 days for a response :)
Submitting Evidence in Stripe:
If you submit evidence in the Stripe Dashboard (as opposed to Salesforce), all evidence information will get created in Salesforce as Webhook Events.
- The Dispute Evidence record will relate to the open Dispute.
- File ID fields will populate with a Stripe Id if a document was uploaded for that particular Type.
NOTE:
Learn more about evidence submission.
Accept, Withdraw, and Refund Disputes
Accept
Closing the Dispute for a charge indicates that you do not have any evidence to submit and are dismissing the Dispute, or acknowledging it as lost. The disputed amount and $15 fee will not be reimbursed.
Steps to Accept a Dispute:
- Navigate to the Dispute record.
- Click Accept Dispute button.
- The Status will be updated to "Lost".
Losing a Dispute will update the original Transaction's Payment Status to "Refunded".
Withdrawn
If your customer has created a Dispute in error and plans to withdraw it, you will need to submit proof in Dispute Evidence that the customer made a mistake.
When a Dispute is withdrawn:
- The Dispute Status = "Won".
- The original Transaction Amount will be refunded to you.
- An adjustment Transaction for $15.00 will be created. This is Stripe reimbursing you for the Dispute fee.
- Payment Status on the original Transaction will update to "Captured."
Refund
If you are refunding a customer that has withdrawn their Dispute, it can take up to 75 days to refund the payment because the disputed claim must close first.
Trying to refund a Transaction before the Dispute is closed will result in a failed Transaction.
Steps for refunding a withdrawn Dispute:
- Once the Dispute Status = "Won", navigate back to the original Transaction.
- Click Refund at the top of the page (Classic UI) or click the drop-down arrow and select "Refund" (Lightning UI).
Additional information on refunding a withdrawn Dispute.
Troubleshooting
If you have received an error with Disputes or have a question, please view our Troubleshooting or FAQ page.