Create a Form
You may run into a Salesforce limit for the ERS Payload when registering more than 20 Attendees simultaneously for an Event with more than 10 Form Elements/Questions. (String maximum length exceeded) This is likely to happen for Form Elements Type = “Text (30,000),” but having 20 Form Elements with Type = "Text" and 20 Attendees in one registration will also cause it.
To prevent this error, reduce the number of Attendees added in one registration or avoid using Form Elements with Type = “Text (30,000).”
Go to the Forms tab.
Click New.
Enter a to create a Form Name.
Select a Type.
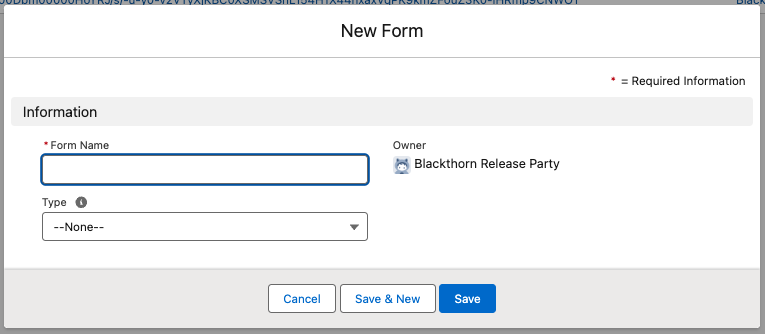
Click Save
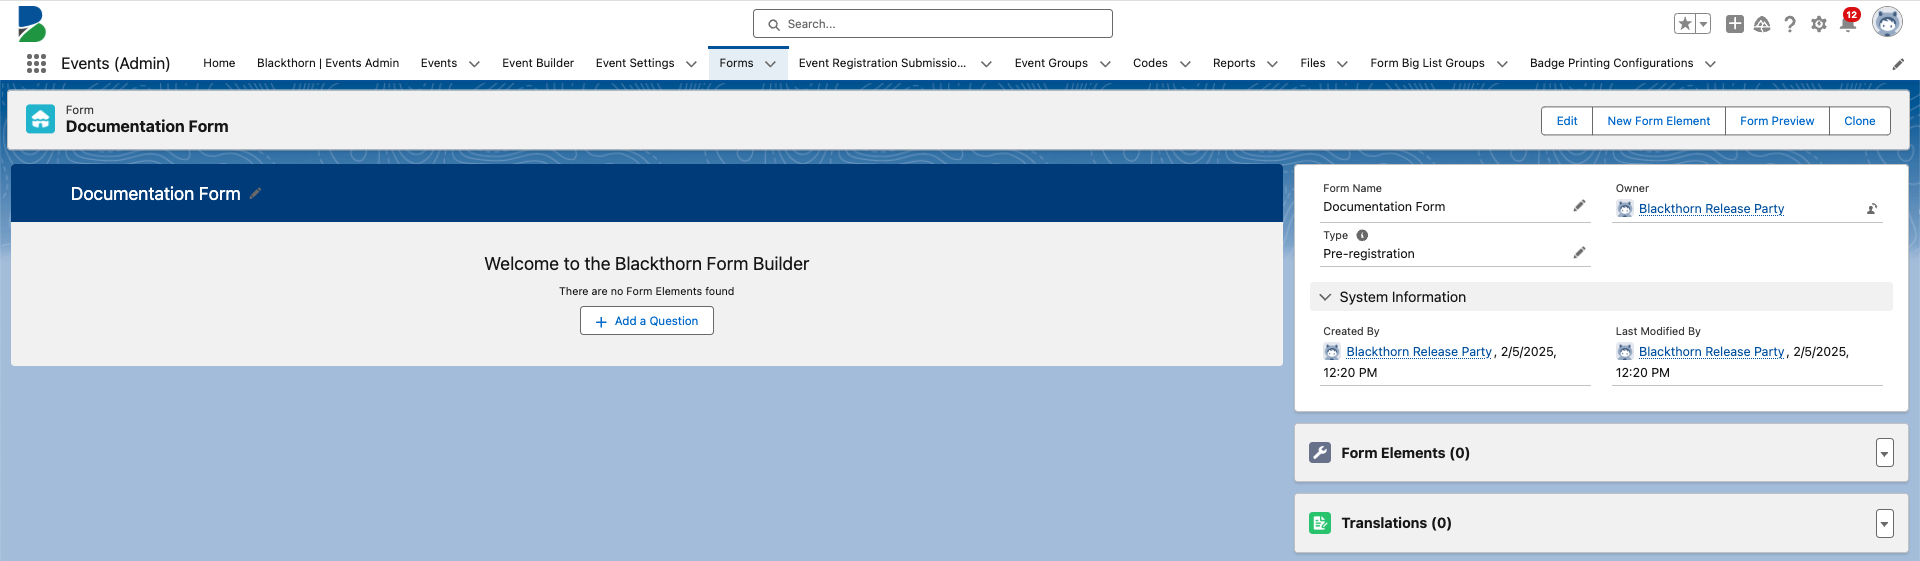
Clone a Form
If you need to clone a Form, click the Clone button on the Form record you want to clone and follow the steps below to add/edit the Form Elements.
Add Form Elements
Relationship Settings and Form Mapping
We do not recommend mapping Form Elements to the Attendee object’s First Name, Last Name, and Email fields. Doing so can create an unsupported process for creating and updating Attendee records.
The process of creating an Attendee record includes configured relationship settings. If mapping from a Form to the Attendee object’s First Name, Last Name, and Email fields occurs, the newly created Contact and/or Account fields will not be populated because the Form mapping disrupts the Attendee record creation process.
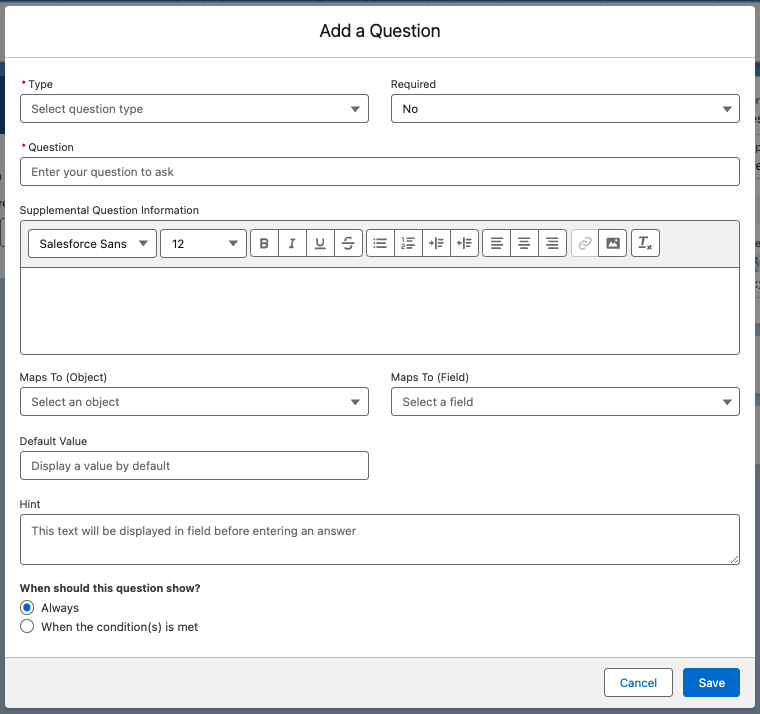
Click + Add Question.
Complete the following fields.
Type (required) - select the type of question. For this example, we selected “Pre-registration.” Click here for more information about the different types of questions.
Required - select if the question is required.
Question (required) - enter the question.
Supplemental Question Information – enter additional information to help an Attendee answer the question.
Maps To (Object) - define the object where an Attendee’s answer will go.
Maps To (Field) - define the field on the object where an Attendee’s answer will go.
Default Value - enter the value that will automatically appear on the registration form.
Default Checkbox Value - defines the default value (checked or unchecked) for a checkbox question.
Hint - enter information that will help an Attendee answer the question.
When should this question show?
select “Always” if there are no additional conditions for this question.
Select “When the condition(s) is met” to add conditions and complete the following fields.
If the Answer of Question
Operator
Value
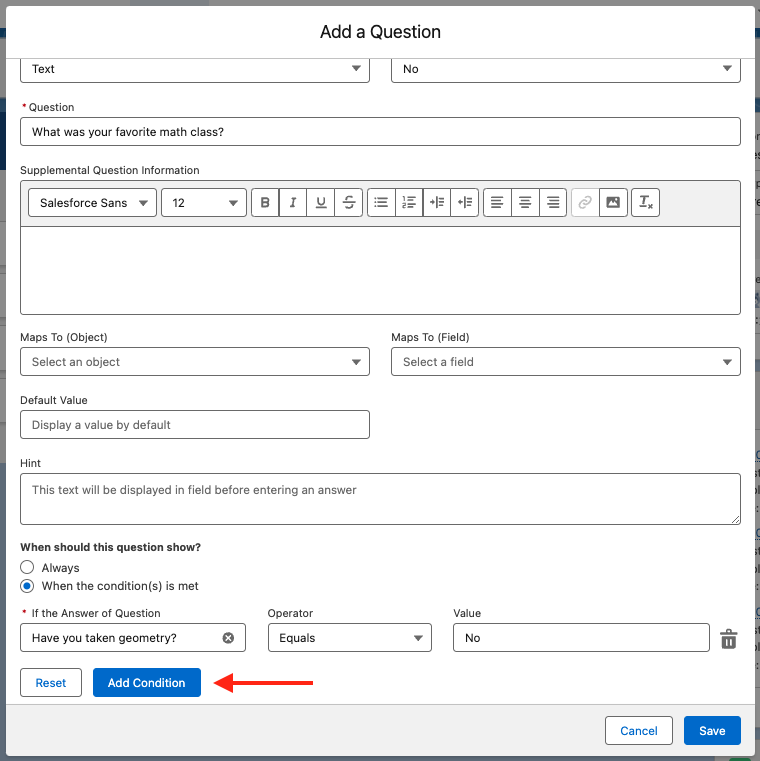
Use the Add Condition button to add more conditions.
Click Save.
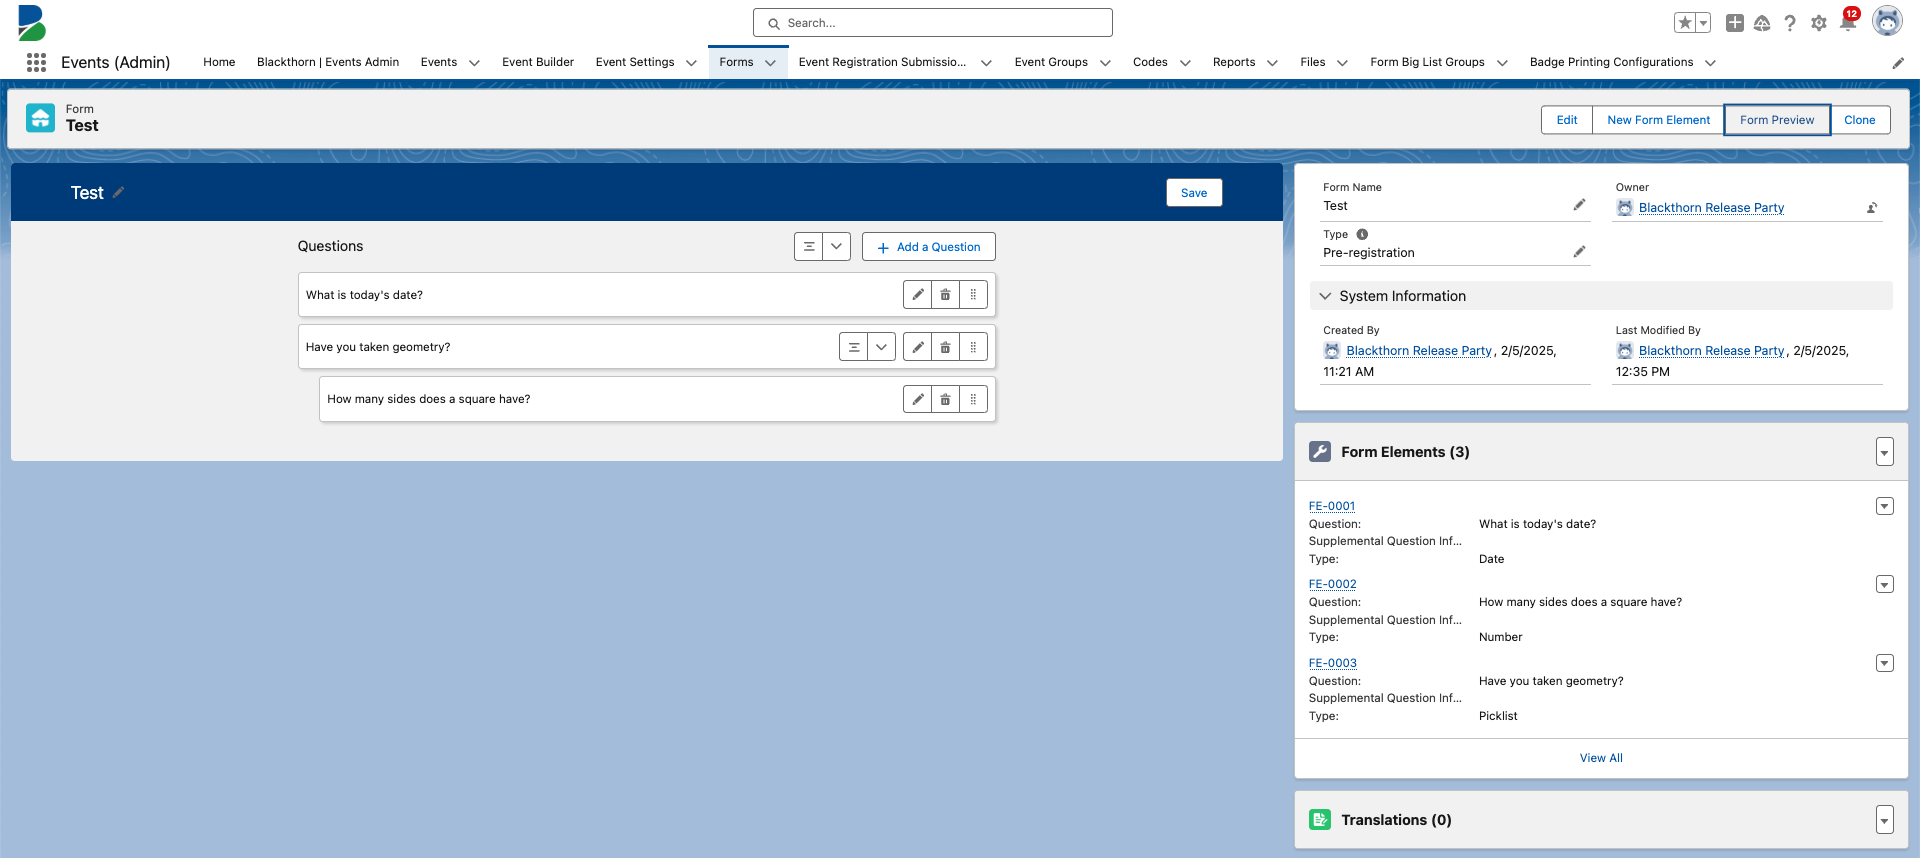
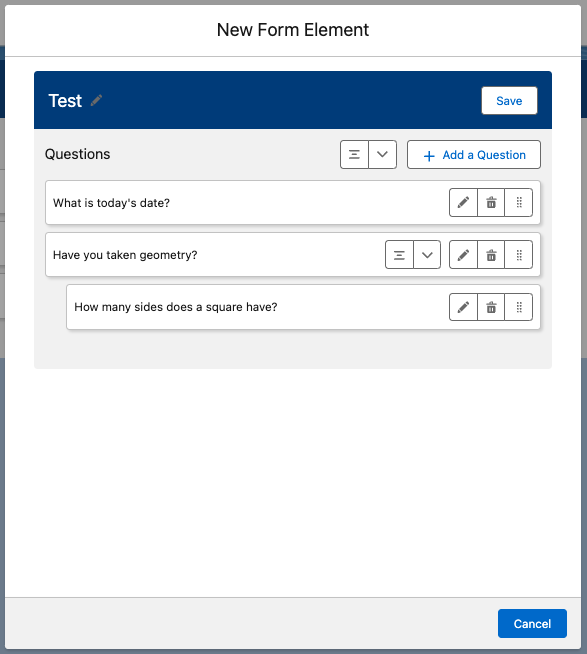
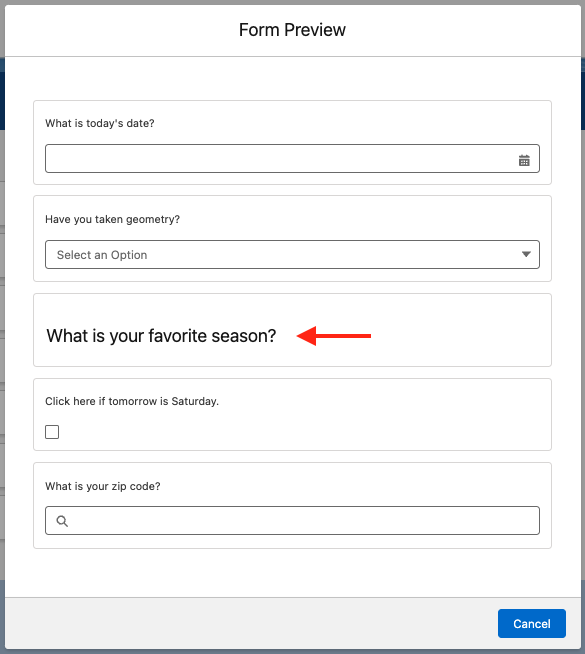
Once you are done creating Form Elements, your Form will look similar to the one below.
Sorting Form Elements
When using Events Version 5.0 or higher, use the Forms UI to re-arrange the questions’ (Form Elements) order. Questions will appear in the order which they were added.
To change the sort order of the questions, tap the Sort Order icon and drag and drop the question at the place where you want it. Click Save to save the new order.
Important Note: Manually updating the Sort Order field when nested questions are present may result in unexpected behaviors.
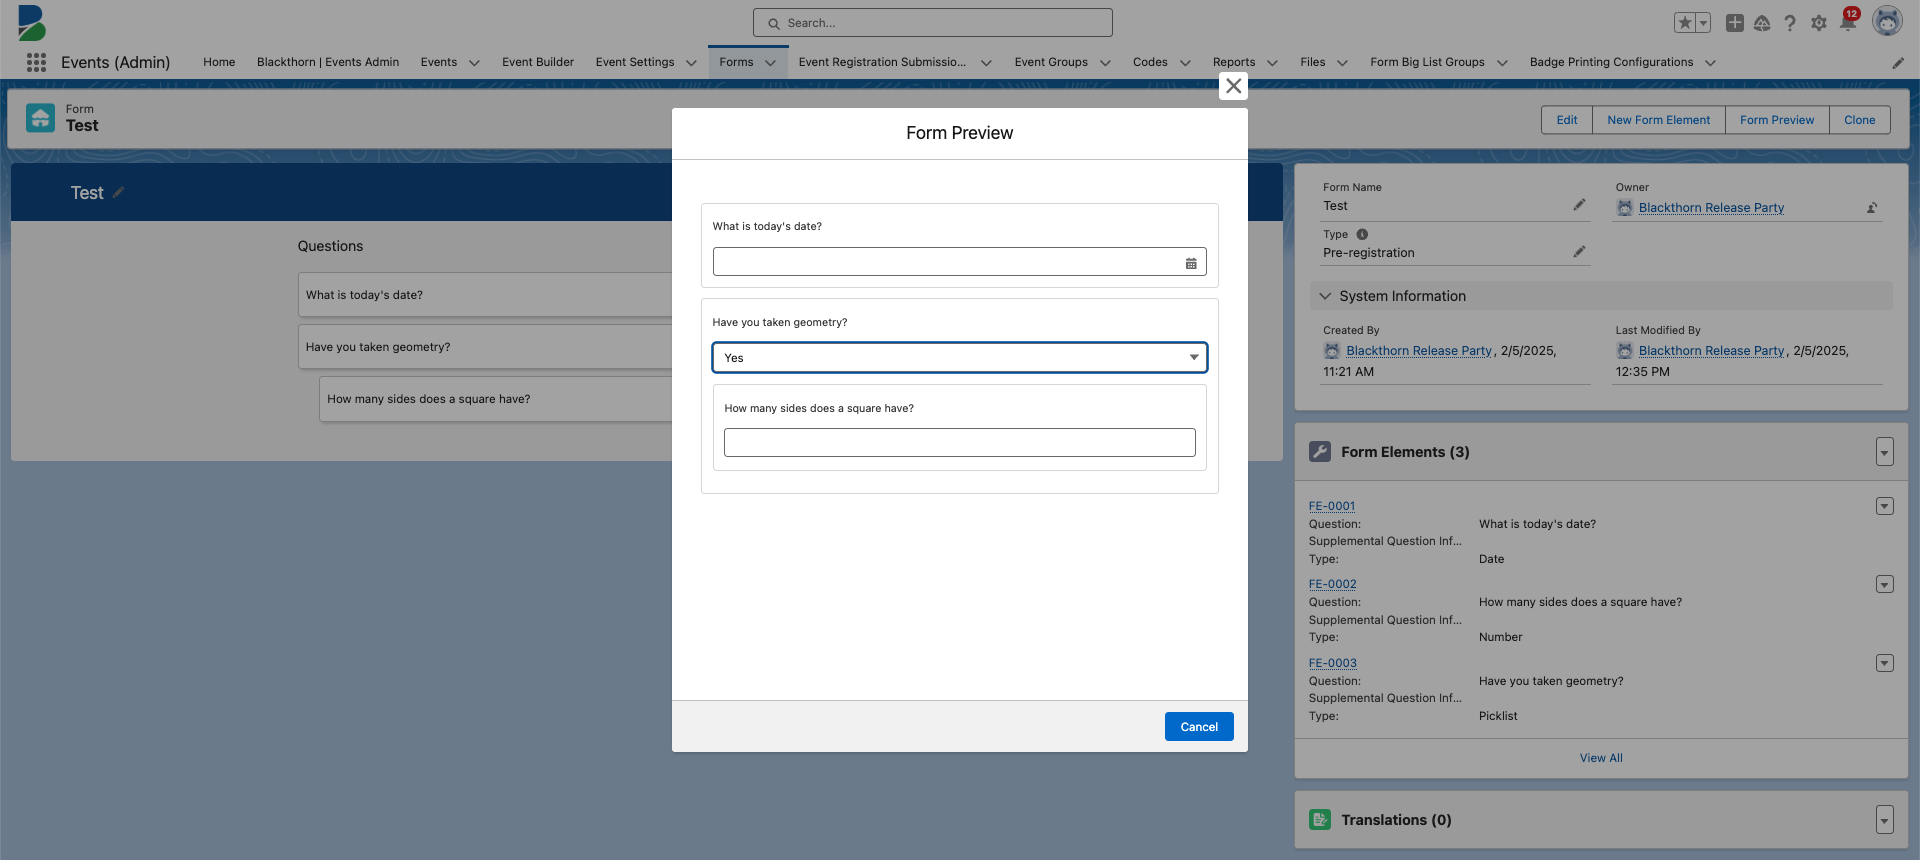
Form Preview
Click the Form Preview button to see what your Attendees will see.
Conditional Questions
Spaces and Picklist Values
When creating multiple Conditional Questions on a Form Element, do NOT add a space after entering a picklist value. Picklist values that include a space after the value will not save properly after an Attendee clicks Save.
The answer to a conditional question determines which question (Form Element) will be asked next. This type of question can include multiple levels of nested conditional questions, giving Event Organizers the ability to gather complex information.
The following types of Form Elements allow for conditional questions, including multiple levels of nested conditional questions. A single Form Element can include up to 200 Conditional Form Elements (questions).
Checkbox
Date
Email
Multi-Select Picklist
Picklist
Text
Text (30,000)
URL
Setup
Click the New Form Element or + Add Question button.
Complete the following fields.
Type (required)
Required
Question (required)
Supplemental Question Information
Maps To (Object)
Maps To (Field)
Default Value
Default Checkbox Value
Hint
In When should this question show?, select “When the condition(s) is met.”
Select a question in If the Answer of Question.
Choose an Operator.
Enter a Value.
Click Add Condition if you need to add more conditions.
Click Save.
Example
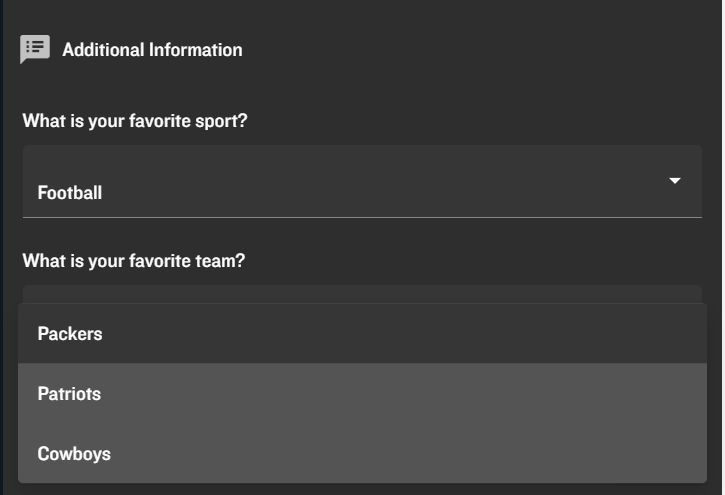
If you want to find out which sports team is an Attendee’s favorite, but don’t want to use a giant picklist, a conditional question can help narrow down the potential answers.
The first question you could ask is, "What is your favorite sport?" Depending on how an Attendee answers that question, the question, "What is your favorite team" will change. If an Attendee selects "Baseball," they will see baseball teams. If they select "Football," a list of football teams will be visible.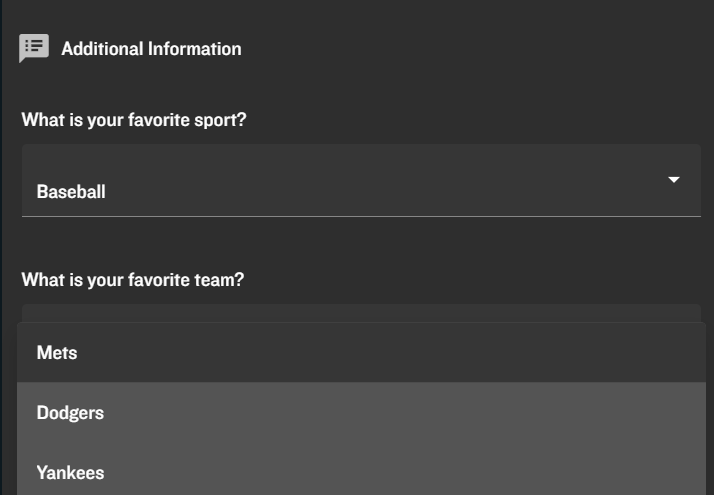
Form Element Types
Big List Group (Type Ahead Picklist)
Form Big List Groups are picklists with thousands of options. Using a Form Big List Group gives Attendees the option to search for the answer they'd like to select.
Setup
From the App Launcher, navigate to Form Big List Group object.
Click New in the top-right-hand corner.
Enter a name in the Form Big List Name field.
Click Save.
Example
For this example, we will use zip codes. Imagine if an Attendee had to scroll through thousands of zip codes just to find where they live. That’s very inefficient and a poor user experience. By using a Form Big List Group, an Attendee can simply search for their answer and click it.
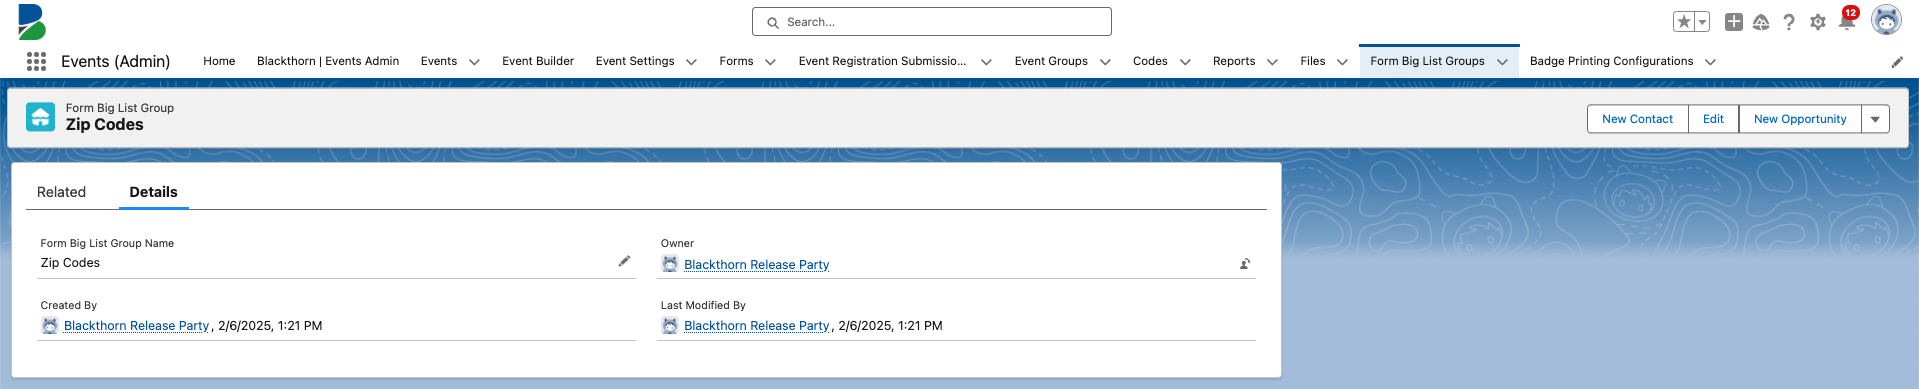
From the App Launcher, navigate to Form Big List Group.
Click New in the top, right-hand corner.
Enter “Zip Codes” in the Form Big List Name field.
Click Save.
Click the Related List tab.
Click New next to the Form Big List Option.

Complete the following fields.
Option Name: The value that is saved in Salesforce as the answer.
Option Value: The text an Attendee sees when completing the checkout process.
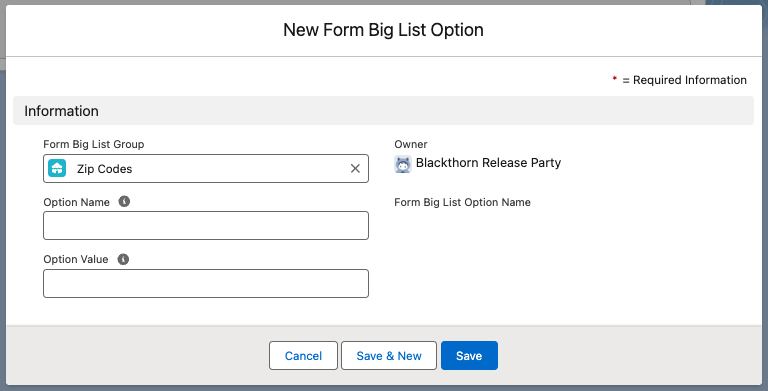
Click Save.
Navigate to an existing Form or create a new one.
Create a new Form Element.
Set the Type field to “Big List Group.”
Set the Question field to “What is your zip code?”
Set the Big List Group field to “Zip Codes.”
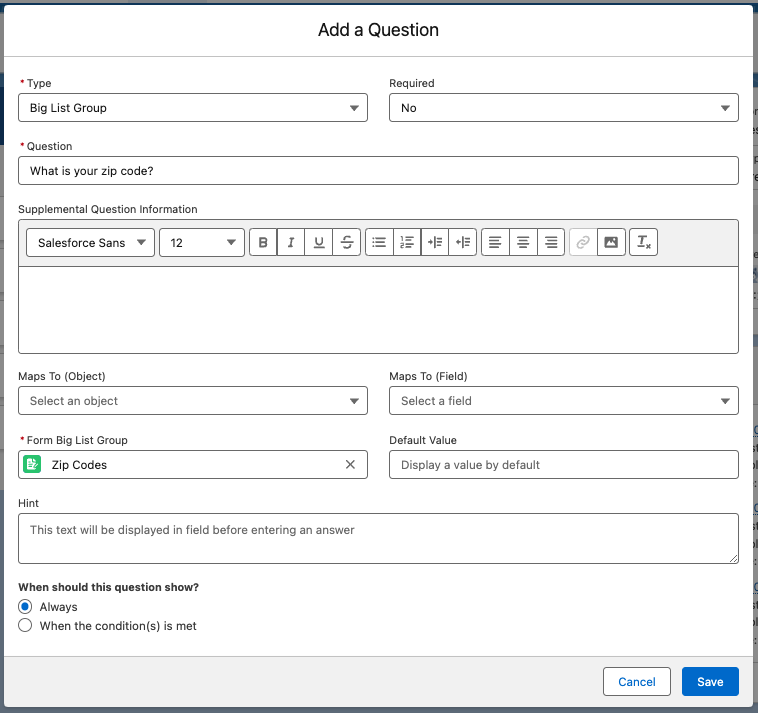
Click Save.
Results
The user is asked to enter their zip code.
.png)
They enter “540” and only see the options that start with “540.”
.png)
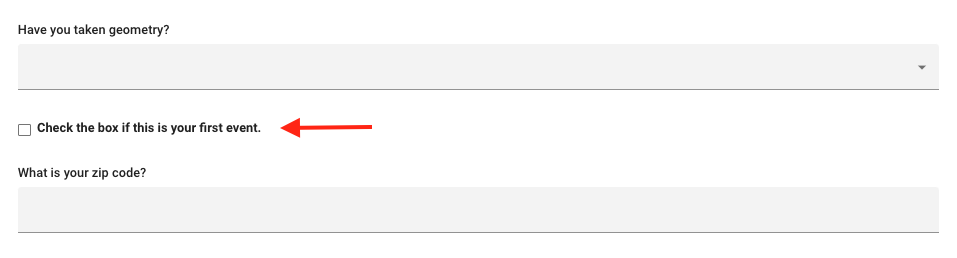
Checkbox
Use the “Checkbox” option to ask a question that requires a yes or no answer when you don’t want to create a picklist question.
Setup
Set the Form Element Type field to “Checkbox.”
Let Attendees know if the question is Required.
Enter a Question that can be answered by clicking a checkbox. In this example, we entered, “Check here if this is your first event.”
Complete the remaining fields as needed.
Set When should this question show? to “Always.”
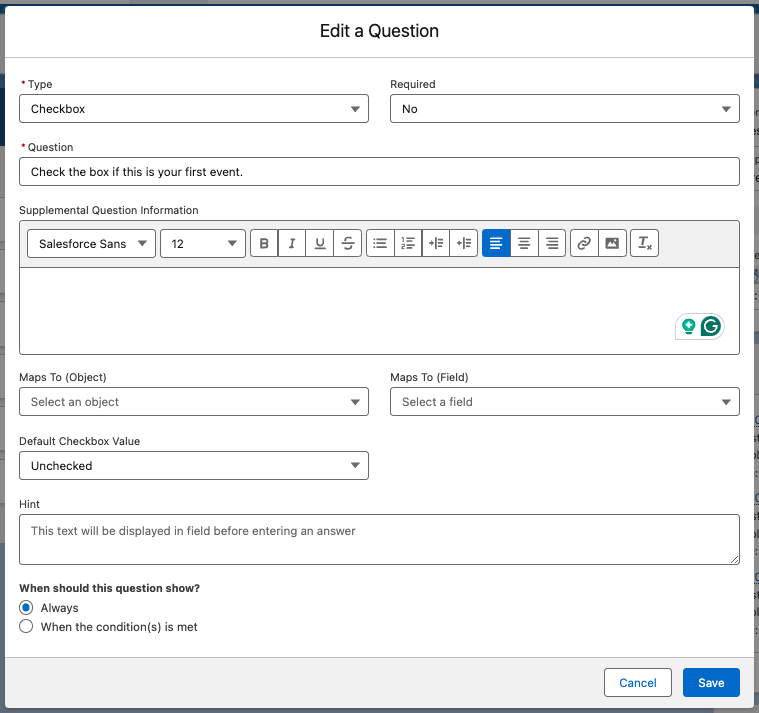
Click Save.
Example
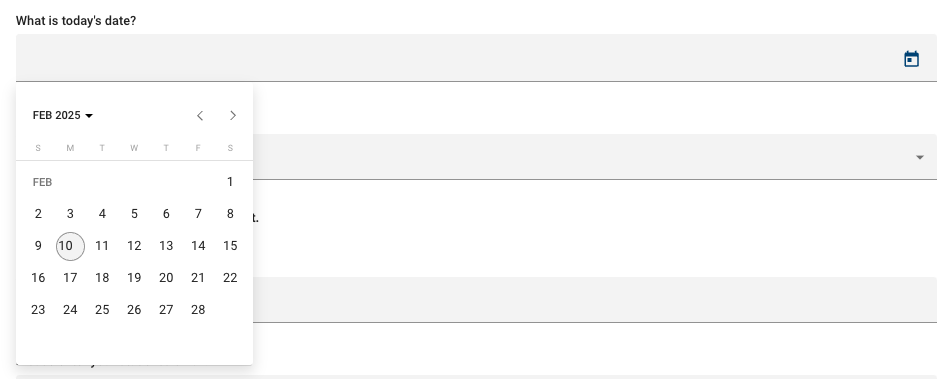
Date
Use this Form Element Type to ask a question that requires a date for the answer.
Setup
Set the Form Element Type field to “Date.”
Let Attendees know if the question is Required.
Enter a Question that requires a date for an answer. In this example, we entered, “What is today’s date?”
Complete the remaining fields as needed.
Set When should this question show? to “Always.”
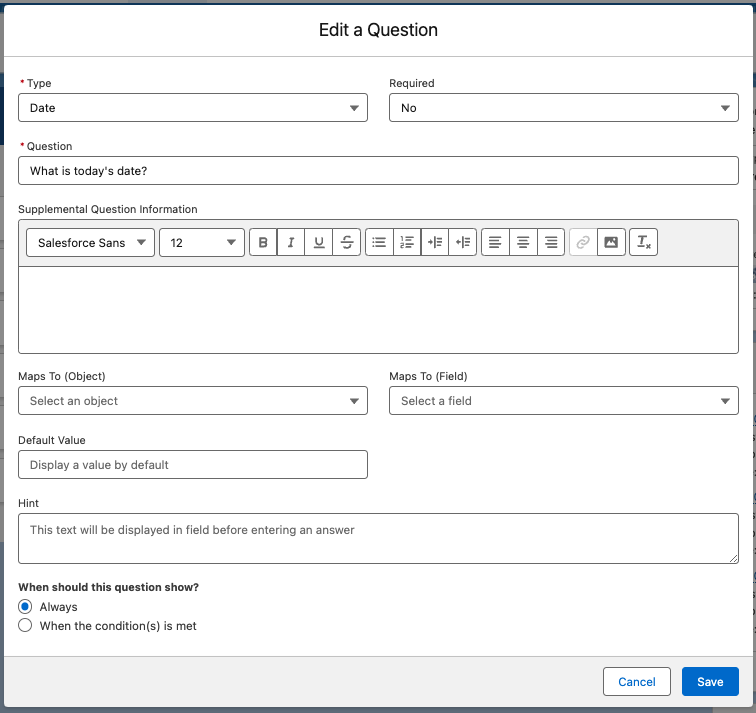
Click Save.
Example
Dividers
Dividers allow Event Organizers to add a blank space between questions or include more information for Attendees to see!
Setup
Set the Form Element Type to “Divider.”
If you don’t see “Divider in the picklist, go to the Blackthorn | Events Admin tab.
Click Upgrade.
Click Update Picklists.
Enter the text you want Attendees to see in the Question field.

Any text in the Supplemental Question Information field will be displayed at the bottom of the Form.
Set When should this question show? to “Always.”
Click Save.
Example
Email questions allow Event Organizers to ask for an email that isn’t included in the Attendee Form.
Setup
Set the Form Element Type field to “Email.”
Let Attendees know if the question is Required.
Enter a Question that requires an email for an answer. In this example, we entered, “Please enter your student’s email.”
Complete the remaining fields as needed.
Set When should this question show? to “Always.”
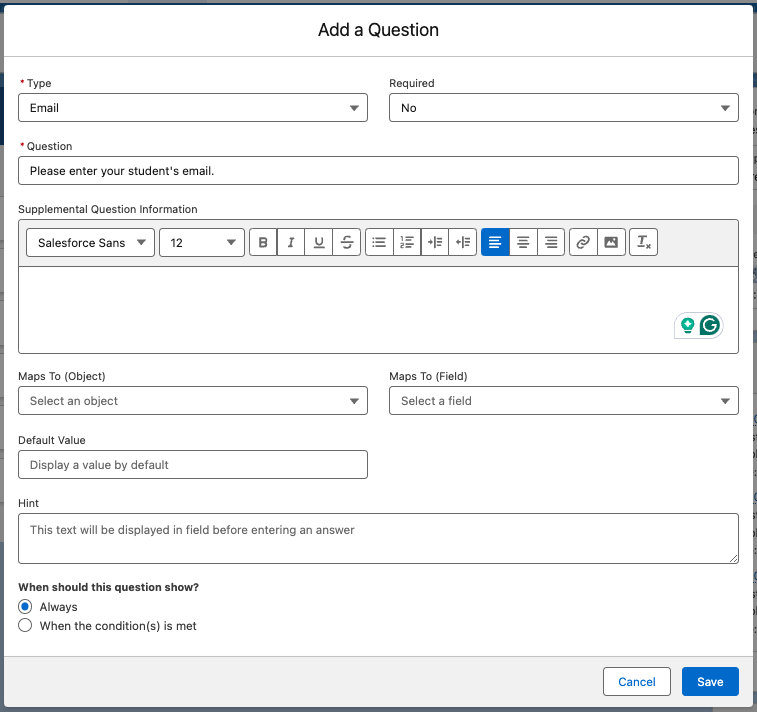
Click Save.
Example

File Upload
Uploading files is now part of the Form Element object. Files can be written to anything in the Maps To (Object) picklist. After checkout, the file will be uploaded and added to Salesforce Files and the object defined in the Maps To (Object) picklist.
Please keep in mind that files can take up to five minutes to relate to their respective record.
Supported File Types
All image file formats (for example, .jpg, jpeg, .png, .gif, .svg) and
PDF (.pdf).
File Access
Since only authorized users can access/view the files section in Salesforce, they are the only ones who can access files that are uploaded as part of a Form Element. There can only be one authorized user for Blackthorn Events, which means this user will be listed as the creator of all records (i.e. Attendees, files) created during registration from your Event webpage. All other users must be given specific access to the files under the authorized user.
Share Files Uploaded via Form Elements
Salesforce offers several ways to share files uploaded via Form Elements with = “File”. To learn more, select an option on Salesforce’s File Privacy and Sharing document that meets your requirements.
Setup
Set the Form Element Type to “File Upload.”
Enter the text you want the Attendee to see in the Question field.
Files that Attendees upload will be added to the Files section of Salesforce. They can also be added as a Related List on the Attendee/Contact/etc object that is defined in the Maps To (Object) picklist. This will allow Event Organizers to easily see the file the Attendee uploaded.
Example
Hidden Form Elements
To map a hidden Form Element to a field on a different object, you must assign a default value to the hidden Form Element. This default value will then map to the configured field after an Attendee completes the registration process.
Examples
Map to a Checkbox
If you want to map a hidden Form Element to a checkbox on a different object, set the checkbox’s default value to true. When the Form Submission Answer is processed, then the checkbox field will be checked.
Map to a Text or Picklist Field
If you want to map a hidden Form Element to a text or picklist field on a different object, set the hidden Form Element’s to the desired text or value. That value will then be mapped to the text or picklist field when the Form Submission Answer is processed.
Multi-Select Picklist
Multi-select picklist questions allow Event Organizers to ask questions that can have one or more answers.
Setup
Set the Form Element Type field to “Multi-Select Picklist.”
Let Attendees know if the question is Required.
Enter a Question that such as “Please select your top two choices.”
Enter multiple Picklist Values. In this example, we are using “Art History,” “Literature,” “Biology,” “Finance,” and “Statistics.” IMPORTANT: Do not add a space after entering a picklist value. Picklist values that include a space after the value will not save properly after an Attendee clicks Save.
Complete the remaining fields as needed.
Set When should this question show? to “Always.”
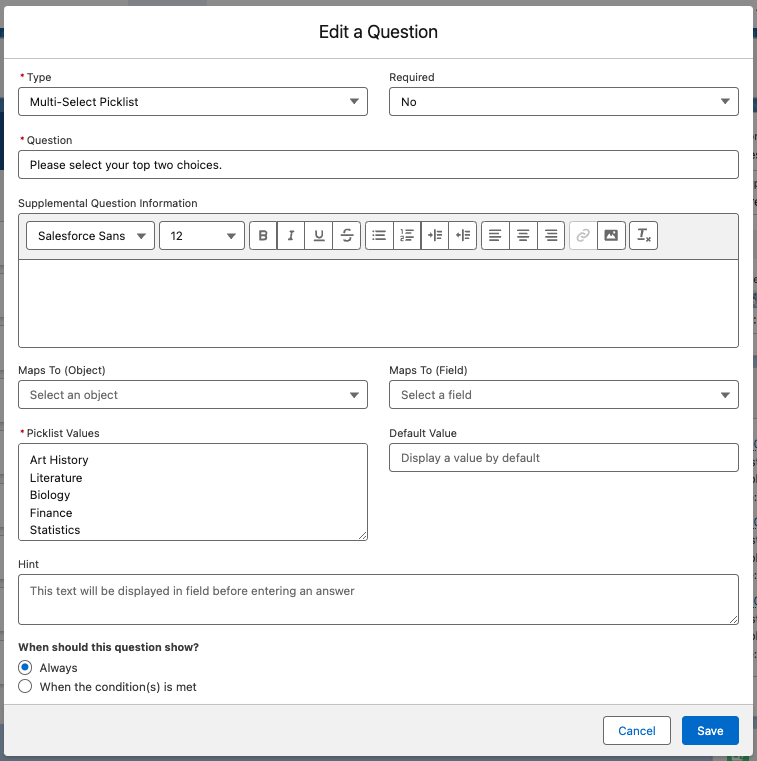
Click Save.
Example

Number
Mapping Phone Numbers
A value in a Form Element with Type = “Number” cannot be mapped to Phone Number fields in Salesforce. We recommend using a Form Element with Type = “Text” if you need to map a phone number to a Phone Number field.
Number questions allow Event Organizers to ask a question that requires a number for an answer. It might be as simple as “How old are you” or complicated like “What is the derivative of 5?”
Setup
Set the Form Element Type field to “Number.”
Let Attendees know if the question is Required.
Enter a Question such as “How many sides does a square have?”
Complete the remaining fields as needed.
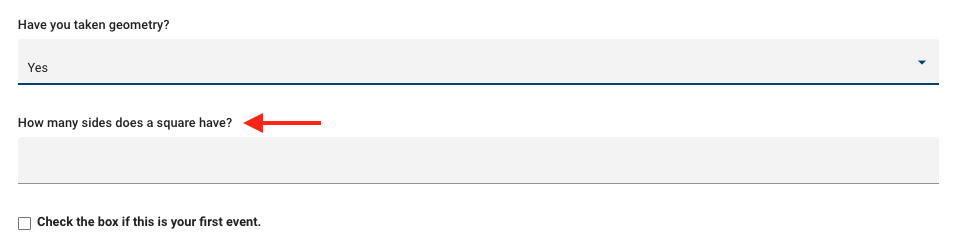
In this example, the Form Element is part of a conditional question, so When should this question show? is set to “When the condition(s) is met.”
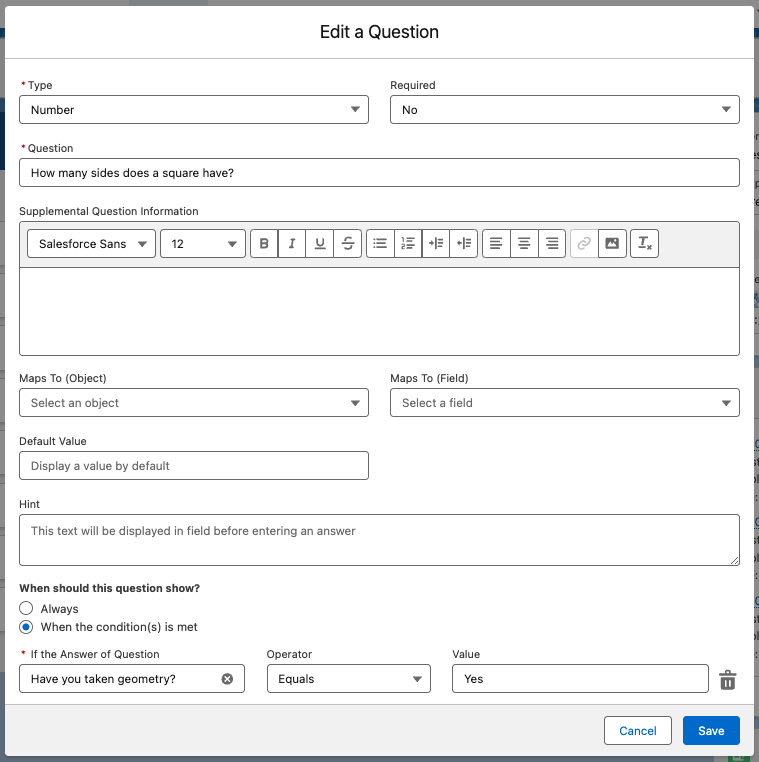
Click Save.
Example
UTM Parameter
UTM parameters are tags that you can add to a URL. When the link is clicked, the tags are sent back to Google Analytics (or your preferred system) and tracked. The tags are stored in the Attendees' local storage for 30 days after clicking the Event link. Click here for more information about UTM parameters.
Setup
Set the Form Element Type to “Parameter.”
Let Attendees know if the question is Required.
Enter the text in the Question field. The text entered here will be a part of the original URL.
Complete the remaining fields as needed.
Set When should this question show? to “Always.”
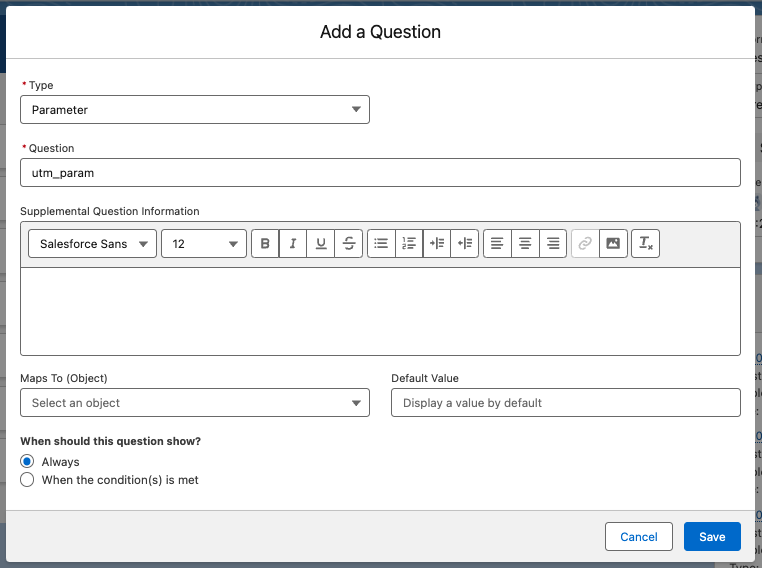
Click Save.
Example
Parameter question types will not show up in the Additional Information section. Here is an example of a URL that includes the parameter.
"https://events.blackthorn.io/en/3h2AhtF7/g/HNex28aSVs/test-all-custom-question-types-4a123hZrGq/overview?utm_param=utm_param_Value"
Notice that at the end of the URL, "?utm_param=utm_param_Value," is the text, "utm_param" that was defined in the image above.
After the user navigates anywhere in the URL, the “?utm_param=utm_param_Value” disappears from the URL. Even though the text isn't visible, all the information will still be tracked.
Picklist
Picklist questions allow Event Organizers to present a list of possible answers to their questions. We suggest keeping the list of answers to a manageable amount. For example, scrolling through 20 or 30 options can be frustrating for Attendees. If you need a large number of potential answers, consider using the Big List Group option.
Setup
Set the Form Element Type to “Picklist.”
Let Attendees know if the question is Required.
Enter a Question such as “Which entrée would you like for lunch?”
Enter the following options in the Picklist Values field: “Chicken,” “Beef,” and “Vegan.” Separate each picklist option with a return or paragraph break. (See the image.) IMPORTANT: Do not add a space after entering a picklist value. Picklist values that include a space after the value will not save properly after an Attendee clicks Save.
Complete the remaining fields as needed.
Set When should this question show? to “Always.”
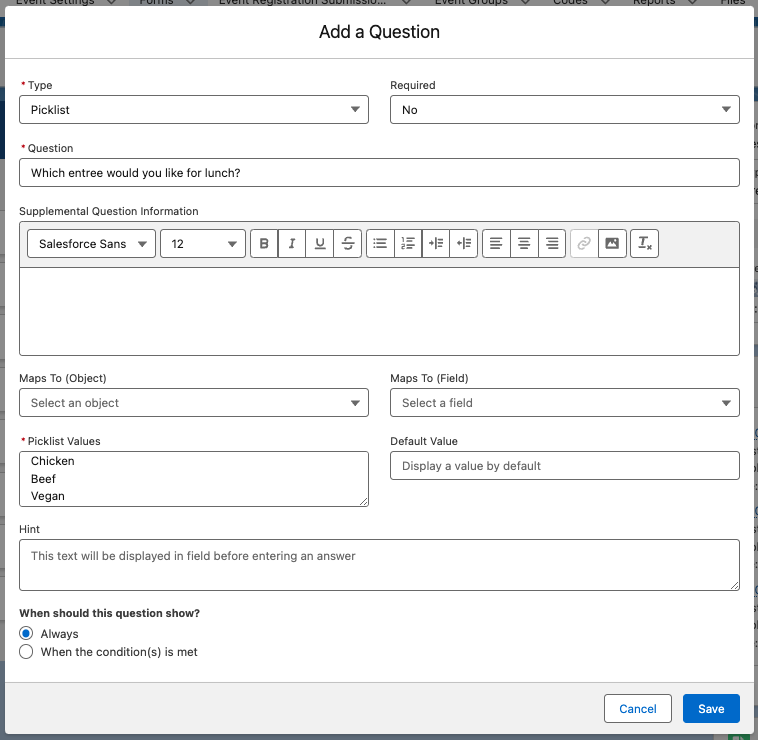
Click Save.
Example

Text
Event Organizers should use the Text question when the answer is less than 255 characters. If the answer will be more than 255 characters, use the “Text (30,000)” option.
Setup
Set the Form Element Type to “Text.”
Let Attendees know if the question is Required.
Enter a Question such as “Please enter five words that describe what it means to be a student.”
Complete the remaining fields as needed.
Set When should this question show? to “Always.”
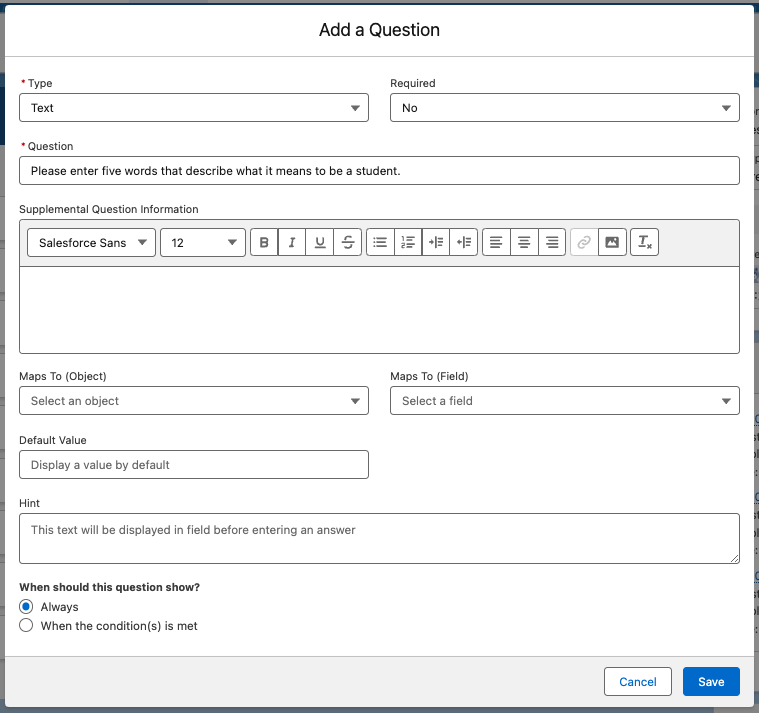
Click Save.
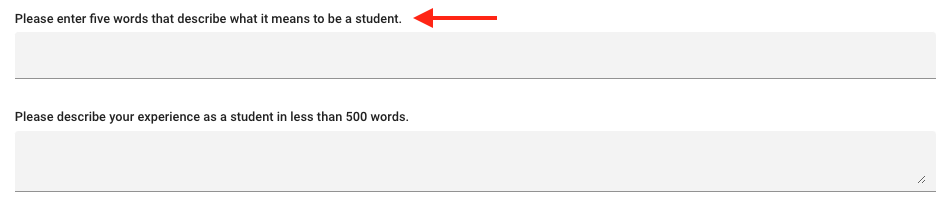
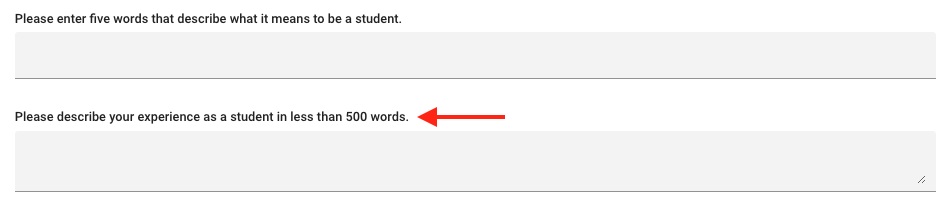
Example
Text (30,000)
If an Attendee’s answer will be more than 255 characters, Event Organizers must use the “Text (30,000)” option.
Setup
Set the Form Element Type to “Text (30,000).”
Let Attendees know if the question is Required.
Enter a Question such as “Please describe your experience as a student in less than 500 words.”
Complete the remaining fields as needed.
Set When should this question show? to “Always.”
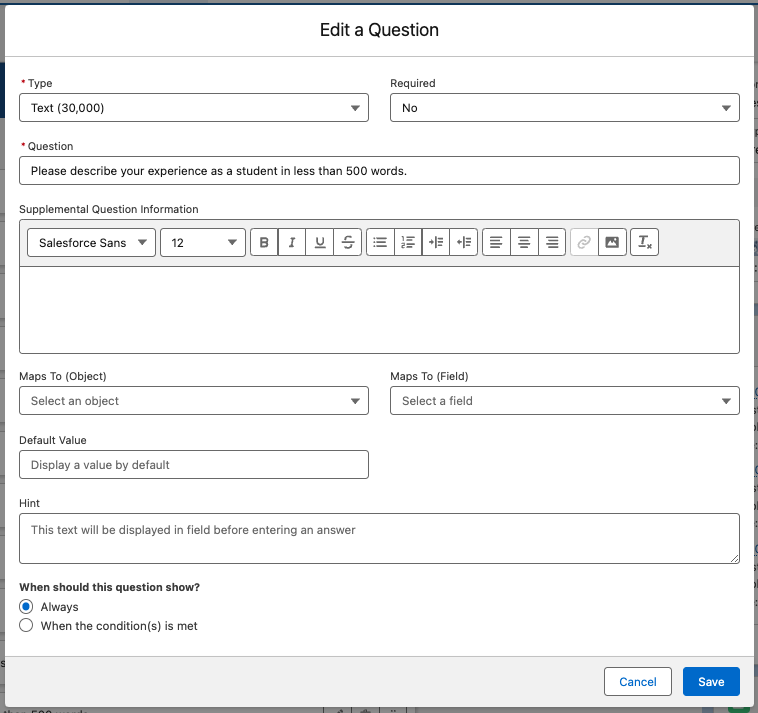
Click Save.
Example
URL
The URL option allows Attendees to enter a URL upon registration. This field will validate that the text entered is a proper URL.
When written to a URL Salesforce field, the text will appear as a hyperlink.
When written to a text field, the text will appear as text with no hyperlink.
Setup
Set the Form Element Type field to “URL.”
Let Attendees know if the question is Required.
In the Question field, enter the text you want the Attendee to see.
If necessary, define the Supplemental Question Information, Default Value, and Hint fields.
Set When should this question show? to “Always.”
Click Save.
Example
When an Attendee enters data into a URL field, the system will validate that the text starts with http:// or https:// and has a top-level domain (.com, .gov, .io,. etc.) identified.
Post-Registration Forms
Forms with Type set to “Post-registration” use AttendeeLinks to gather information. Once an Attendee registers for an Event or is invited to an Event, they'll receive their AttendeeLink via email. The AttendeeLink can include the post-registration questions.
Setup
Go to the Forms tab.
Click New.
Set Form Type to “Post-registration.”
Click Save.
Complete the following fields to create the Form Element.
Type (required) - Select the question type you want to use.
Required
Question (required)
Supplemental Question Information
Maps To (Object)
Maps To (Field)
Default Value
Hint
Set When should this question show? to “Always.”
Click Save.
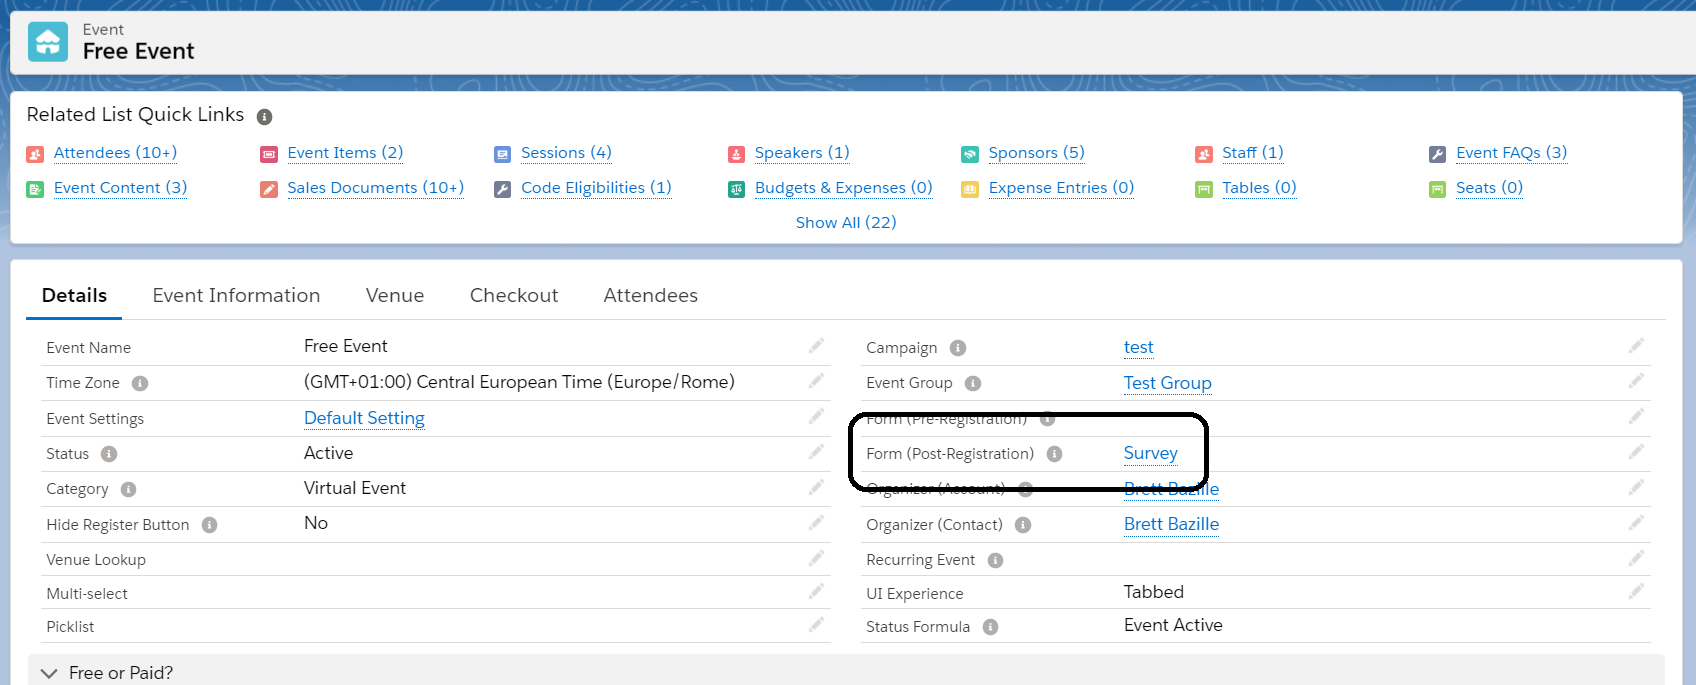
Go to the Event record.
Add the Form to the Form (Post-Registration) field on the Event.
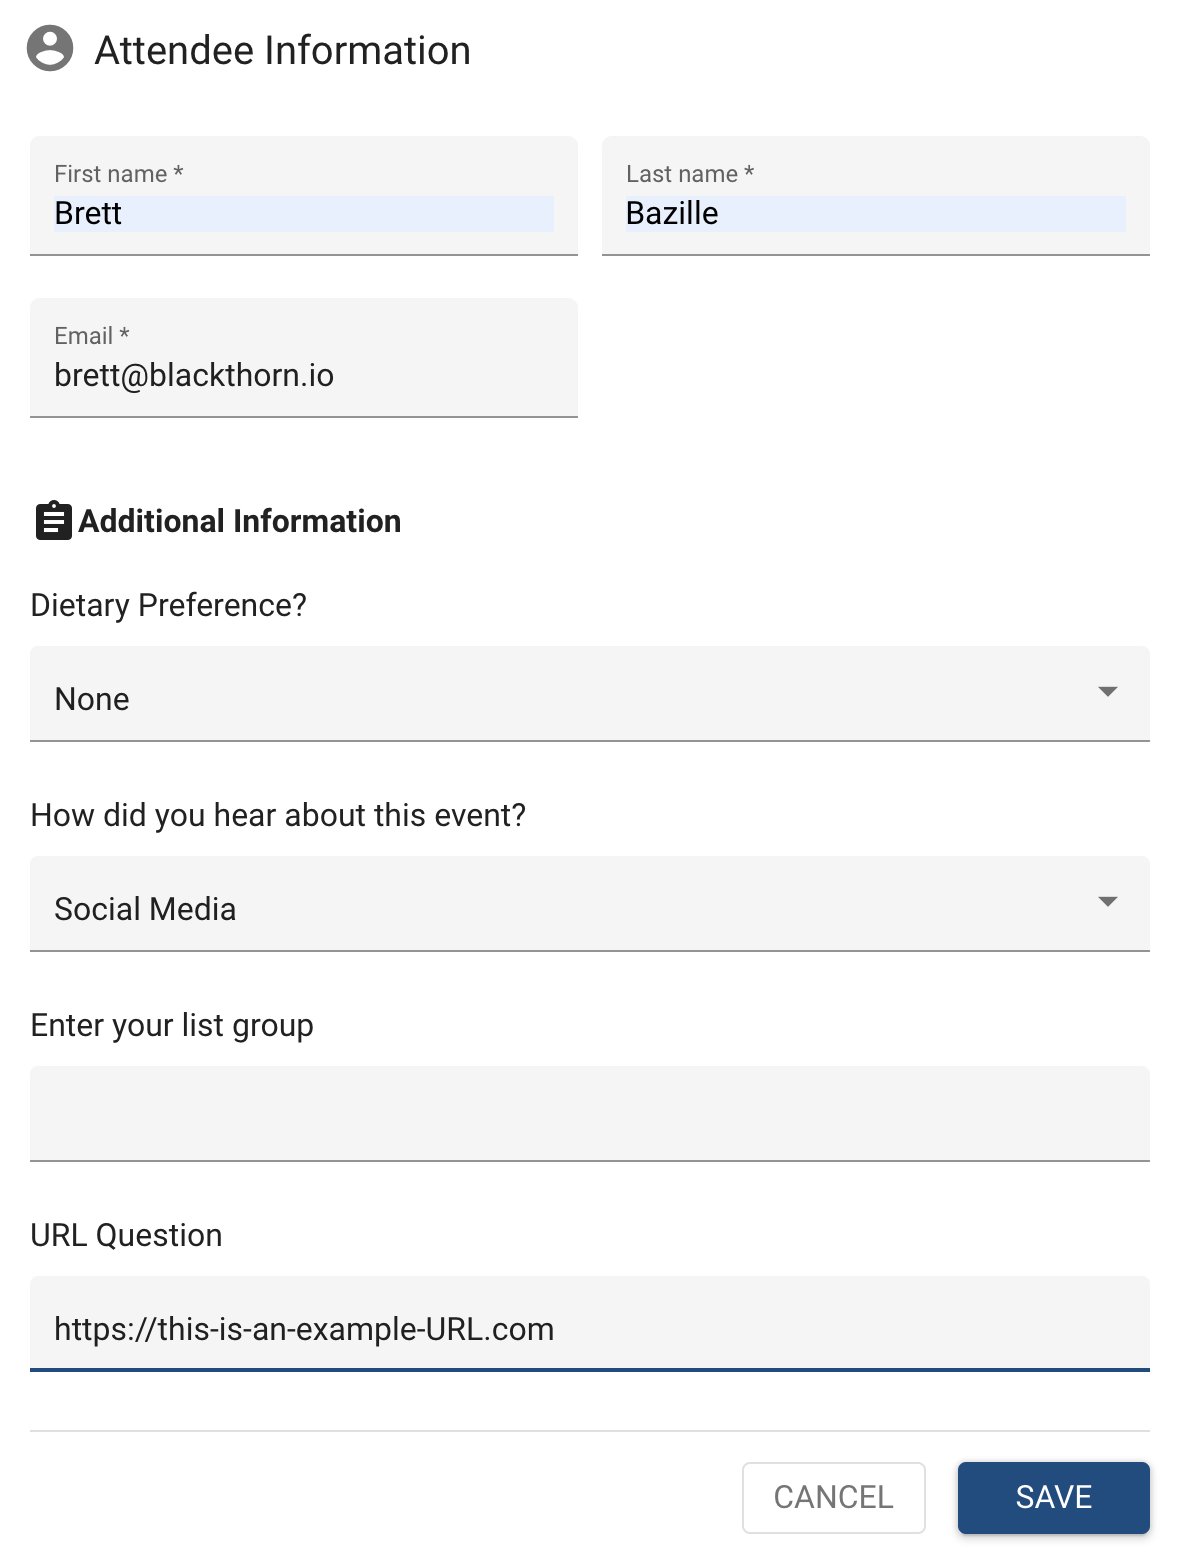
Attendees will now see the questions when they revisit their AttendeeLink. Unlike pre-registration Forms, Attendees won’t see any prefilled fields.
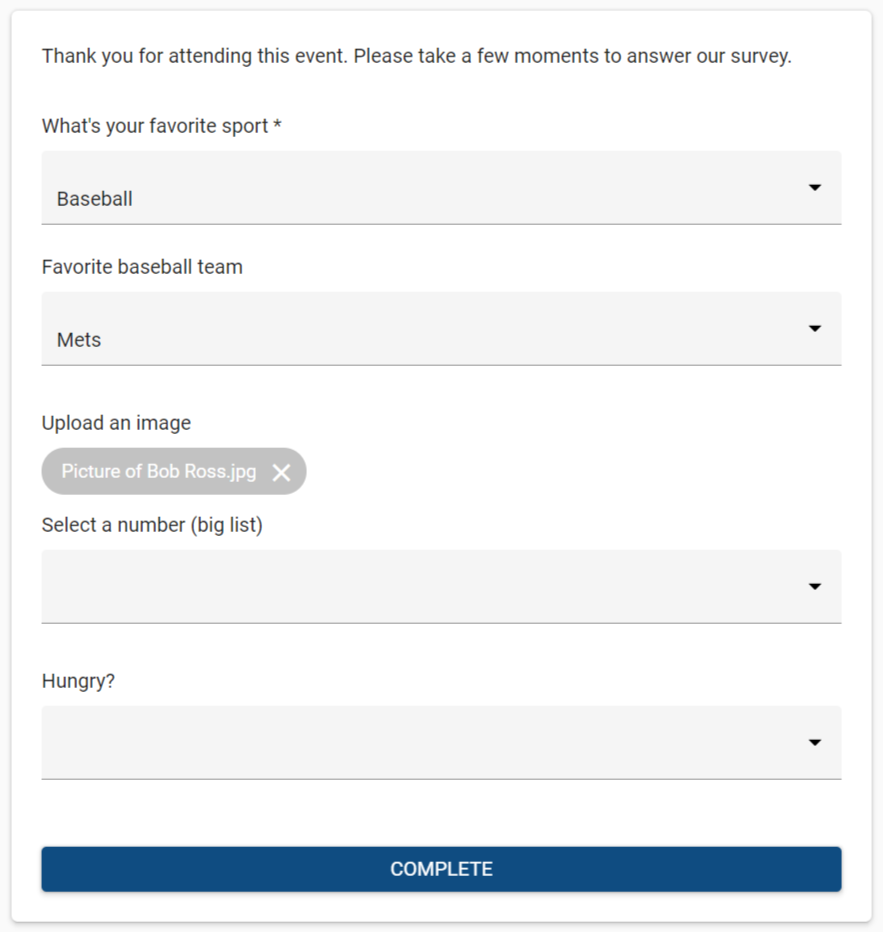
Example
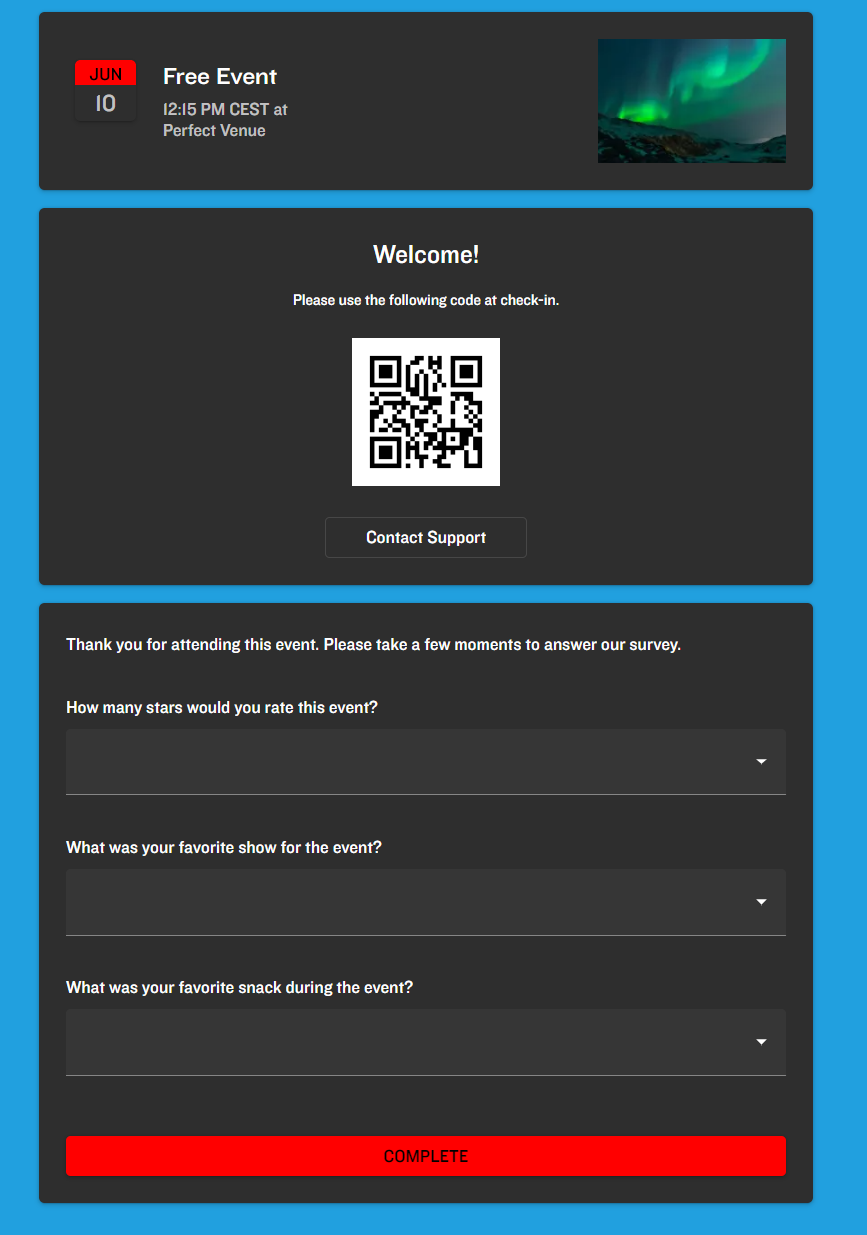
Change the Text
The generic text that appears on the post-registration Form is “Thank you for attending [XYZ]. Please take a few moments to answer our survey."
If you want to change the original text, use the MSG_SURVEY_TITLE Key from the Blackthorn Events Data Dictionary document. Click here for more information about the Data Dictionary feature.
Post-Event Survey
Post-Event Surveys/Questions can now be translated.
However, please note the following.
Default values, picklist values, and big list values will not be translated to accommodate custom flows and logic.
Since Post-Event Questions can work independently from Events/Event Settings, they are not impacted by the Event Settings’ Source Language field. Instead, the questions will be written in the language set by the org’s locale.
Post-event surveys allow Attendees to give feedback on an Event. They can be added to Event, Event Item, and Attendee records. We recommend using the process builder or flows to set up a process to automatically send the Post Event Questions URL.
Event Organizers can use the Event Post Event Survey Expiration Date (conference360__Post_Event_Survey_Expiration_Date__c) field to specify how many days after the Event’s Event End Date the post-event survey (Form) should be available to Attendees. The minimum value is 0 days, and the maximum value is 30 days.
Note: “0” means the post-event survey will go offline on the same date as the Event’s Event End Date.
Complete the following steps to add a post-event survey.
Go to the Forms tab.
Click New.
Fill in the following fields.
Form Name (required)
Type = “Survey.”
Click Save.
Add one or more Form Elements to the survey.
Go to relevant Event, Event Item, or Attendee record and add the previously created Form to the Post Event Questions field.
If you want to specify how many days after the Event’s Event End Date the post-event survey will be available, go to the Event record and enter a value in the Post Event Survey Expiration Date field.
Note: The value in the Post Event Questions URL field is unique to each Attendee record. The field pulls from the Form added to the Post Event Questions field on the Event, Event Item, or Attendee records.
Sessions
The same functionality applies at the Session level. The Post Event Questions field can be found on both the Session and Session Attendee records. The Session Attendee record also includes the Post Session Question URL, just like its Attendee record counterpart.
FAQ
Q: How do we automatically send the Form’s URL to ONLY the Attendees who actually attended?
A: Use the Email component to create and send an Email Template with the Post Event Questions URL and the Attendee Filter set to Attendance Status = “Attended.”
View Attendee Answers
Dietary Preference Field Mapping
The Dietary Preference field on the Attendee object is automatically set to map to the Dietary Preference field on the Event Item. As a result, the Attendee's Dietary Preference field does not work with custom Forms.
Forms are submitted to Salesforce through the Blackthorn Events Form Submission object.
There are two Related Lists that can be added on the Attendee object to easily access an Attendee's answers: Form Submission & Form Submission Answer.
Navigate to the Form Submissions Related List, and click the Form Submission Name you want to view, or Navigate to the Form Submission Answer Related List and click the specific answer you want to view.
If a specific Form Submission fails to process, open the Blackthorn Events Form Submission, and click the Process button. This will reprocess the answers and submit the Form properly.
The following Form Element types do not map to the Answer field on the Form Submission Answer object. For the types that do not map to the Answer field, see the mappings below.
Form Element Type = “Date” maps to the Form Submission Answer Answer Date field.
Form Element Type = “Number” maps to the Form Submission Answer Answer Number field.
Form Element Type = “Multi-Select Picklist” maps to the Form Submission Answer Answer Text Long field.
Form Element Type = "Text (30,000)" maps to the Form Submission Answer Answer Text Long field.
Form Element Type = “Big List Group” maps to the Form Submission Answer Form Big List Option field.