Add Sessions to an Event for breakouts, presentations, discussions, or other activities.
- Discount Codes are not supported for Sessions.
- Session Name vs Display Name
- The Display Name field on Sessions overrides the Session Name field on the front end.
Create a Session
-
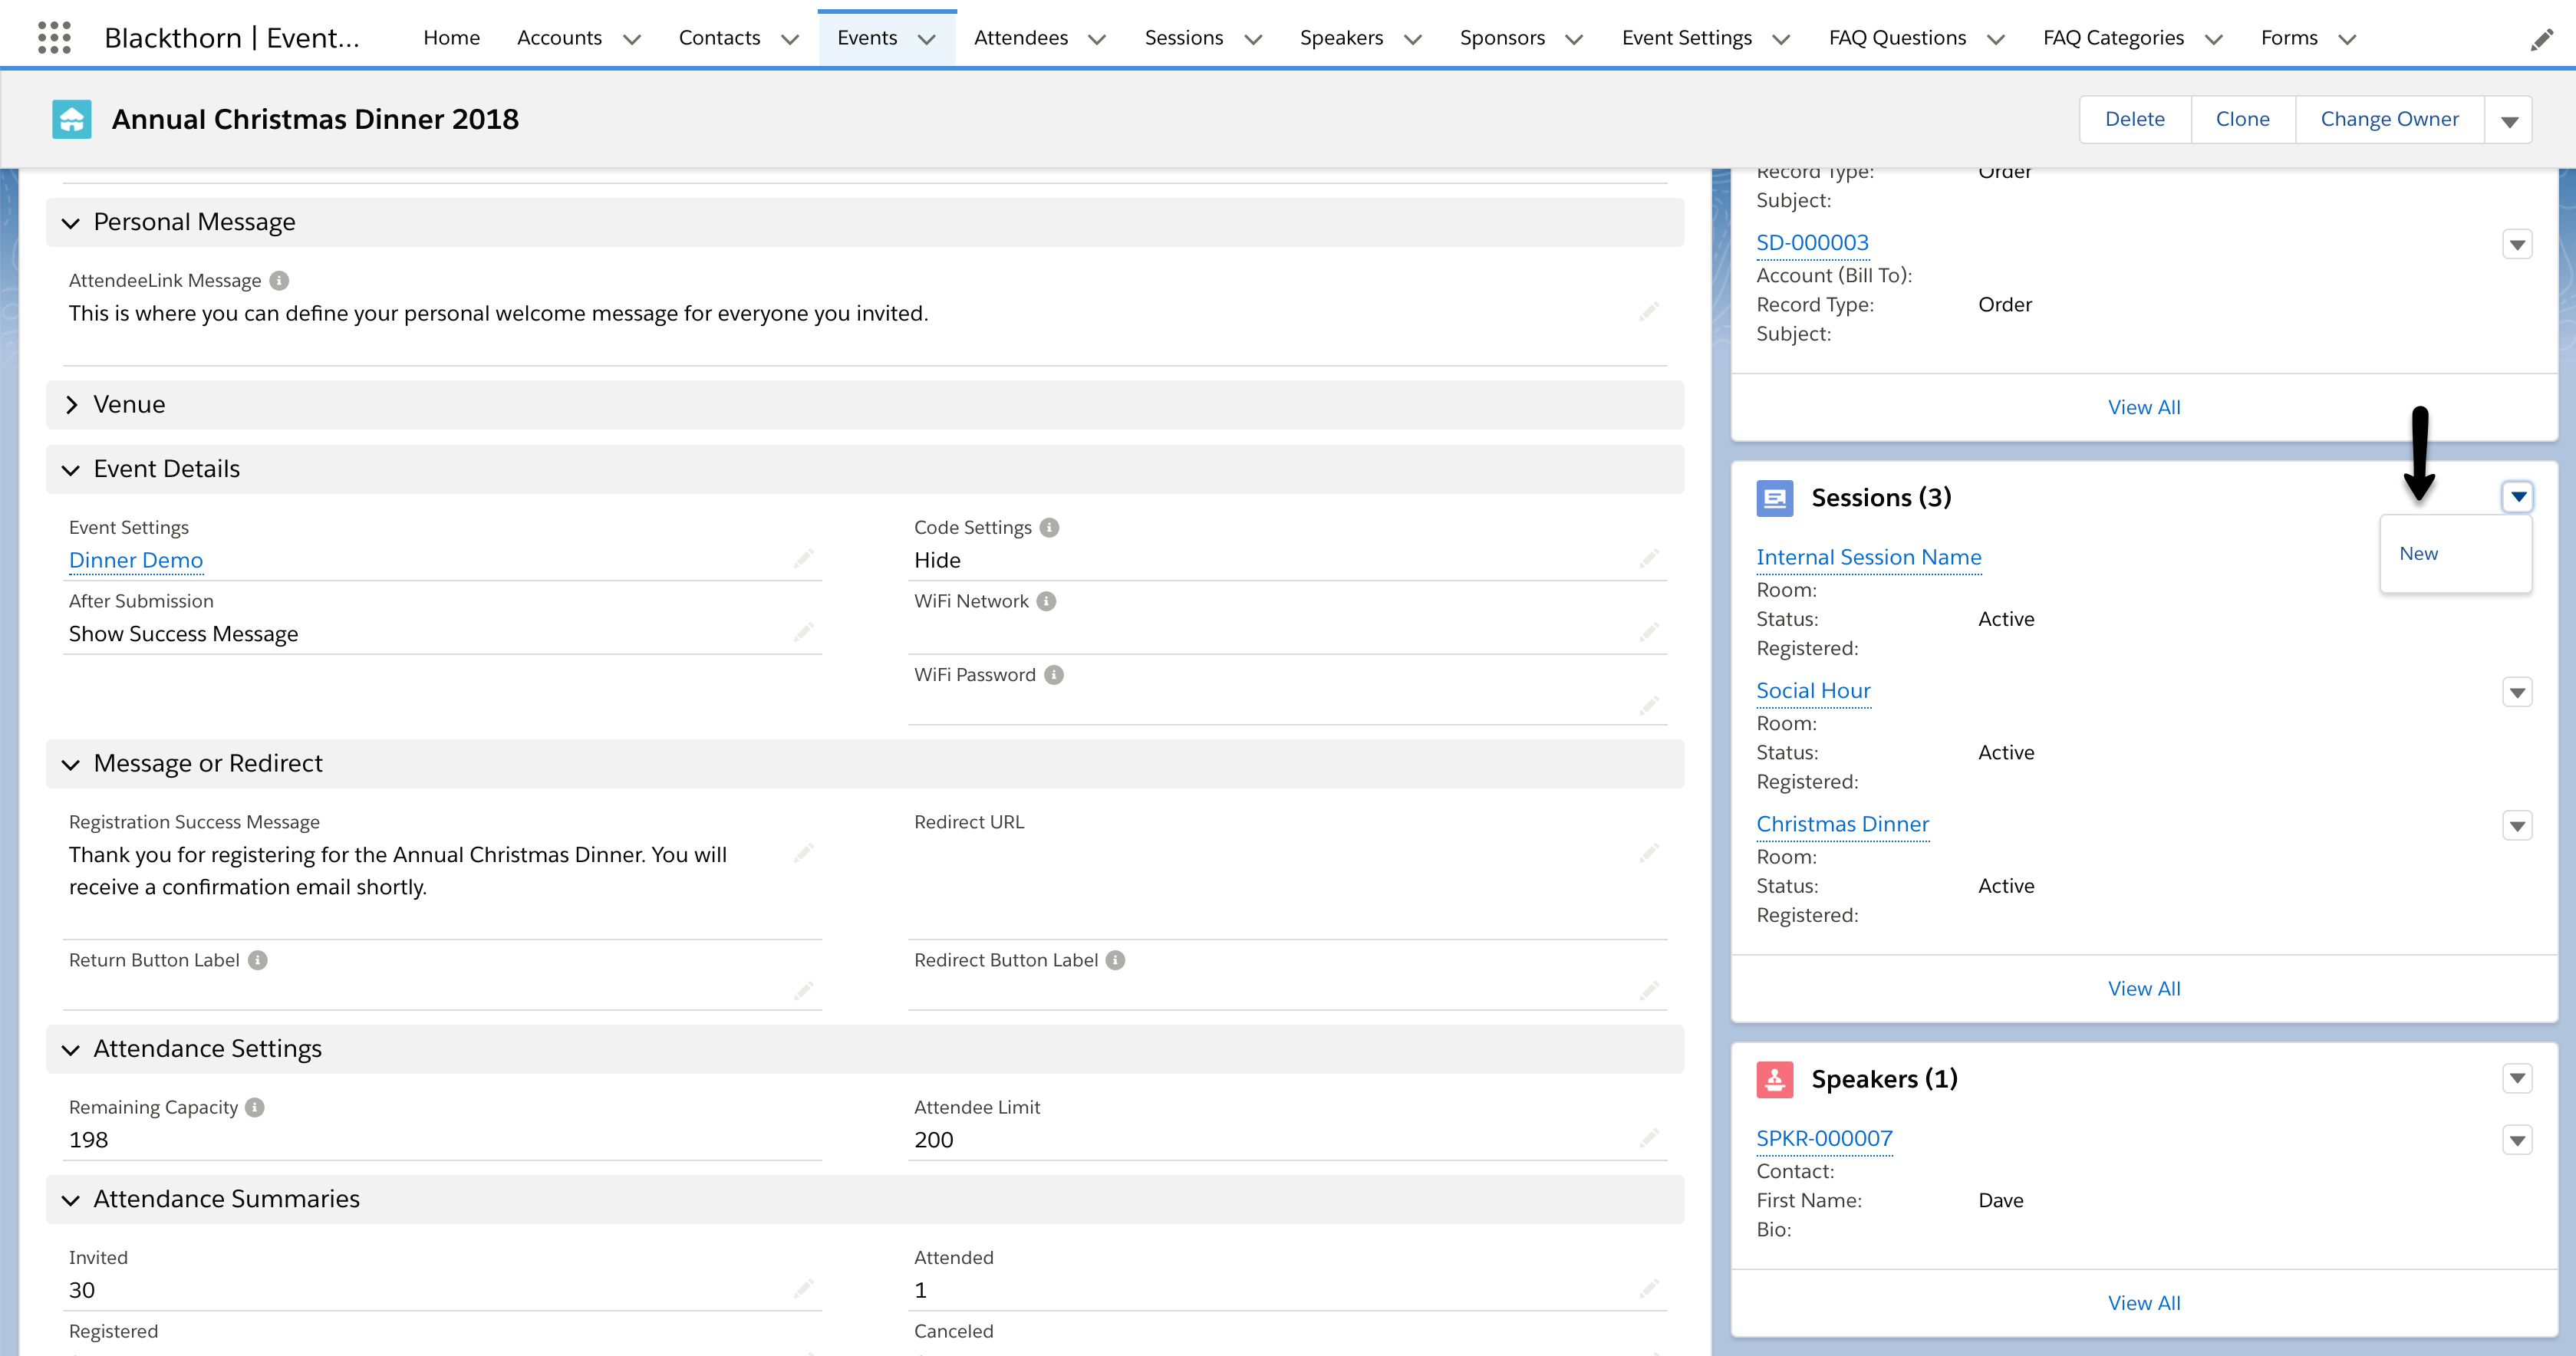
From the Event record, navigate to the Sessions Related List and click New.
-
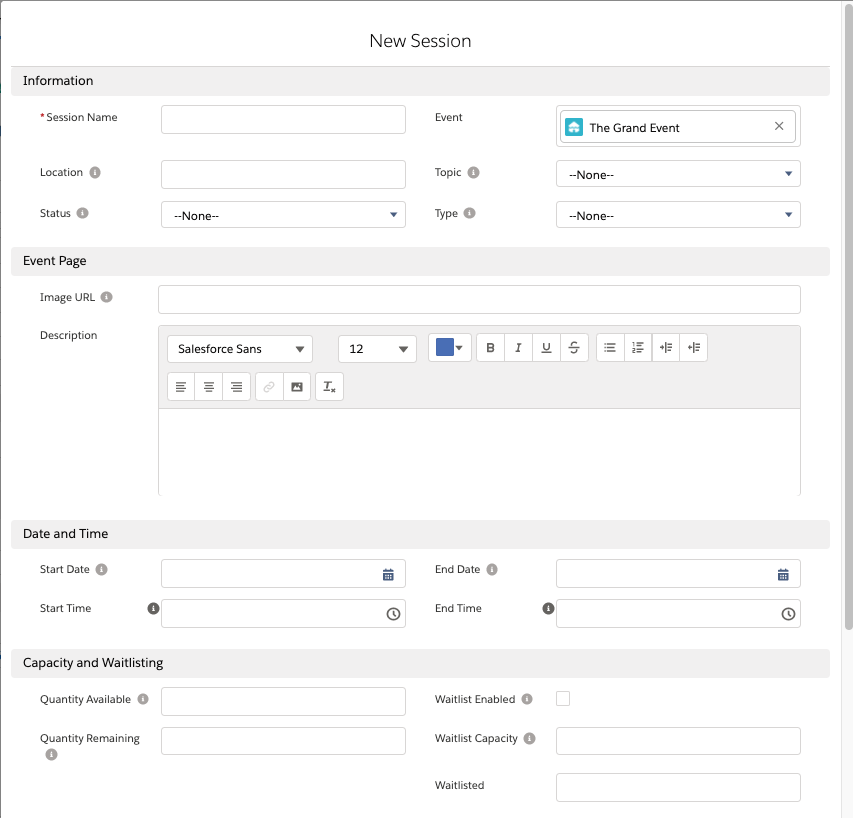
Enter the Session Name.
-
Add Session details such as,
- Description
- Image URL
- Alternative Text for Visual Impairment - This field is required if the Image URL has a value.
- Location
- Start Date
- Start Time
- End Date
- End Time
NOTE: The Session’s Start Date/Time and End Date/Time fields are not included on the Session’s page layout out of the box. They standardize calculations and display the Session’s start and end dates/times from the perspective of the time zone set on the authorized user’s profile instead of the time zone set on the Event record.
- To limit the number of people that can register and attend a Session, enter an amount in the Quantity Available
The Quantity Remaining is a formula field that will automatically update.
Formula: Quantity Remaining = Quantity Available - Registered
Session Status Functionality
- If a Session’s Status is set to “Active” or is left blank, the Session will be displayed on the Event’s landing page.
- If a Session’s Status is set to any other value, the Session will not be displayed on the Event’s landing page.
Configure Sessions
Sorting Sessions
The default sort order for Sessions is alphabetical. Sessions can also be sorted by Start Date and Start Time in ascending order. The list below describes how the Session’s sorting rule works in various scenarios.
- If there are multiple Sessions on a single day and each Session has a different Start Time, then the Sessions will be listed from the earliest Start Time to the last.
- If there are multiple Sessions with the same Start Time, BUT each Session has a different Start Date, then the Session with the earliest Start Date will be listed first.
- If multiple Sessions have the same Start Date and Start Time, the Sessions will be sorted alphabetically by Session Name.
- If there are multiple Sessions without a Start Date, the Sessions will be sorted alphabetically by Session Name.
Sold Out
When Waitlist Enabled is not checked and Quantity Remaining = "0", the Session will be sold out.
Waitlisted
When Waitlist Enabled is enabled and Quantity Remaining = "0", additional Session registrants will have a "Waitlisted - Pending" status and be added to the waitlist.
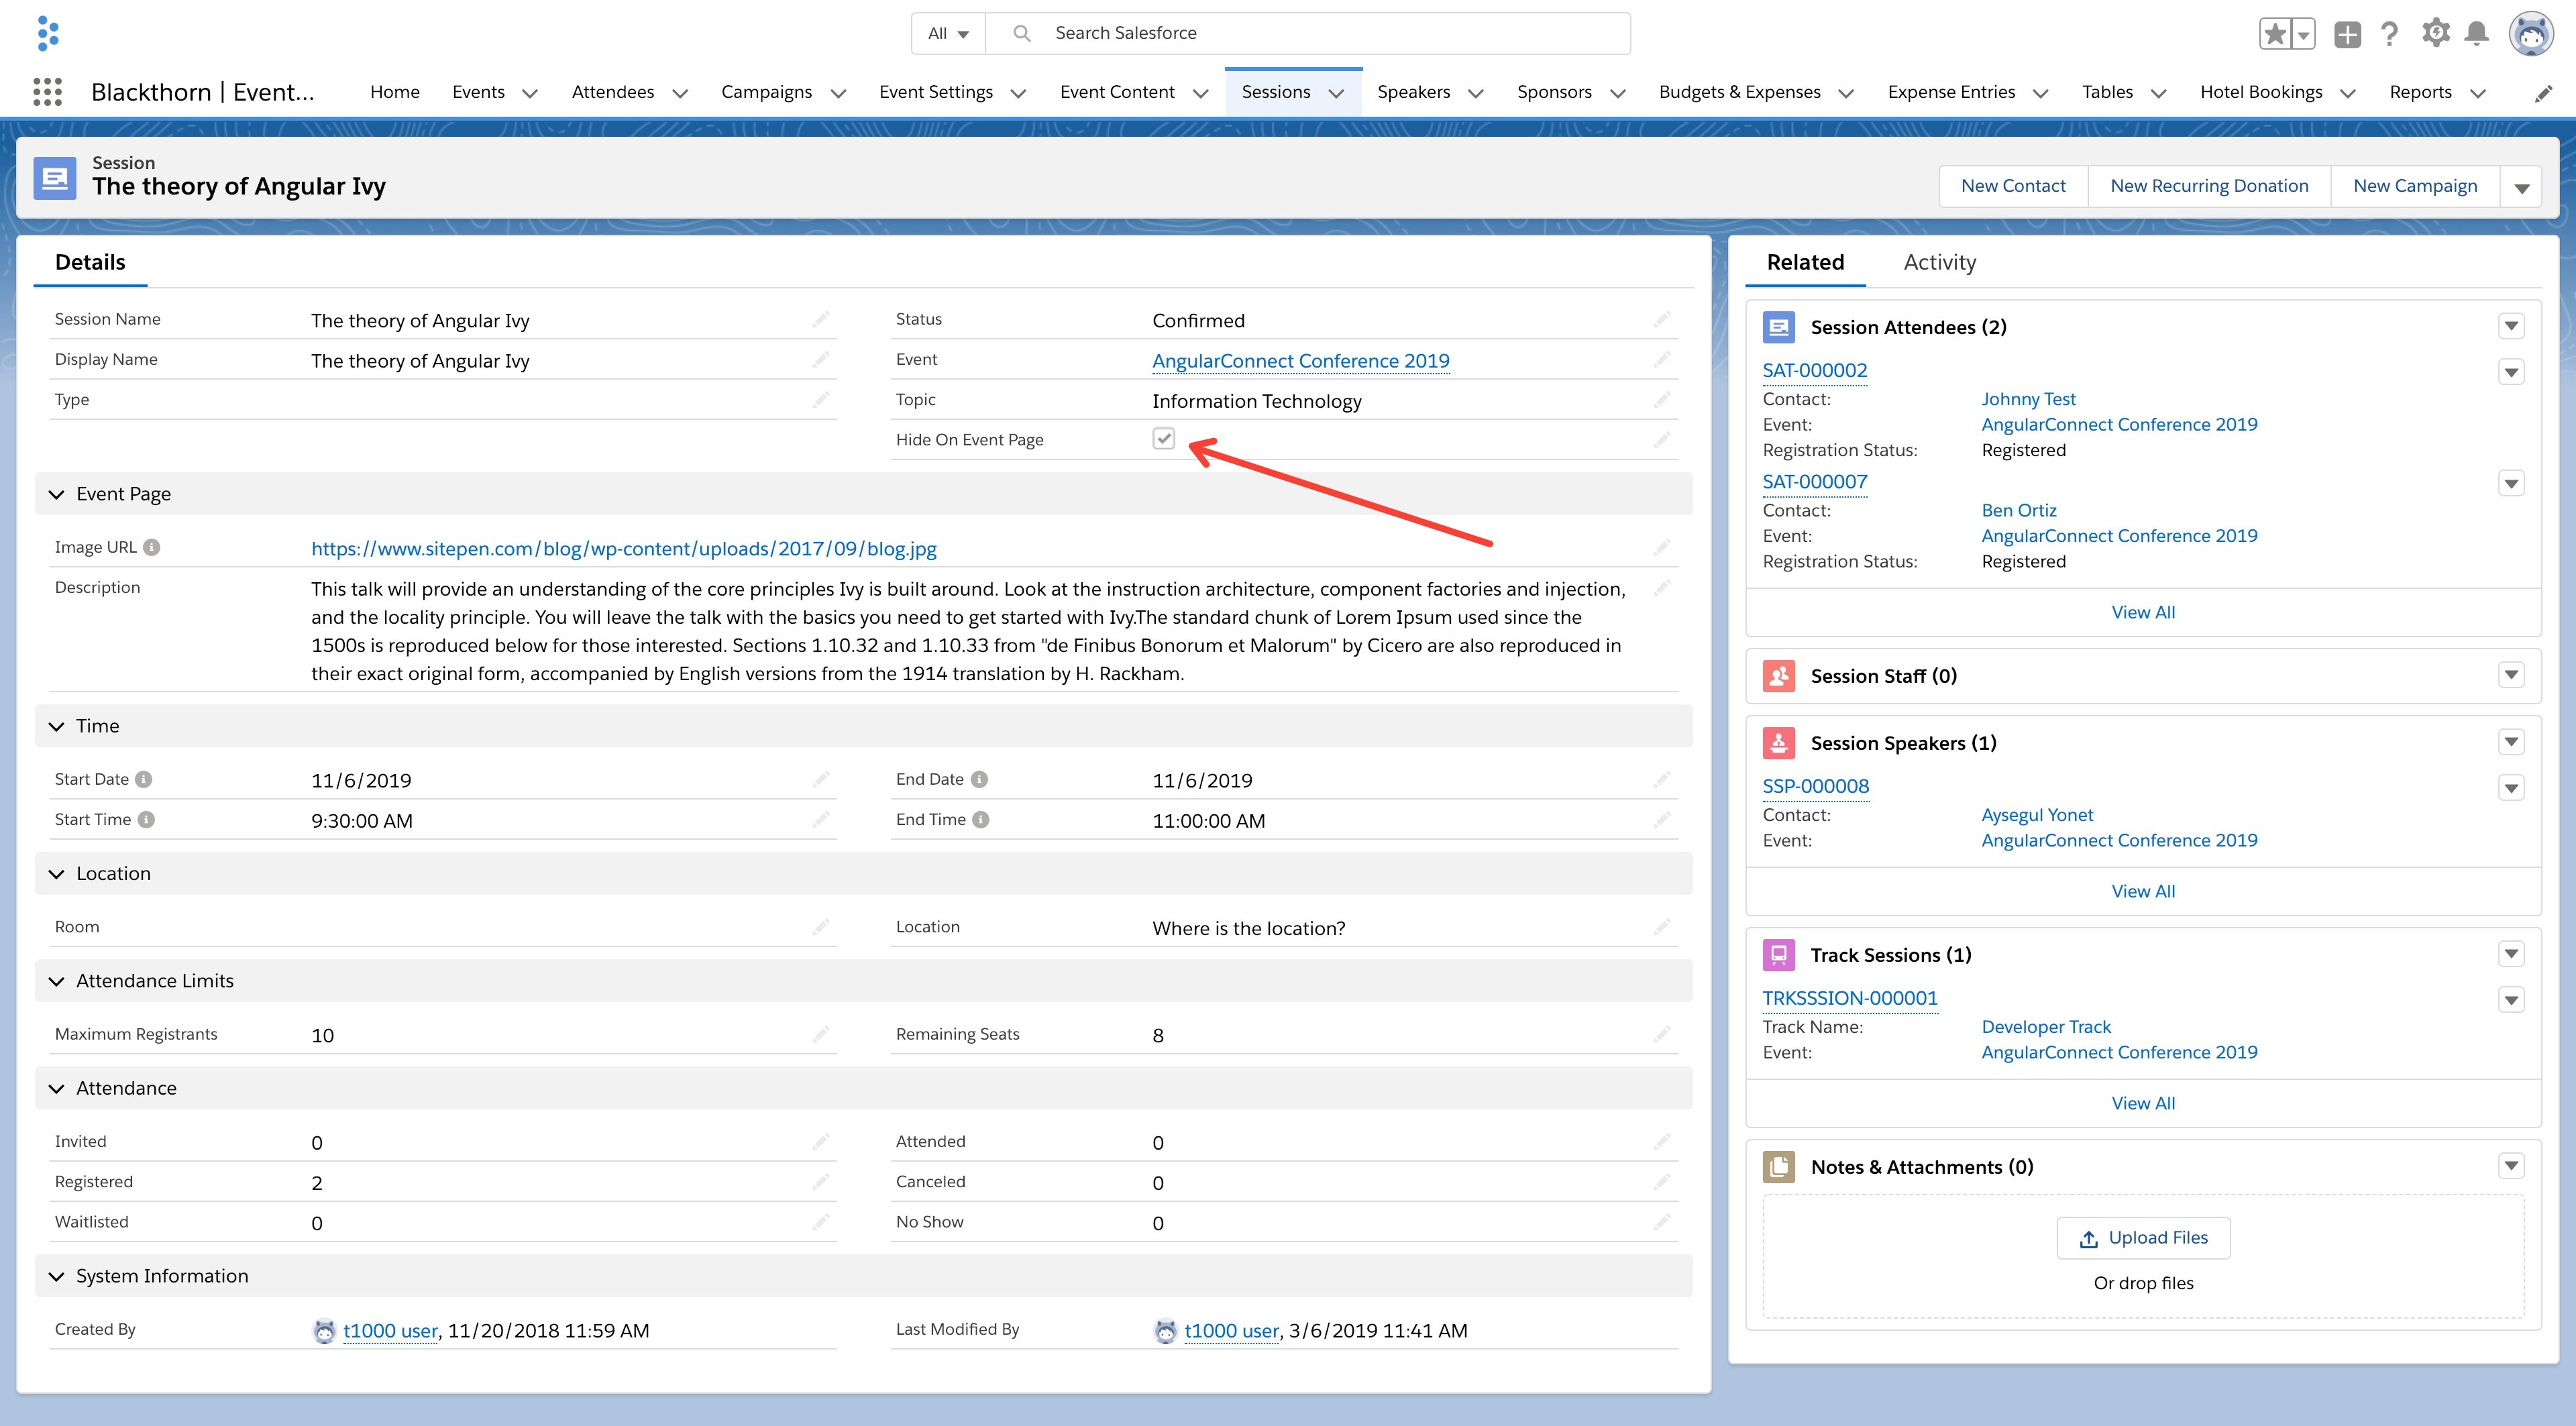
Hide on Event Page
The Hide On Event Page checkbox allows users to hide the Session from the Event's Session tab. As a result the Session will be invisible to the public.
To prevent that from occuring, the following needs to occur:
- The Session belongs to a specific track that is associated with an AttendeeLink invitation.
- The Session is pre-registered to an Attendee in the AttendeeLink invitation.
- Once saved, view your newly created Session on the Event page.
Visibility
To show the Sessions on the Event, navigate to the Event Settings record and update the Sessions field to "Always". Make sure that the Session's Hide On Event Page field is unchecked.
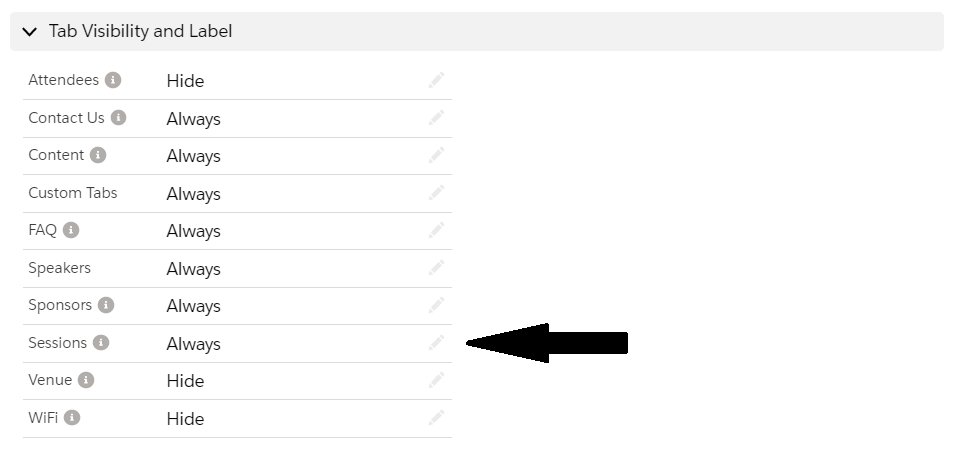
If you only want Attendees to see Sessions on their AttendeeLink and not on the Event registration page, complete the following steps.
- Relate a Session to an Event Item, creating an Event Item Session.
- Update the Event Settings’ Tab Visibility setting for Sessions to “Post Registration.”
The Event Item Sessions will now appear in an Attendee’s AttendeeLink.
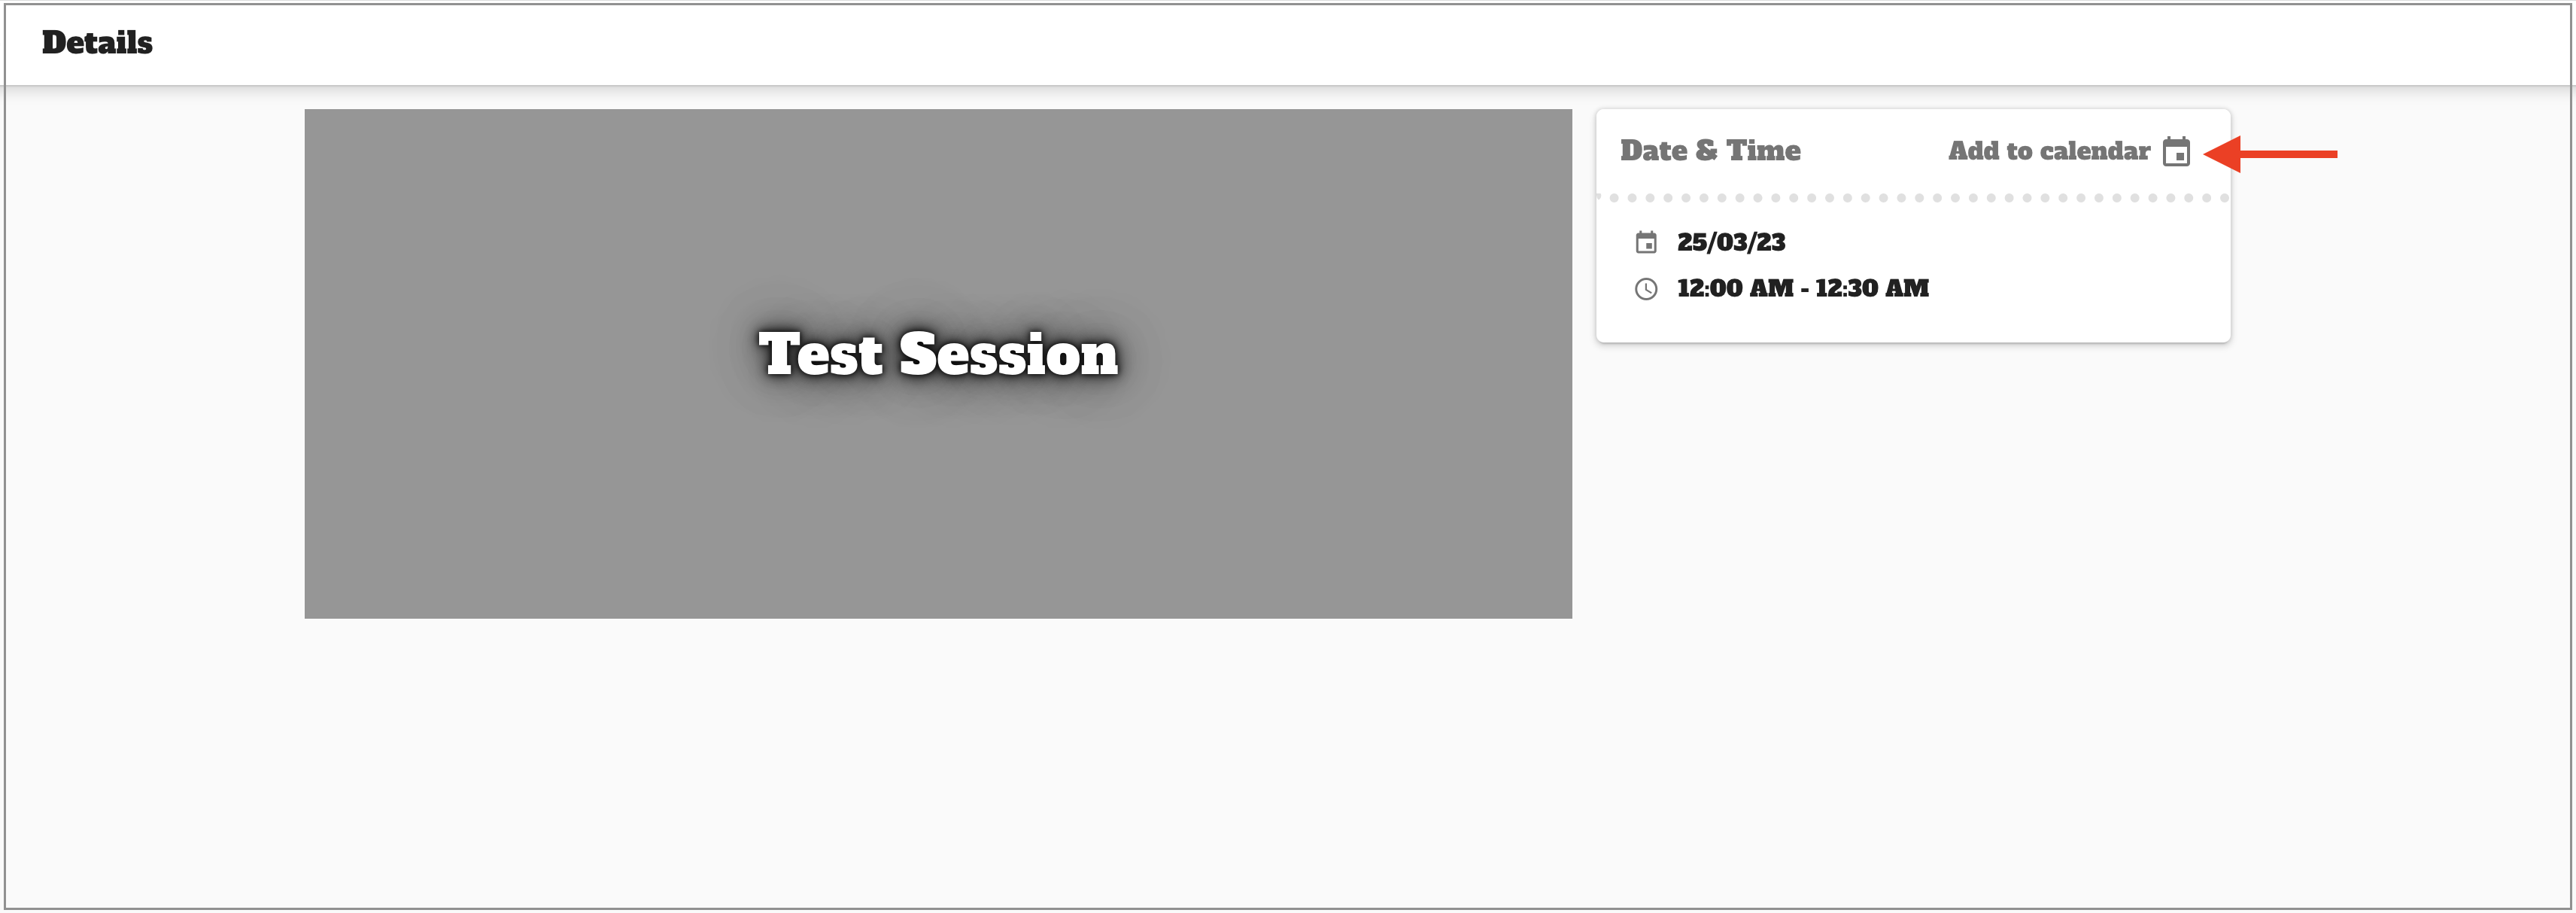
Add Session to Calendar
Complete the following steps to add a specific Session to a calendar from the Event's webpage.
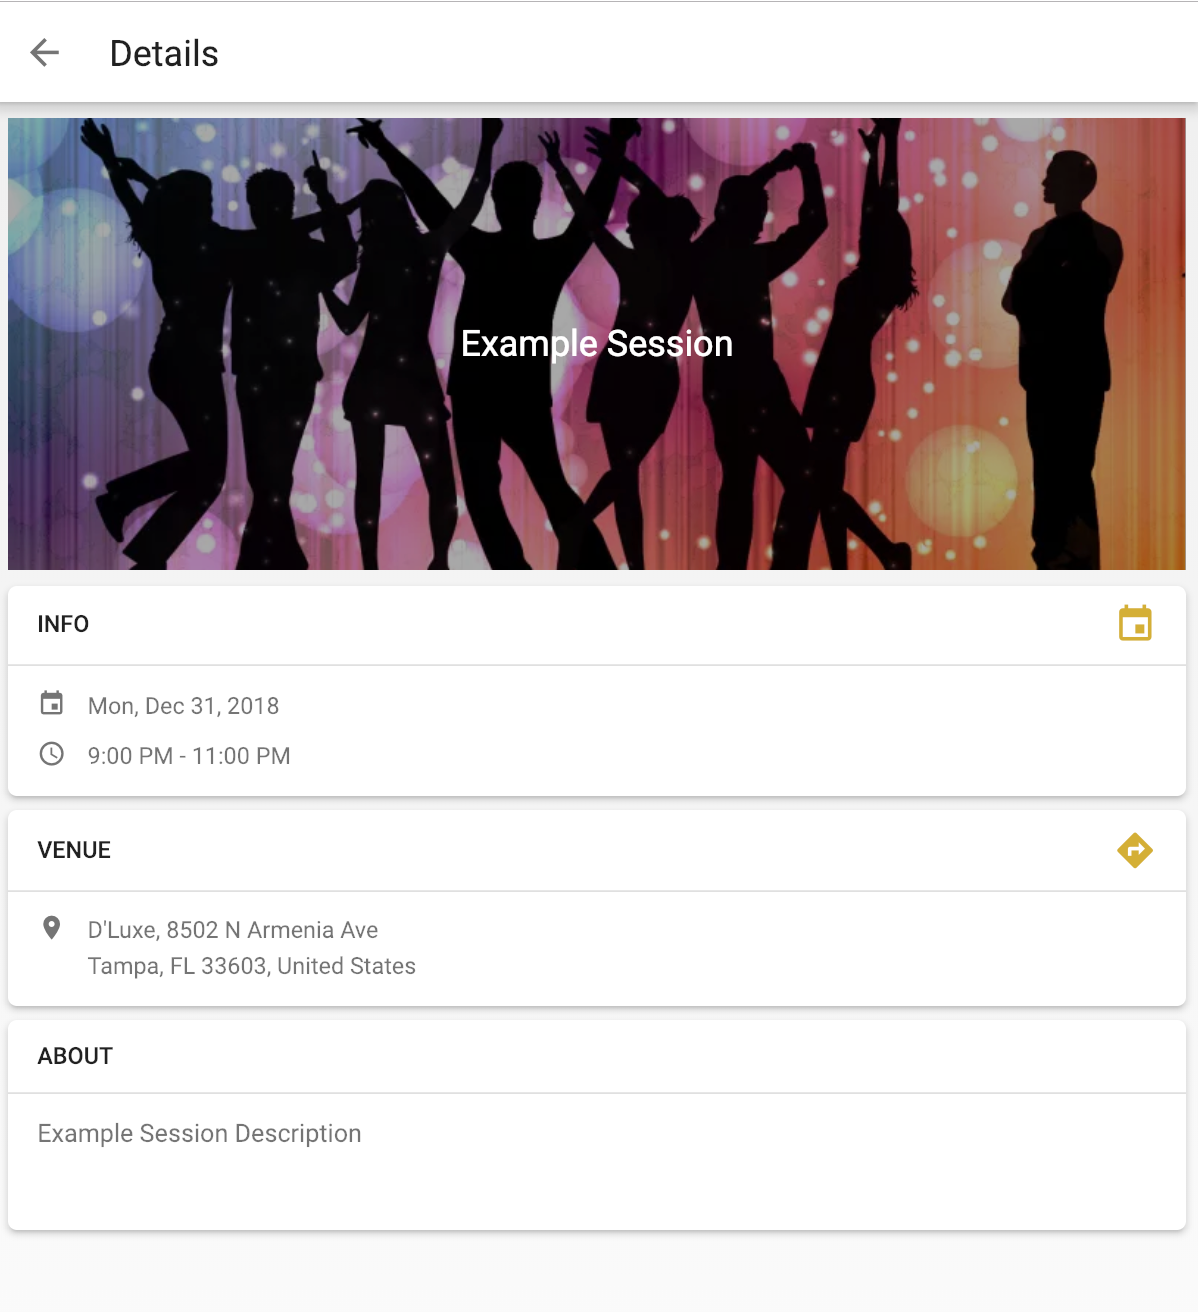
- Go to the Event’s webpage.
- Click the Sessions tab.
- Click a Session Name.
- Click Add to Calendar.
- Select the calendar type.
Data Dictionary and Session Counts
The Data Dictionary can help Event Organizers inform potential Attendees of the number of available Tickets, Session spots, and Products using the following Keys.
- Key = “LBL_COUNT_TICKETS_REMAINING”
- Key = “LBL_COUNT_ITEMS_REMAINING”
- Key = “LBL_COUNT_SPOTS_REMAINING”
- Key = “MSG_QUANTITY_TICKET_WAITLISTED”
IMPORTANT NOTE: These Keys do not work for Donations.
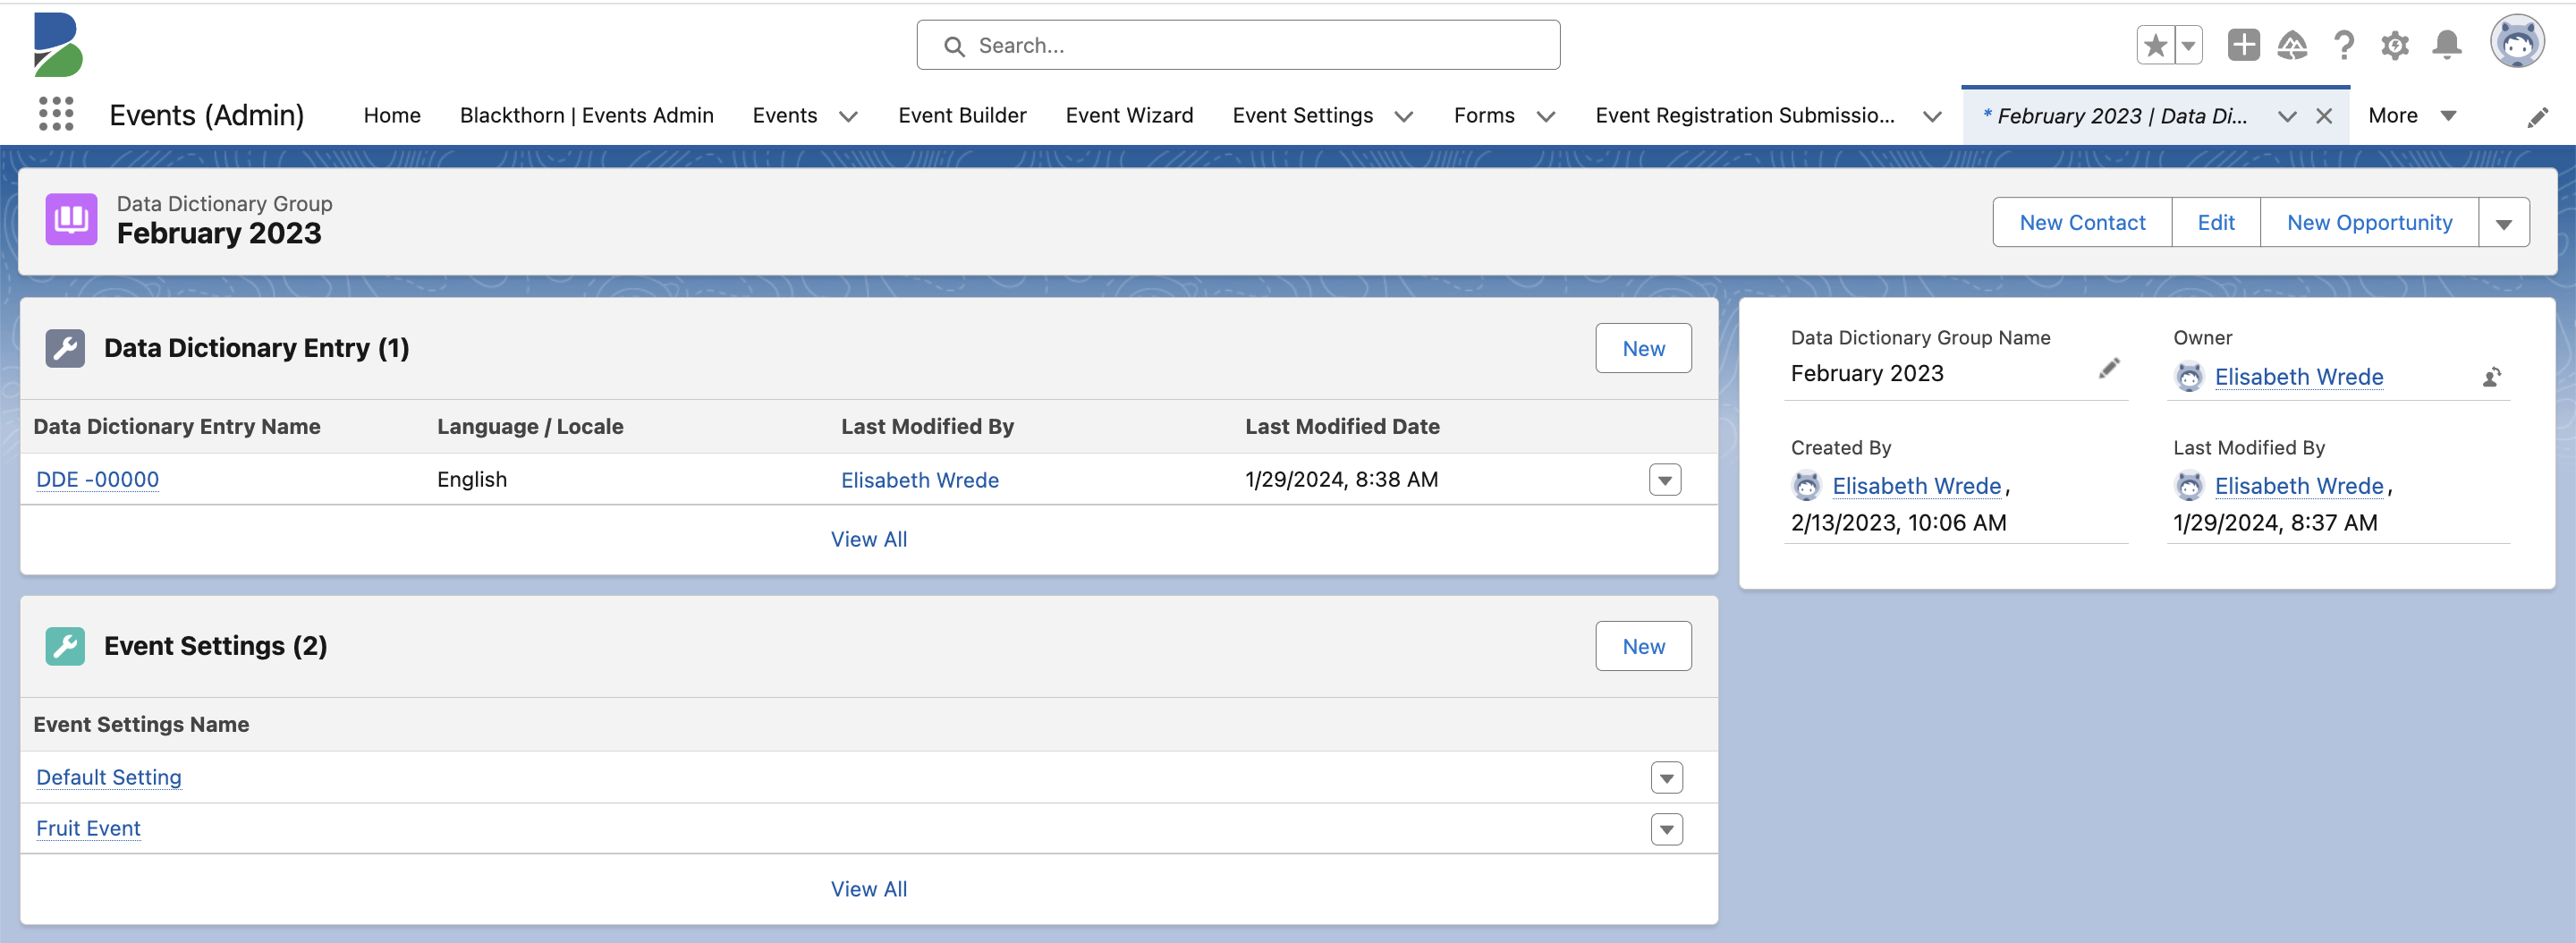
Create a Data Dictionary Group
- In the App Launcher, enter and click "Data Dictionary Group".
- Click New.
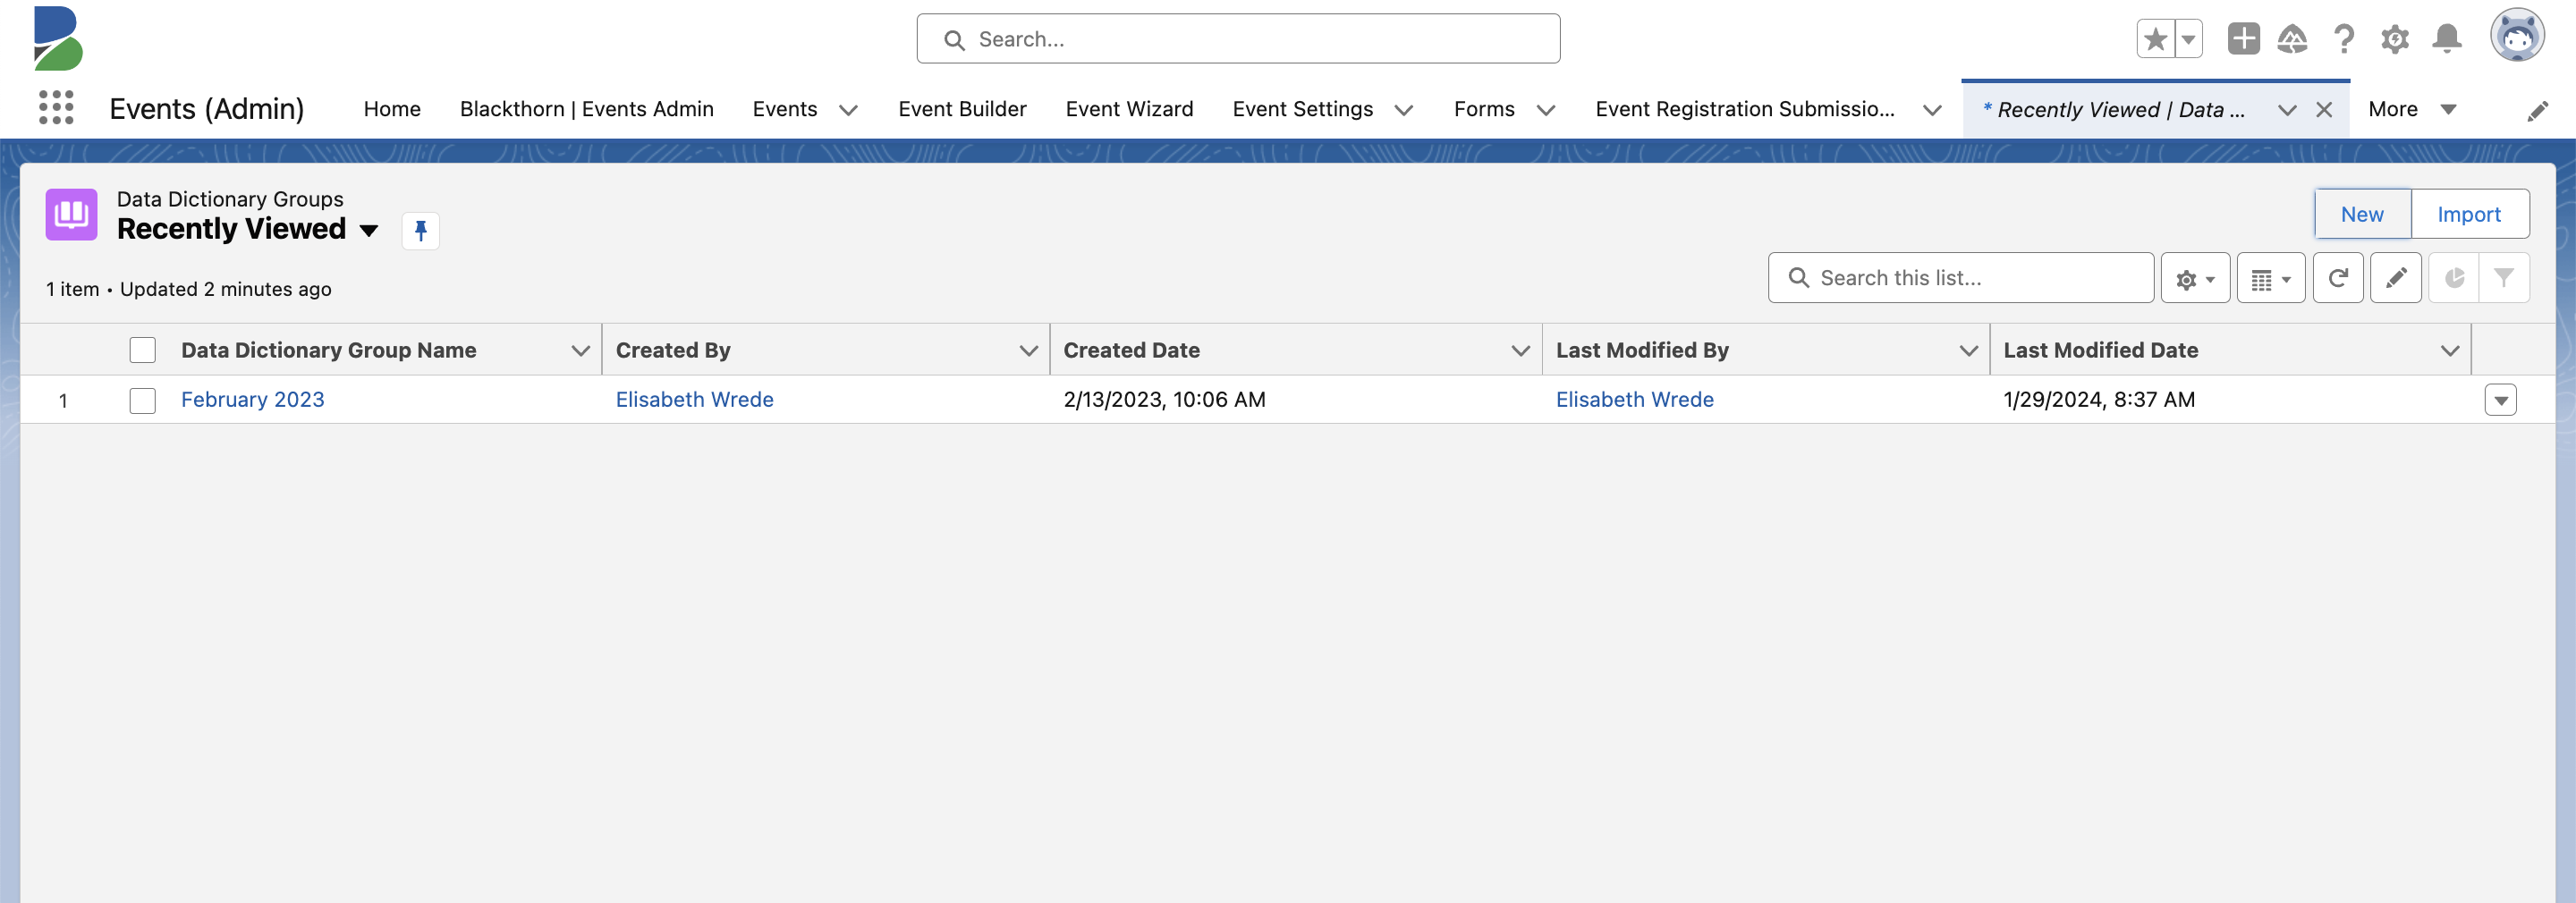
- Enter a Data Dictionary Group Name.
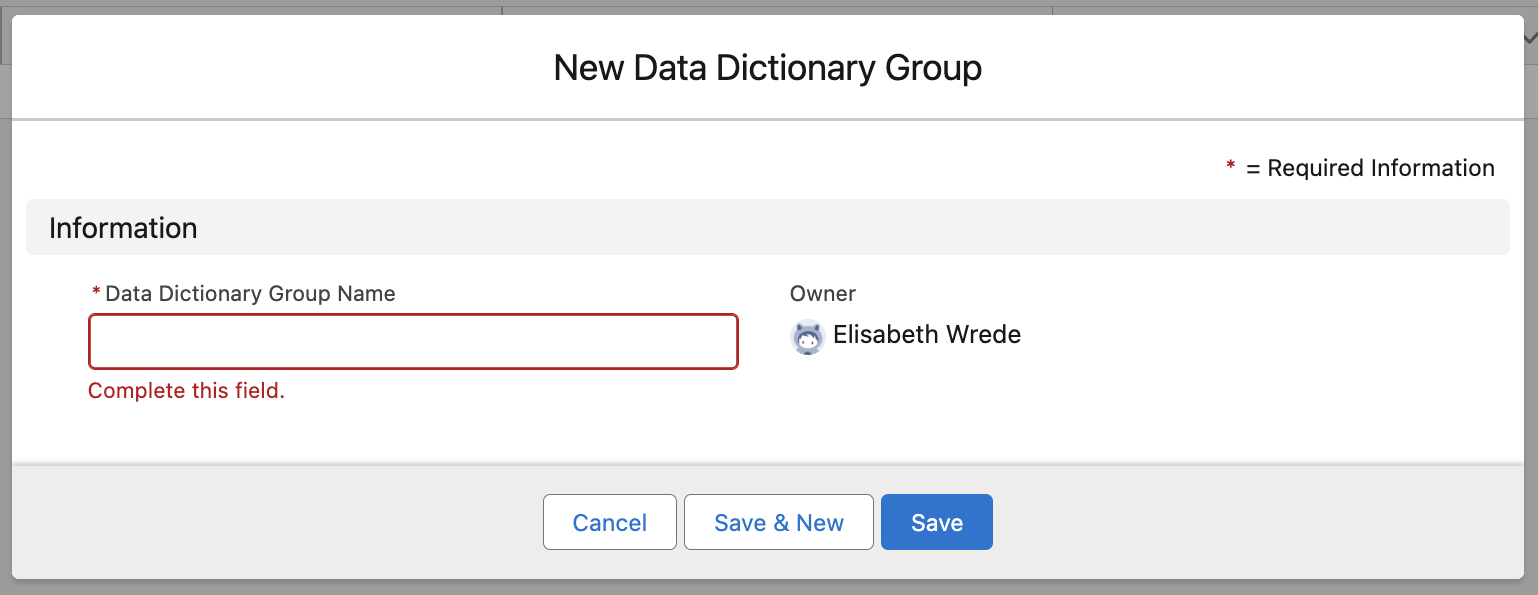
- Click Save.
Create Data Dictionary Entries
To show the amount of available Tickets, Sessions, or Products, you must include "{count}" in the Value field.
- Click New next to the Data Dictionary Entry. In a Data Dictionary Group, each Data Dictionary Entry can only support one language.
- In this example, we’ll set Language / Locale to “English.”
- For Event Items with Typeset to “Main event ticket” or “Guest,”
- Set Key = “LBL_COUNT_TICKETS_REMAINING”
- Set Value = “{count} Tickets Left in Event”
- Click Add Row.
- For Event Items with Typeset to “Other” (Products),
- Set Key = “LBL_COUNT_ITEMS_REMAINING”
- Set Value = “{count} Products. Left in Event"
- Click Add Row.
- For Sessions,
- Set Key = “LBL_COUNT_SPOTS_REMAINING”
- Set Value = “{count} Tickets Left in Session”
- Click Add Row.
- For waitlisted Tickets (Event Items with `Type` set to “Main event ticket” or “Guest”),
- Set Key = “MSG_QUANTITY_TICKET_WAITLISTED”
- Set Value = “[count] Waitlist Spots Left”
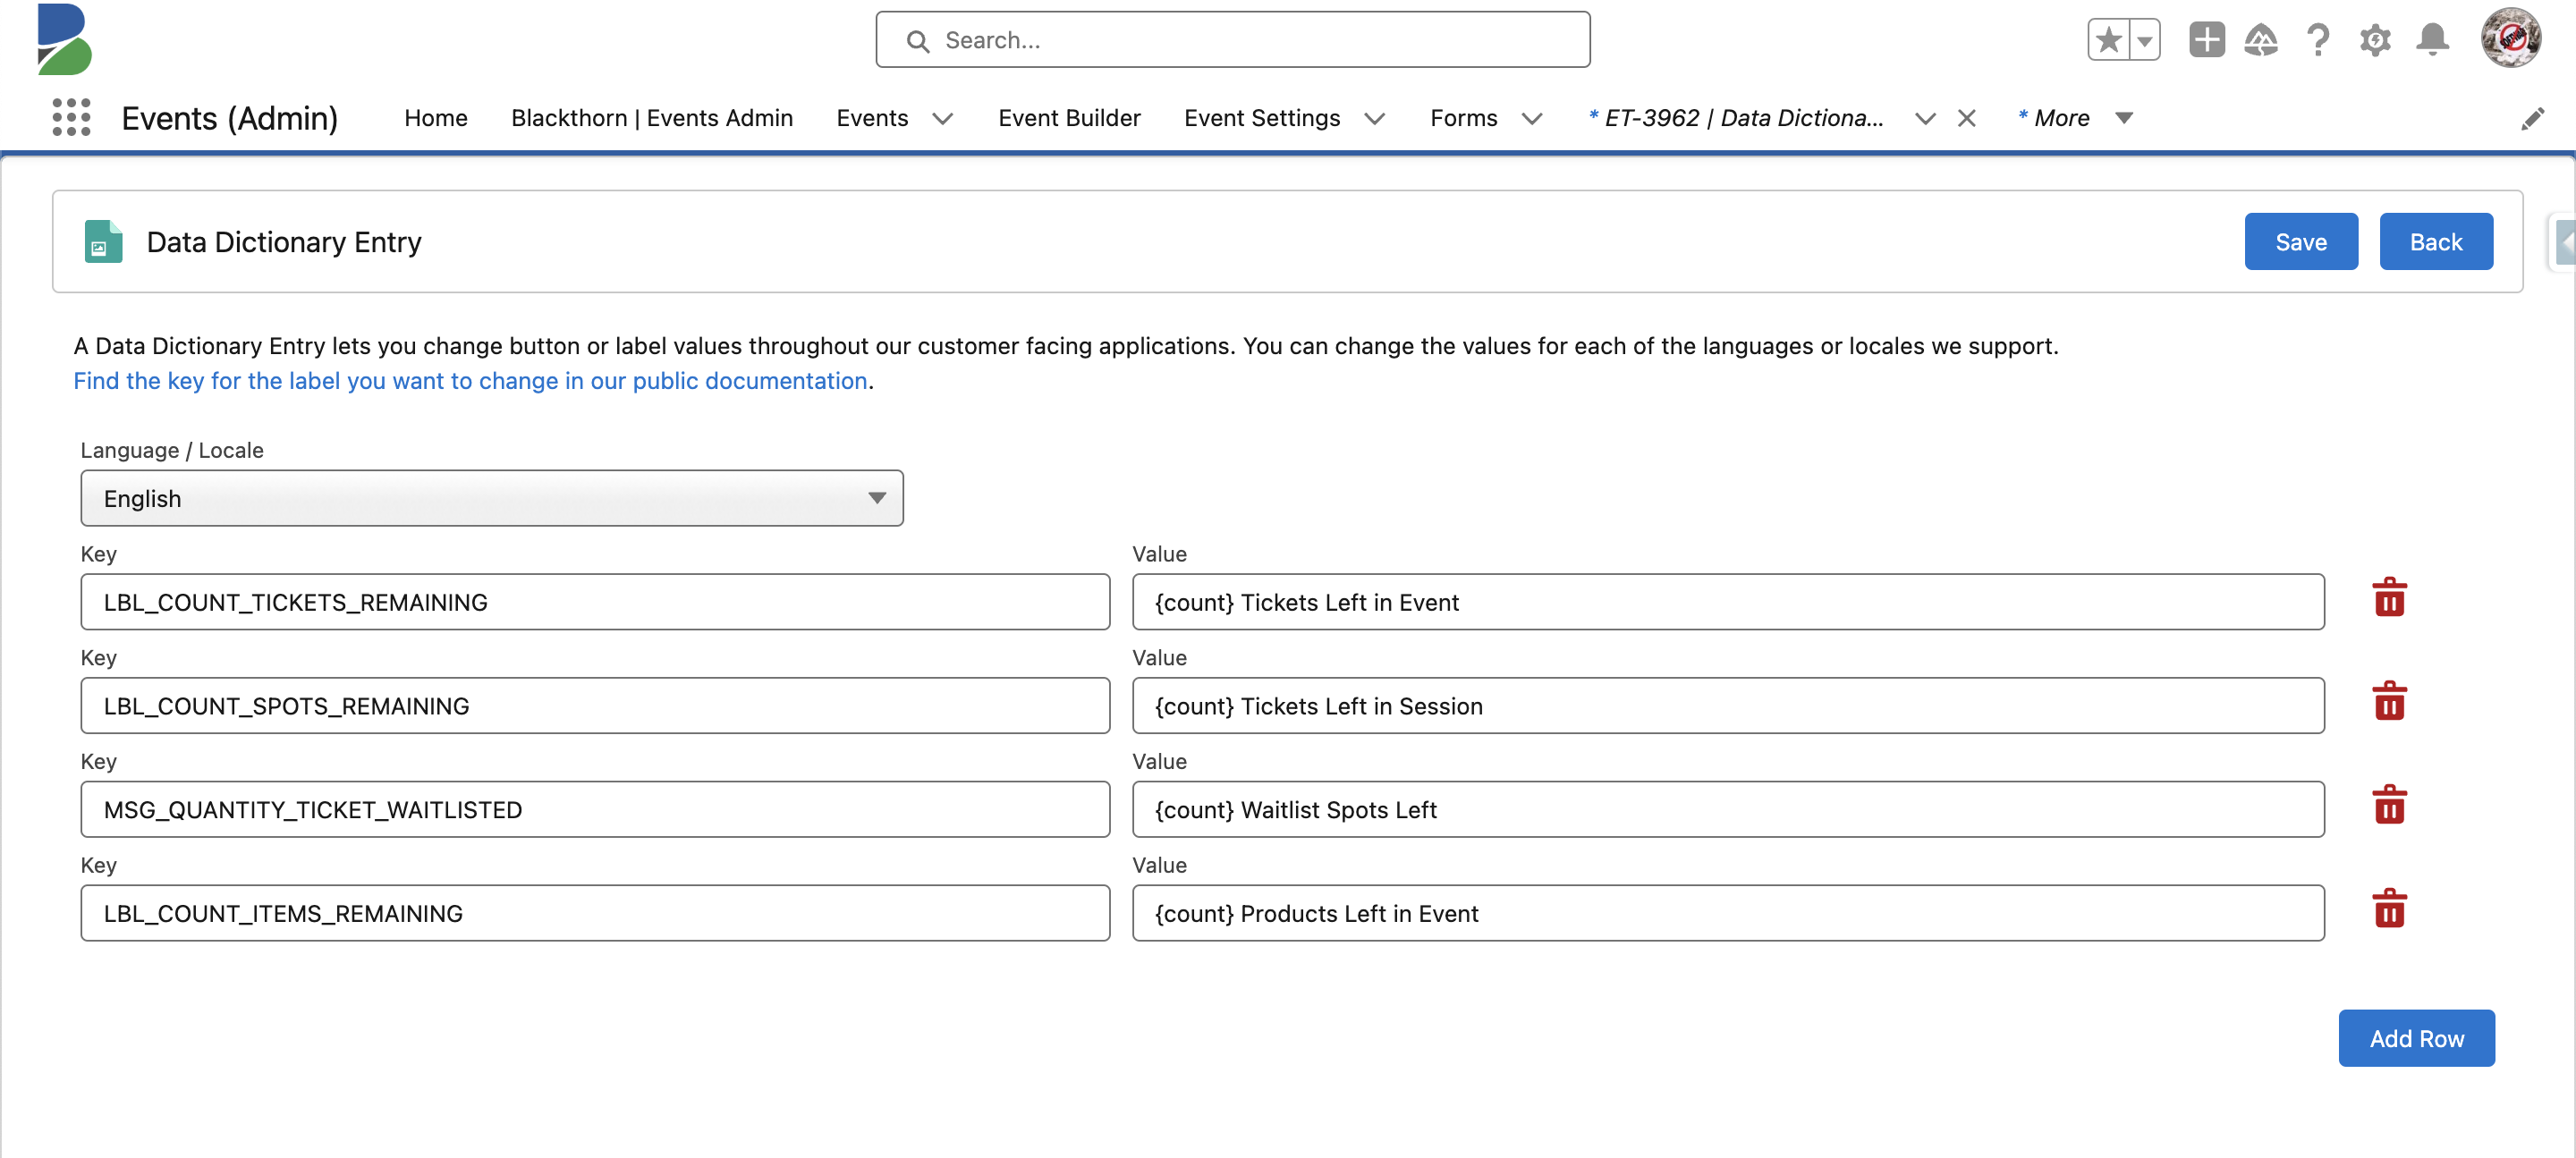
- Click Save.
- Click Back to return to the Data Dictionary Group record.
Click here for the full Events Data Dictionary list.