Use the steps below to configure the Lead object for SMS messaging in Lightning or Classic.
Lightning
Update the Page Layout and Related List
Add the Do Not SMS Field.
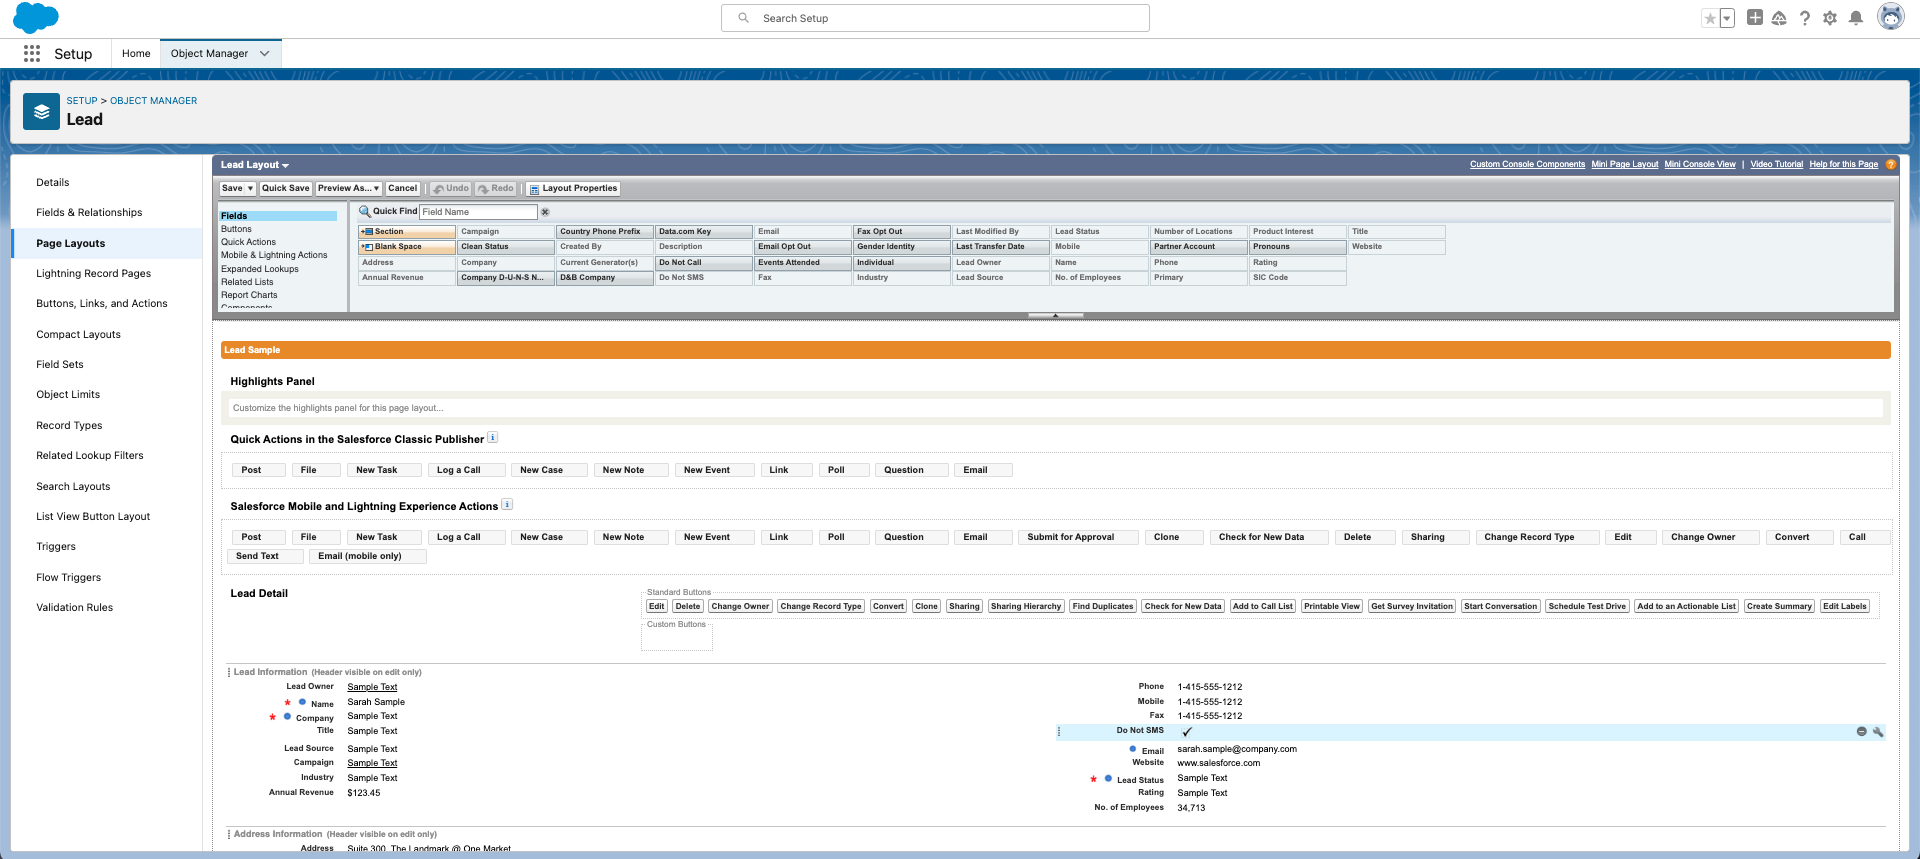
- Go to Setup.
- Click the Object Manager tab.
- In the Quick Find box, search for and click “Lead.”
- Click the Page Layouts tab.
- Select the layout type you need to update.
- Click the Fields tab.
- In the Quick Find box, search for the Do Not SMS field.
- Drag and drop the Do Not SMS field onto the page layout.
Add the Related List
- Click the Related Lists tab.
- In the Quick Find box, search for the “SMS Messages” Related List.
- Drag and drop the Related List onto the page layout.
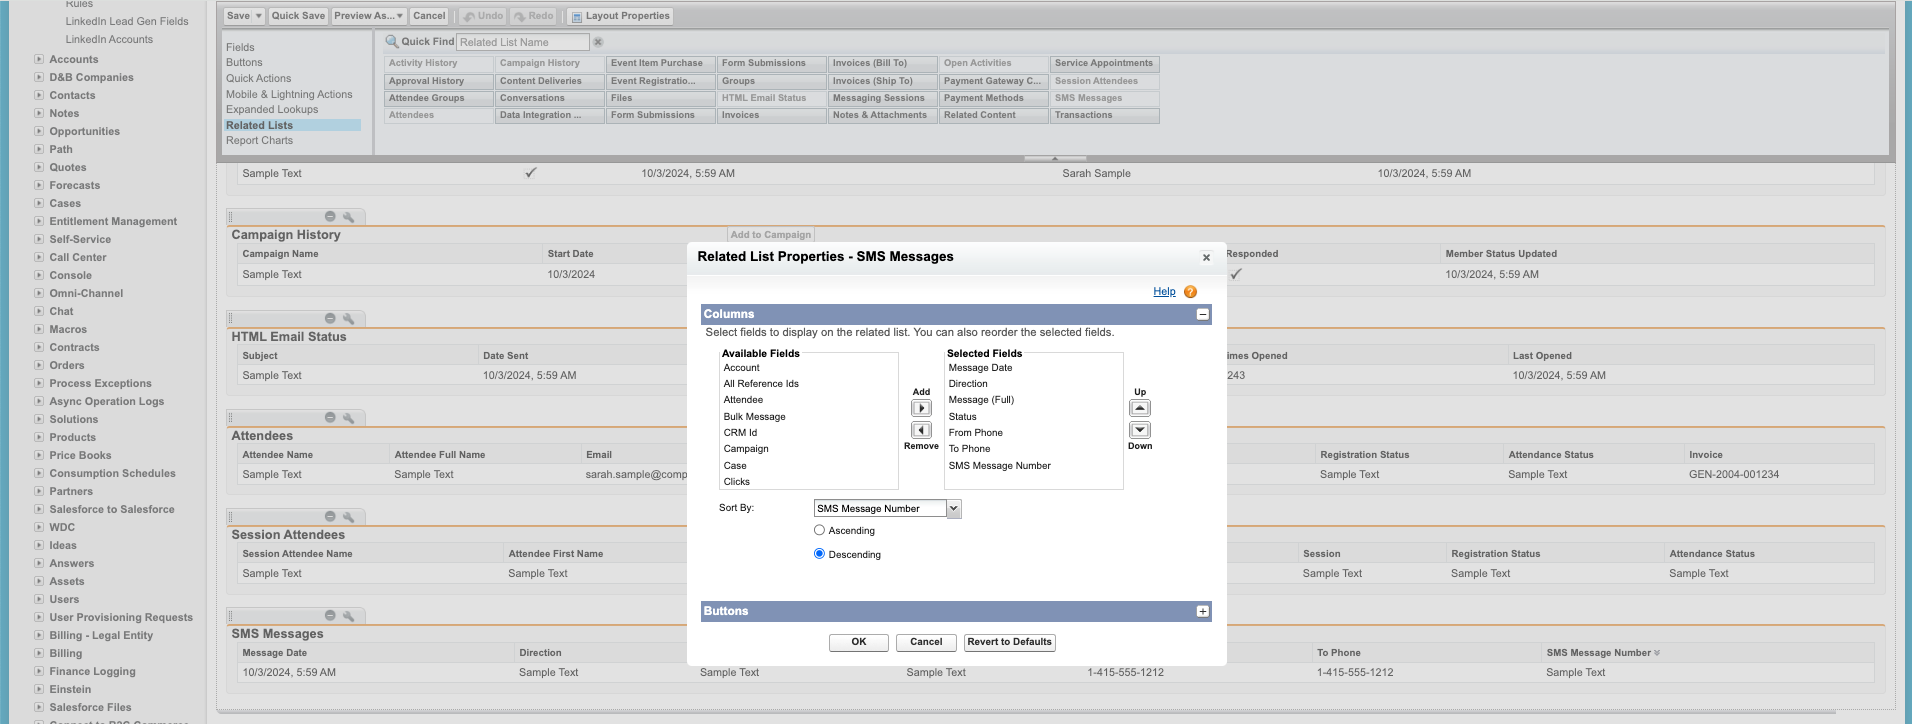
- Click the Wrench icon to open the Properties for this related list.

- Add these fields in the following order:
- Message Date
- Direction
- Message (Full)
- Status
- From Phone
- To Phone
- SMS Message Number
- In the Sort By drop-down, choose "SMS Message Number" and "Descending."
- Click the plus sign (+) located in the Buttons section.
- Uncheck the box next to New and click Ok.
- Click Save.
Lightning Record Page Layout
- Click the Lightning Record Pages tab.
- Click the name of the layout you want to modify.
- Click Edit.
- Complete the following steps if you don't see any Lightning page layouts listed.
- Click New.
- Choose Record Page.
- Click Next.
- Enter a Label (i.e. Lead Layout).
- Set Object = “Lead.”
- Click Next.
- Click the Clone Salesforce Default Page tab.
- Choose Lead Record Page Default.
- Click Done.
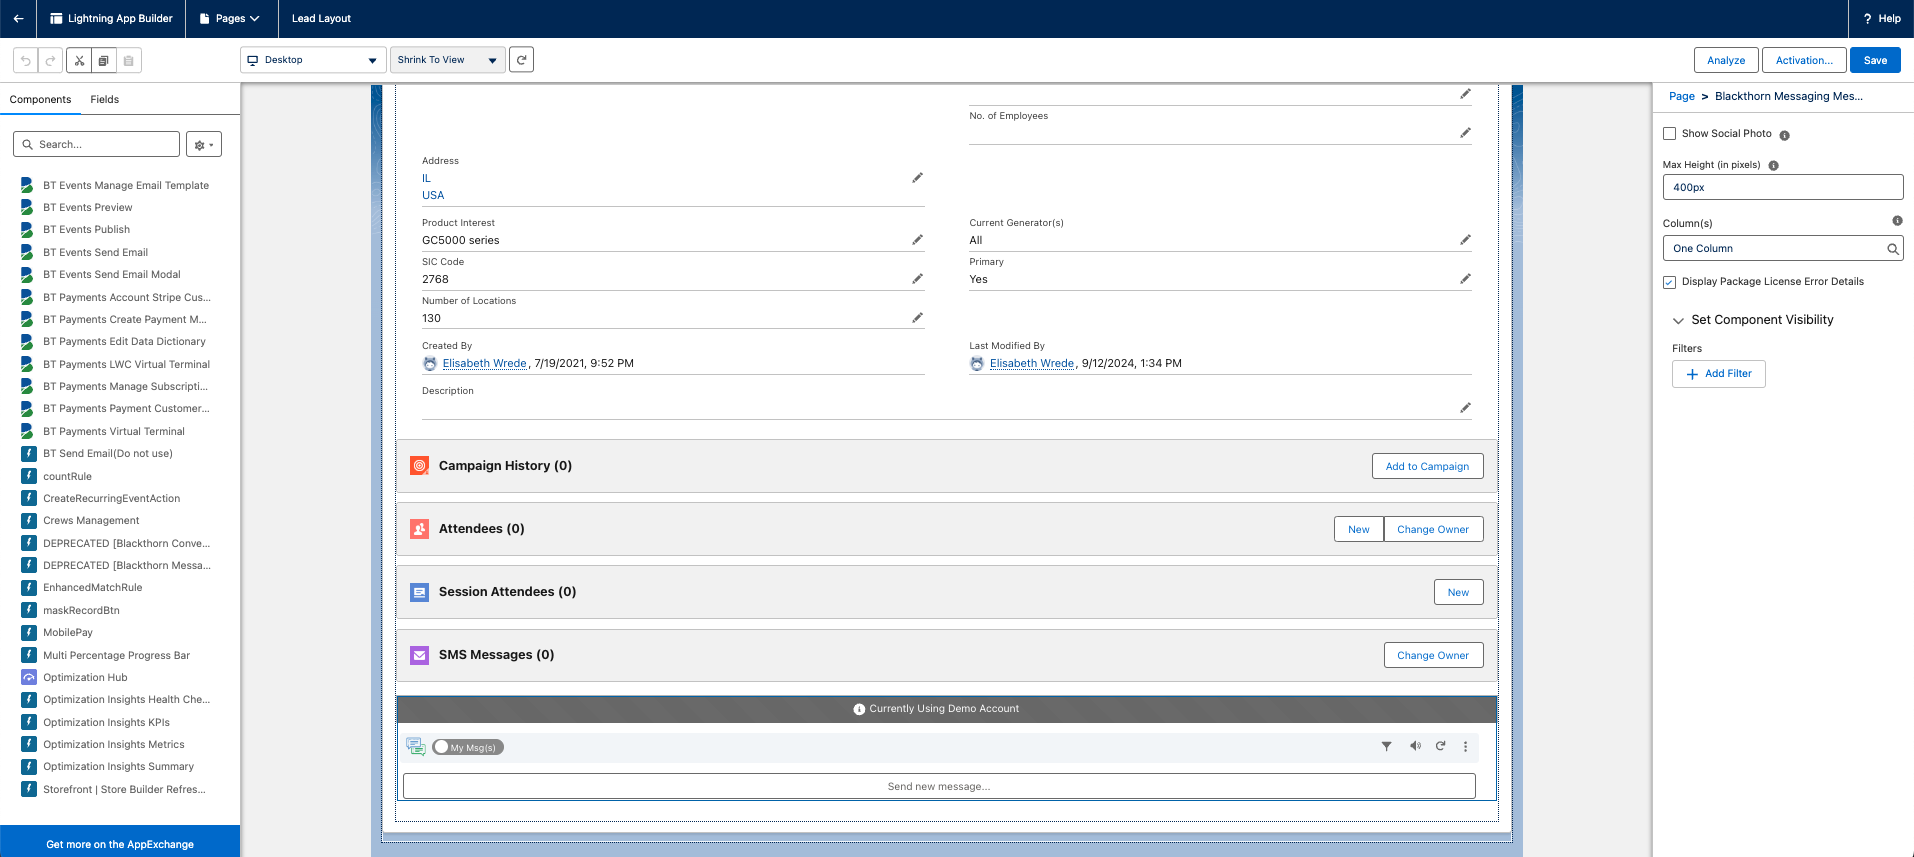
- You should now be in the Lightning App Builder.
- On the left-hand navigation bar, scroll down to the Custom-Managed section.
- Locate the Blackthorn Messaging Messenger component.
- Drag and drop the component onto the page layout.
- The right-hand column will have the configuration options. We recommend keeping the Max Height (in pixels) = "400px", but you can modify it as needed.
- If you've added the component to a sidebar, set Column(s) = “One Column.”
- If you've added it to a wide section of the page, you can set Column(s) = “Two Column” to maximize the space.
- Click Save.
- Click Activation.
- Review the settings.
- Click Close. Refresh your browser for the changes to take effect.
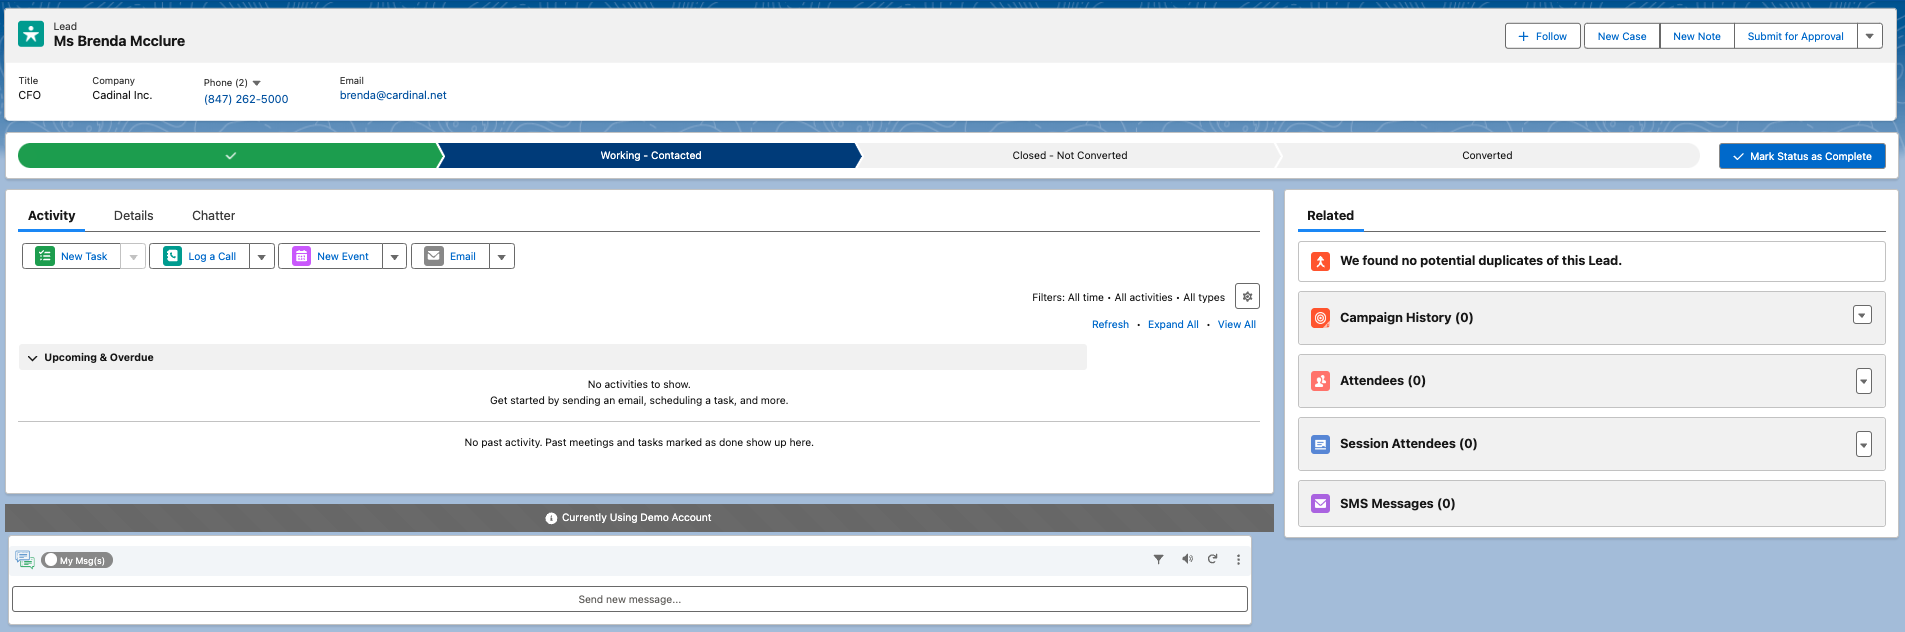
- Open a Lead record to see the Blackthorn Messaging Messenger component on your page.
Classic
Update the Page Layout and Related List
Add the Do Not SMS Field
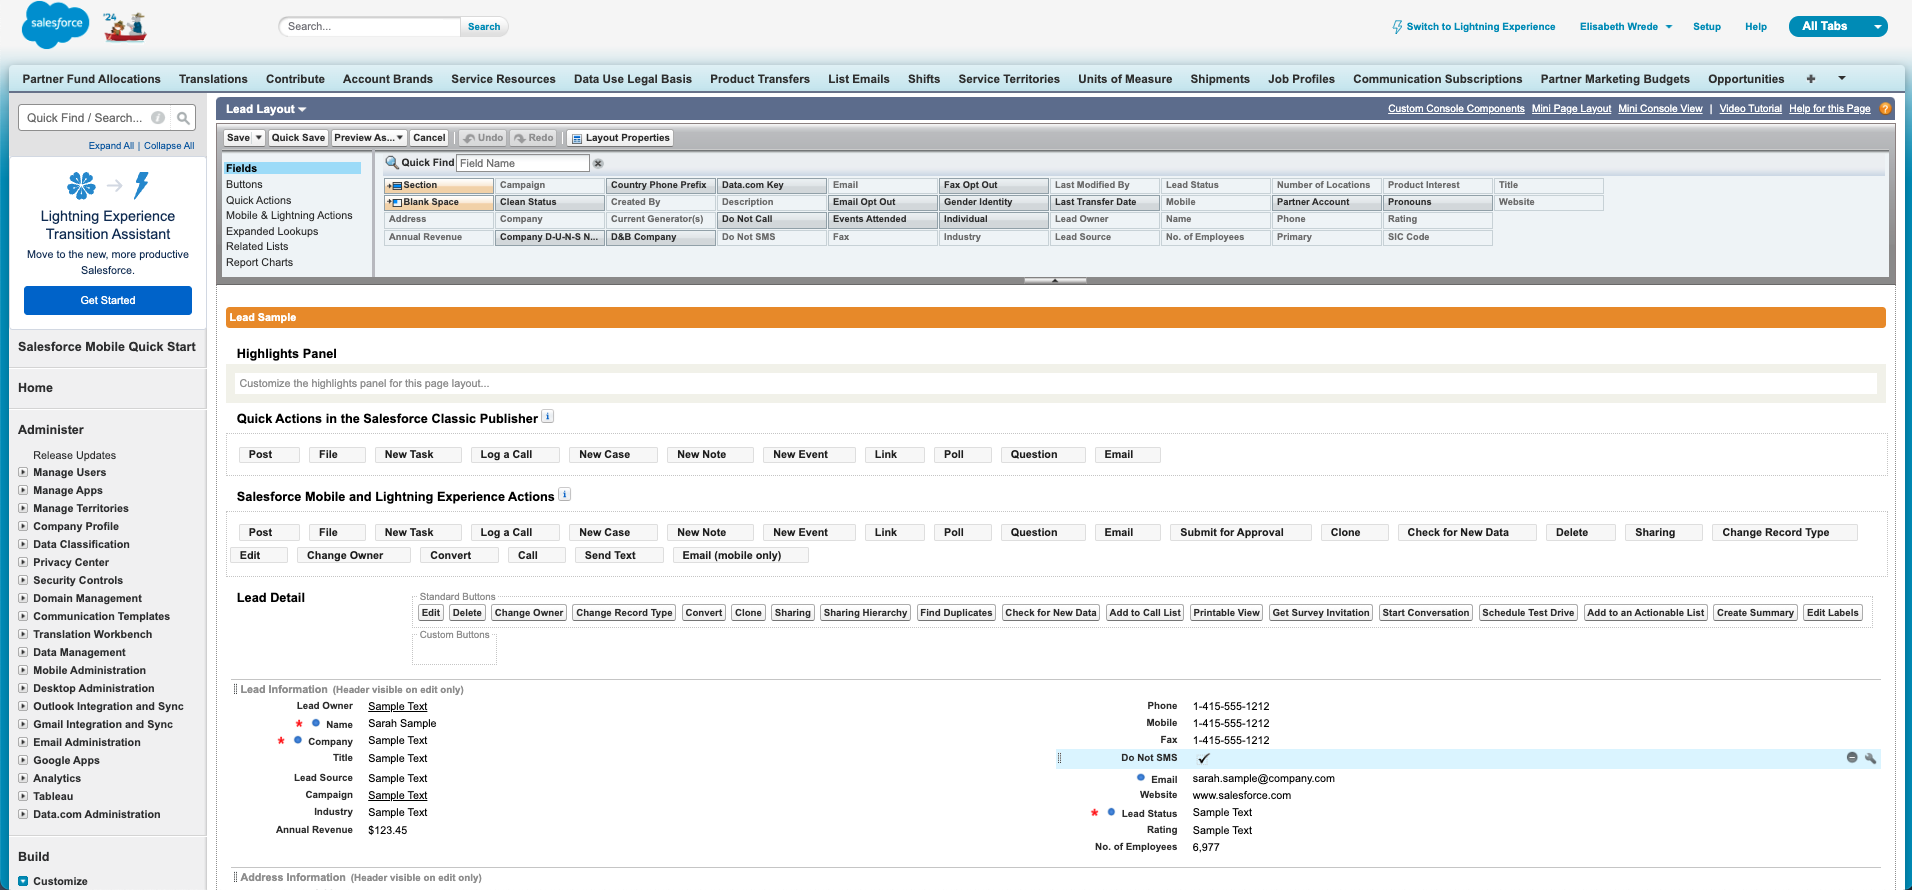
- Go to Setup.
- In the Quick Find box, enter “Leads.”
- Click Page Layouts.
- Click Edit next to the layout type you need to modify. This will open the Page Layout Editor.
- Click the Fields tab.
- In the Quick Find box, search for the Do Not SMS field.
- Drag and drop the Do Not SMS field onto the page layout.
Add the Related List
- Click the Related Lists tab.
- In the Quick Find box, search for the “SMS Messages” Related List.
- Drag and drop the Related List onto the page layout.
- Click the Wrench icon to open the Properties for this related list.
- Add these fields in the following order:
- Message Date
- Direction
- Message (Full)
- Status
- From Phone
- To Phone
- SMS Message Number
- In the Sort By drop-down, choose "SMS Message Number" and "Descending."
- Click the plus sign (+) located in the Buttons section.
- Uncheck the box next to New and click Ok.
- Save the page layout.
Classic Record Page Layout
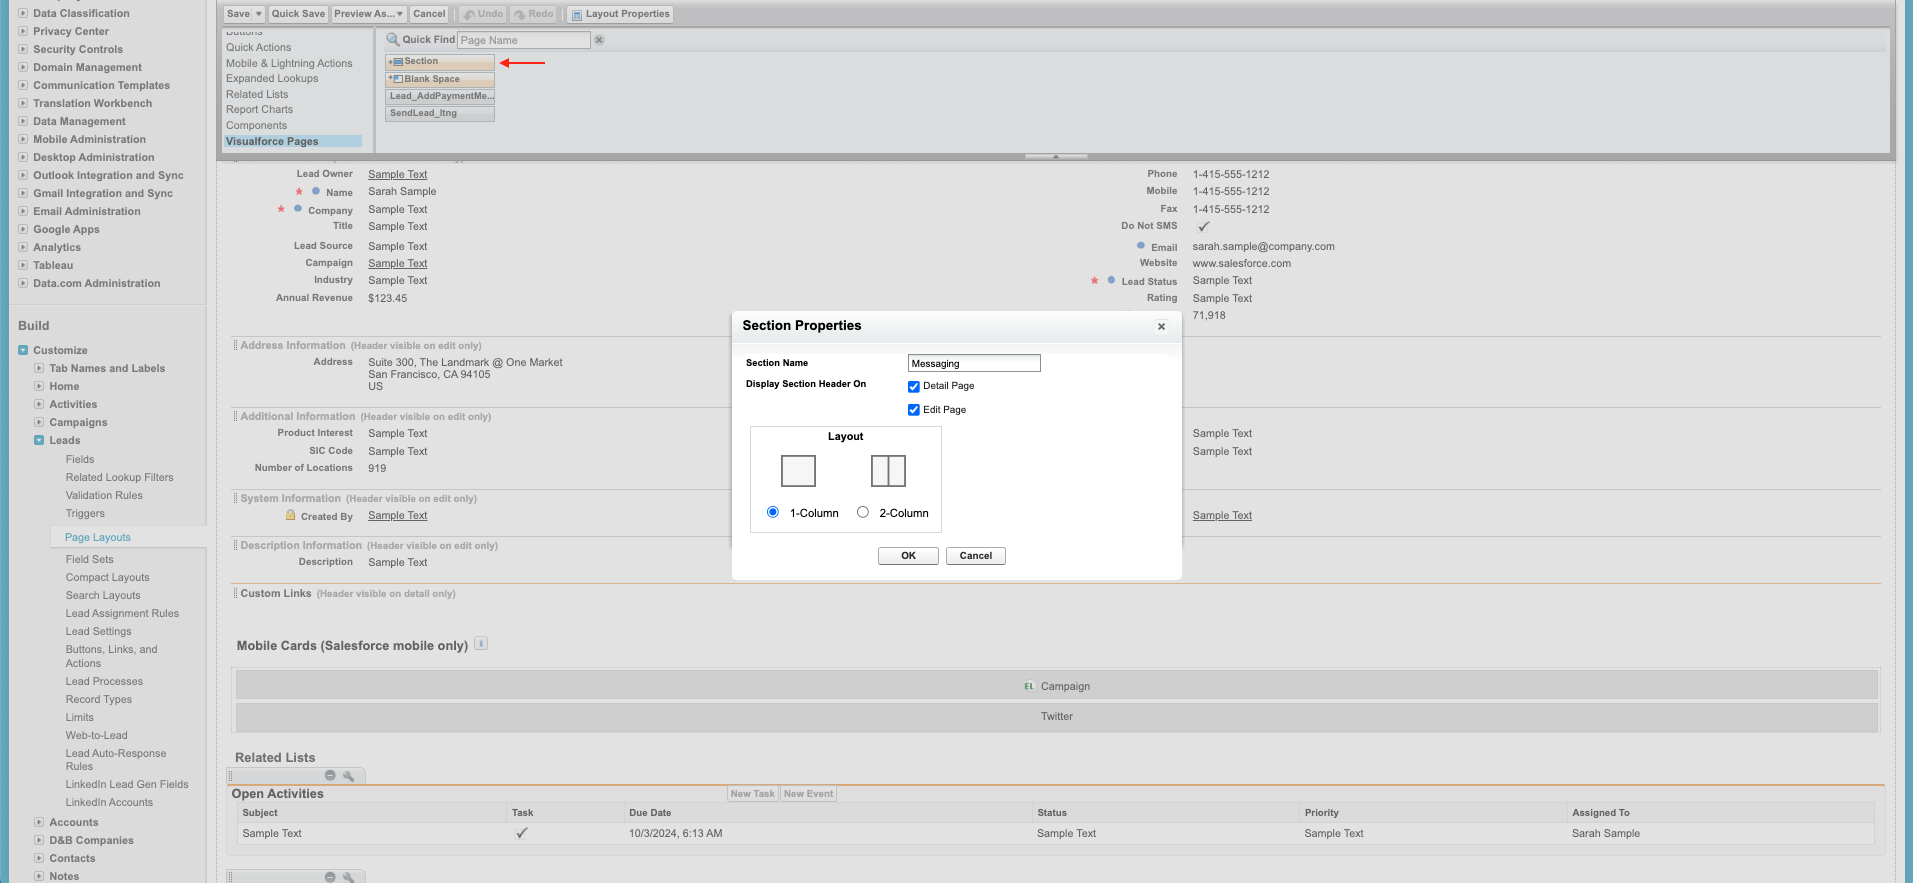
- Click the Visualforce Pages tab.
- Drag and drop the "+Section" on the page.
- Enter a Section Name such as "Messaging."
- Under Display Section Header On, check Detail Page and Edit Page.
- Set Layout to “1-Column.”
- Click Ok.
- In the Visualforce Pages section, find the page named "SendLead_ltng."
- Drag and drop SendLead_Itng in the section you just created.
- Hover over the section and click the Wrench icon to open the Properties for this section.
- Update the following fields.
- Change Height (in pixels) to "500."
- Set Show scrollbars = “True” (checked).
- Click Ok.
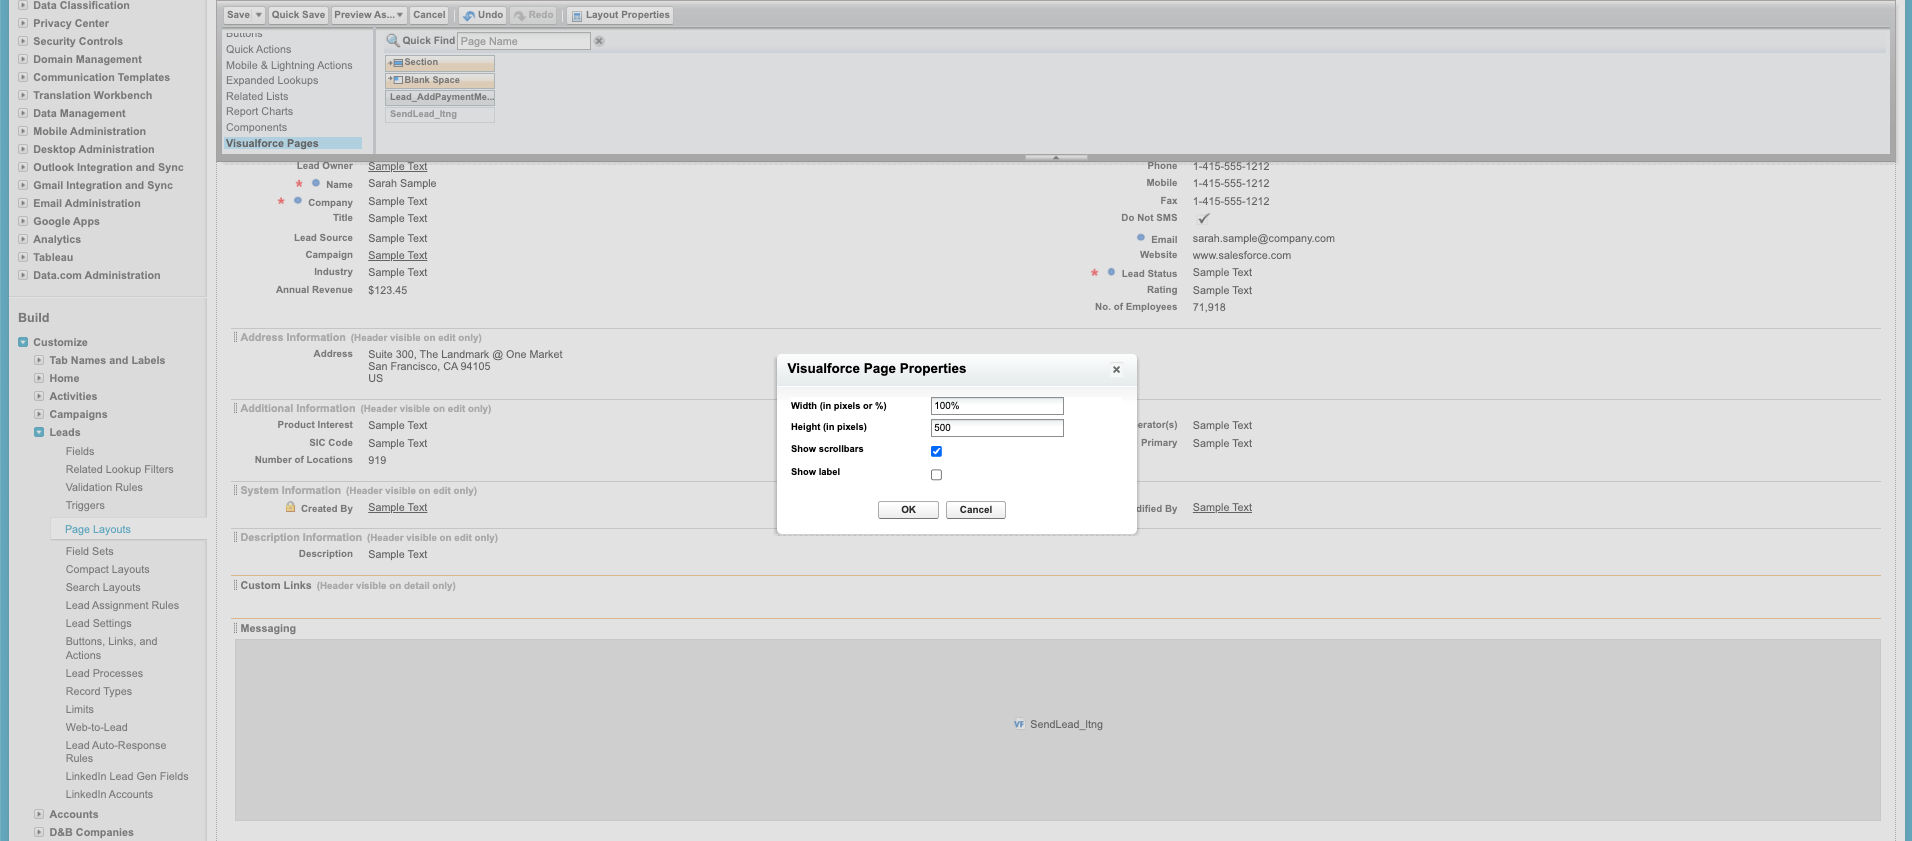
- Click Save to save the page layout.