Currently, the Check 21 integration is only compatible with iOS Mobile Payments.
Overview
Blackthorn supports Check 21 integration by utilizing Check 21 technology into the Blackthorn Mobile Payments iOS app and the Salesforce.com applications. It allows you to accept payments in the field by scanning checks.
Check 21, a third-party provider, will be leveraged through its API and native Salesforce package to achieve the check and money order processing.
Limitations
- A warning message will appear when the Transaction to Account rollup batch job attempts to roll up more than 10,000 Transactions related to a single Account. This message lets users know the rollup job is approaching Salesforce limits and will appear as a Blackthorn Log.
- If the batch job detects more than 40,000 Transactions rolling up to a single Account, the job will create a cap at 40,000 Transactions and generate a Blackthorn Log recommending users disable the batch job via Custom Settings.
Package Installs
- Install the latest version of Blackthorn Payments and complete the Setup Wizard.
- Install the Blackthorn Mobile Payments package and assign licenses to all users who need access.
- Install Check 21.
- Install the Check 21 Integration package.
- Assign MCC Payology permission set to the user.
Setup
Custom Settings Setup
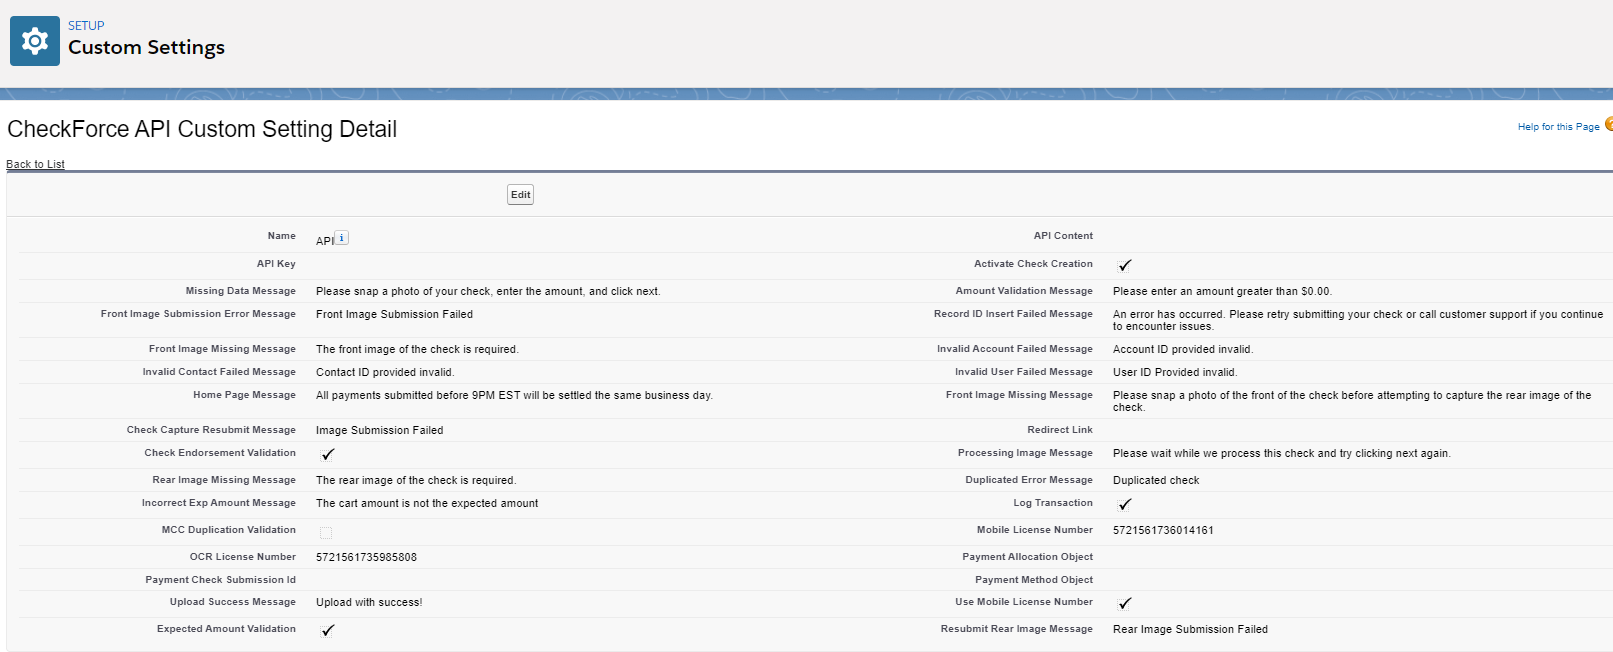
- Navigate to Setup > Custom Settings > CheckForce API Custom Settings
- Click Manage.
- Click New.
- Enter the data listed in the following image.
Page Layout Updates
Update your Charge Transaction page layout to include four fields:
* Transaction Sub-Type
* Source
* Check Capture Submission
* Mobile Skip Intro Screen
The Transaction Sub-Type will be defined as "Check", Source will be defined as "Mobile", and Check Capture Submission will be populated after submitting a check through the mobile app.
Use Check Scanning Functionality from a Mobile App
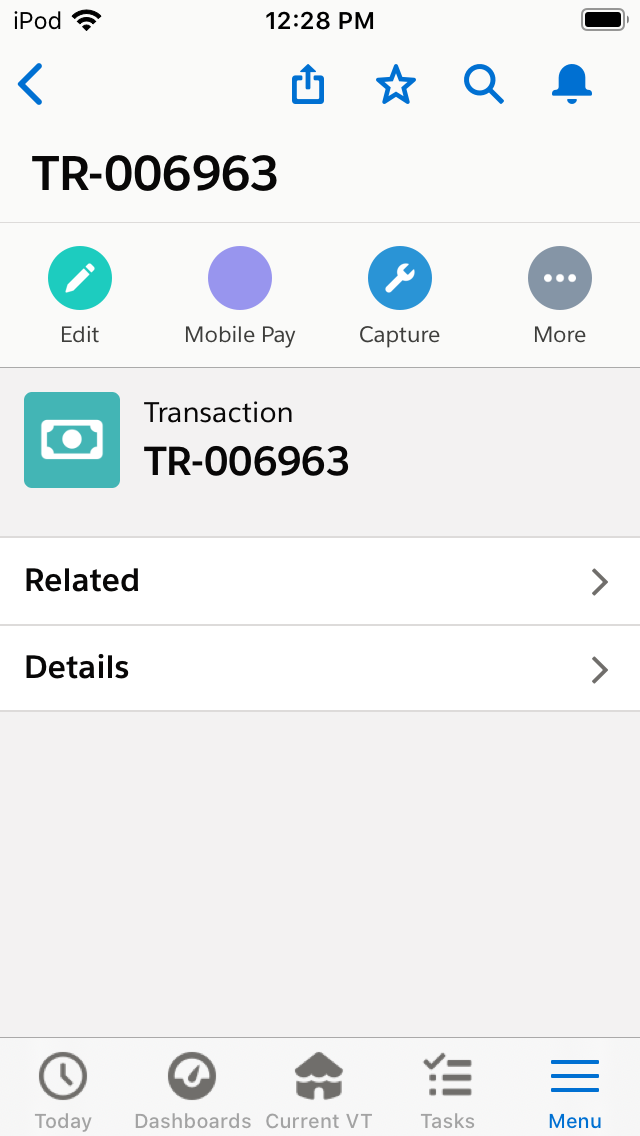
Open an existing Transaction from the Salesforce app that has the Amount populated, a Check 21 enabled Payment Gateway selected, and the Accepted Payment Methods = "Check".
Click the Mobile Pay button at the top of the screen.
You will be directed to a screen where you can scan the front and rear images of your check.
Note: Setting Mobile Skip Intro Screen = "Yes" on the Transaction will take the user directly to the check scanning page. Otherwise, you will see a screen to validate the field values from the Transaction.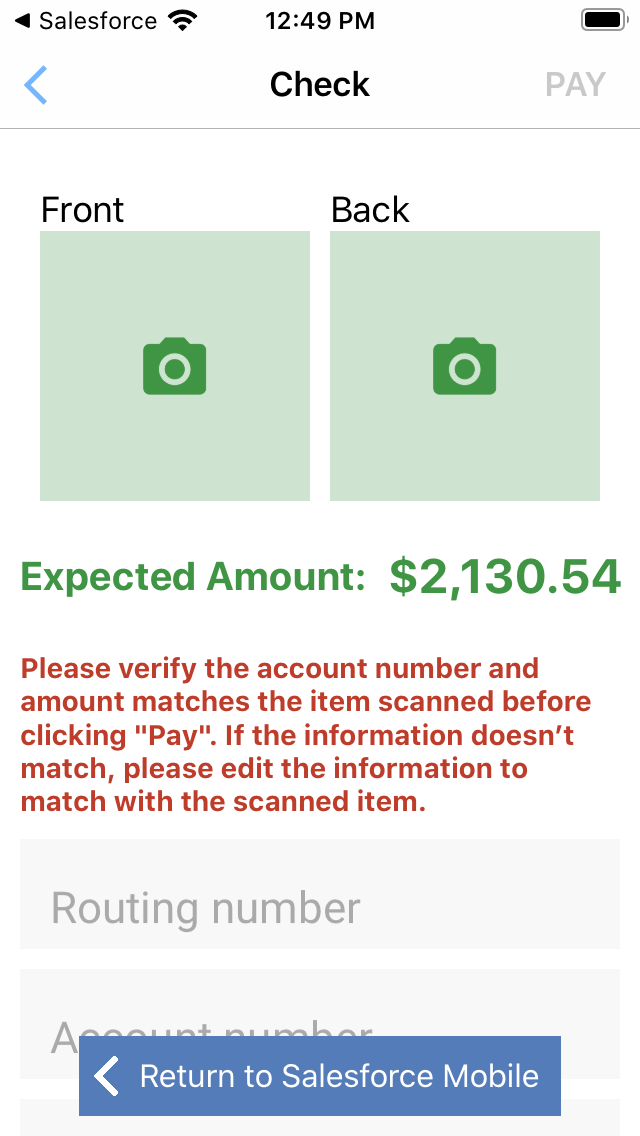
If Check 21 is not installed in the org, the user will not see the screen above.
Tap on the left image to start scanning of the front of the check. It will ask for camera permissions, which you will need to accept, or the scan won’t be possible.
Take a picture of the check. You'll notice a green rectangle appears. Line up the border with the check image. This rectangle will rotate with the screen orientation.
Follow the directions above to capture an image of the back of the check.
Once you have captured both the front and rear check images, the application will upload the images to the Check 21 API for image recognition.
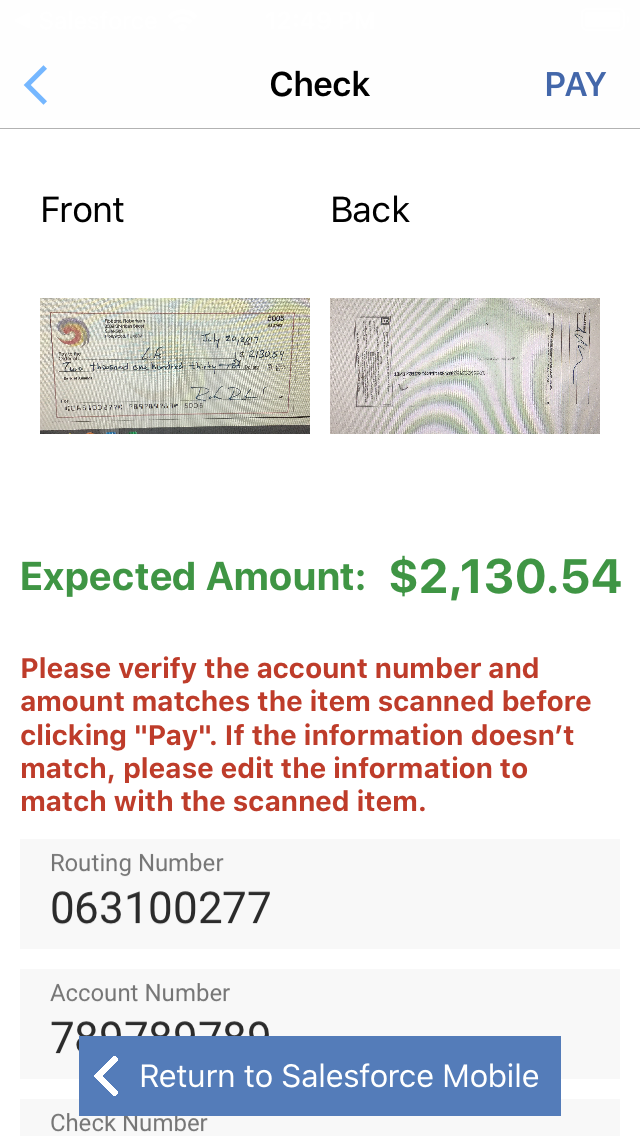
Verify the data from the images is correct, and click on Pay to finish the process.
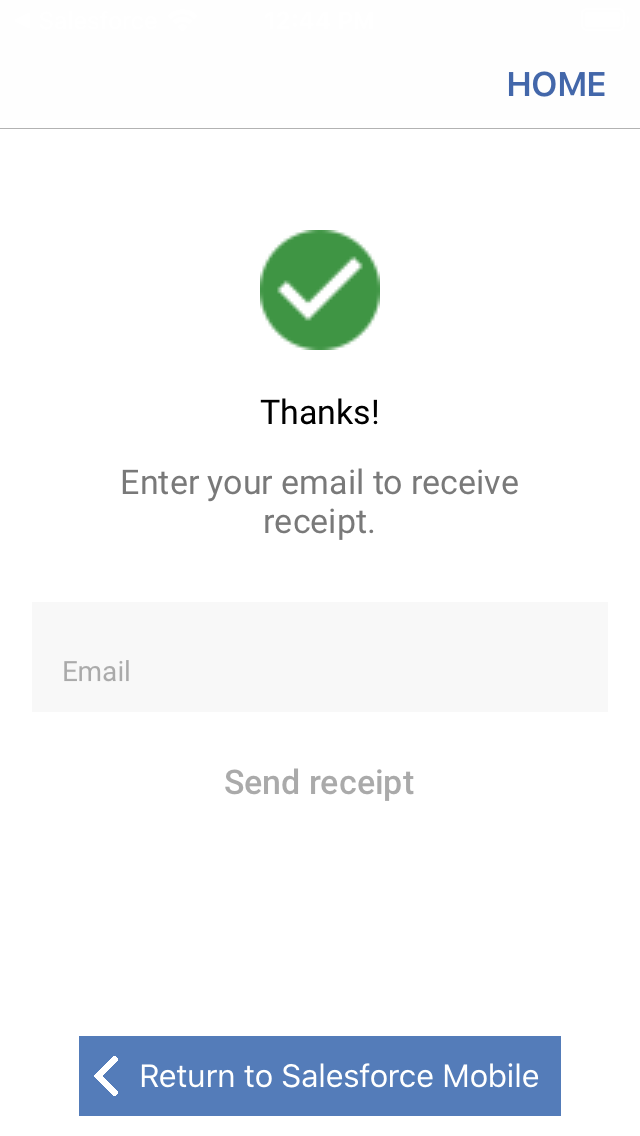
Note: You can edit the values detected by Check 21.The user will then be directed to a success screen where they can send an email receipt if needed.
The Transaction Transaction Status field will be updated to "Completed".