Add the Blackthorn Events Lightning Component to your Experience Cloud to display a list or calendar of Events or a dynamic Event!
Prerequisites
This guide assumes you have already set up Experience Cloud.
Custom Profiles
Since the authorization process happens each time the Events app loads, the app looks for the following permissions instead of the user’s assigned profile name. It is essential for customers who use a custom System Admin profile instead of the Standard System Admin profile to include these settings in their custom profiles.
Object
User: Field User Type (UserType) = “Standard” (Click here for more information about the User Type field.)
Permissions
System Permission: Modify all Data (Profile.PermissionsModifyAllData) = “True” (checked)
Users: Manage Users (Profile.PermissionsManageUsers) = “True” (checked)
Users: Manage Profiles and Permission Sets (Profile.PermissionsManageProfilesPermissionsets) = “True” (checked)
Sharing Settings
Please make sure Blackthorn Event and Event Group objects have Default External Access set to "Public Read Only" or "Public Read/Write." If Sharing Settings are set to "Private", the Event page will not render in the Experience Cloud.
Custom Domains
If you currently have a custom domain for an Experience Cloud, you will need to allowlist the domain before the component will load. Please navigate to CSP Trusted Sites in Salesforce Setup to add your site name and URL (Trusted Site URL = Experience Cloud URL).

Lightning Locker
If the Events Experience Cloud component is grayed out, your Lightning Locker is not enabled. To enable the Lightning Locker, complete the following steps.
Go to the Experience Cloud and open Experience Builder.
Click the Gear icon (Settings).
Click the Security & Privacy tab.
Set the Security Level to “Relaxed CSP: Permit Access to Inline Scripts and Allowed Hosts.”
Set the Lightning Web Security to “On.”
Configure the Blackthorn Events Component
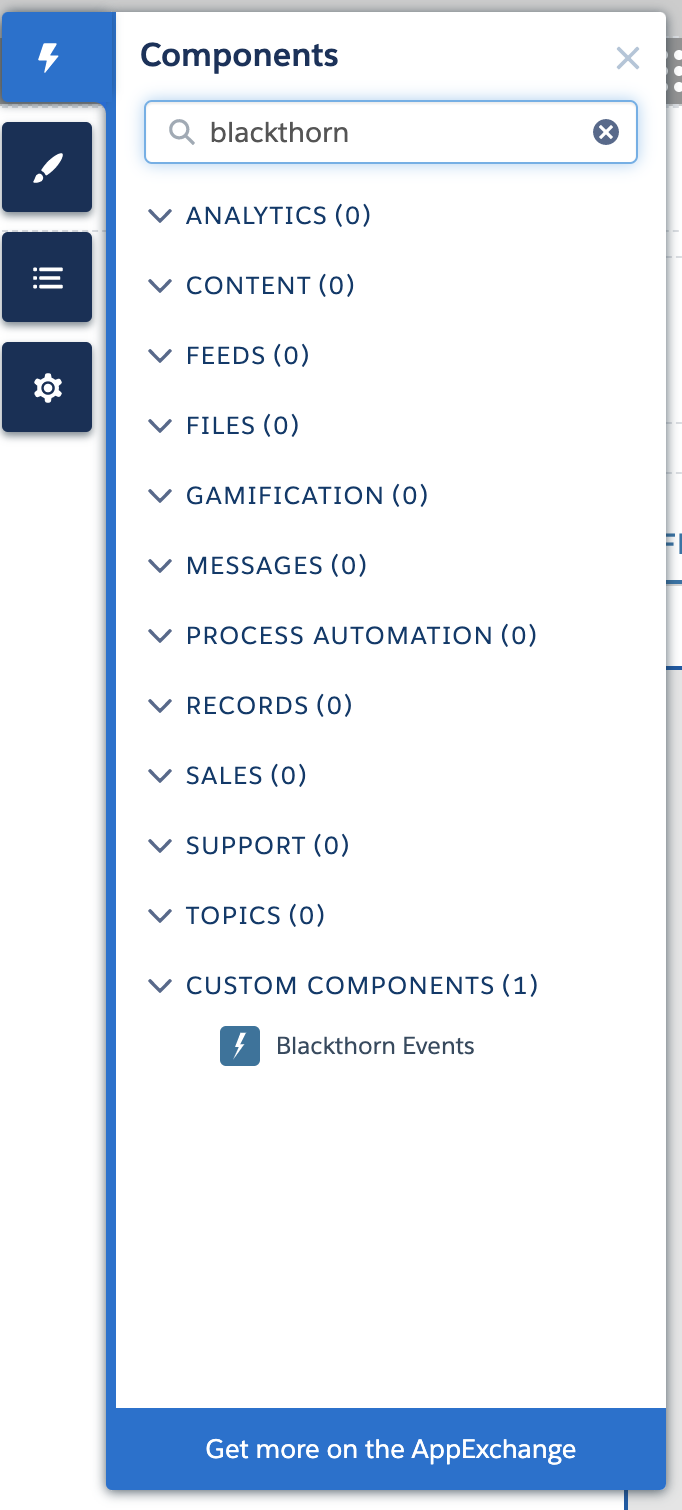
Drag and drop the "BT Events Listing" Lightning Component to a page.
You are now ready to configure any of the following three scenarios.
List/Calendar View of Events (Event Group)
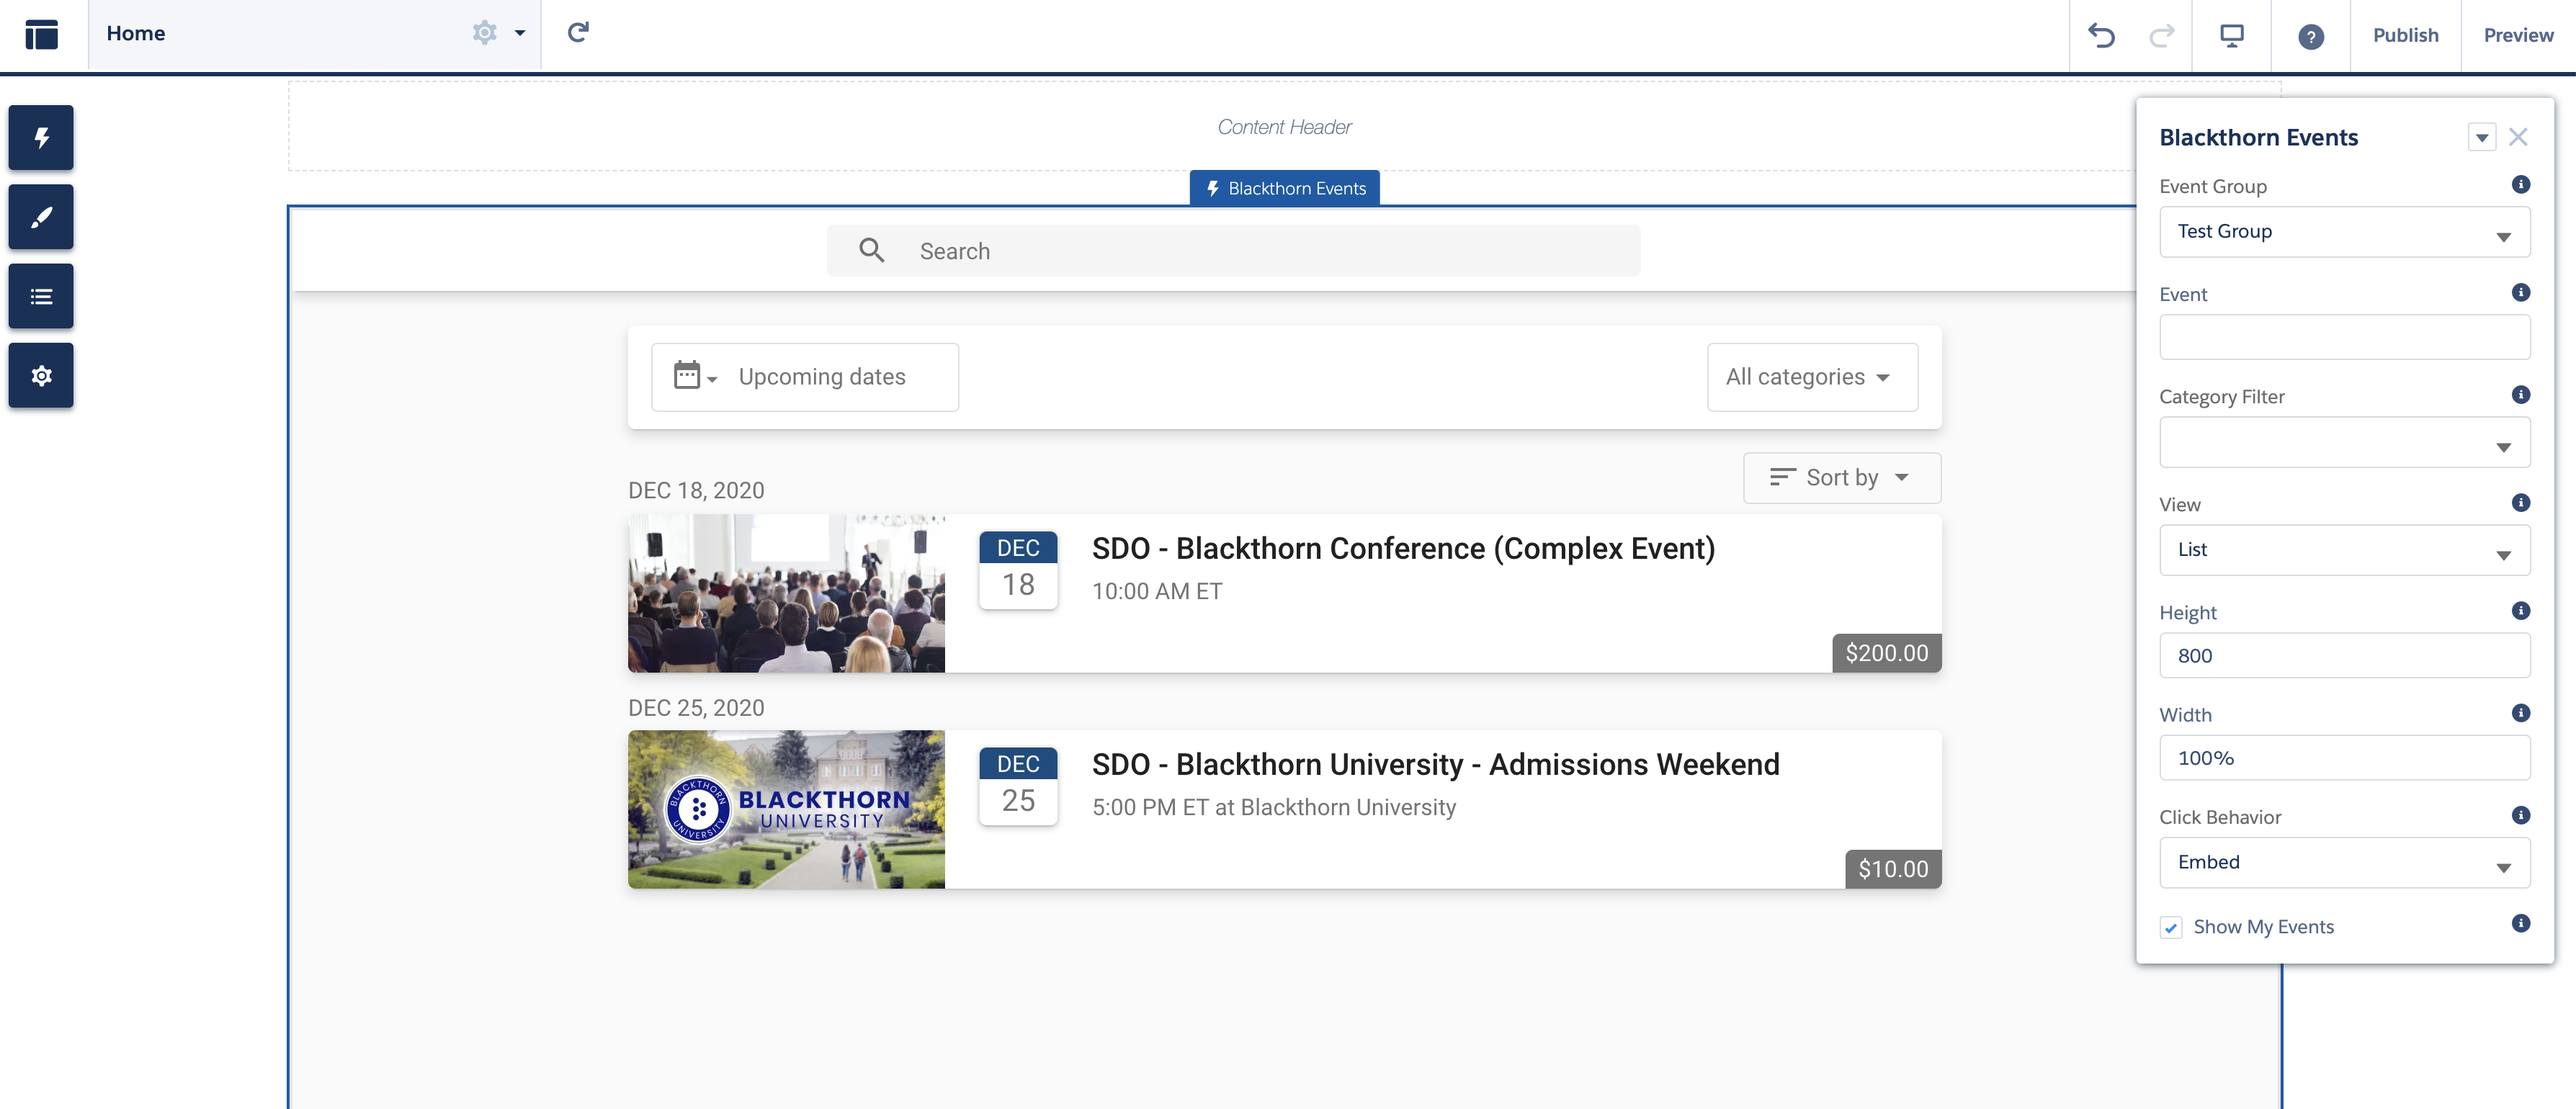
Configure a List or Calendar View of Events
The instructions below are for setting up a list or calendar view of an Event Group. The Event Group shows a group of available Events.
Define the Event Group.
Only Events associated to the Event Group will be displayed on the component. To display all Events, leave blank.Set the Category Filter to display Events by type. Example: Conference, Virtual Event, Brunch, etc.
For View, select “Calendar” or “List.”
Specify Height; the default is 500px.
The Click Behavior field defines how to open the Event details.
Enabling the Show My Events field will allow an Attendee to view the Events they are registered for. If the View = “List,” then the user will also be able to filter "My Events" on the Experience Cloud page when Show My Events is checked.
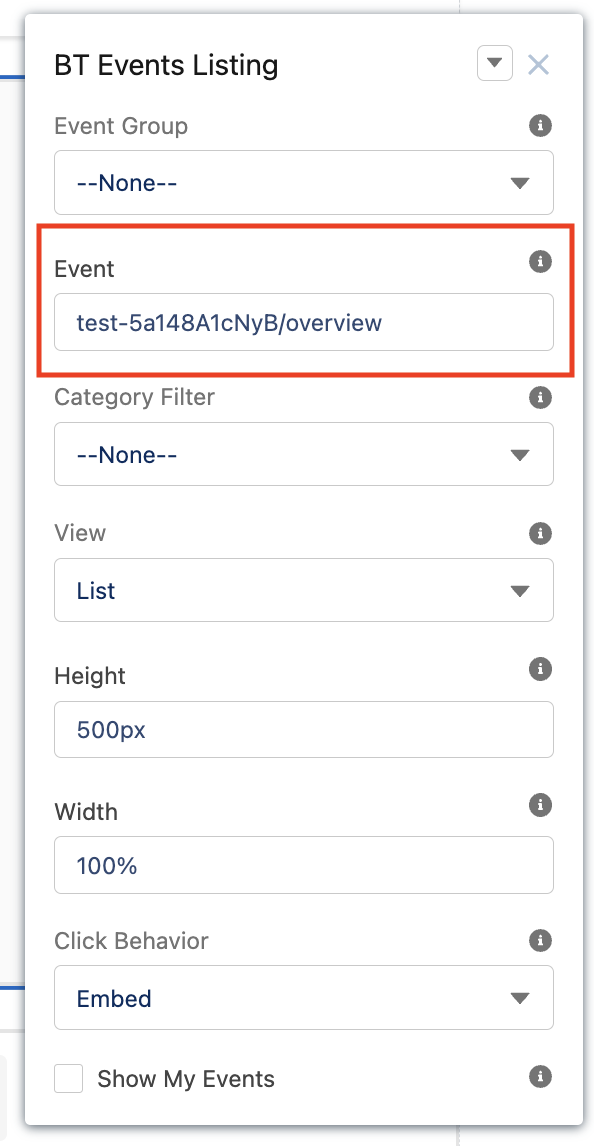
Configure a Specific Event
Only define the Event field.
Go to the Event page in Salesforce that you want to post in your Experience Cloud. Click the Event URL link.
Grab the last portion of the URL to load a single Event: "test-5a148A1cNyB/overview"
Here is the full link for reference: https://events.blackthorn.io/en/8AHDeK6/test-5a148A1cNyB/overviewAdd the last portion (Ex. "test-5a148A1cNyB/overview") to the BT Events Listing on your site's component settings.
Configure Registration Logic
Use the registration logic for Experience Cloud users to prevent blank Contact records from being created when the Relationship Settings Use logged-in EC User as Default Contact field is checked.
When true (checked), newly created Attendees will automatically be related to the logged-in user’s Experience Cloud Contact record.
When false (unchecked), newly created Attendees will be matched to an existing Contact or other Salesforce record. If a matching record isn’t found, a new record will only be created if the validation rules and required fields are compatible with the submitted Attendee data.
Configure a Dynamic Event URL
Use the Dynamic Event URL option to create a static Experience Cloud page that will dynamically load any Event.
Open your Experience Cloud in "Builder" mode and click the Settings icon at the top.
Click New Page.
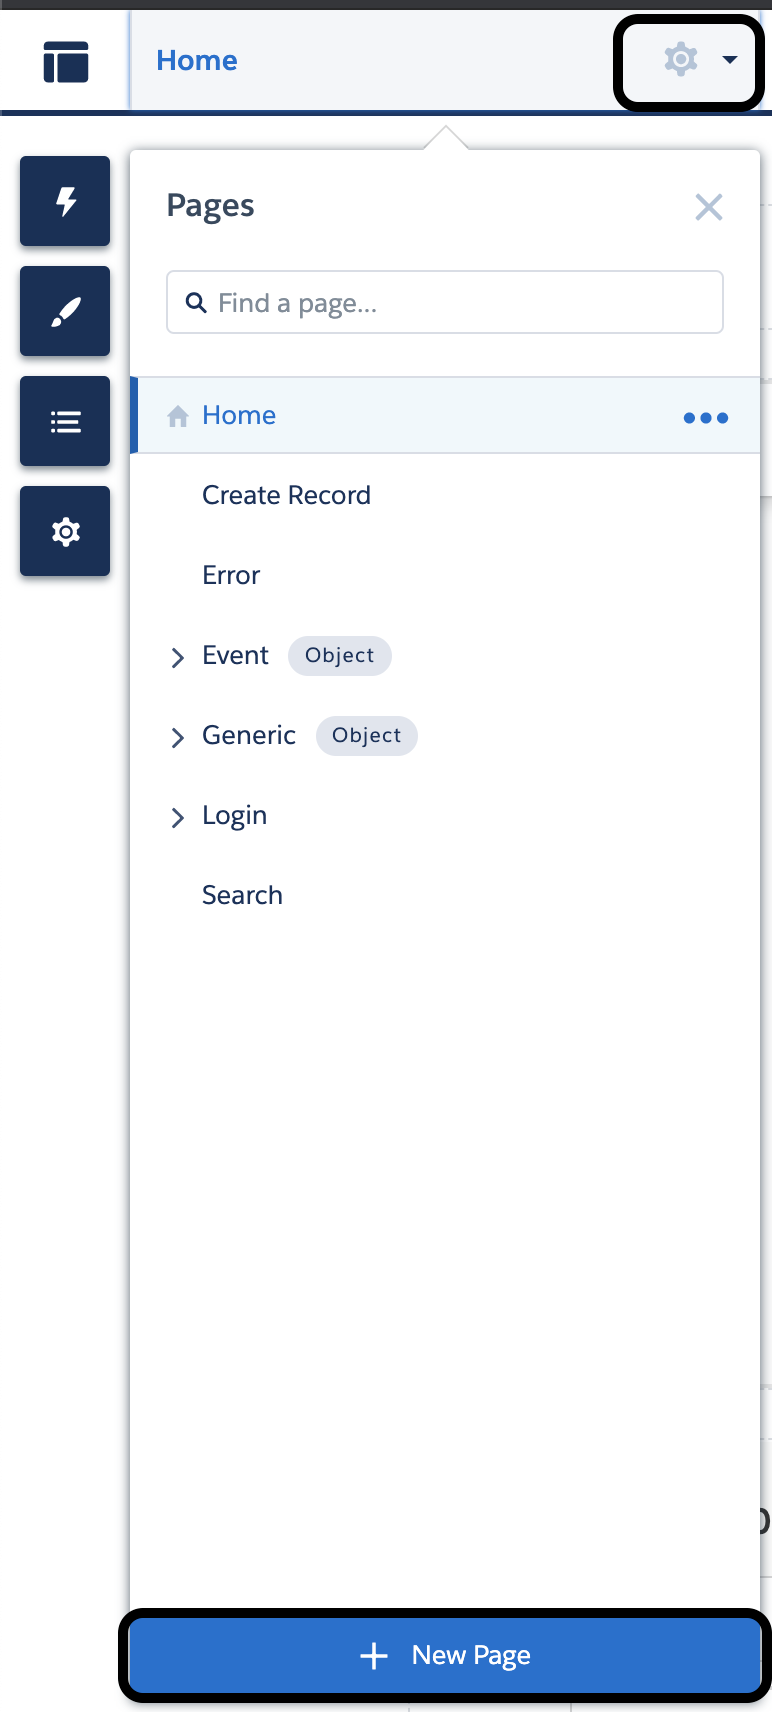
Select a "Standard Page" in the pop-up menu.
Add the Blackthorn Events component to the page.
Set Event Group = "None"
Set View = "List"

Click your page, and you'll see the URL field. This is used as part of the dynamic URL.

Now, any Event you want to give to your Attendees is a simple copy and paste. Here is the formatting for the URL to provide:
<URL>?event=<event-id>Here is an example URL:
https://yourdomain.force.com/s/blackthorn-events?event=a0w3i00000054tW
Our suggestion would be to create the URL in a text formula field on the Event object.
Create a text formula field on the Event object.
The formula will be:
https://yourdomain.force.com/s/blackthorn-events?event=& Id
Configure Person Accounts
The Events app uses the mapped address field, Mailing Address (PersonMailingAddress), for Person Accounts, including the following subfields:
Mailing City (PersonMailingCity)
Mailing Country (PersonMailingCountry)
Mailing Postal Code (PersonMailingPostalCode)
Mailing Street (PersonMailingStreet)
You must use the Mailing Address (PersonMailingAddress) field (and its subfields) to ensure consistency and accuracy when configuring Person Accounts.
Register Experience Cloud Users
There are several steps that need to be completed before Experience Cloud users can register. External users need to be able to access your Experience Cloud and log in. You can find the Salesforce documentation to enable this here.
Once you complete the six steps in the Salesforce documentation, you are ready to log in as an Experience Cloud user! Experience Cloud users who have login credentials will be able to log in and register for Events.
Redirect Registered Users to their AttendeeLink
When an Event Organizer checks the Event Settings Auto Redirect Users to Confirmation Page field, authenticated users (EC users, authenticated iframe, AttendeeLink users) will be automatically redirected to their AttendeeLink when revisiting the (non-AttendeeLink) Event URL.
Out-of-the-box permission sets for the Auto Redirect Users to Confirmation Page (conference360__ Auto_Redirect_Users_to_Confirmation_Page__c) field include the following:
Read/Edit: Blackthorn | Event (Organizer), Blackthorn | Event (Admin), and Blackthorn | Event (Community Platform User)
Read Only: Blackthorn | Event (Limited Access), Blackthorn | Event (Lite User), and Blackthorn | Event (Read Only)
Register Other Users
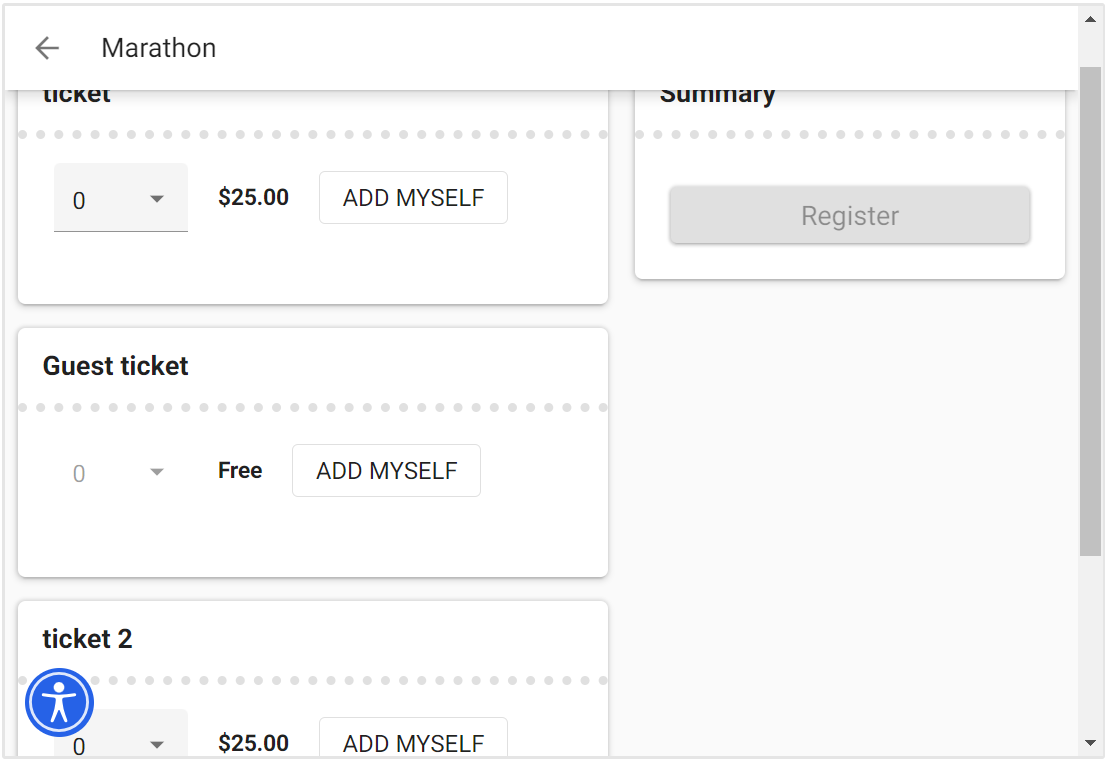
When logged into an Experience Cloud, users can now select a number of Tickets for an Event without having to add themselves as an Attendee. The user can then click Register to complete the registration process.
New Field
The Disable Requirement to Add Myself field (checkbox) was added to the BT Event Listing component. The default setting is “True” or checked.
When Disable Requirement to Add Myself = “False” or unchecked, the user cannot register other Attendees without registering themselves. They must click the Add Myself button.
When Disable Requirement to Add Myself = "True" or checked, the user does not have to add themselves to register other Attendees.
Note regarding authenticated iframes:
When a user registers for an Event via the authenticated iframe, the pre-fill functionality only applies to the main Ticket. Guest Tickets will no longer be pre-filled with the logged-in Attendee's information and will not have access to the Add Myself button, regardless of the BT Event Listing’s Disable Requirement to Add Myself setting.
When using an authenticated iframe with the BT Event Listing Disable Requirement to Add Myself = "True" (checked), registrants must select a Ticket for themselves.
Functionality
The new field does not remove the restriction that the user must buy a primary Ticket (Event Item Type = “Main event ticket”) to buy a Guest Ticket. The change is that the primary Ticket does not have to be for the logged-in user.
Additional functionality includes the following:
If more than one Attendee is registered, they will be added to an Attendee Group.
Clicking the Add Myself button will pre-fill the registration form for the logged-in user and add one to the quantity after the button is clicked.
Register Non-Experience Cloud Users
You may want to share your Experience Cloud with guests as well as verified users. To do this is simple! Follow these easy steps.
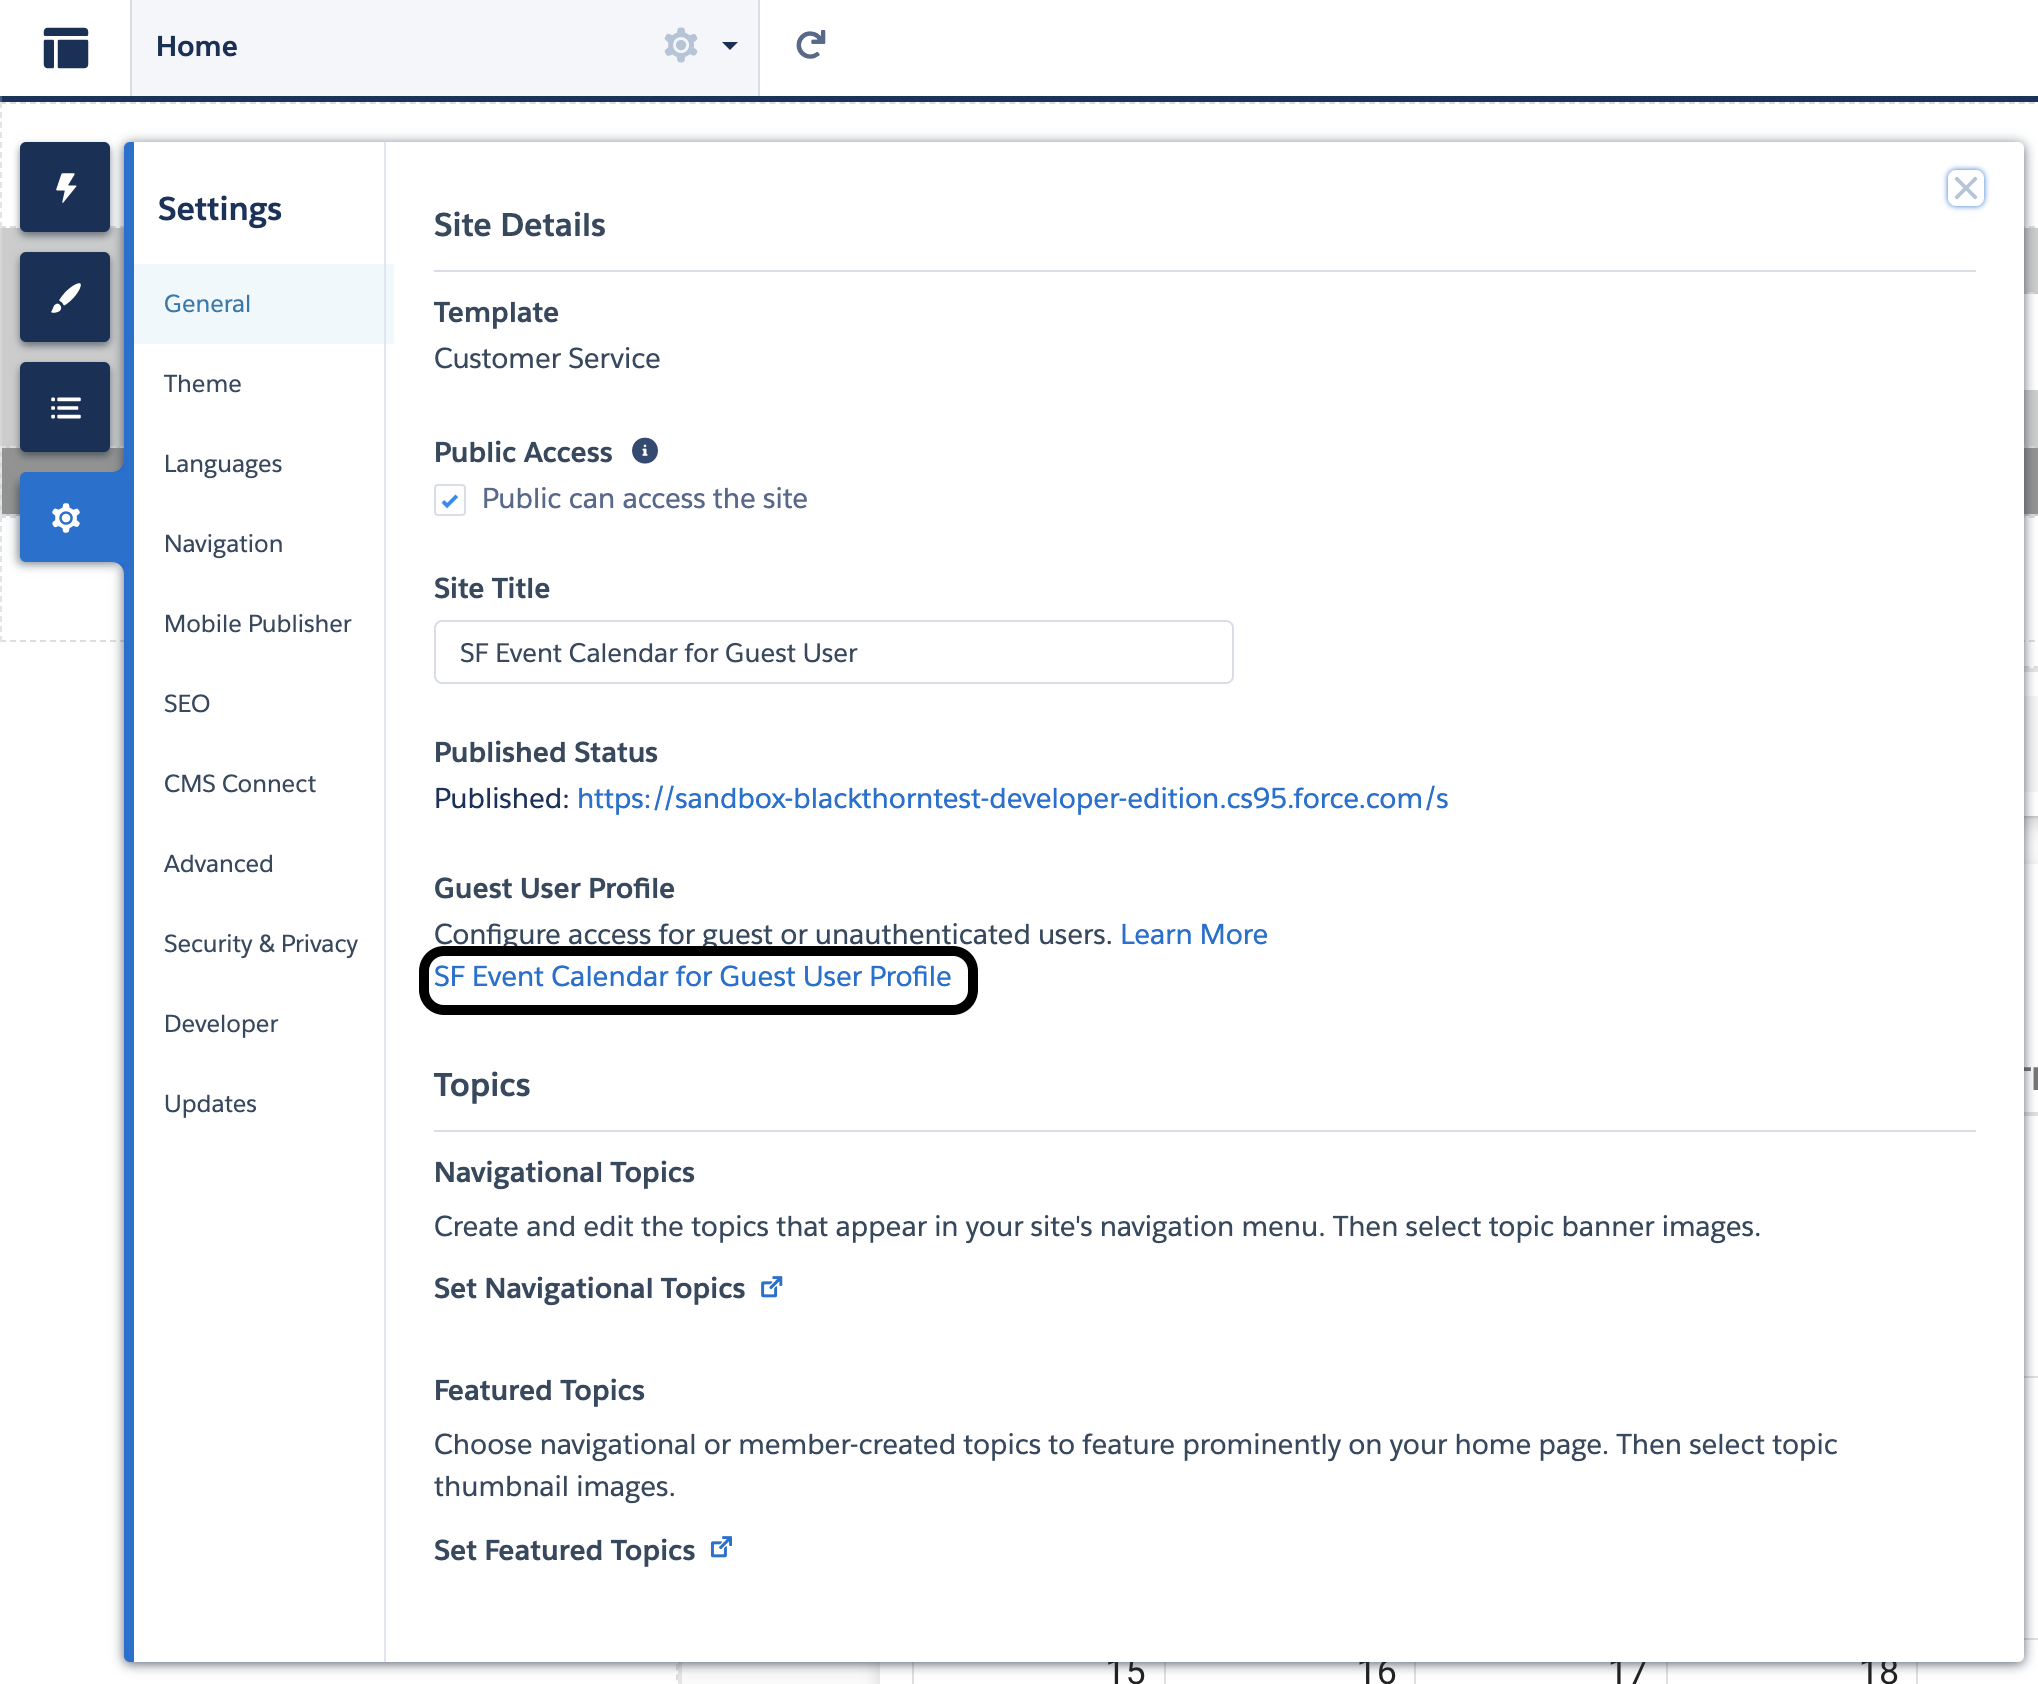
From your Experience Cloud builder, navigate to "Settings," and click your Guest User Profile.
Give the guest user access to the Blackthorn | Events (Community Guest User) permission set.
Make sure "Sharing Settings" are defined properly. To do this, navigate to Setup and search for "Sharing Settings". Set all Blackthorn Events Objects to Default External Access = "Public Read Only" or "Public Read/Write".
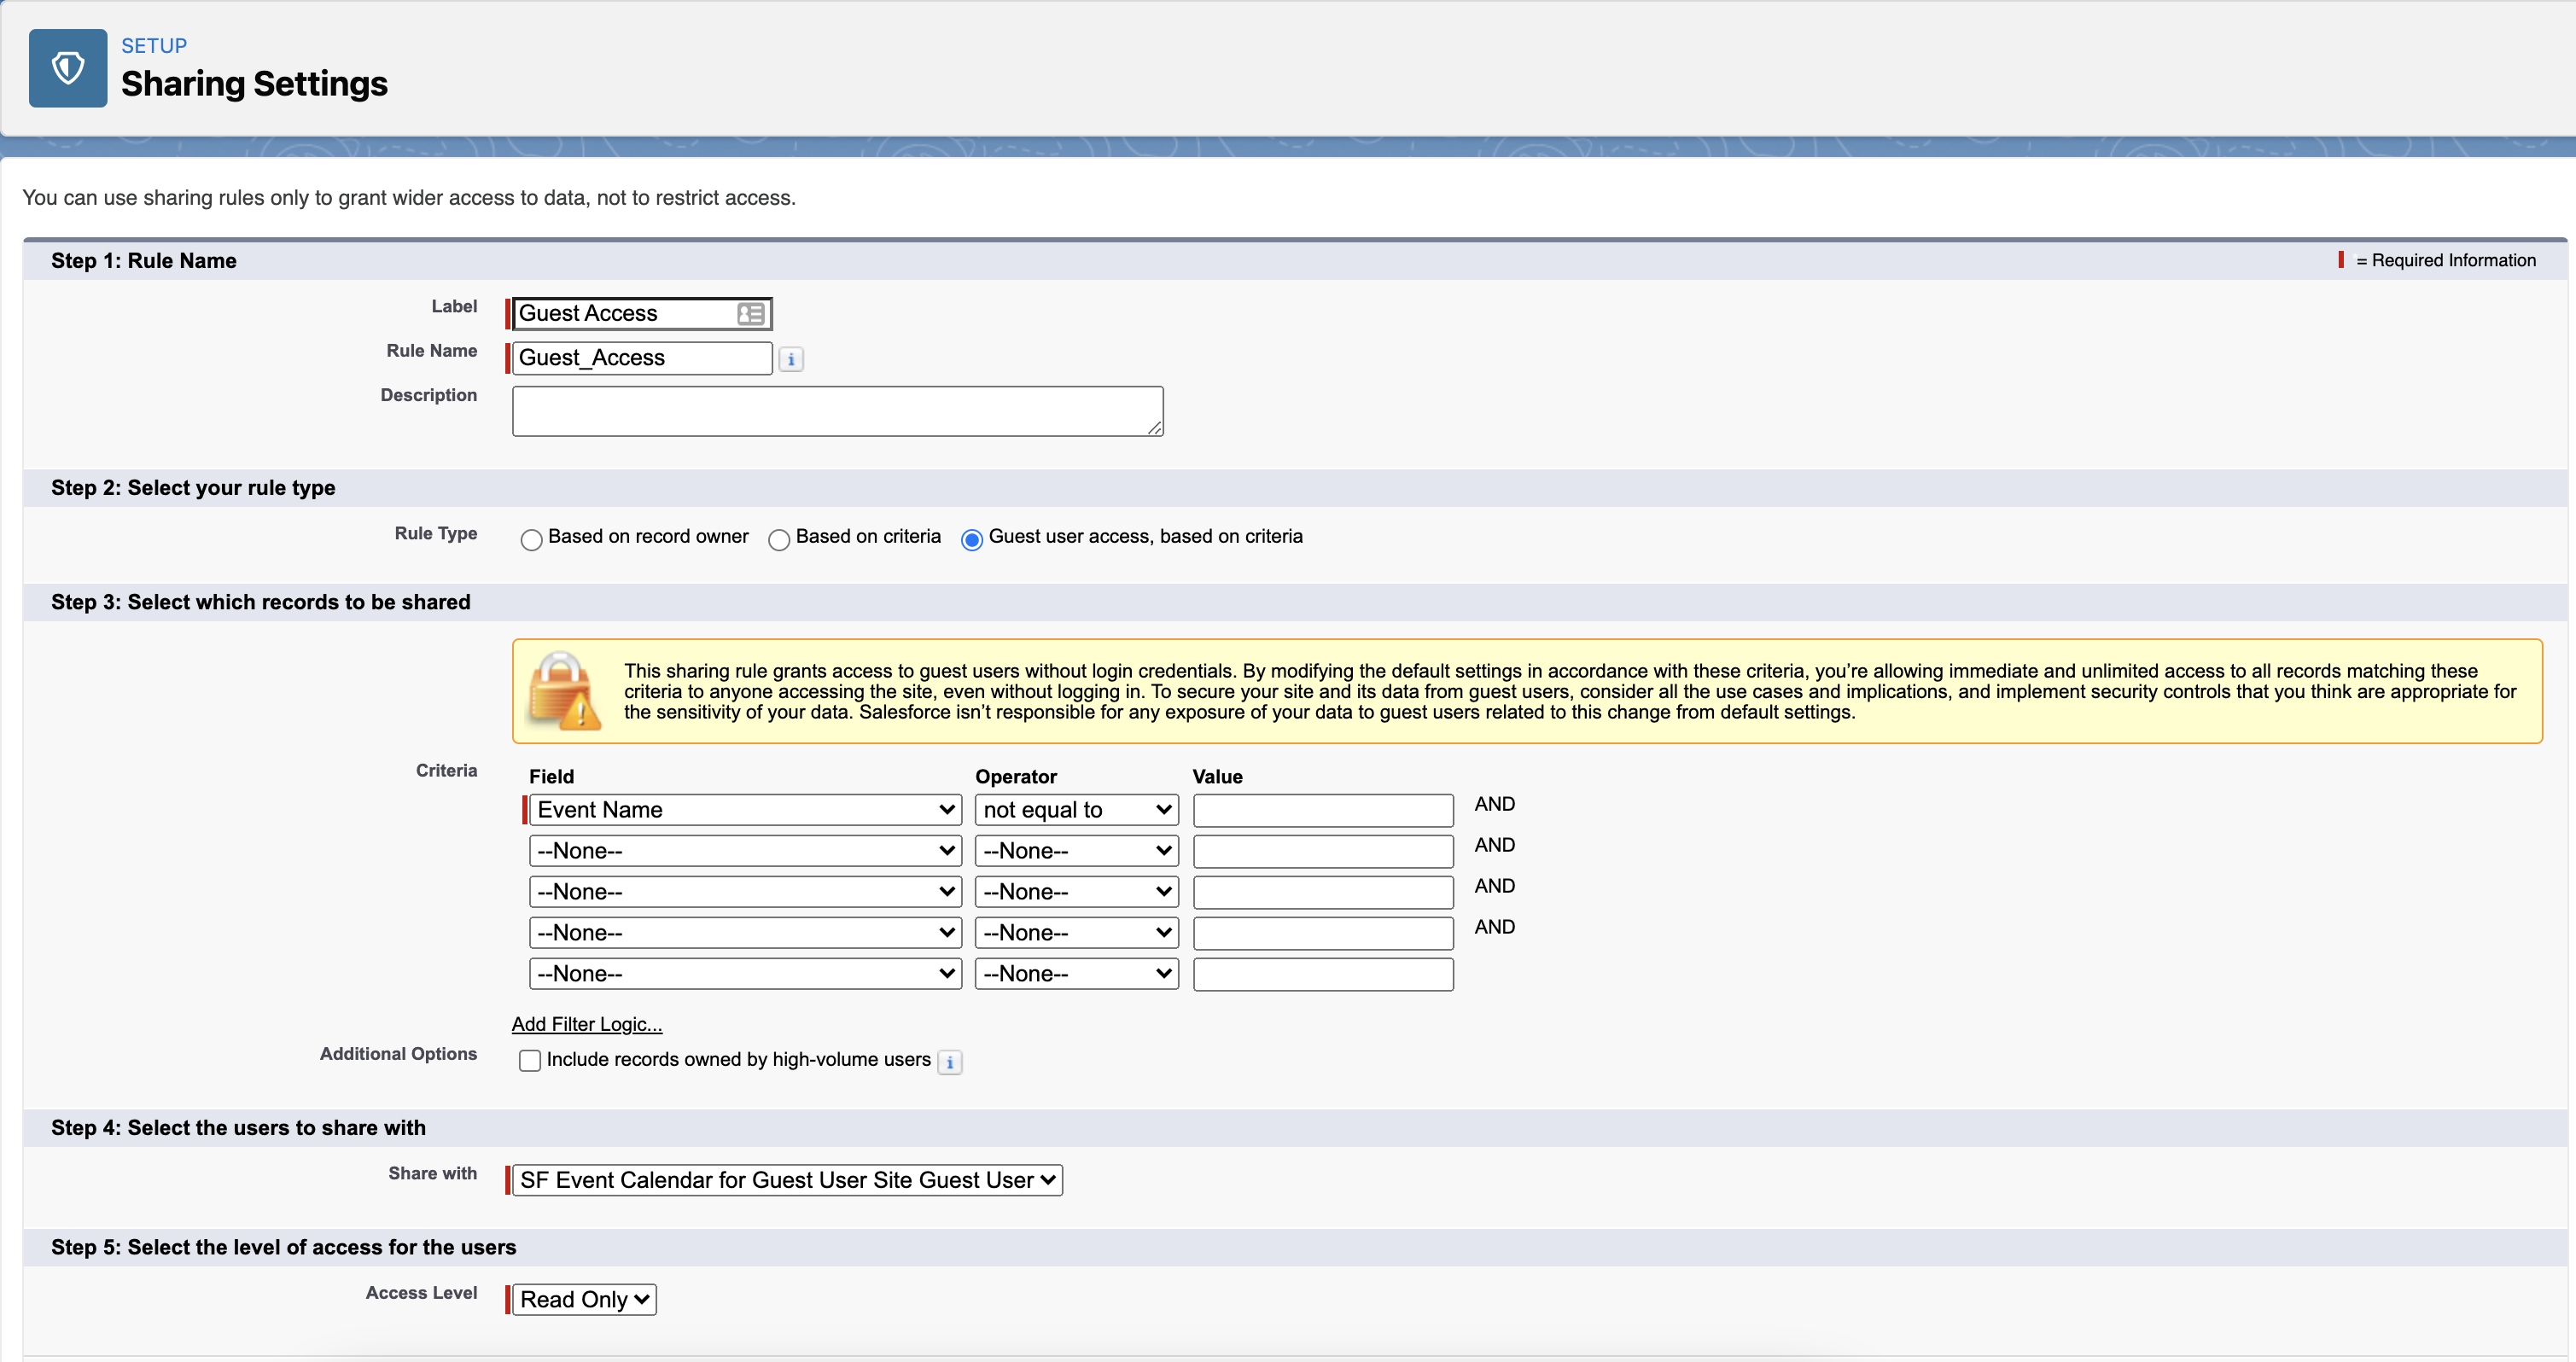
Navigate to "Event Sharing Rules" and click New.
Recreate the settings below to allow access to view all Events by default:
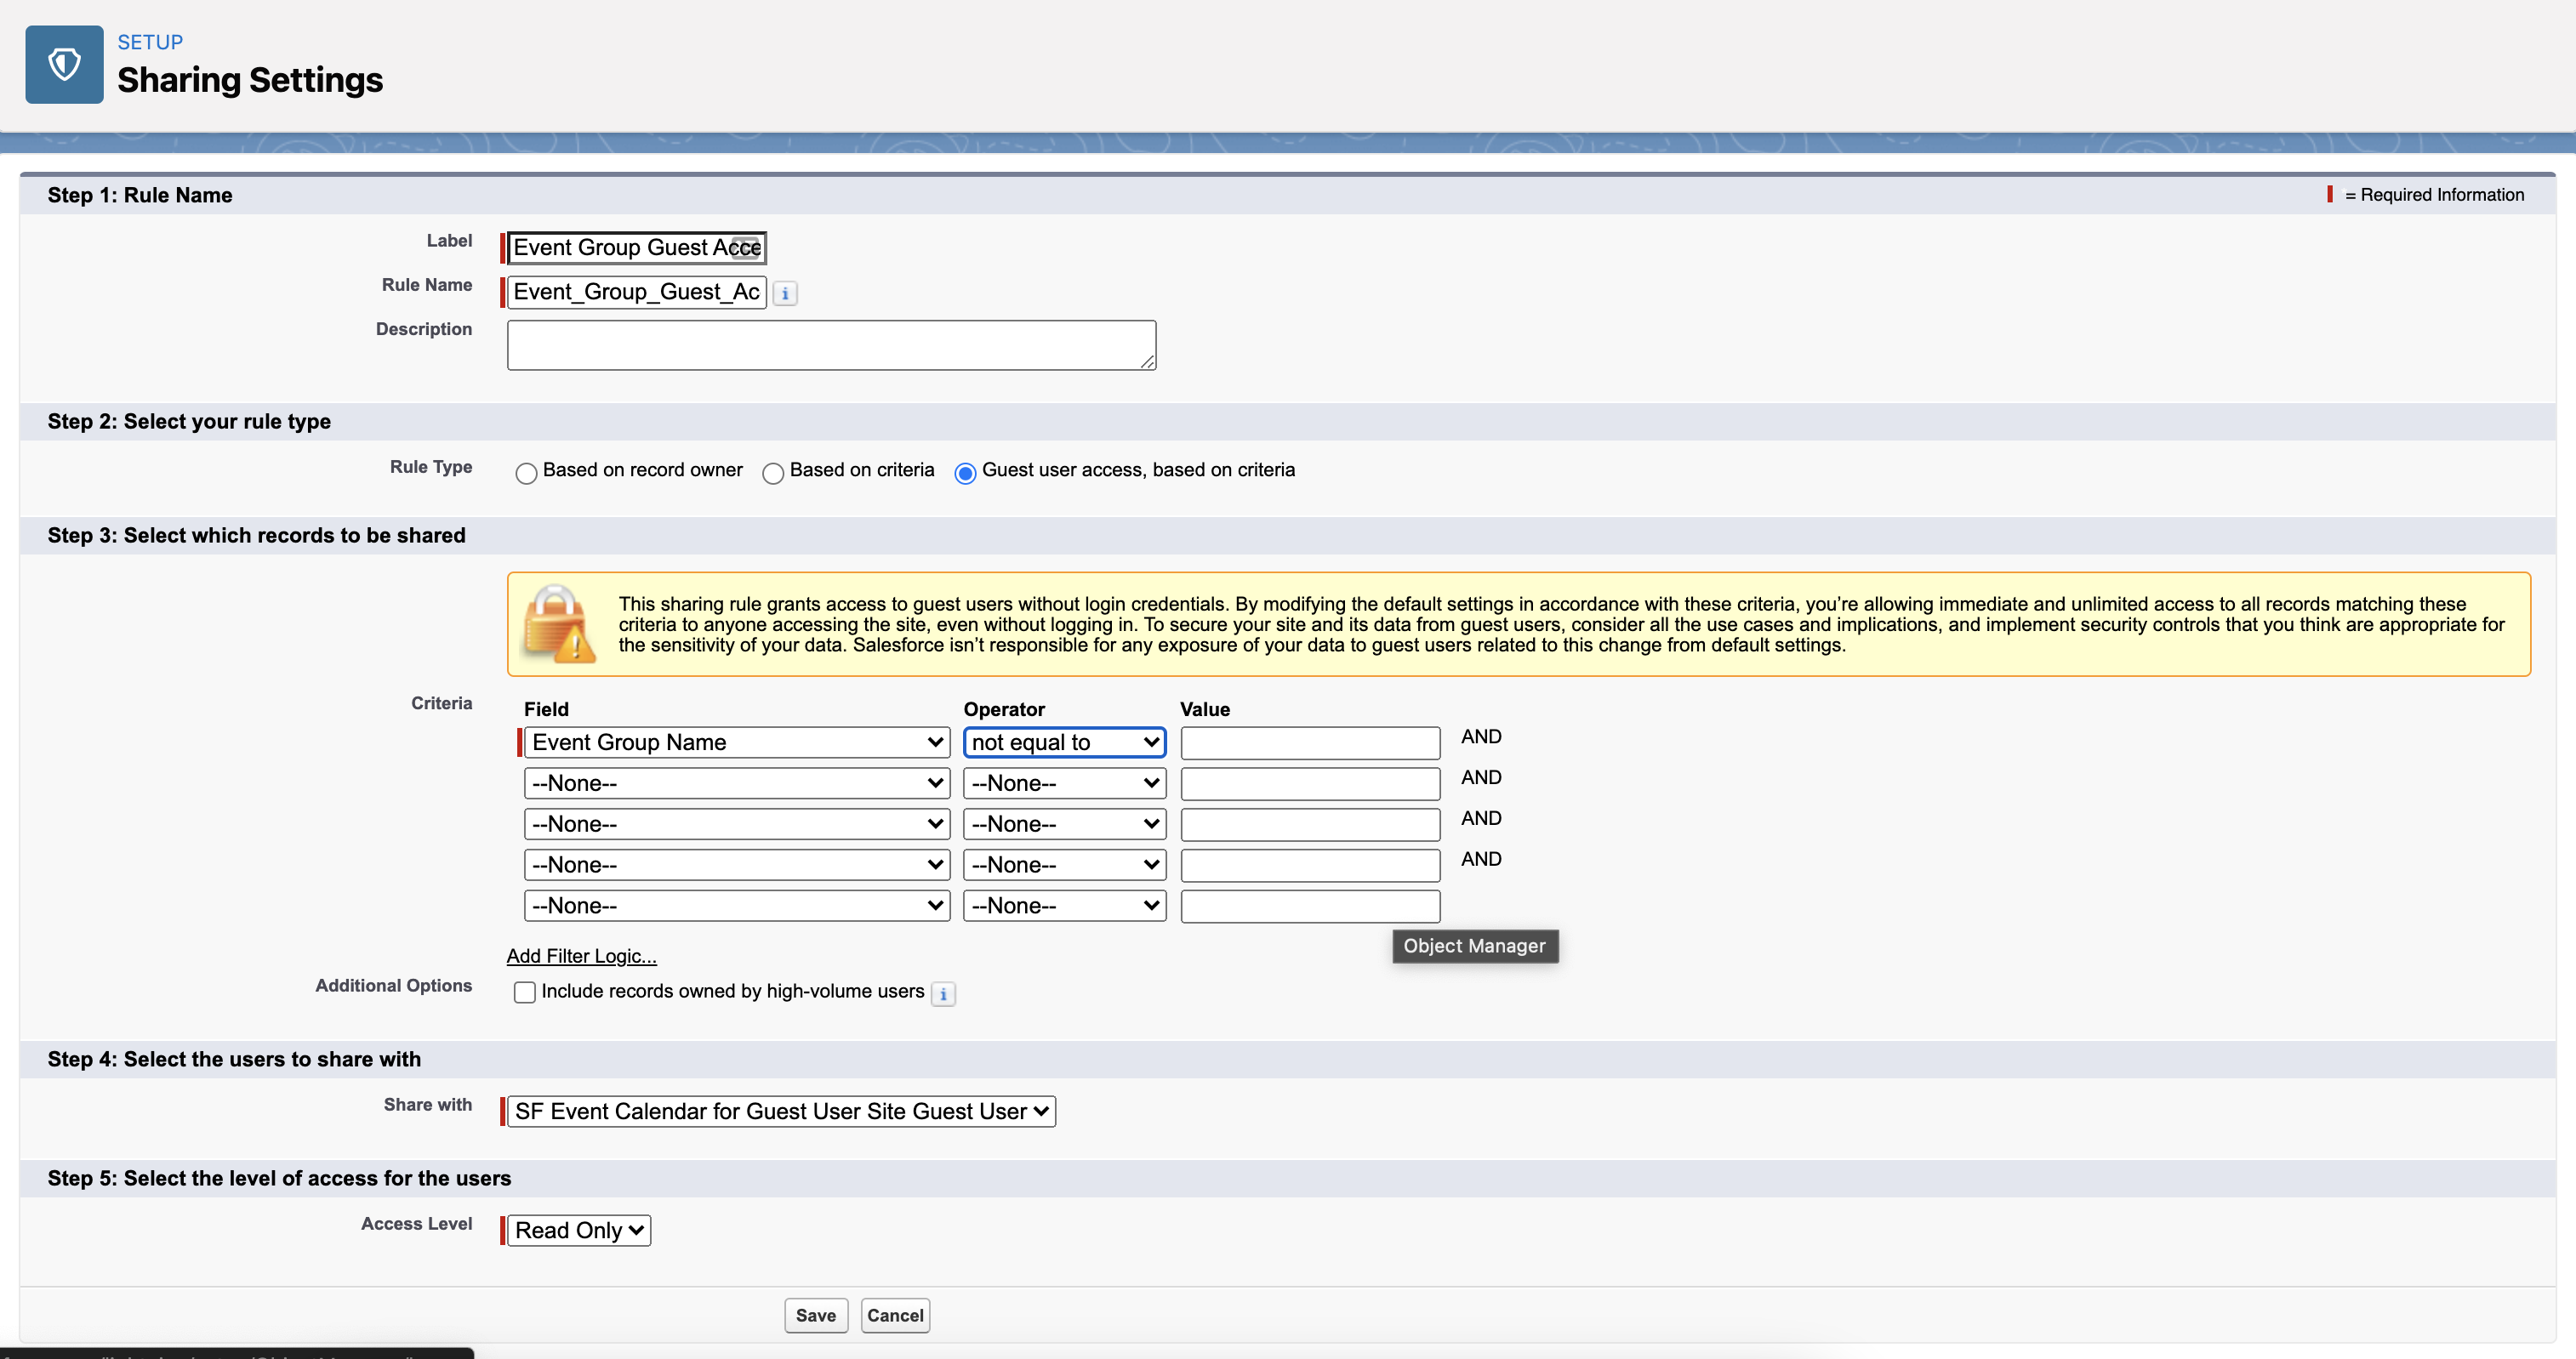
Navigate to "Event Group Sharing Rules" and click New.
Recreate the settings below to allow access to view all Event Groups by default:
Now all guest users will be able to access the Blackthorn Events Experience Cloud component!
Allow Users to View Your Experience Cloud
The user you assign must have a profile that you assigned to access the Experience Cloud. This will allow them to view the Blackthorn | Events Lightning Component.
This can be found under Communities > Administration > Members > Available Profiles.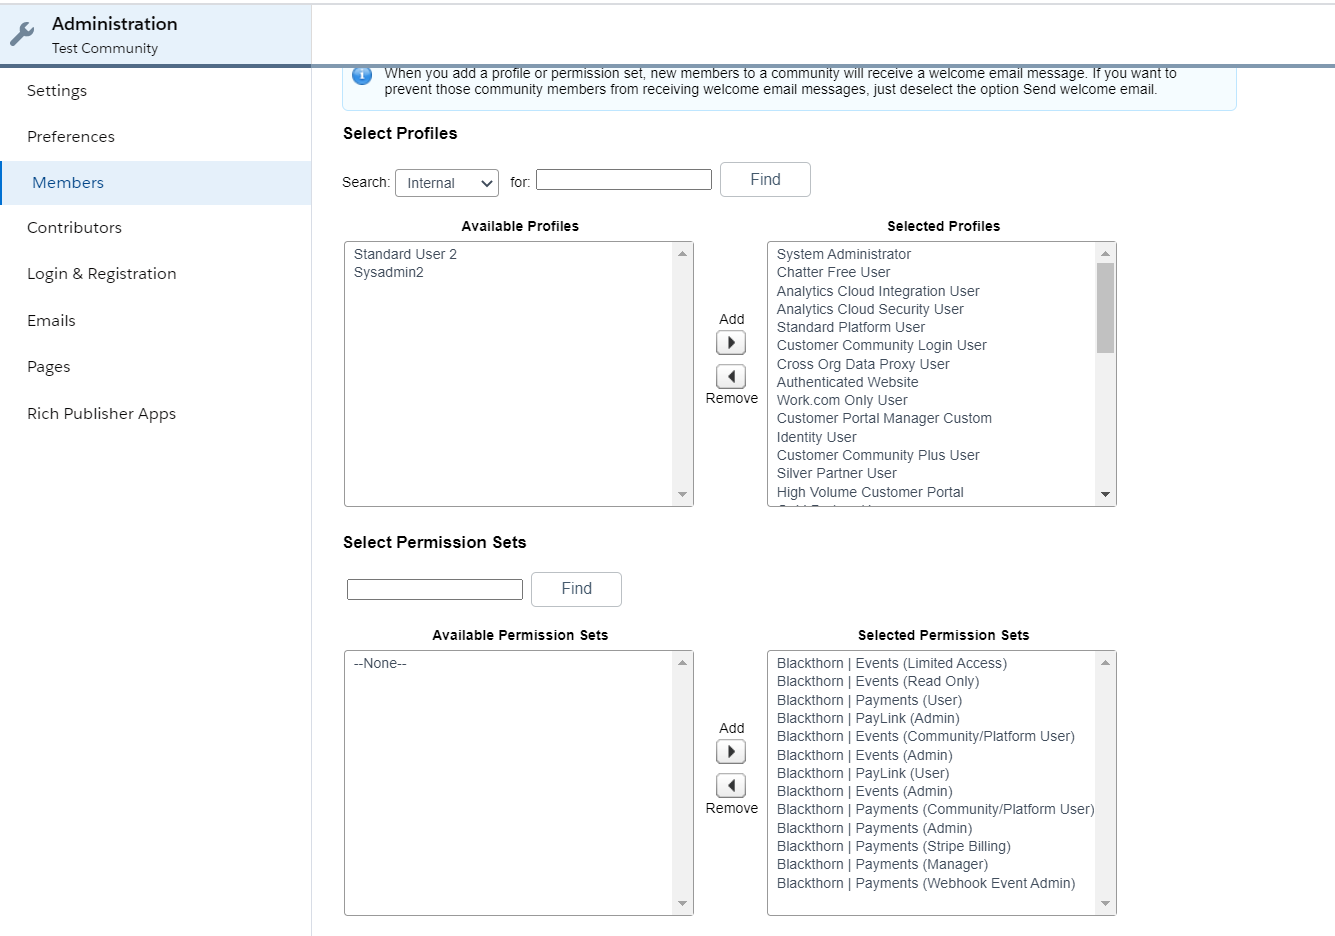
Please make sure Experience Cloud users have the following permission sets assigned to them:
For authorized users:
Blackthorn | Events (Community/Platform User)
Blackthorn | Payments (Community/Platform User)
or
For guest users:
Blackthorn | Events (Community Guest User)
Multilingual Events
To control which language is displayed in the Experience Cloud component, go to the Experience Cloud user’s locale settings. This is found under User > Settings > My Personal Information > Language & Time.
When the Events app is embedded in another website (Experience Cloud etc.), the host website is responsible for setting the correct language code for the app. (The language code is in the Events app URL)
This ensures the host can maintain the same language between the host and the Events app. If the host doesn’t set a language for the Events app, the language will match the source language, and there will be no translation.
Use Cases:
A specific language will load in the Events app.
The Events app’s language will follow the language of the host. In this case, the host has a language selector, and the Events app’s language will match the language of the host.
Testing
There are two ways to test the Experience Cloud component for users. You can log in via the Contact, or sign in directly to the Experience Cloud with the user's login credentials.
Option 1: Navigate to the Contact record and click Log in to Experience as User.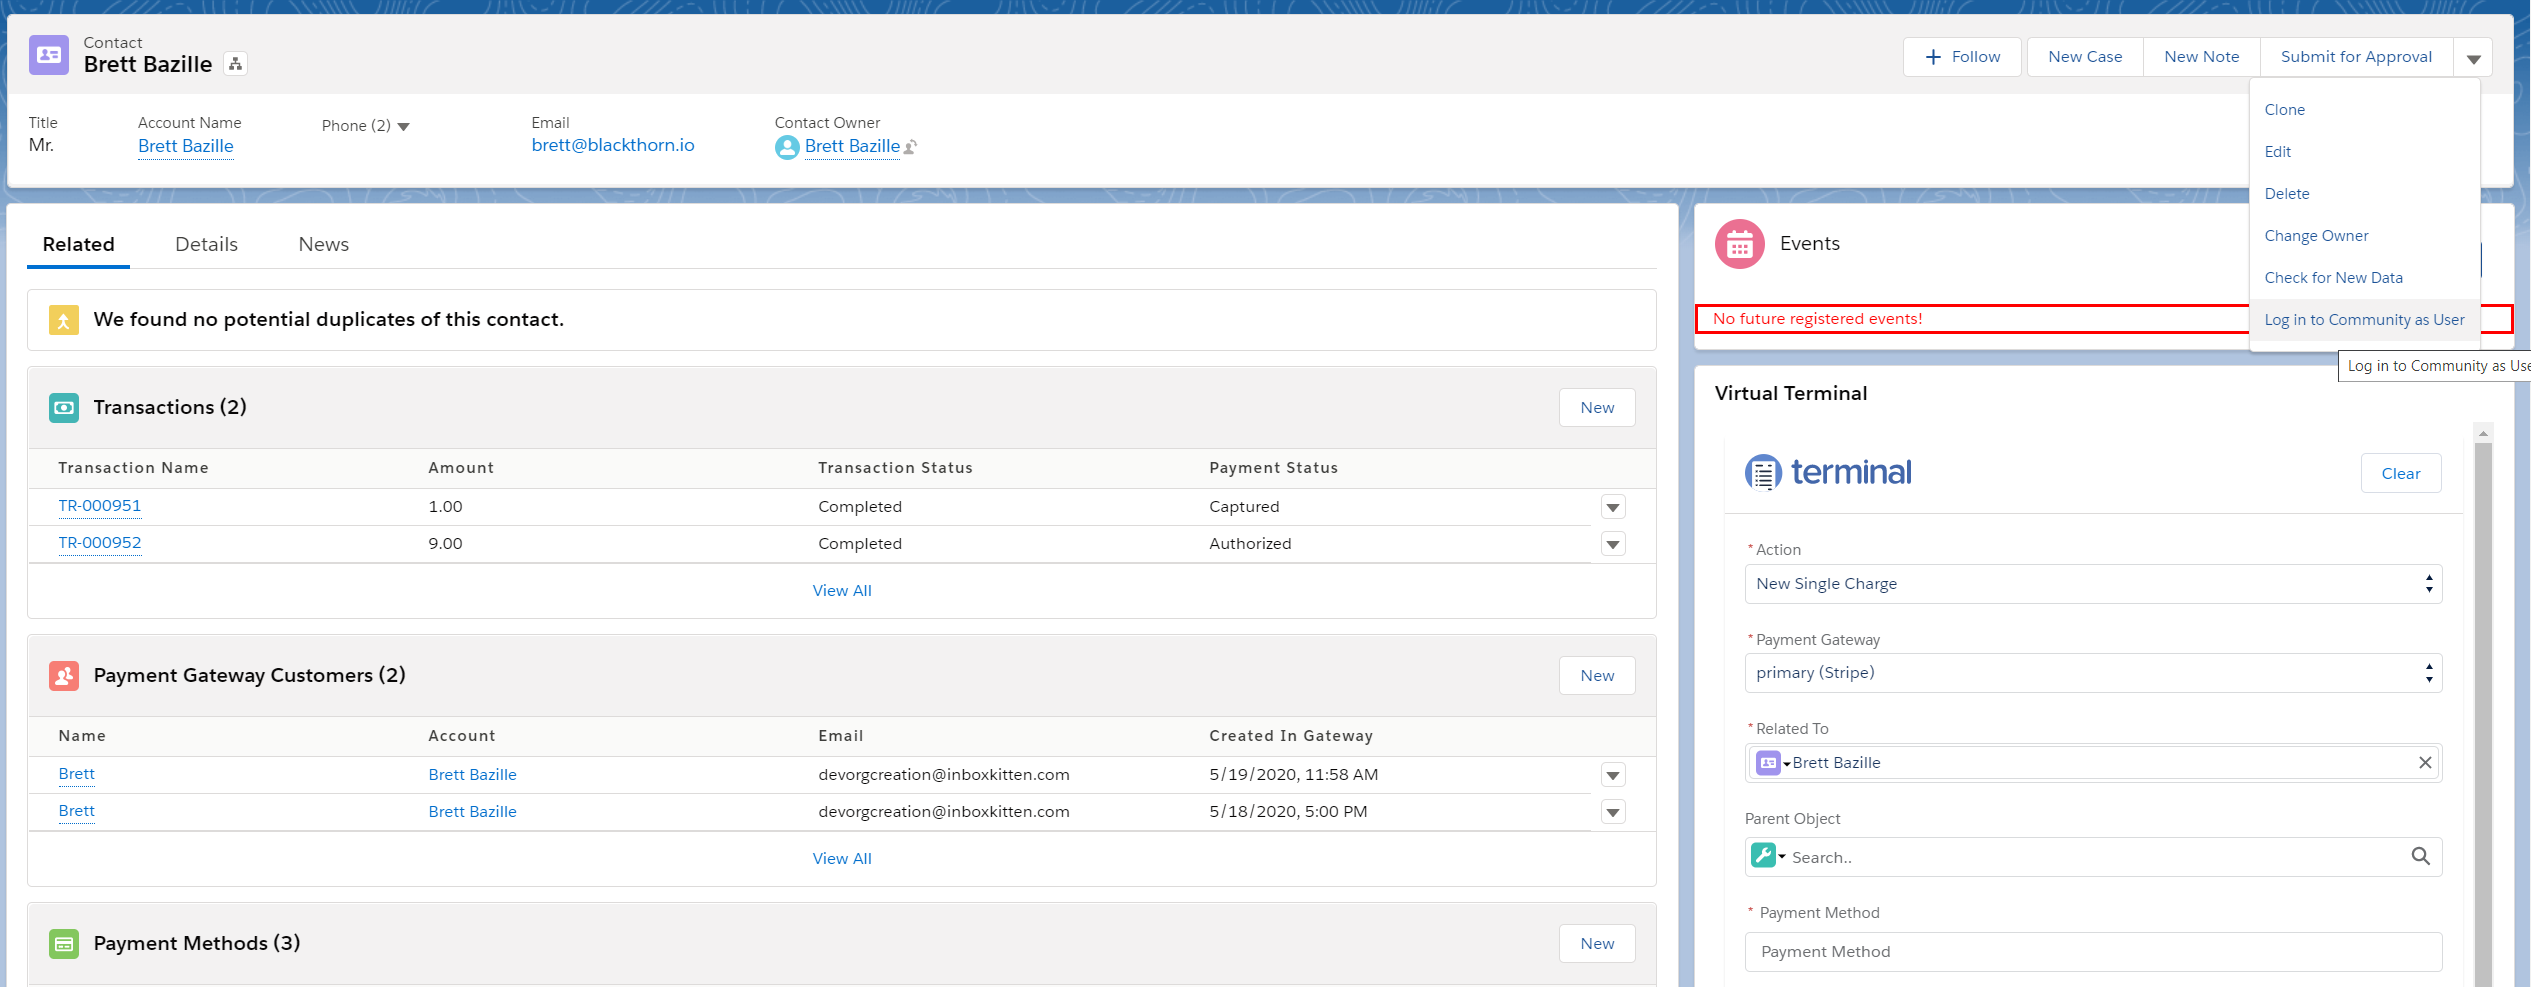
Option 2: Log in to your Experience Cloud using the user's login credentials.
Click on the Event you want to register for.
Click Add Myself.
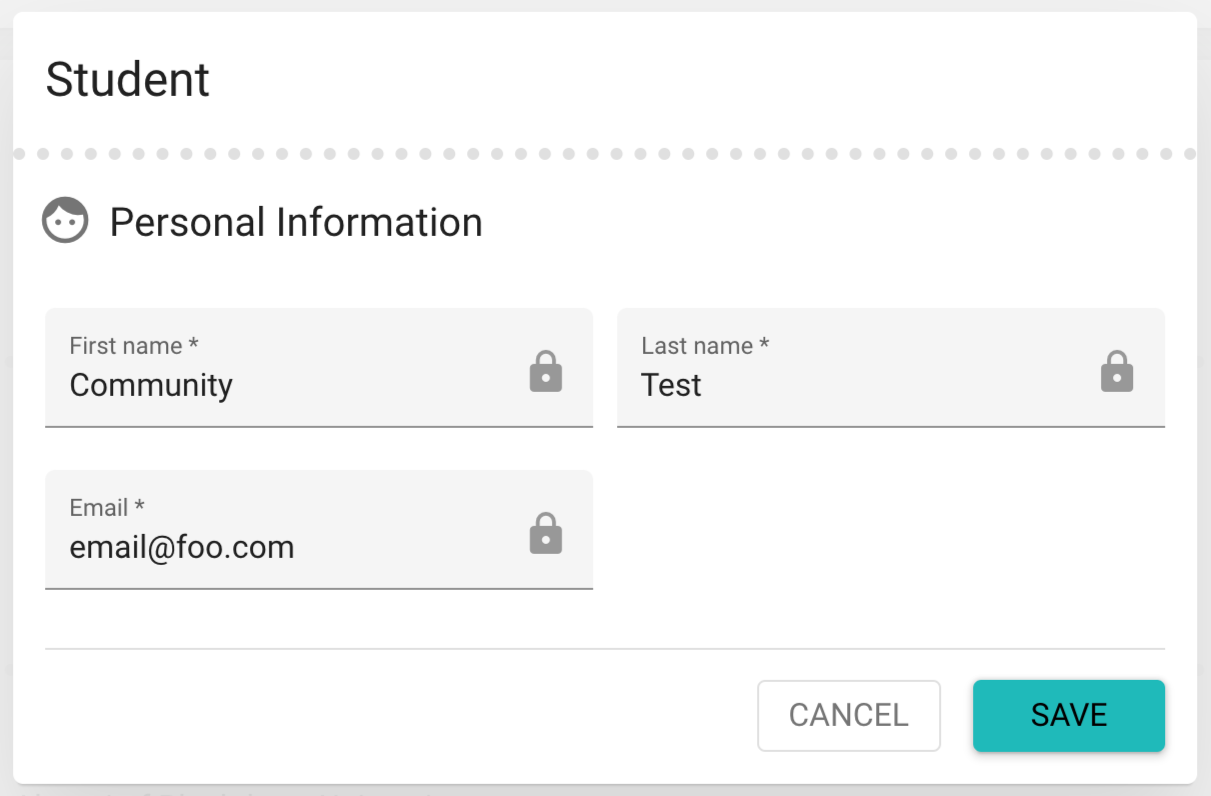
You will see all contact information pre-filled into the Attendee Form!
If Show My Events is enabled from "Configure a List or Calendar View of Events" Step 6 for the Configuration in Experience Cloud, an Attendee will be able to view all the Events they are registered for by clicking the "Heart" icon in the categories section.
In this example, the Attendee has registered for "SDO - Blackthorn Conference," notice the heart icon is full.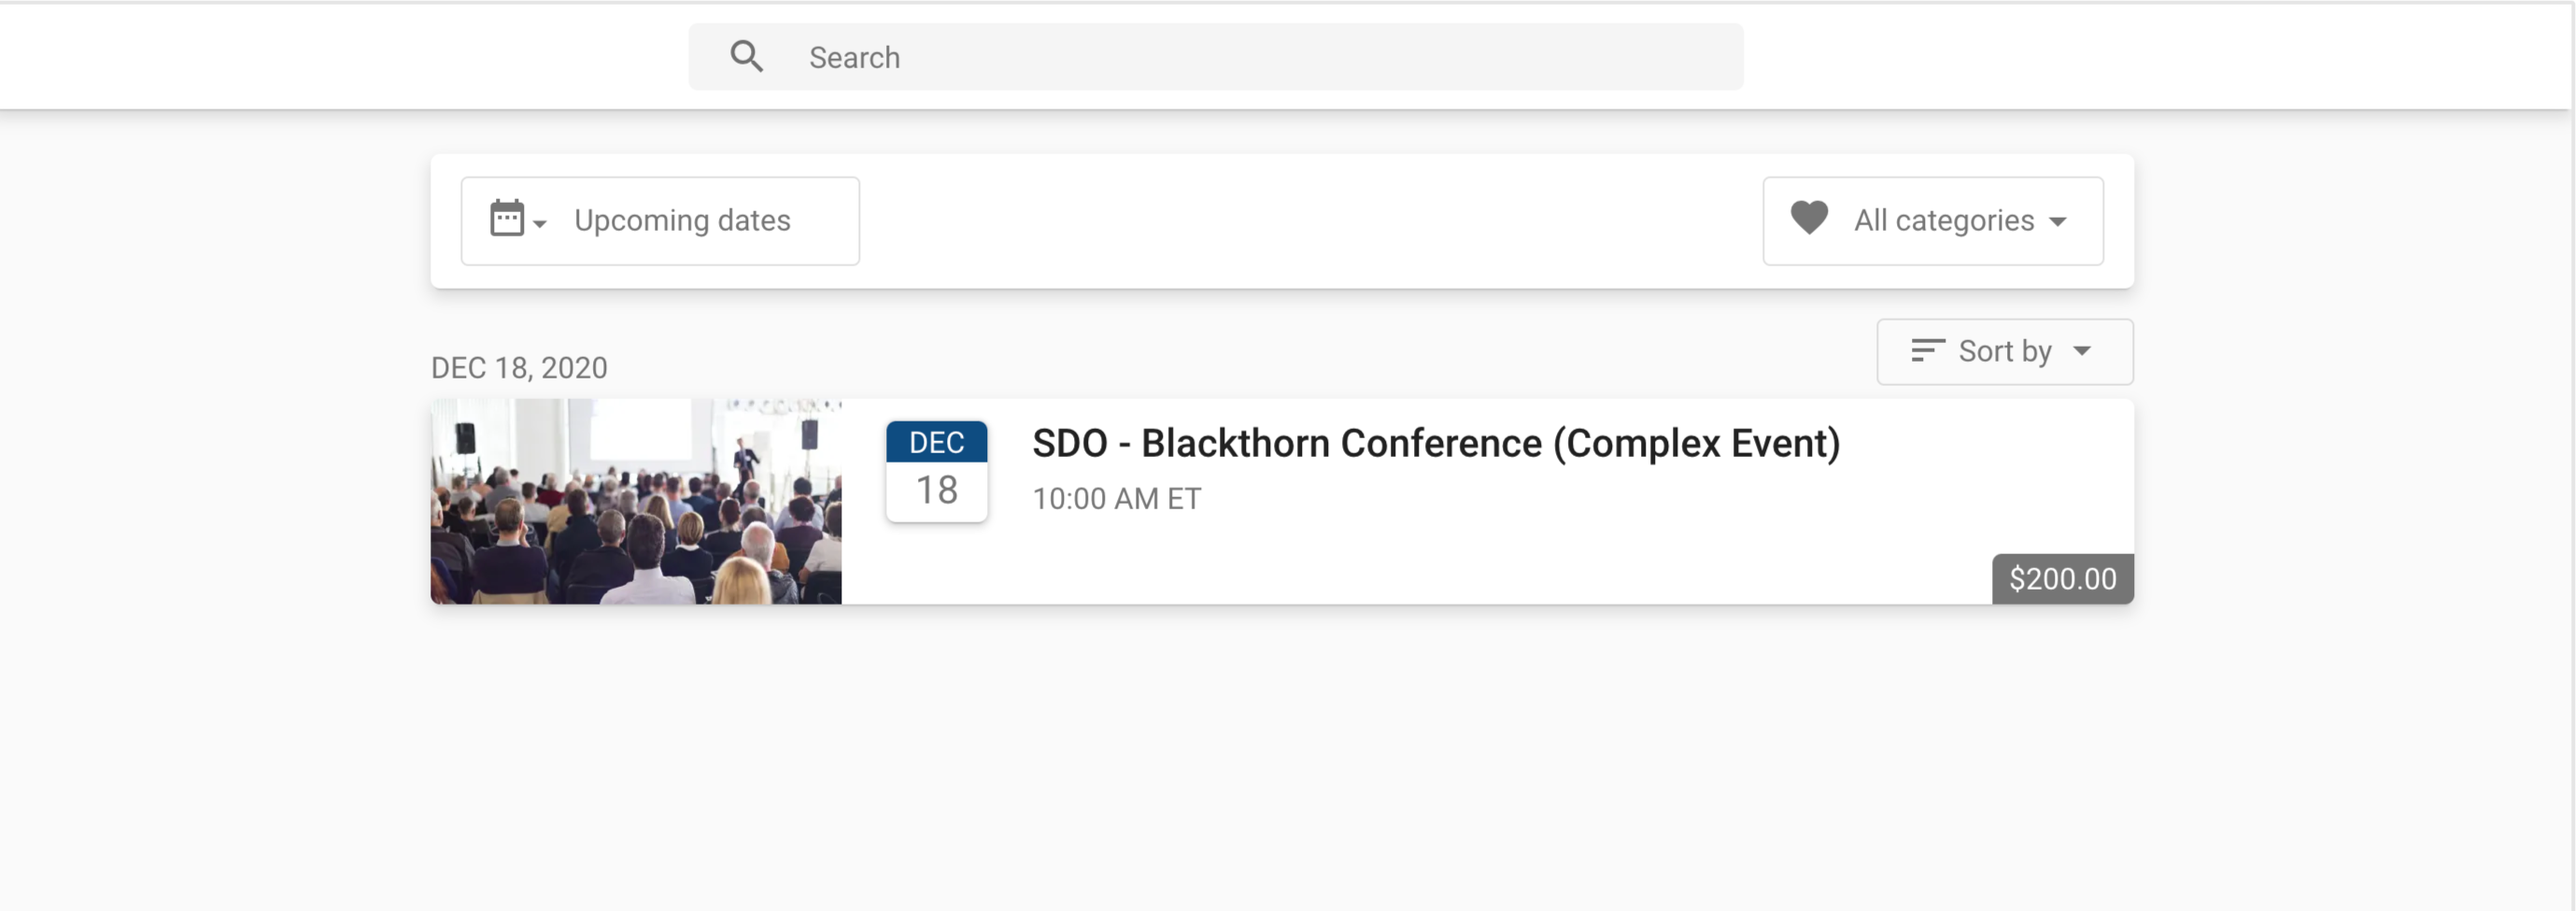
The following image shows all the Events the Attendee is eligible to register for. Notice the heart icon is empty.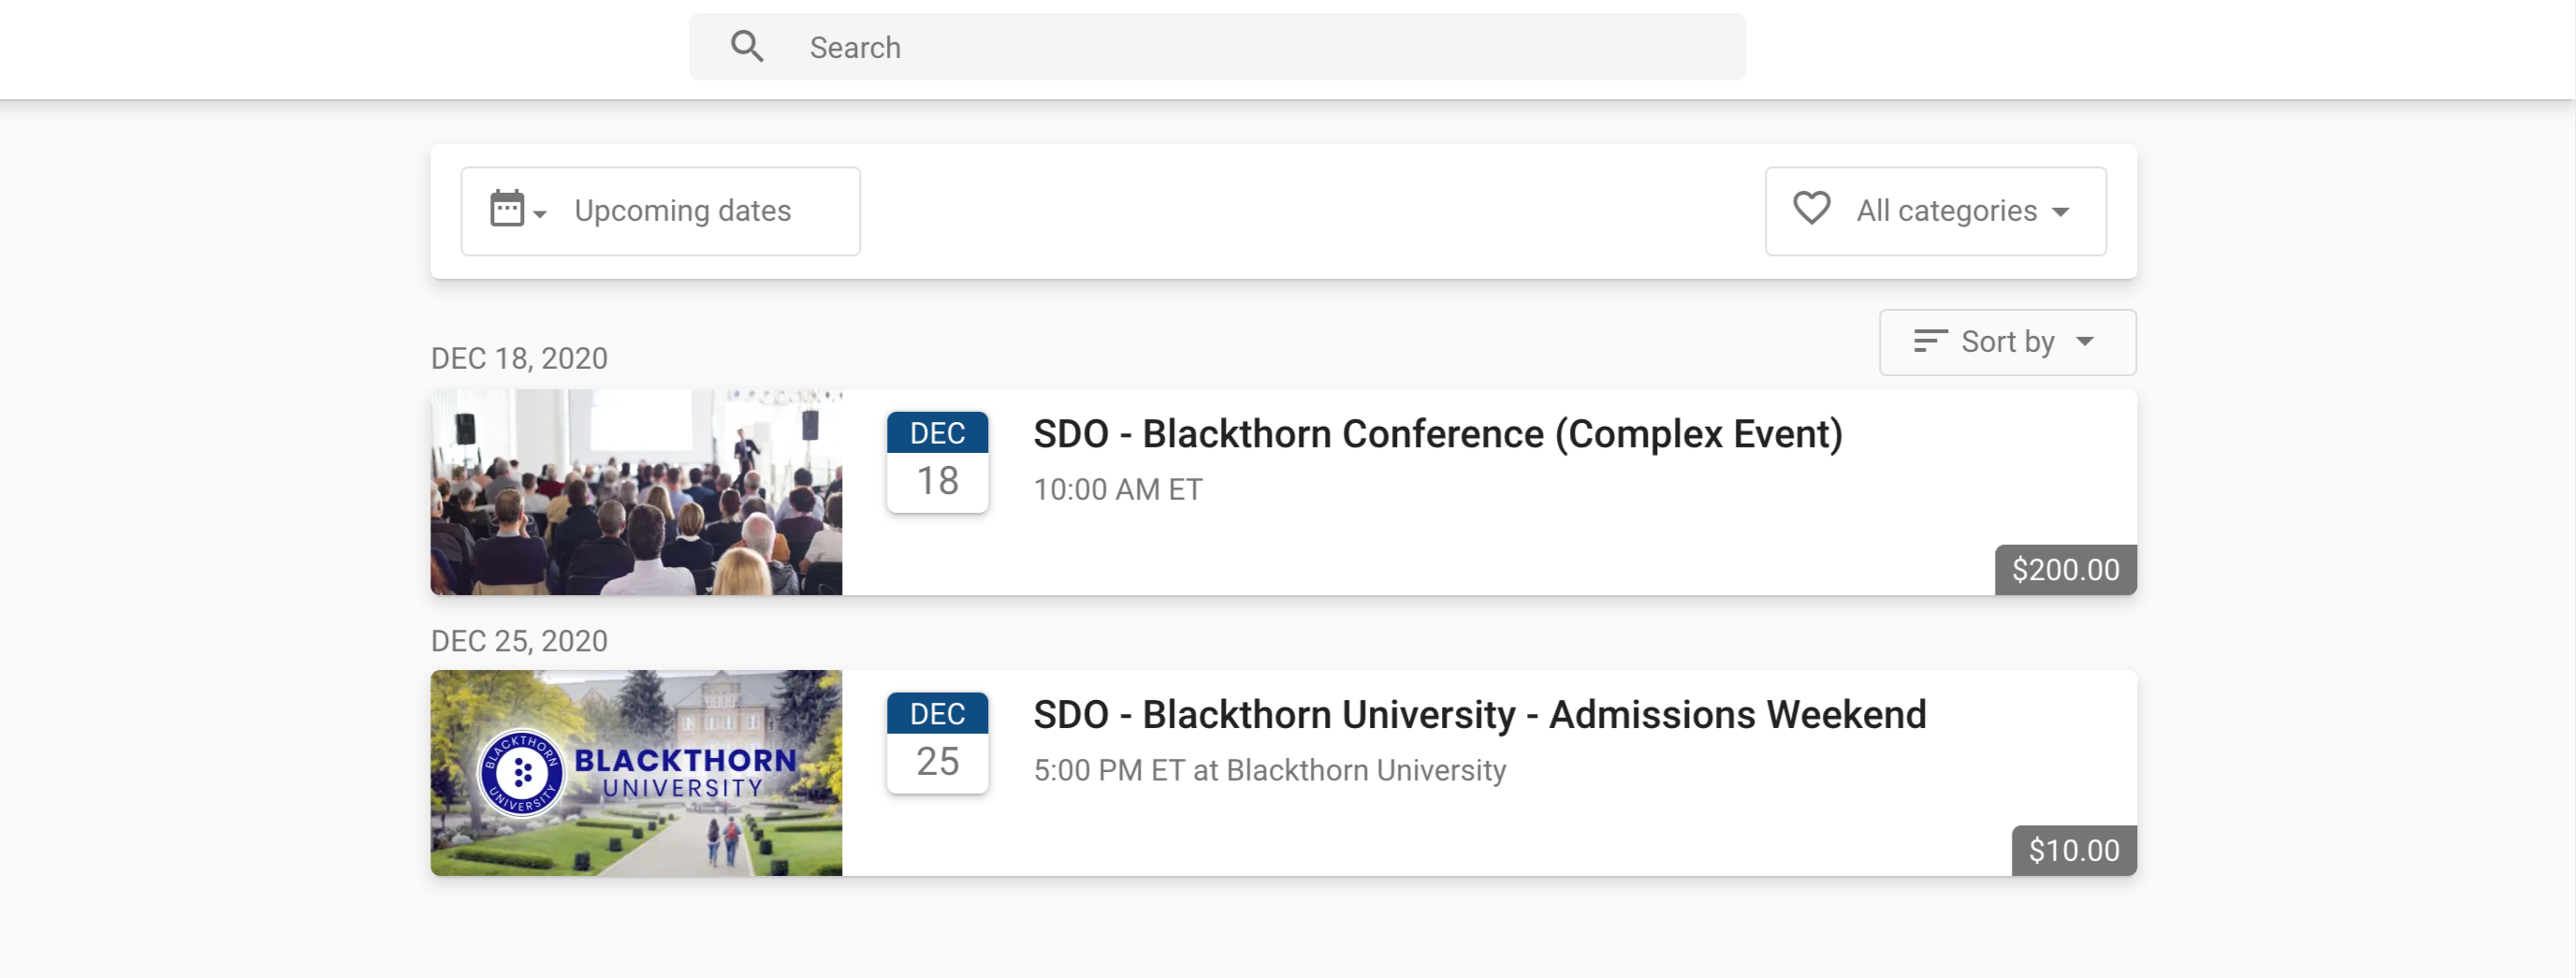
FAQ:
Q: My Events aren't showing the changes I make in Salesforce; what gives?
A: Salesforce Communities + Blackthorn takes some time to clear the cache and update the Event. Please wait approximately 15 minutes for this to happen. Please note, that using the Publish button in this scenario will not manually refresh the cache.
Q: My Redirect URL is not working in the Experience Cloud component.
A: To fix this, add the redirection domain to CSP Trusted Sites on Salesforce (Setup > Security > CSP Trusted Sites). The redirection domain should have relaxed CSP rules or the parent domain (in this case https://*.force.com - for Experience Cloud) needs to be added to the frame-ancestor rule.

FAQ
Q: Can I use a discount Code in the Experience Cloud?
A: Yes, you can use discount Codes in the Experience Cloud if the following criteria are met.
A user logged into an Experience Cloud site as a Contact related to an Account can apply a discount Code if...
The Account is related to a discount Code.
The Code’s Restrict To Account field is set to “True.”
A user logged into an Experience Cloud site as a Contact related to an Account cannot apply the discount Code if...
The Account is NOT connected to a discount Code.
The Code’s Restrict To Account field is set to “True.”