We have brought the power of Event registration into Salesforce with our brand new BT Events Attendee Registration Lightning component.
If you need to register someone directly in Salesforce, you no longer need to navigate through 5+ records.
Before you had to navigate to the specific Event, add new Attendee, relate a Contact, create an Invoice, and finally link the Attendee's Event Item (Ticket) to the Invoice.
Now, you just need to use our BT Events Attendee Registration component to register an Attendee. Need to cancel an Attendee's registration? You can do that simply with the BT Events Attendee Registration component too! Did we mention the registration component works for paid and free Events?!
Updated Functionality
The Add Attendee component's permission management has been updated. Campaign and Campaign Member object access is no longer a prerequisite to use the component.
The following functionality now applies.
- Users who have read permissions to one or more of the Account, Contact, Lead, Campaign, and Report objects can search the object(s) and add Attendees.
- Users with access to the Account, Contact, Lead, Campaign, and Report objects will see Attendee records from these objects.
- Users will only see Attendee records from the Account, Contact, Lead, Campaign, and/or Report objects they can access.
- Users who don’t have access to the Account, Contact, Lead, Campaign, and/or Report objects will not see any Attendee suggestions as they cannot retrieve records related to those objects.
- If a user who doesn’t have access to the Campaign object tries to load an Attendee who has already been added to the Event from the Campaign object, the user will see the Attendee, but they will not be able to see any Campaign-specific information they don’t have access to.
Set Up the Component
Update the Page Layout
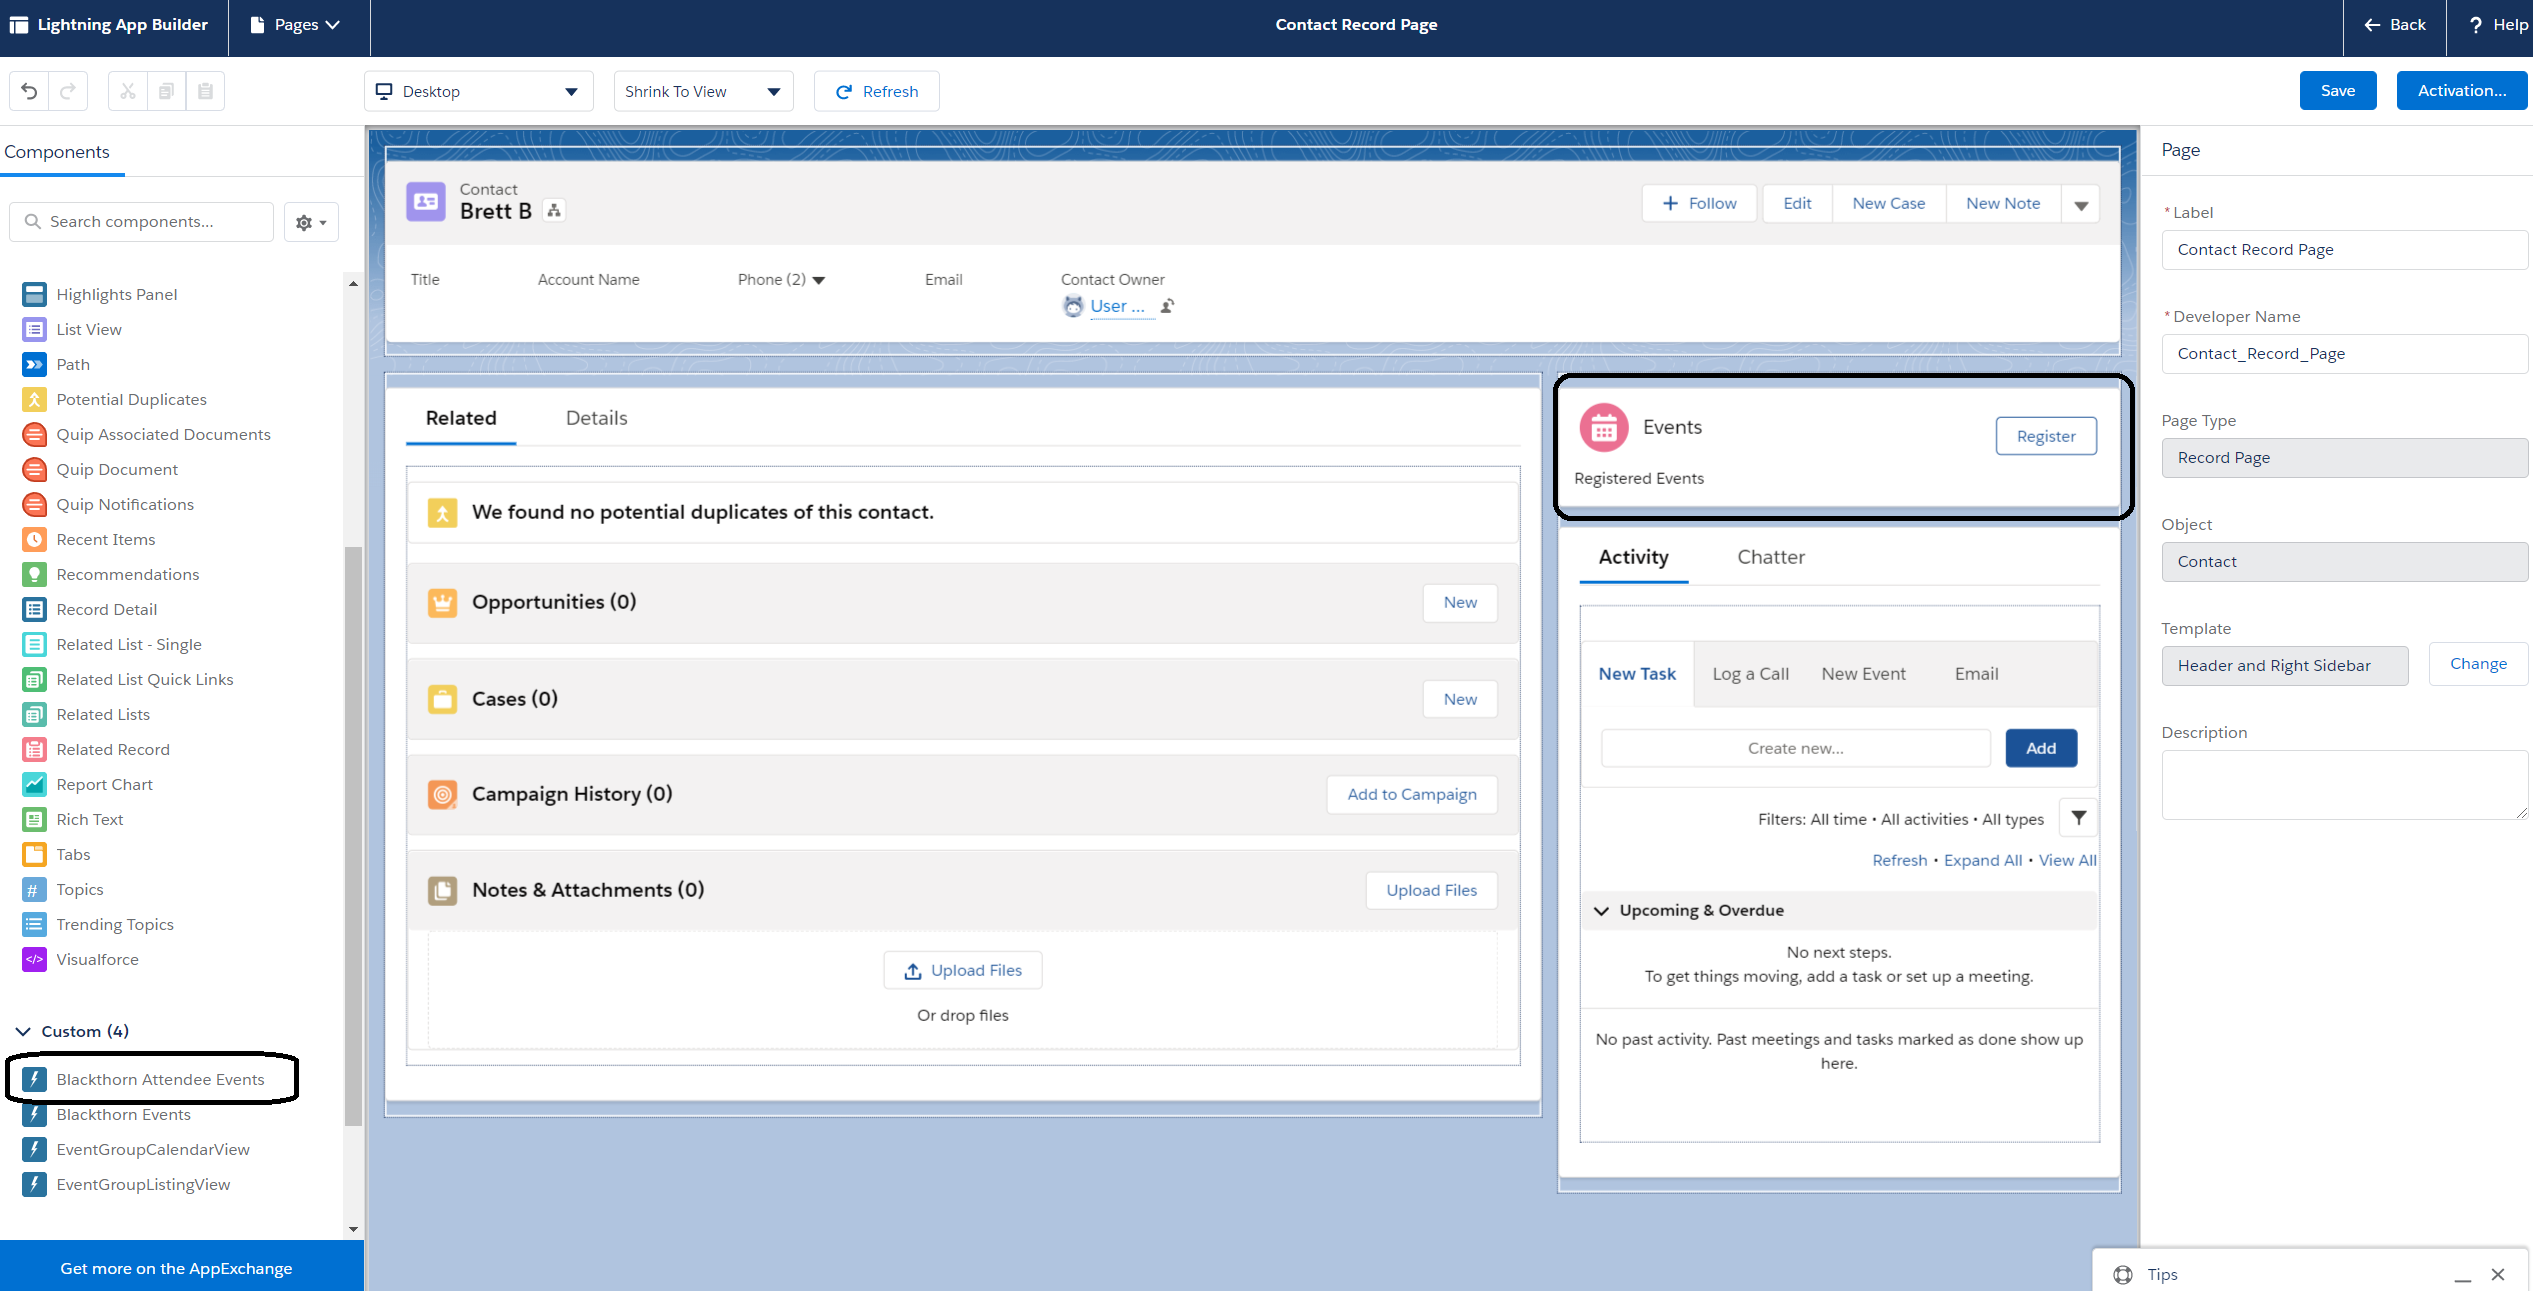
The BT Events Attendee Registration component can be added to the Contact, Lead, Attendee, and Event lightning pages.
- Navigate to one of the supported object records.
- Click Setup.
- Click Edit Page.
- Scroll down to the Custom – Managed section and drag and drop the BT Events Attendee Registration component on the page.
- Click Save.
Activate Geocodes
- Click the Gear icon.
- Click Setup.
- In the Quick Find box, search for and click “Data Integration Rules”.
- Click "Geocodes for Contact Mailing Address."
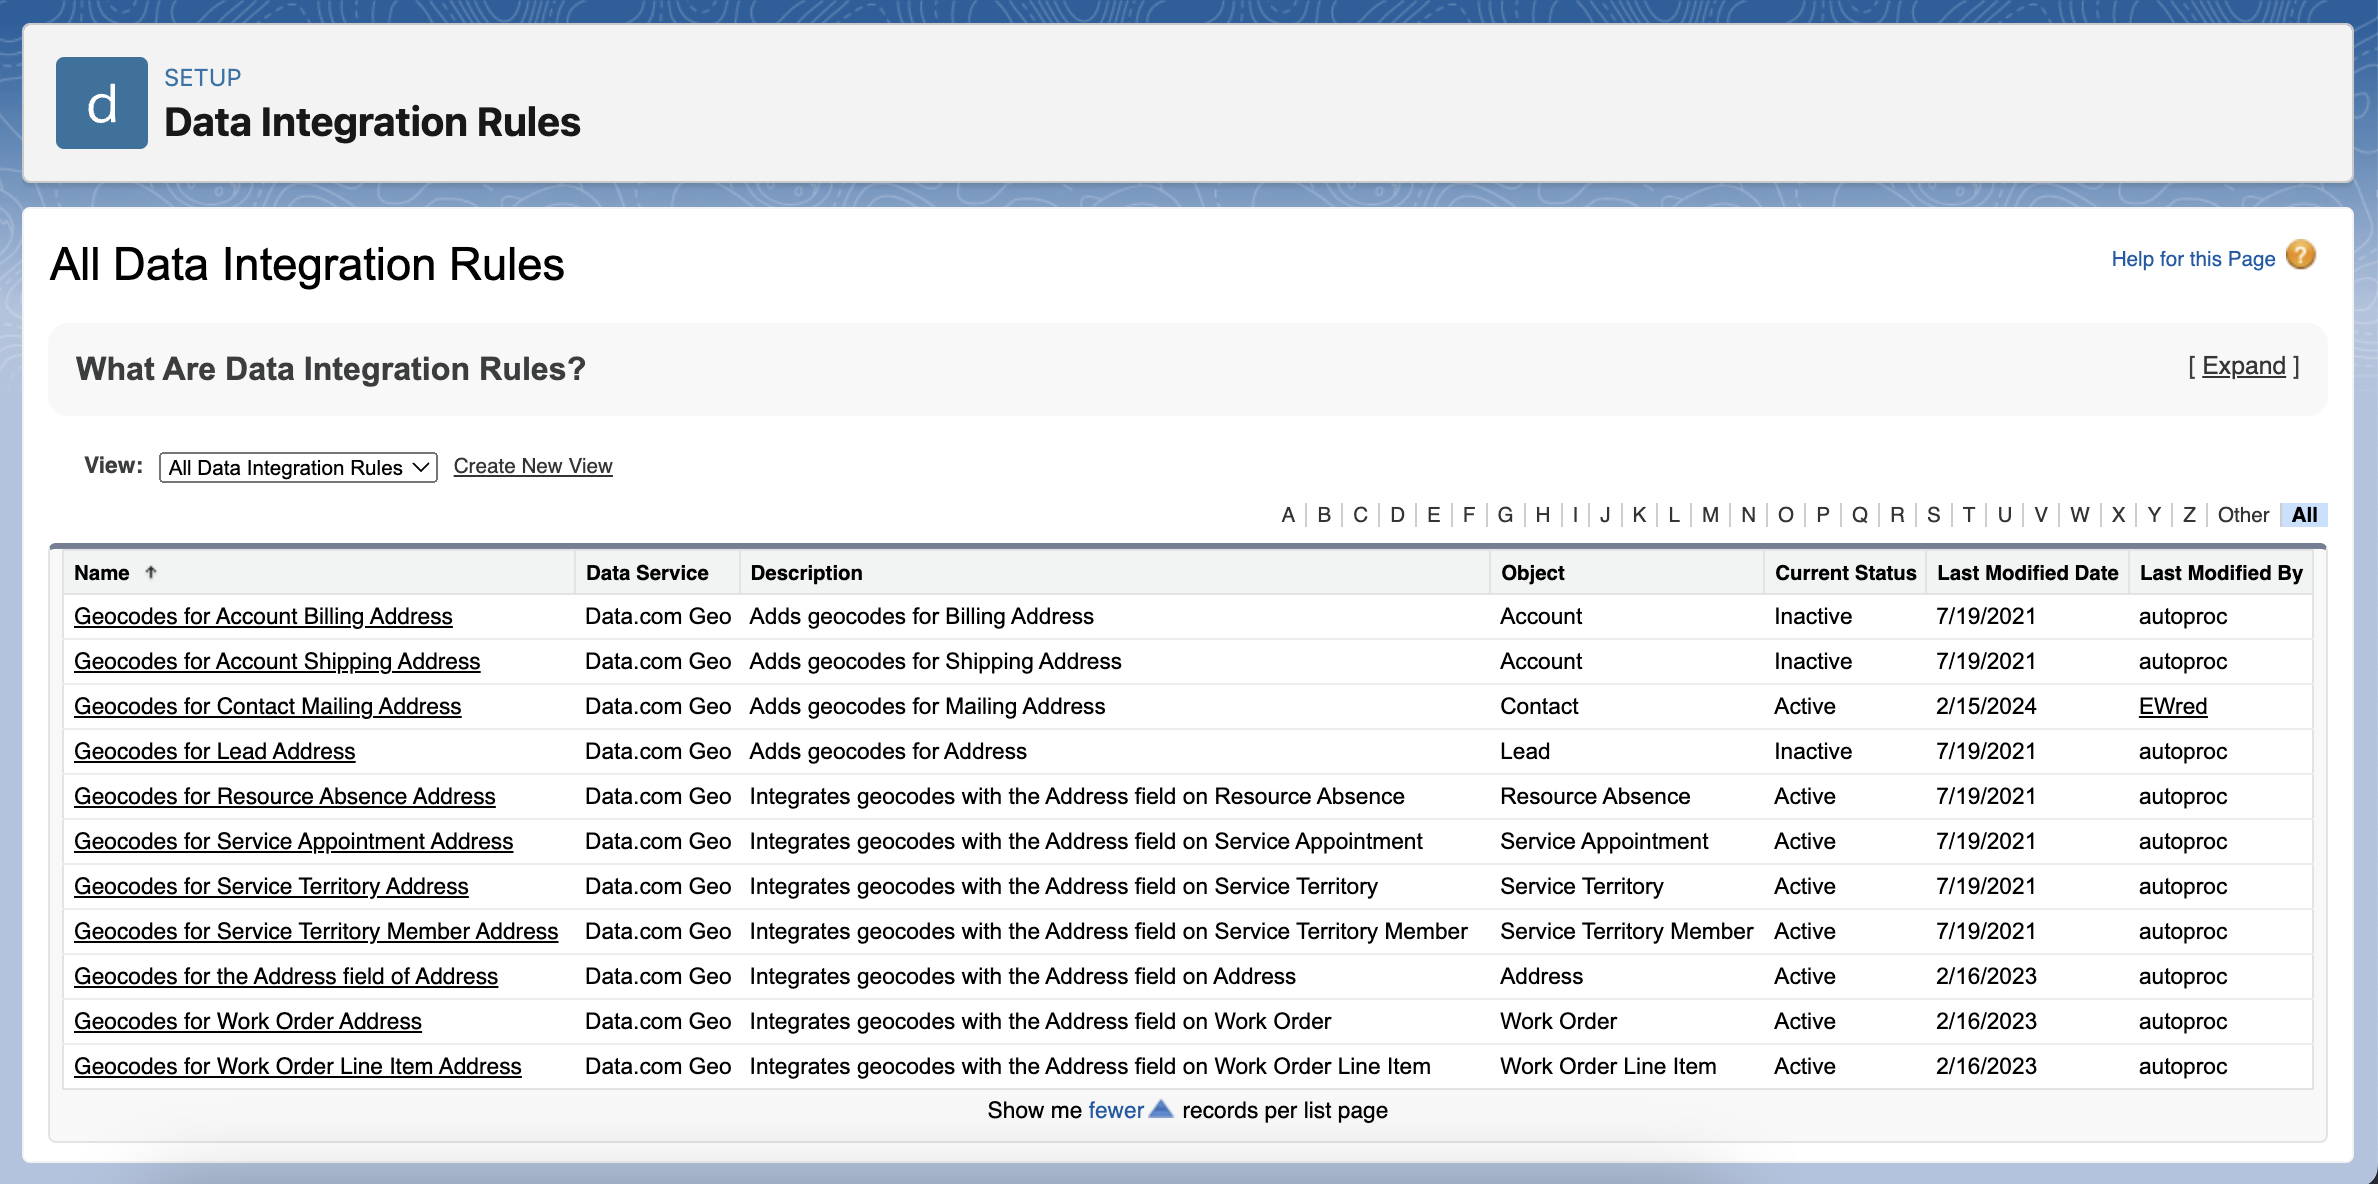
- Click Activate.
- If you agree with the message, click Ok.
- Perform a hard refresh on the Contact record. The Sort By Distance checkbox will be enabled automatically on the Contact page of the BT Events Attendee Registration component.
Note: If required, repeat the steps above to activate the Lead and Account.
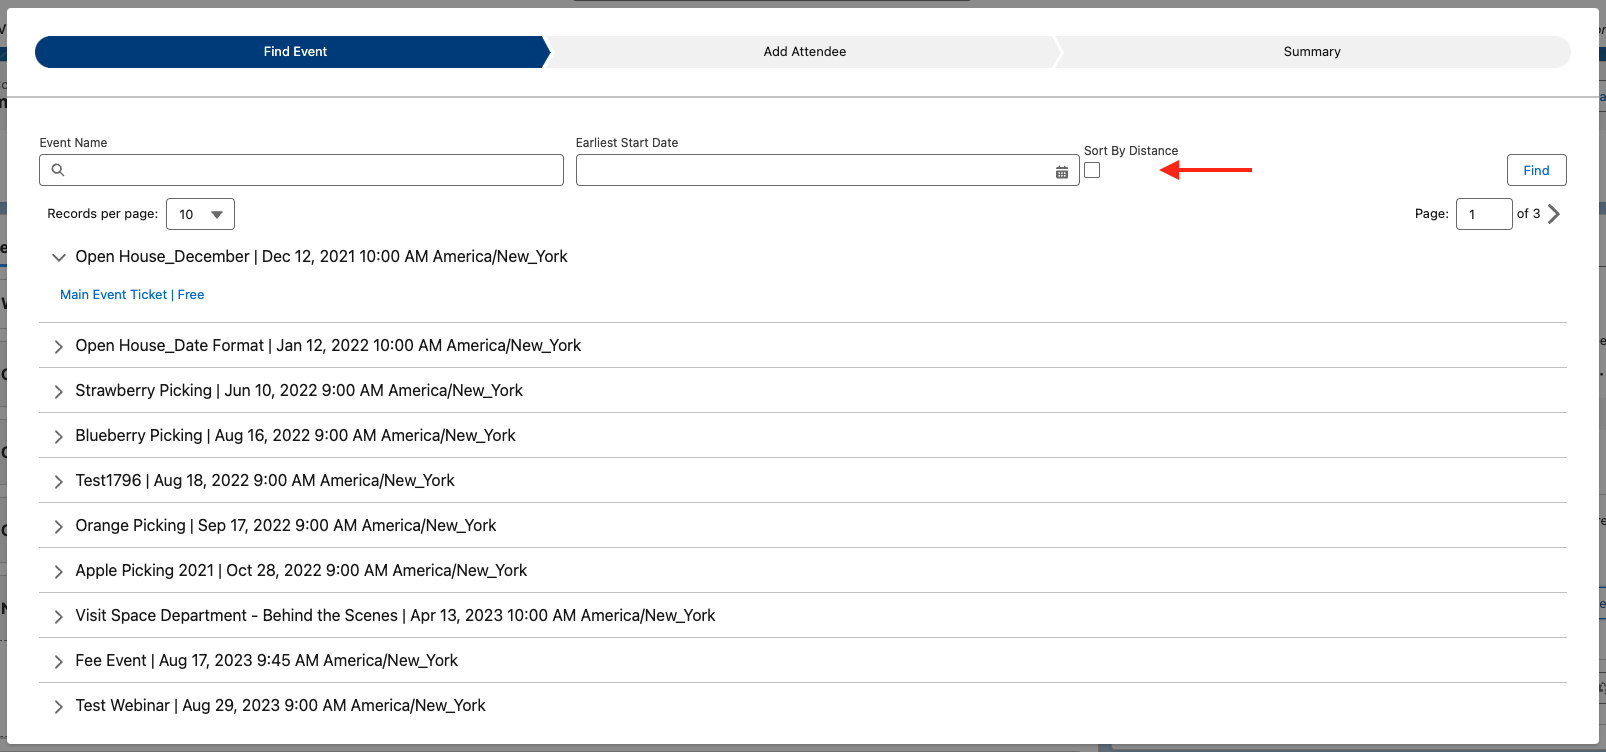
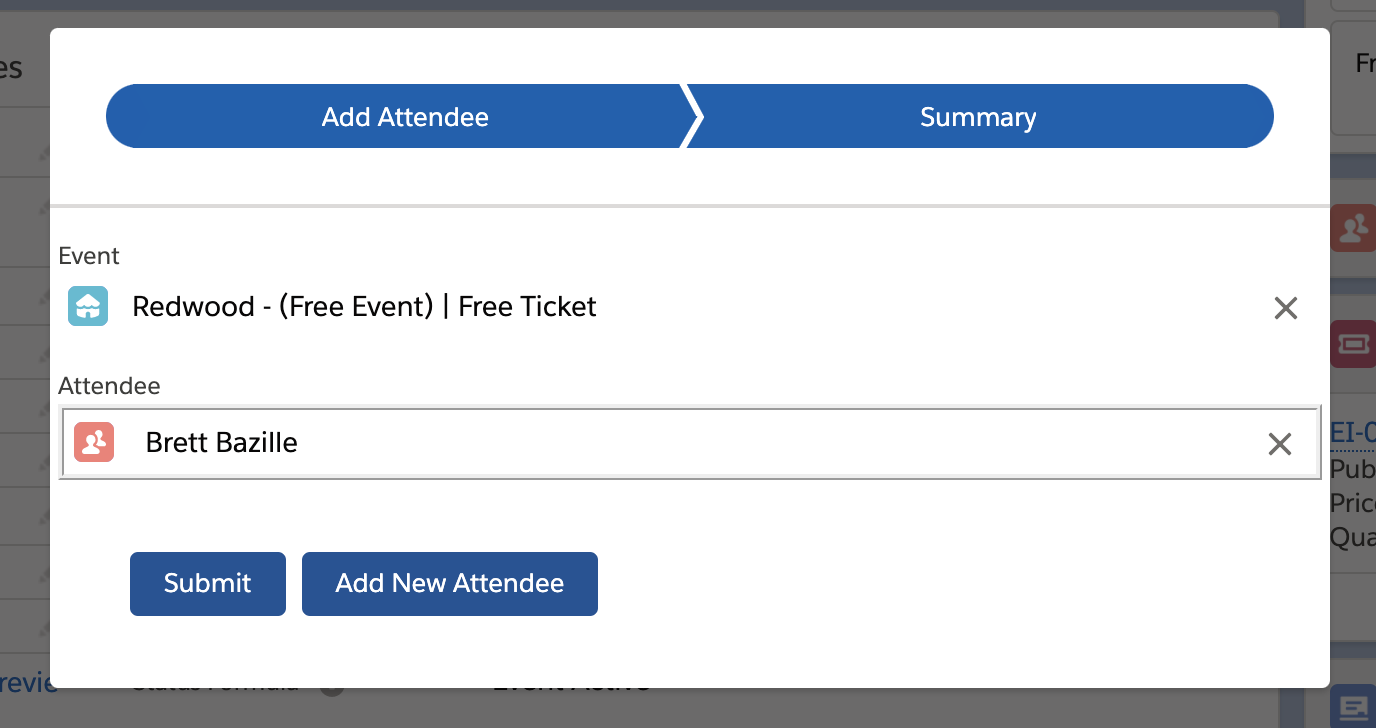
Register an Attendee from the Event Record
After you add the BT Events Attendee Registration component to an Event record, you will see Event Items with Type = "Main event ticket" and "Guest" populate within the component.
Event Items with Type set to “Donation” and “Other” are not available from within the component.

The new filter, called “Distance” is based upon the Contact's mailing address and the Event venue's physical address.
To use the new feature, check the Sort By Distance checkbox on the Search screen. The results will be sorted by the Event Start Date/Time or Distance.
If the contact mailing address is null, the checkbox will be disabled, and the help text will display this message: “The Contact’s Mailing Address is not populated. Please exit this window, update the Contact’s mailing address, save, and reload this screen.”
If physical location is not populated for the Event Venue, results will still appear, but the message “Venue Location Missing” will be shown.
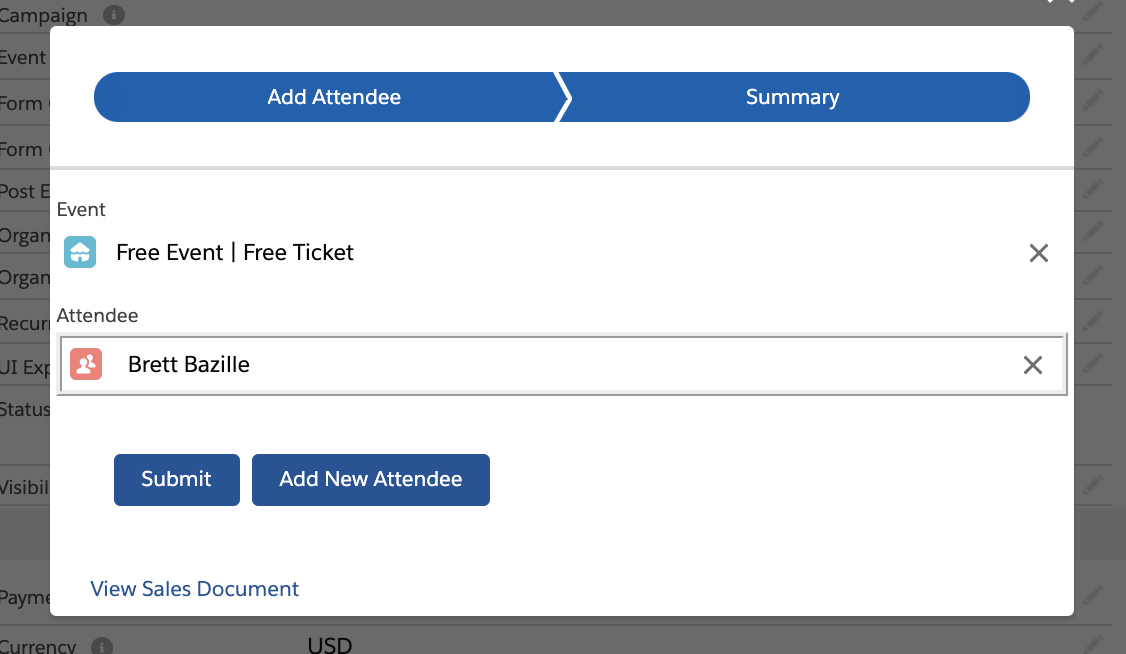
After selecting an Event Item you'll be able to add an Attendee!
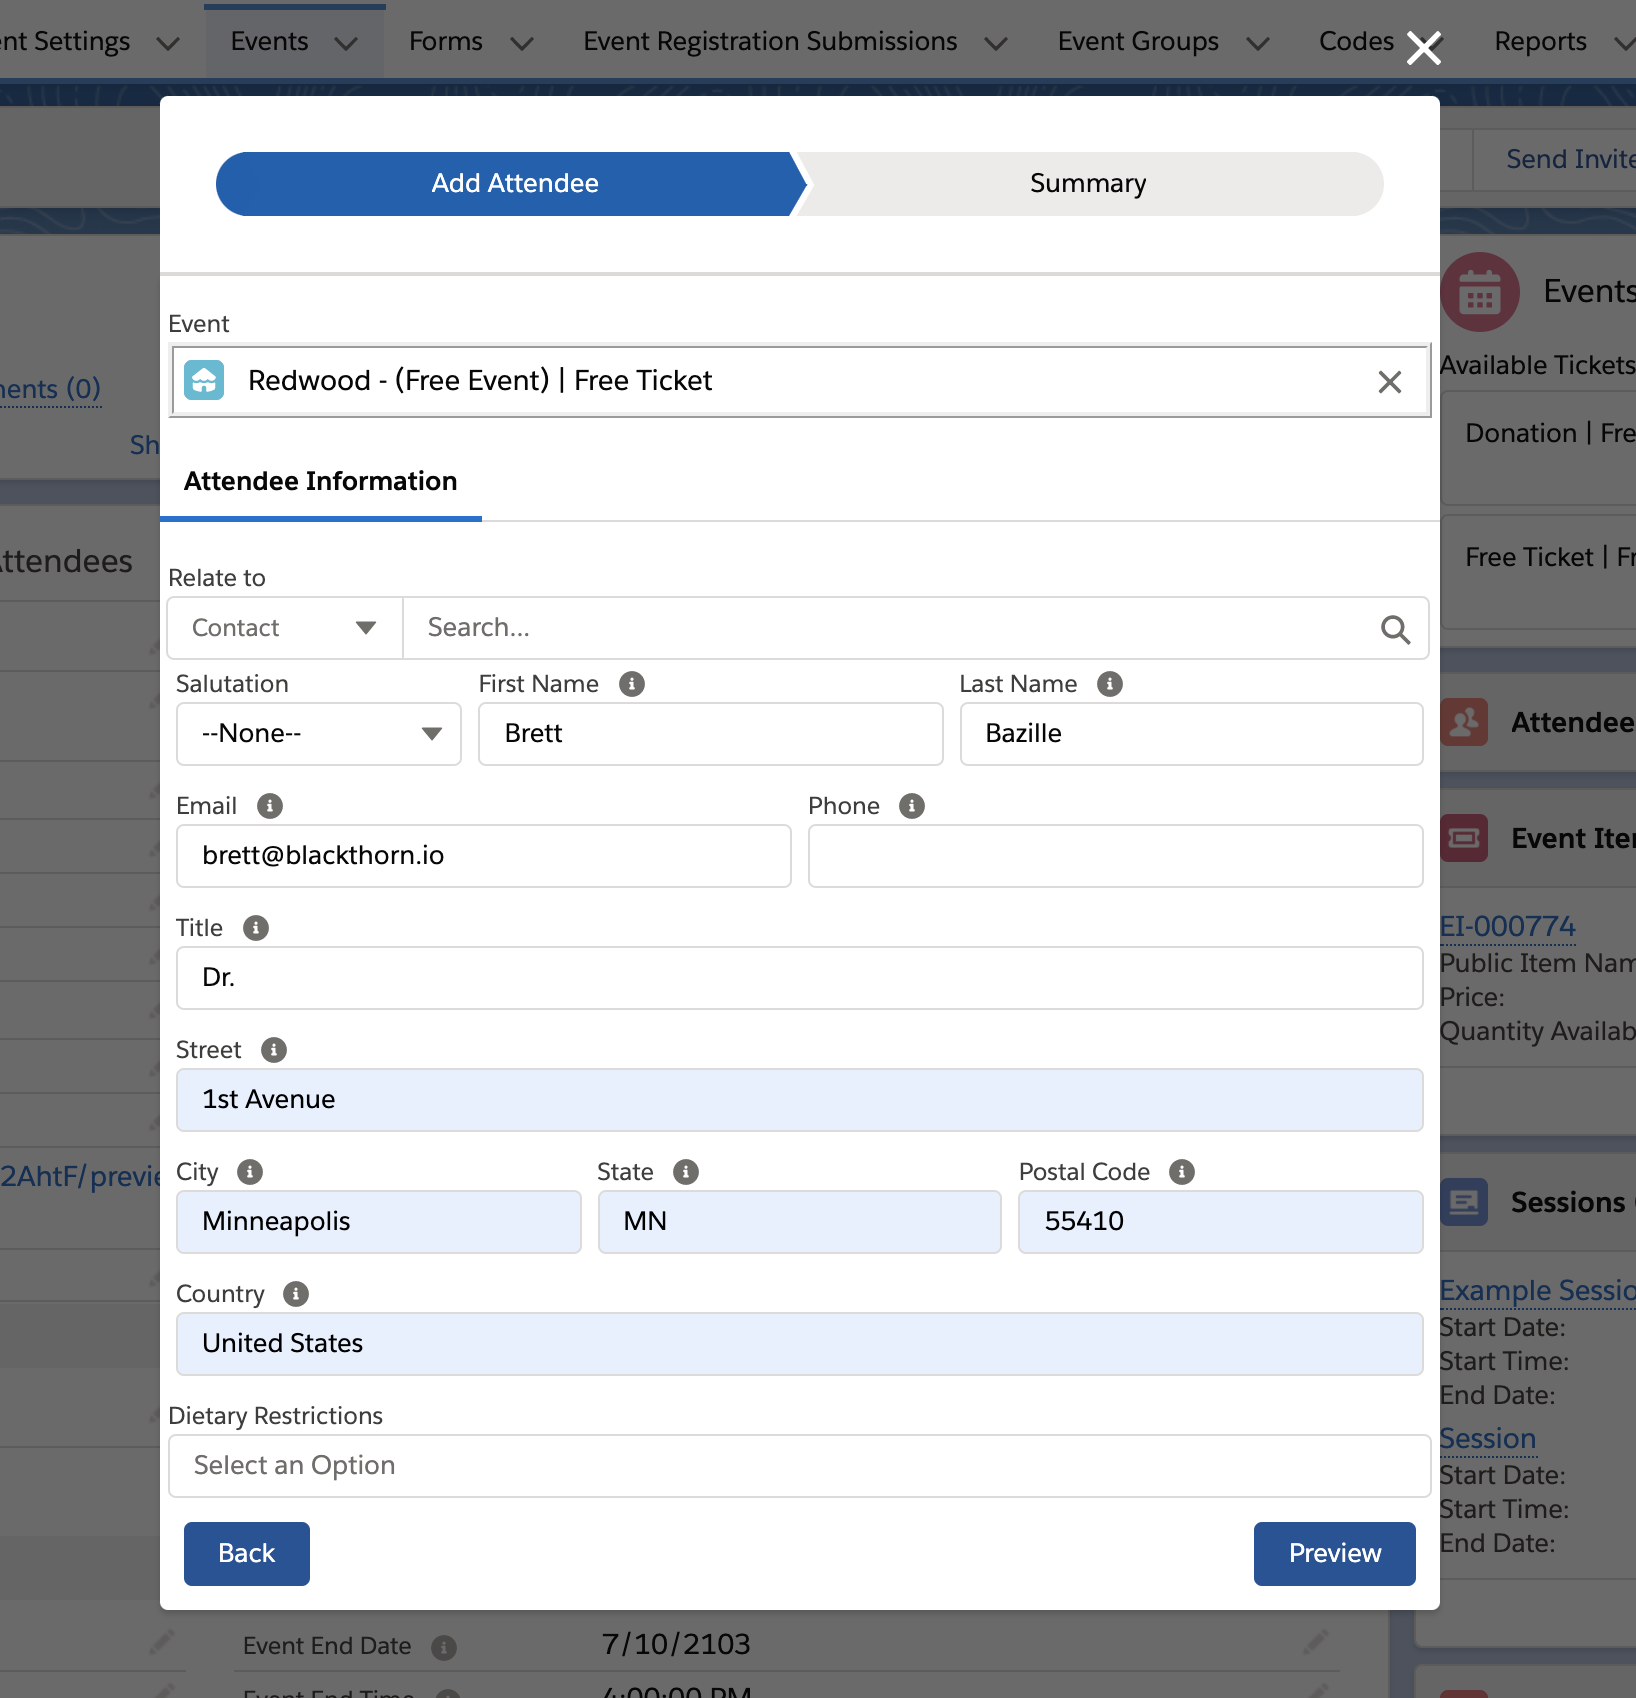
From here, you can either click Submit to register the Attendee, or add a second Attendee by clicking Add New Attendee.
Ta-da! Your Attendee has been created!
If you have a paid Event, you will be prompted with the "Payment" tab. If you click Proceed To Payment on this page, it will redirect you to the associated Invoice.
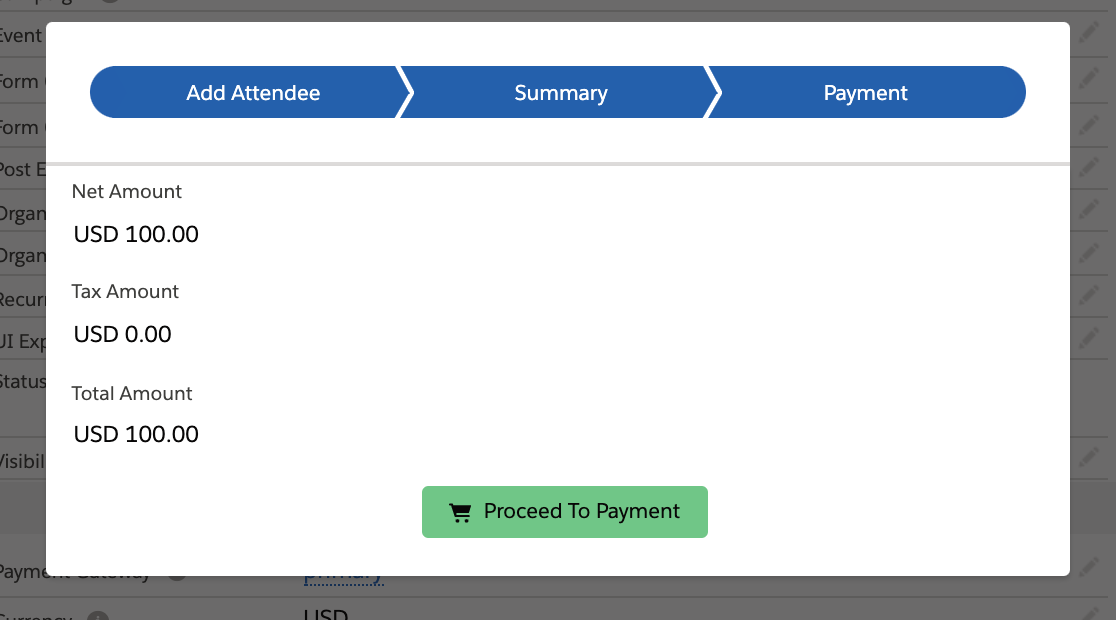
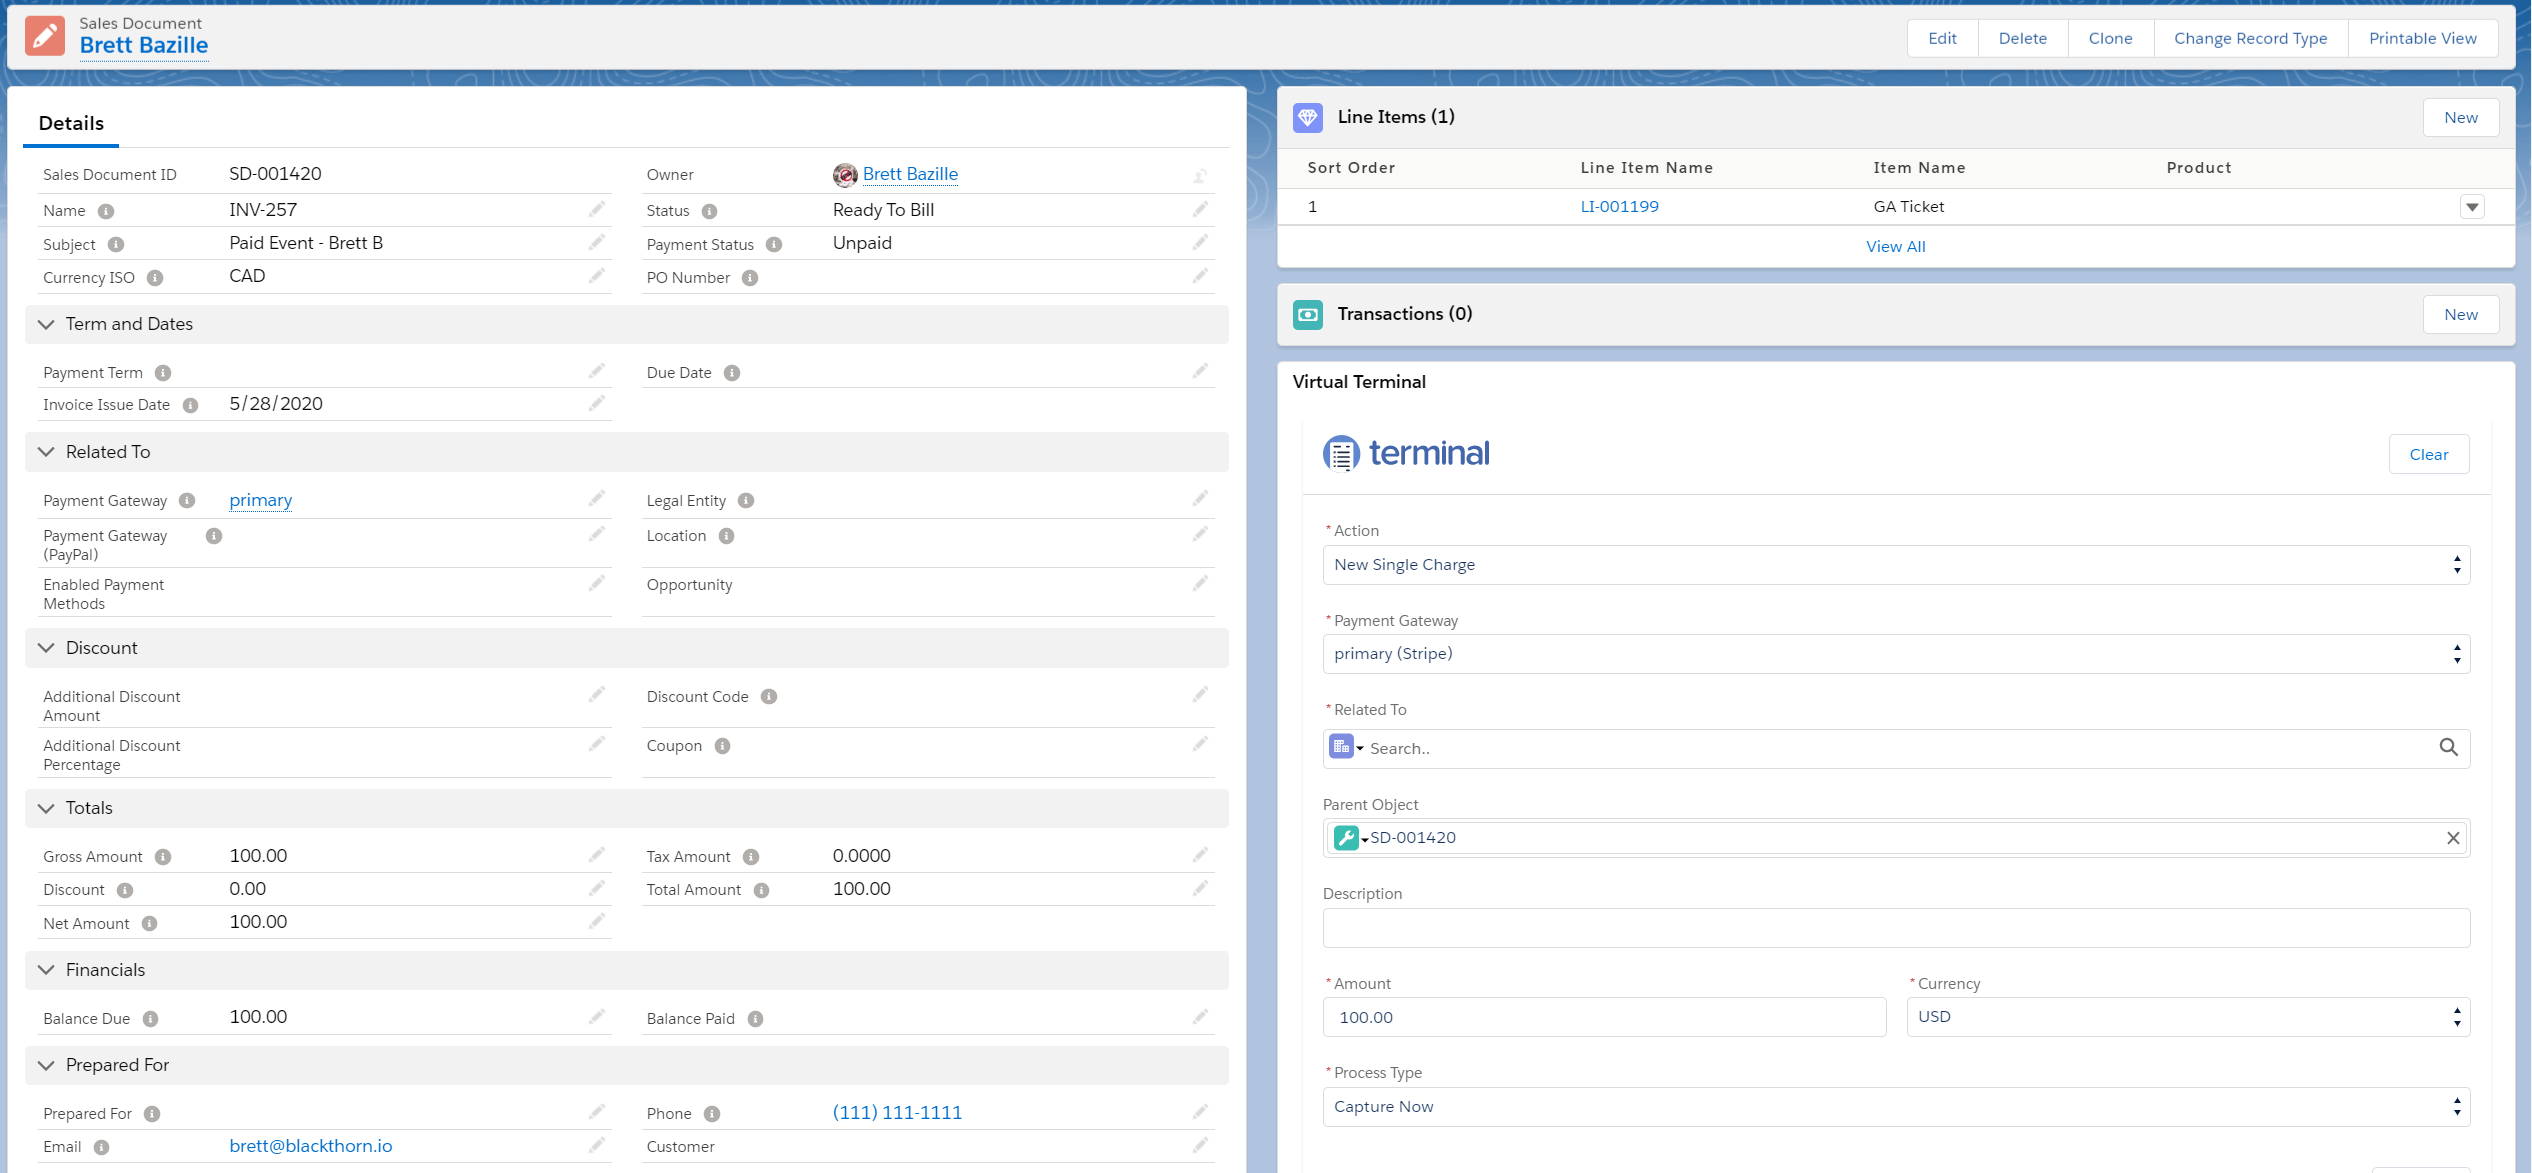
After opening the Invoice, you can then forward the DocumentLink URL to the Attendee to be paid. Once paid, the Payment Status field will be updated from "Unpaid" to "Paid" and the Status field will update from "Ready to Bill" to "Completed".
There is also a Not Paid checkbox field on the Attendee object. Any time the Invoice is marked as "Unpaid" this checkbox will be checked. This gives the user who is registering the Attendees the ability to easily view if the Attendee has paid or not.
Cancel an Attendee
Once a Contact or Lead has registered for an Event, the Event will populate in the component.

Next, click the icon below, it will cancel the Attendee from the Event.
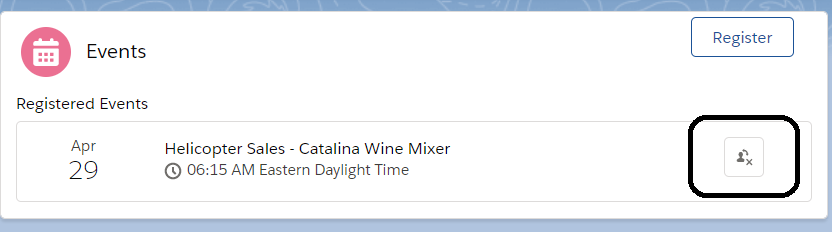
The Registration Status on the Attendee will be updated to "Canceled".
It's as simple as that! Quick and easy way to remove a single Attendee from an Event.